Basic Fixes:
- Restart Windows and router: You can restart your Windows device and Wi-Fi router. So, if the issue of Wi-Fi networks not appearing is due to a temporary glitch, this should fix it.
- Check the physical Wi-Fi switch: Certain Wi-Fi routers come equipped with a physical switch that disables Wi-Fi without turning the router off. If this is the case with your router, ensure that this switch is on.
- Check for Windows updates: Windows updates can help fix most Windows 11 issues as they contain bug fixes and crucial driver updates. So, if you have been putting off installing the latest updates for your Windows device, it might be time to bite the bullet and install it.
Fix 1: Check if the Wi-Fi Adapter Is Enabled
To detect Wi-Fi networks, your Windows 11 device’s Wi-Fi adapter must be enabled. To check this, open the Control Panel and use the Network and Sharing Center option. Here’s how to do it.
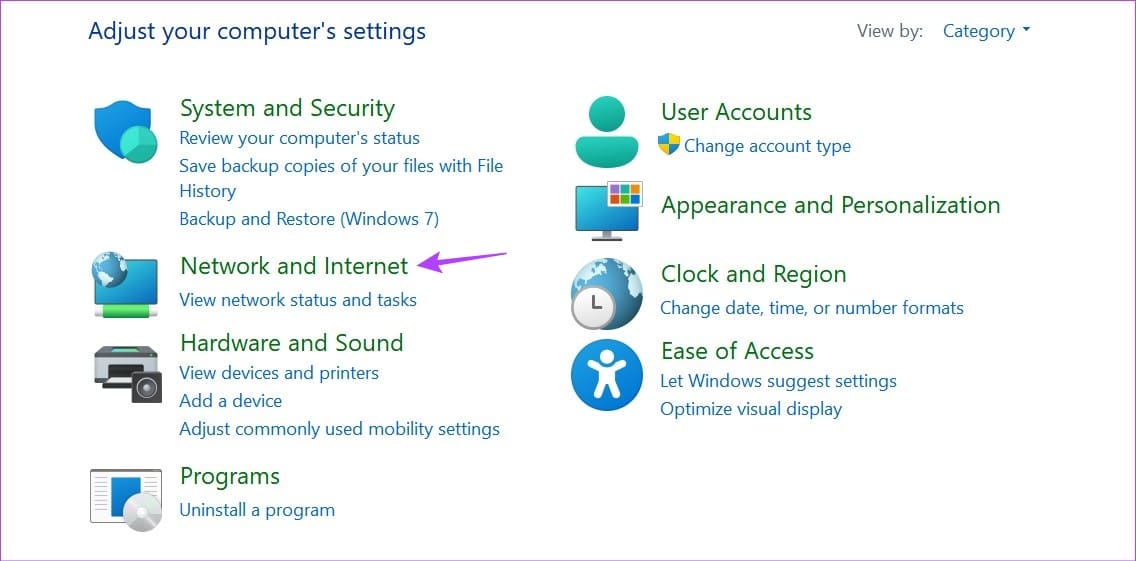
Step 1: Open Control Panel and click on Network and Internet.
Step 2: Then, click on Network and Sharing Center.

Step 3: From the side options, click on Change adapter settings.

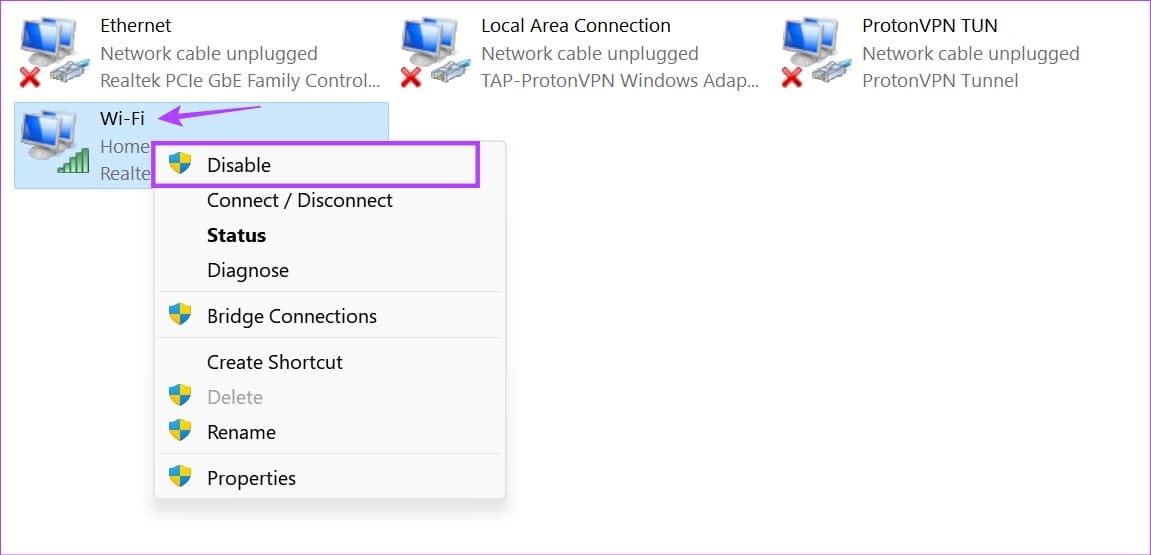
Step 4: Right-click on your Wi-Fi adapter and, if available, click on Enable.
Fix 2: Forget and Reconnect Network
If you have been facing issues with Windows 11 not detecting a specific Wi-Fi network that was previously connected, try forgetting and reconnecting to it. This can also remove any networks that might have been known by a different name formerly. Follow the below steps to do it.
Step 1: Open Settings using the Windows + I key and click on Network & internet. Click on Wi-Fi.

Step 2: Scroll down and click on Manage known networks.

Step 3: Go through this list and click on Forget in front of the relevant networks.

Step 4: Go back to the Wi-Fi page and click on Show available networks. Go to the relevant network and click on Connect.

Step 5: Enter the Wi-Fi password and click on Next. Wait for the Wi-Fi network to connect.

Fix 3: Run Network Troubleshooter
Capable of self-scanning and diagnosing issues, you can use the Windows troubleshooter to fix any network-related errors on your device. Once run, the troubleshooter will scan your device for any possible change or error and suggest ways to fix or resolve it. Follow the below steps to do it.
Step 1: Open Settings and click on System. Click on Troubleshoot.

Step 2: Then, click on Other troubleshooters.

Step 3: Go to Network and Internet and click on Run.

Once the network troubleshooter finishes diagnosing the issue, a list of possible solutions will be available on your screen. Apply those fixes and check again.
Fix 4: Check for Driver Updates
Network drivers help ensure your device stays compatible with all external network devices. And even though driver updates are usually installed automatically, you can check and install these updates manually. Do this if your Windows 11 laptop is still not showing available networks. Here’s how.
Step 1: Open Device Manager and click on Network adapters. Right-click on your Wi-Fi driver and click on Update driver.

Step 2: Then, click on Search automatically for drivers.

Windows will now search for driver updates online. If an update is available, install it and restart Windows. Then, see if the Wi-Fi networks are visible on your device.
Fix 5: Perform a Network Reset
As the name suggests, performing a network reset on your Windows device will delete all network-related components. Then, a default copy of your network drivers and adapters will be reinstalled. This will also delete any third-party app or service causing interference on your Windows 11 device. Here’s how.
Step 1: Open Settings and click on Network & internet. Click on Advanced network settings.

Step 2: Go to More settings and click on Network reset.

Step 3: Click on Reset now and confirm if prompted. Then, try finding your Wi-Fi network.

Fix 6: Set Services to Automatic
Services help ensure your device’s processes work well, even in the background. While it is usually set to run automatically at device boot, you can manually set Services to automatic as well. Do this if you’ve been facing issues with Wi-Fi networks not appearing on Windows 11. Here’s how to do it.
Step 1: Open Service and double-click on WLAN AutoConfig.

Step 2: Click on the Startup type drop-down menu and select Automatic.

Step 3: Click on Apply and OK. This will apply and save the changes.

Fix 7: Reset TCP/IP and Flush DNS Cache
TCP/IP helps your device communicate with other devices over the internet. However, a wayward setting or bug can prevent it from working properly. In this case, you can reset TCP/IP on your Windows 11 device to its default settings. Here’s how.
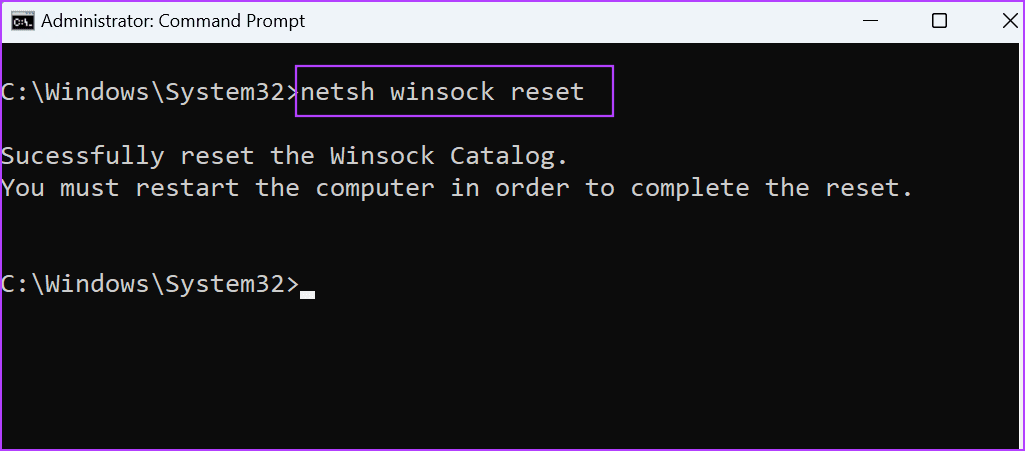
Step 1: Open the Command Prompt with administrator privileges. Type the below command and press enter.
netsh winsock reset
Step 2: Then, type the following command and press enter to execute.
netsh int ip reset

Once done, close the window and restart Windows 11. This will also help you flush the DNS cache on Windows 11. Now, try finding your Wi-Fi network again.
Was this helpful?
Last updated on 24 July, 2024
Read Next
 5 Fixes for Windows Security App Showing White Screen on Windows 11
Common Fixes Reboot PC: Press the Windows + X shortcut to open the Power User Menu, select Shut down or sign out, and click Restart.
5 Fixes for Windows Security App Showing White Screen on Windows 11
Common Fixes Reboot PC: Press the Windows + X shortcut to open the Power User Menu, select Shut down or sign out, and click Restart.
 Top 8 Fixes for Notifications Banners Not Showing on Windows 10
Typically, when you receive a notification on your Windows 10 computer, you will hear a sound, and a banner will appear near the Action Center.
Top 8 Fixes for Notifications Banners Not Showing on Windows 10
Typically, when you receive a notification on your Windows 10 computer, you will hear a sound, and a banner will appear near the Action Center.
 3 Fixes When an External Hard Drive Is Not Showing up in Windows 11
https://youtu.be/zu_eLoLltq4 Basic Fixes: Try another USB port: Your current port may be faulty, and using a different one may be effective.
3 Fixes When an External Hard Drive Is Not Showing up in Windows 11
https://youtu.be/zu_eLoLltq4 Basic Fixes: Try another USB port: Your current port may be faulty, and using a different one may be effective.
 5 Fixes for Phone Link App Not Showing Notifications on Windows 11
Basic Fixes: Check Wi-Fi and Bluetooth settings: The Phone Link app uses both Bluetooth and Wi-Fi to help sync your phones with your Windows device. So, ensure your Wi-Fi connection is
5 Fixes for Phone Link App Not Showing Notifications on Windows 11
Basic Fixes: Check Wi-Fi and Bluetooth settings: The Phone Link app uses both Bluetooth and Wi-Fi to help sync your phones with your Windows device. So, ensure your Wi-Fi connection is
 4 Fixes for Events Not Showing in Outlook Calendar on Windows 11
Basic Fixes Check your internet speed: You should check the status of your internet speeds in order to sync your calendar events to Outlook Check your Outlook account: If you
4 Fixes for Events Not Showing in Outlook Calendar on Windows 11
Basic Fixes Check your internet speed: You should check the status of your internet speeds in order to sync your calendar events to Outlook Check your Outlook account: If you
 3 Fixes for Kindle Not Showing Up on Windows 11
Basic Fixes Check the USB cable: It is suggested to use the official cable provided inside your Kindle's box for connecting it with your Windows 11 PC or laptop.
3 Fixes for Kindle Not Showing Up on Windows 11
Basic Fixes Check the USB cable: It is suggested to use the official cable provided inside your Kindle's box for connecting it with your Windows 11 PC or laptop.
 6 Fixes for Sent Items Not Showing in Microsoft Outlook for Windows
Fix 1: Make Sure Outlook Is Configured to Save Sent Items Your sent emails may not show up in Outlook if you have previously configured the app to not save
6 Fixes for Sent Items Not Showing in Microsoft Outlook for Windows
Fix 1: Make Sure Outlook Is Configured to Save Sent Items Your sent emails may not show up in Outlook if you have previously configured the app to not save
 5 Fixes for Android Phone Not Showing Up on Windows 11
Basic Fixes Check your USB cable and port: You need to start by checking the port and USB cable that you are using.
5 Fixes for Android Phone Not Showing Up on Windows 11
Basic Fixes Check your USB cable and port: You need to start by checking the port and USB cable that you are using.
The article above may contain affiliate links which help support Guiding Tech. The content remains unbiased and authentic and will never affect our editorial integrity.