Basic Fixes
- Check the CPU temperature: If your PC’s processor runs at abnormally high temperatures, it may automatically reboot your system to cool it down. Use the OEM (Original Equipment Manufacturer) app or temperature monitor software to check and control the CPU temperature.
- Ensure installed RAM is compatible: An incompatible or inaccurately installed RAM can reboot your Windows 11 system randomly. Check the compatibility of the installed RAM and try reseating it on your motherboard.
- Update BIOS: An obsolete BIOS version can restart your Windows PC randomly. Head to your PC’s manufacturer support page, download the latest BIOS files, and install them to fix the issue.
- Remove all connected devices: If you’ve connected multiple accessories/devices to your PC, an issue with them can force Windows to reboot automatically. Disconnect all connected devices and check if it resolves the reboot issue.
- Scan your PC for malware: Your Windows PC may reboot randomly if infected with malware. Run a Quick malware scan from the Windows Security app > Virus & threat protection > Quick scan to locate and flush it.
- Rule out memory problems: System memory issues such as corrupt DRAM or bad memory sectors can reboot your Windows 11 PC abruptly. Use the Windows Memory Diagnostic tool to scan and fix it.
Fix 1: Disable Automatic Restart
By default, your Windows 11 PC reboots automatically in the event of system failure. If you didn’t get time to check the error before it rebooted, you can disable the behavior to read the underlying error code.
Step 1: Press the Windows + I shortcut to open Settings, select System from the left sidebar, and click About.

Step 2: Select Advanced system settings under Device specifications.

Step 3: Click Settings under the Startup and Recovery section.
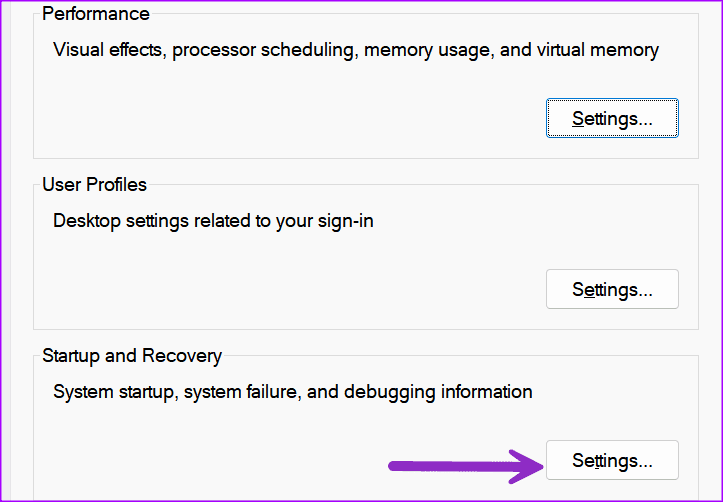
Step 4: Disable the ‘Automatically restart‘ checkmark and hit OK to save changes.

Fix 2: Turn off Fast Startup
As the name suggests, Fast Startup lets you boot up your PC quickly. When the feature acts up, your Windows 11 PC may restart randomly. Disable Fast Startup under Shutdown settings to restore normalcy.
Step 1: Press the Windows + R shortcut to open the Run dialog, type control, and press Enter.

Step 2: Switch ‘View by‘ to Category, and click Hardware and Sound.
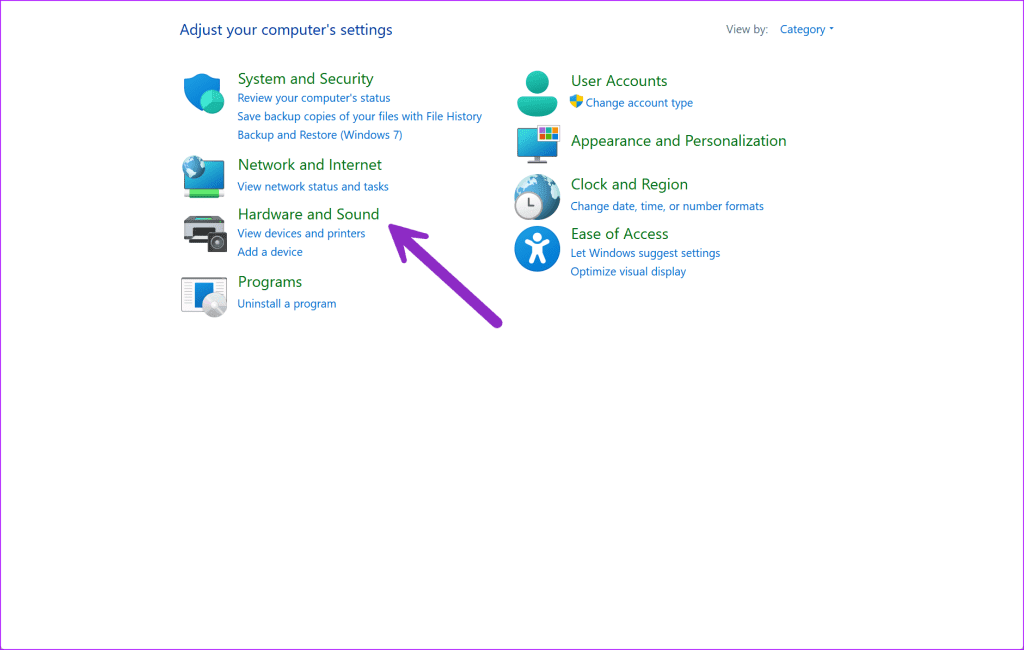
Step 3: Select Power Options.

Step 4: Click ‘Choose what the power buttons do‘ from the left sidebar.
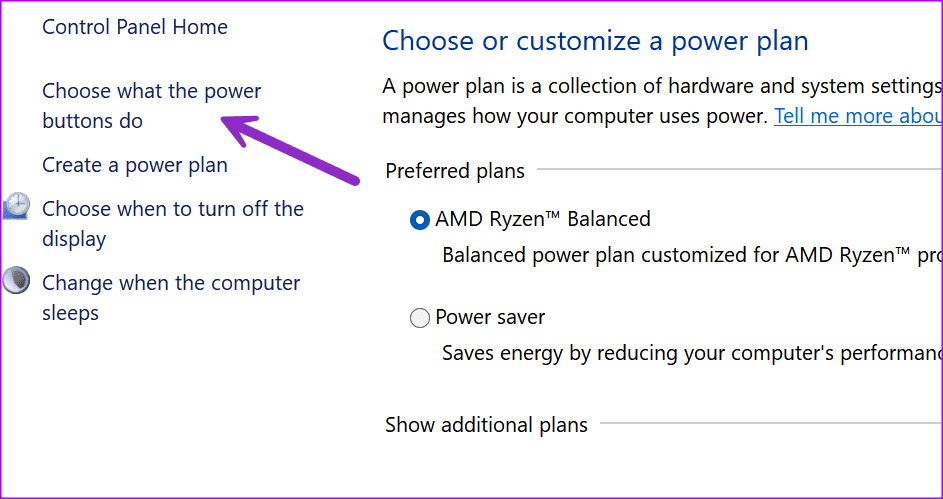
Step 5: Disable the ‘Turn on fast startup (recommended)‘ checkmark and hit Save changes.

Fix 3: Update or Reinstall Graphics Drivers
Outdated graphics drivers are a common reason behind random reboot issues on your PC. Download the latest GPU drivers from the official website or use the Device Manager app to update them manually.
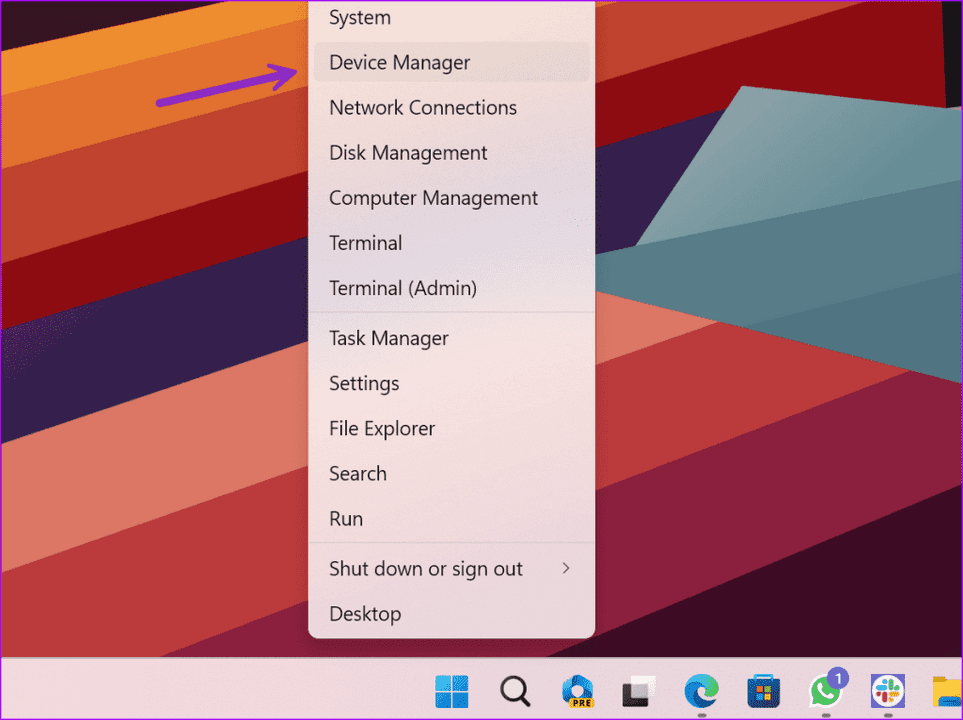
Step 1: Open the Power User Menu using the Windows + X shortcut, and select Device Manager.
Step 2: Expand Display adapters, right-click your graphics card, and select Update driver.

Step 3: Click Search automatically for drivers to install the best suitable graphics drivers.

Step 4: Alternatively, right-click the graphics card and select Uninstall device. Reboot your PC and let Windows 11 automatically install the compatible graphics drivers.
Fix 4: Rollback the Recent Windows Update
A buggy Windows update installation can mess up the startup function of your PC. Thankfully, you can rollback or hide the recent Windows Update using these easy steps:
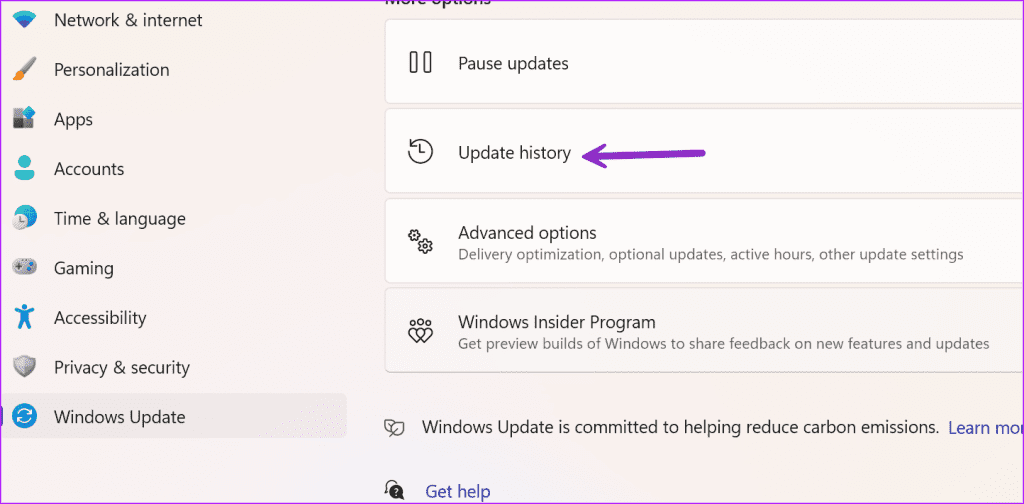
Step 1: Open Windows Settings (check the above steps), select Windows Update from the sidebar, and click Update history.
Step 2: Scroll down and select Uninstall updates.

Step 3: Locate the recent Windows Update using the ‘Installed on’ timestamp, and click Uninstall to roll it back. Hit Uninstall when prompted to confirm it.

Fix 5: Repair Corrupt System Files
Running the SFC (System File Checker) scan fixes corrupt system files. It’s an effective way to troubleshoot common system problems such as your PC rebooting randomly.
Step 1: Press the Windows key, search Command Prompt, and click Run as administrator.

Step 2: Type sfc /scannow in the console and press Enter to begin the scan. Once it finishes, reboot your PC.

Fix 6: Boot Into Safe Mode
Lastly, if the issue persists, boot your Windows 11 PC into safe mode to rule out the possibility of an installed third-party application causing the random restart. While in safe mode, review all installed apps and uninstall the unnecessary ones.
Step 1: Open the Run dialog (check the above steps), type msconfig, and hit Enter to open the System Configuration Window.

Step 2: Select the Boot tab, enable Safe boot, and click Apply followed by OK.

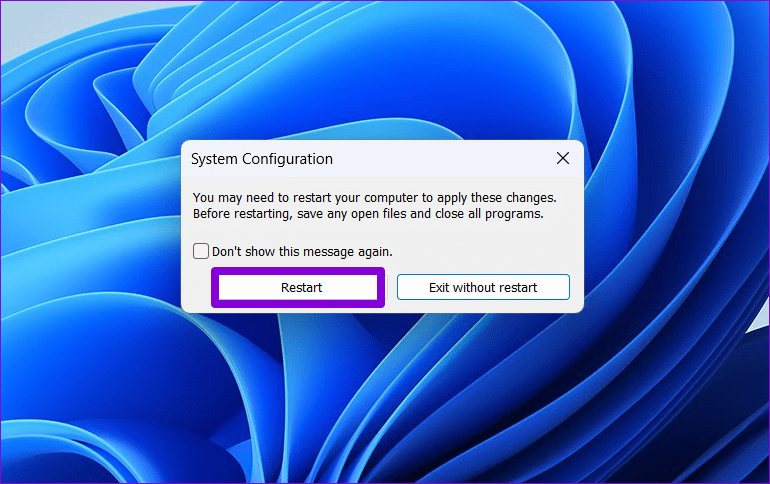
Step 3: Click Restart when prompted to boot your Windows 11 PC in safe mode.
Was this helpful?
Last updated on 26 August, 2024
Read Next
 6 Fixes for Samsung Galaxy Watch Keeps Vibrating Randomly
Fix 1: Turn off Bluetooth Connection Alerts One of the primary reasons your Galaxy smartwatch vibrates randomly is the Bluetooth disconnection alerts.
6 Fixes for Samsung Galaxy Watch Keeps Vibrating Randomly
Fix 1: Turn off Bluetooth Connection Alerts One of the primary reasons your Galaxy smartwatch vibrates randomly is the Bluetooth disconnection alerts.
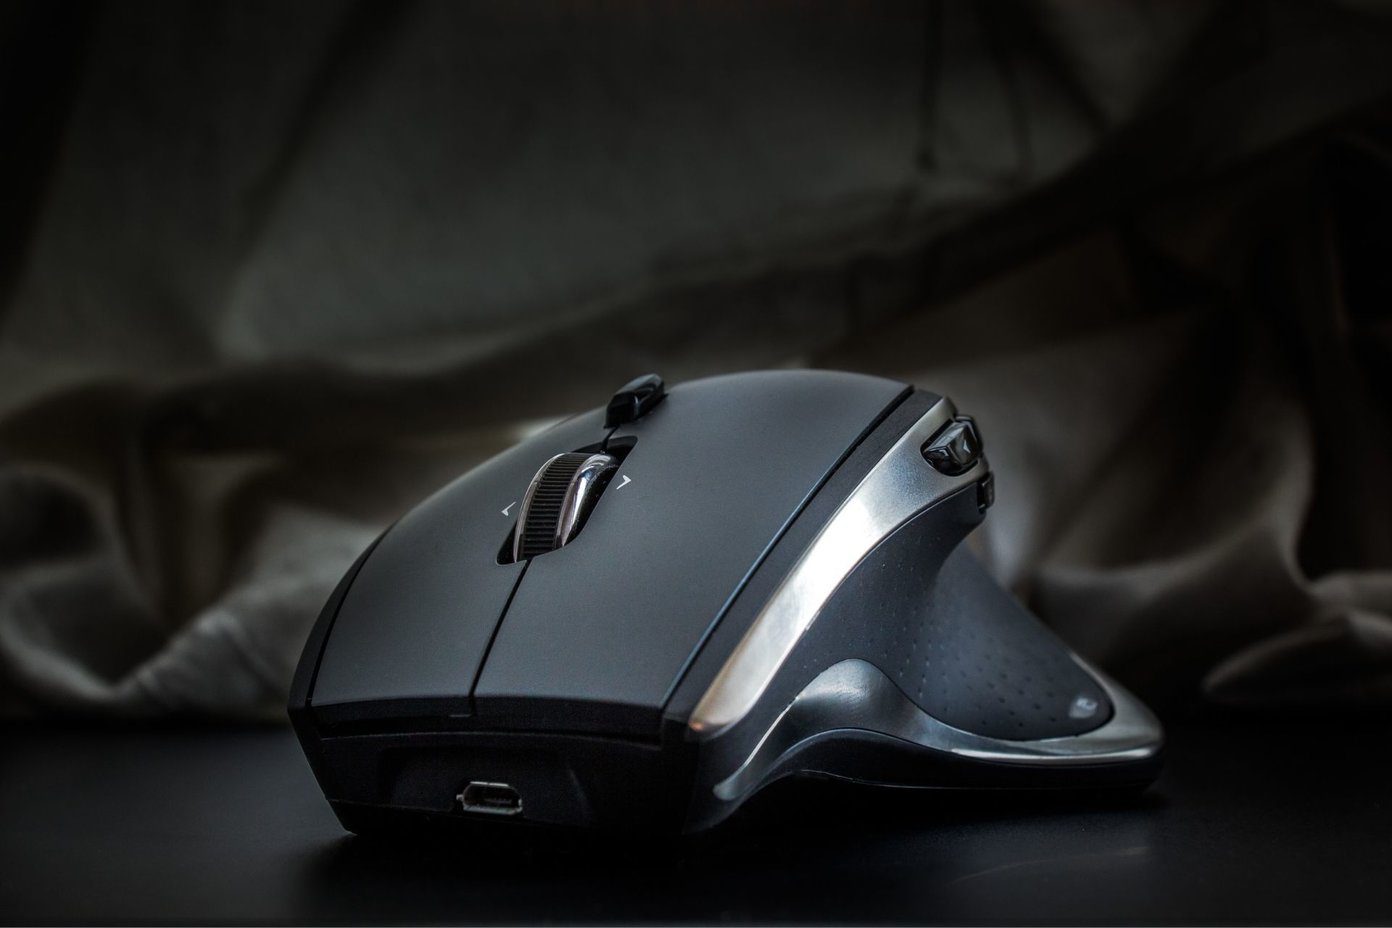 8 Best Ways to Fix Mouse Sensitivity Changes Randomly on Windows 10
While mice and keyboards help while working with desktop or laptop, the mouse gets finicky sometimes.
8 Best Ways to Fix Mouse Sensitivity Changes Randomly on Windows 10
While mice and keyboards help while working with desktop or laptop, the mouse gets finicky sometimes.
 5 Ways to Fix Monitor Goes Black Randomly on Windows 11
Basic Fixes Check the monitor connection: Ensure the monitor cable isn't loose.
5 Ways to Fix Monitor Goes Black Randomly on Windows 11
Basic Fixes Check the monitor connection: Ensure the monitor cable isn't loose.
 5 Ways to Fix Windows PC Randomly Waking Up From Sleep
Basic Fixes Disable Awake From Powertoys: Open Powertoys and disable the Awake option.
5 Ways to Fix Windows PC Randomly Waking Up From Sleep
Basic Fixes Disable Awake From Powertoys: Open Powertoys and disable the Awake option.
 5 Fixes for Windows 11 PC Going to Sleep Randomly
Fix 1: Reset and Change the Power Plan If your computer is randomly going to sleep, there may be something wrong with the power plan settings.
5 Fixes for Windows 11 PC Going to Sleep Randomly
Fix 1: Reset and Change the Power Plan If your computer is randomly going to sleep, there may be something wrong with the power plan settings.
 9 Best Ways to Fix Google Home Randomly Beeps Issue
The smartness of a Google Home speaker can become spooky if it activates automatically.
9 Best Ways to Fix Google Home Randomly Beeps Issue
The smartness of a Google Home speaker can become spooky if it activates automatically.
 5 Ways to Fix Android Vibrates Randomly for No Reason
Try Basic Fixes Check for loose charging cable or adapter: If your Android only vibrates randomly while charging, it could be due to a loose charging cable or adapter.
5 Ways to Fix Android Vibrates Randomly for No Reason
Try Basic Fixes Check for loose charging cable or adapter: If your Android only vibrates randomly while charging, it could be due to a loose charging cable or adapter.
The article above may contain affiliate links which help support Guiding Tech. The content remains unbiased and authentic and will never affect our editorial integrity.