Try These Things First
- Restart your computer: The first thing you should try is restarting your computer. This can often fix temporary bugs or glitches causing the problem.
- Check remaining battery in Settings: You can check your battery level in the Settings menu. To do this, open Settings, select System from the left, and then click Power & battery on the right. You’ll see your device’s remaining battery life there.
Fix 1: Update Windows
Your laptop could be running a buggy version of the Windows 11 OS that’s messing up the battery time remaining estimation. If this is the case, updating your laptop’s OS could help fix the issue.
Step 1: Press the Windows key + I button simultaneously to launch the Settings menu.
Step 2: Choose Windows Update from the left sidebar and click Check for updates on the right.
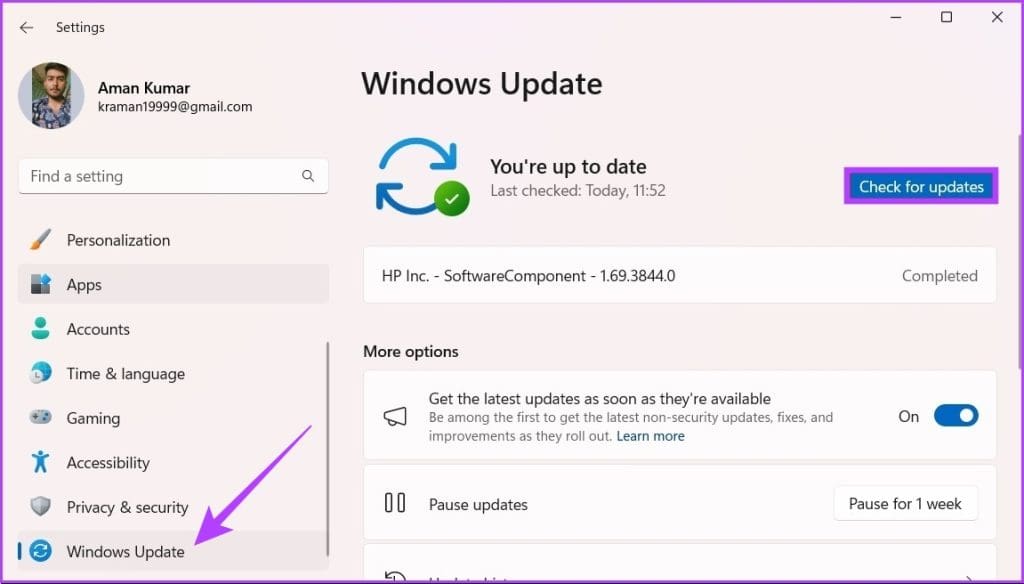
If there are any updates available, Windows will automatically download them without requiring any input from your side.
Fix 2: Make the Registry Edit
The Registry Editor is a tool that allows to make changes to certain hardware and software configuration settings on their computers. To fix your laptop’s battery time estimate issues, you’d have to make changes to two entries/keys in the Windows Registry: UserBatteryDischargeEstimator and EnergyEstimationDisabled.
When enabled, these two entries would prevent your laptop from displaying the estimated usage time you can get from your laptop’s battery. The hack is to delete these entries and create a new entry that displays battery estimate. It’s all simple to do, really. Just follow the steps below.
Step 1: Open the Start menu, type Registry Editor in the search bar and hit Enter.
Step 2: In the Registry Editor, navigate to this directory:
Computer\HKEY_LOCAL_MACHINE\SYSTEM\CurrentControlSet\Control\Power
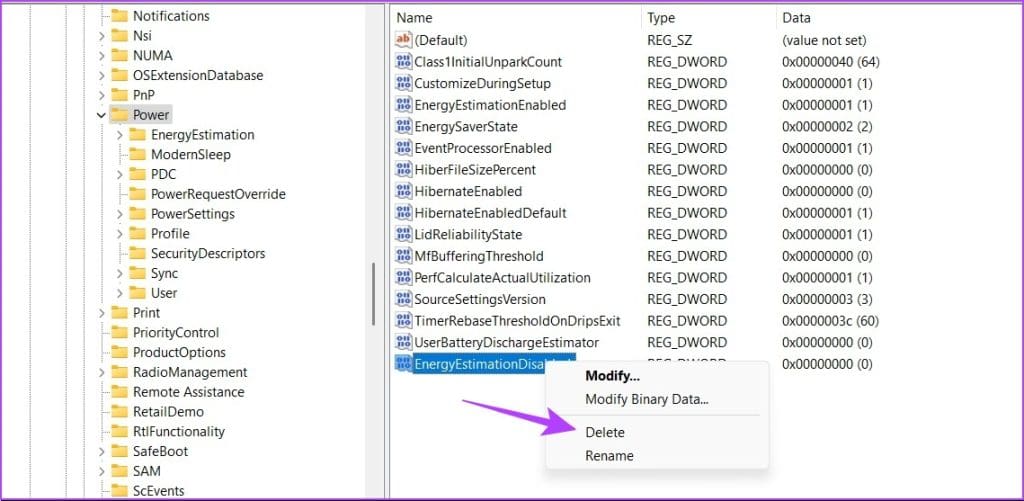
Step 3: Right-click the UserBatteryDischargeEstimator entry on the right, and select Delete. A warning prompt notifying you that deleting a System Registry entry could cause system instability would be displayed. Tap Yes to proceed.

Step 4: Right-click the EnergyEstimationDisabled entry, and select Delete. Tap Yes on the pop-up to confirm the deletion of the entry.
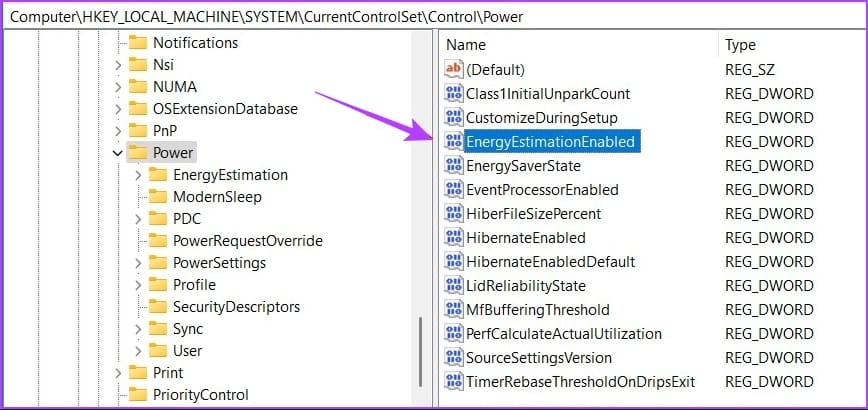
Step 5: Right-click the Power folder on the left-hand pane of the Registry Editor, hover your mouse pointer on New and select DWORD (32-bit) Value option.
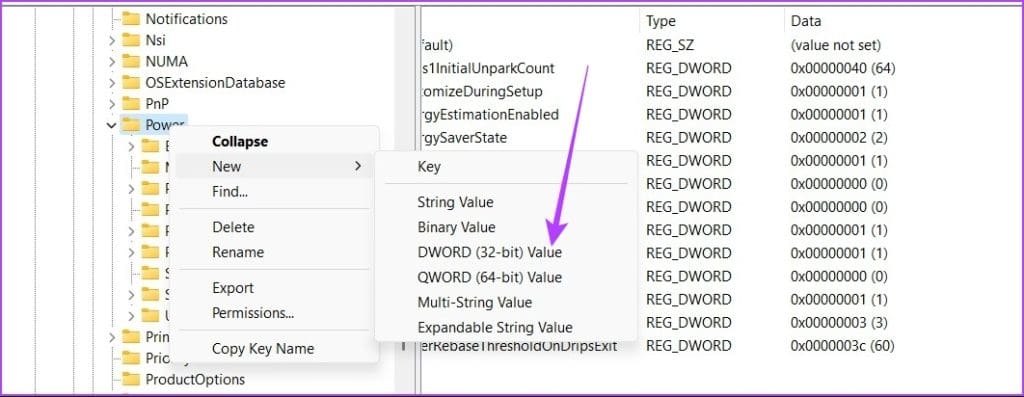
Step 6: Rename the newly-created entry to EnergyEstimationEnabled and tap the Enter button.
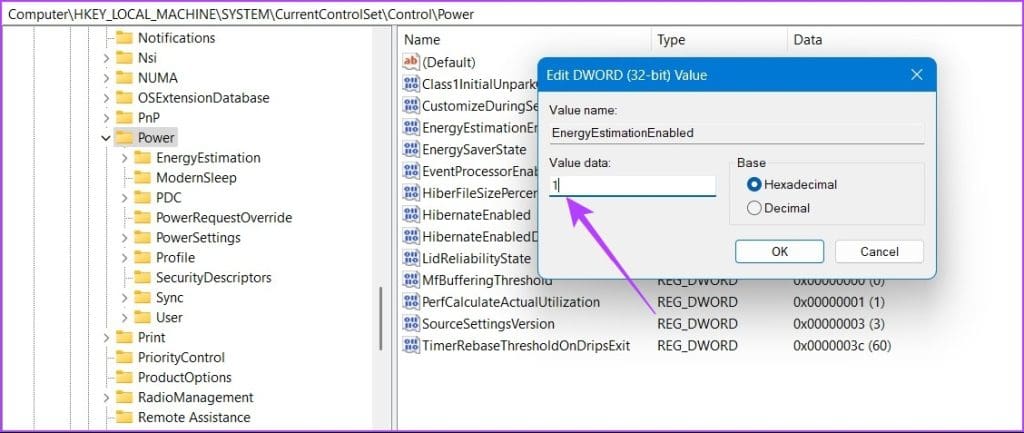
Step 7: Double-click the EnergyEstimationEnabled entry, change the Value data to 1 and click OK.
Close the Registry Editor and restart your computer. Upon restart, you should now see an estimate of the number of hours or minutes of usage time your current battery level (in percentage) can supply.
Also Read: 3 Ways to Fix Windows 11 Laptop Showing Wrong Battery Percentage
Was this helpful?
Last updated on 01 August, 2024
Read Next
 Top 3 Ways to Fix Google Chrome Black Screen Issues on Windows 10
Do you often witness a black screen whenever you launch Google Chrome on your Windows PC?
Top 3 Ways to Fix Google Chrome Black Screen Issues on Windows 10
Do you often witness a black screen whenever you launch Google Chrome on your Windows PC?
 Top 6 Ways to Fix Microsoft Edge Black Screen Issues on Windows 10
Microsoft Edge continues to quickly pace ahead in the browser race on mobile and desktop.
Top 6 Ways to Fix Microsoft Edge Black Screen Issues on Windows 10
Microsoft Edge continues to quickly pace ahead in the browser race on mobile and desktop.
 Top 8 Ways to Fix Windows 10 Network Connection Issues
The internet connection is crucial while working from home or enjoying web-based content.
Top 8 Ways to Fix Windows 10 Network Connection Issues
The internet connection is crucial while working from home or enjoying web-based content.
 6 Ways to Fix Audio Distortion Issues While Streaming on Windows 11
Fix 1: Reconnect the Audio Device Your first course of action is to disconnect your audio device and reconnect it.
6 Ways to Fix Audio Distortion Issues While Streaming on Windows 11
Fix 1: Reconnect the Audio Device Your first course of action is to disconnect your audio device and reconnect it.
 3 Ways to Fix Microsoft Teams Connection Issues
Preliminary Fixes Check internet connection: Ensure that your laptop is connected to the internet.
3 Ways to Fix Microsoft Teams Connection Issues
Preliminary Fixes Check internet connection: Ensure that your laptop is connected to the internet.
 4 Ways to Fix Scaling and Zoom Issues in Google Chrome
Basic Fixes Update or reinstall Chrome: Updating Chrome is often an effective way to fix most major issues.
4 Ways to Fix Scaling and Zoom Issues in Google Chrome
Basic Fixes Update or reinstall Chrome: Updating Chrome is often an effective way to fix most major issues.
 7 Ways to Fix High Ping and Lagging Issues in Valorant
Why Is My Ping So High in Valorant High ping in Valorant can be frustrating, but there are a few reasons behind it.
7 Ways to Fix High Ping and Lagging Issues in Valorant
Why Is My Ping So High in Valorant High ping in Valorant can be frustrating, but there are a few reasons behind it.
 5 Ways to Fix Intel Wi-Fi 6 AX201 Adapter Driver or Hardware Issues
Fix 1: Update or Reinstall Driver The software drivers for the Intel Wi-Fi 6 AX201 on your Windows PC may be outdated and are due for an update.
5 Ways to Fix Intel Wi-Fi 6 AX201 Adapter Driver or Hardware Issues
Fix 1: Update or Reinstall Driver The software drivers for the Intel Wi-Fi 6 AX201 on your Windows PC may be outdated and are due for an update.
The article above may contain affiliate links which help support Guiding Tech. The content remains unbiased and authentic and will never affect our editorial integrity.