Fix 1: Make Sure Outlook Is Configured to Save Sent Items
Your sent emails may not show up in Outlook if you have previously configured the app to not save a copy of your sent items. Here’s how to change that.
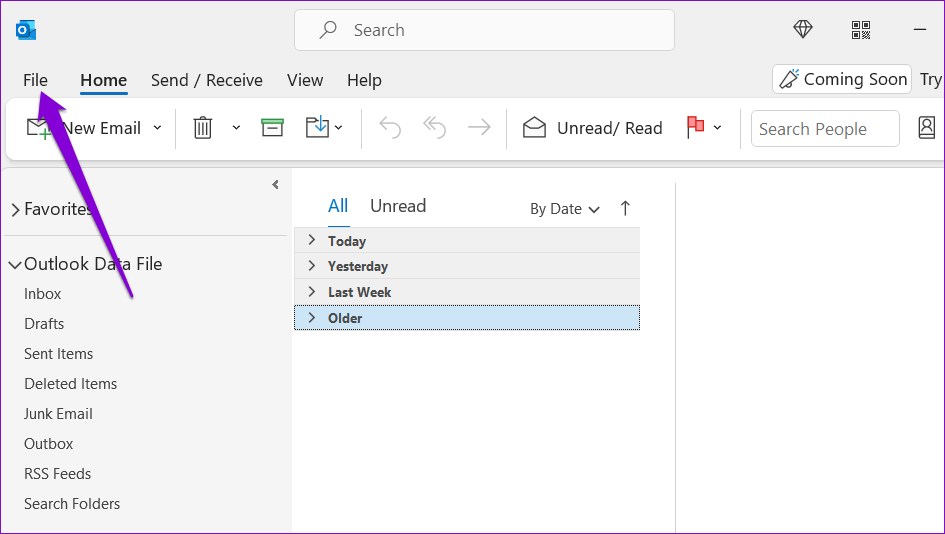
Step 1: Open Outlook on your PC and click the File menu at the top-left corner.
Step 2: Select Options from the left pane.

Step 3: In the Mail tab, scroll down to the Save messages section and tick the Save copies of messages in the Sent Items folder checkbox. Then, click OK.

Fix 2: Check Group Policy Settings for Outlook
If the Sent Items section does not save your emails even after configuring Outlook to do so, you should check the Group Policy settings.
Note that this method only applies to those running the Professional, Education, or Enterprise editions of Windows. If you’re using Windows Home, you don’t need to worry about this.
Step 1: Press the Windows + R keyboard shortcut to open the Run dialog box. Type gpedit.msc in the text box and hit OK.
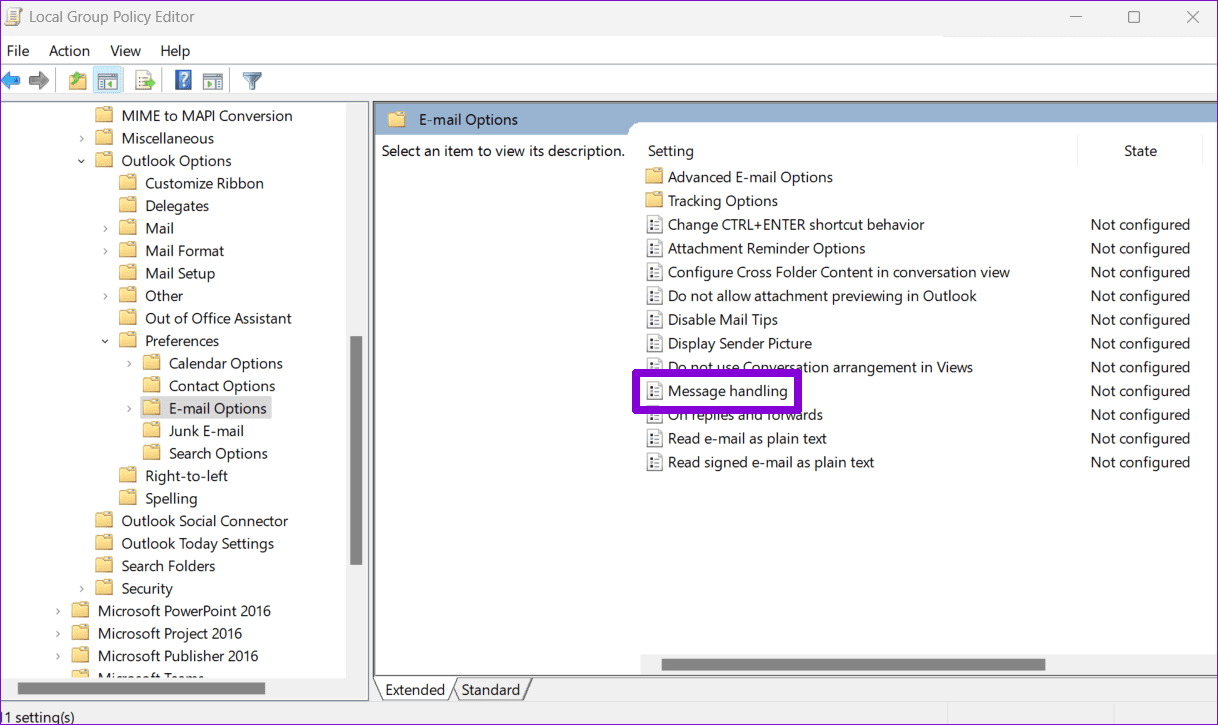
Step 2: Use the left pane to navigate to the following folder:
User Configuration/Administrative Templates/Microsoft Outlook 2016/Outlook Options/Preferences/E-mail Options
Step 3: Double-click the Message handling policy on your right.
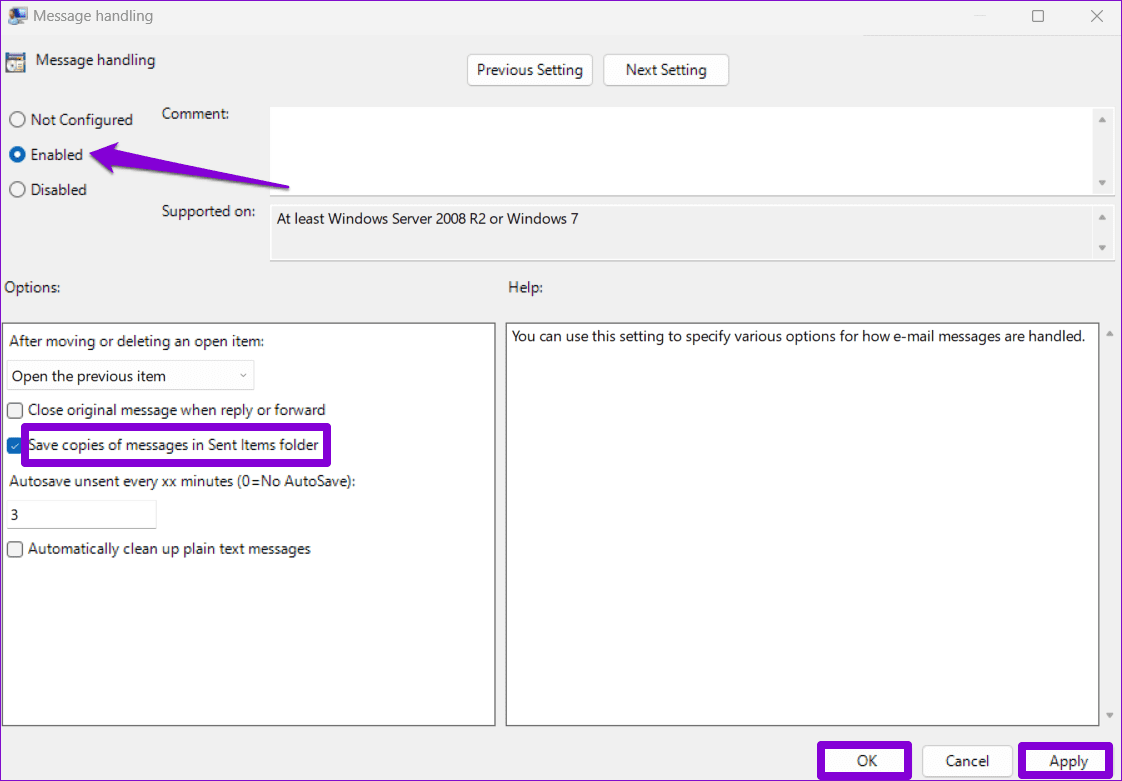
Step 4: Select the Enabled option and then tick the Save copies of messages in Sent Items folder option. Then, hit Apply followed by OK.
Restart Outlook after this and check if it saves copies of your sent emails.
Fix 3: Try Deleting a Few Emails From the Sent Folder
Insufficient storage space can also prevent Outlook from saving emails you send. To check for this possibility, try deleting a few emails from the Sent Items folder and see if that solves your problem.
Step 1: Open Outlook and select the Sent Items folder.

Step 2: Hold down the Ctrl key and select the messages you want to remove. Then, click the Delete button at the top.

Fix 4: Check AutoArchive Settings
If you can’t find some old emails in your Sent Items folder, Outlook may have archived or deleted them based on your settings. If you don’t want that to happen, check the AutoArchive settings in Outlook using these steps:
Step 1: Open Outlook on your PC, right-click on the Sent Items folder and select Properties.

Step 2: Switch to the AutoArchive tab and select the Do not archive items in this folder option. Then, hit Apply followed by OK.

After this, Outlook should not archive sent emails automatically, and they won’t go missing.
Fix 5: Save Sent Items to a Different Folder
If Outlook fails to show your sent items after configuring everything, you can try saving your emails in a different folder and see if that works. Here’s how:
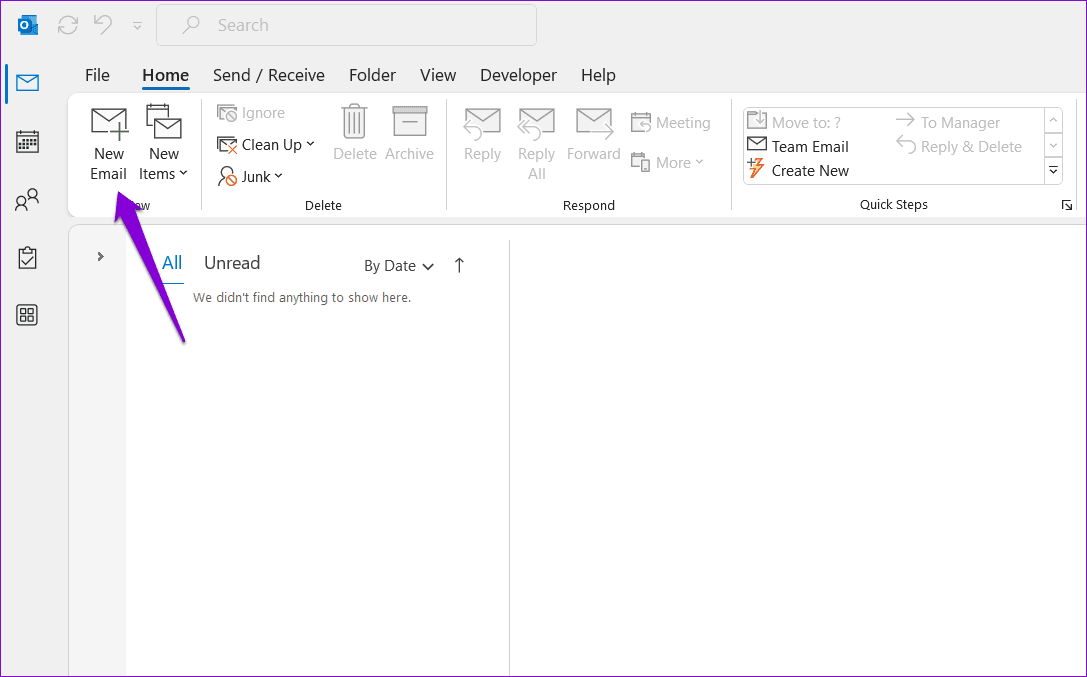
Step 1: Open Outlook and click the New Email button.
Step 2: In the Options tab, click the Save Sent Items To button and select Other Folder.
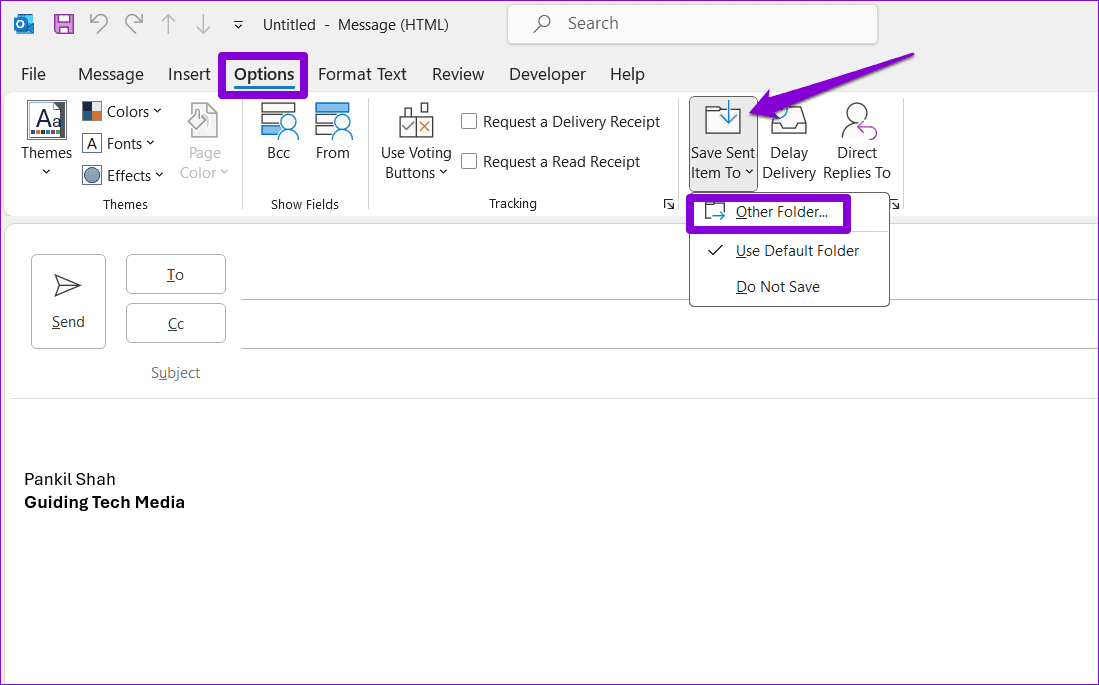
Step 3: Click the New button, type in a name for the folder, and click OK.

Fix 6: Create a New Outlook Profile
Your Outlook profile on Windows can become corrupted over time. When this happens, you could face all kinds of issues with Outlook, including this one. If that’s the case, you will need to create and switch to a new Outlook profile to solve the problem.
Step 1: Press the Windows key + R keyboard shortcut to open the Run dialog, type in control, and press Enter.
Step 2: Change the view type to Large icons and click on Mail (Microsoft Outlook).

Step 3: Under Profiles, select Show Profiles.

Step 4: Click the Add button, enter a name for the new profile, and click OK.

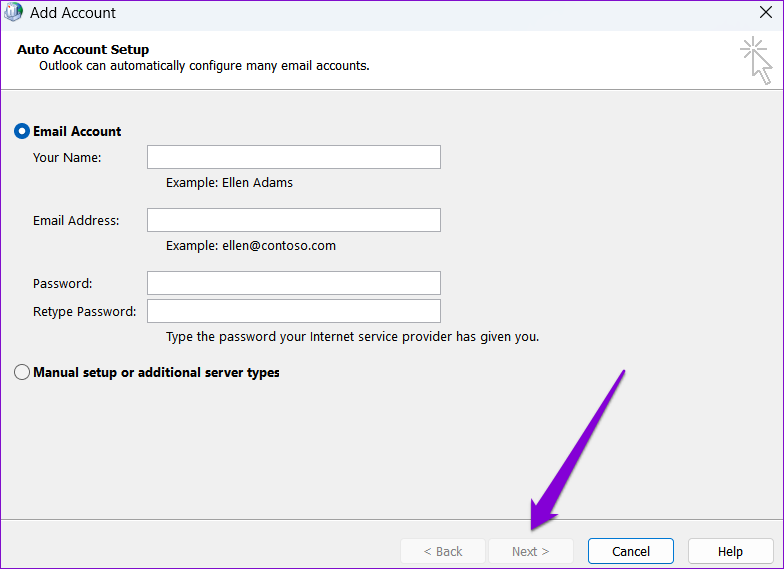
Step 5: Enter your account details in the Add Account window and click Next.
Step 6: Select your new profile under When starting Microsoft Outlook and click Apply.

Was this helpful?
Last updated on 02 August, 2024
Read Next
 How to Fix iMessage “Sent as Text Message” Issue on iPhone
Basic Fixes Trigger Airplane Mode: If your mobile data has trouble, it is best to trigger airplane mode.
How to Fix iMessage “Sent as Text Message” Issue on iPhone
Basic Fixes Trigger Airplane Mode: If your mobile data has trouble, it is best to trigger airplane mode.
 How to See Your Sent Friend Requests on Facebook and Instagram
How to Check and Cancel Your Sent Friend Requests on Facebook The Friend Requests tab on Facebook makes it simple to track all the friend requests you have sent and
How to See Your Sent Friend Requests on Facebook and Instagram
How to Check and Cancel Your Sent Friend Requests on Facebook The Friend Requests tab on Facebook makes it simple to track all the friend requests you have sent and
 How to Turn Off Sent Message Sound on iPhone and Android
Notifications and sounds tell you about new messages, but some sounds, like the one when you send a message from your phone, may be unnecessary.
How to Turn Off Sent Message Sound on iPhone and Android
Notifications and sounds tell you about new messages, but some sounds, like the one when you send a message from your phone, may be unnecessary.
 4 Fixes for Events Not Showing in Outlook Calendar on Windows 11
Basic Fixes Check your internet speed: You should check the status of your internet speeds in order to sync your calendar events to Outlook Check your Outlook account: If you
4 Fixes for Events Not Showing in Outlook Calendar on Windows 11
Basic Fixes Check your internet speed: You should check the status of your internet speeds in order to sync your calendar events to Outlook Check your Outlook account: If you
 6 Ways to Fix Microsoft Outlook Not Showing Email Content on Windows
Fix 1: Disable Offline Mode Your first step is to ensure that Outlook is not in offline mode.
6 Ways to Fix Microsoft Outlook Not Showing Email Content on Windows
Fix 1: Disable Offline Mode Your first step is to ensure that Outlook is not in offline mode.
 How to Remove Cards, Tickets, and Other Items From Apple Wallet
Basic Fixes Remove Expired Tokens: Some tickets also expire after use, so removing something from your Apple Wallet is useful to eliminate these expired tokens taking up space.
How to Remove Cards, Tickets, and Other Items From Apple Wallet
Basic Fixes Remove Expired Tokens: Some tickets also expire after use, so removing something from your Apple Wallet is useful to eliminate these expired tokens taking up space.
 5 Fixes for Microsoft Outlook Out of Memory or System Resources Error on Windows
Fix 1: Run the Inbox Repair Tool Damaged or corrupted PST or OST files can cause Outlook to run out of memory on your Windows computer.
5 Fixes for Microsoft Outlook Out of Memory or System Resources Error on Windows
Fix 1: Run the Inbox Repair Tool Damaged or corrupted PST or OST files can cause Outlook to run out of memory on your Windows computer.
 6 Fixes for “The Operation Failed” Error in Microsoft Outlook for Windows
Fix 1: Open Outlook in Safe Mode Running Office apps like Outlook in safe mode can help you determine if one of the add-ins is responsible for the issue.
6 Fixes for “The Operation Failed” Error in Microsoft Outlook for Windows
Fix 1: Open Outlook in Safe Mode Running Office apps like Outlook in safe mode can help you determine if one of the add-ins is responsible for the issue.
The article above may contain affiliate links which help support Guiding Tech. The content remains unbiased and authentic and will never affect our editorial integrity.