Fix 1: Make Sure Spell Check Is Enabled
This may seem obvious, but it’s worth double-checking that you haven’t accidentally turned off the spell check feature in Gmail. Here’s how to do it.
Step 1: Open your browser and navigate to Gmail.
Step 2: Click the gear-shaped icon in the top right corner and select See all settings.

Step 3: Under the General tab, select the following options: Grammar suggestions on, Spelling suggestions on, and Autocorrect on.

Step 4: Scroll down to click the Save Changes button.

Fix 2: Run Spell Check Manually
Another thing you can do is run the spell check feature manually in Gmail. To do so, open Gmail in your browser, click the Compose button, and type in a few misspelled words. Then, click the three-dot icon at the bottom and select the Check spelling option.

Fix 3: Check if Spell Check Is Available in Your Language
Although Gmail’s spell check feature supports various popular languages like English, Spanish, German, Italian, Hindi, and more, it does not cover every language. You need to make sure that Gmail’s spell-check feature supports the language you are writing in.
Step 1: Open Gmail in your browser, compose a new message, and deliberately type a few misspelled words. Click the three-dot menu at the bottom and select the Check spelling option.
Step 2: Click the down arrow next to Re-check to view a list of supported languages.

Fix 4: Enable Spell Check in Your Browser
If the spell check feature in Gmail is still not working properly, you can try enabling the spell check feature in your browser to see if that resolves the issue.
If you’re using Chrome, type chrome://settings/languages in the URL bar and press Enter. Then, enable the toggle next to Check for spelling errors when you type text on web pages.

For those using Edge, type edge://settings/languages in the address bar at the top and press Enter. Then, enable the toggle next to Enable grammar and spellcheck assistance.

Fix 5: Use Incognito Mode
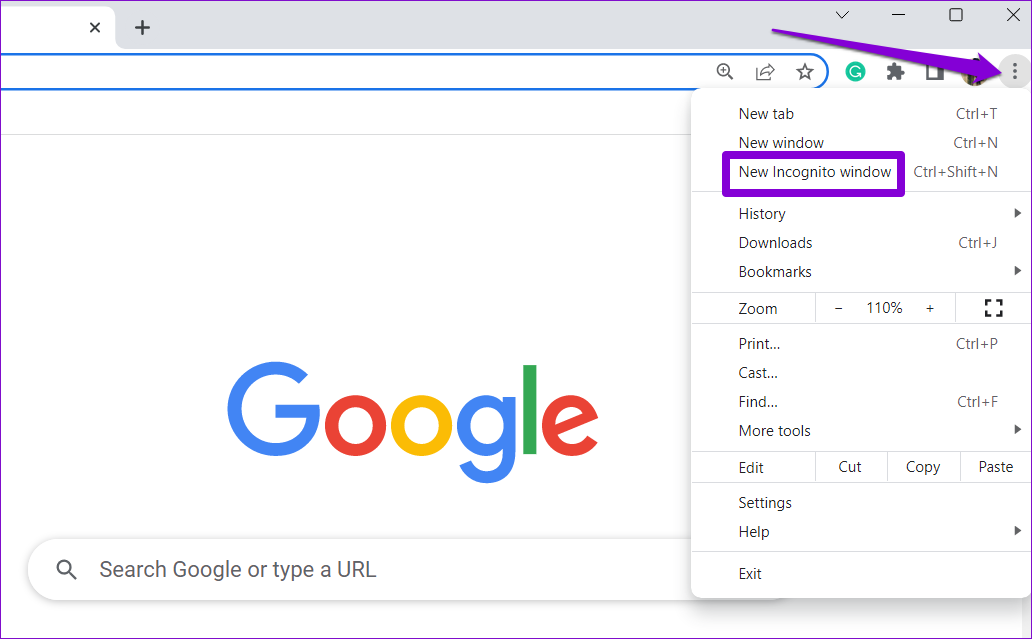
Gmail’s spell check feature in incognito mode can help you verify whether a third-party browser extension is causing the problem. Click the three-dot menu icon and select New incognito window.
Head over to Gmail, sign in with your account, and try using the spell check feature again. If it works fine, one of your extensions is responsible for the issue. To find it, you will need to disable all the extensions and re-enable them one at a time.
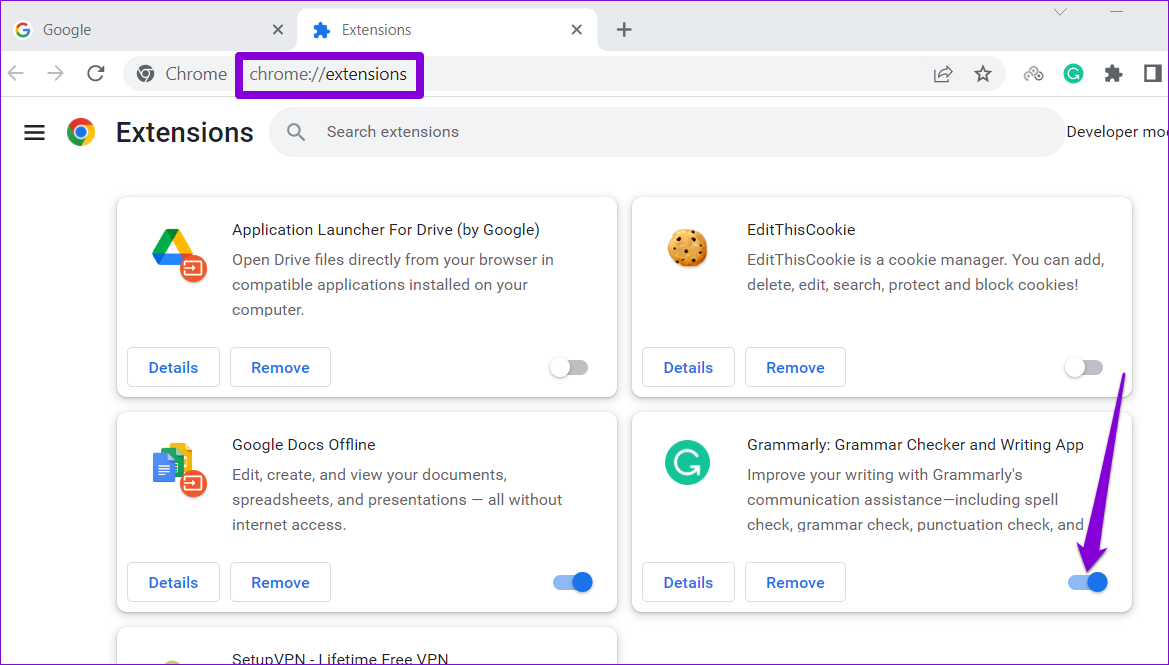
Type chrome://extensions (Chrome) edge://extensions (Edge) in the address bar at the top and press Enter. Turn off the toggles next to the extensions to disable them.
Restart your browser after this and re-enable your extensions one by one. You will need to test Gmail’s spell-check feature after enabling each extension. Once you find the problematic extension, consider removing it.
Was this helpful?
Last updated on 02 July, 2024
Read Next
 3 Ways to Fix Spell Check Not Working in Google Docs
Basic Fixes Check network connectivity: Google Docs does not check for spelling in offline mode.
3 Ways to Fix Spell Check Not Working in Google Docs
Basic Fixes Check network connectivity: Google Docs does not check for spelling in offline mode.
 6 Ways to Spell Check Is Not Working in Microsoft Word
Before you begin, try to restart Microsoft Word to fix temporary bugs and glitches.
6 Ways to Spell Check Is Not Working in Microsoft Word
Before you begin, try to restart Microsoft Word to fix temporary bugs and glitches.
 5 Fixes for Spell Check Not Working in Microsoft Outlook for Windows
Fix 1: Check Spelling and Autocorrect Settings The first thing you should do is ensure that spell check is enabled and configured correctly in Outlook.
5 Fixes for Spell Check Not Working in Microsoft Outlook for Windows
Fix 1: Check Spelling and Autocorrect Settings The first thing you should do is ensure that spell check is enabled and configured correctly in Outlook.
 5 Fixes for Spell Check Not Working in Microsoft Teams for Windows
Fix 1: Disable and Re-Enable Spell Check This may seem too simple, but disabling and re-enabling the spell check feature in Microsoft Teams can help.
5 Fixes for Spell Check Not Working in Microsoft Teams for Windows
Fix 1: Disable and Re-Enable Spell Check This may seem too simple, but disabling and re-enabling the spell check feature in Microsoft Teams can help.
 How to Disable OneNote Spell Check
OneNote is simply fantastic at what it offers.
How to Disable OneNote Spell Check
OneNote is simply fantastic at what it offers.
 6 Ways to Fix Keyboard Shortcuts Not Working in Gmail
Fix 1.
6 Ways to Fix Keyboard Shortcuts Not Working in Gmail
Fix 1.
 5 Ways to Fix Gmail Not Working in Google Chrome
Fix 1: Disable Browser Extensions Third-party extensions in Chrome can sometimes prevent Gmail from loading properly.
5 Ways to Fix Gmail Not Working in Google Chrome
Fix 1: Disable Browser Extensions Third-party extensions in Chrome can sometimes prevent Gmail from loading properly.
 4 Ways to Fix Gmail Not Working in Safari for Mac and iPad
Basic Fixes Check date and time: There can be a delay in receiving emails in Gmail if the date and time are inaccurate on your Mac or iPad.
4 Ways to Fix Gmail Not Working in Safari for Mac and iPad
Basic Fixes Check date and time: There can be a delay in receiving emails in Gmail if the date and time are inaccurate on your Mac or iPad.
The article above may contain affiliate links which help support Guiding Tech. The content remains unbiased and authentic and will never affect our editorial integrity.