Chromebooks remain the preferred choice for students and consumers on a tight budget. ChomeOS is easy-to-use, gets the job done, supports Android apps, and has tight integration with Android phones. Your ideal ChromeOS experience can turn upside down when your Chromebook charger stops working. Here are the best ways to fix Chromebook not charging.
Most Chromebooks have a stellar battery life due to an efficient ChromeOS system. But you eventually need to charge your laptop after some time. Chromebook not charging can affect your study hours or an ongoing class. Let’s troubleshoot the problem.
1. Check the Power Source and Adapter
Let’s cover some basics first. You need to check the power source. If it’s switched off, turn it on and try again. You can also check the supplied adapter with another device. If none of your devices are charging with the Chromebook adapter, it’s time to get a new adapter from the local shop or Amazon.
2. Check the Charging Cable
It’s another basic factor you need to check off before making any changes to your Chromebook. You should carefully check the charging cable, and if there is any major damage or cuts on either side, replace it with a new one and try again.
3. Use Another Charging Port
Modern Chromebooks come with several USB-C ports to utilize. If a specific port isn’t working, switch to another one and charge your device.
4. Restart Chromebook
Most Chromebook users put their laptop to sleep so it’s ready to use in only a few seconds. You need to occasionally restart the Chromebook for smooth device operations.
Step 1: Click the clock icon on the bottom right corner and click the power icon.

Step 2: After your device turns off, unplug the charger.
Step 3: Wait for a few minutes and turn on the device. Connect a power adapter and see if Chromebook is charging.
5. Run EC Reset
It’s yet another effective way to fix common ChromeOS problems like Wi-Fi not working and battery not charging. EC (Embedded Controller) reset is a hard reset that resets all the hardware and software settings. Connect your Chromebook to a power adapter and try the tricks below.
Step 1: Turn off your Chromebook (check the steps above).
Step 2: Connect a charger. Press and hold the Refresh and Power buttons simultaneously.
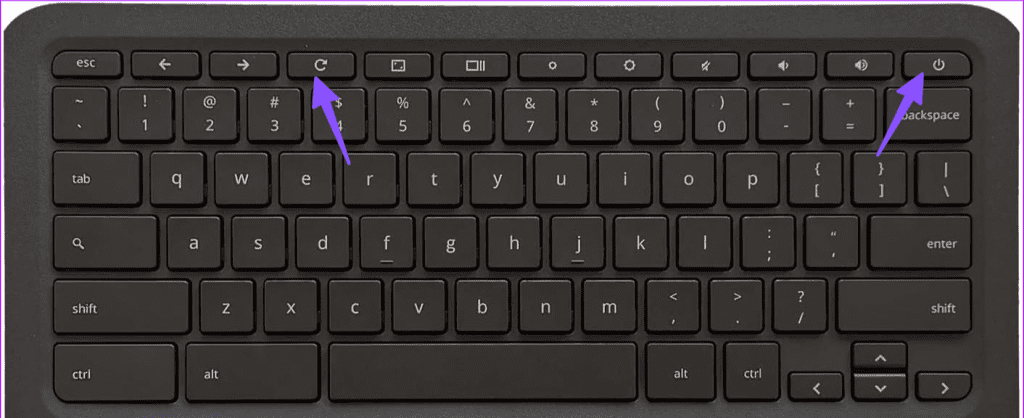
Step 3: Release both buttons when the device starts up. It takes around 5 seconds.
6. Overheating Chromebook
If your Chromebook is overheating due to heavy usage, it may not charge the device to avoid permanent damage to the internals. You need to let the Chromebook cool down and try charging it after some time.
7. Tweak Power Settings
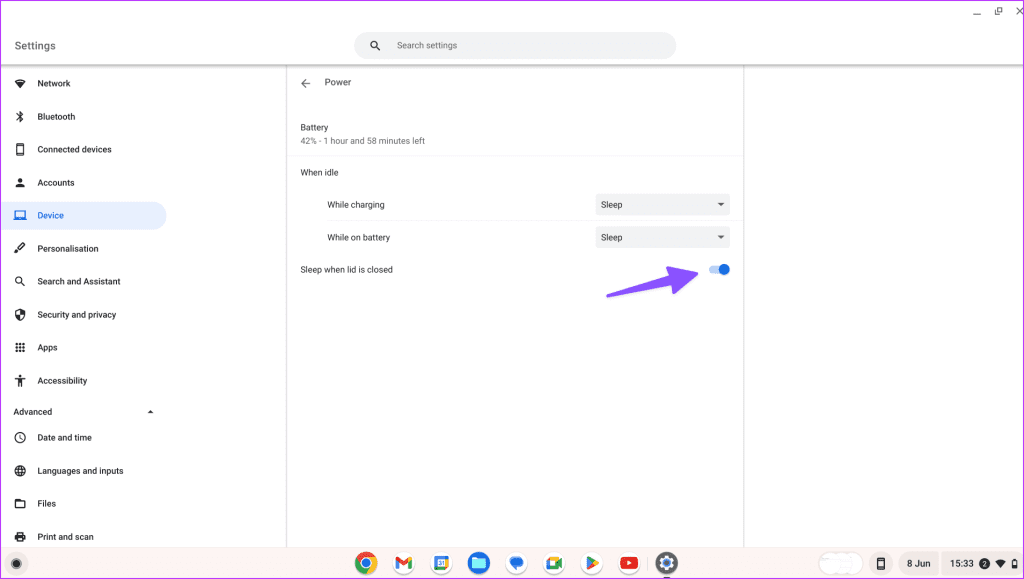
If your Chromebook doesn’t remain idle during sleep mode, it may drain the battery and doesn’t charge properly when the lid is closed. You need to tweak the power settings on your laptop.
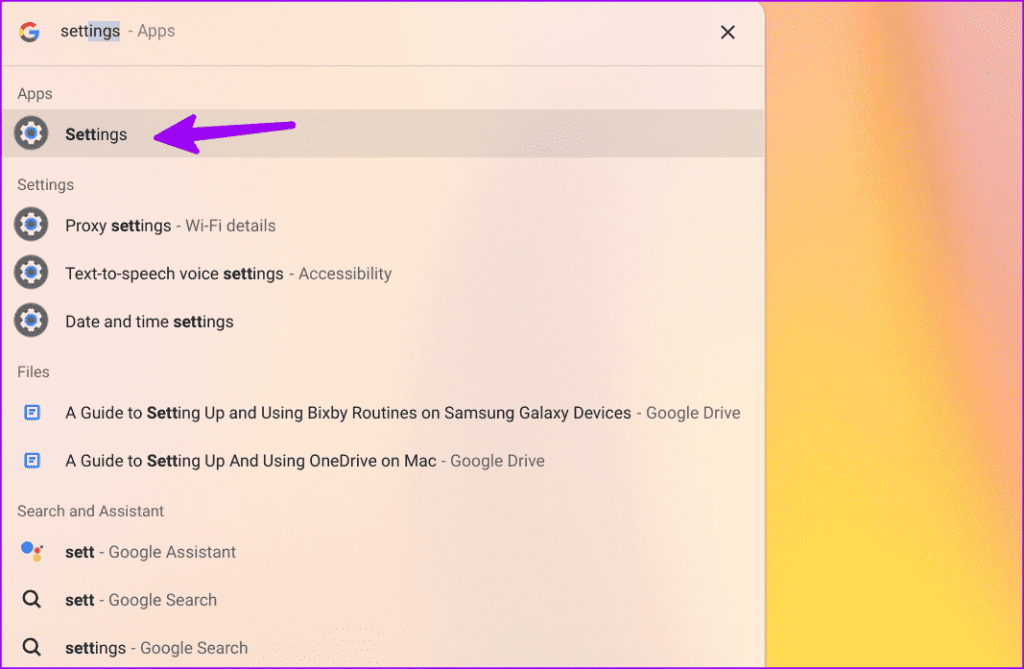
Step 1: Click the applications menu and open Settings.
Step 2: Select Power under Device.
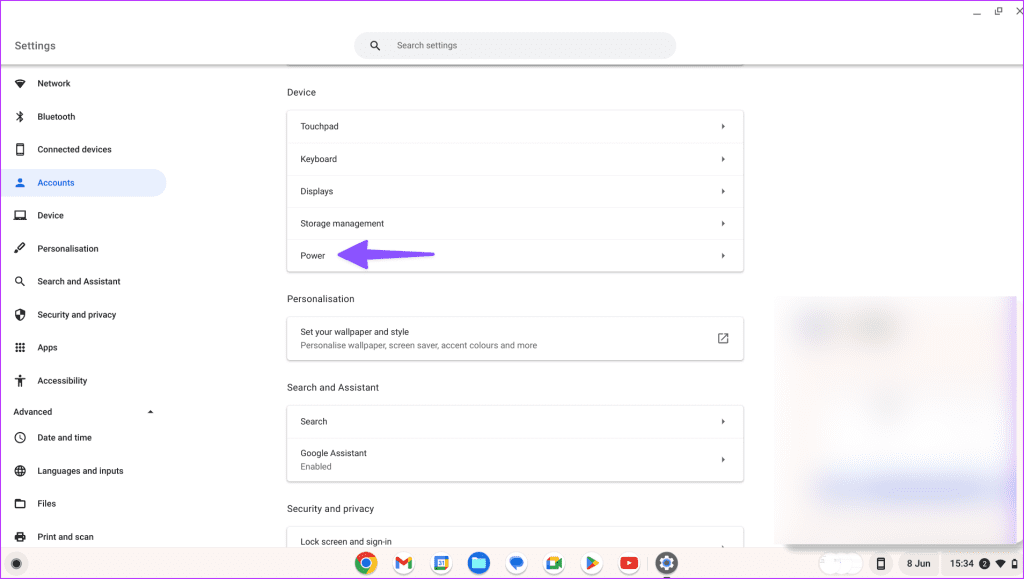
Step 3: Enable the Sleep when the lid is closed toggle.
8. Run Charge Test
ChromeOS comes with a built-in diagnostic tool to check the battery’s health. You can run the charge test to check charging cycles, battery health, capacity, and current.
Step 1: Open ChromeOS settings (check the steps above).
Step 2: Select About ChromeOS from the sidebar.
Step 3: Click Diagnostics.

Step 4: Select System and run the charge test under the Battery menu.

If your battery health is below 70%, you may need to replace it with a new one.
9. Update ChromeOS
An outdated ChromeOS build may cause charging issues on your laptop. You need to update ChromeOS to the latest version.
Step 1: Open the About ChromeOS menu in Chromebook settings (check the steps above).
Step 2: Select ‘Check for updates’ and install the newest ChromeOS update on your laptop.

10. Reset Chromebook
Do you still face issues with charging your Chromebook? You need to reset the system and start again.
Step 1: Head to ChromeOS settings (check the steps above).
Step 2: Select ‘Reset settings’ and click Reset.
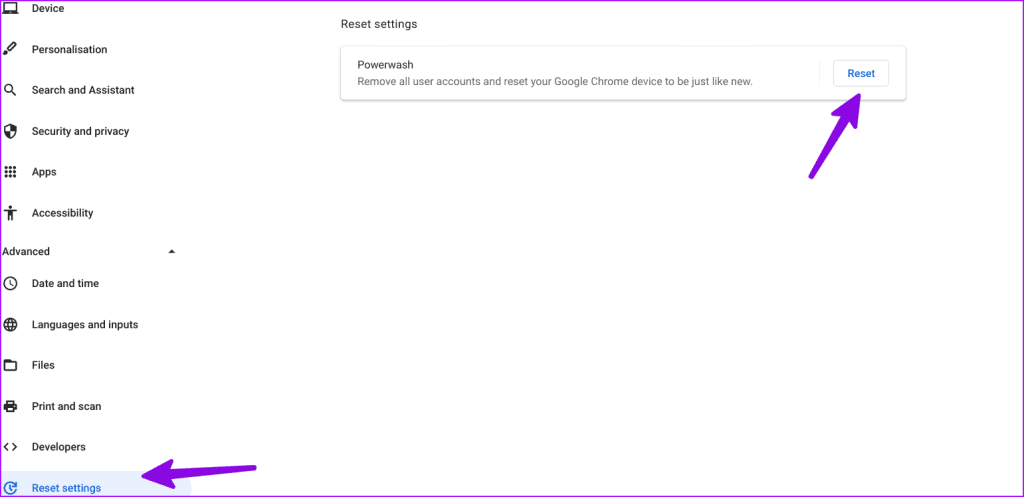
Follow the on-screen instructions to factory reset the laptop.
Juice Up Your Chromebook in No Time
Chromebook not charging can spoil your mood and may leave you with a dead laptop. Before you rush to the nearest service center, use the tricks above to address charging issues. While you are at it, let us know the trick that worked for you.
Was this helpful?
Last updated on 07 August, 2023
Read Next
 Why Is My Chromebook Battery Light Blinking White: 4 Ways to Fix the Issue
Many Chromebook users noticed the LED near the power cord connector sometimes blinks white.
Why Is My Chromebook Battery Light Blinking White: 4 Ways to Fix the Issue
Many Chromebook users noticed the LED near the power cord connector sometimes blinks white.
 7 Best Multi-Charging Cables for Charging Multiple Devices
Most of us nowadays have multiple devices to charge.
7 Best Multi-Charging Cables for Charging Multiple Devices
Most of us nowadays have multiple devices to charge.
 4 Ways to Enable or Disable Dark Mode on Chromebook
Method 1: From Quick Settings Step 1: Click on the bottom right corner (on the time) of your Chromebook to open the Quick Settings panel.
4 Ways to Enable or Disable Dark Mode on Chromebook
Method 1: From Quick Settings Step 1: Click on the bottom right corner (on the time) of your Chromebook to open the Quick Settings panel.
 5 Ways to Lock Your Chromebook Screen
Method 1: Using the Lock Button on the Keyboard On most Chromebook keyboards, you will find a lock button that lets you lock your Chromebook quickly without closing its lid.
5 Ways to Lock Your Chromebook Screen
Method 1: Using the Lock Button on the Keyboard On most Chromebook keyboards, you will find a lock button that lets you lock your Chromebook quickly without closing its lid.
 Top 8 Ways to Fix Apple iPad Not Charging
Apple’s iPad is ideal for consuming media, getting some work done, and taking Google Meet/Zoom calls on the go.
Top 8 Ways to Fix Apple iPad Not Charging
Apple’s iPad is ideal for consuming media, getting some work done, and taking Google Meet/Zoom calls on the go.
 4 Ways to Fix Samsung Galaxy Phone Not Charging After 80 or 85 Percent
https://youtu.be/jIQ1_jjmQec Why Samsung Limits the Phone Charge to 80 or 85 Percent?
4 Ways to Fix Samsung Galaxy Phone Not Charging After 80 or 85 Percent
https://youtu.be/jIQ1_jjmQec Why Samsung Limits the Phone Charge to 80 or 85 Percent?
 6 Ways to Fix “iPhone Charging on Hold” Error
Charging on Hold Due to iPhone Temperature: A Much-Needed Feature High battery temperatures are the prime reason for the depletion of battery health on your iPhone.
6 Ways to Fix “iPhone Charging on Hold” Error
Charging on Hold Due to iPhone Temperature: A Much-Needed Feature High battery temperatures are the prime reason for the depletion of battery health on your iPhone.
 4 Ways to Fix Kindle Not Charging
Basic Fixes Check charging accessories: If there’s any visible damage to the charging cable/adapter, it can certainly cause issues while you try and charge your Kindle reader. Check power source:
4 Ways to Fix Kindle Not Charging
Basic Fixes Check charging accessories: If there’s any visible damage to the charging cable/adapter, it can certainly cause issues while you try and charge your Kindle reader. Check power source:
The article above may contain affiliate links which help support Guiding Tech. The content remains unbiased and authentic and will never affect our editorial integrity.

