Fix 1: Use Task Manager to Close the App
The primary reason for the ‘another program is currently using this file’ error is that another program on your PC is accessing the file. So, you must close the program using the Task Manager.
Step 1: Press the Ctrl + Shift + Esc keyboard shortcut to open Task Manager.
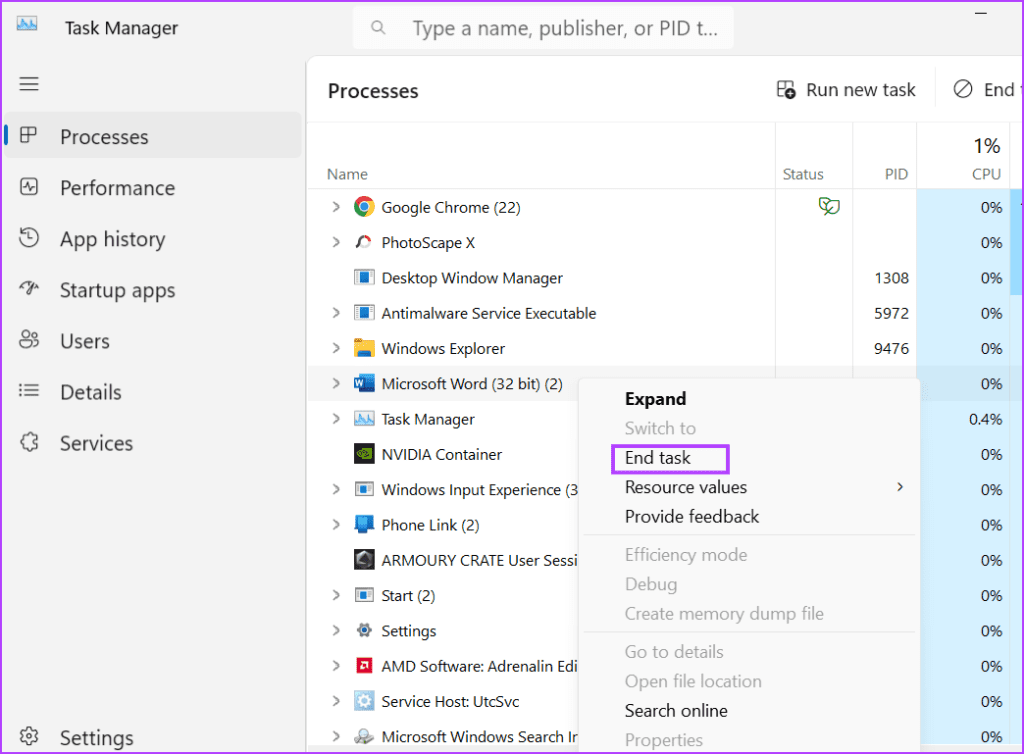
Step 2: Find the program which could be using the file in the Processes list. For example, if it is a document file like Microsoft Word or some other text editor program will be used.
Step 3: Right-click on the process and select the End Task option from the context menu.
Fix 2: Restart Windows Explorer
Windows Explorer process manages the programs and offers GUI support for many operating system elements. But if this process glitches and stops working properly, you can encounter the error. So, you must restart Explorer using Task Manager.
Step 1: Press the Ctrl + Shift + Esc keyboard shortcut to open Task Manager.
Step 2: Click on the search bar at the top. Type explorer and press Enter.

Step 3: Right-click on the Windows Explorer process and click on the Restart option.

Your screen will flicker for a few seconds and then return to normal. Any open apps will not be closed.
Fix 3: Change File Explorer Properties
A File Explorer property is also known to cause the ‘file is open in another program’ error on Windows. So, you must disable this property using the Folder Options in File Explorer.
Step 1: Press the Windows + E keyboard shortcut to open File Explorer.
Step 2: Go to the top menu bar and click on the three horizontal dots button to open the drop-down menu. Click on Options.

Step 3: Switch to the View tab. Locate the Launch folder windows in a separate process option. Click on the checkbox to unselect it.

Step 5: Click on the Apply button and then click on the OK button.

Fix 4: Disable File Explorer Preview
File Explorer Preview pane can help you check the contents of a file without leaving the File Explorer window. But if the file is already open in the preview pane, and you try to make changes to it, you can face the error. So, you must disable the File Explorer preview.
Step 1: Press the Windows + E keyboard shortcut to open File Explorer.
Step 2: Navigate to the top menu bar and click on the View button.

Step 3: A drop-down list will open. Hover on the Show option and then click on the Preview Pane option to unselect it.

Fix 5: Tweak a System Policy Using Group Policy Editor
Thumbnail Caching on Windows can also be a reason behind this infuriating problem. So, you must disable it using the Group Policy Editor.
Step 1: Press the Windows key to open the Start menu. Type gpedit.msc in the search bar and press Enter to open the Group Policy Editor.

Step 2: Navigate to the left-hand side menu. Click on the Administrative Templates option listed under the User Configuration section.

Step 3: Double-click on the Windows Components option.

Step 4: Scroll down and double-click on the File Explorer option.

Step 5: Double-click on the Turn off caching of thumbnails in hidden thumbs.db files policy to open its settings.

Step 6: Select the Enabled option.

Step 7: Click on the Apply button and then click on the OK button.

Step 8: Close the Group Policy Editor and restart your PC to apply the changes.
Fix 6: Disable Thumbnail Caching Using Registry Editor
If you have the Windows Home version, you won’t be able to disable thumbnail caching using the Group Policy Editor because it is exclusive to Windows Pro and Enterprise versions. Instead, you can modify the system registry using Command Prompt to disable thumbnail caching. But before doing that, create a registry backup.
Step 1: Press the Windows key to open the Start menu. Type cmd in the search bar and press Ctrl + Shift + Enter keyboard shortcut.

Step 2: The User Account Control window will open. Click on the Yes button to open Command Prompt with administrator privileges.

Step 3: Now, type the following command and press Enter to create a new subkey:
reg add "HKEY_CURRENT_USER\Software\Microsoft\Windows\CurrentVersion\Policies\Explorer"Step 4: After that, type the following command and press Enter:
reg add "HKEY_CURRENT_USER\Software\Microsoft\Windows\CurrentVersion\Policies\Explorer" /v NoThumbnailCache /t REG_DWORD /d 00000001 /f
Step 5: Close the Command Prompt window. Restart your PC to apply the changes.
Fix 7: Flush System Cache
An outdated or corrupt Windows cache can cause issues with the normal functioning of programs. You can easily remove the cache using the Disk Cleanup tool in Windows.
Step 1: Press the Windows key to open the Start menu. Type cleanmgr in the search bar and click on the Run as administrator option.

Step 2: Select all the checkboxes listed under Files to delete: section. Click on the OK button.

Step 4: Click on the Delete Files button.

Fix 8: Use Safe Mode
The last resort is to restart your PC in Safe Mode and then try to modify the app or file. Safe Mode will run the bare minimum of Windows services and drivers.
Step 1: Press the Windows key to open the Start Menu. Click on the Power icon.

Step 2: Press and hold the Shift key, then click on the Restart option.

Step 3: Windows Recovery Environment will launch. Click on the Troubleshoot option.

Step 4: Click on Advanced options.

Step 5: Click on the Startup Settings option.

Step 6: Click on the Restart button.

Step 7: Press the F4 key to boot the PC into safe mode.

Step 8: Log in to your PC and check if you face the same error while modifying or removing a file.

Was this helpful?
Last updated on 17 July, 2024
Read Next
 5 Fixes for “Word Experienced an Error Trying to Open the File” Error in Windows
Fix 1: Unblock Your Word File Microsoft Word may fail to open a document if it has been altered by third-party software.
5 Fixes for “Word Experienced an Error Trying to Open the File” Error in Windows
Fix 1: Unblock Your Word File Microsoft Word may fail to open a document if it has been altered by third-party software.
 6 Ways to Fix Default Apps and Program Missing on Windows 10
There are two types of people: those who use default apps on their Windows PC and those who don't.
6 Ways to Fix Default Apps and Program Missing on Windows 10
There are two types of people: those who use default apps on their Windows PC and those who don't.
 3 Ways to Force Quit a Program on Windows 11
Method 1: Force Close an App or Program From the Taskbar On computers running Windows 11 version 23H2 or later, you can terminate non-responsive apps and programs from the taskbar.
3 Ways to Force Quit a Program on Windows 11
Method 1: Force Close an App or Program From the Taskbar On computers running Windows 11 version 23H2 or later, you can terminate non-responsive apps and programs from the taskbar.
 4 Ways to Run the Program Compatibility Troubleshooter on Windows 10 and 11
Method 1: Using the Settings App The Settings app has a dedicated Troubleshoot section that contains all types of troubleshooters. To run the Program Compatibility Troubleshooter, you must access the Settings
4 Ways to Run the Program Compatibility Troubleshooter on Windows 10 and 11
Method 1: Using the Settings App The Settings app has a dedicated Troubleshoot section that contains all types of troubleshooters. To run the Program Compatibility Troubleshooter, you must access the Settings
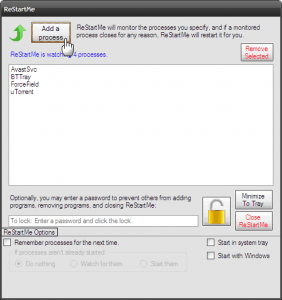 Quickly Auto-Restart a Windows Process or Program that Crashes
No one’s ever been killed in a Windows crash, so the Microsoft jokes don’t die down.
Quickly Auto-Restart a Windows Process or Program that Crashes
No one’s ever been killed in a Windows crash, so the Microsoft jokes don’t die down.
 Difference Between an App and a Program in Windows 10: GT Explains
Back in the day, people used to talk about programs while discussing desktop operating systems like Windows.
Difference Between an App and a Program in Windows 10: GT Explains
Back in the day, people used to talk about programs while discussing desktop operating systems like Windows.
 How to Find App and Program Location on Windows 11
Method 1: Using the Program Icon Step 1: Firstly, open your preferred browser.
How to Find App and Program Location on Windows 11
Method 1: Using the Program Icon Step 1: Firstly, open your preferred browser.
 5 Ways to Fix “Outlook Data File Cannot Be Accessed” Error on Windows
Fix 1: Change the Default Mail Delivery Location One of the most straightforward ways to fix the "Outlook data file cannot be accessed" error is to configure Microsoft Outlook to
5 Ways to Fix “Outlook Data File Cannot Be Accessed” Error on Windows
Fix 1: Change the Default Mail Delivery Location One of the most straightforward ways to fix the "Outlook data file cannot be accessed" error is to configure Microsoft Outlook to
The article above may contain affiliate links which help support Guiding Tech. The content remains unbiased and authentic and will never affect our editorial integrity.