Windows is one of the most popular operating systems allowing users to run multiple programs and other operating systems, such as Linux or Android. However, you must enable Virtualization in Windows 11 to make it happen. If you don’t know how to do it, this guide is for you.

Virtualization lets users create and run multiple operating systems on a single physical machine. This is especially helpful for a developer, a system administrator, or a tech enthusiast. In this guide, we’ll help you know what Virtualization is in Windows. And how you can turn on hardware virtualization.
Also read: How to enable Virtualization in Windows 10
What Is Virtualization in Windows 11
Virtualization is a technology that enables users to run multiple virtual machines (VMs) on a single hardware (PC). When you enable the virtual machine platform in Windows, users can run virtual machines with their operating systems and applications. Virtualization lets these programs utilize hardware storage for storing data, virtual switches, etc.
Thus as mentioned above, you can run Linux or even use Android apps on your Windows PC.
Check if Your Windows 11 System Supports Virtualization
Before we look into the steps to turn on hardware virtualization on your Windows 11 system, you need to ensure that your system supports virtualization technology. While most modern PC comes with support for Virtualization (VT), here’s how you can check if your system is compatible.
Step 1: Press Windows + R keys to open the Run application on your Windows PC.
Step 2: Type msinfo32 inside the dialogue box and hit Ok or Enter.

Step 3: Type Virtualization in the search bar below and locate ‘Virtualization-based security’
Step 4: Now, see what’s mentioned next to it. If it’s shown as Supported or Running, you can enable Virtualization on your Windows system.

Now that you are up to date with the basics, let’s show you how to enable Virtualization on the Windows system.
Part 1: Enable Virtual Machine Platform in Windows 11 From UEFI/BIOS
First, follow our guide on how to enter the UEFI/BIOS mode on your Windows system. Once done, follow the below steps.
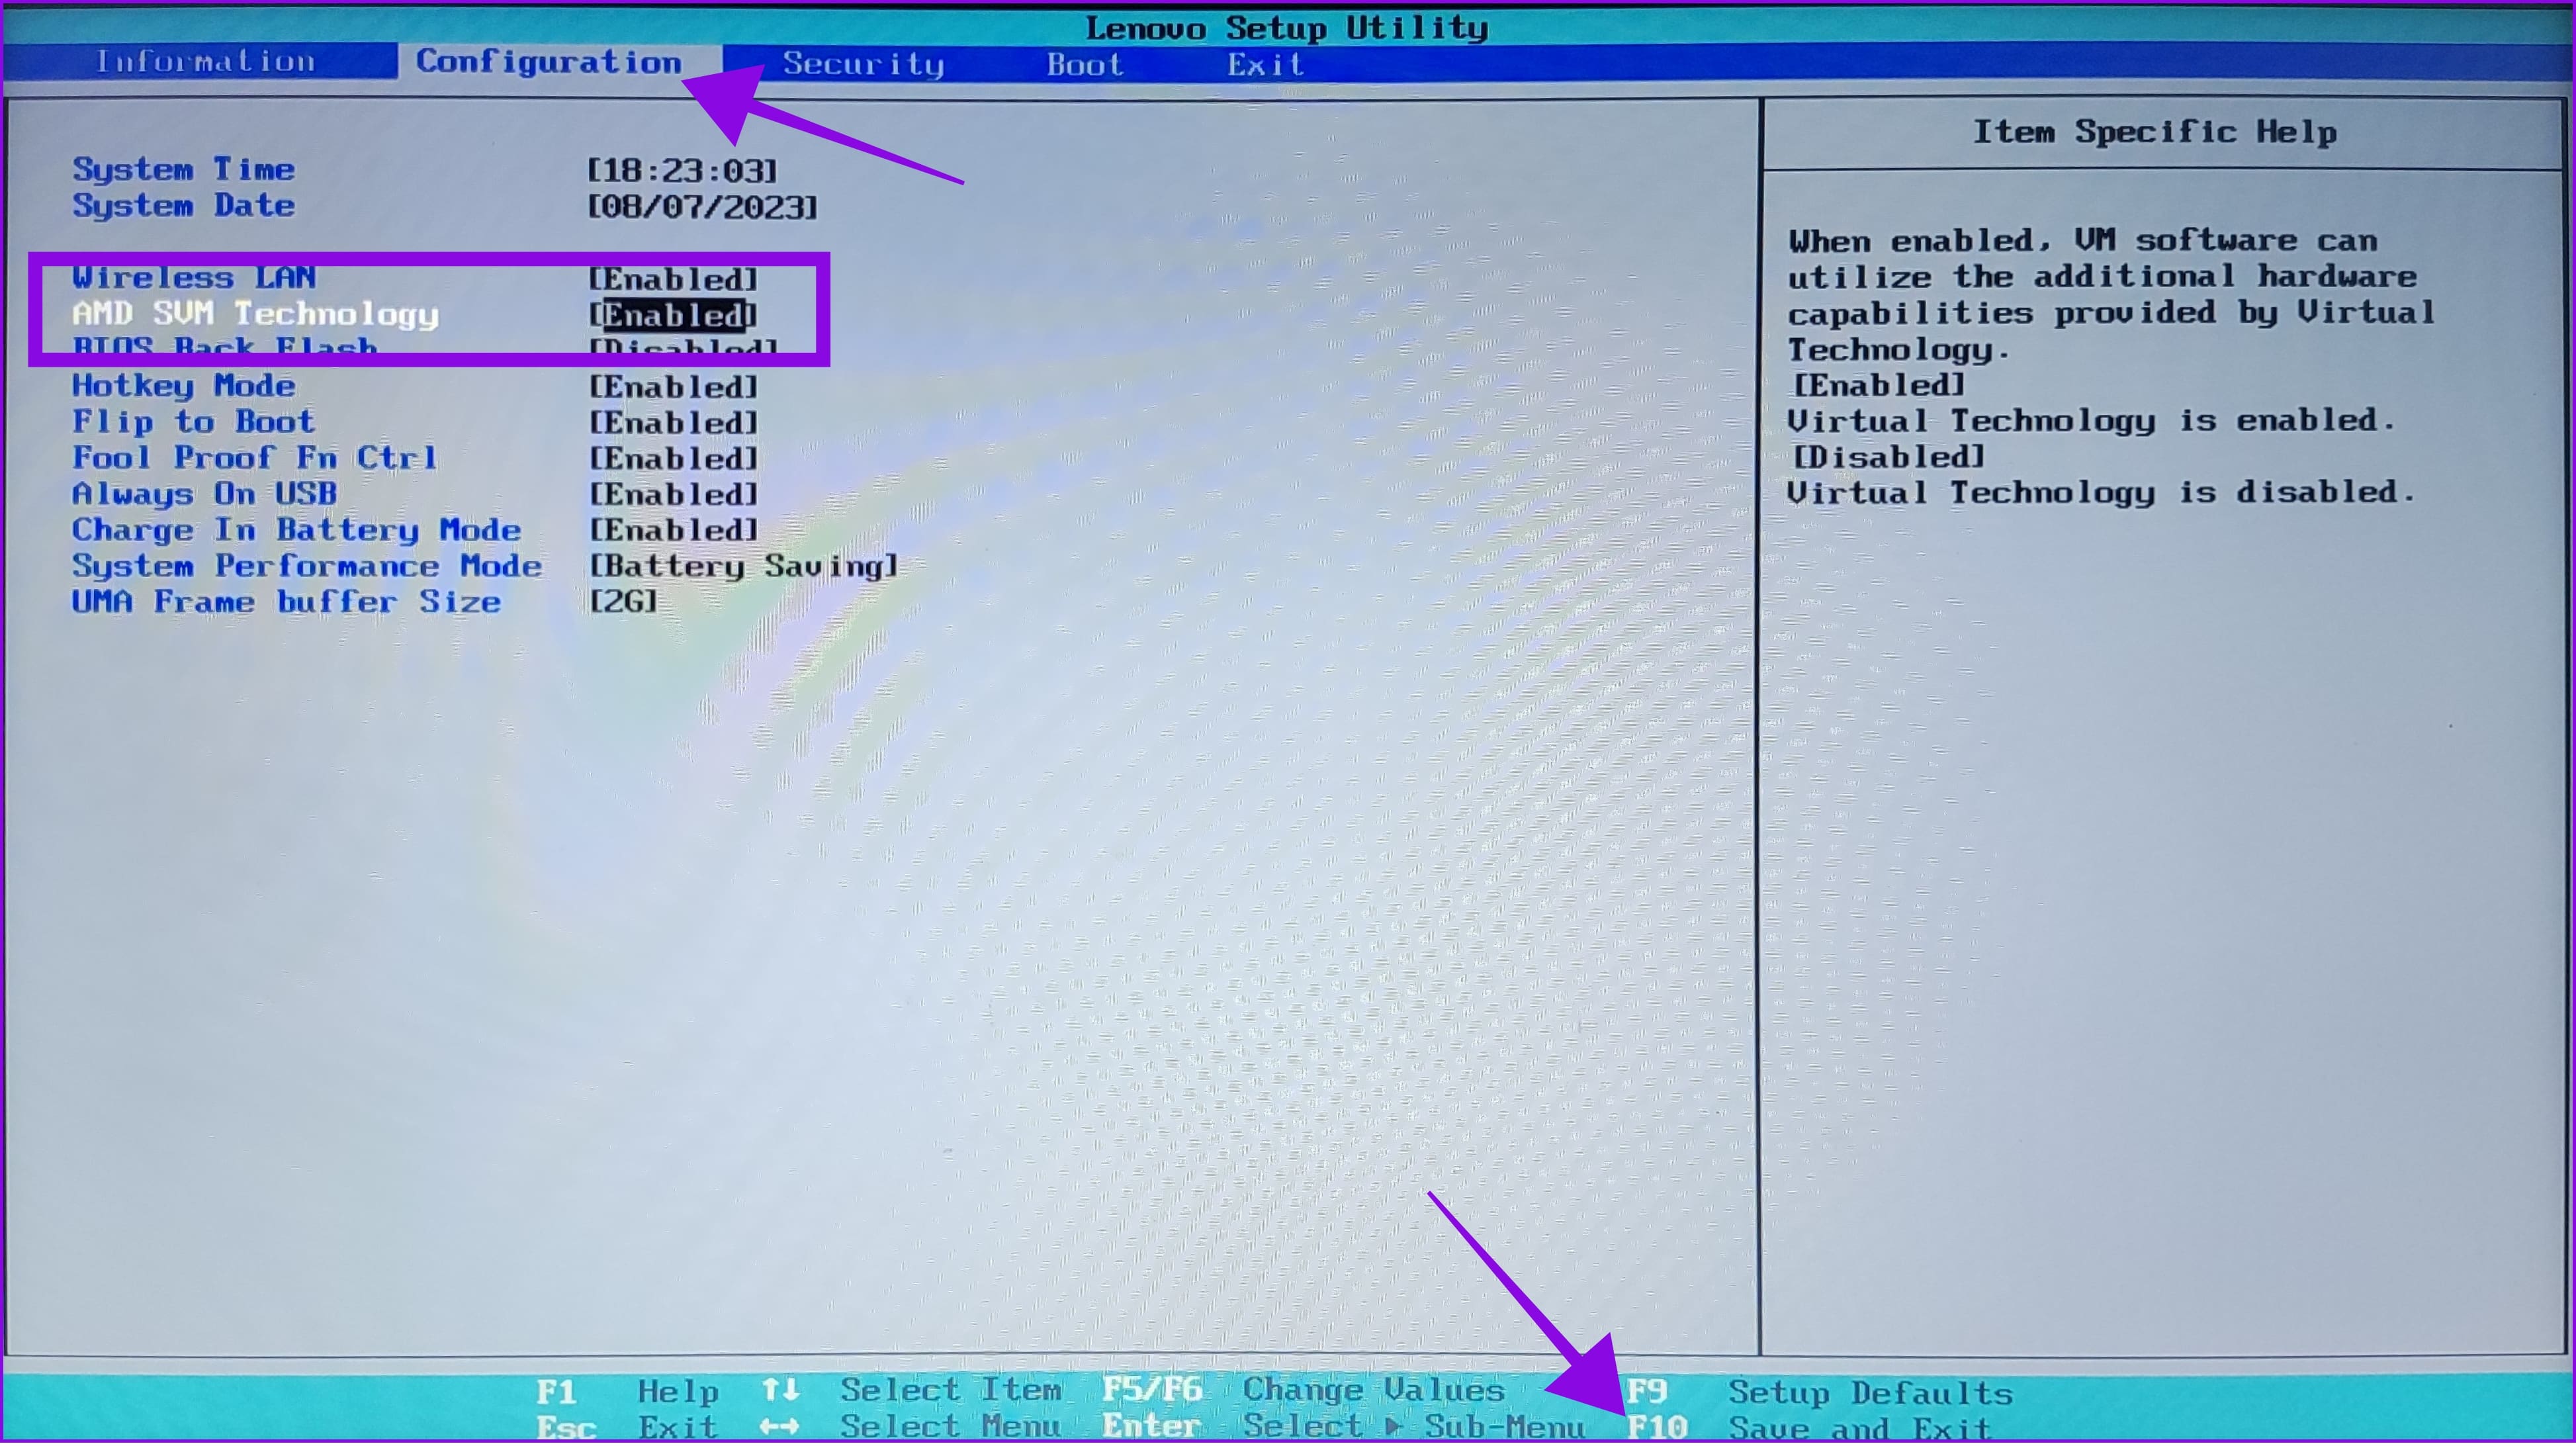
Note: The steps in this guide are based on an AMD-powered Lenovo laptop. The steps might differ based on the manufacturer and the processor. We have provided official guides to enable Virtualization in UEFI/BIOS if you use any other Windows system.
Step 1: After entering into BIOS mode, choose Configuration.
Step 2: Change the option for ‘AMD SVM Technology’ to Enabled.
Step 3: Now, hit the F10 button and choose Yes to confirm.

For those who are using other Windows devices, refer to the official guides below:
As for the Microsoft Surface devices, Virtualization is enabled in Windows 11 by default.
Part 2: Turn on Hardware Virtualization Features on Windows 11
Now that you have enabled Virtualization in BIOS, it’s time to enable all of the feature’s capabilities within Windows. Follow these steps:
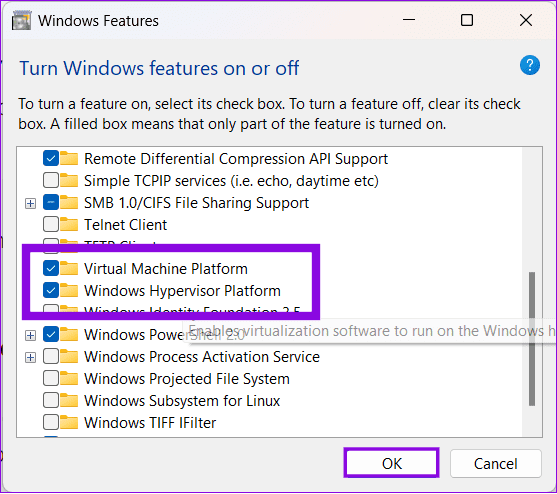
Step 1: Once your PC restarts, click on the Start icon > search and open Windows features.

Step 2: Check the boxes for ‘Virtual Machine Platform’, Hyper V, and ‘Windows Hypervision platform.’
Note: If your system doesn’t have Hyper V, don’t worry. It is limited to Windows 11 Pro or higher versions.
- Virtual Machine Platform: This enables certain virtualization components to run specific features, such as the Windows Subsystem for Linux and Windows Subsystem for Android. Many third-party apps can improve performance once you enable Virtualization in Windows 11.
- Hyper-V: It will let you unlock more virtualization features. You can run more than one virtual machine upon enabling this feature. Both ‘Virtual Machine Platform’ and ‘Windows Hypervision platform’ are required to run this feature.
- Window Hypervisor Platform: This is best for some third-party apps to shed a few more features than what they provide natively. You are required to enable this feature to run any virtualization feature.
Step 3: Hit Ok to confirm.

Wait for a few minutes until the necessary components are installed. Afterward, restart your system.
FAQs on Virtualization for Windows 11
Virtualization can enhance the performance and stability of the games and programs that utilize the service. However, running multiple programs utilizing the Virtualization feature might affect the system’s performance. This is similar to how running multiple programs affects the system’s performance without Virtualization.
Enabling Virtualization in Windows 11 doesn’t harm or affect your system. However, if you notice some applications consuming too many resources, it is better to disable the feature.
In most scenarios, having 8GB of RAM will run all tasks without issues. However, you might see some hiccups with 4GB RAM or below.
Use Windows to the Fullest
Enabling Virtualization in Windows 11 can greatly improve the capabilities of your system. We hope that this guide helped enable Virtualization in Windows 11. If you still have any suggestions or queries, let us know in the comments.
Was this helpful?
Last updated on 09 August, 2023
The article above may contain affiliate links which help support Guiding Tech. The content remains unbiased and authentic and will never affect our editorial integrity.


