Google Forms is the go-to option for many people when it comes to creating digital forms. Although it’s easily accessible on the web, it doesn’t have dedicated Android or iOS apps as of now. But that doesn’t mean you can’t create Google Forms on mobile. You surely can and here’s how.
Incredibly, you can use Google Forms anytime, anywhere, across any device cost-free, including iPhone, iPad, and Android devices. What’s more? You can do almost everything from adding more questions to changing the theme and we’re going to take you through every step.
How to Make a Google Form on iPhone, iPad, or Android Devices
Step 1: Open any preferred web browser on your device.
Step 2: Go to the Google forms website using the link below.
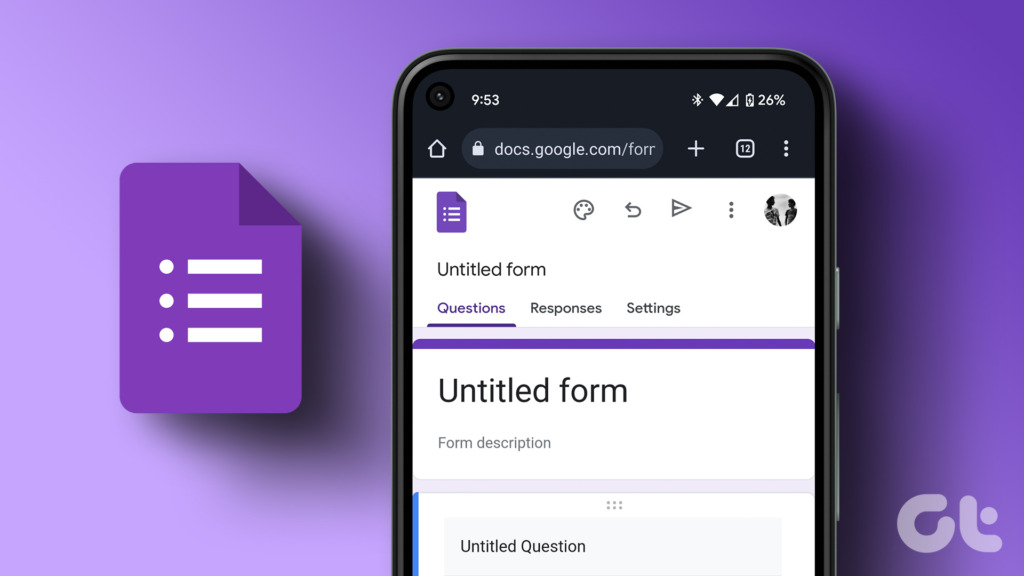
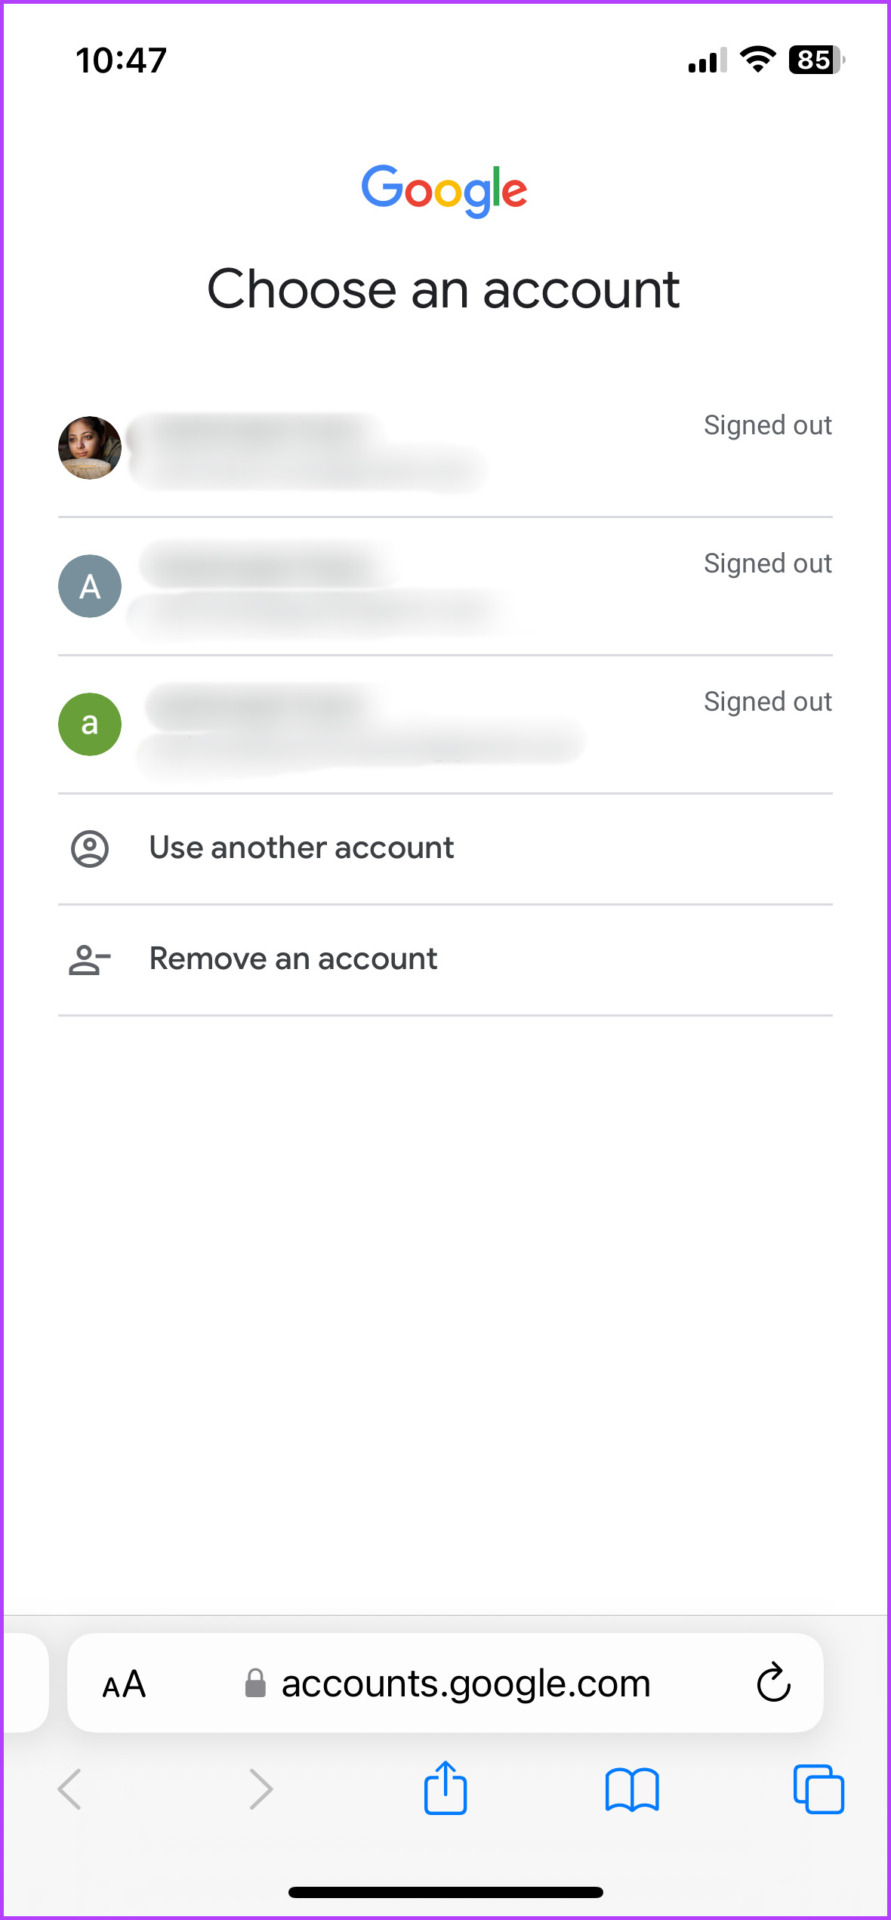
Step 3: Log in to your Google ID, if requested. A new form will automatically open.
The interface will greet you with a new form having one question and title. Follow along to learn how to customize this Google Form to your liking.
How to Add Form Title or Rename Google Form
To add a title, tap the Untitled form text and start typing your title. You can rename the form anytime before sharing. Simply tap the title text.
Additionally, you can also add a description to share more information about the form. To do so, tap the Form description box and add the required information.
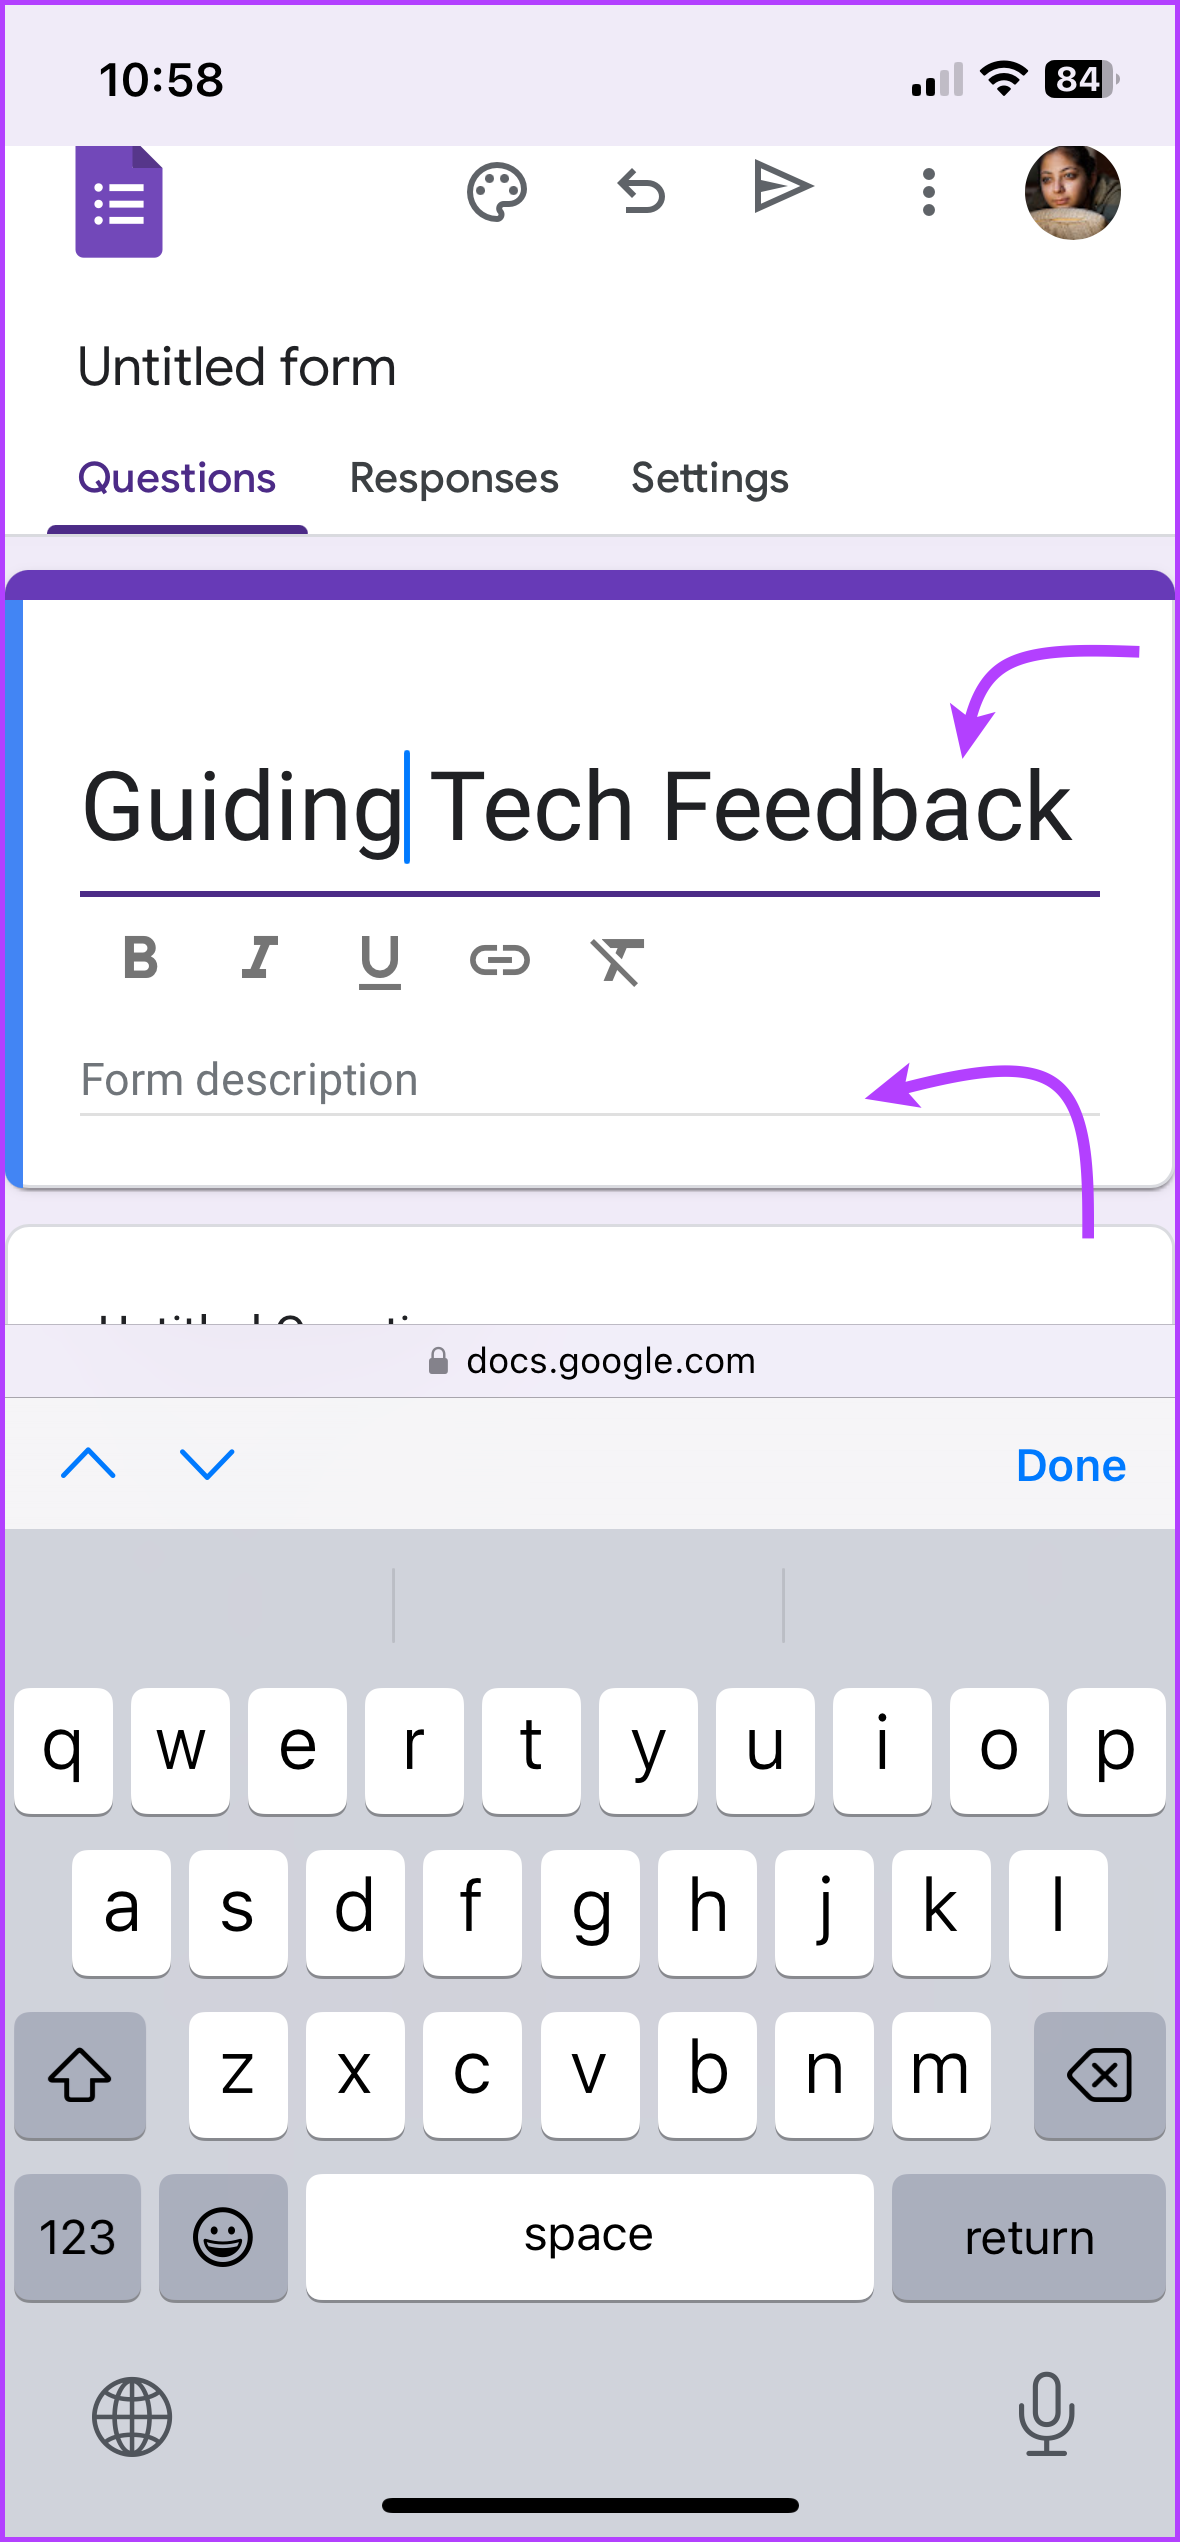
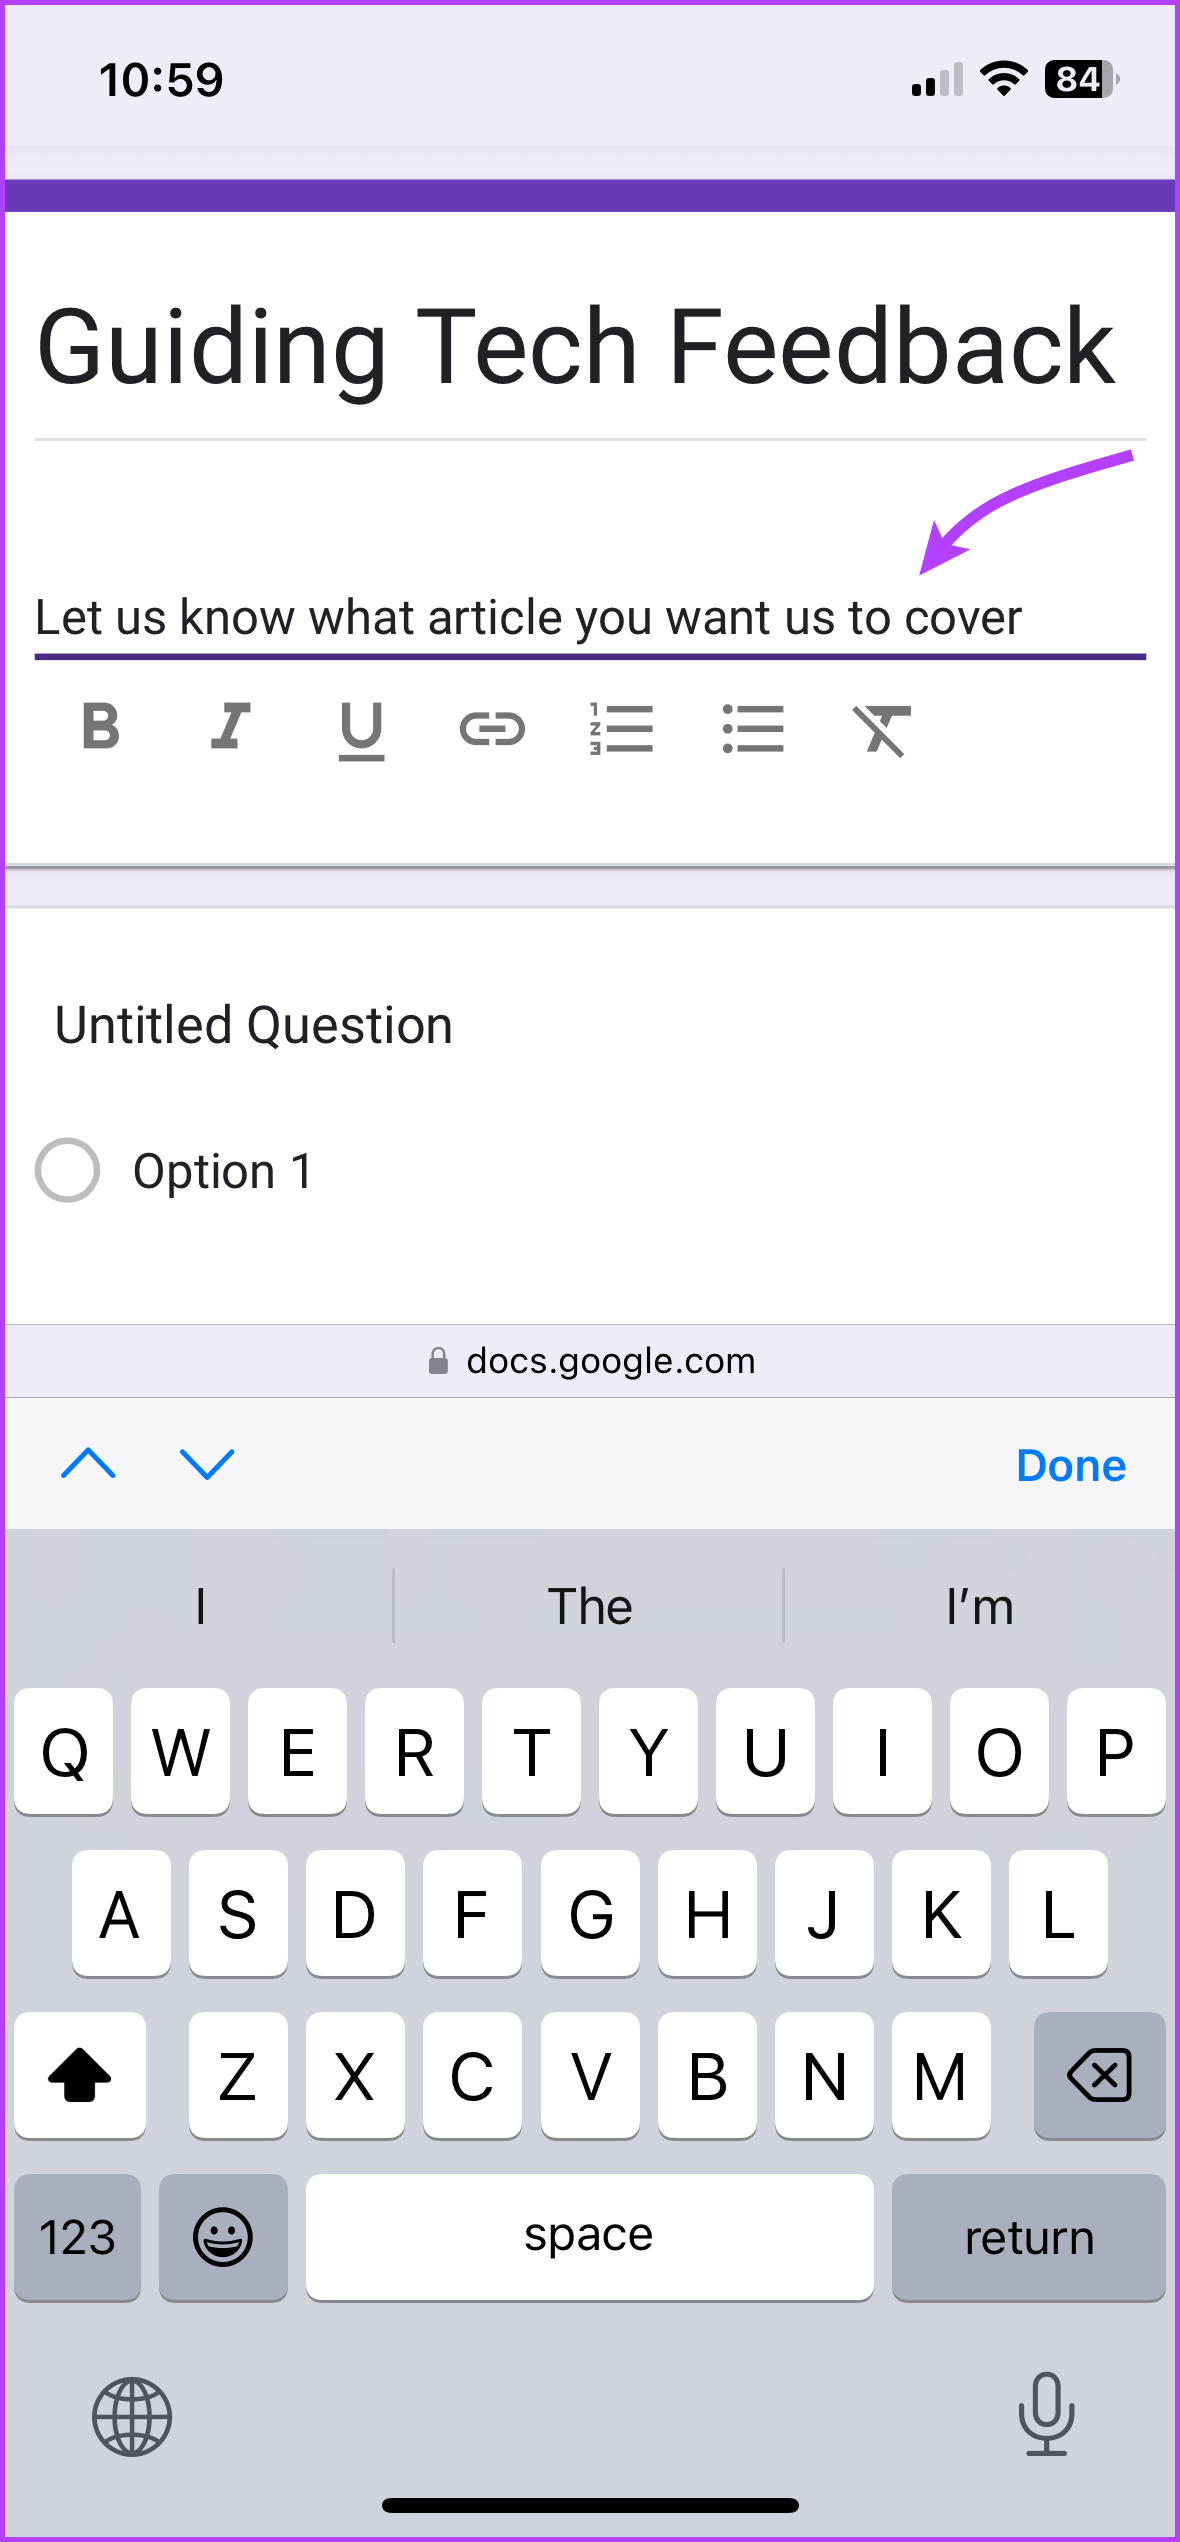
Tip: When you tap either box, a formatting bar appears. You can use it to format the text (bold, italic, underline, add bullets, etc.) and even add relevant links.
Create More Headings
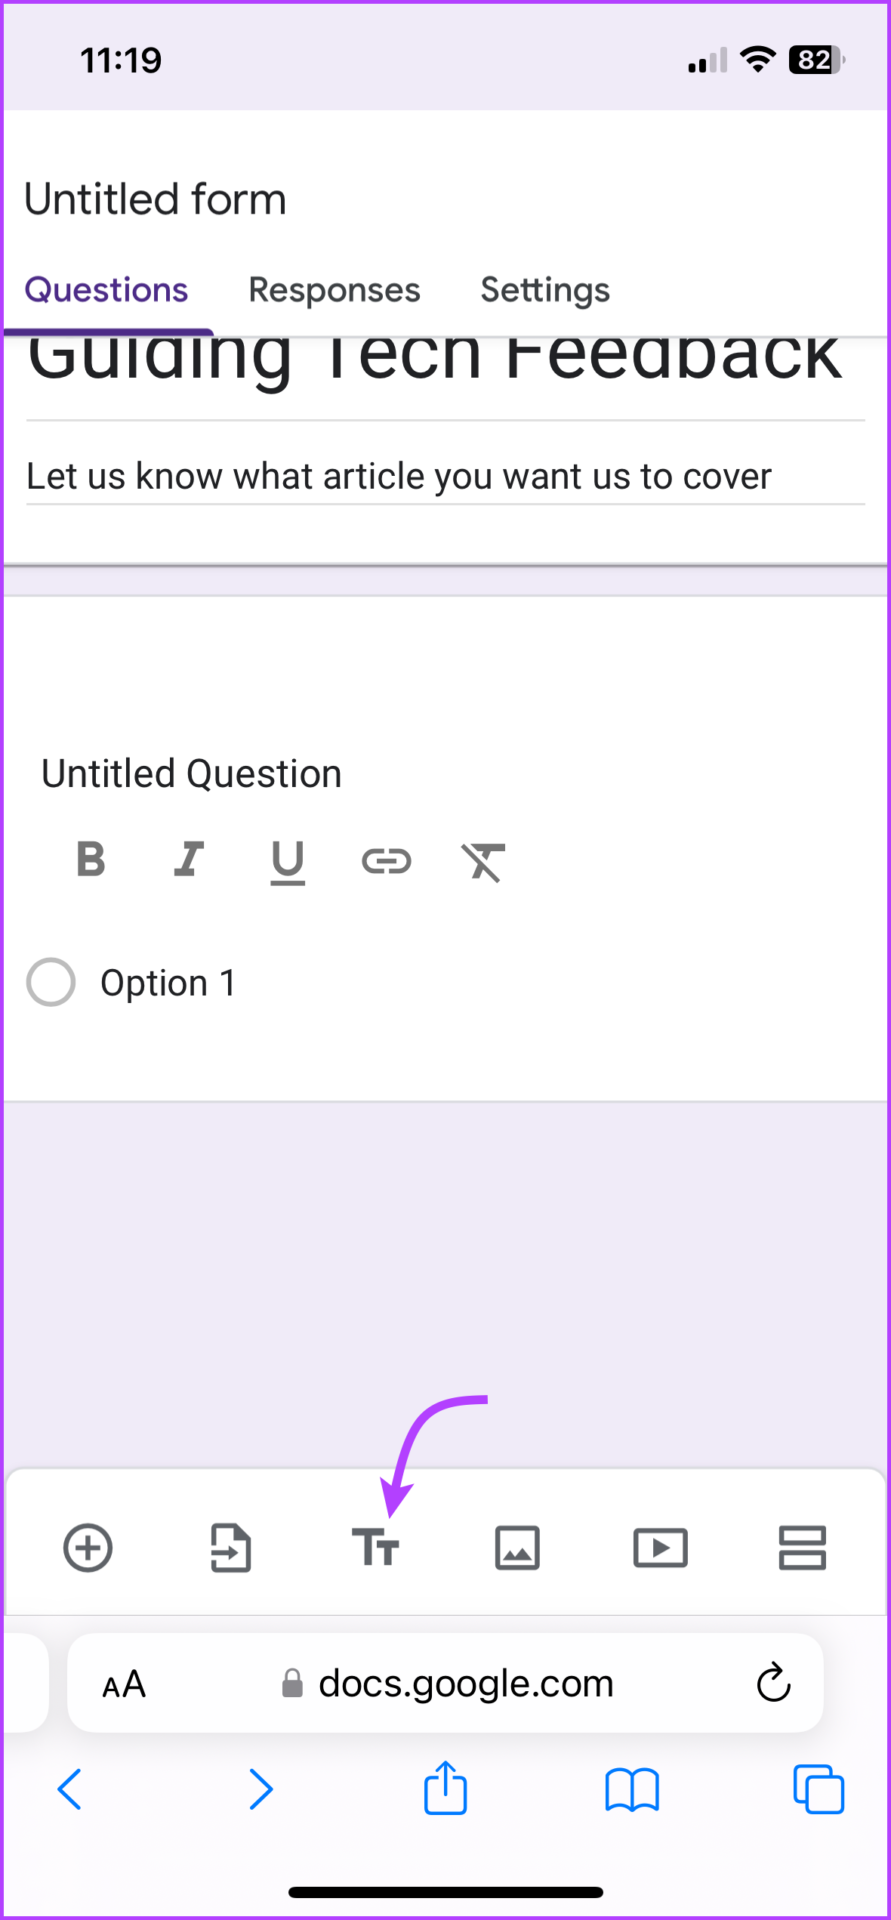
When you create a new form, the title box will be added automatically. If you want to add more titles and divide your form into multiple sections, tap the title (two T’s) icon. In addition to the title, you can also add a suitable description to the section.
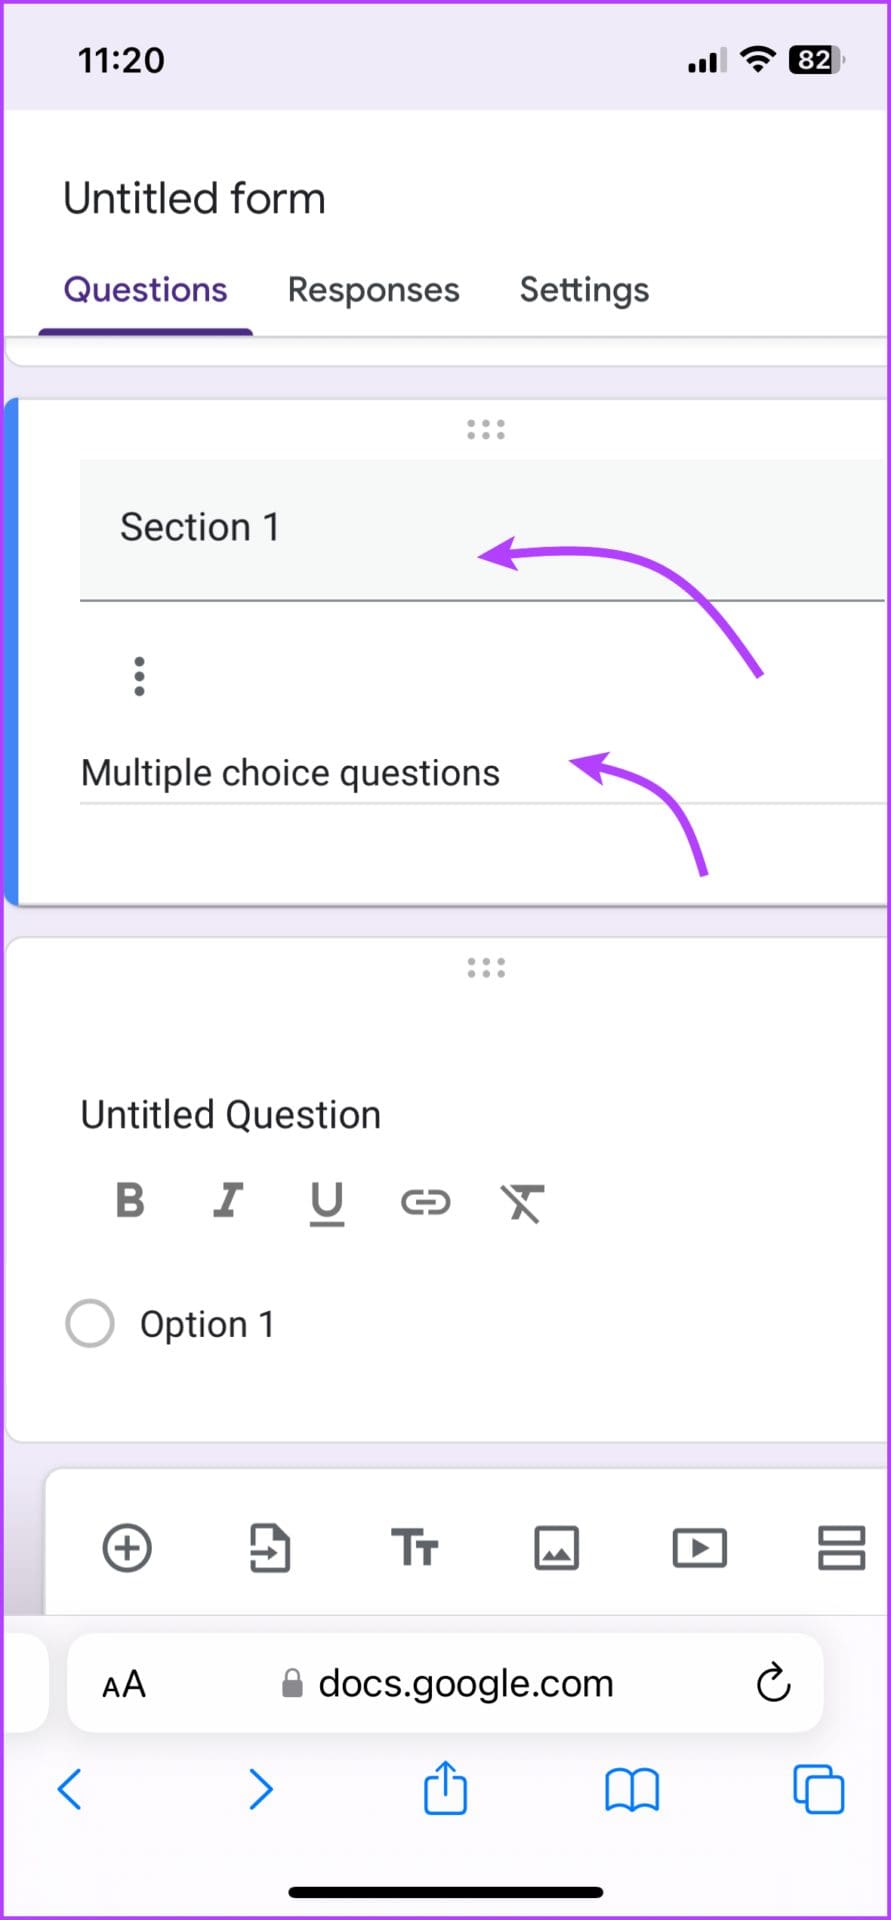
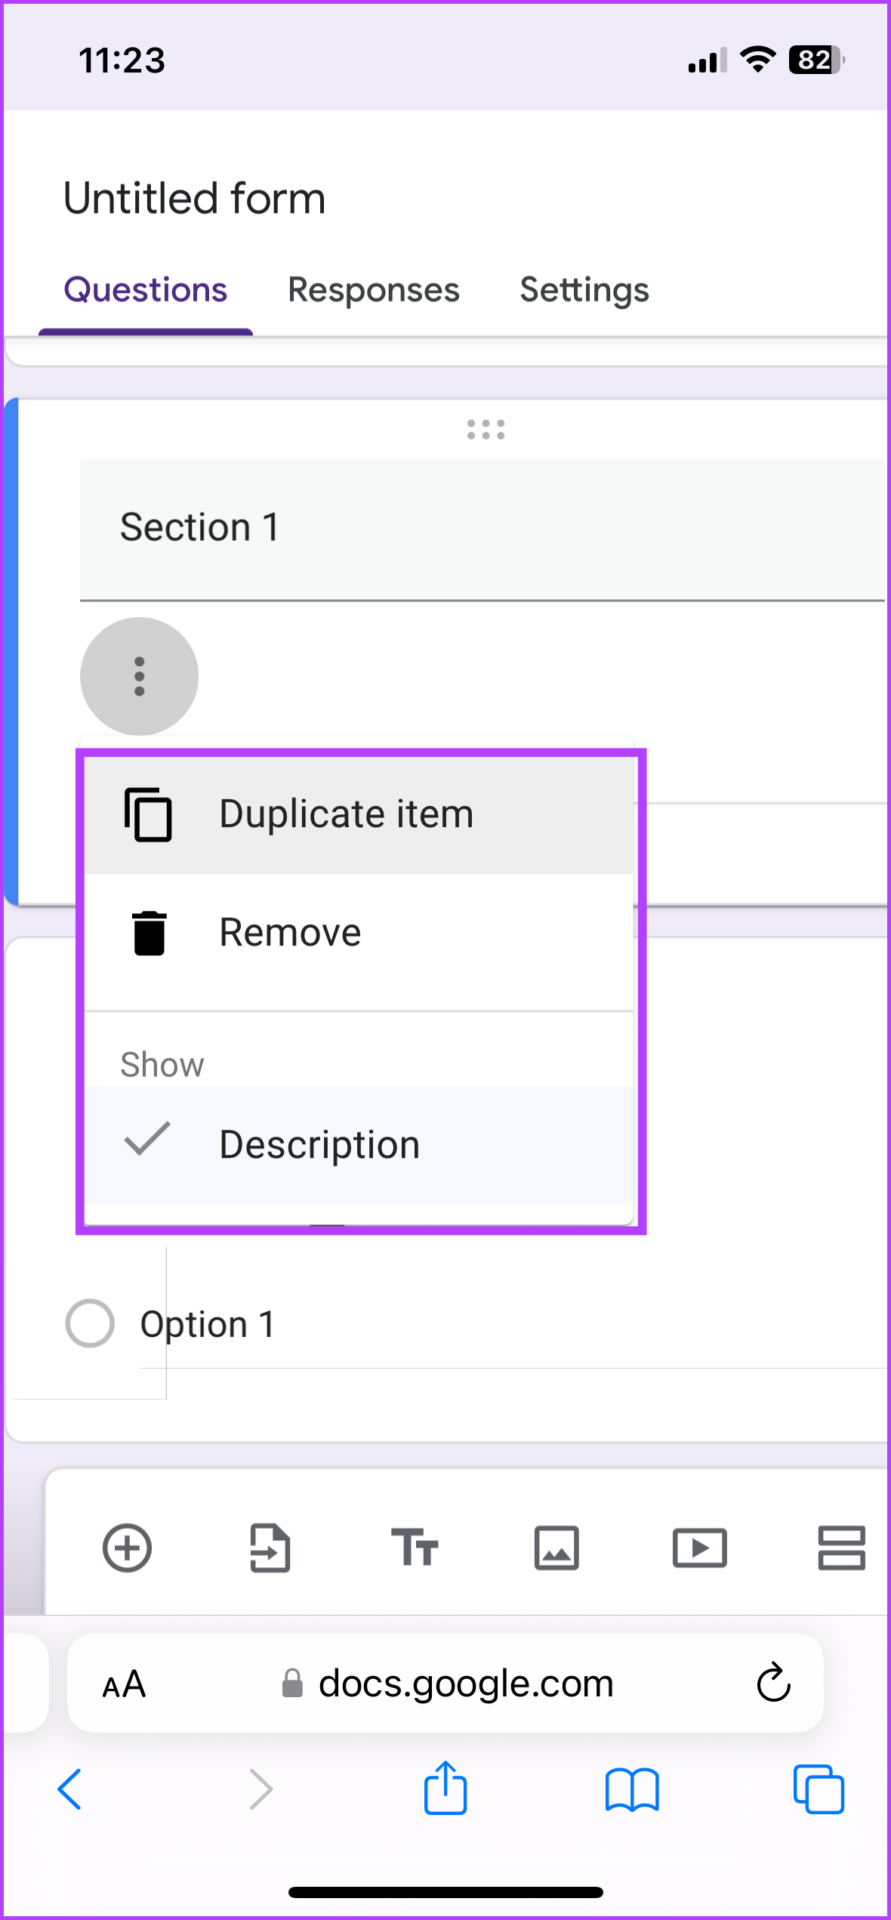
You can also tap the vertical ellipsis (three-dot icon) and uncheck Description to remove the field altogether or duplicate or remove the section title from this option.
Add or Edit Questions to Your Google Form
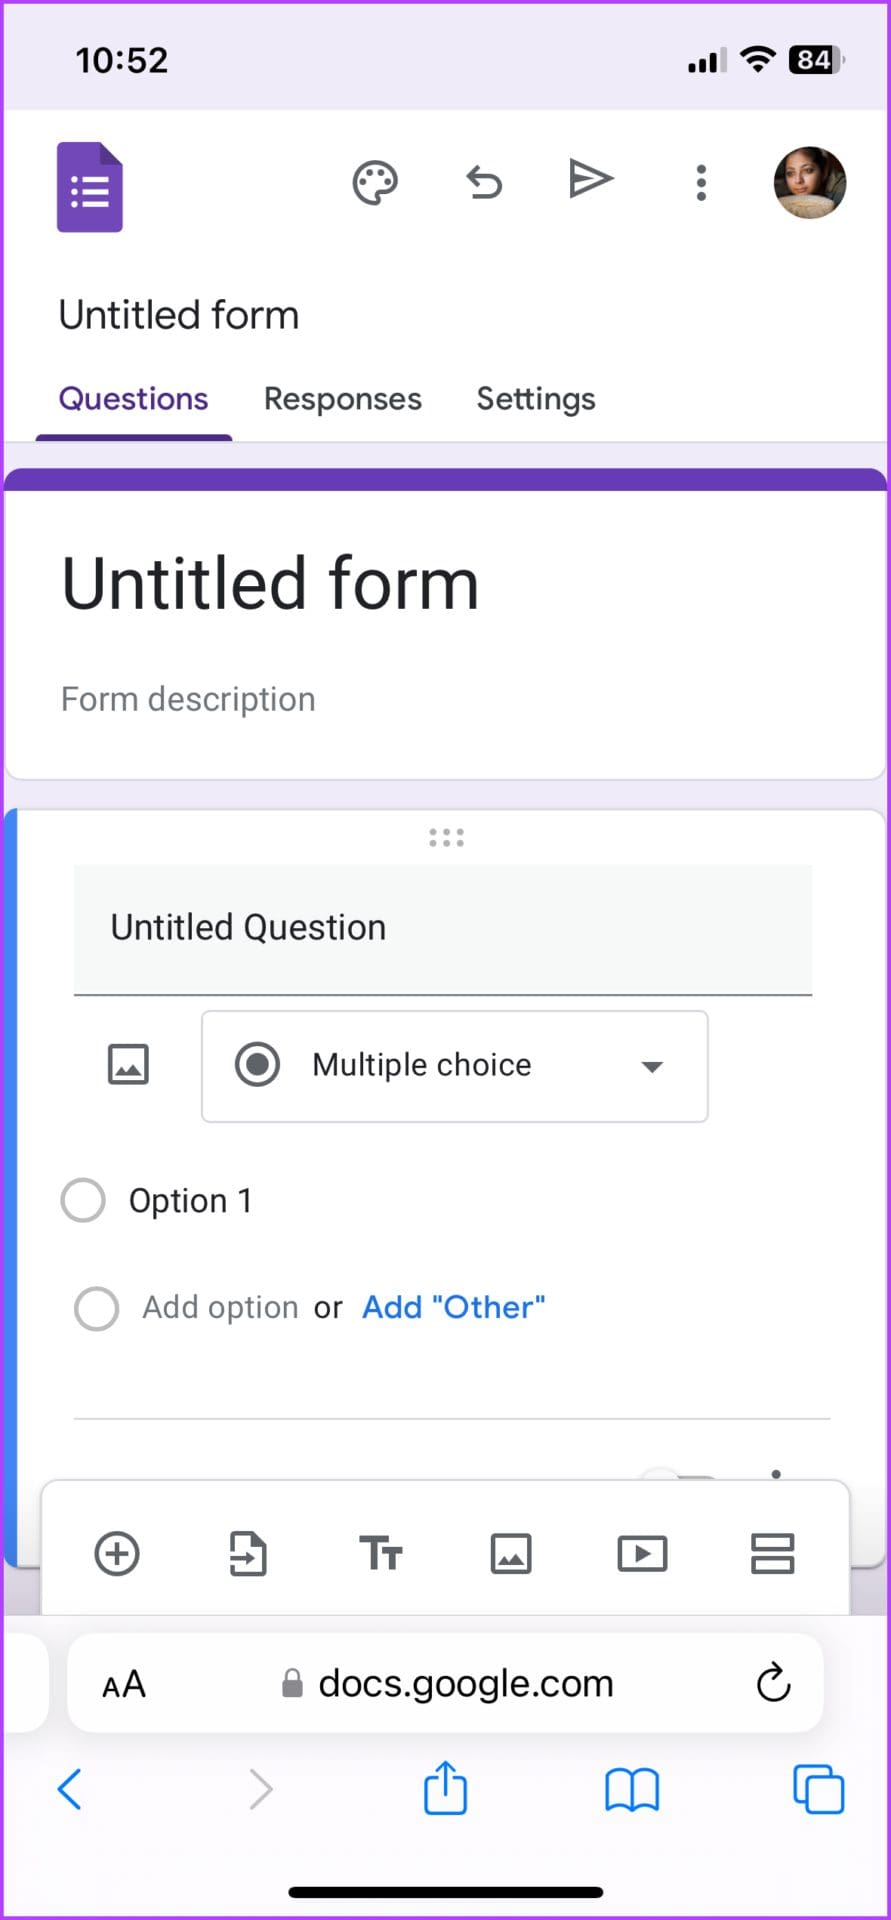
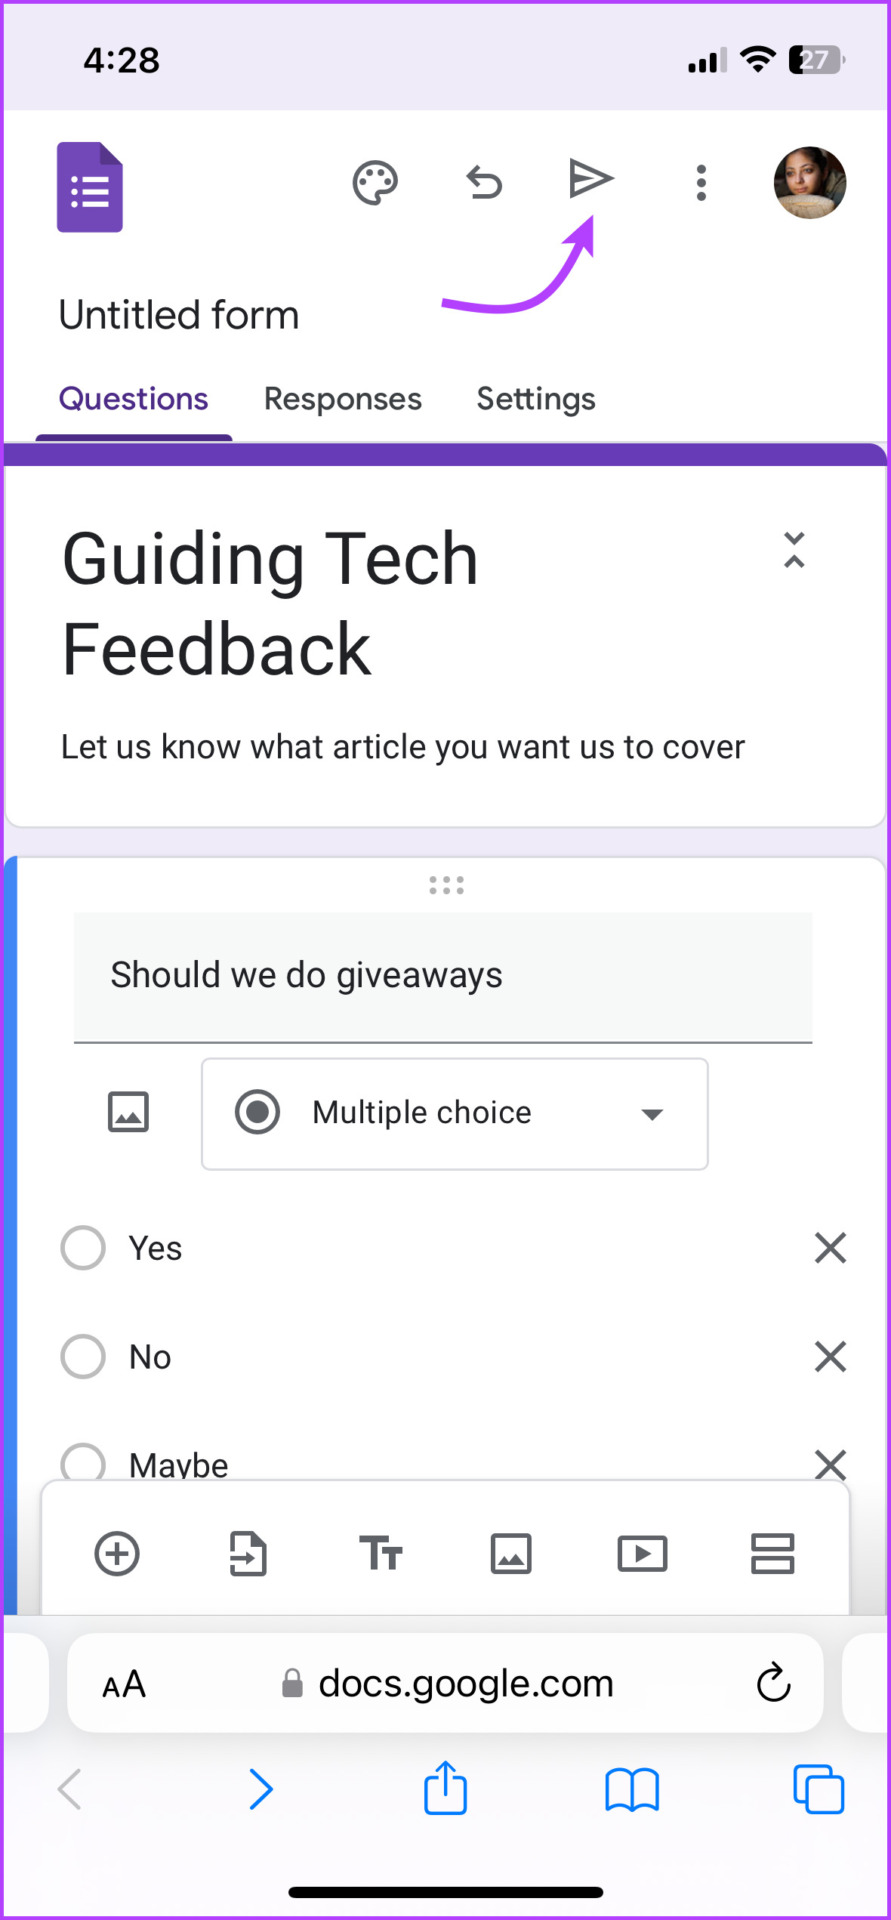
Step 1: Tap the + icon present in the toolbar at the bottom. A new multiple-choice question will be added to your form.
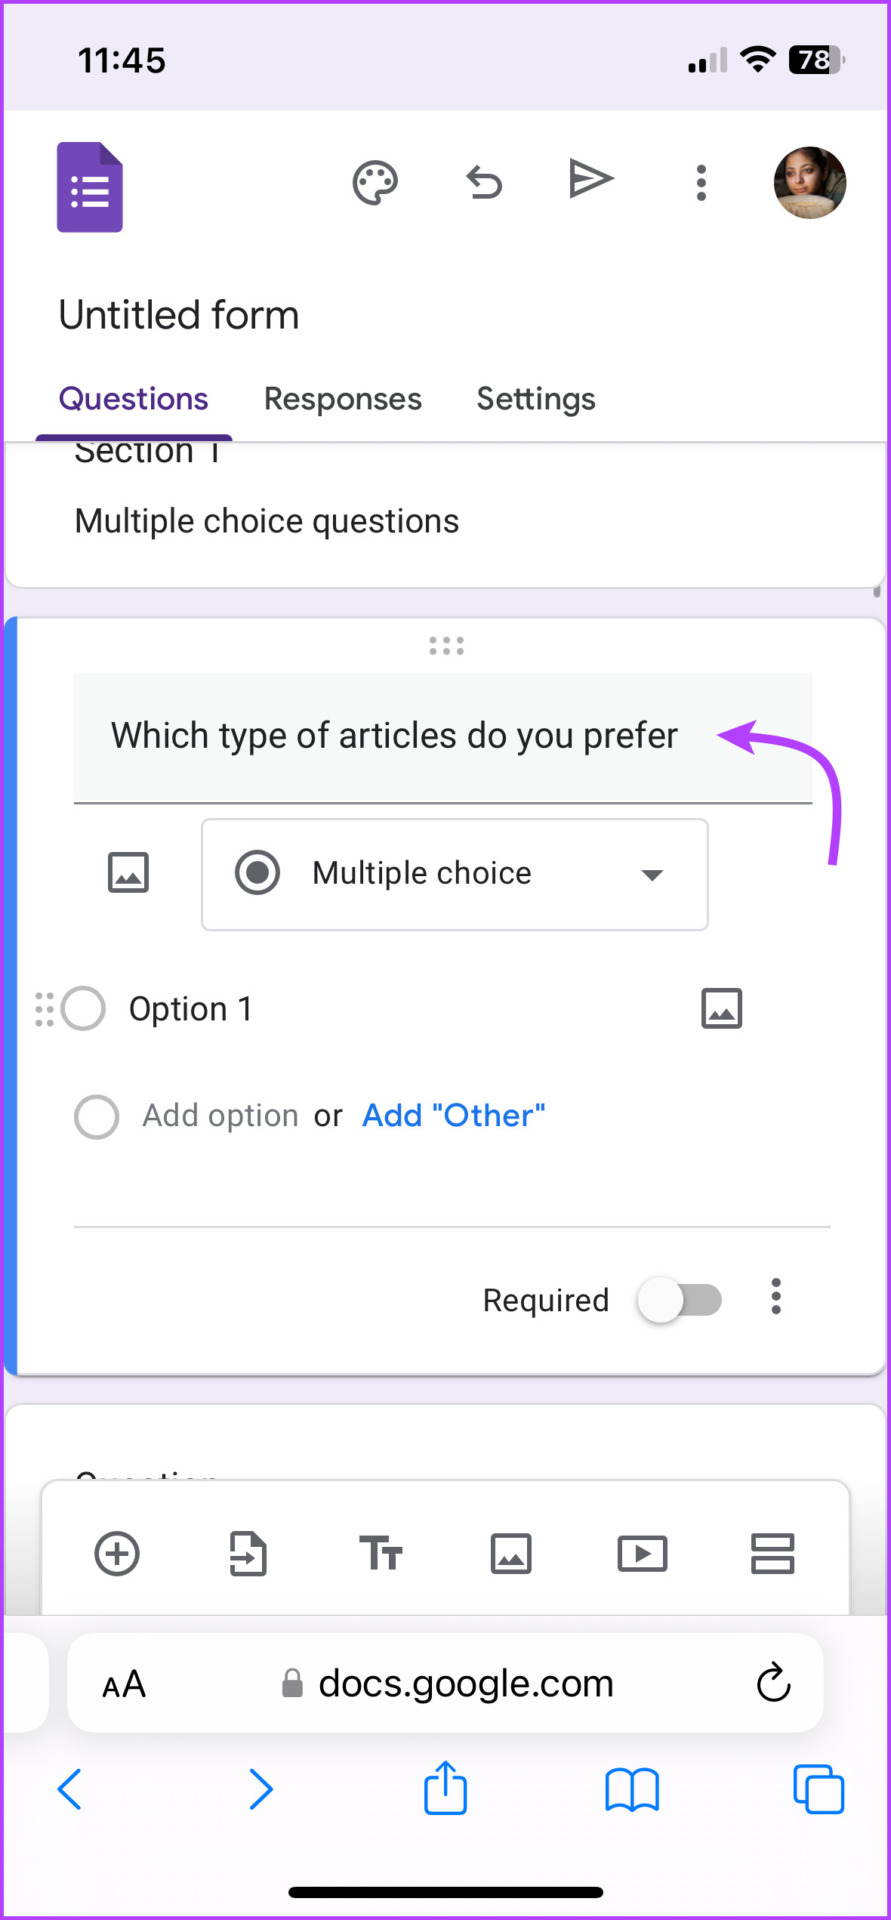
Step 2: Select the Question box to enter the question.
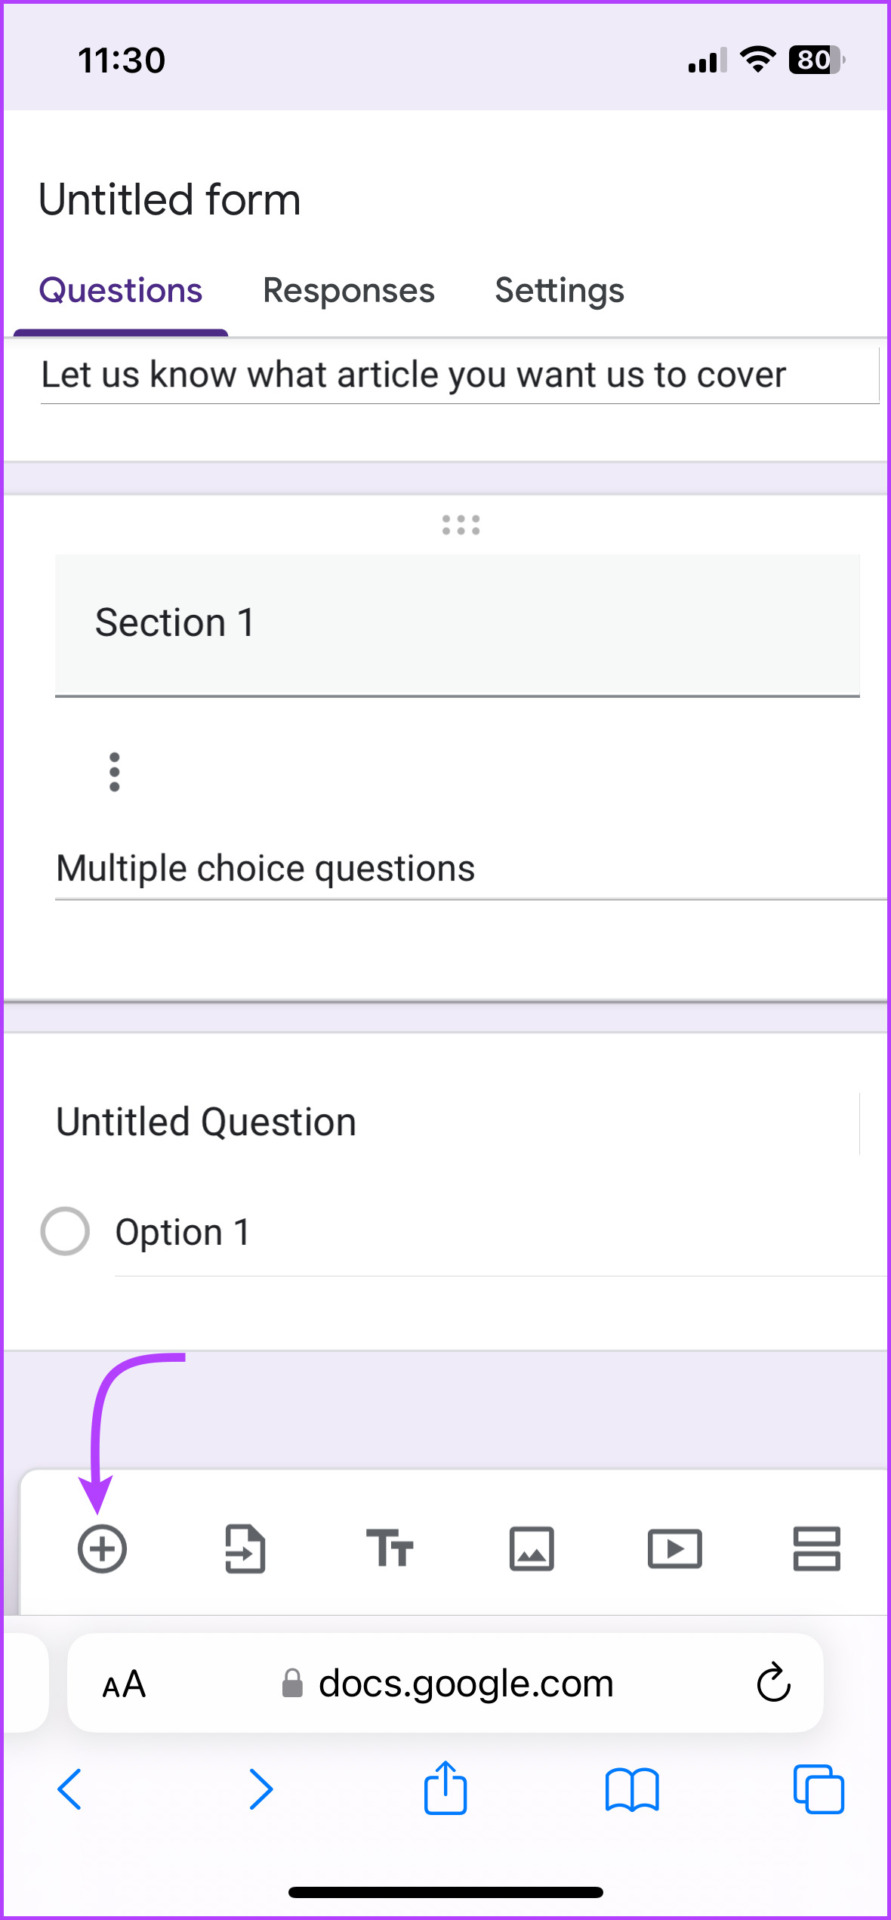
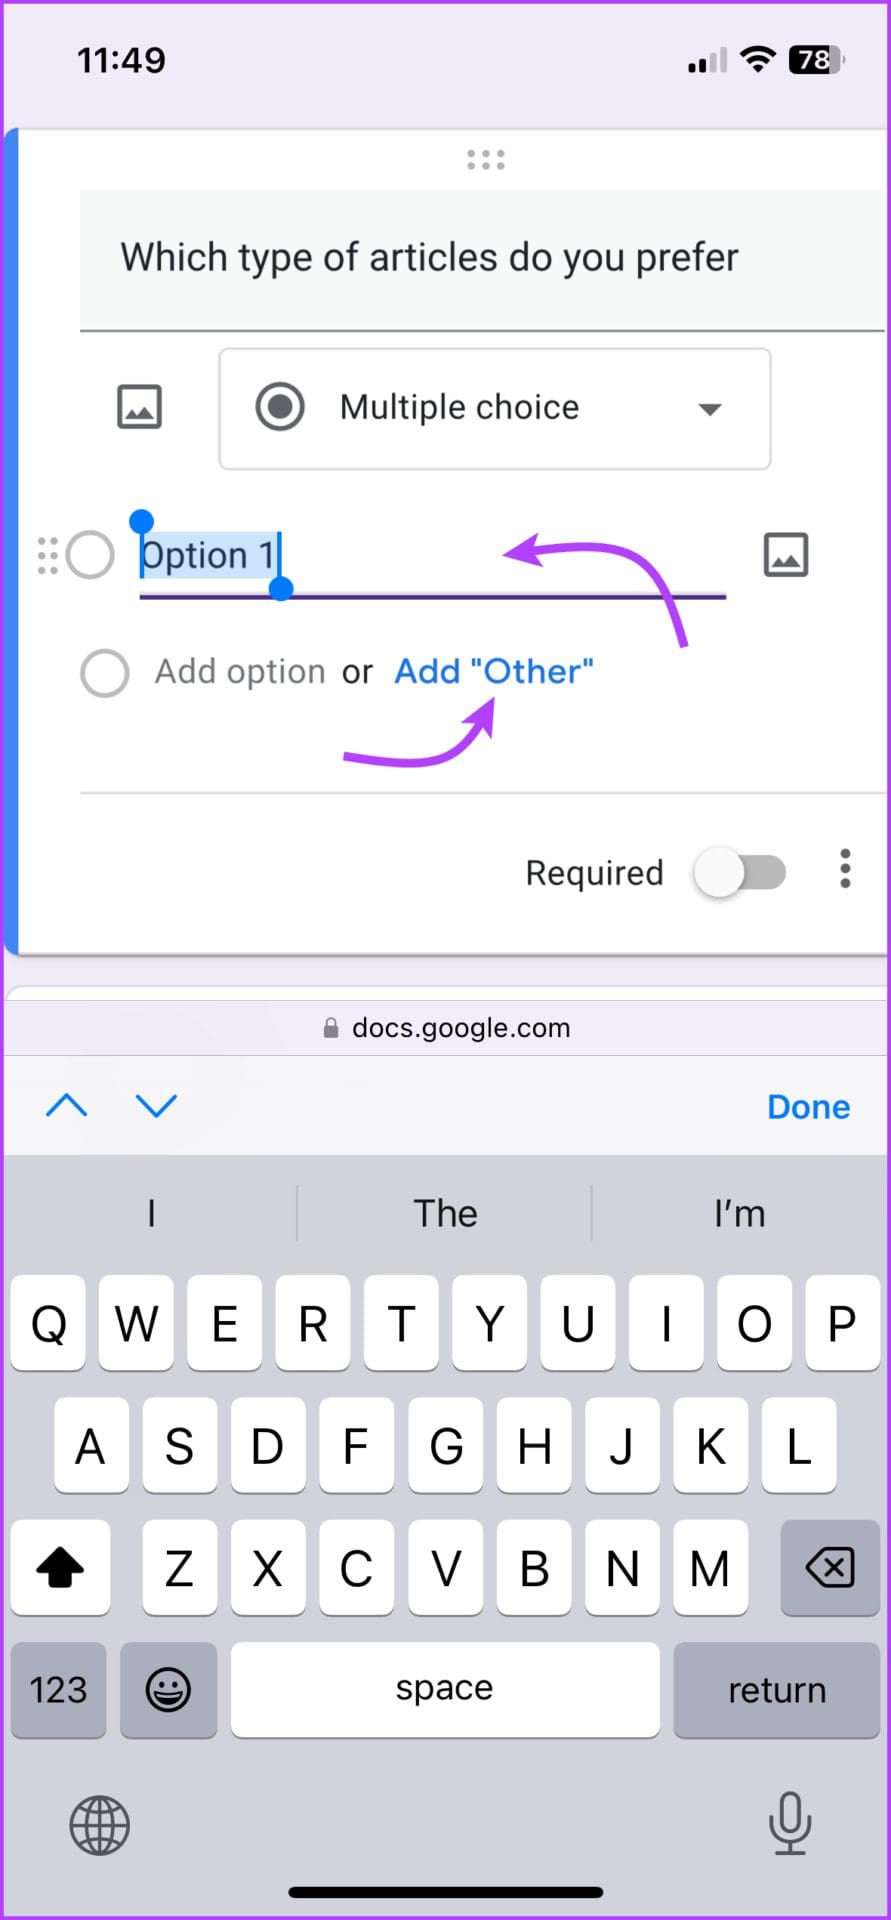
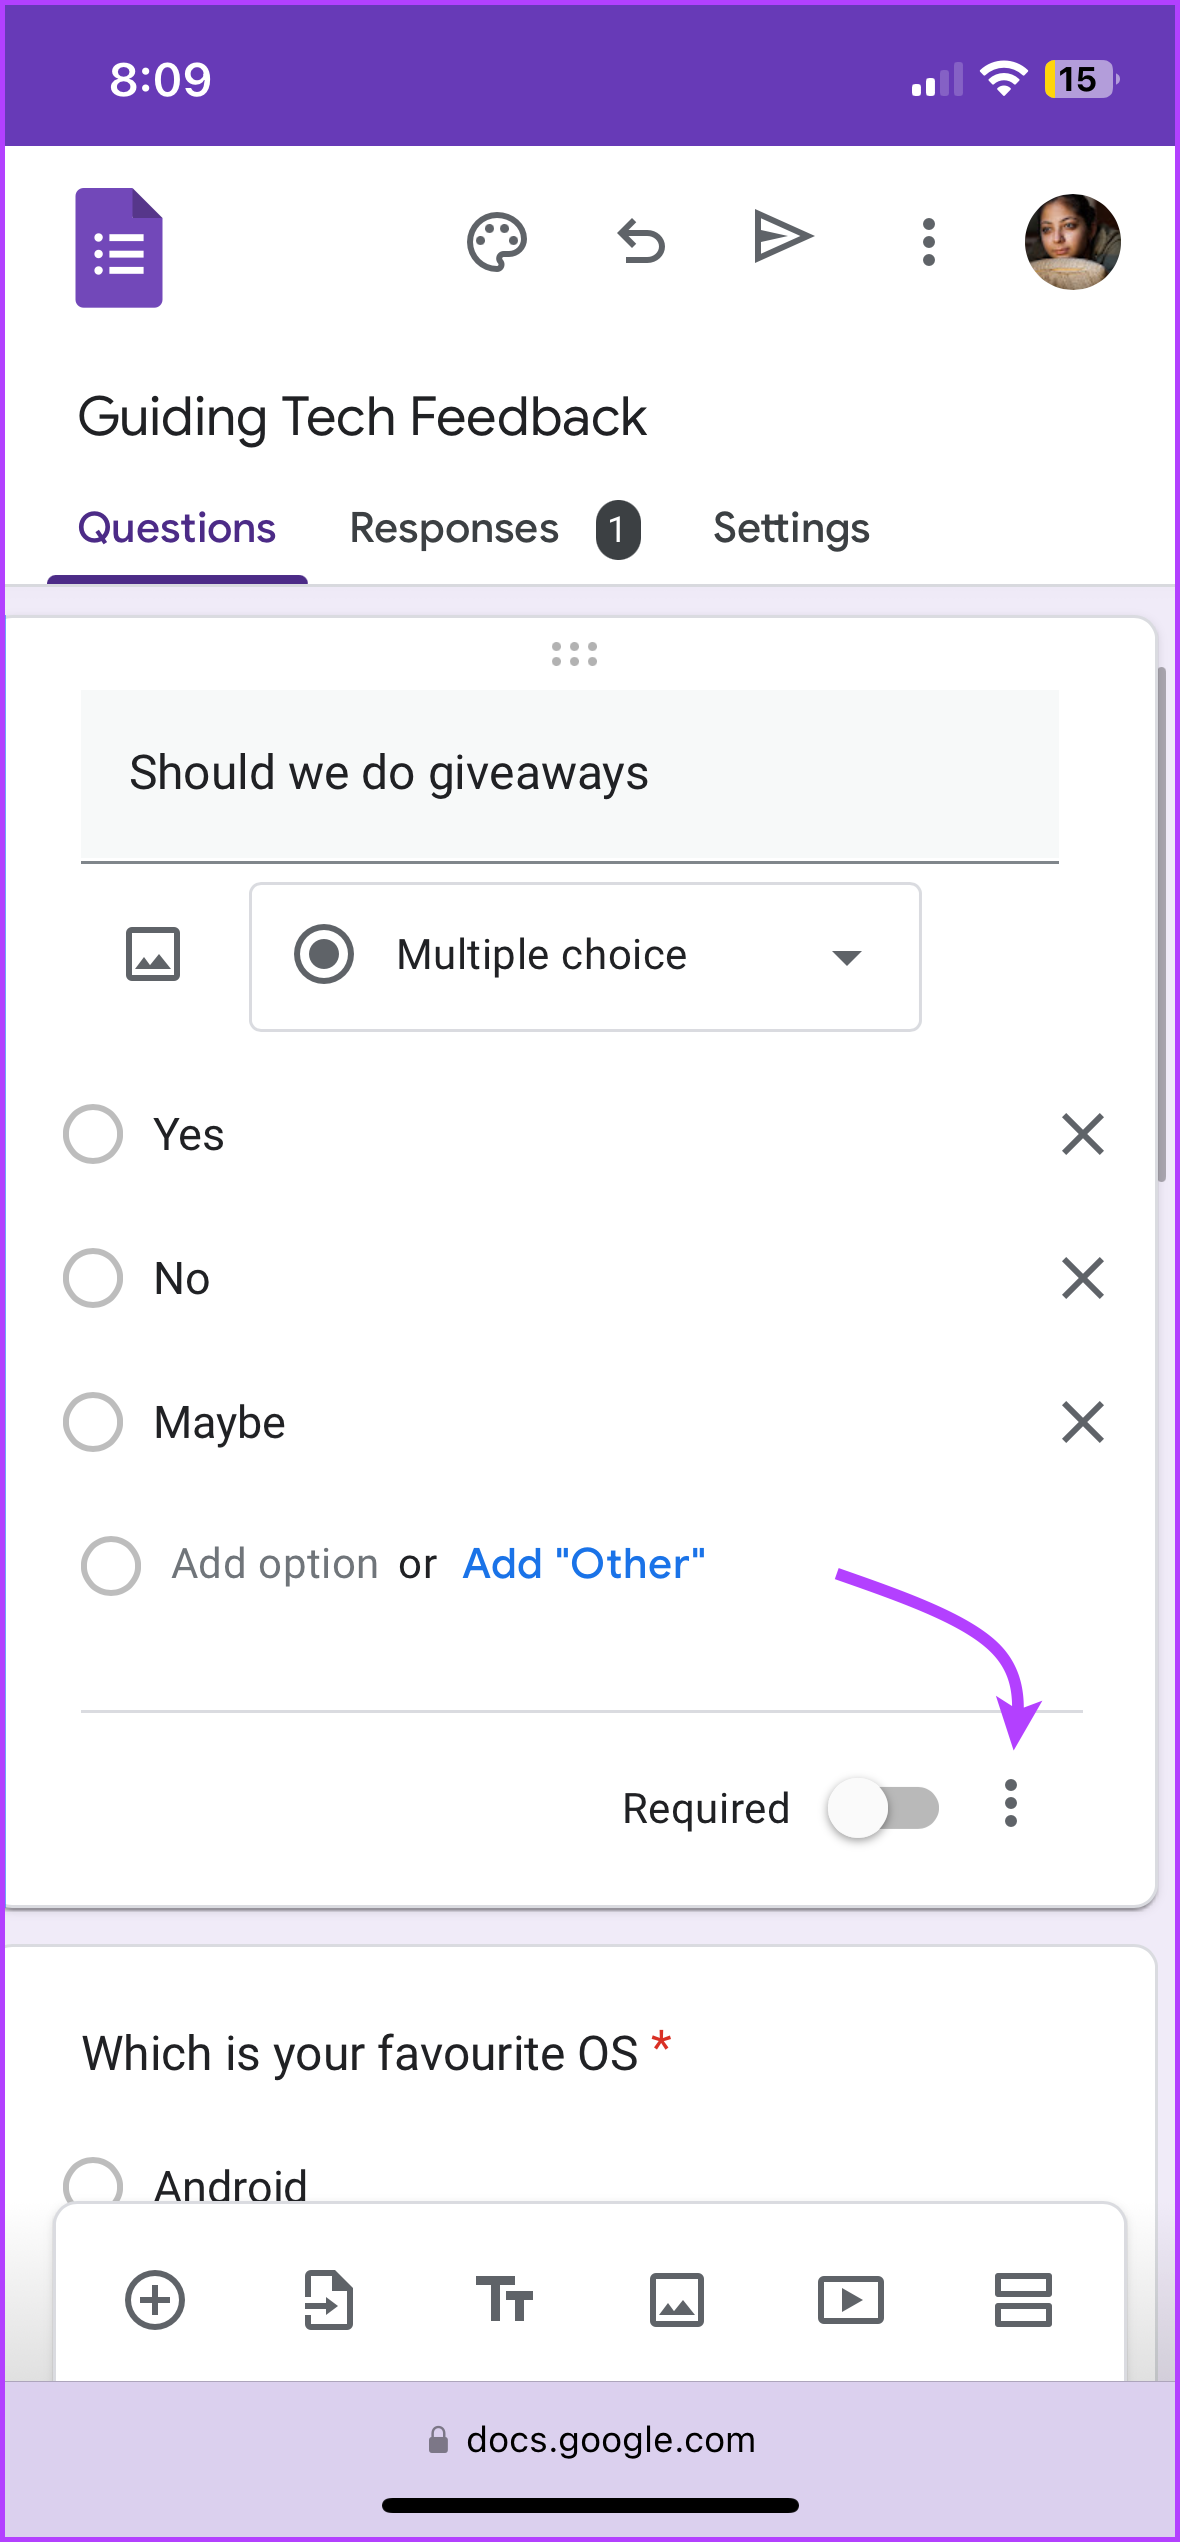
Step 3: Tap Option 1 to add the first option.
Step 4: Next up, tap Add Other to add more options. Keep tapping Add Option to create more answers.
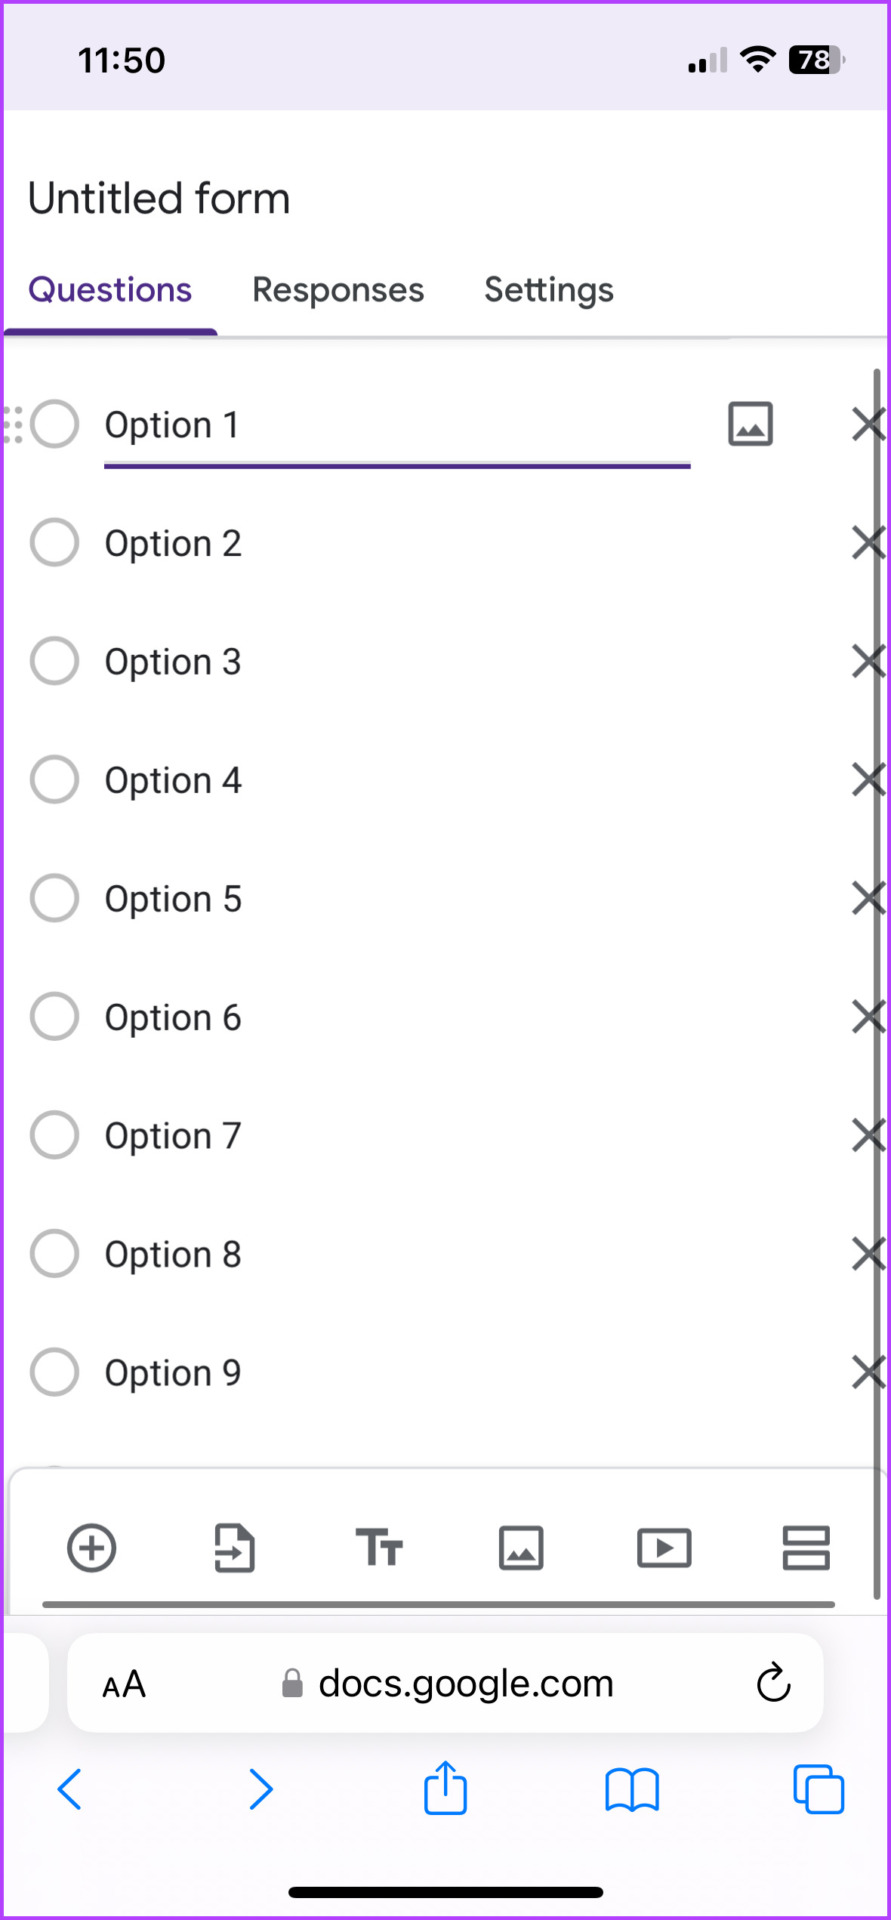
Note: The platform doesn’t seem to have any restrictions over the number of options. We tested it up to 30 and could have added more if needed.
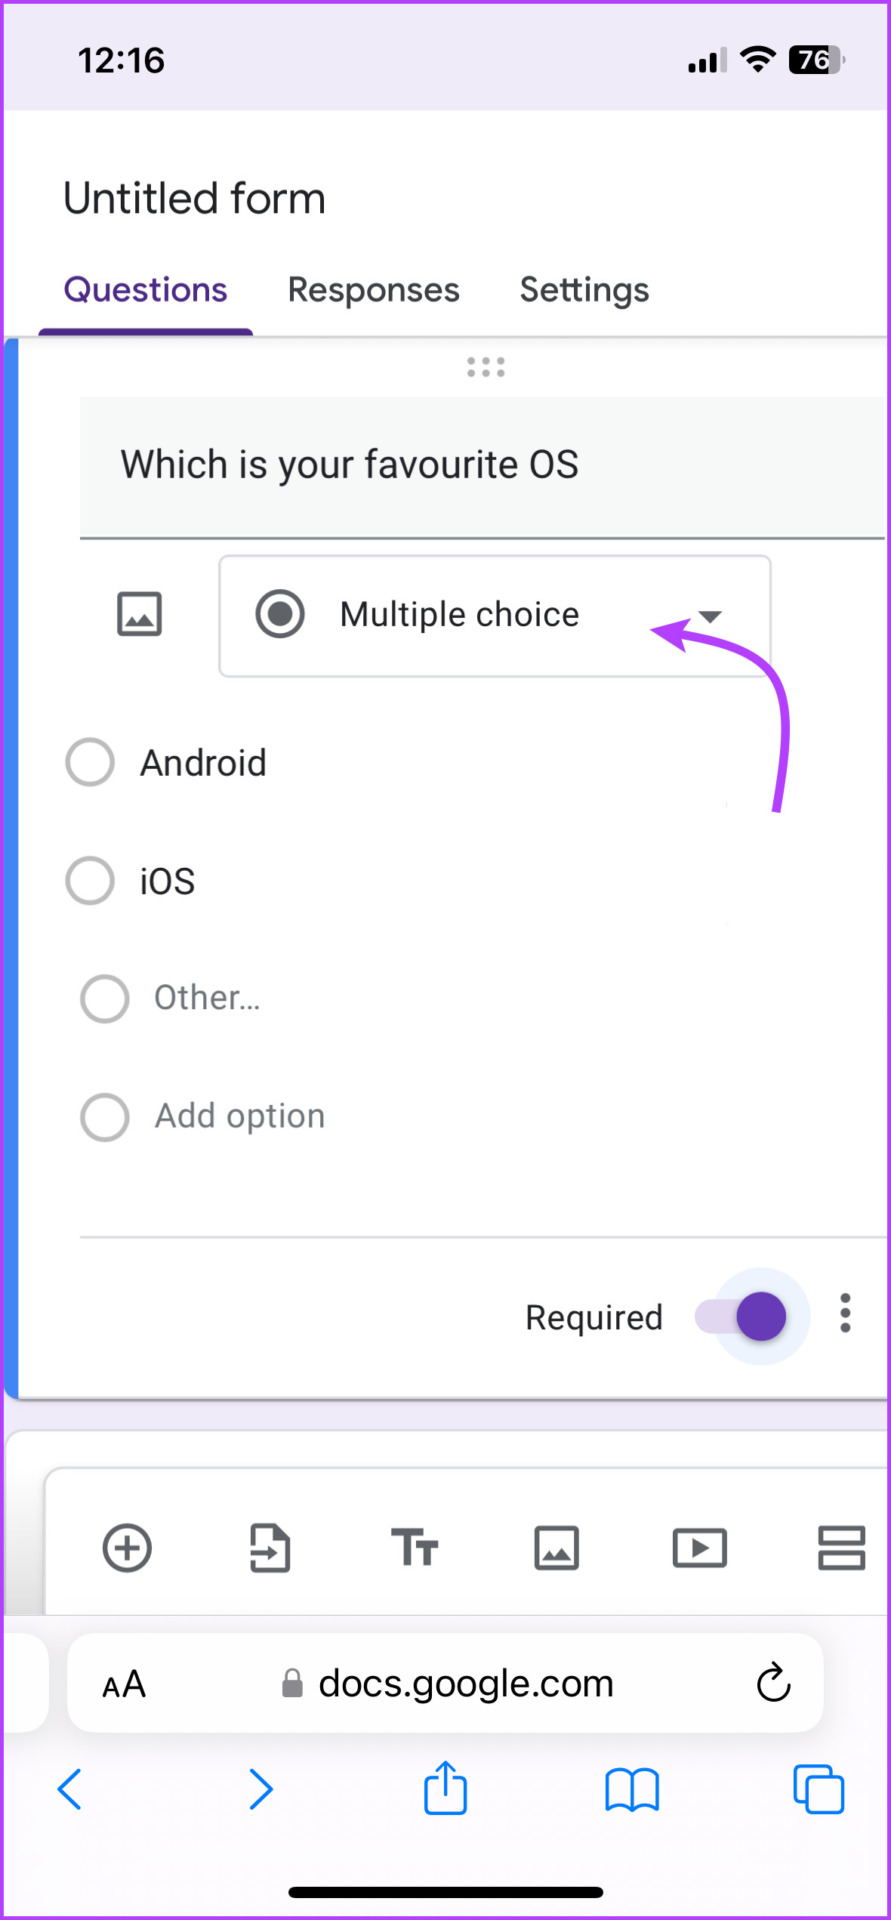
Change Question Type
By default, a multiple-choice question is added. To change the question type, tap the Multiple choice drop-down box and select the question of your choice from the list.
Incredibly, you get multiple choices from short answers to paragraphs, checkboxes to drop-down, and file upload to date/time. Simply select the question type you want and fill in the question accordingly.

Edit Questions or Options in Google Form
To edit an existing question, tap anywhere on it to activate the typing boxes. Then write the new questions or options.
Duplicate or Delete a Question or Option
If there are two similar questions with slight differences, duplicate the question and modify it instead of starting from scratch.
- For the whole section – Tap the ellipsis icon from the bottom-right corner of the question and select a suitable option.
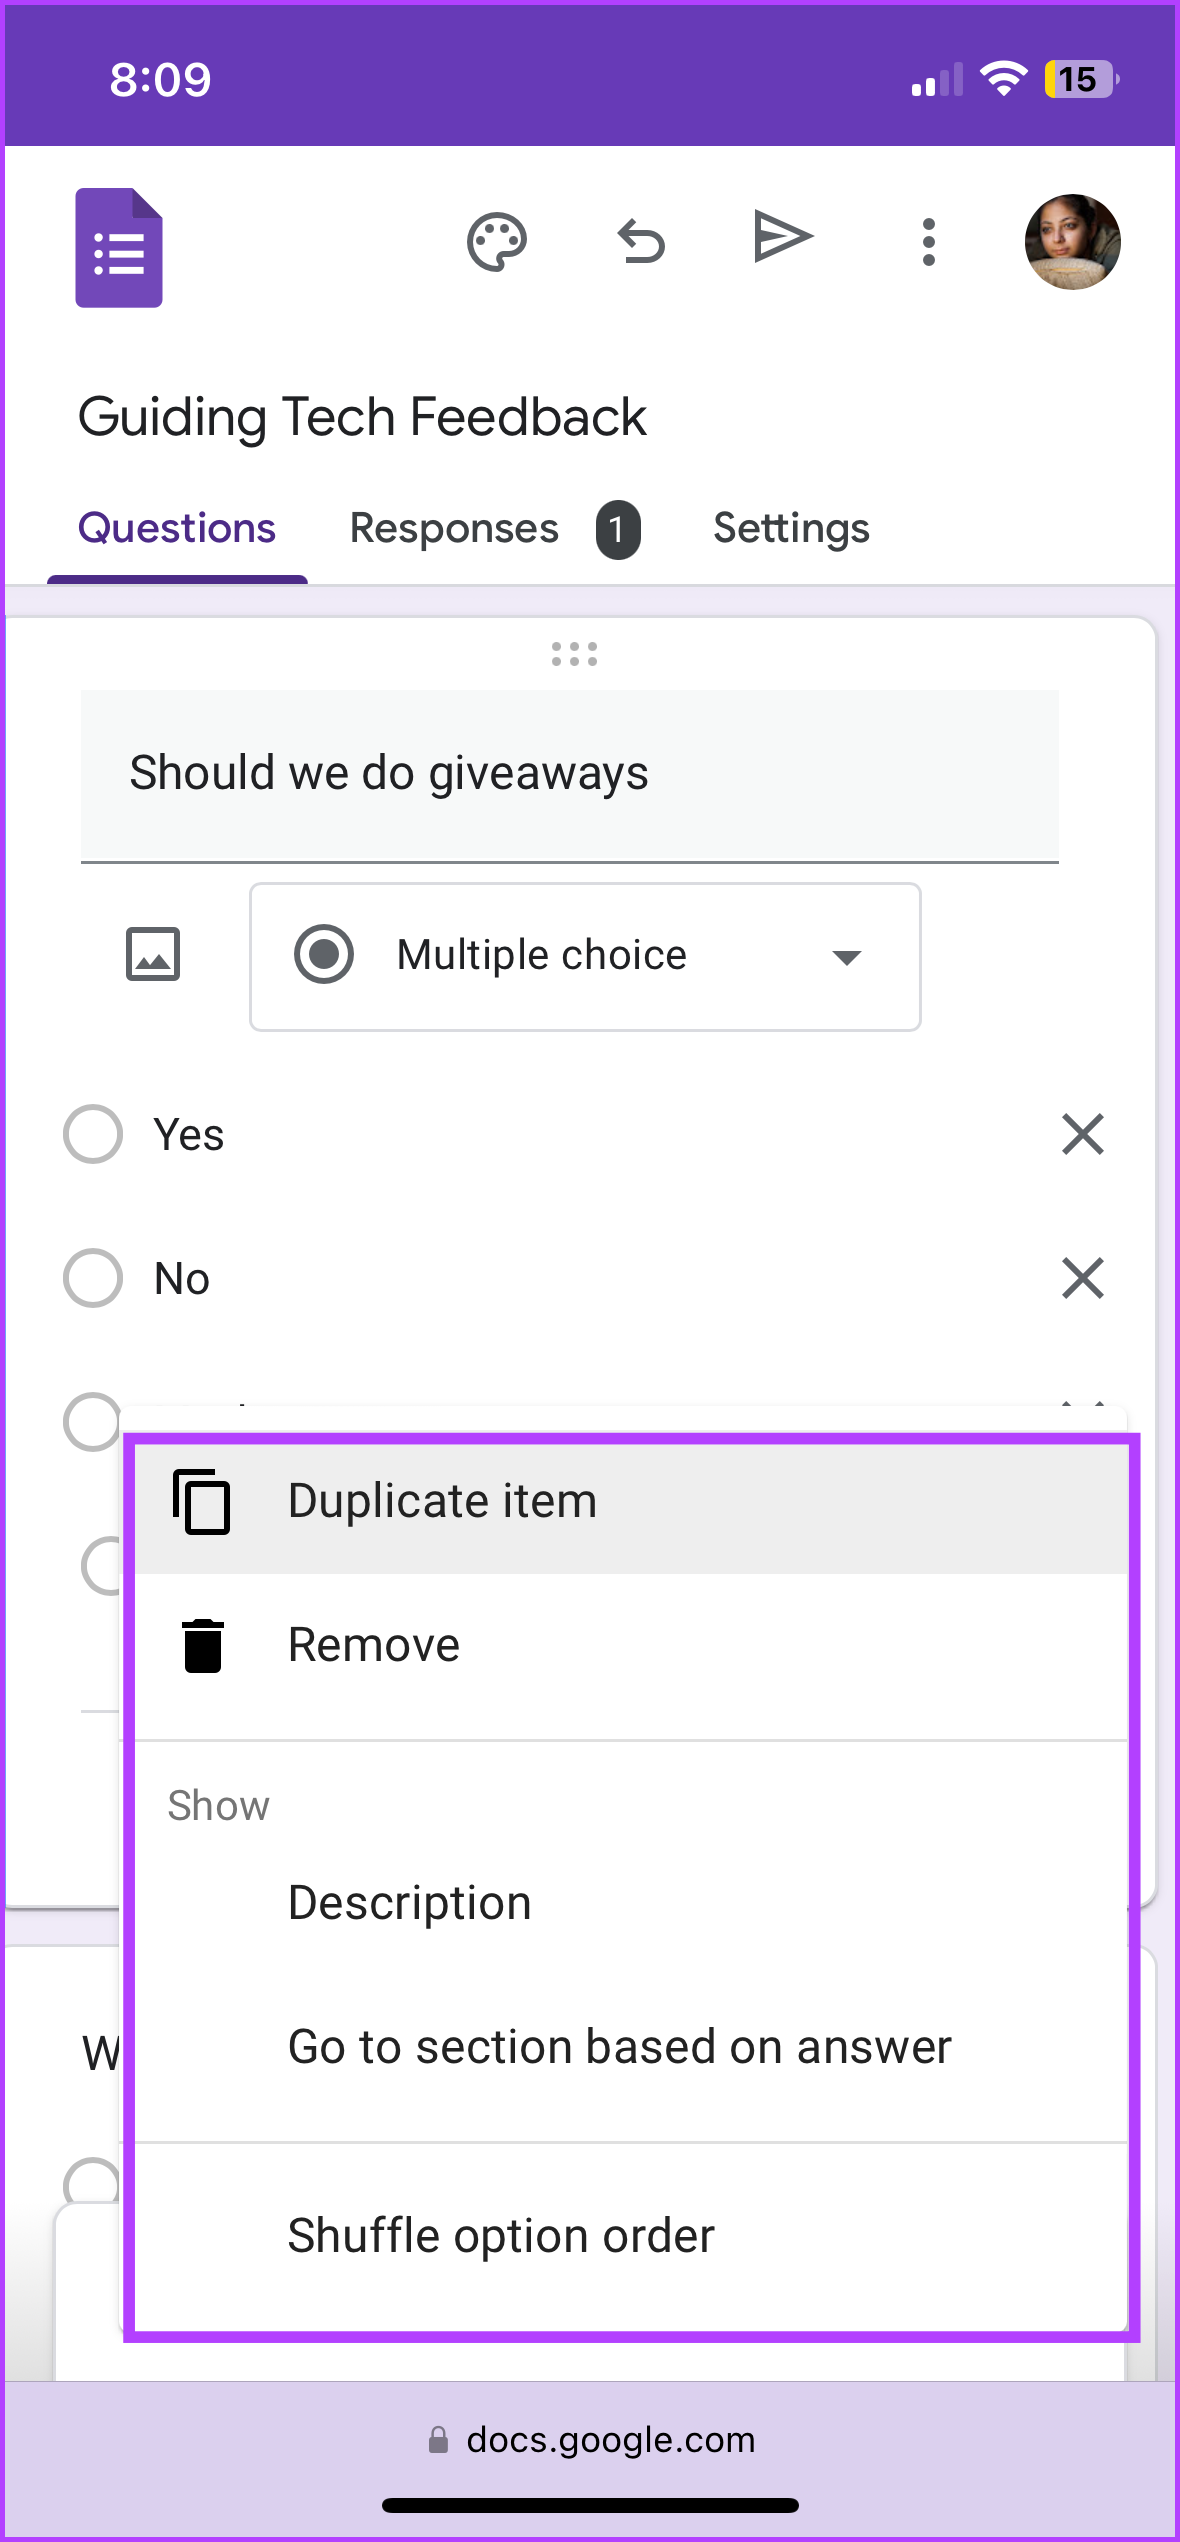
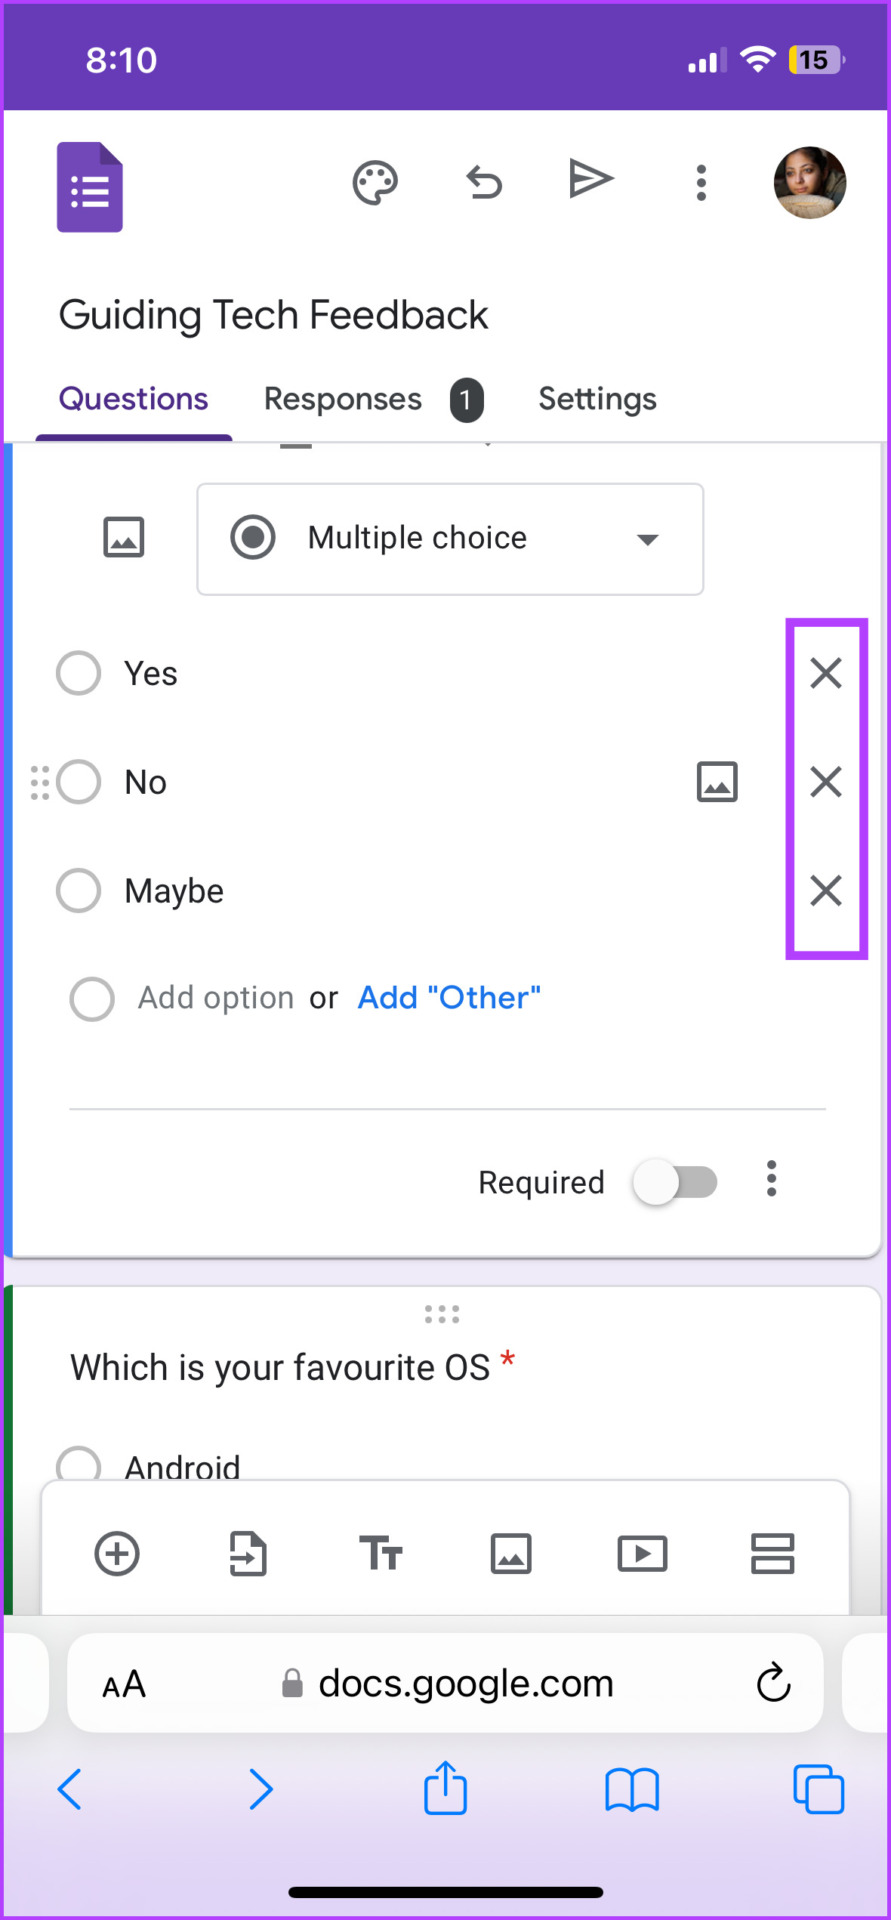
- For an option – Though you can’t duplicate an option within the question, you can indeed remove it. Tap the option and then the X in front of it.
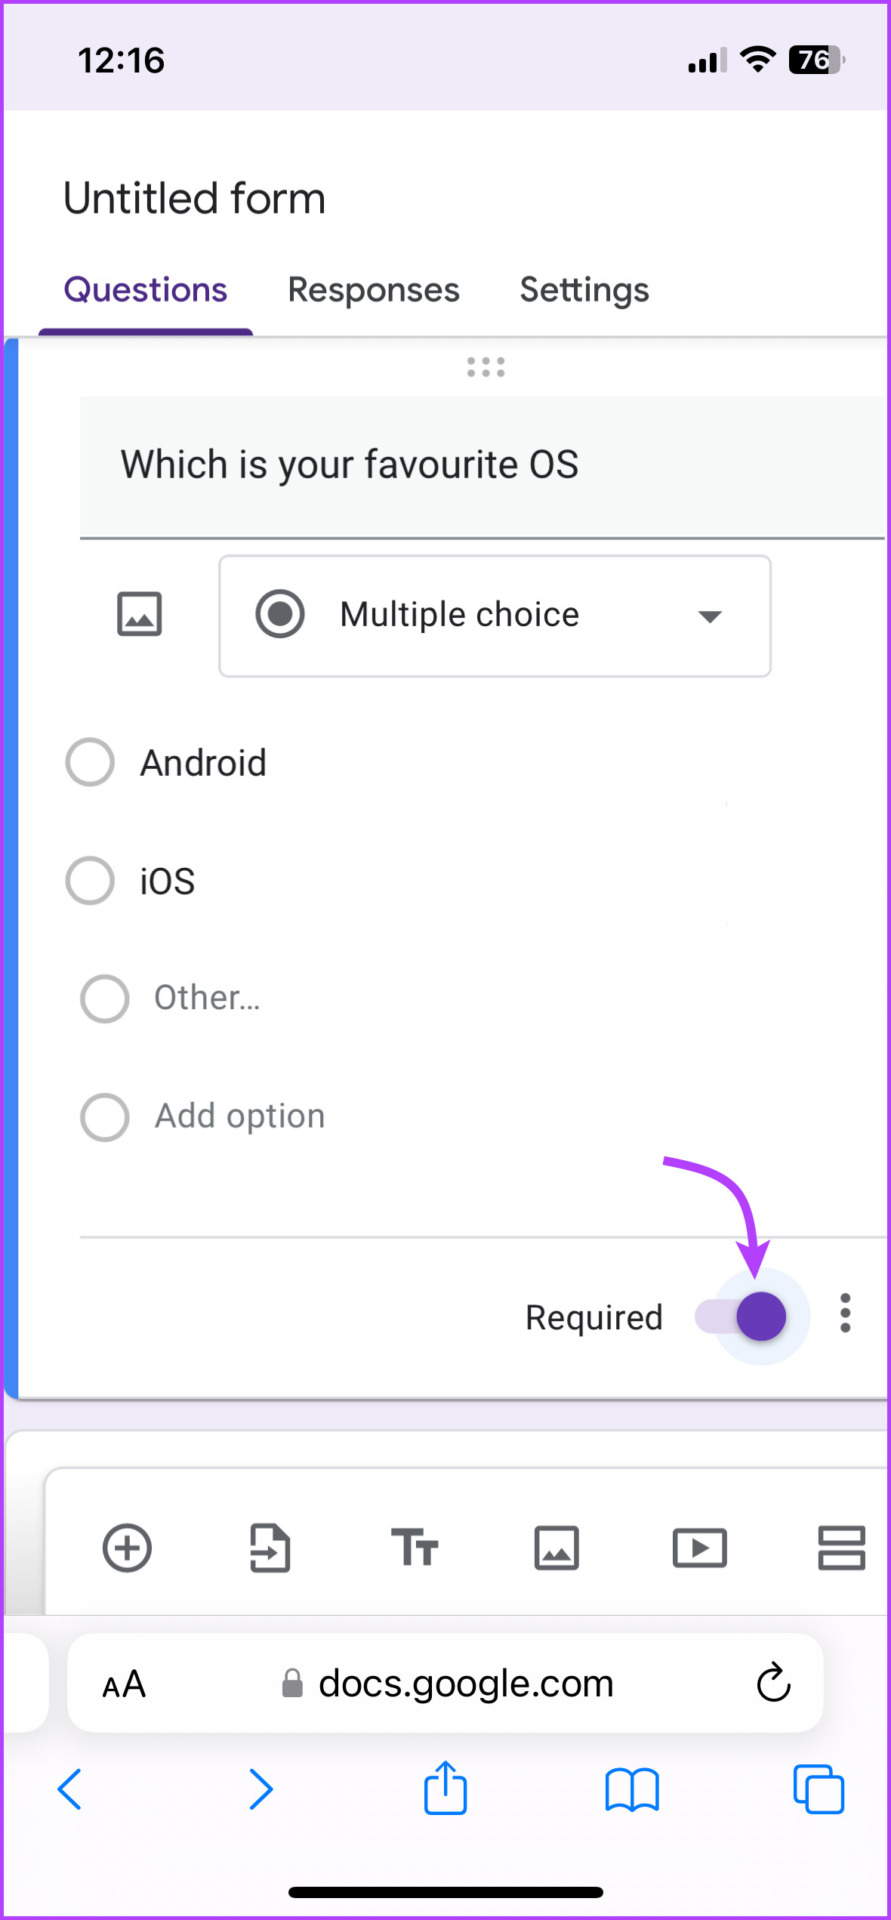
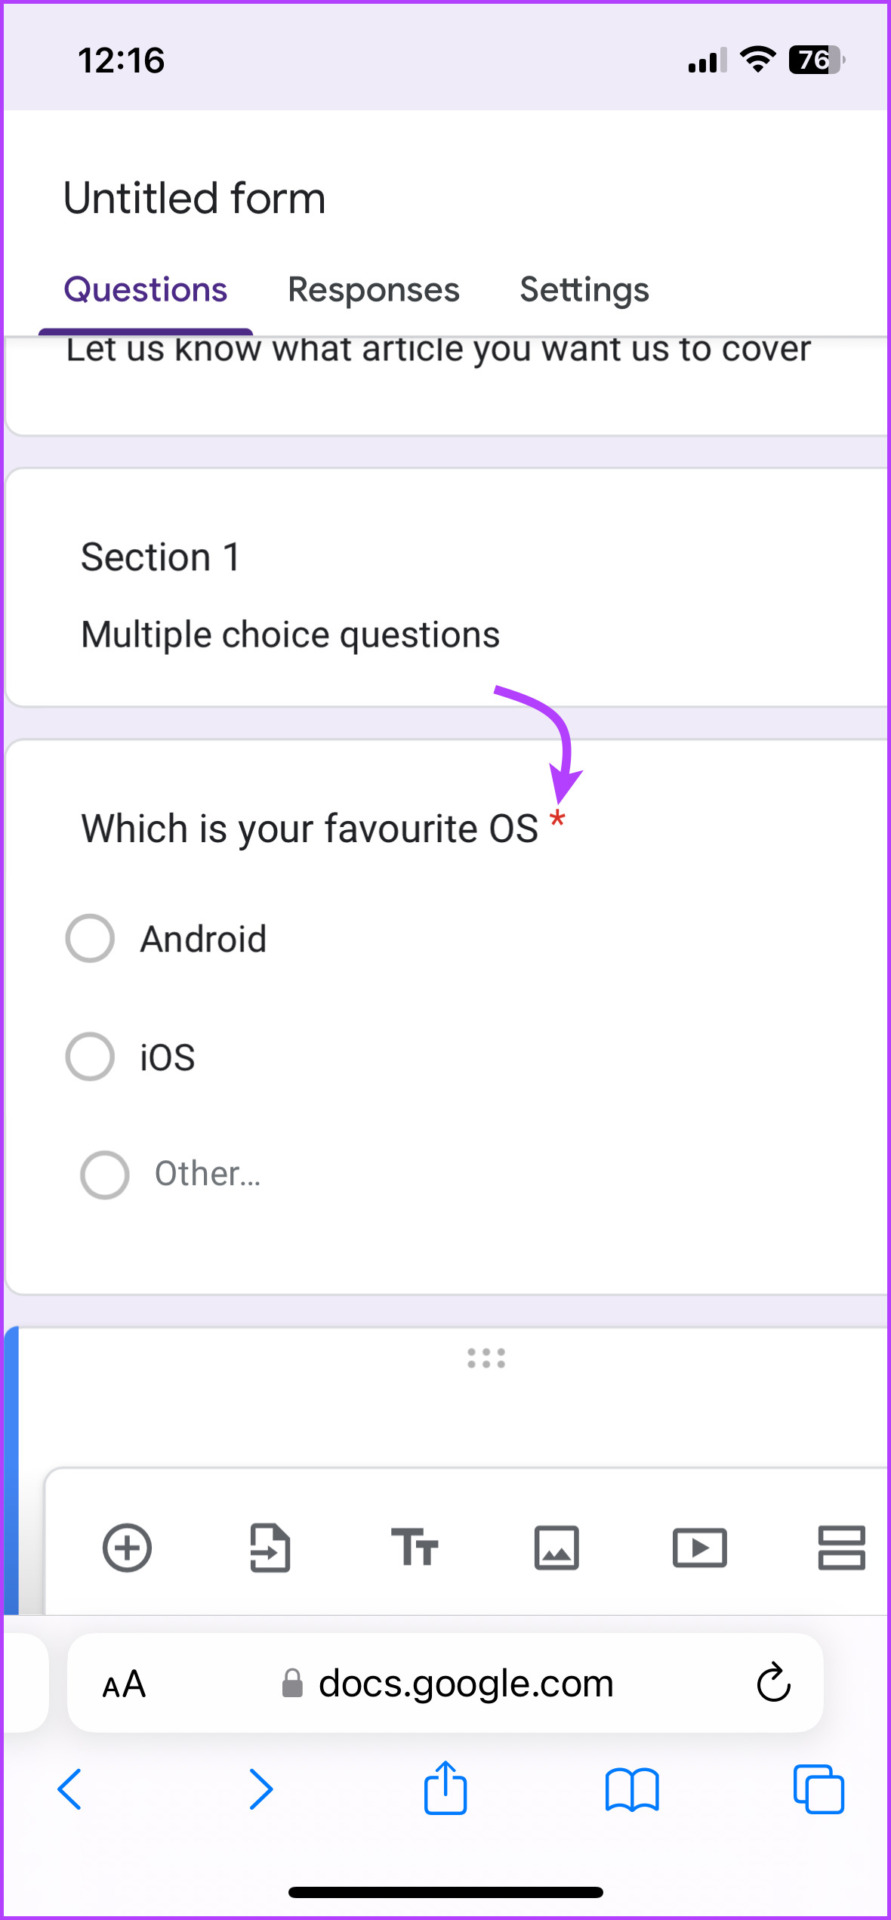
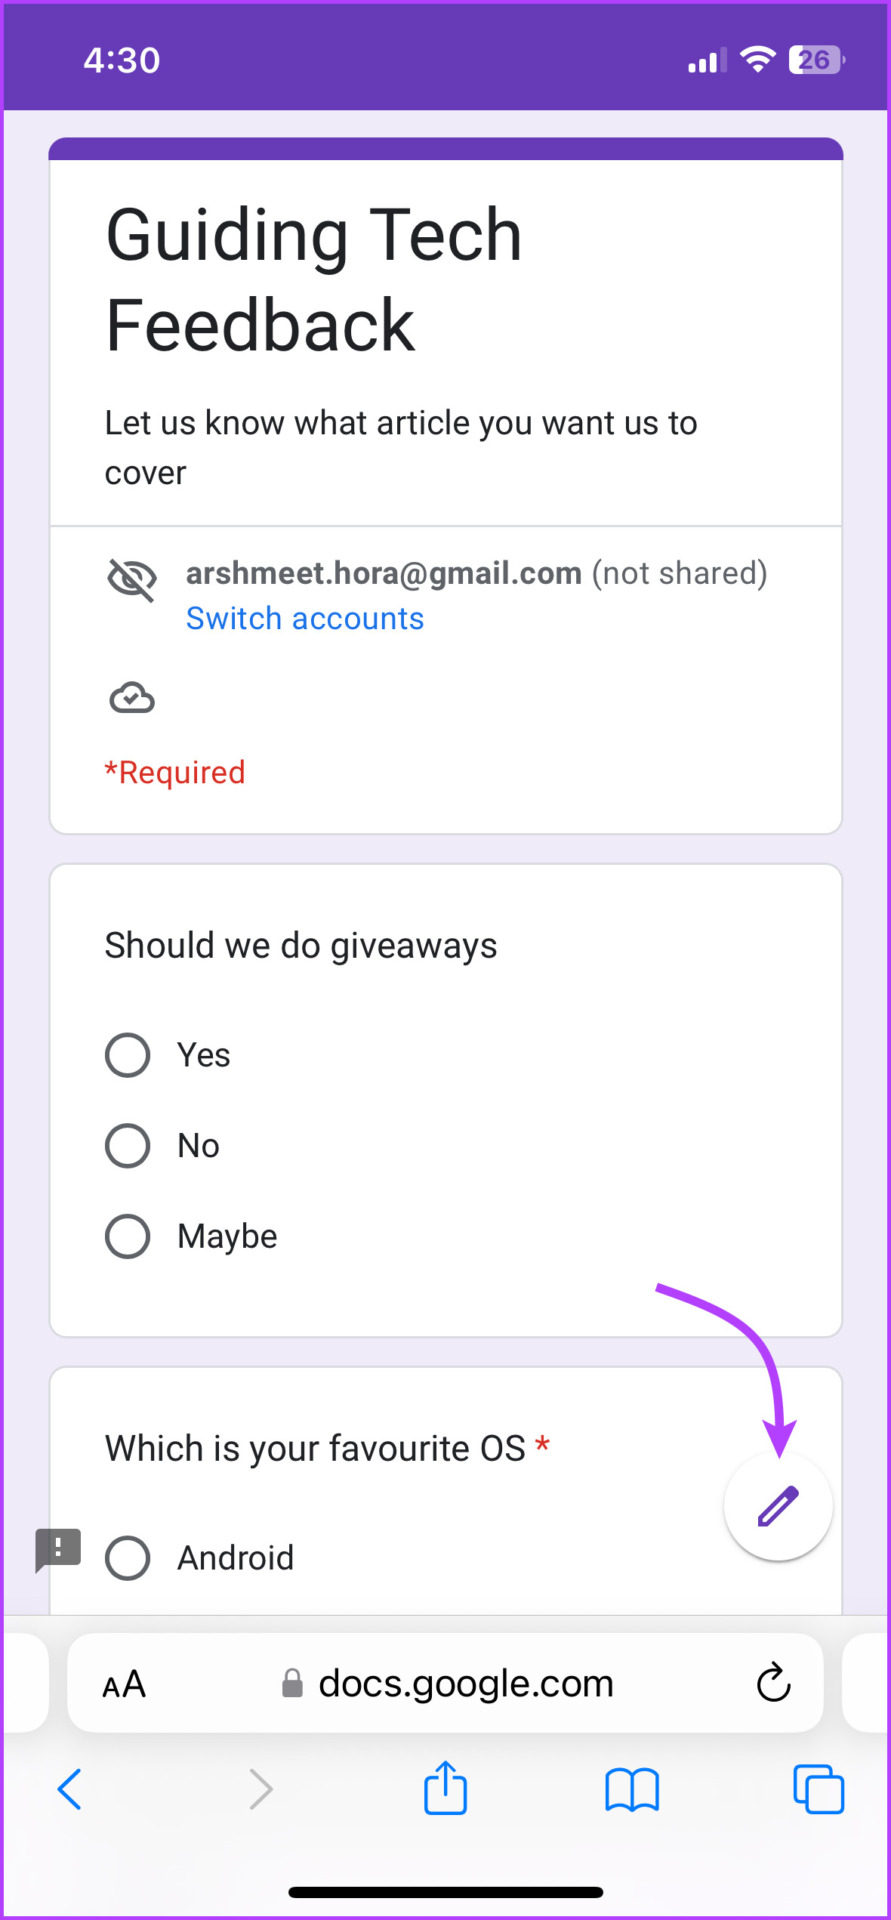
Add Required to the Questions Field
For that, turn on the toggle for the Required option present under each question. Once enabled, the receiver will see a red asterisk (*) next to the question.
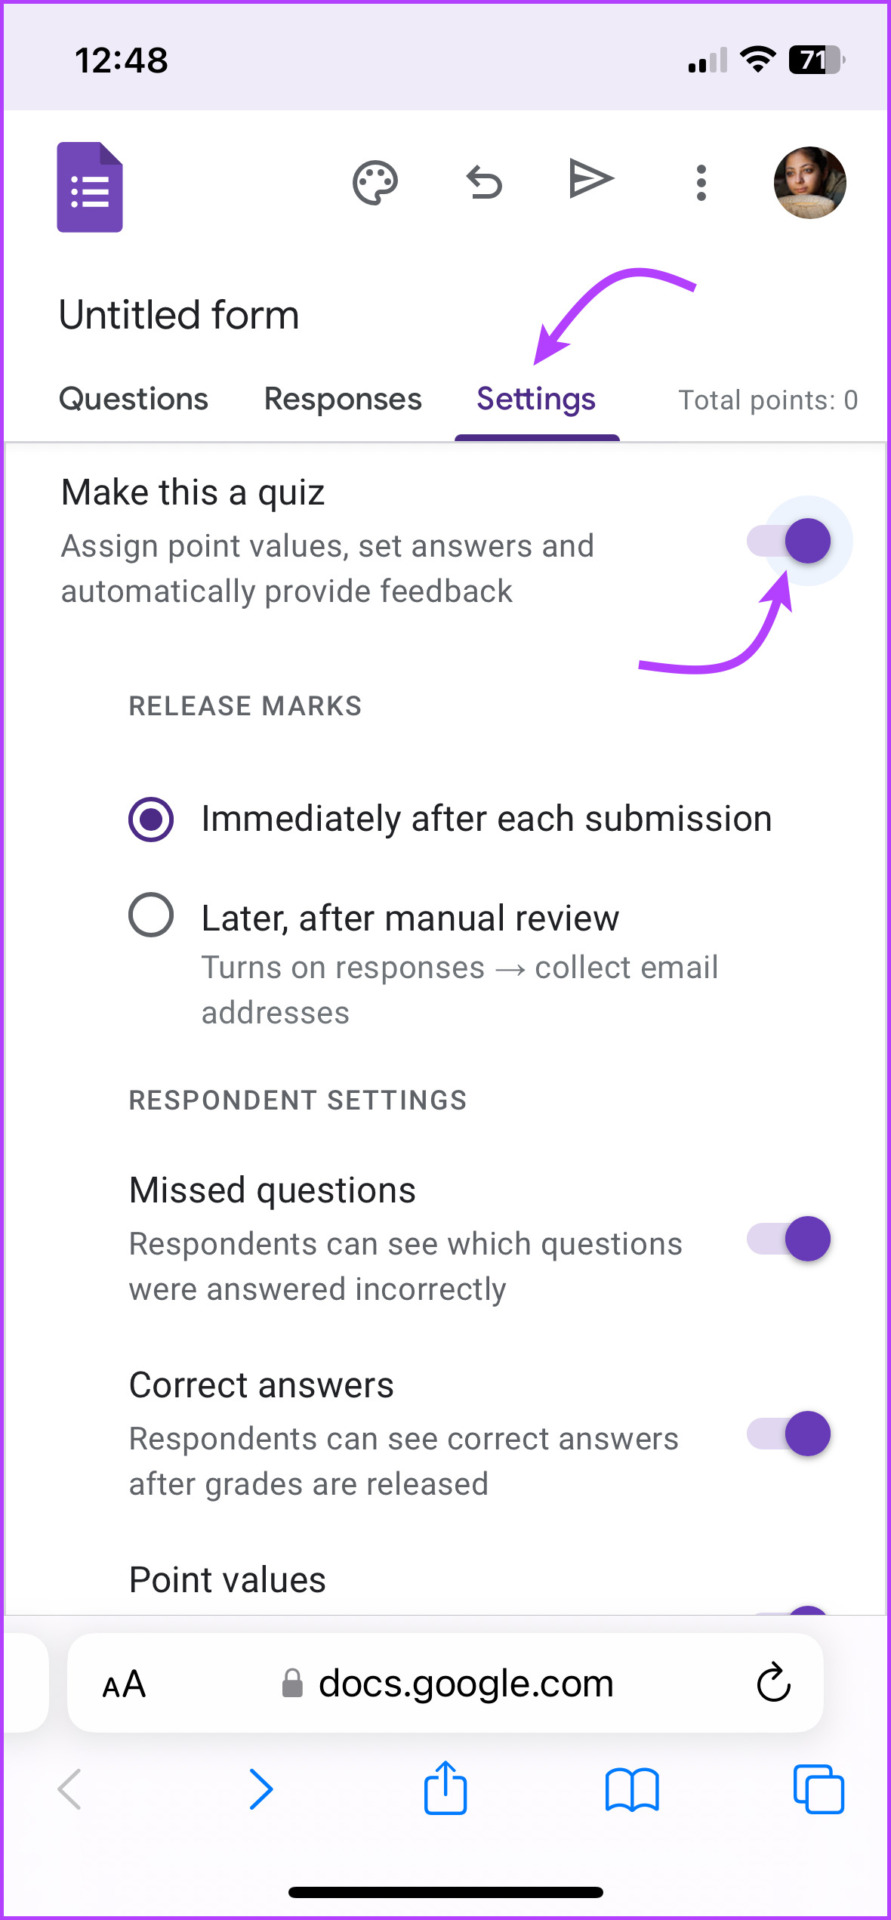
Create a Quiz With Google Forms
You can also use Google Forms to create a quiz, complete with immediate or delayed scoring. Depending upon your comfort level, you can either start with a quiz option or convert it anytime while creating a form.
Step 1: In Google From, tap the Settings tab from the top bar.
Step 2: Next, toggle on the switch next to ‘Make this a Quiz’.
Step 3: A host of options will appear, select the preferred options, add point value, etc.
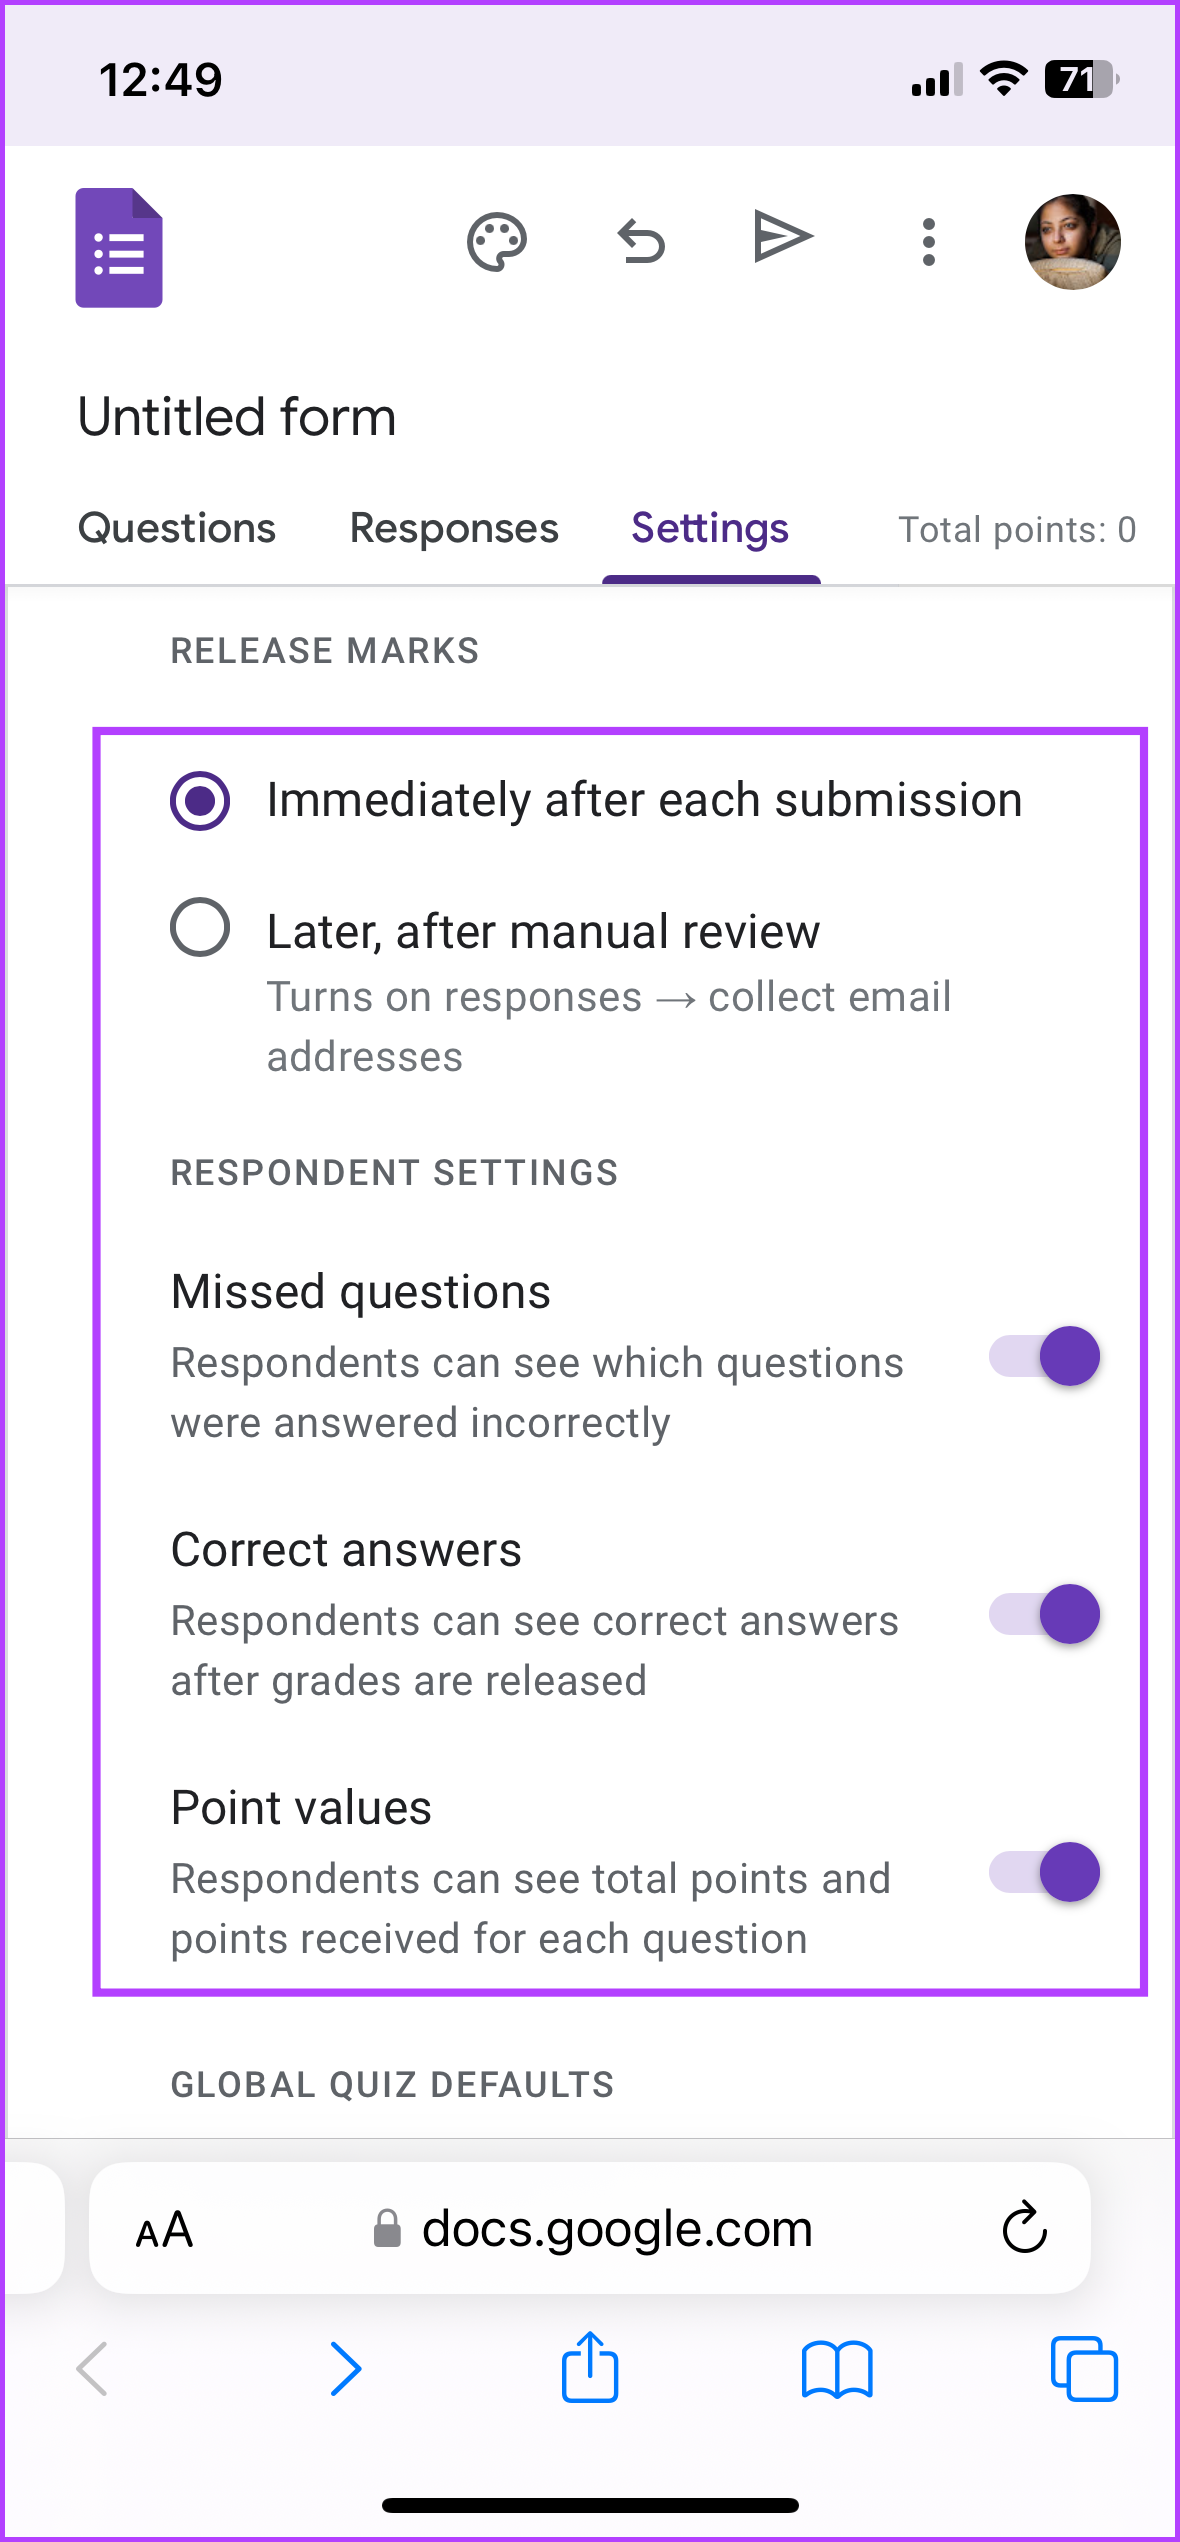
Once the form is converted into a quiz, you’ll see an additional icon at the bottom of each question. Tap the answer icon and then provide the correct answer. You can also manage the points system for individual questions.

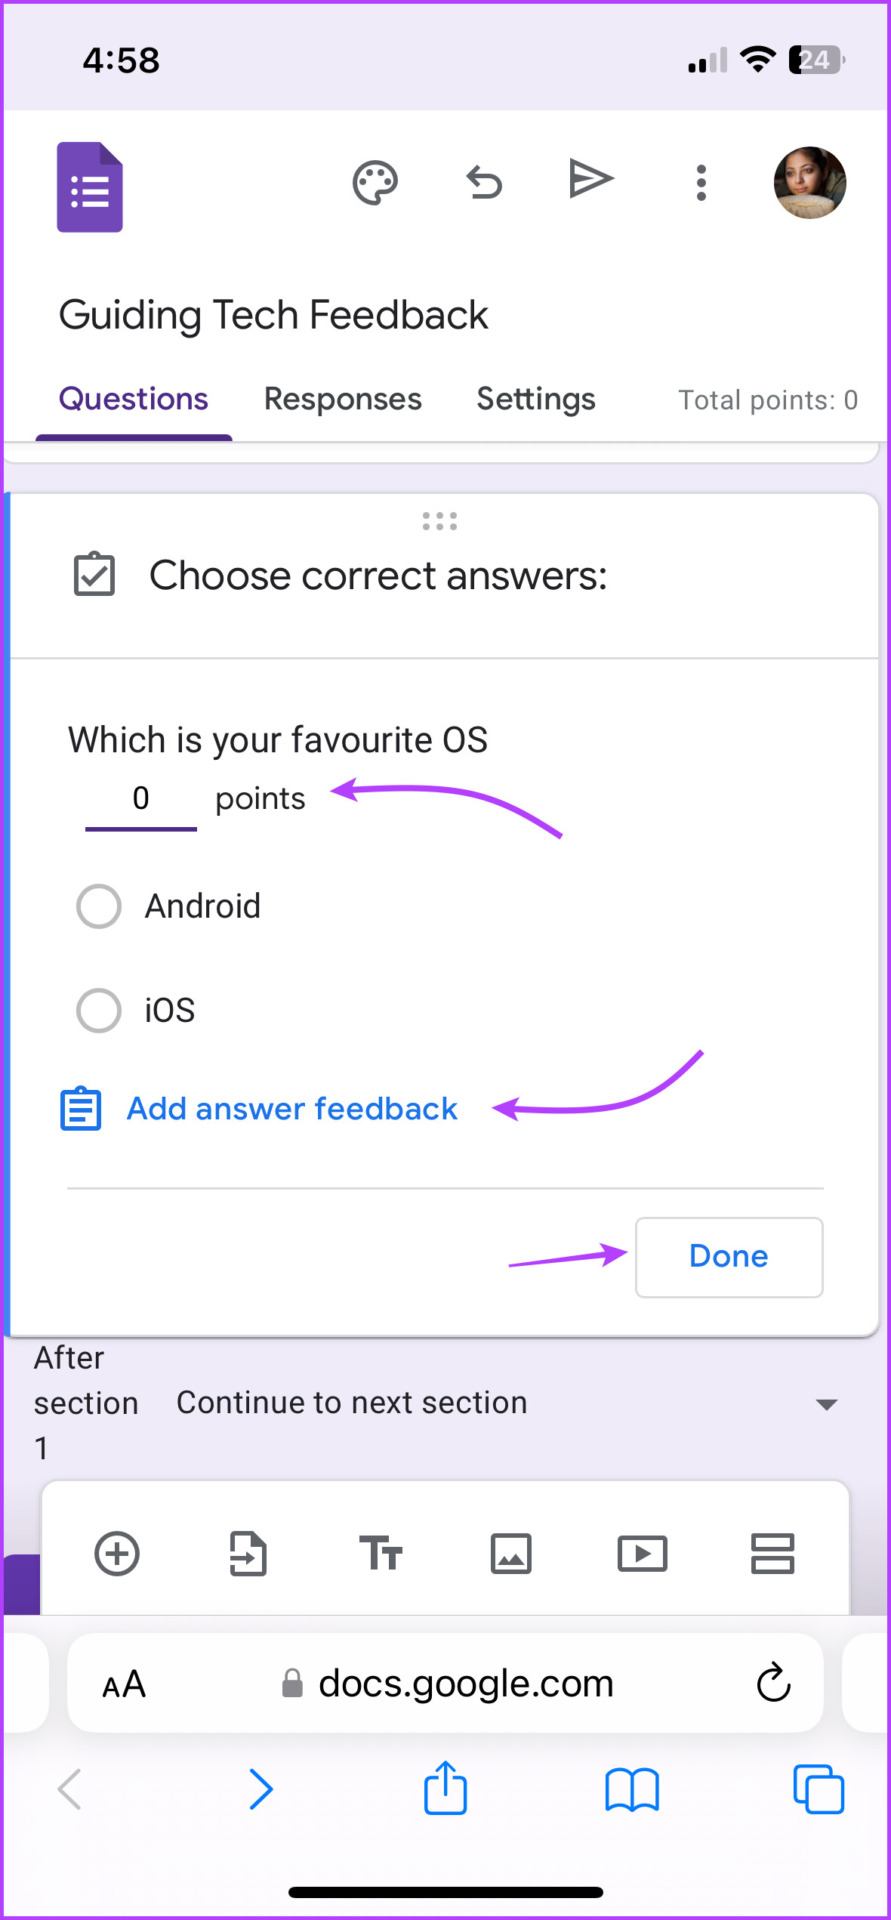
Note: The quizzes are only compatible with multiple-choice, checkbox, and dropdown questions.
How to Reorder Items in Google Forms
To change the position of any question, activate the question first by tapping anywhere on it. Then tap and hold the six-dotted icon (from the top of the section), and drag and drop it to the required position.
To move options up or down, tap the option. Hold the six-dotted icon next to the option, and drag and drop it.

Insert Multimedia In Google Forms
You can insert the image either as a standalone item to any question or add it as an answer. The latter is supported only for multiple-choice or checkbox questions.
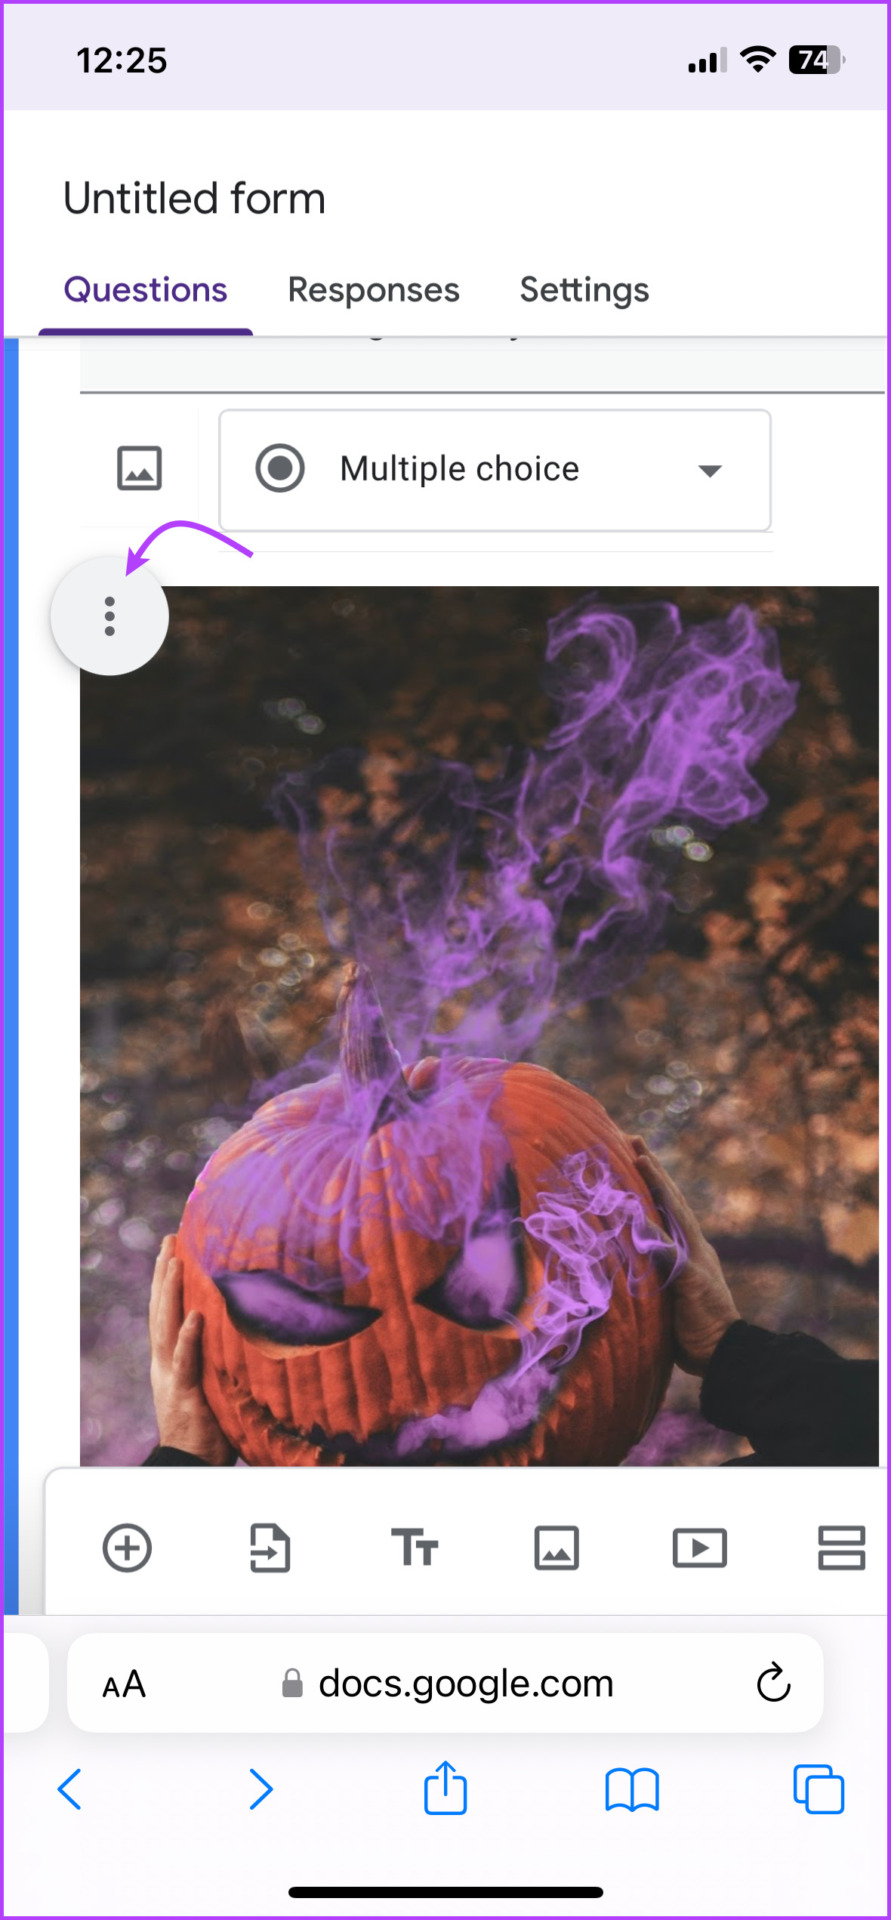
For that, tap on the image icon next to the options. Next, you can upload an image from your phone or use URL, Photos, Google Drive, Google Images, and more. To insert an image in any question, tap on the image icon under the question.
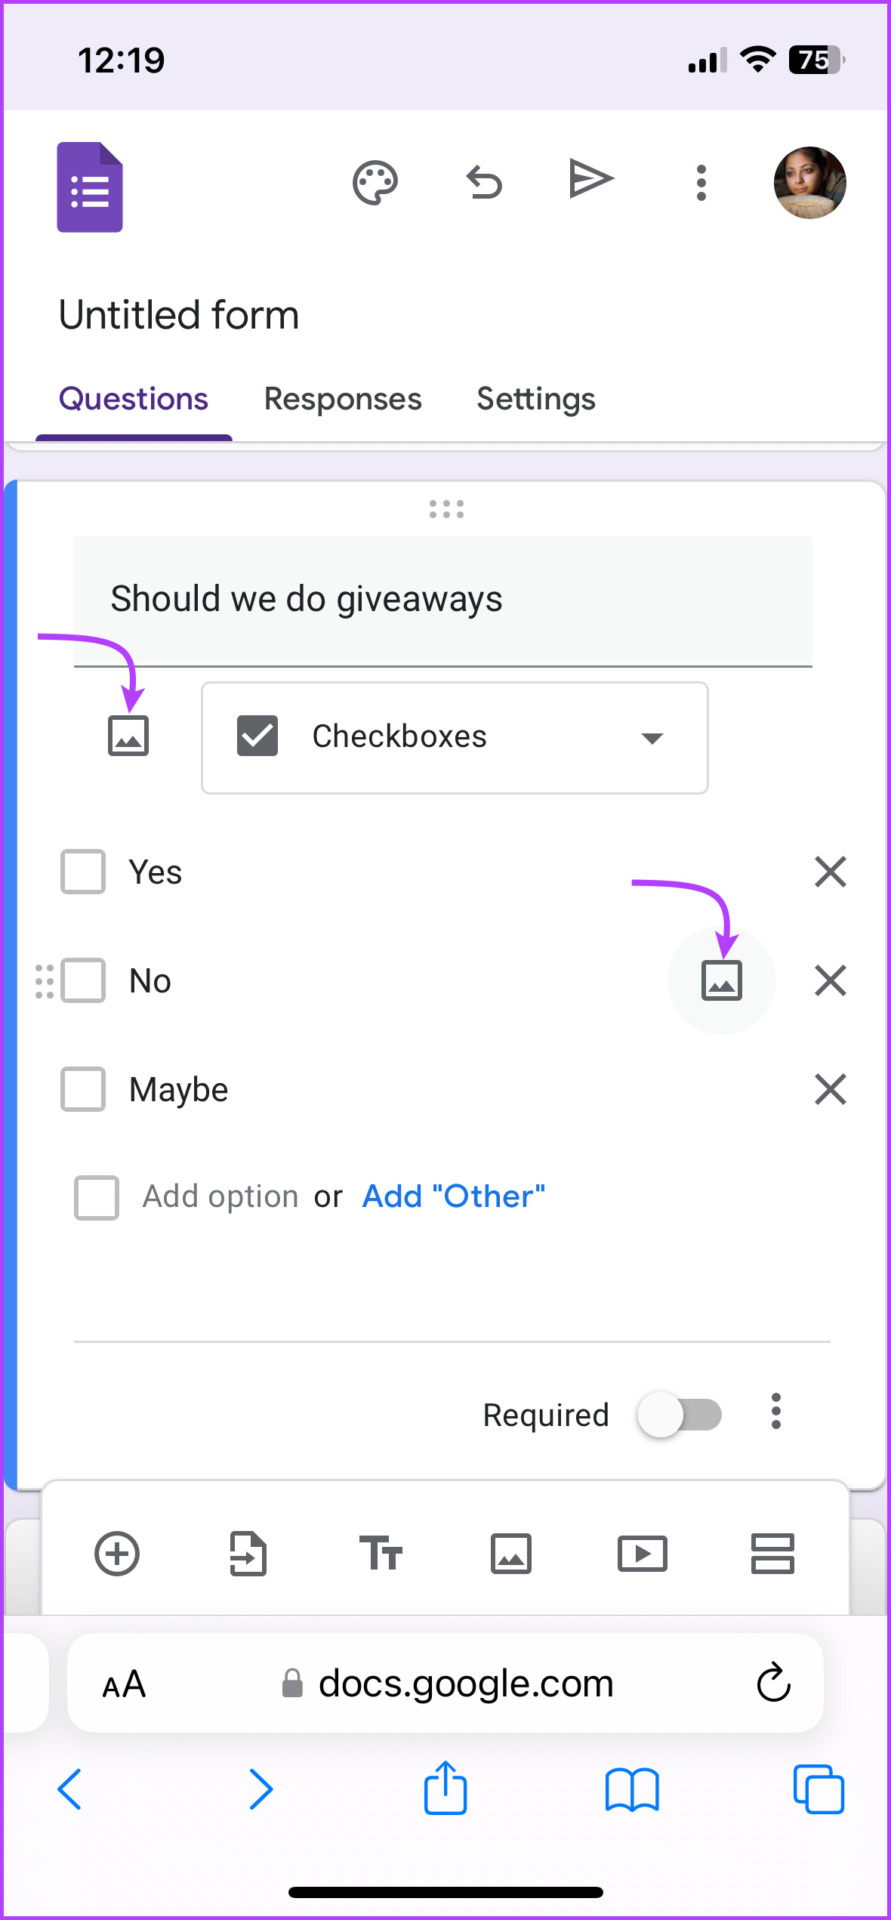

After the image is added, tap the three-dot icon to align, change, or remove the image, or add a caption.

You can also add images or YouTube videos to the Google Form. Simply, tap the image or YouTube icon from the bottom of the page.
Create Sections in Your Google Form
To organize your forms in a superior manner, you can add sections to them. Further, you can categorize your questions under different sections. Sections also help in adding conditional logic to your forms.
To add a section, go to the place/question > tap the add section icon at the bottom > tap the Untitled section to rename it. You can also add a description or skip it if needed. Next up, tap the ellipses icon to duplicate, move, delete, or merge sections.
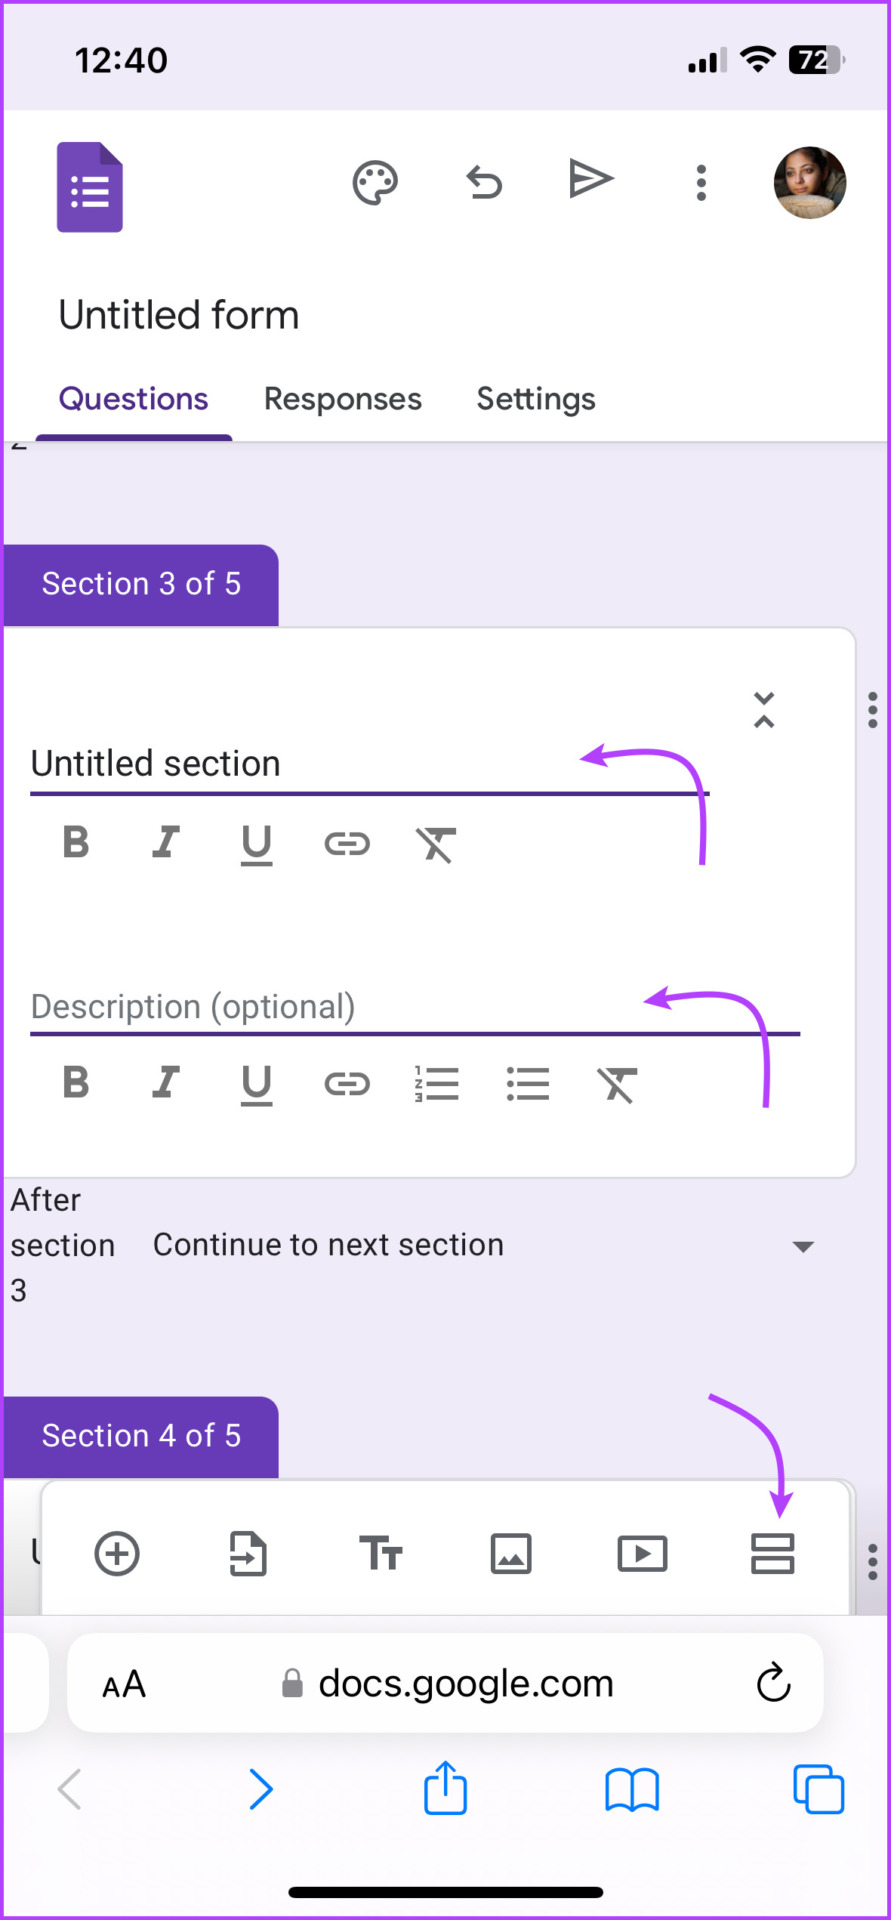

Repeat the steps to create multiple sections in Google Forms. Notably, you can drag and drop questions between sections by tapping the six-dot icon.
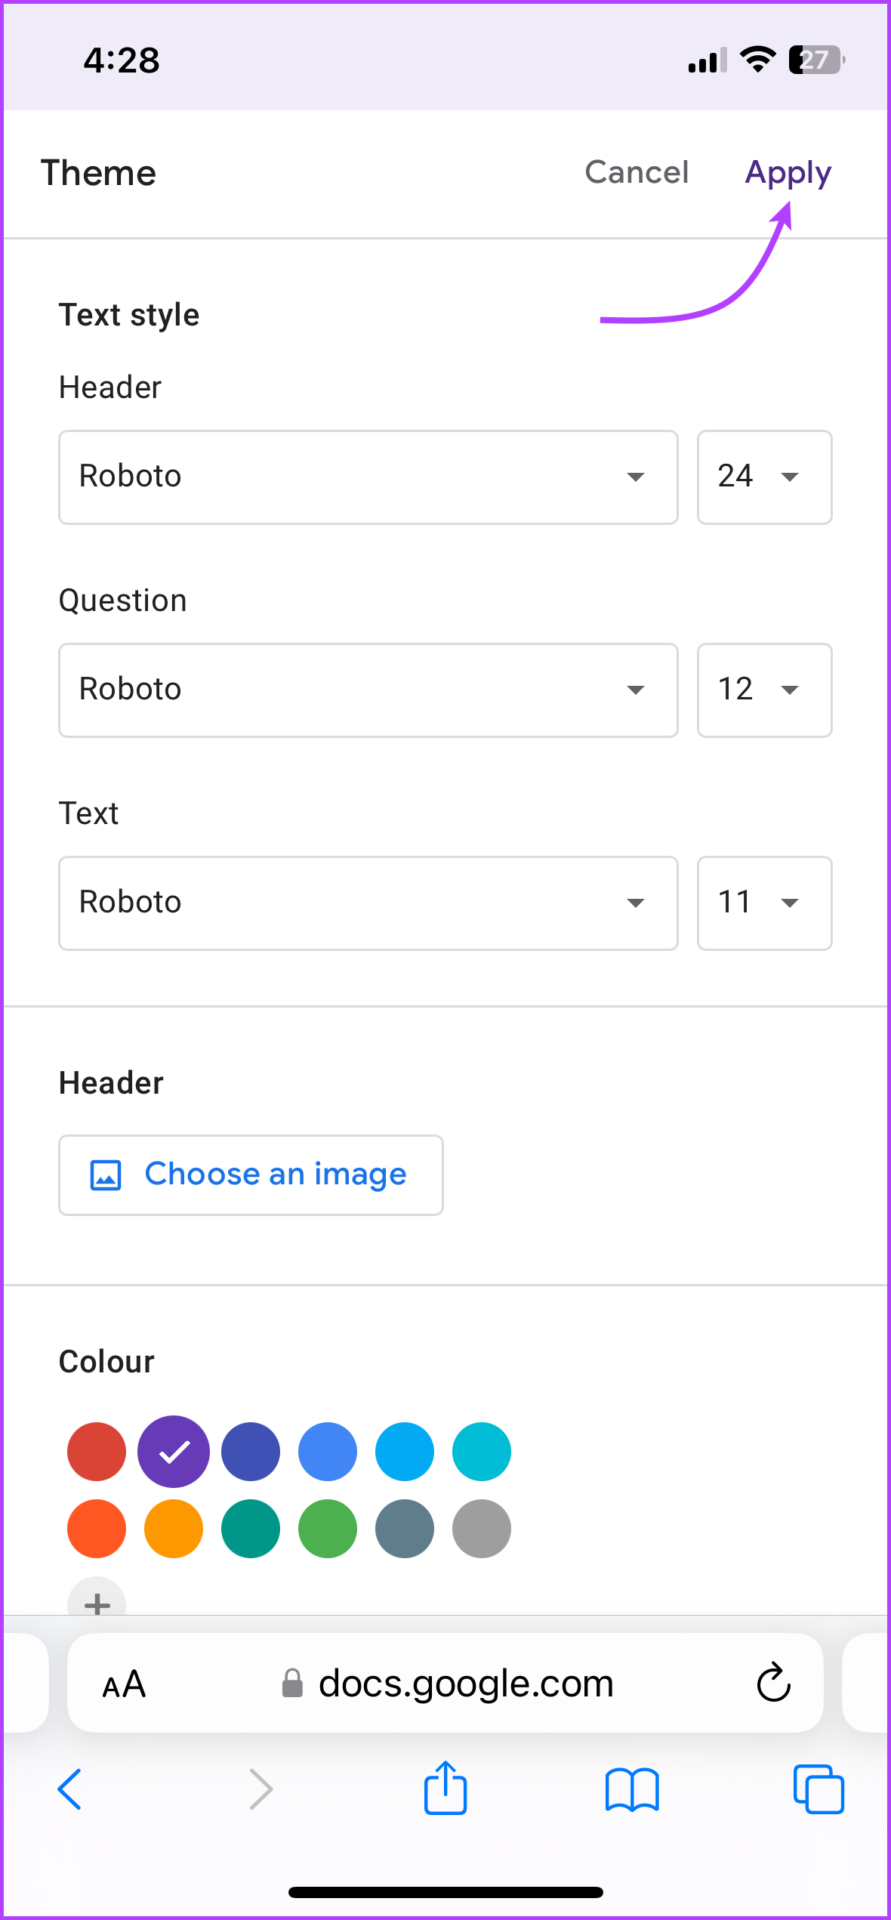
Customize Background Theme and Font
The interface allows you to change the theme color and font style of the entire form. You can even add an image in the header of the form.
Step 1: Open any Google form and tap the color palette icon at the top.
Step 2: Choose the colors and styles as per your choice.
Step 3: Hit the Apply button at the top to save the changes.
Preview Google Form
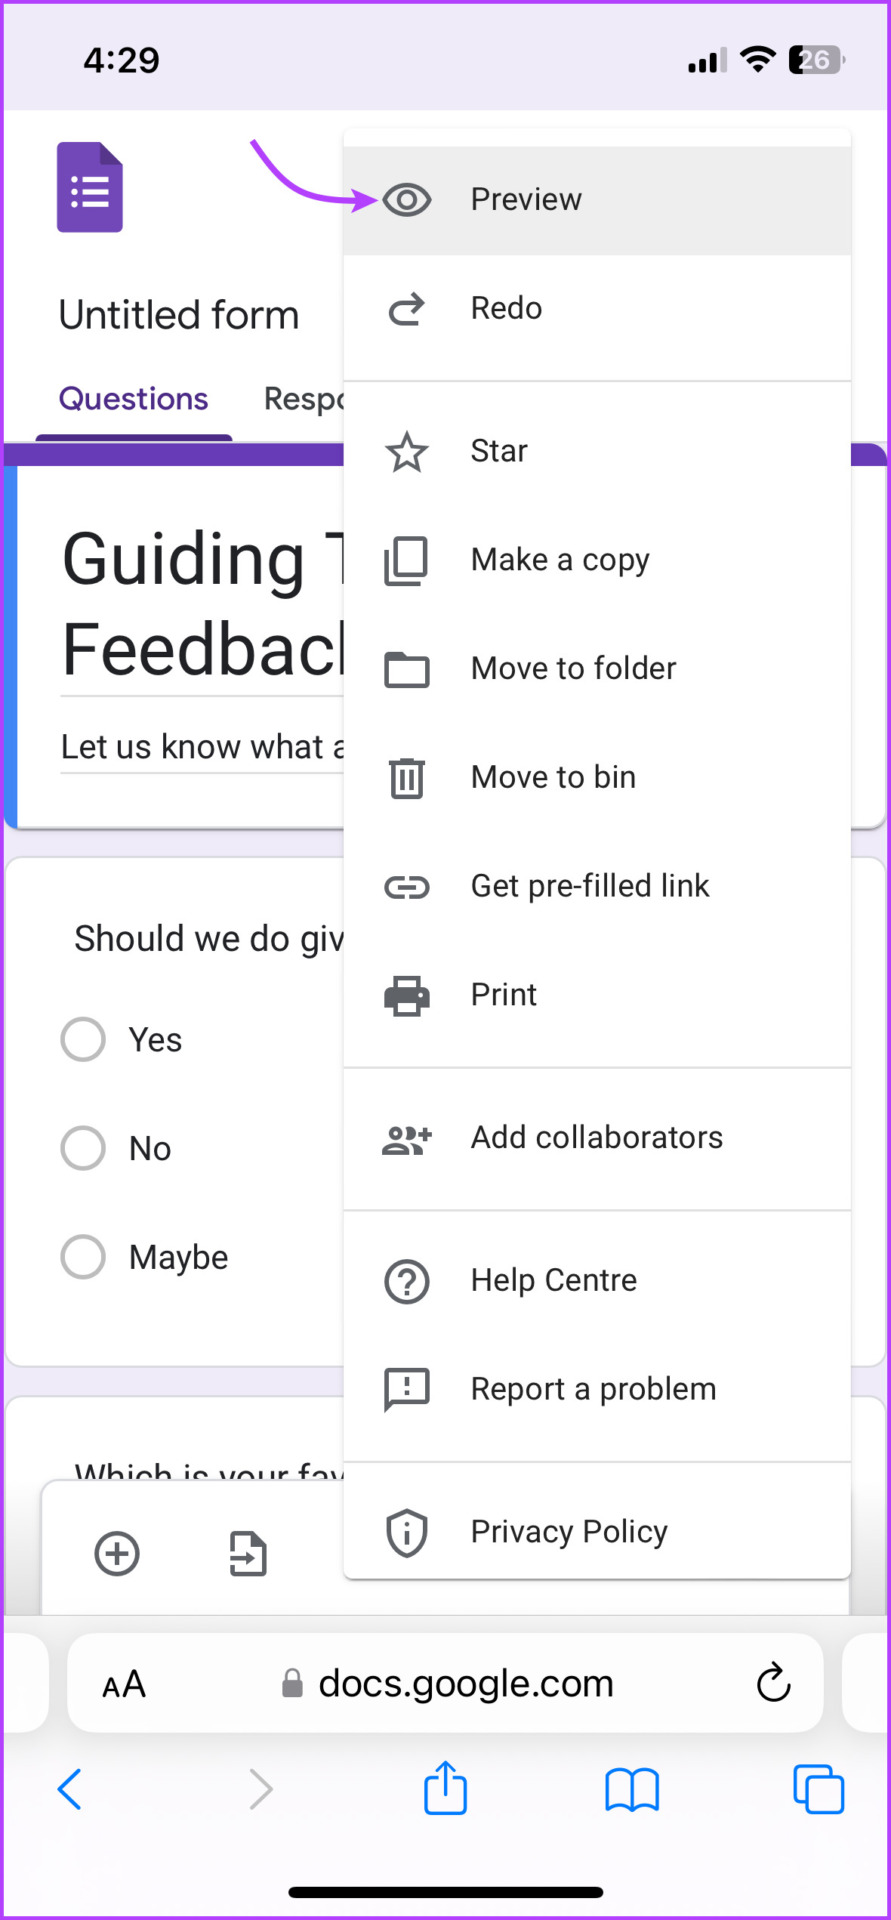
Once you have completed the form or want to see the progress, you can preview it before sending it to the actual recipients. To do so, tap the three-dot icon at the top of the form and select Preview. Once previewed, tap the edit (pencil) icon to return.
How to Invite Collaborators in Google Forms
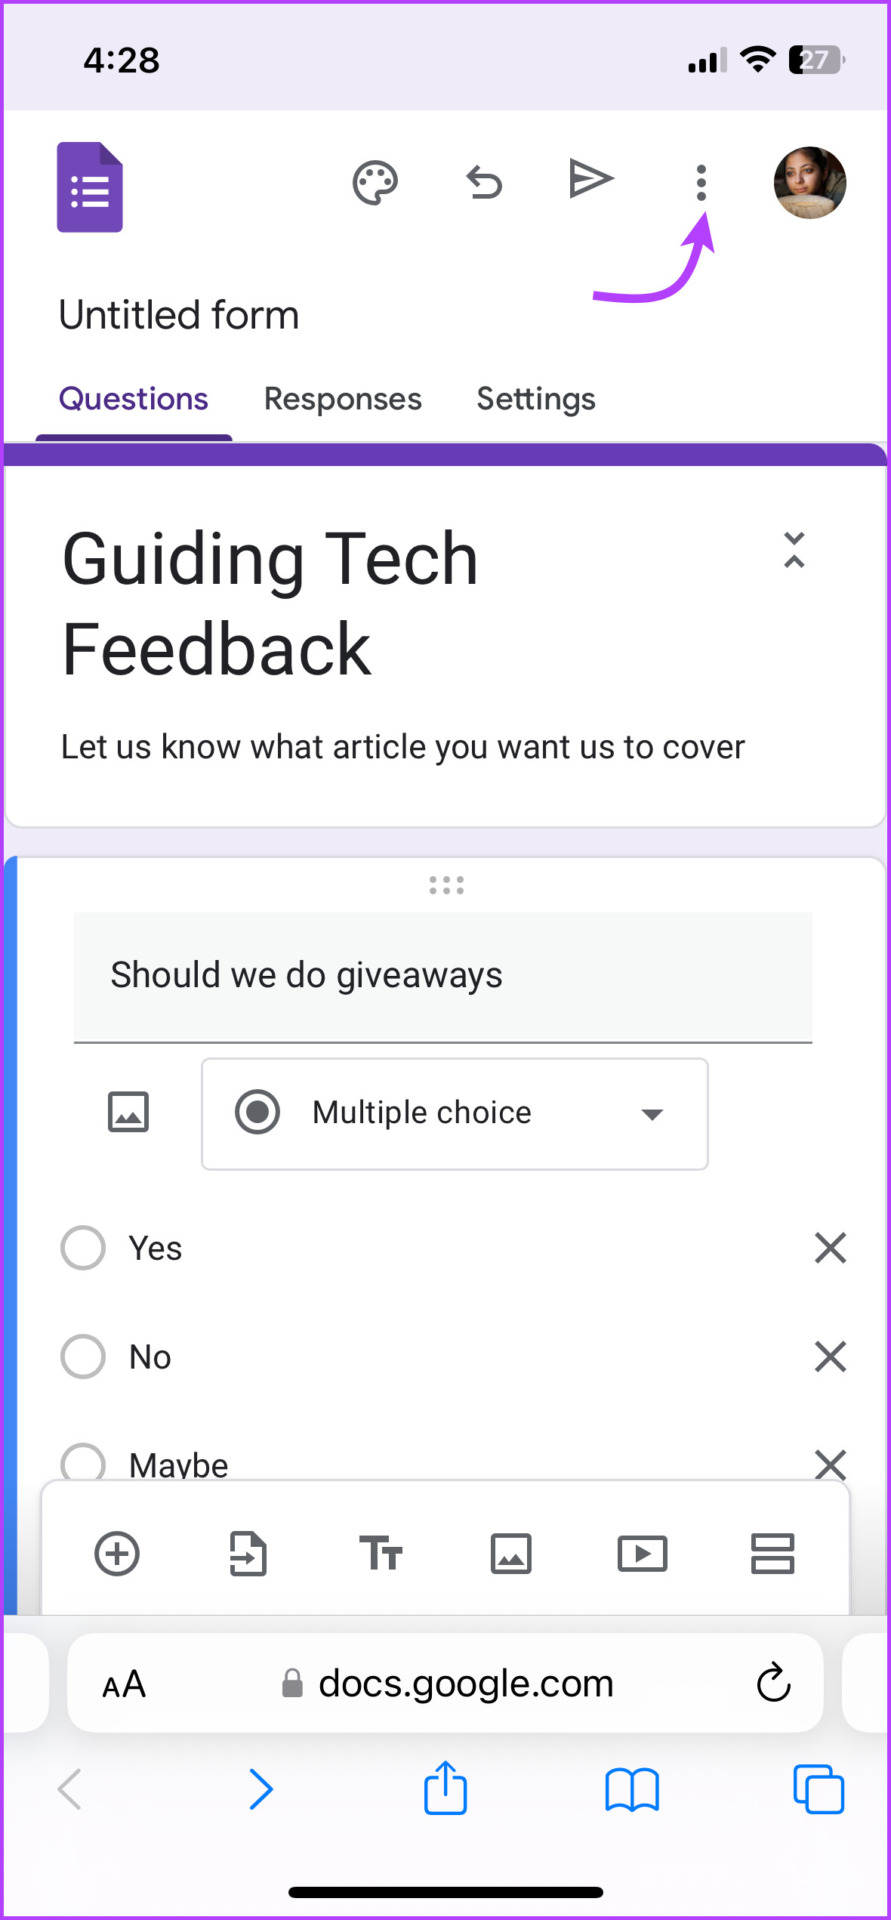
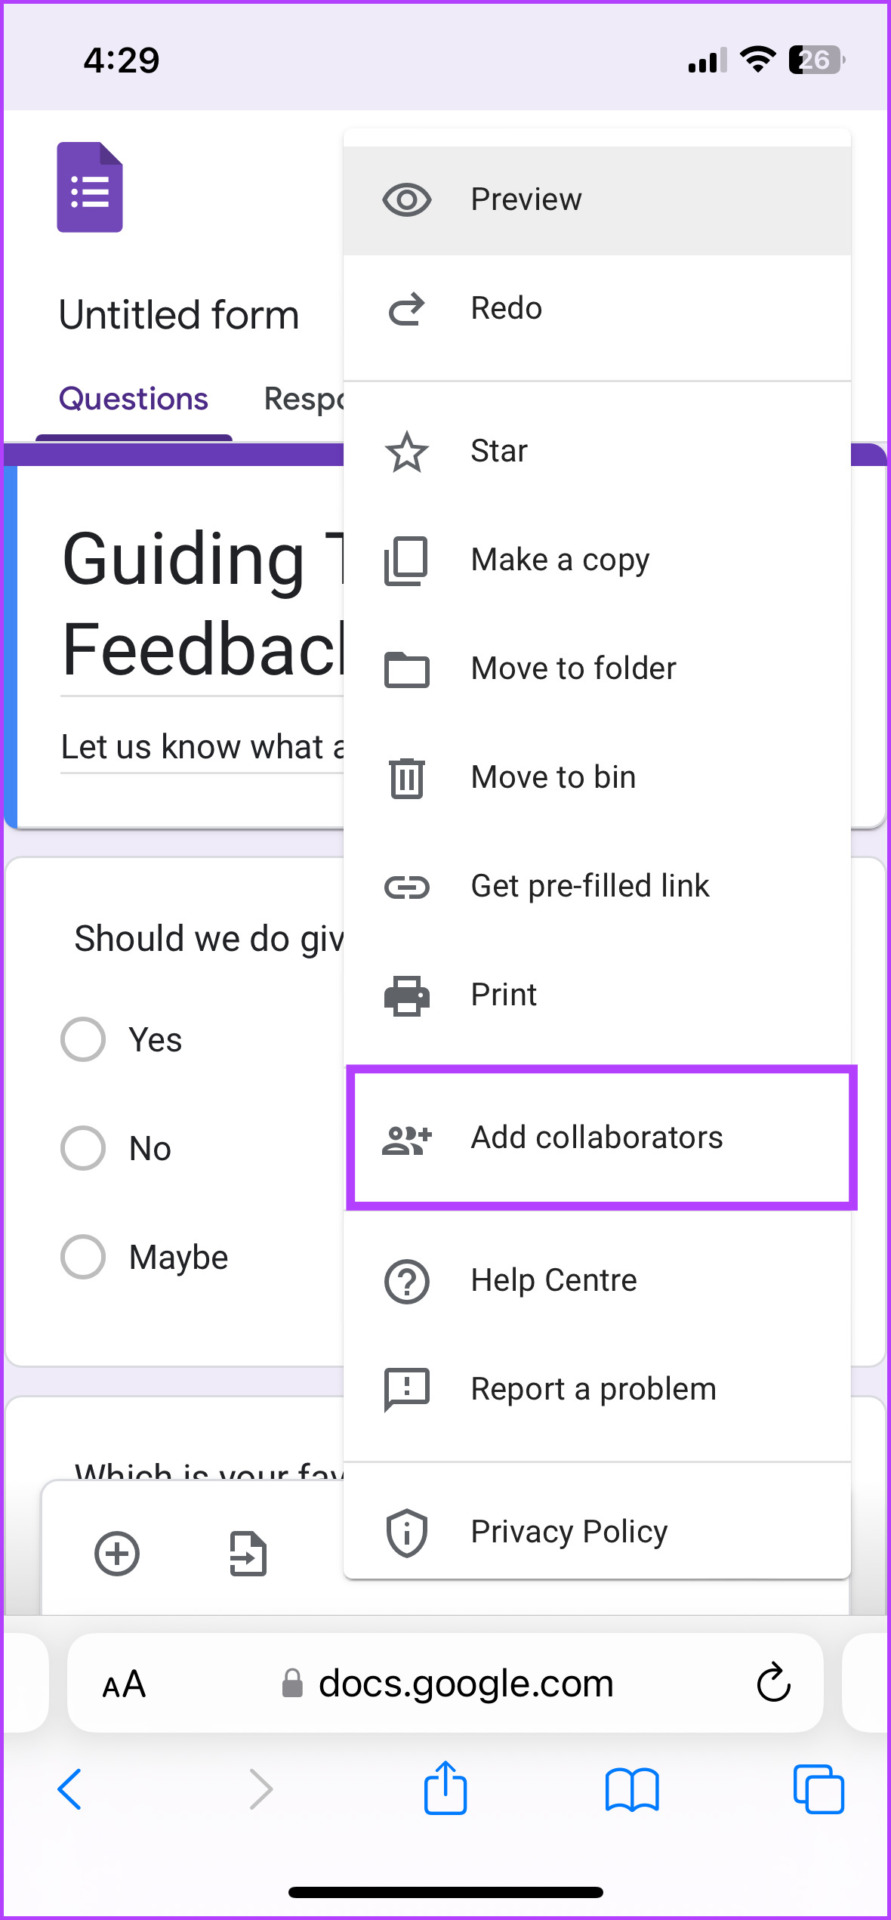
Step 1: Tap the three-dot icon from the top of the form.
Step 2: Select Add Collaborators.
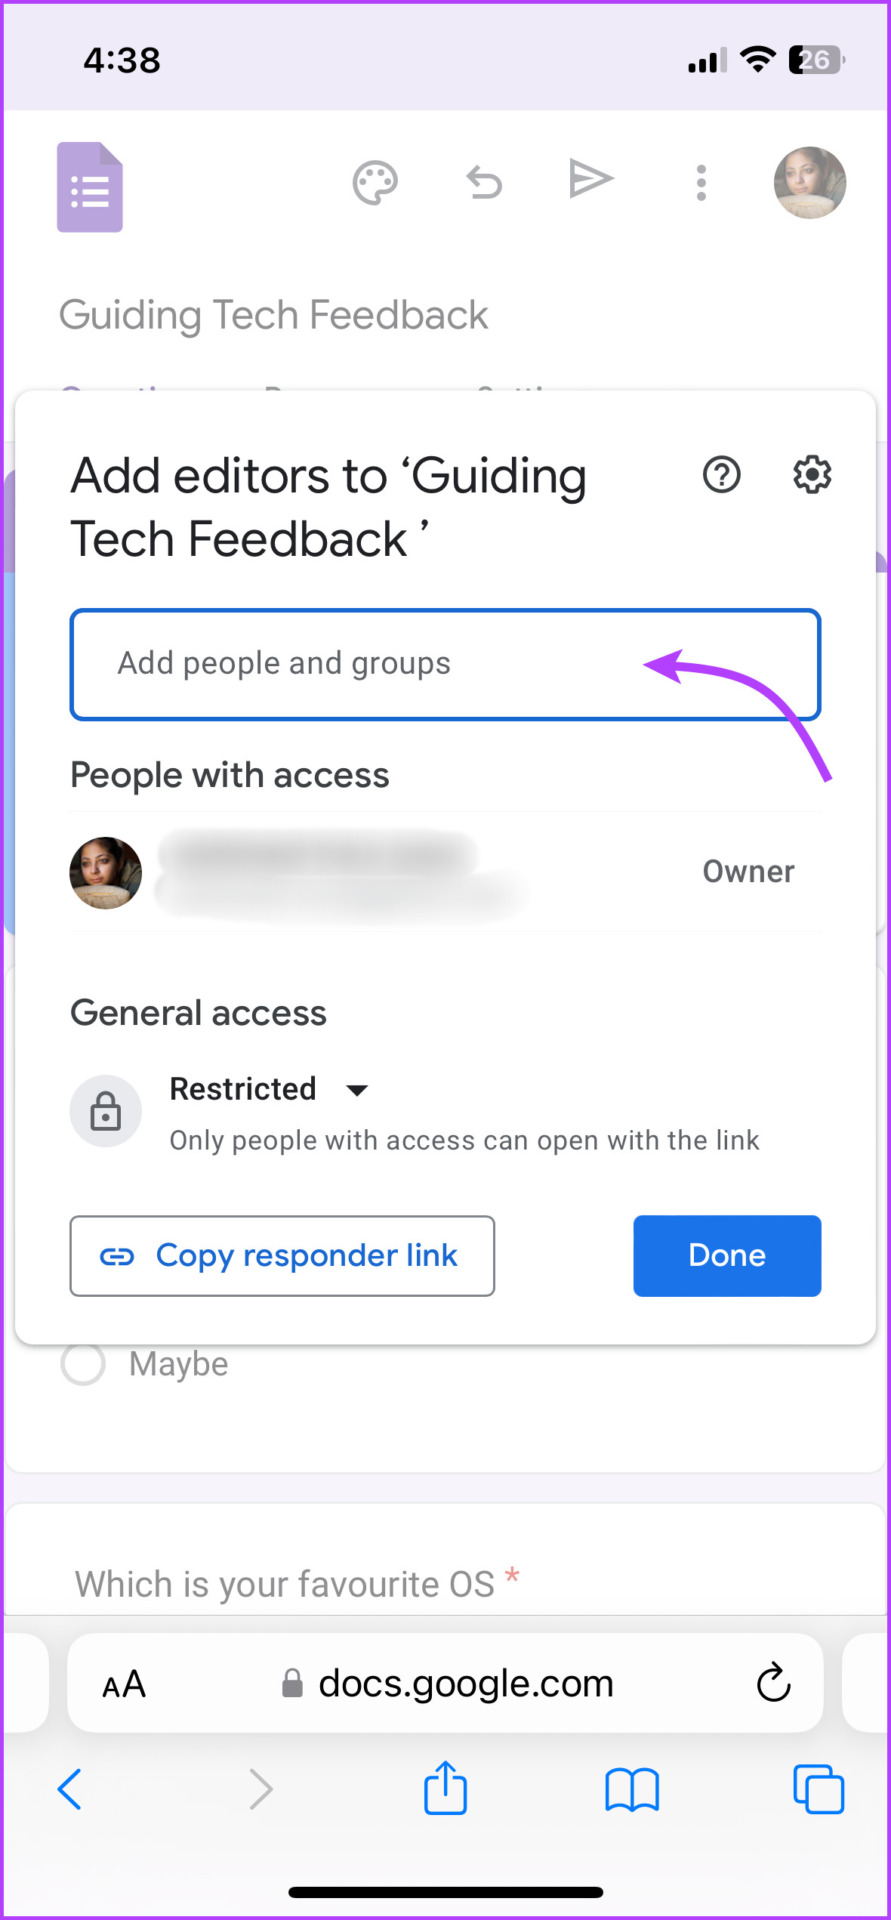
Step 3: In the Add editors window, add the email addresses of collaborators.
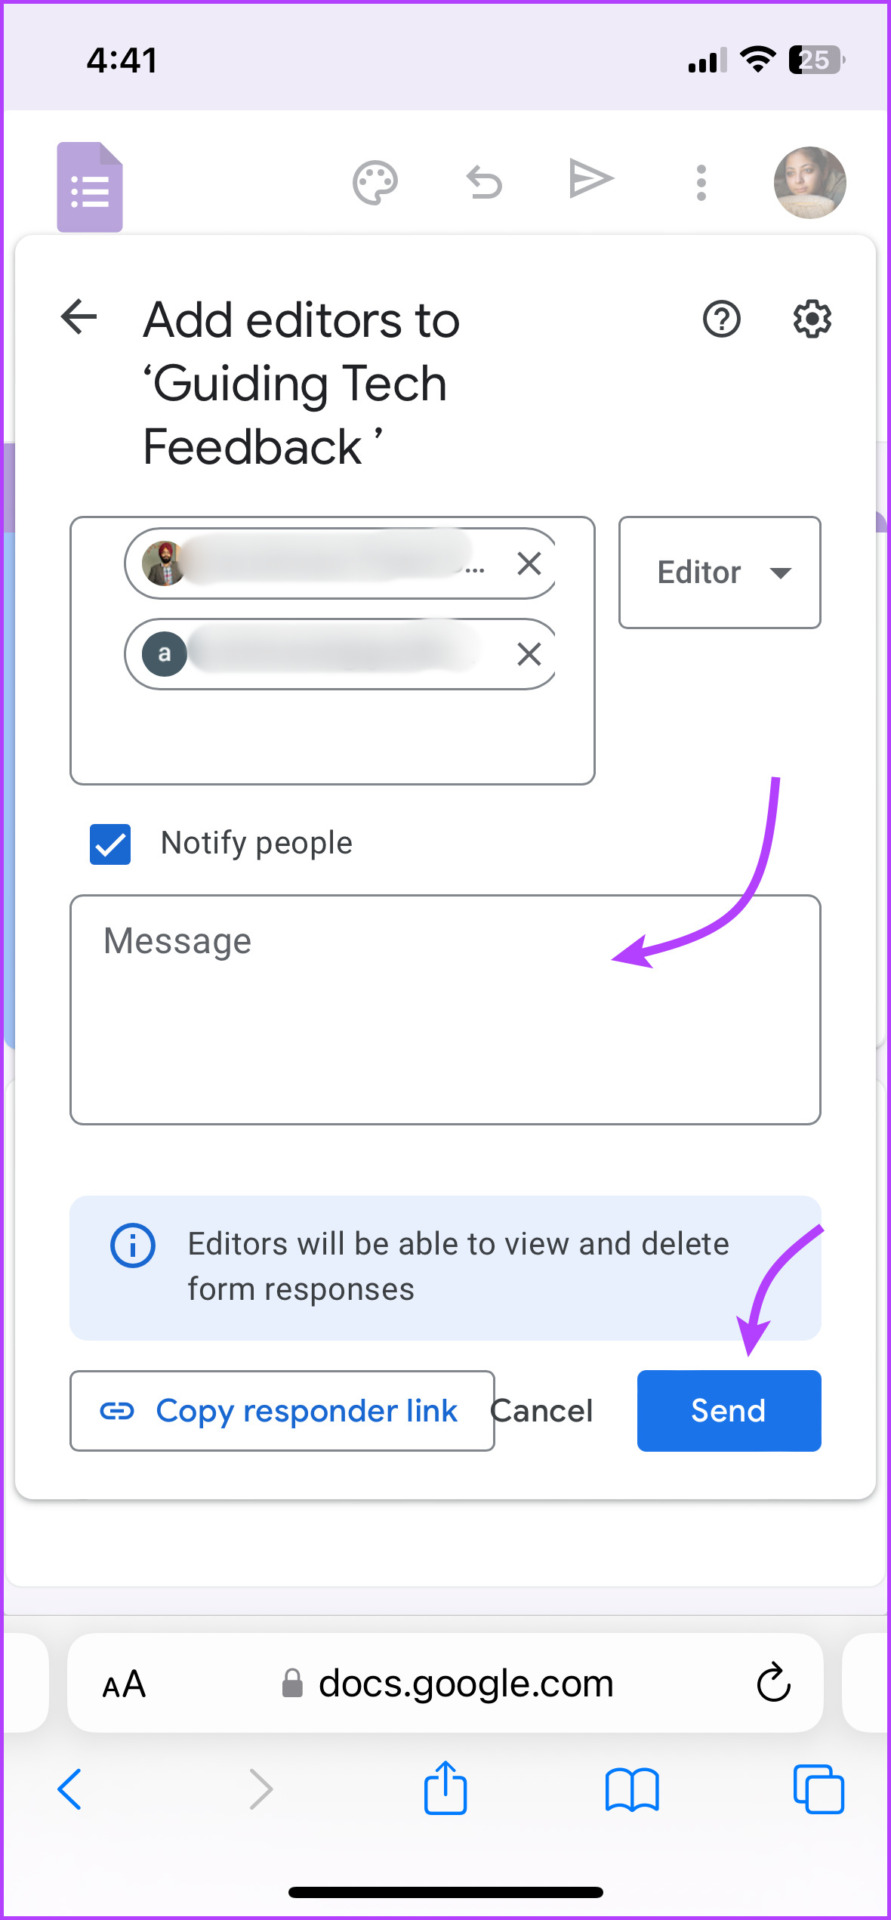
Step 4: Add a message if needed and tap Send.
Manage How Responses Are Received in Google Forms
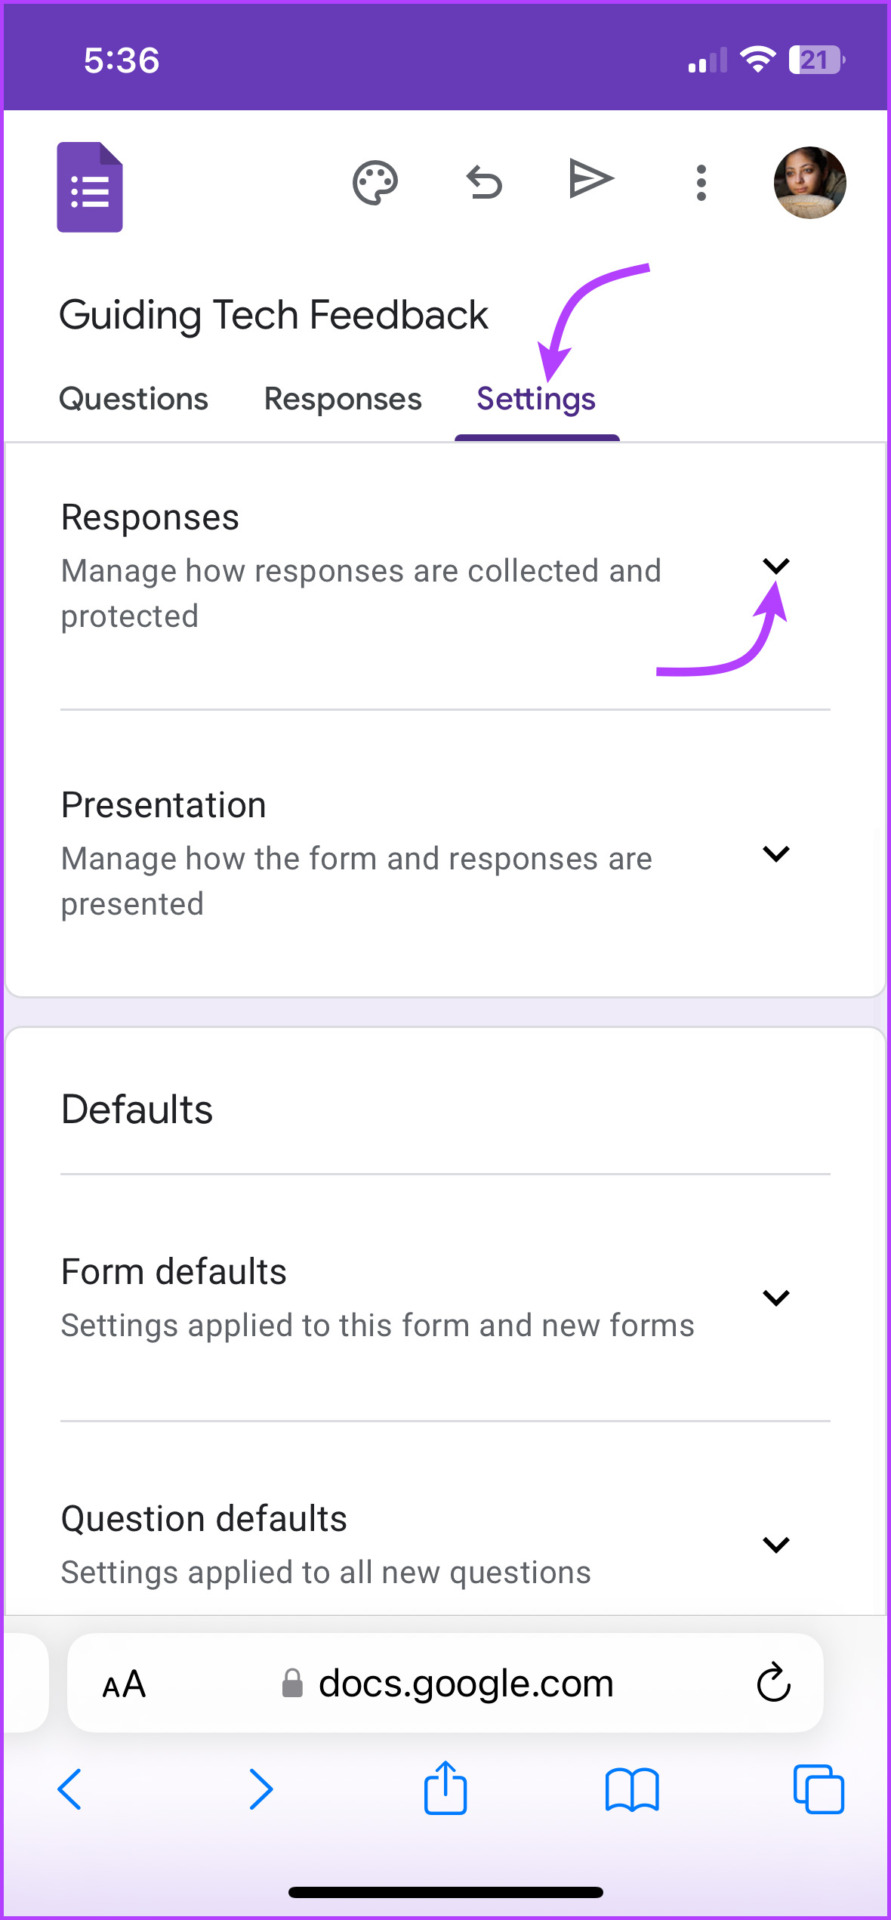
Step 1: Open any Google form and tap the Settings tab from the top bar.
Step 2: Scroll to Responses and tap the (⌄) downward arrowhead next to it.
Step 3: Now, you can select whether to
- Collect the email addresses of the responders,
- Send responders a copy of the response.
- Enable/disable response editing.
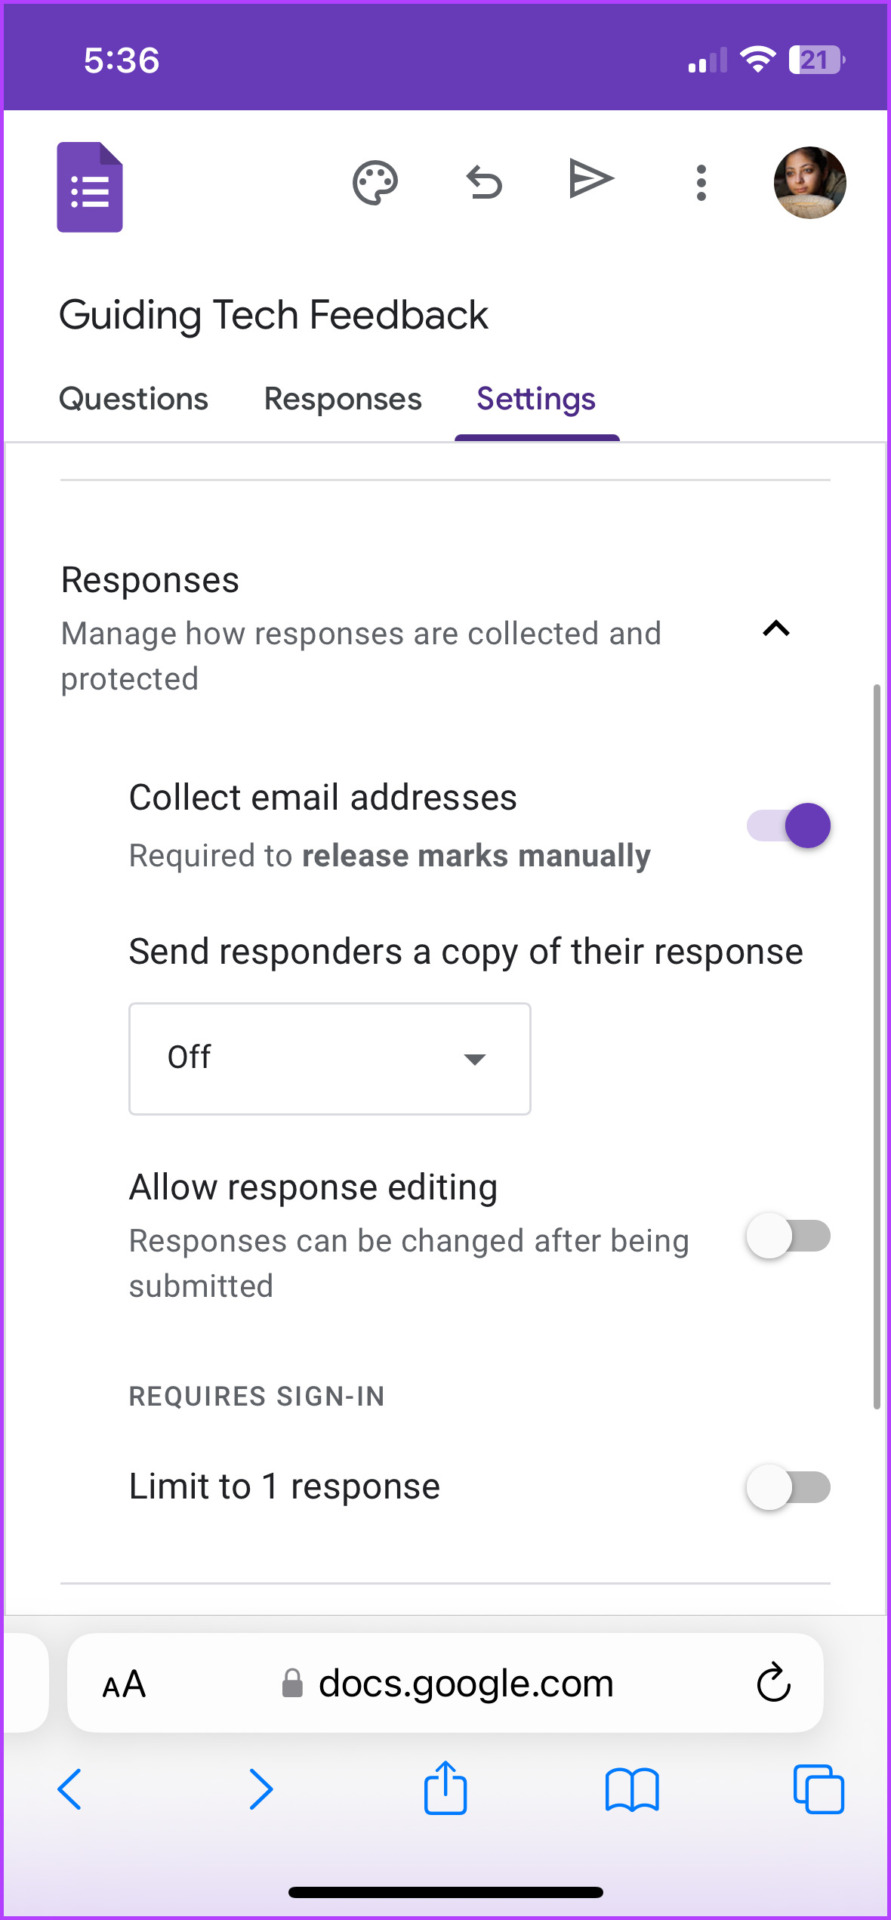
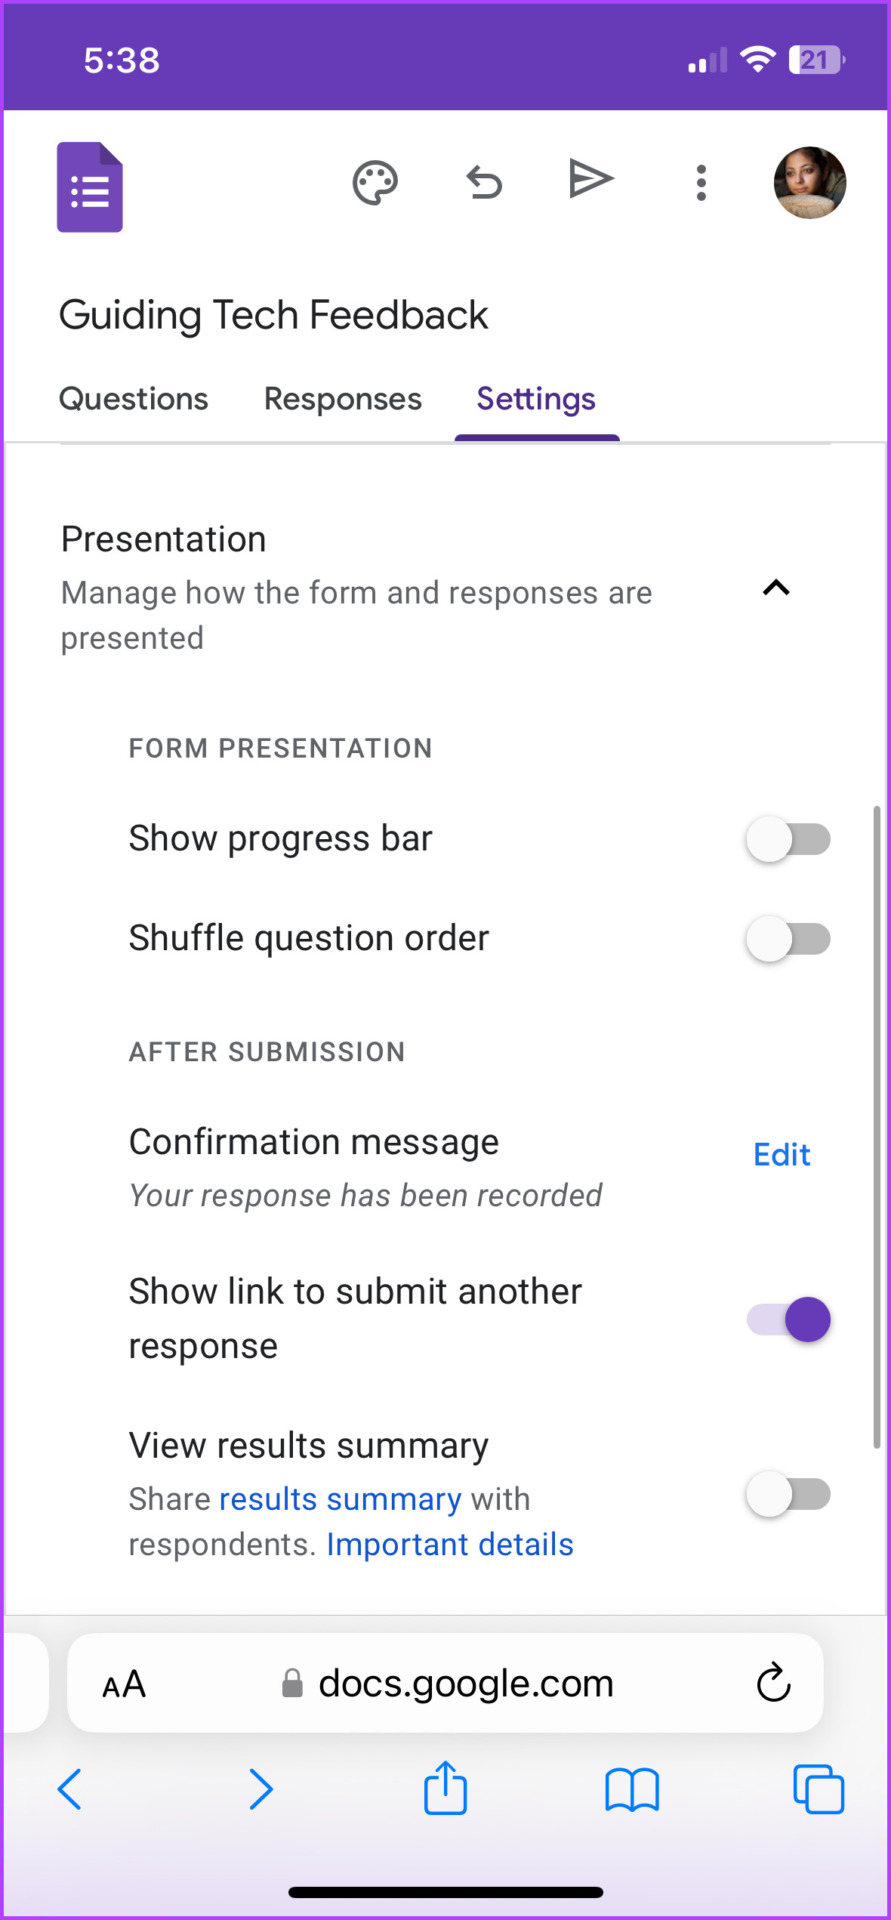
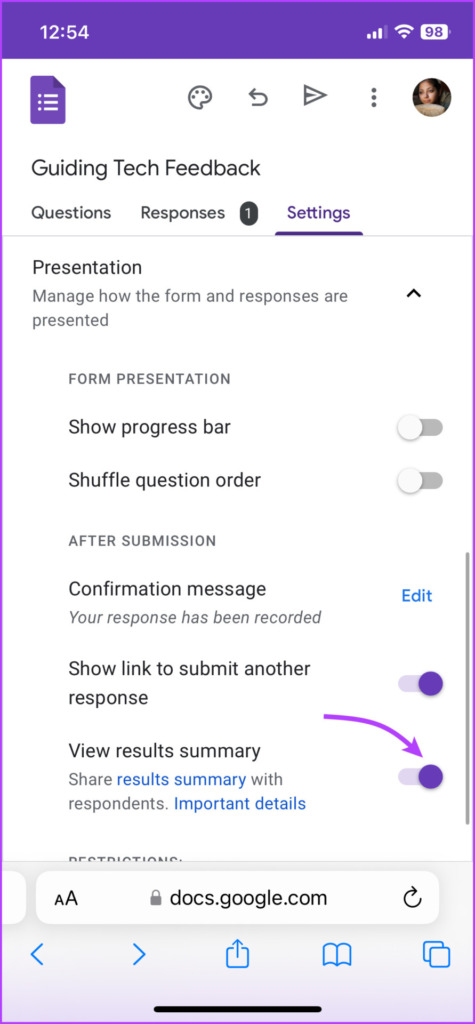
Notably, you can also limit the responses from this section. And while you’re at it, feel free to manage the forms and their responses presentation.
To do so, tap the (⌄) downward arrowhead next to Presentation. Here toggle on or off the desired setting.
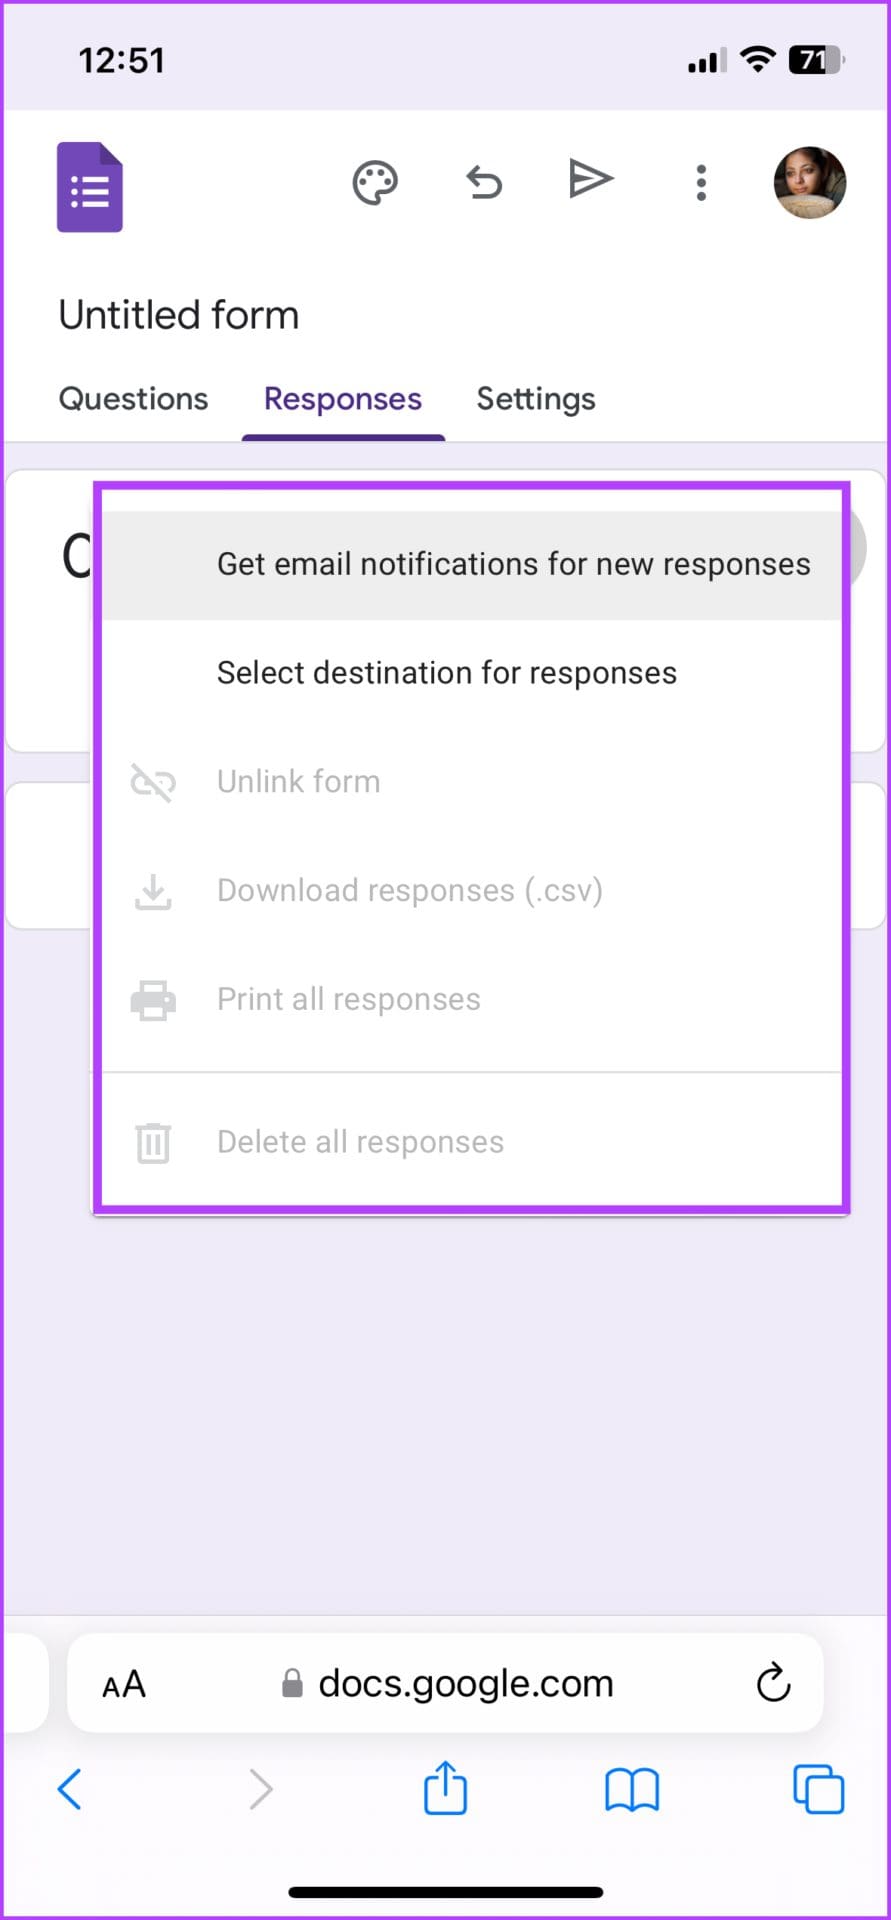
Additionally, you can manage notifications for responses. In the form, tap the Responses section and tap the three-dot icon.
How to Create a Poll in Google Forms
Whether you want to create a public poll or a limited audience poll, Google Forms can help. What’s great is that you don’t have to do things much differently. Simply select multiple-choice or checkboxes style questions, enter the question, and share the poll.
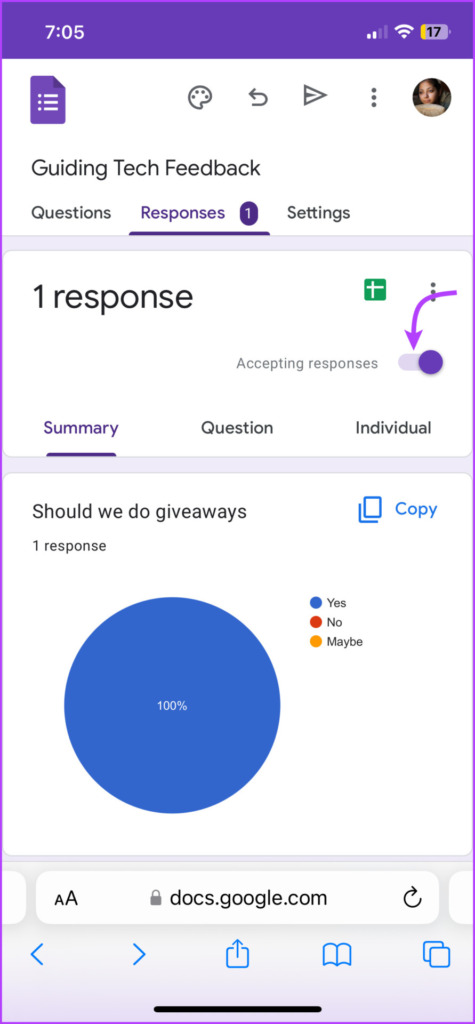
Incredibly, you can also choose to share the poll results summary with the respondents. The pie chart will show them the percentage of votes each option received. To do so, go to the Settings tab → Presentation → toggle on the switch next to View results summary.
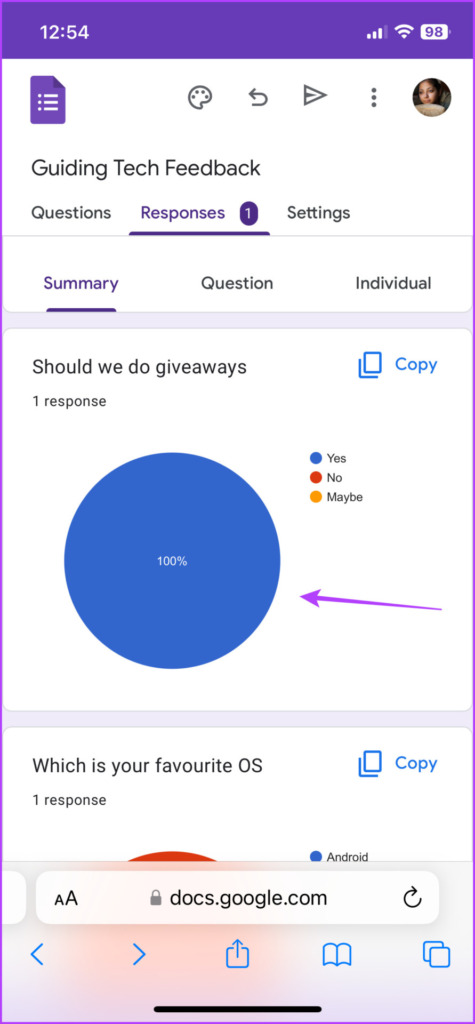
The respondents can see a summary for each question (as shown in the above screenshot) after they’ve filled out their form.
Send Google Forms
Finally, tap the send button at the top to share the form with others. You can either share the form via Mail, create a link or embedded link, or share via Facebook/Twitter. Choose one or more options as per need.
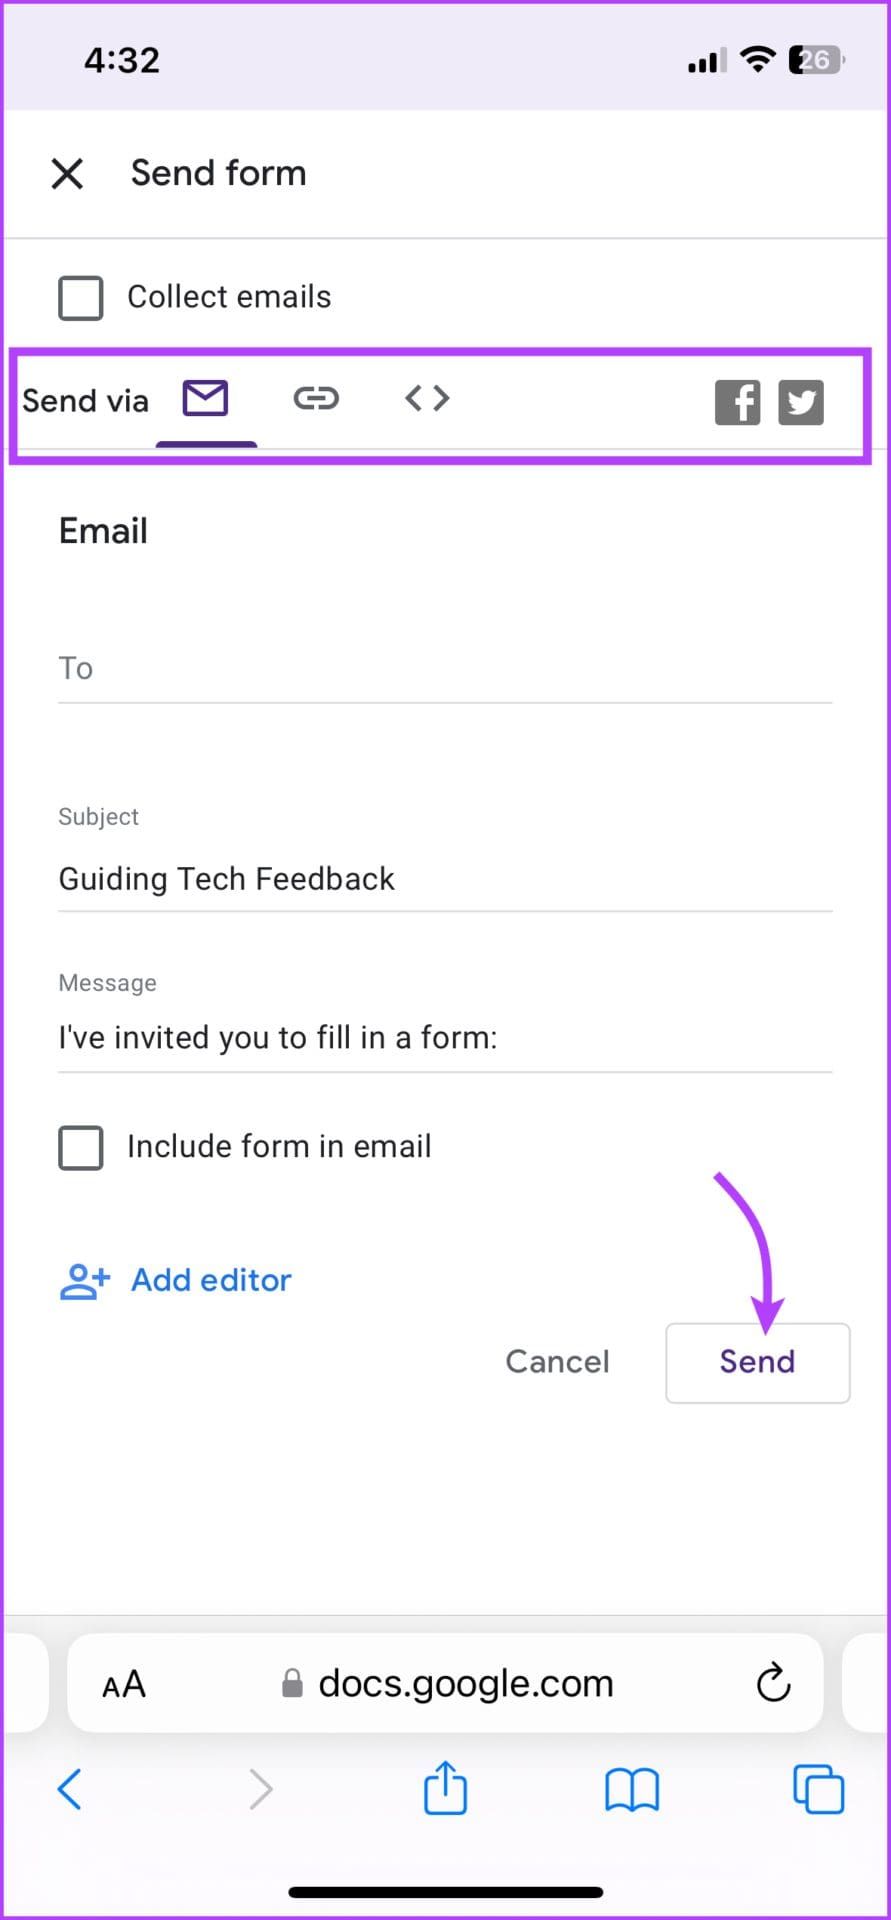
If you wish to make Google Forms public, uncheck the Collect emails option and share the form.
Note: You can also invite collaborators from the sharing window. Simply tap Add editor and repeat the steps mentioned above.
How to View Old Google Forms on iPhone or Android
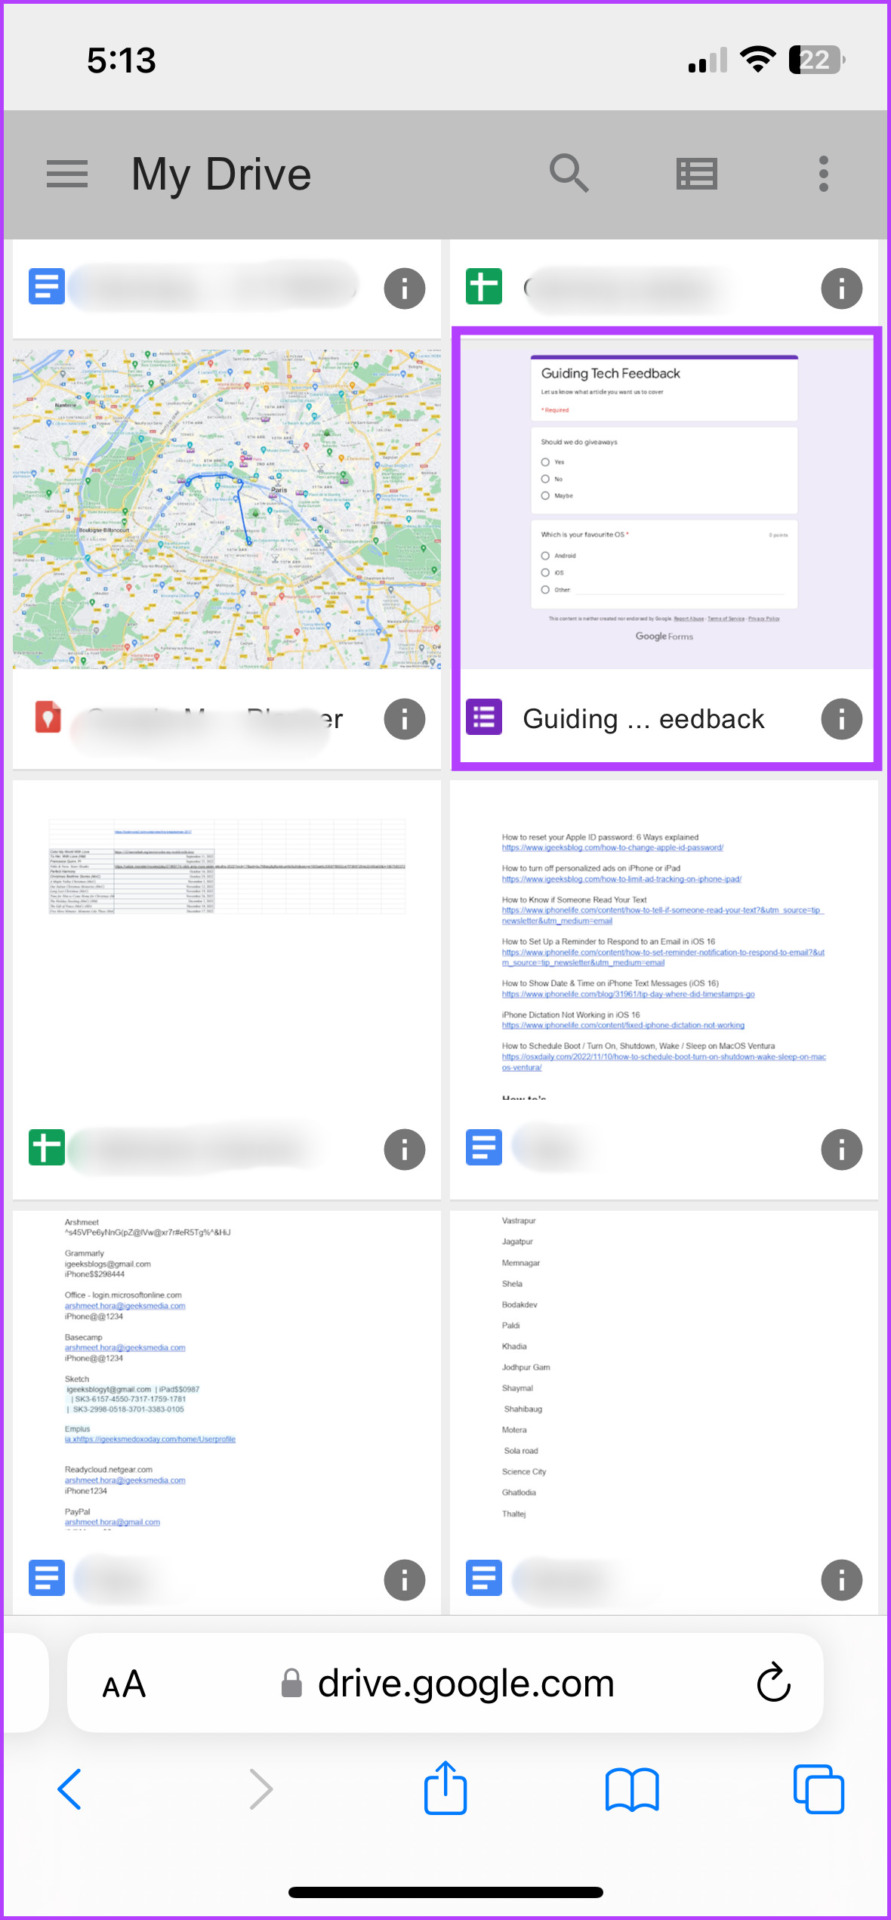
Step 1: Open the Google Forms page → tap the Google Drive icon from the top-left corner.
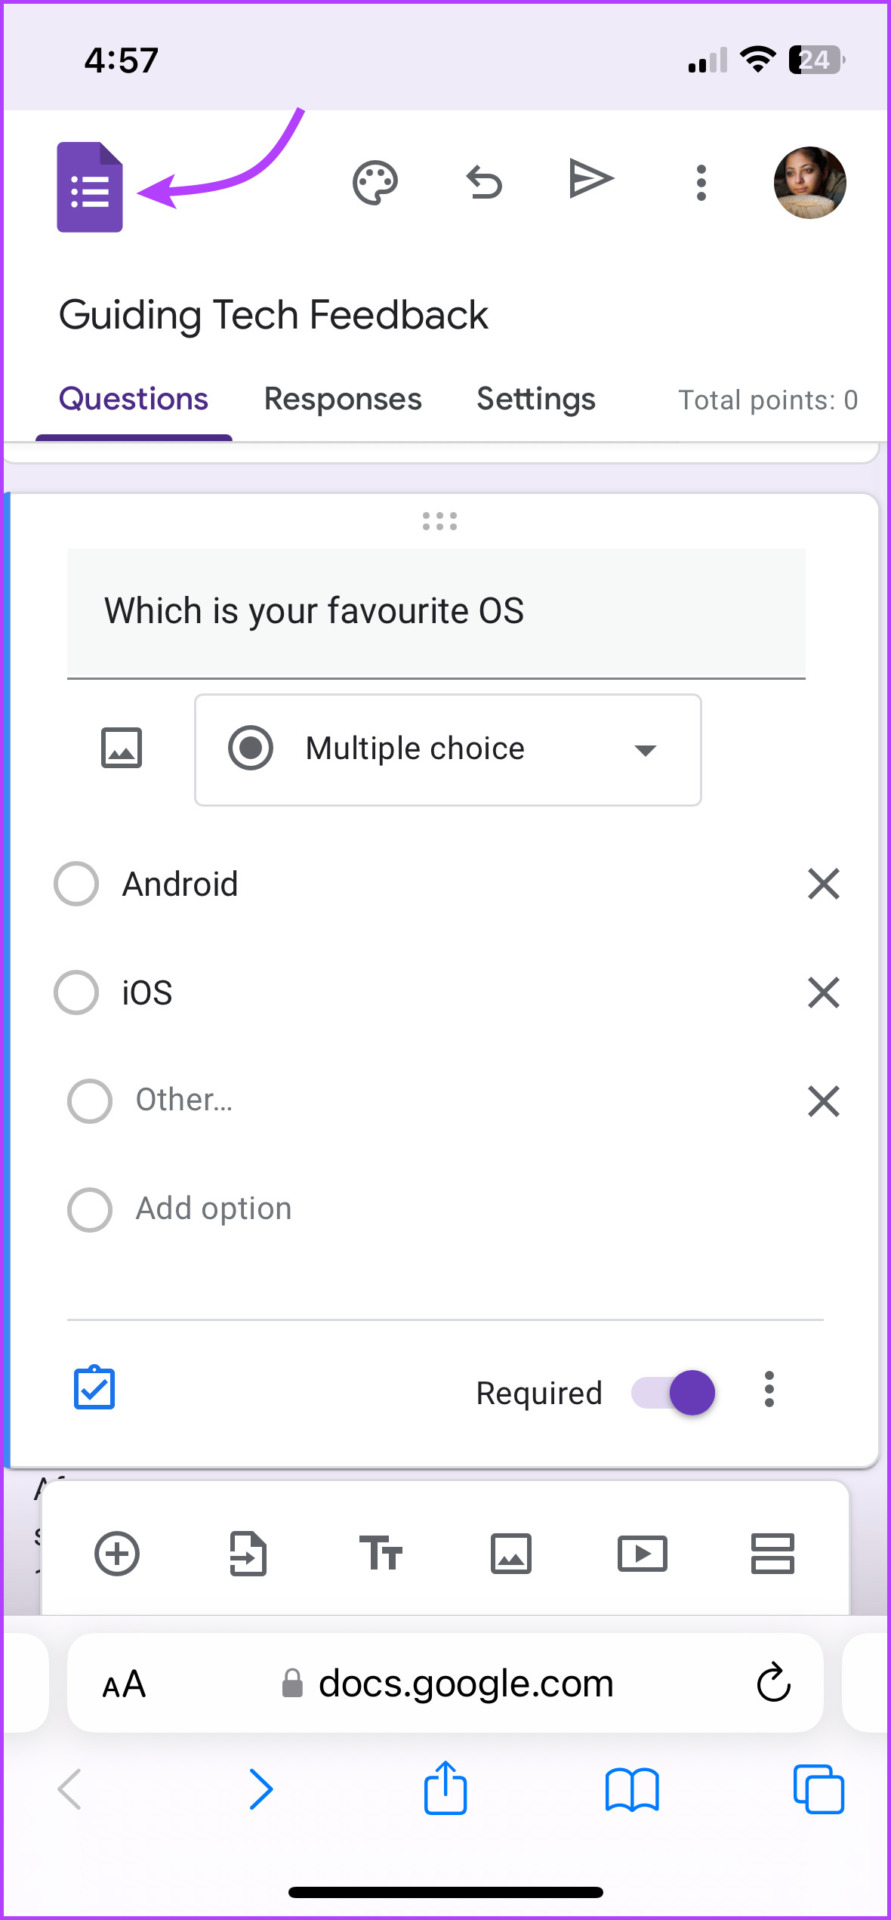
Alternatively, you can also open the Google Drive app or web page (you can use the link below).
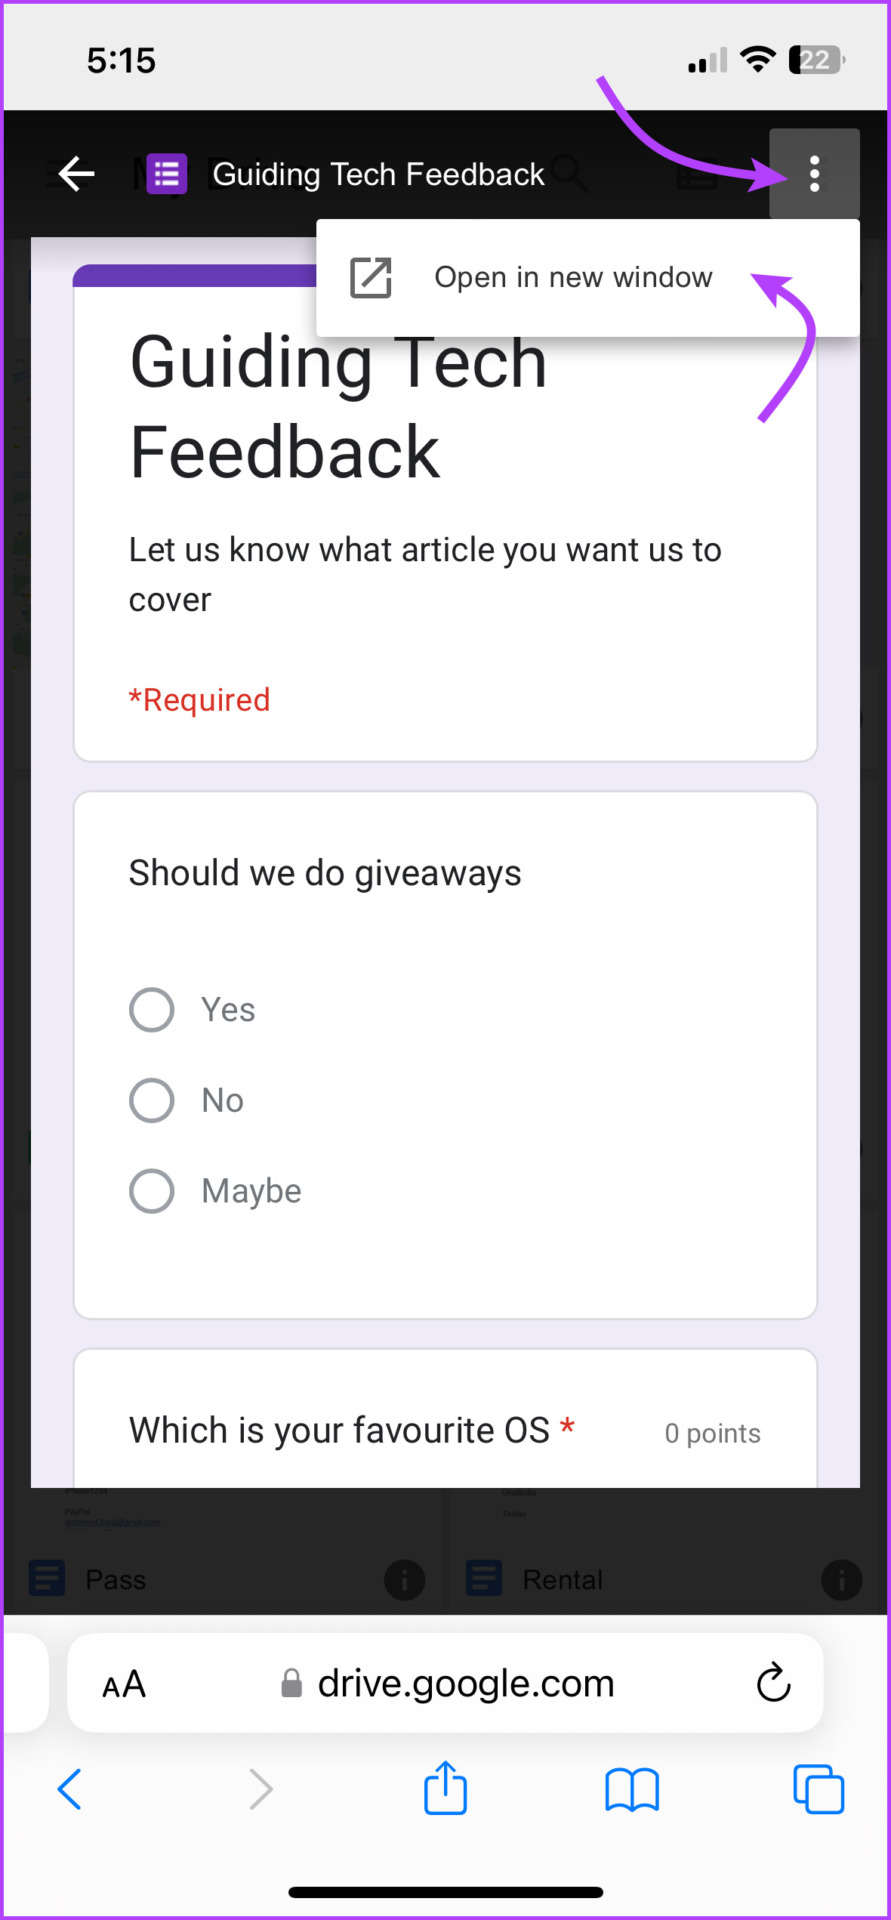
Step 2: Here, find the previously created forms and tap the form you want to open.
Step 3: If you want to edit, duplicate, or share the form, tap the three-dot icon from the top-right corner and select ‘Open in new window’.
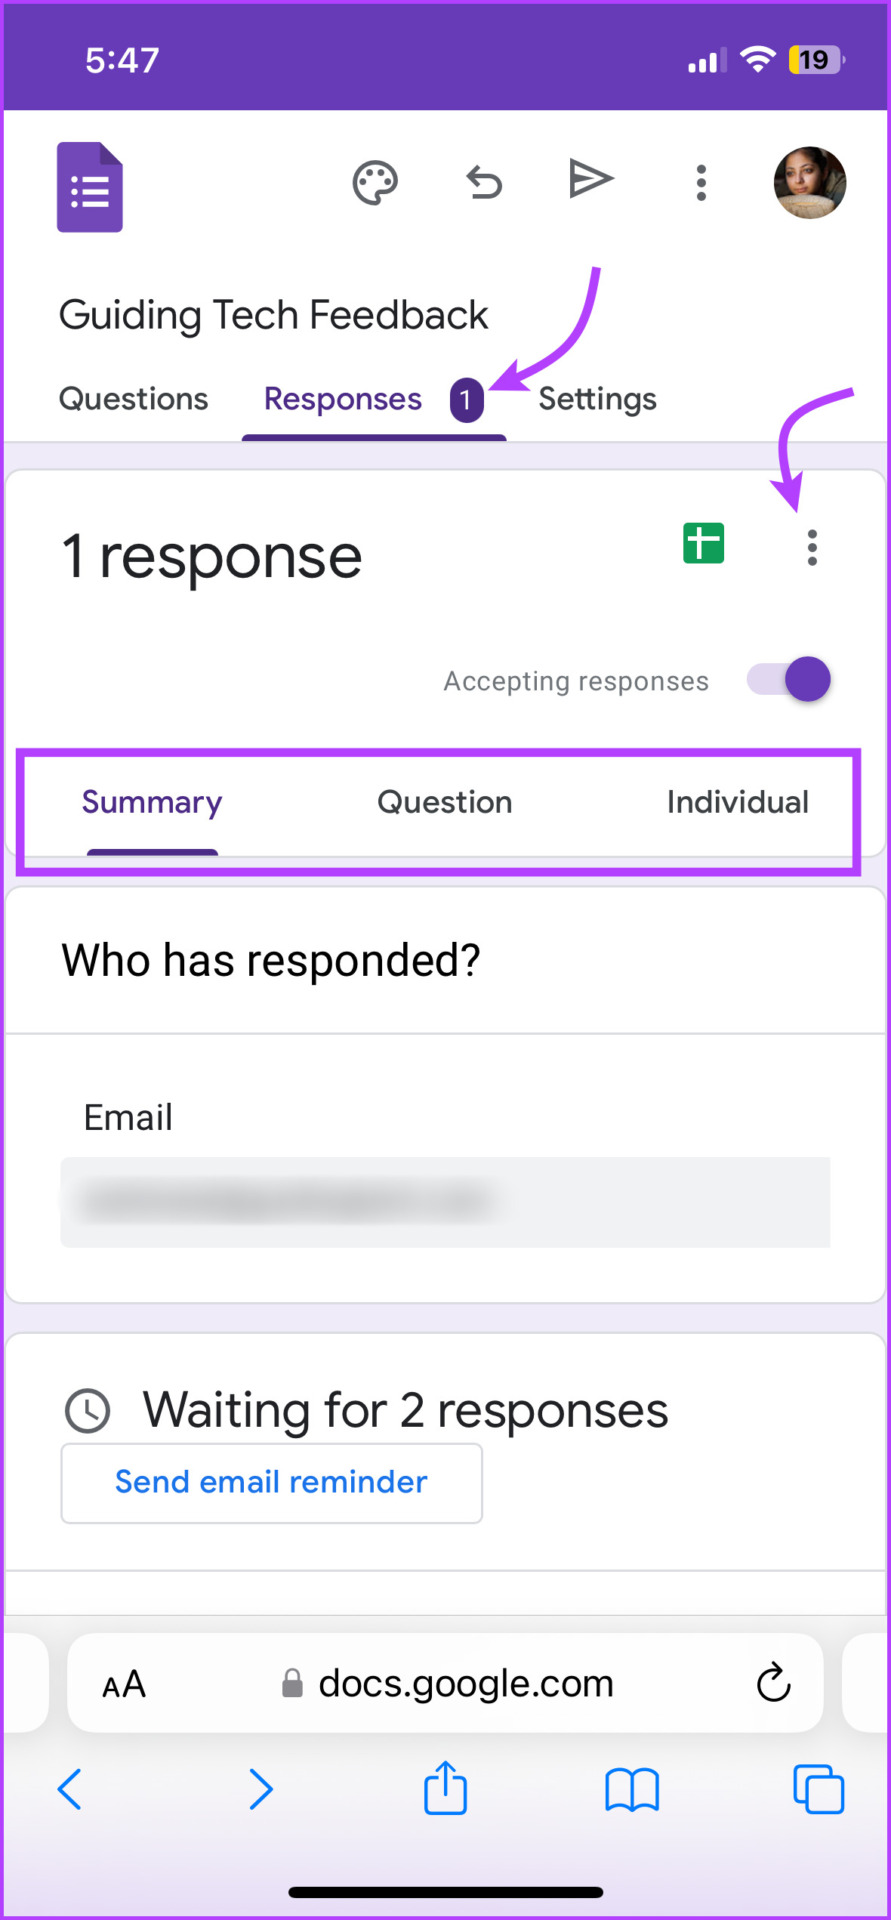
How to View Google Form Responses
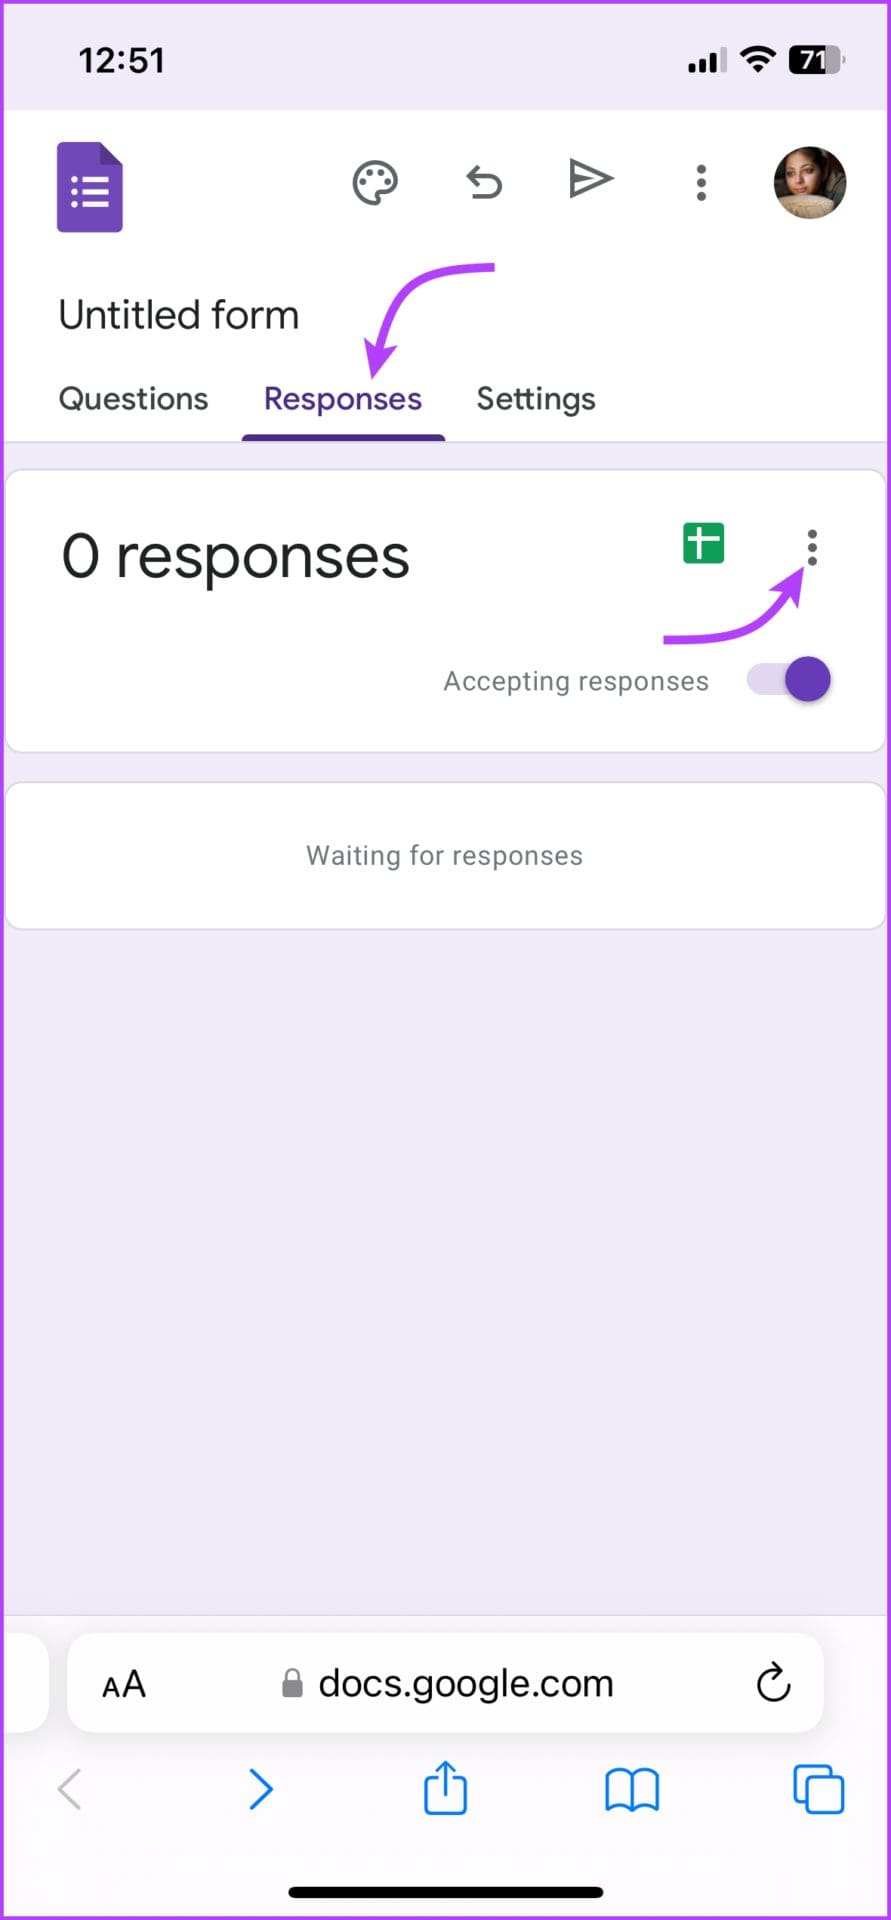
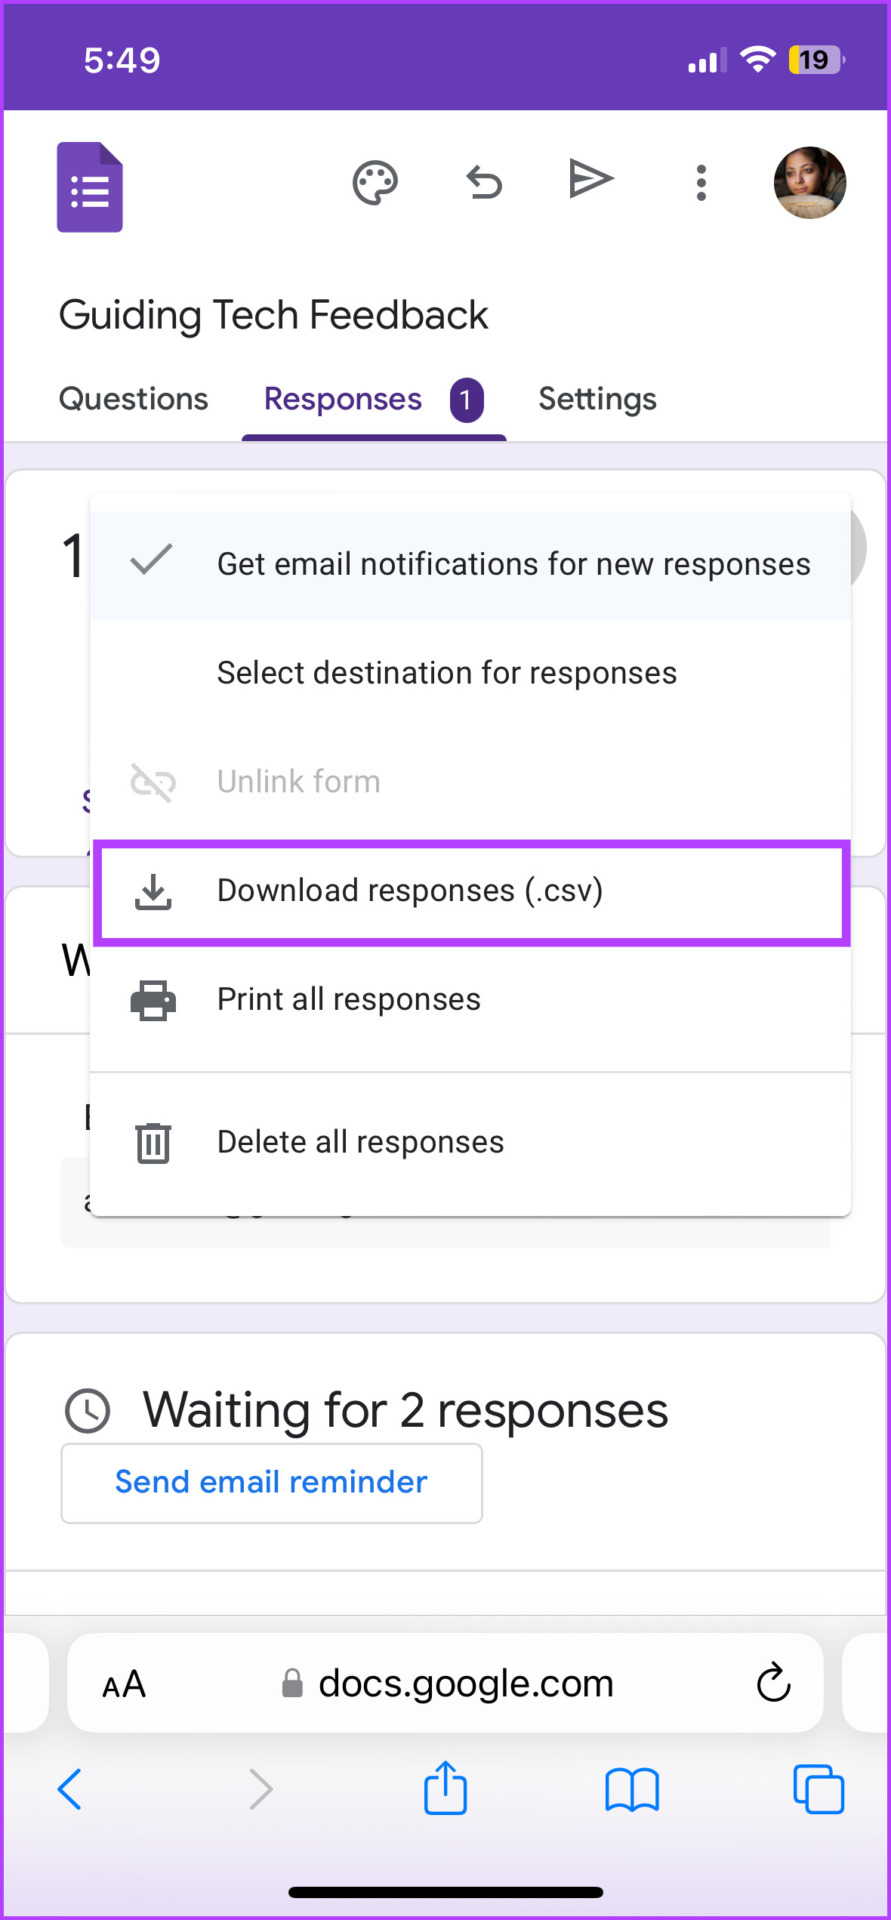
Open the form and tap on the Responses tab at the top (visible to the creator only). Here, you will see a summary and individual responses. If you want to view the responses in Google sheets, tap on the Sheets icon.
You can also download a .CSV file or print the responses, tap the three-dot icon, and select an option accordingly.
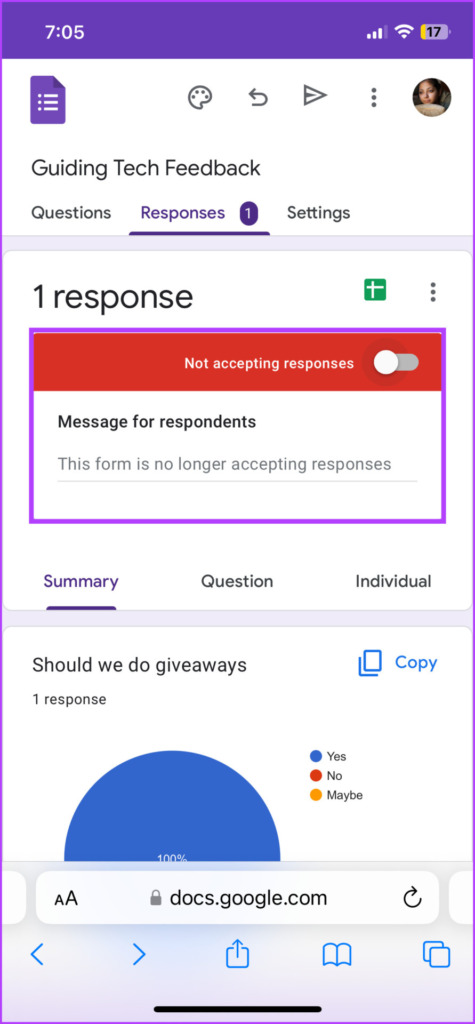
Stop Accepting Responses on Google Forms
While there is no limitation on the acceptance of submissions, you can stop accepting forms whenever required. Open the Google Form → go to the Responses tab → toggle off the tab next to Not accepting responses (add a message if needed).
FAQs for Creating Google Forms on Mobile
Unfortunately, Google does not offer an iOS or Android app for Google forms. You have to use the browser to create and manage Google Forms. However, forms can be accessed from the Google Drive app or webpage.
Basically, Google Forms on mobile is accessible to anyone with a Google account, a web browser, and a mobile phone.
No, Google Forms is not exclusive to Gmail users. You can respond to a form via any email client. However, you’ll need a Google account to create Google Forms.
Within the form, tap the three-dot icon from the top-right corner and select Print. Here, select Save as PDF from the destination dropdown and save.
While some other Google apps offer offline support, Google Forms isn’t one of them. The service requires an internet connection to function properly.
Free users of Google Forms can send up to 20 daily email notifications, while premium users of Gmail and G Suite Legacy can send up to 400. However, Google Workspace and G Suite for work users with premium accounts can send up to 1500 Google Forms emails per day.
Keeping Our Fingers Crossed
Both Google Forms and Microsoft Forms have their respective pros and cons. However, neither application has a dedicated app. Currently, one has to open the Drive app to view the existing forms
It would have been nice if Google Forms had a dedicated app or at least integrated more properly into the Google Drive app. We hope Google does something about it.
Was this helpful?
Last updated on 01 March, 2023
Read Next
 A Guide to Editing Google Forms on Mobile and Desktop
How to Edit Google Forms Once Created On Desktop Step 1: Go to Google Forms and log in with the same Google account you used to create the form.
A Guide to Editing Google Forms on Mobile and Desktop
How to Edit Google Forms Once Created On Desktop Step 1: Go to Google Forms and log in with the same Google account you used to create the form.
 A Complete Guide to Using Sections in Google Forms
If you work a lot with Google Forms, you probably have to create, edit, move, or perform other manipulations on form sections.
A Complete Guide to Using Sections in Google Forms
If you work a lot with Google Forms, you probably have to create, edit, move, or perform other manipulations on form sections.
 How to Create an RSVP Form Using Google Forms
Here's how to create an RSVP invite on Google Forms, share it with your guests, and collect their responses in a few steps.
How to Create an RSVP Form Using Google Forms
Here's how to create an RSVP invite on Google Forms, share it with your guests, and collect their responses in a few steps.
 2 Best Ways to Import Questions Into Google Forms From Google Sheets
Typically, when you create a Google Form, you need to perform several steps.
2 Best Ways to Import Questions Into Google Forms From Google Sheets
Typically, when you create a Google Form, you need to perform several steps.
 How to Convert Google Forms to PDF, Google Docs, or Word
How to Convert Google Forms to PDF Google Forms doesn’t have a native option to convert it into PDF.
How to Convert Google Forms to PDF, Google Docs, or Word
How to Convert Google Forms to PDF Google Forms doesn’t have a native option to convert it into PDF.
 3 Ways to Check Answers in Google Forms
Method 1: View Responses Inside Google Forms One of the easiest ways to view the answers received on your Google Forms is from the Google Forms itself.
3 Ways to Check Answers in Google Forms
Method 1: View Responses Inside Google Forms One of the easiest ways to view the answers received on your Google Forms is from the Google Forms itself.
 3 Ways to Share Google Forms With Others
Method 1: Share a Fillable Google Form via Email and Link This method will help you send your form so that others can fill it out.
3 Ways to Share Google Forms With Others
Method 1: Share a Fillable Google Form via Email and Link This method will help you send your form so that others can fill it out.
 How to Upload Files in Google Forms
Whether it's a small survey or a school assignment, Google Forms is the go-to destination when you have to collect information from multiple people.
How to Upload Files in Google Forms
Whether it's a small survey or a school assignment, Google Forms is the go-to destination when you have to collect information from multiple people.
The article above may contain affiliate links which help support Guiding Tech. The content remains unbiased and authentic and will never affect our editorial integrity.