It’s true that the attention span of the new-age millennial is getting shorter by the day. All thanks to smartphones, social media, games, and other gadgets. So, it is crucial that when you’re collecting information from the masses, the form is as concise as possible. The sad truth about most online forms is that they look like they belong to the Stone Age. Thankfully, Google Forms saves us from the prospect of filling long and dull forms with its conditional logic feature.

This simple feature liberates you from complex processes. At the same time, it becomes convenient for respondents to answer your surveys since the questions (or form elements) change based on a user’s input.
To put it simply, it’s basically an ‘If or Else’ situation. Throw in a couple of interactive elements, and the humble form will end up looking great. On top of that, collection and analysis of data is a walk in the park.
Quite obviously, conditional logic in Google Forms works only for questions with dropdowns and multiple choice options. Now that we have established where this feature can be applied, let’s see how to add conditional logic to Google forms.
Adding Logic to the Mix
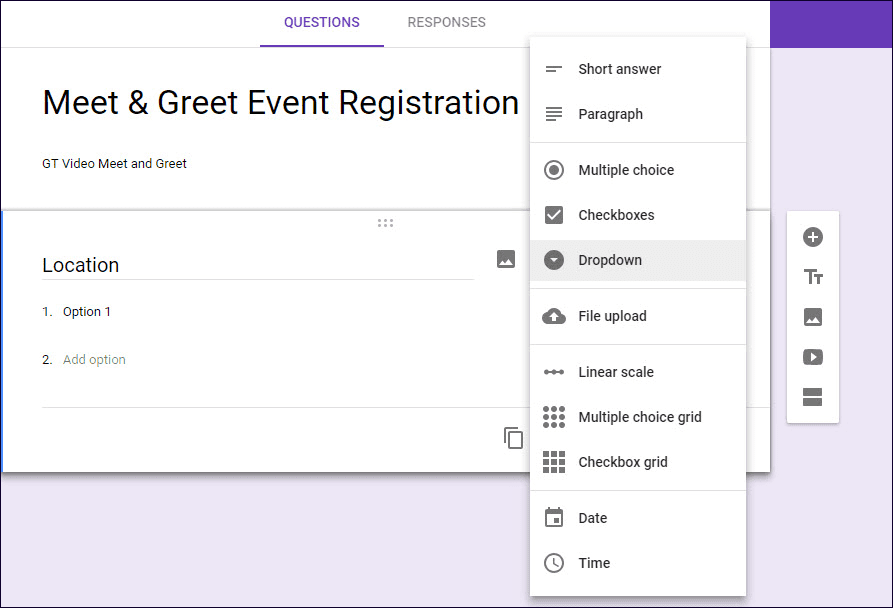
Step 1: To get started, enter the name, description and the first question. For the answer, choose either dropdown or multiple choice — best sums up your survey type. Meanwhile add your dropdown options.
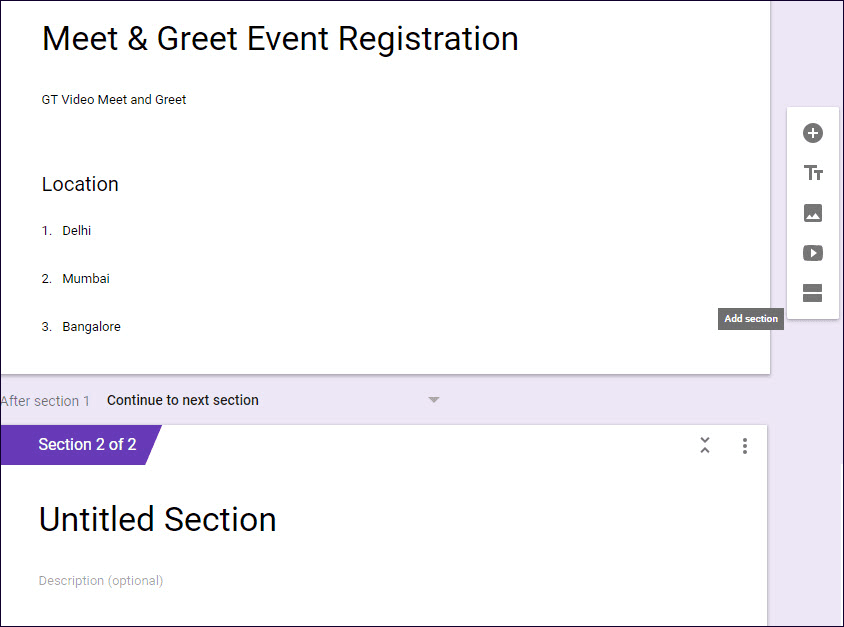
Step 2: Next, create as many sections as your survey demands. To do so, click on the Add section icon and a new one will be added immediately.
Step 3: Once done, get ready to link the dropdown options to their respective sections.
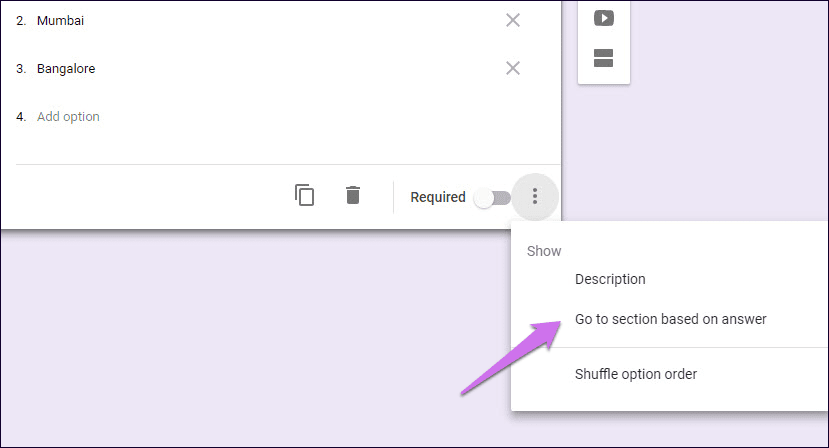
Go back to the first section and tap on the three-dot menu, and select the ‘Go to section based on answer’ option, which will place ‘Continue to next section’ cards against each option of your dropdown (or multiple choice) menu.
Step 4: Now, all you have to do is link the answers to the right section. What’s cool about this process is that a section can also have a condition based sub-section. Continue creating, until you have exhausted all the ‘If-Else’ possibilities of your survey.

To end a survey based on a particular answer, tap on the three-dot menu (yes, again) and select Submit form.
Pro TipCreating a long and complicated form with conditions can sometimes get quite confusing. Thus, it’s recommended that you pen the conditions on a flowchart before you set out to create the form.
Step 5: The creation process is only half the job. The other half is compiling the answers so that they are easier to analyze. For quick form results, the Responses tab is sufficient to see the results summary. However, for big surveys, an ideal form of action would be to link it to a Google Sheet.

To do so, go to the Responses tab of your form and click on the green Add Sheets icon. The moment you click on it, Forms will prompt you to create a new sheet.
To see the response of your survey respondents, open the spreadsheet and select Form > Show summary of responses.
Make the Form Presentable
Would you like to fill out a form that has nothing except soulless and boring text? Most likely, your answer would be no. And that’s precisely why a form should be presented well. Presentation wise, the built-in settings for themes and fonts do their bit in enhancing the overall looks by many folds.
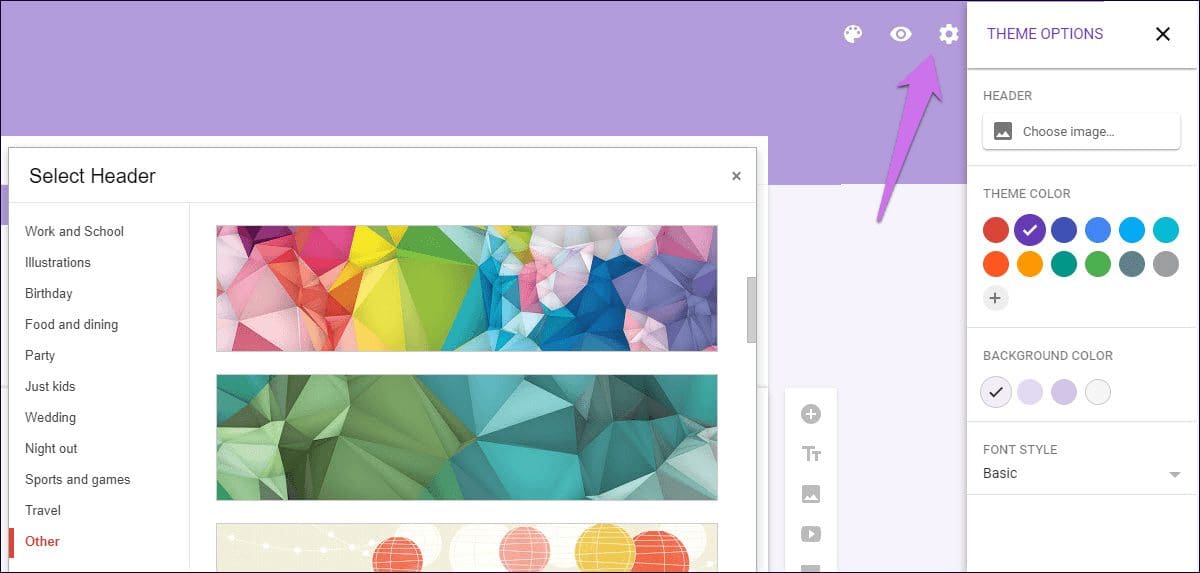
Just click on the Palette icon at the top, and choose from the available themes. Or you can also pick a photo from your own collection. The best part is that Google automatically scans the image and gives you recommendations on the background color. I’d also recommend changing the default background color to a brighter hue, so as to catch the attention of the user.
Google automatically scans the image and gives you recommendations about the color palette
And if you are in doubt, the Preview option is always there to check how your form is looks.
Google Forms Tips and Tricks
1. Response Validation for Checkboxes
Google Forms also has an option to verify the responses of checkboxes. Once you’ve added the boxes, click on the three-dot menu and select Response Validation.
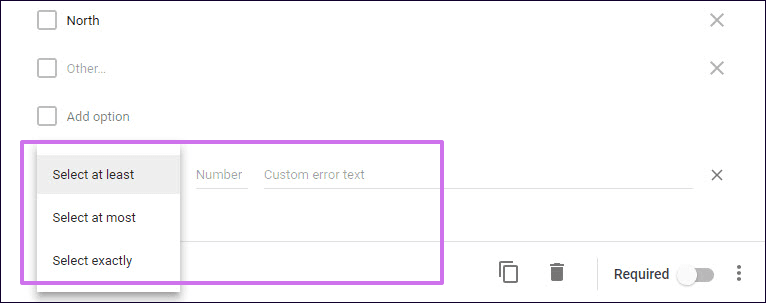
This will bring you a dropdown with the choices for the maximum and minimum inputs. Choose your course of action along with a custom error message, and you’ll be sorted.
2. Let Users See the Progress
Respondents can also monitor their progress when filling out a form.
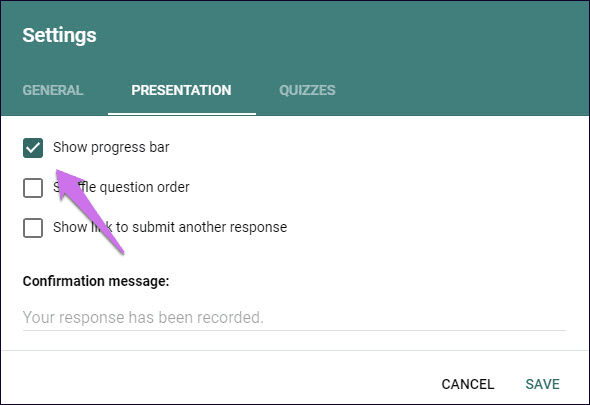
To enable this option click on the Settings icon, go to Presentation and select the option for Show progress bar.
3. Transform a Survey to a Quiz
Transforming a form survey is as easy as switching on a light. All you have to do is head over to Settings > Quizzes and toggle the switch for ‘Make this a quiz button’ on.

And while you are at it, don’t forget to check the option for Shuffle Question Order.
Take Forms to the Next Level
With the added advantage of conditional logic, Google Forms can be used to streamline tasks and not just for filling out random surveys. Now that you know the options for customizing it to your liking, your form won’t be yet another faceless one floating around.
Was this helpful?
Last updated on 03 February, 2022
Read Next
 How to Add Skype Meeting to Outlook Meeting Invite (and Cool Tricks)
There's no denying the fact that Microsoft Outlook and Outlook Web are solid email managers.
How to Add Skype Meeting to Outlook Meeting Invite (and Cool Tricks)
There's no denying the fact that Microsoft Outlook and Outlook Web are solid email managers.
 How to Add and Edit Images in Google Forms
How to Add Images in Google Forms on Desktop Method 1: Add an Image Before or After the Question Sometimes, you want to add an image describing what precedes or
How to Add and Edit Images in Google Forms
How to Add Images in Google Forms on Desktop Method 1: Add an Image Before or After the Question Sometimes, you want to add an image describing what precedes or
 How to Add Timer to a Quiz in Google Forms
Google Forms is a versatile tool for creating surveys and quizzes.
How to Add Timer to a Quiz in Google Forms
Google Forms is a versatile tool for creating surveys and quizzes.
 2 Best Ways to Import Questions Into Google Forms From Google Sheets
Typically, when you create a Google Form, you need to perform several steps.
2 Best Ways to Import Questions Into Google Forms From Google Sheets
Typically, when you create a Google Form, you need to perform several steps.
 How to Convert Google Forms to PDF, Google Docs, or Word
How to Convert Google Forms to PDF Google Forms doesn’t have a native option to convert it into PDF.
How to Convert Google Forms to PDF, Google Docs, or Word
How to Convert Google Forms to PDF Google Forms doesn’t have a native option to convert it into PDF.
 A Guide to Editing Google Forms on Mobile and Desktop
How to Edit Google Forms Once Created On Desktop Step 1: Go to Google Forms and log in with the same Google account you used to create the form.
A Guide to Editing Google Forms on Mobile and Desktop
How to Edit Google Forms Once Created On Desktop Step 1: Go to Google Forms and log in with the same Google account you used to create the form.
 A Complete Guide to Using Sections in Google Forms
If you work a lot with Google Forms, you probably have to create, edit, move, or perform other manipulations on form sections.
A Complete Guide to Using Sections in Google Forms
If you work a lot with Google Forms, you probably have to create, edit, move, or perform other manipulations on form sections.
 3 Ways to Share Google Forms With Others
Method 1: Share a Fillable Google Form via Email and Link This method will help you send your form so that others can fill it out.
3 Ways to Share Google Forms With Others
Method 1: Share a Fillable Google Form via Email and Link This method will help you send your form so that others can fill it out.
The article above may contain affiliate links which help support Guiding Tech. The content remains unbiased and authentic and will never affect our editorial integrity.
