Note: We will use Google Chrome and Android phone to demonstrate the steps in this guide. However, you can follow the same steps even if you use another web browser or an iOS device.
How to Update Your Facebook Profile Picture Without Posting
On Desktop
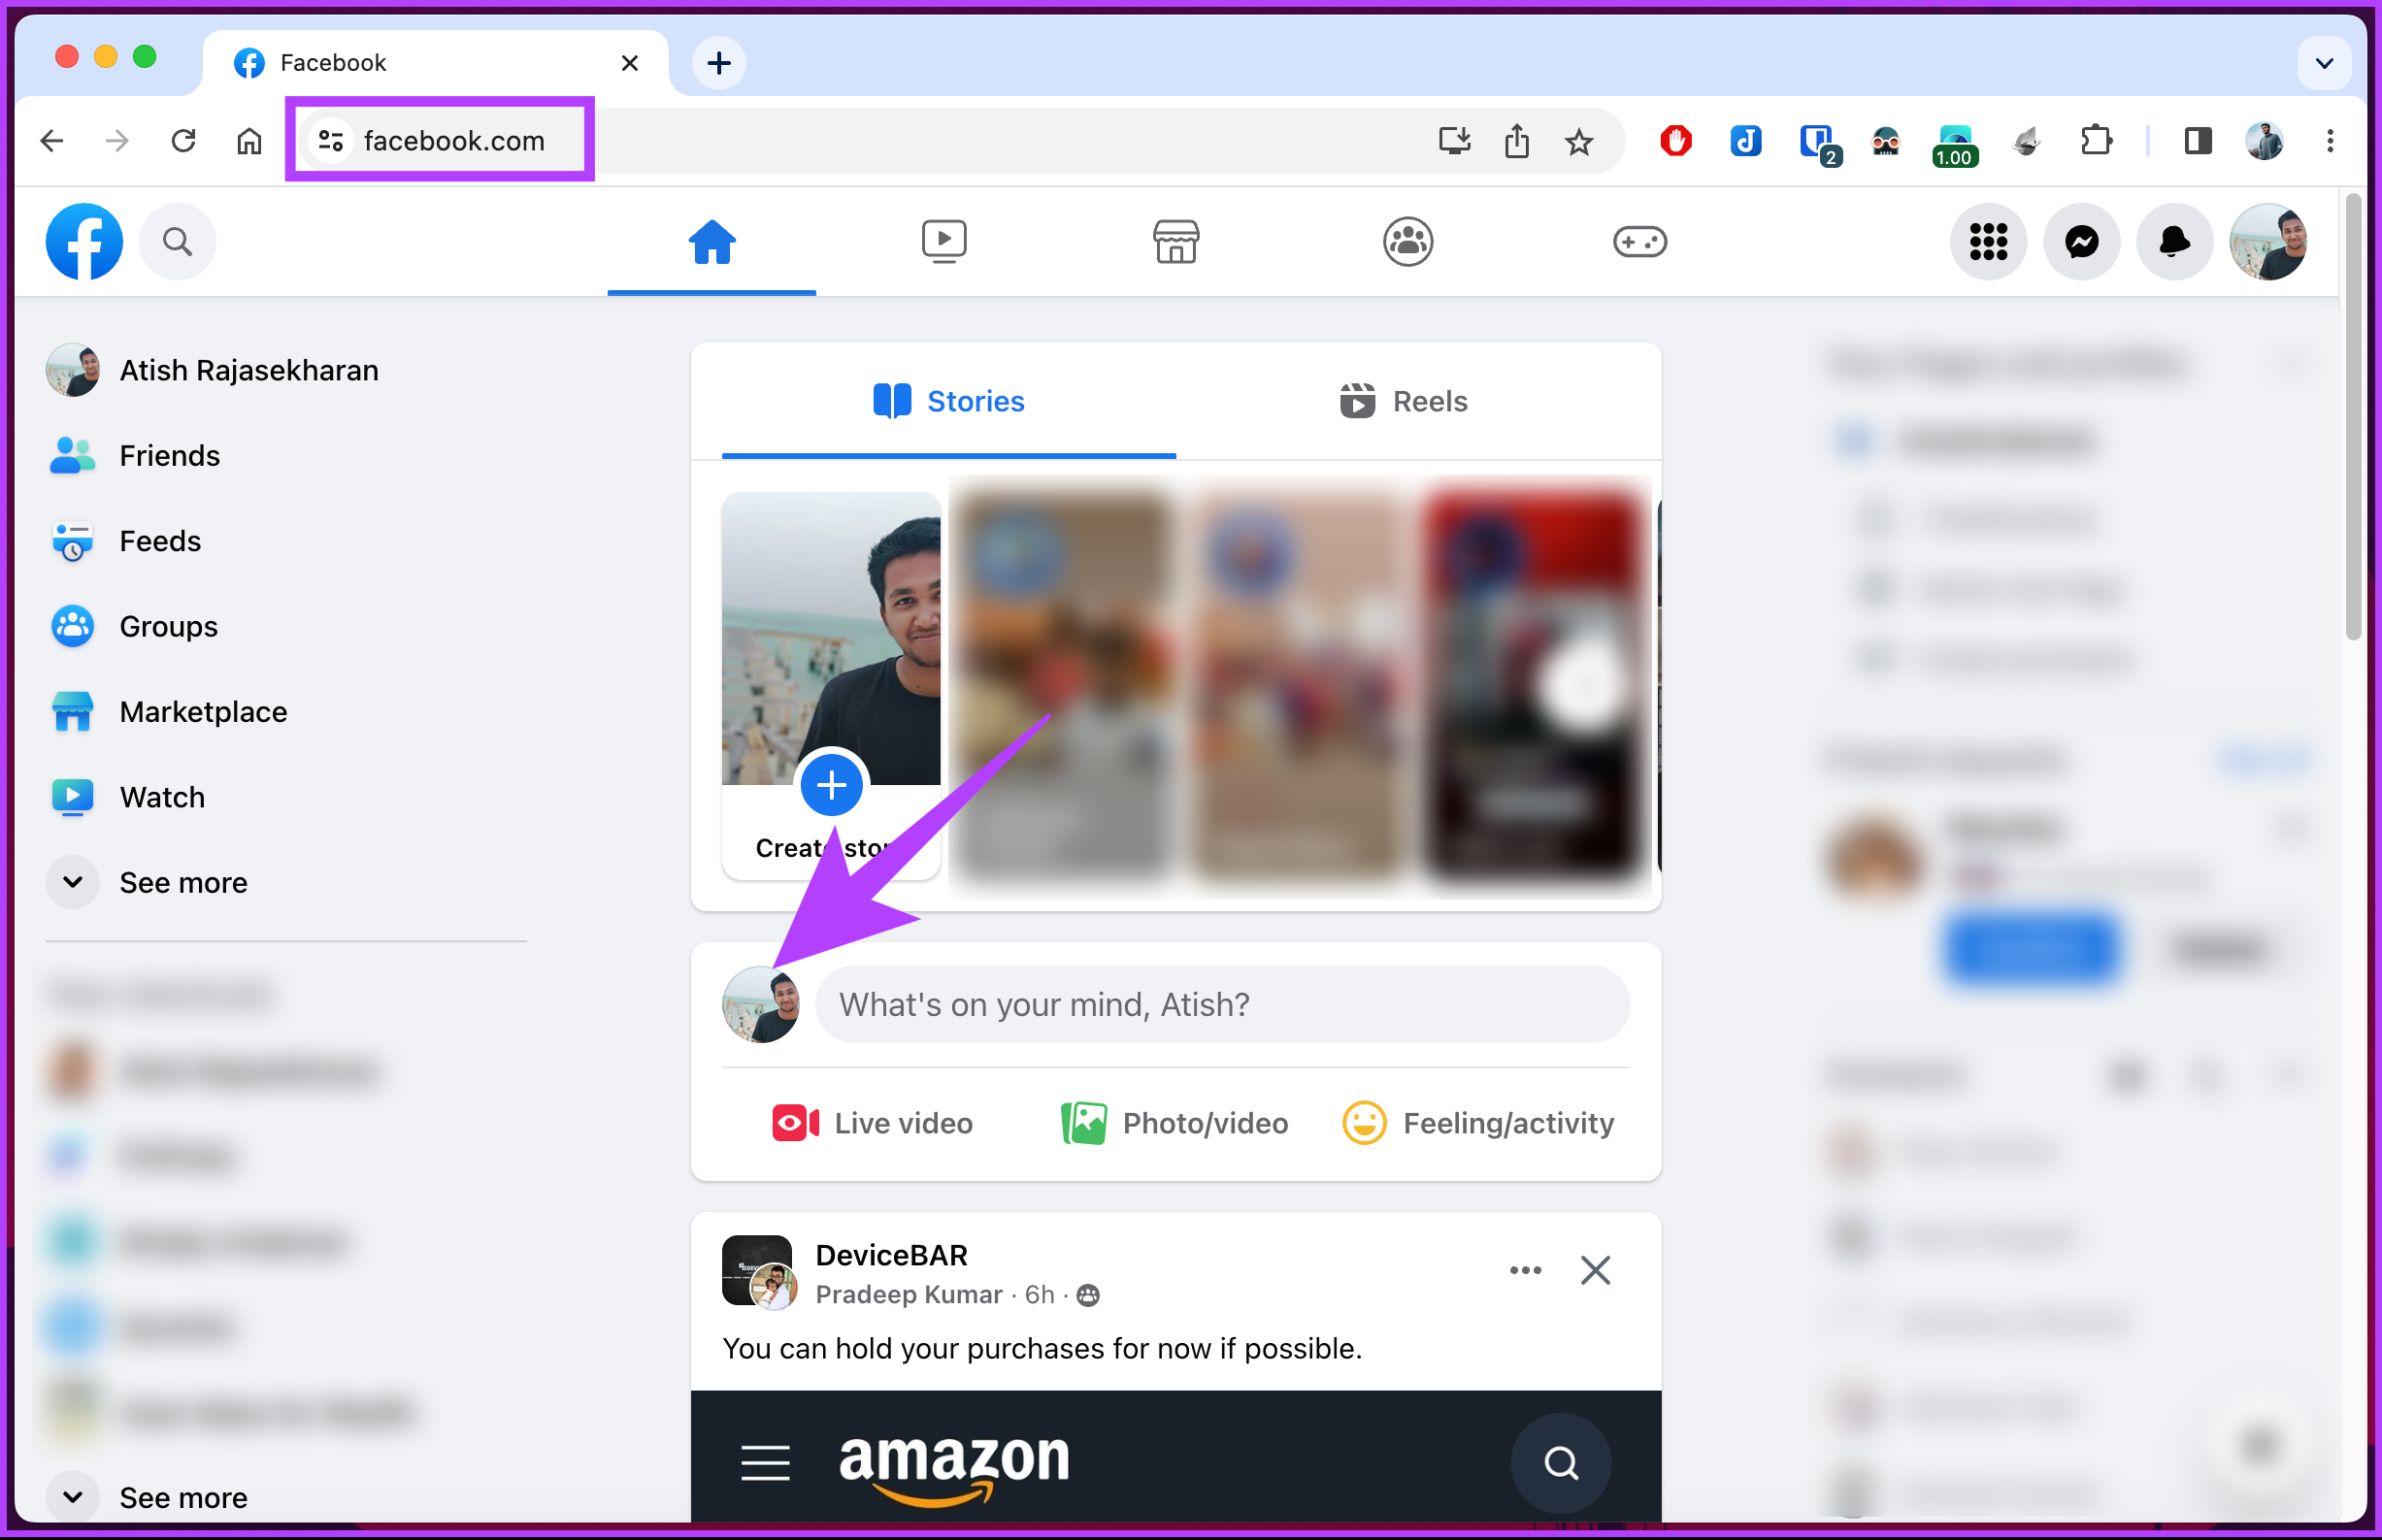
Step 1: Go to Facebook from your preferred browser and log into your account.
Step 2: Now, click on your profile icon from where you post.
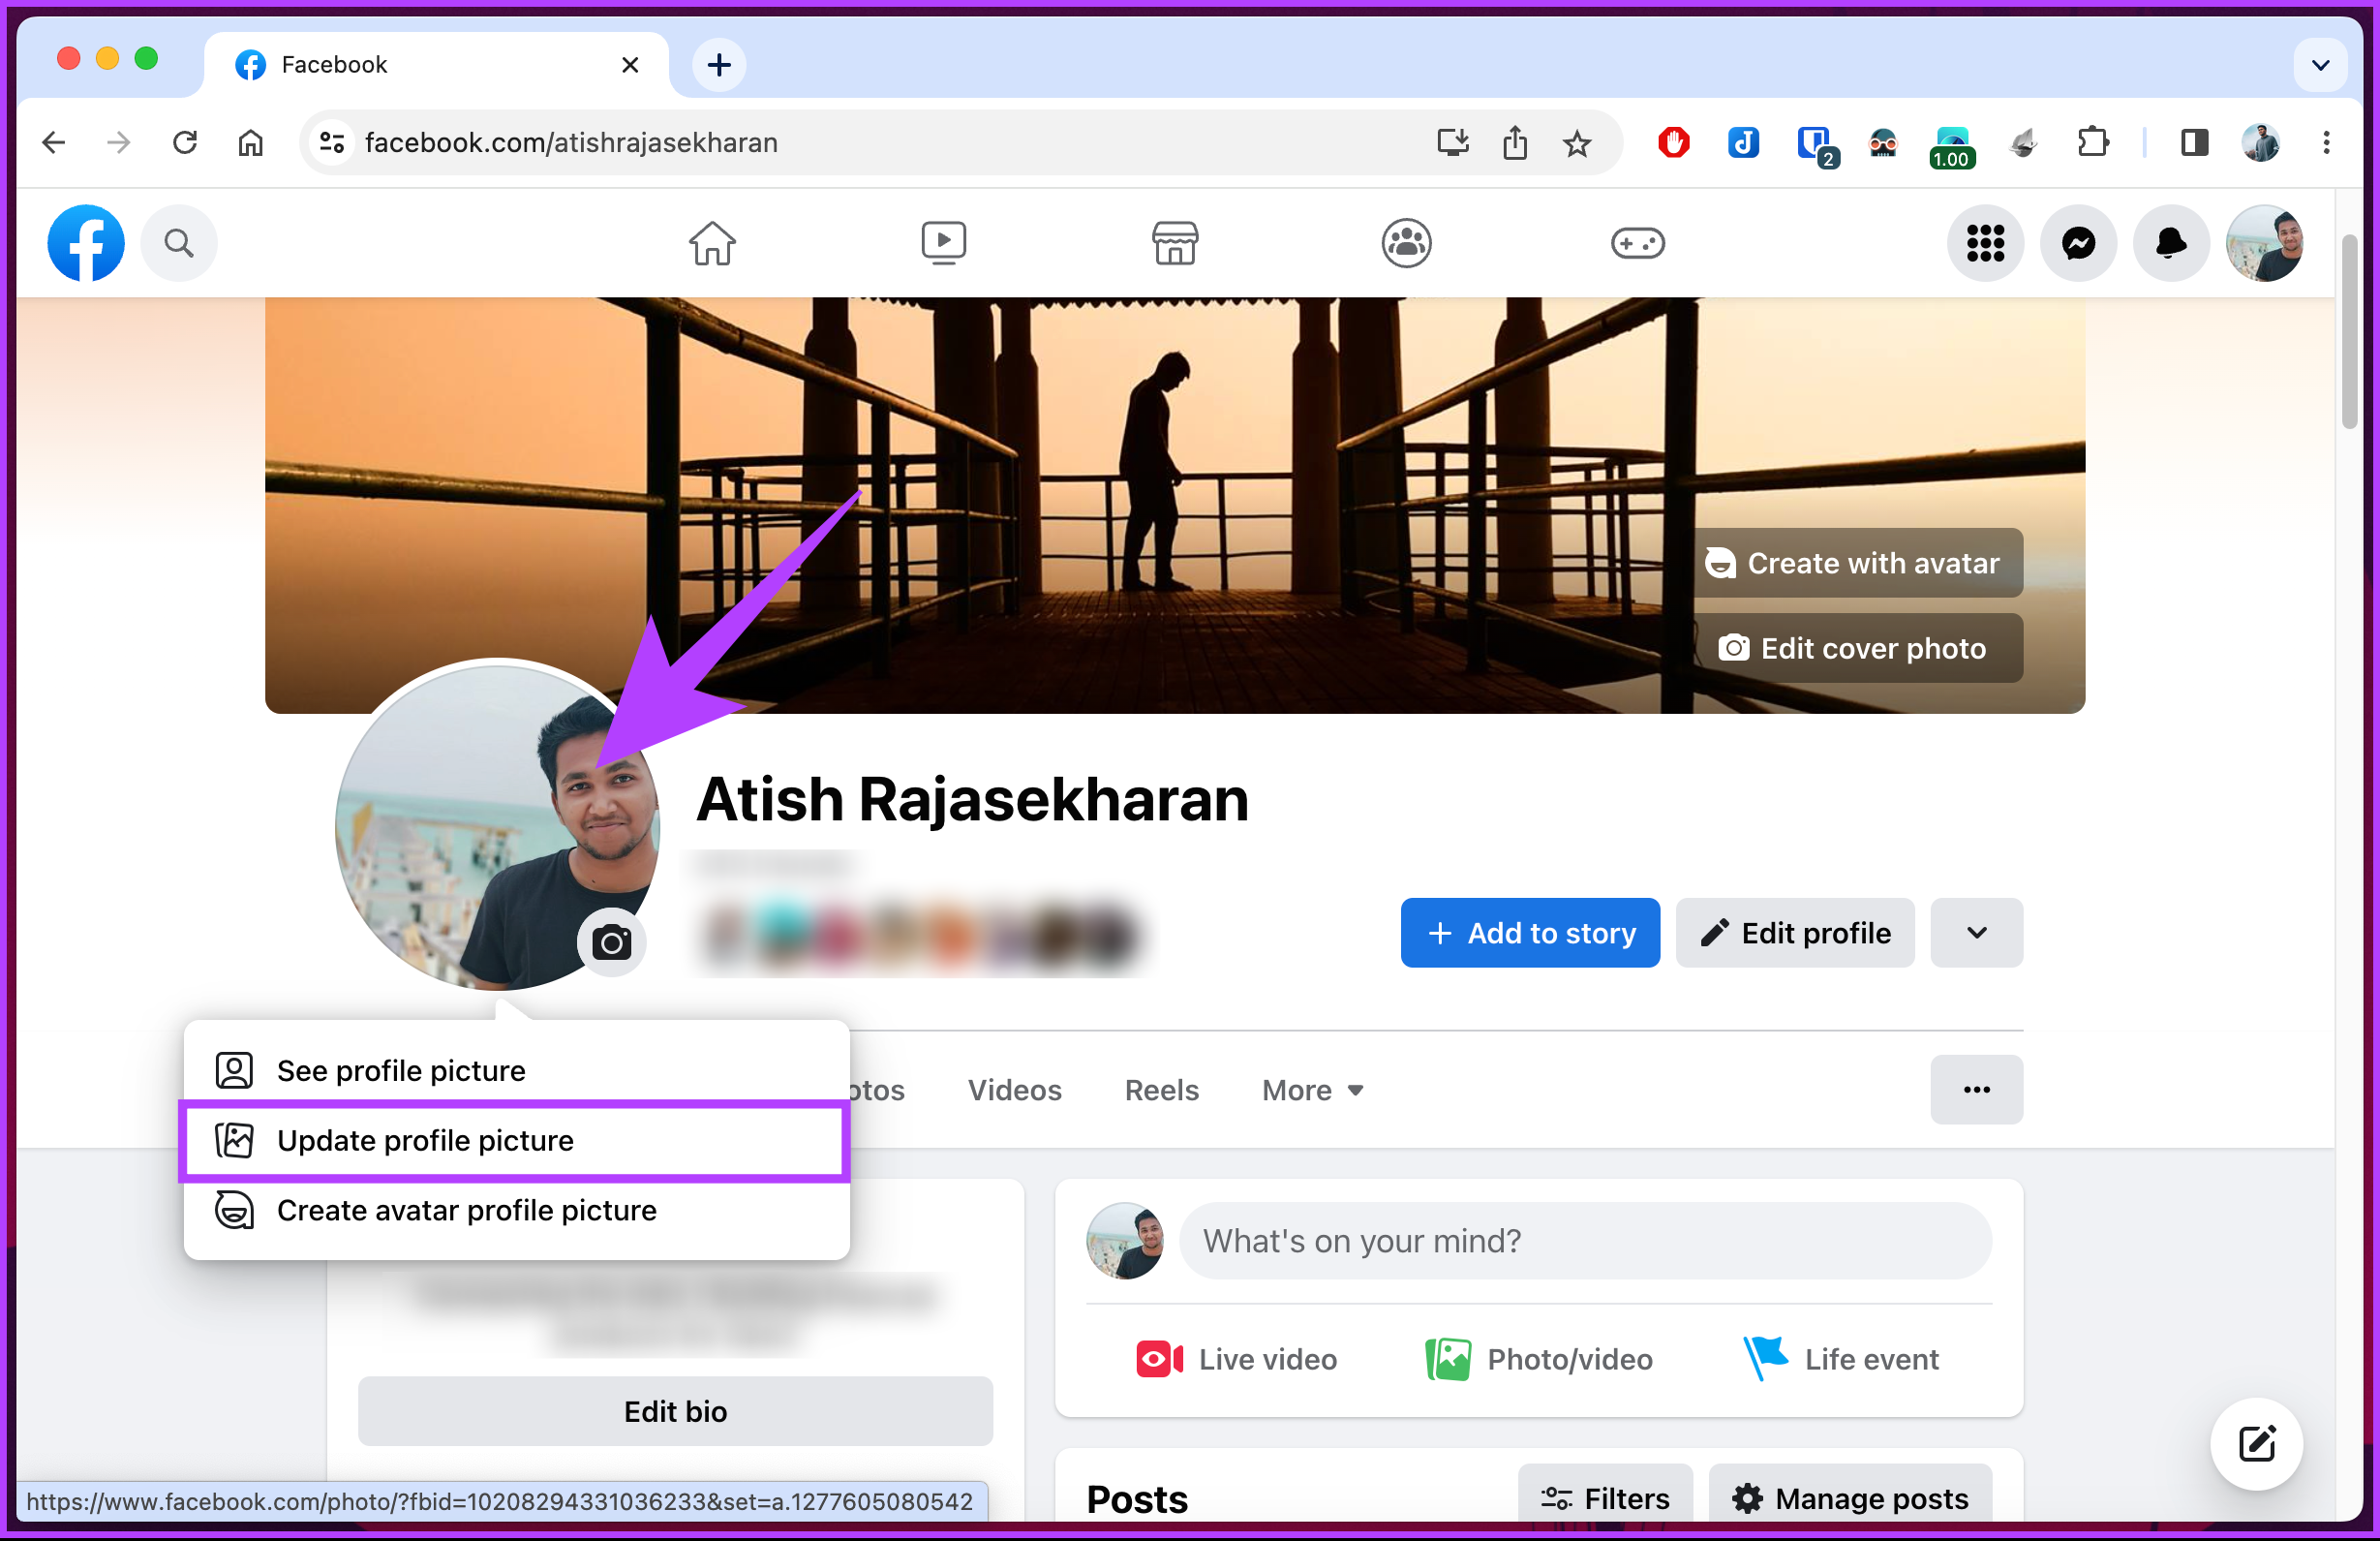
Step 3: Click on your profile picture and choose Update profile picture.
Step 4: Choose Upload photo.

Step 5: Choose the picture you want to upload from the File Explorer and click Open.
Step 6: Next, make the necessary adjustments to the photo and click Save.

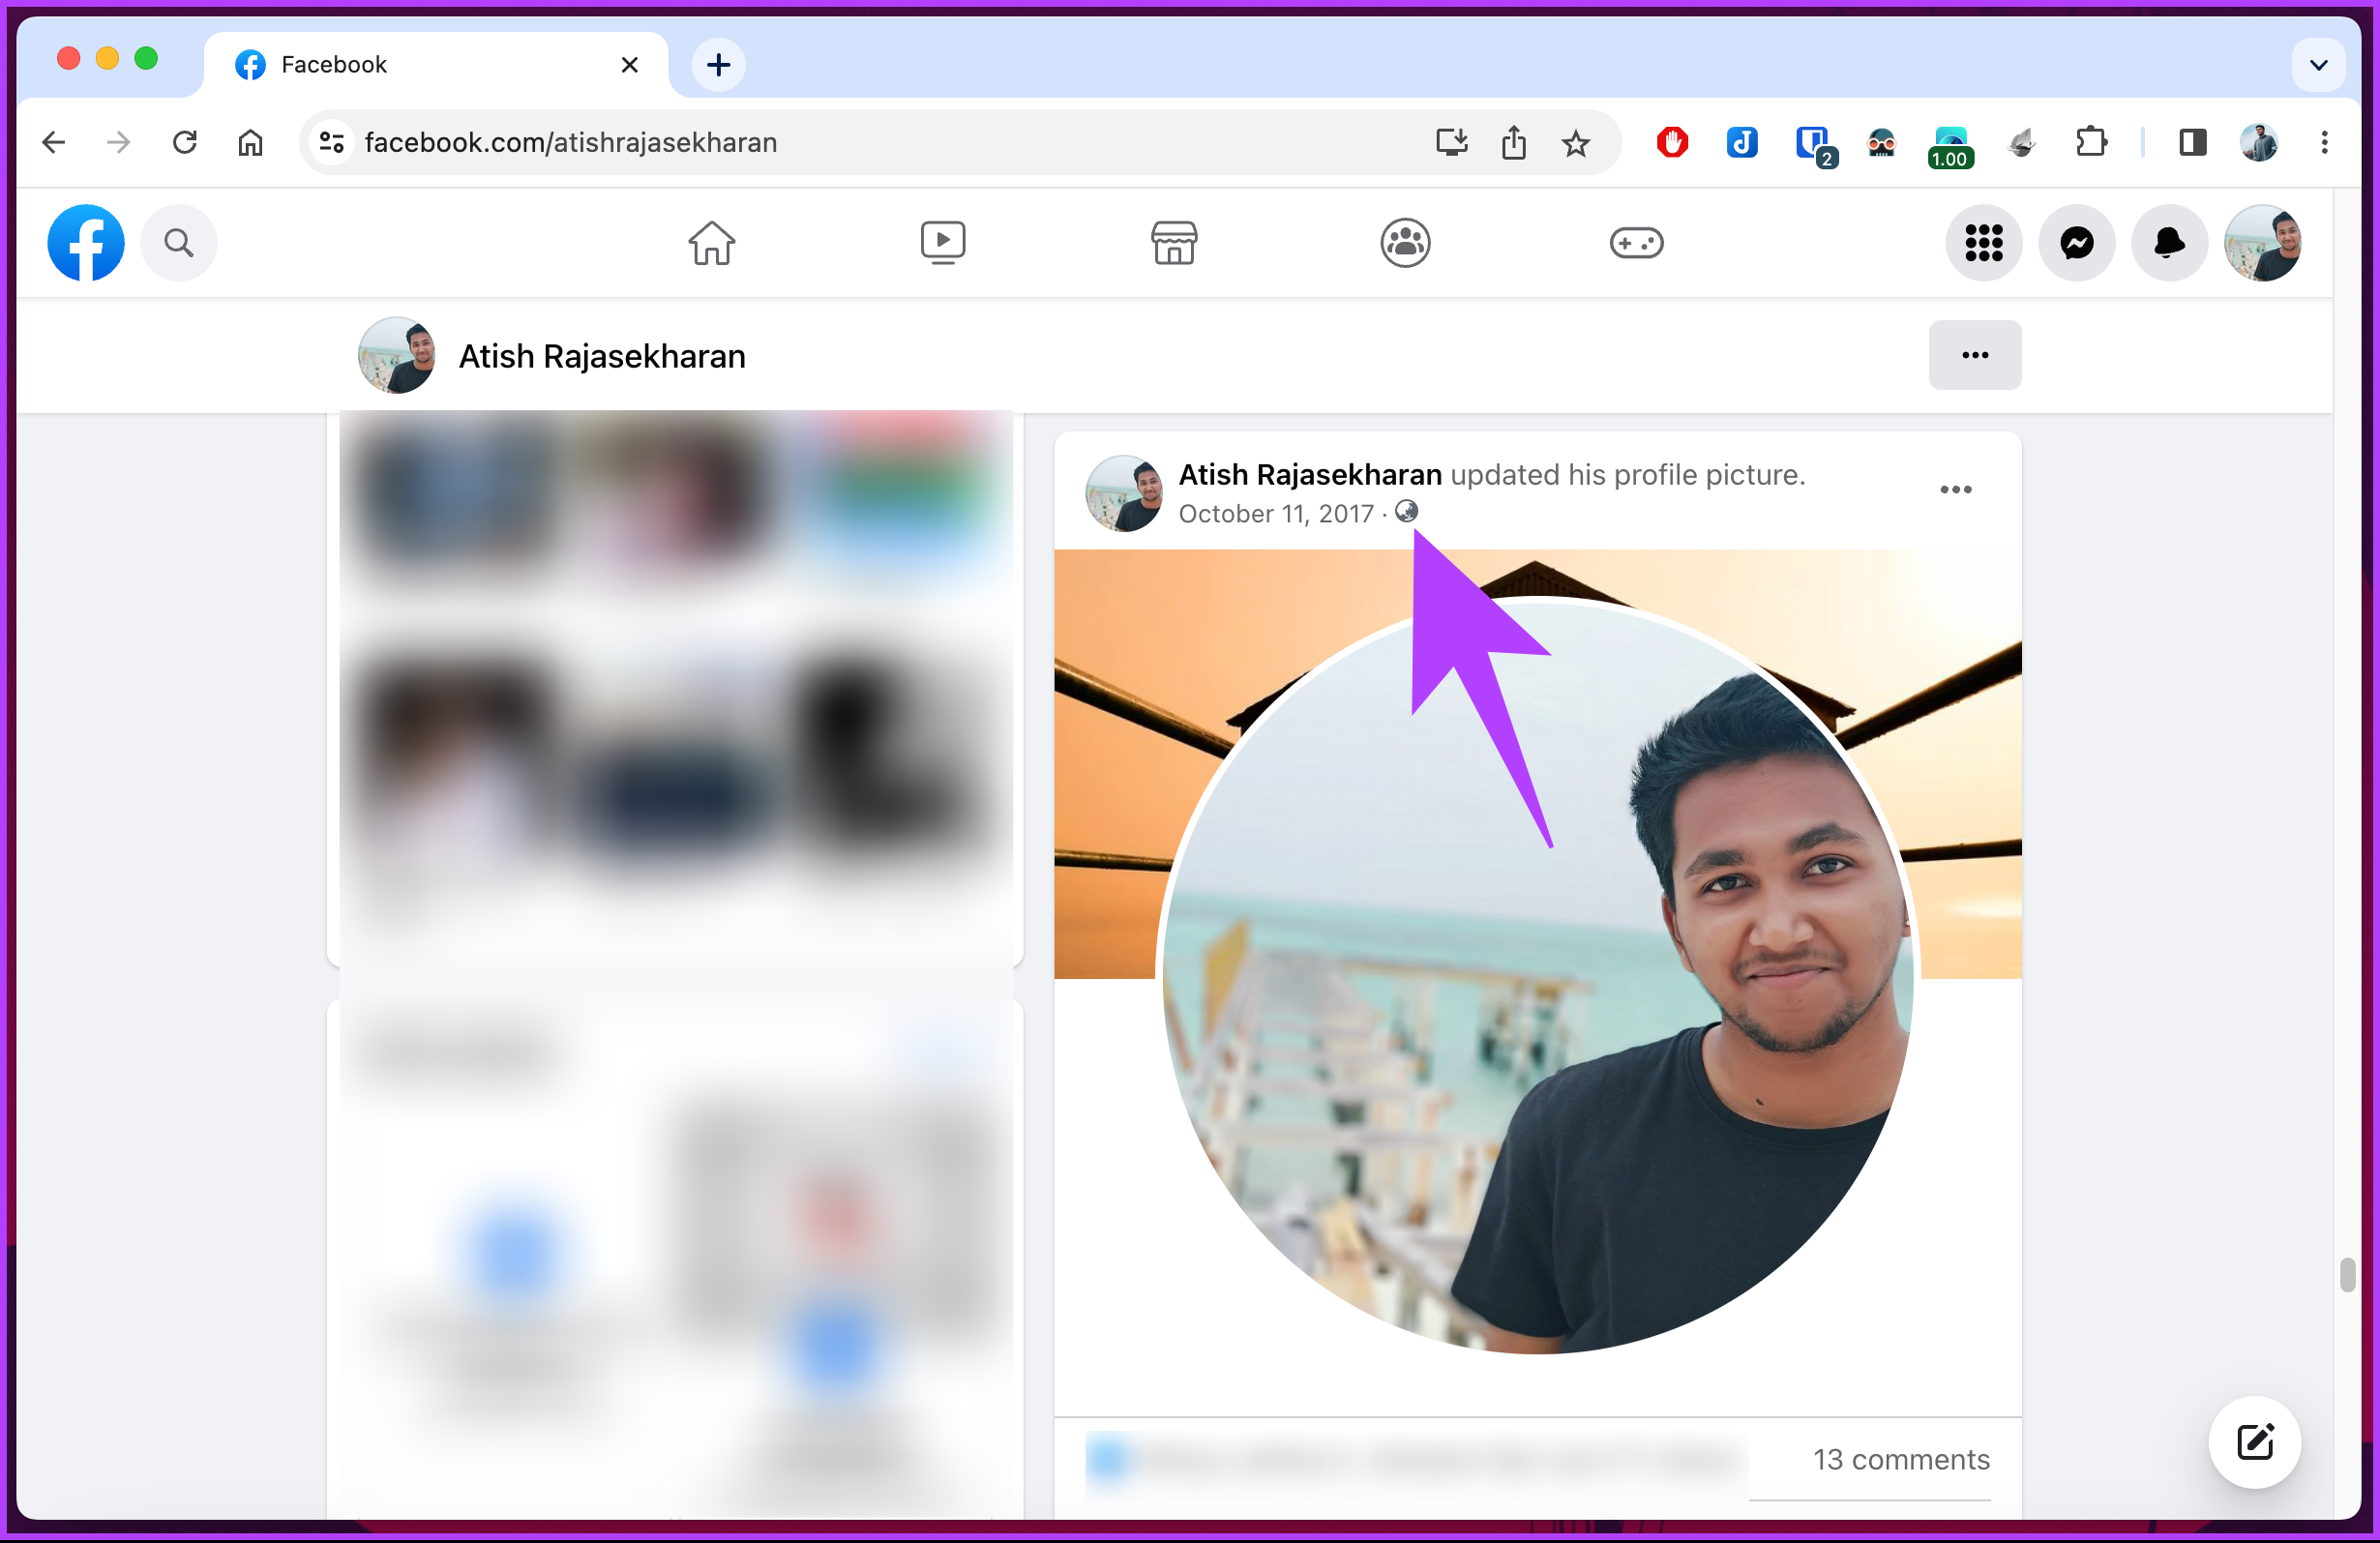
Now, go to your profile and look for the profile picture you posted in your timeline.
Step 7: Click the globe icon (or friends icon) next to the date or time you posted the image.
Step 8: Choose the Only me option and click Save.

Your profile picture has been hidden. It’s invisible to everyone else on Facebook, though you’ll still see it on your timeline.
Also Read: How to lock Facebook profile on mobile and web
On Mobile
Step 1: Launch the Facebook app and tap on the profile icon at the top left of the screen.
Step 2: Again, tap on the profile picture > choose Select profile picture.

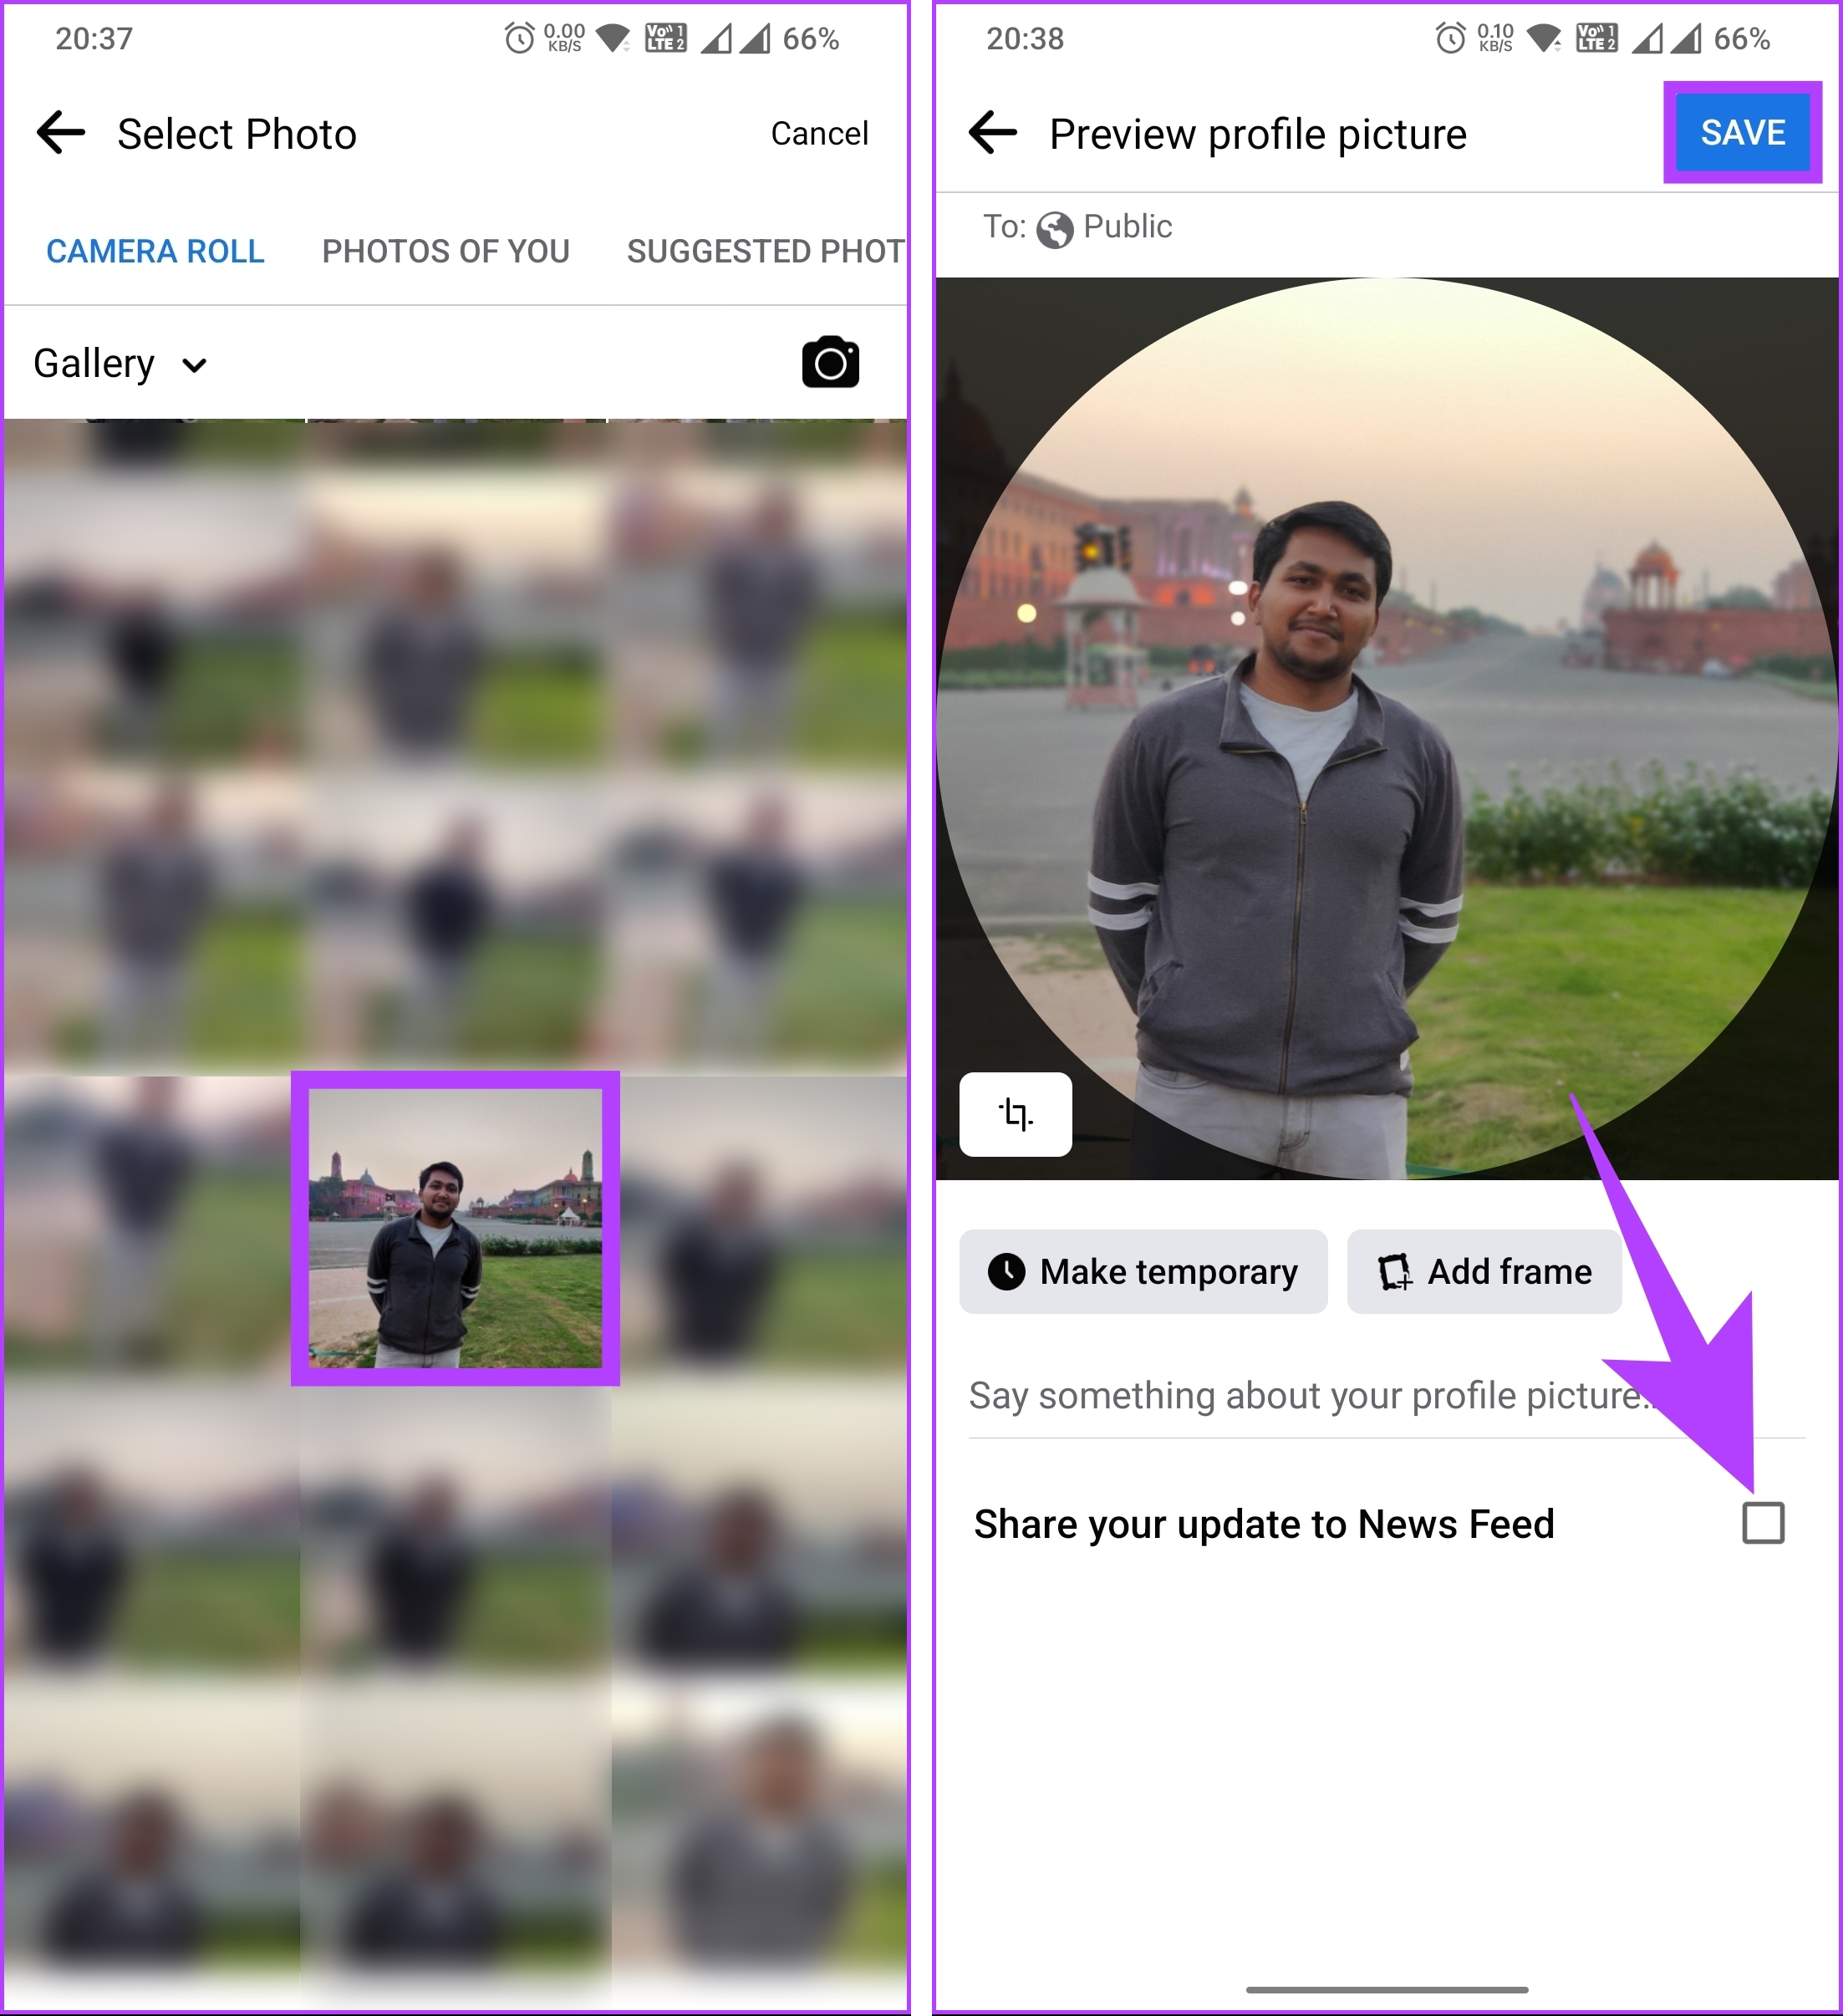
You will be taken to the Select Photo screen.
Step 3: Scroll through your gallery and select the photo you want to use as a profile picture.
Step 4: Finally, uncheck the box for Share your update to News Feed, and tap Save.
There you go. You have updated your Facebook profile picture without posting it to the Newsfeed.
Also Read: How to turn off your birthday on Facebook
Change Your Profile Picture on Facebook and Hide From Your Timeline
Note: Hiding your profile picture means it won’t appear on your timeline. However, it will still be visible in other places, such as your profile, news feed, and when someone searches for you.
On Desktop
Step 1: Go to Facebook from your preferred browser and log into your account.
Step 2: Now, click on your profile icon from where you post.
Step 3: From your profile, click on your profile picture > choose Update profile picture.
Step 4: Choose Upload photo.
Step 5: Choose the picture you want to upload from File Explorer or Finder and click Open.
Once you see the Update profile picture pop-up, continue with the steps below.
Step 6: Make the necessary adjustments to the image and click Save.
Now, go to your profile and look for the profile picture you posted in your timeline.
Step 7: Click the three-dot icon at the top-right corner of the post and select Hide from profile.
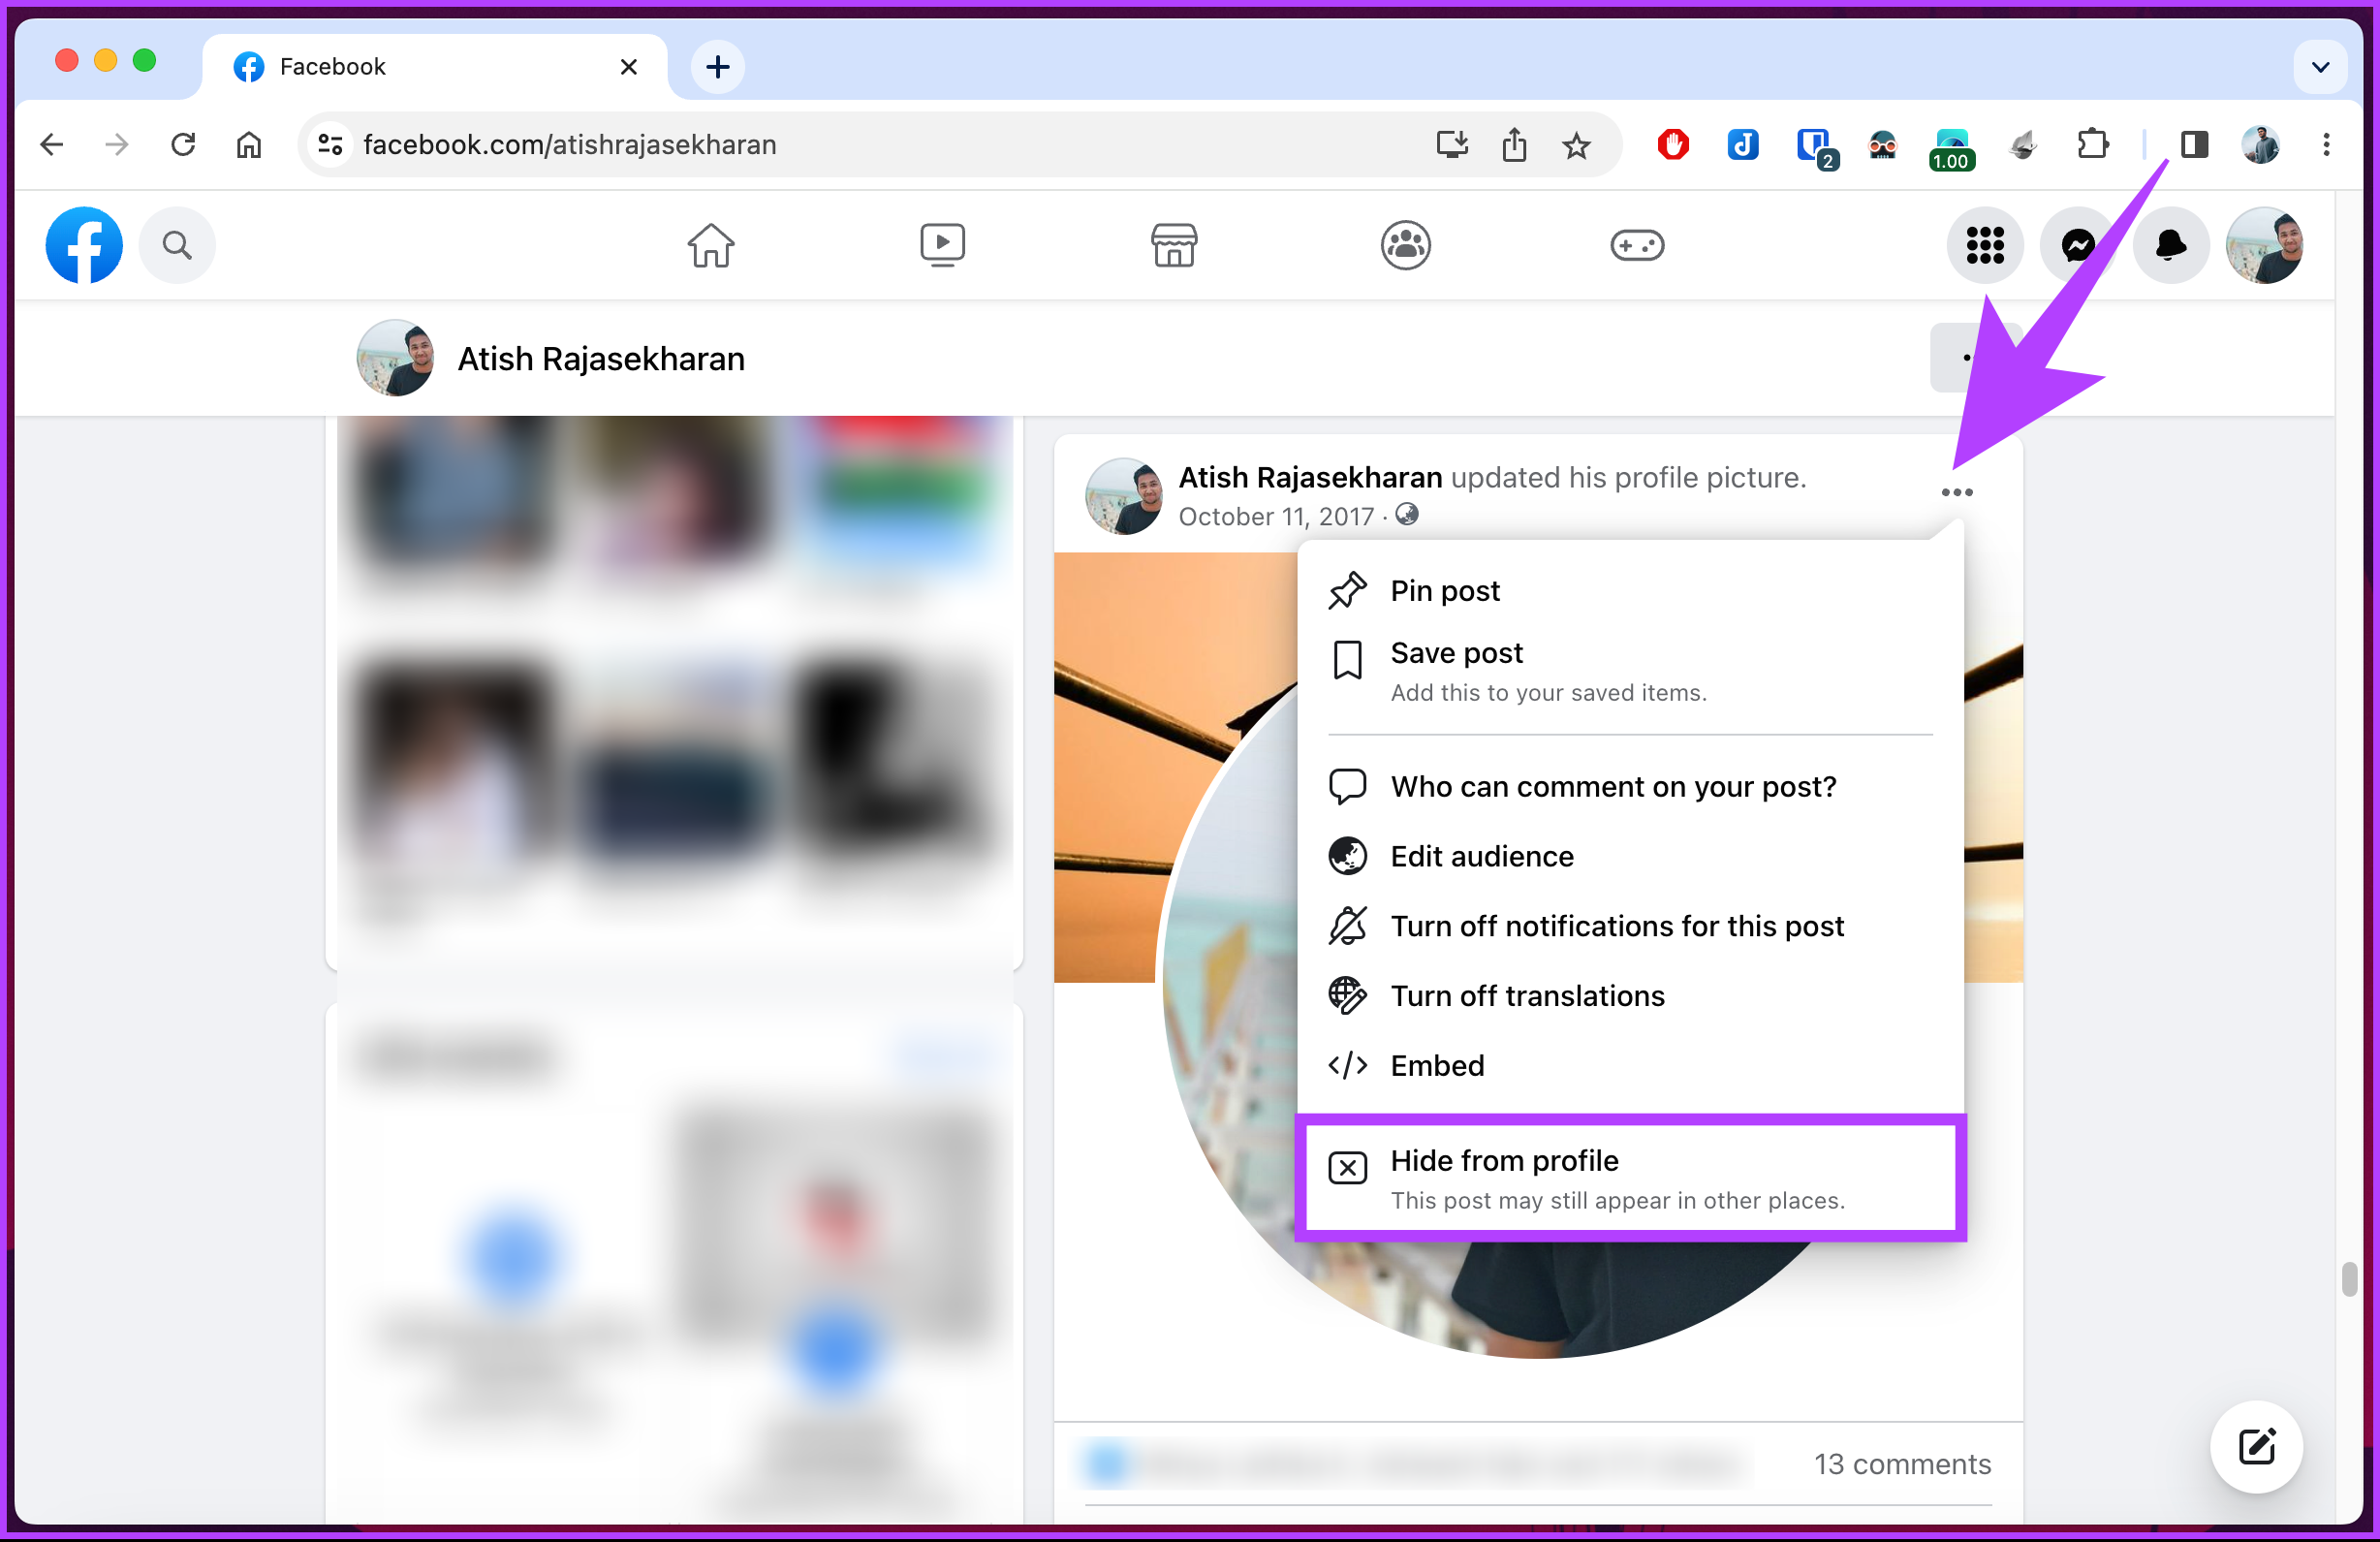
There you go. You have successfully hidden your profile picture in your timeline.
On Mobile
Step 1: Launch the Facebook app and tap on the profile icon at the top left corner of the screen.
Step 2: On the profile page, tap on the profile picture, and from the bottom sheet, choose Select profile picture.
You will be taken to the Select Photo screen.
Step 3: Scroll through your gallery and select the photo you want to make your profile picture.
Step 4: Under Preview profile picture, add a description, adjust the image, and tap Save.

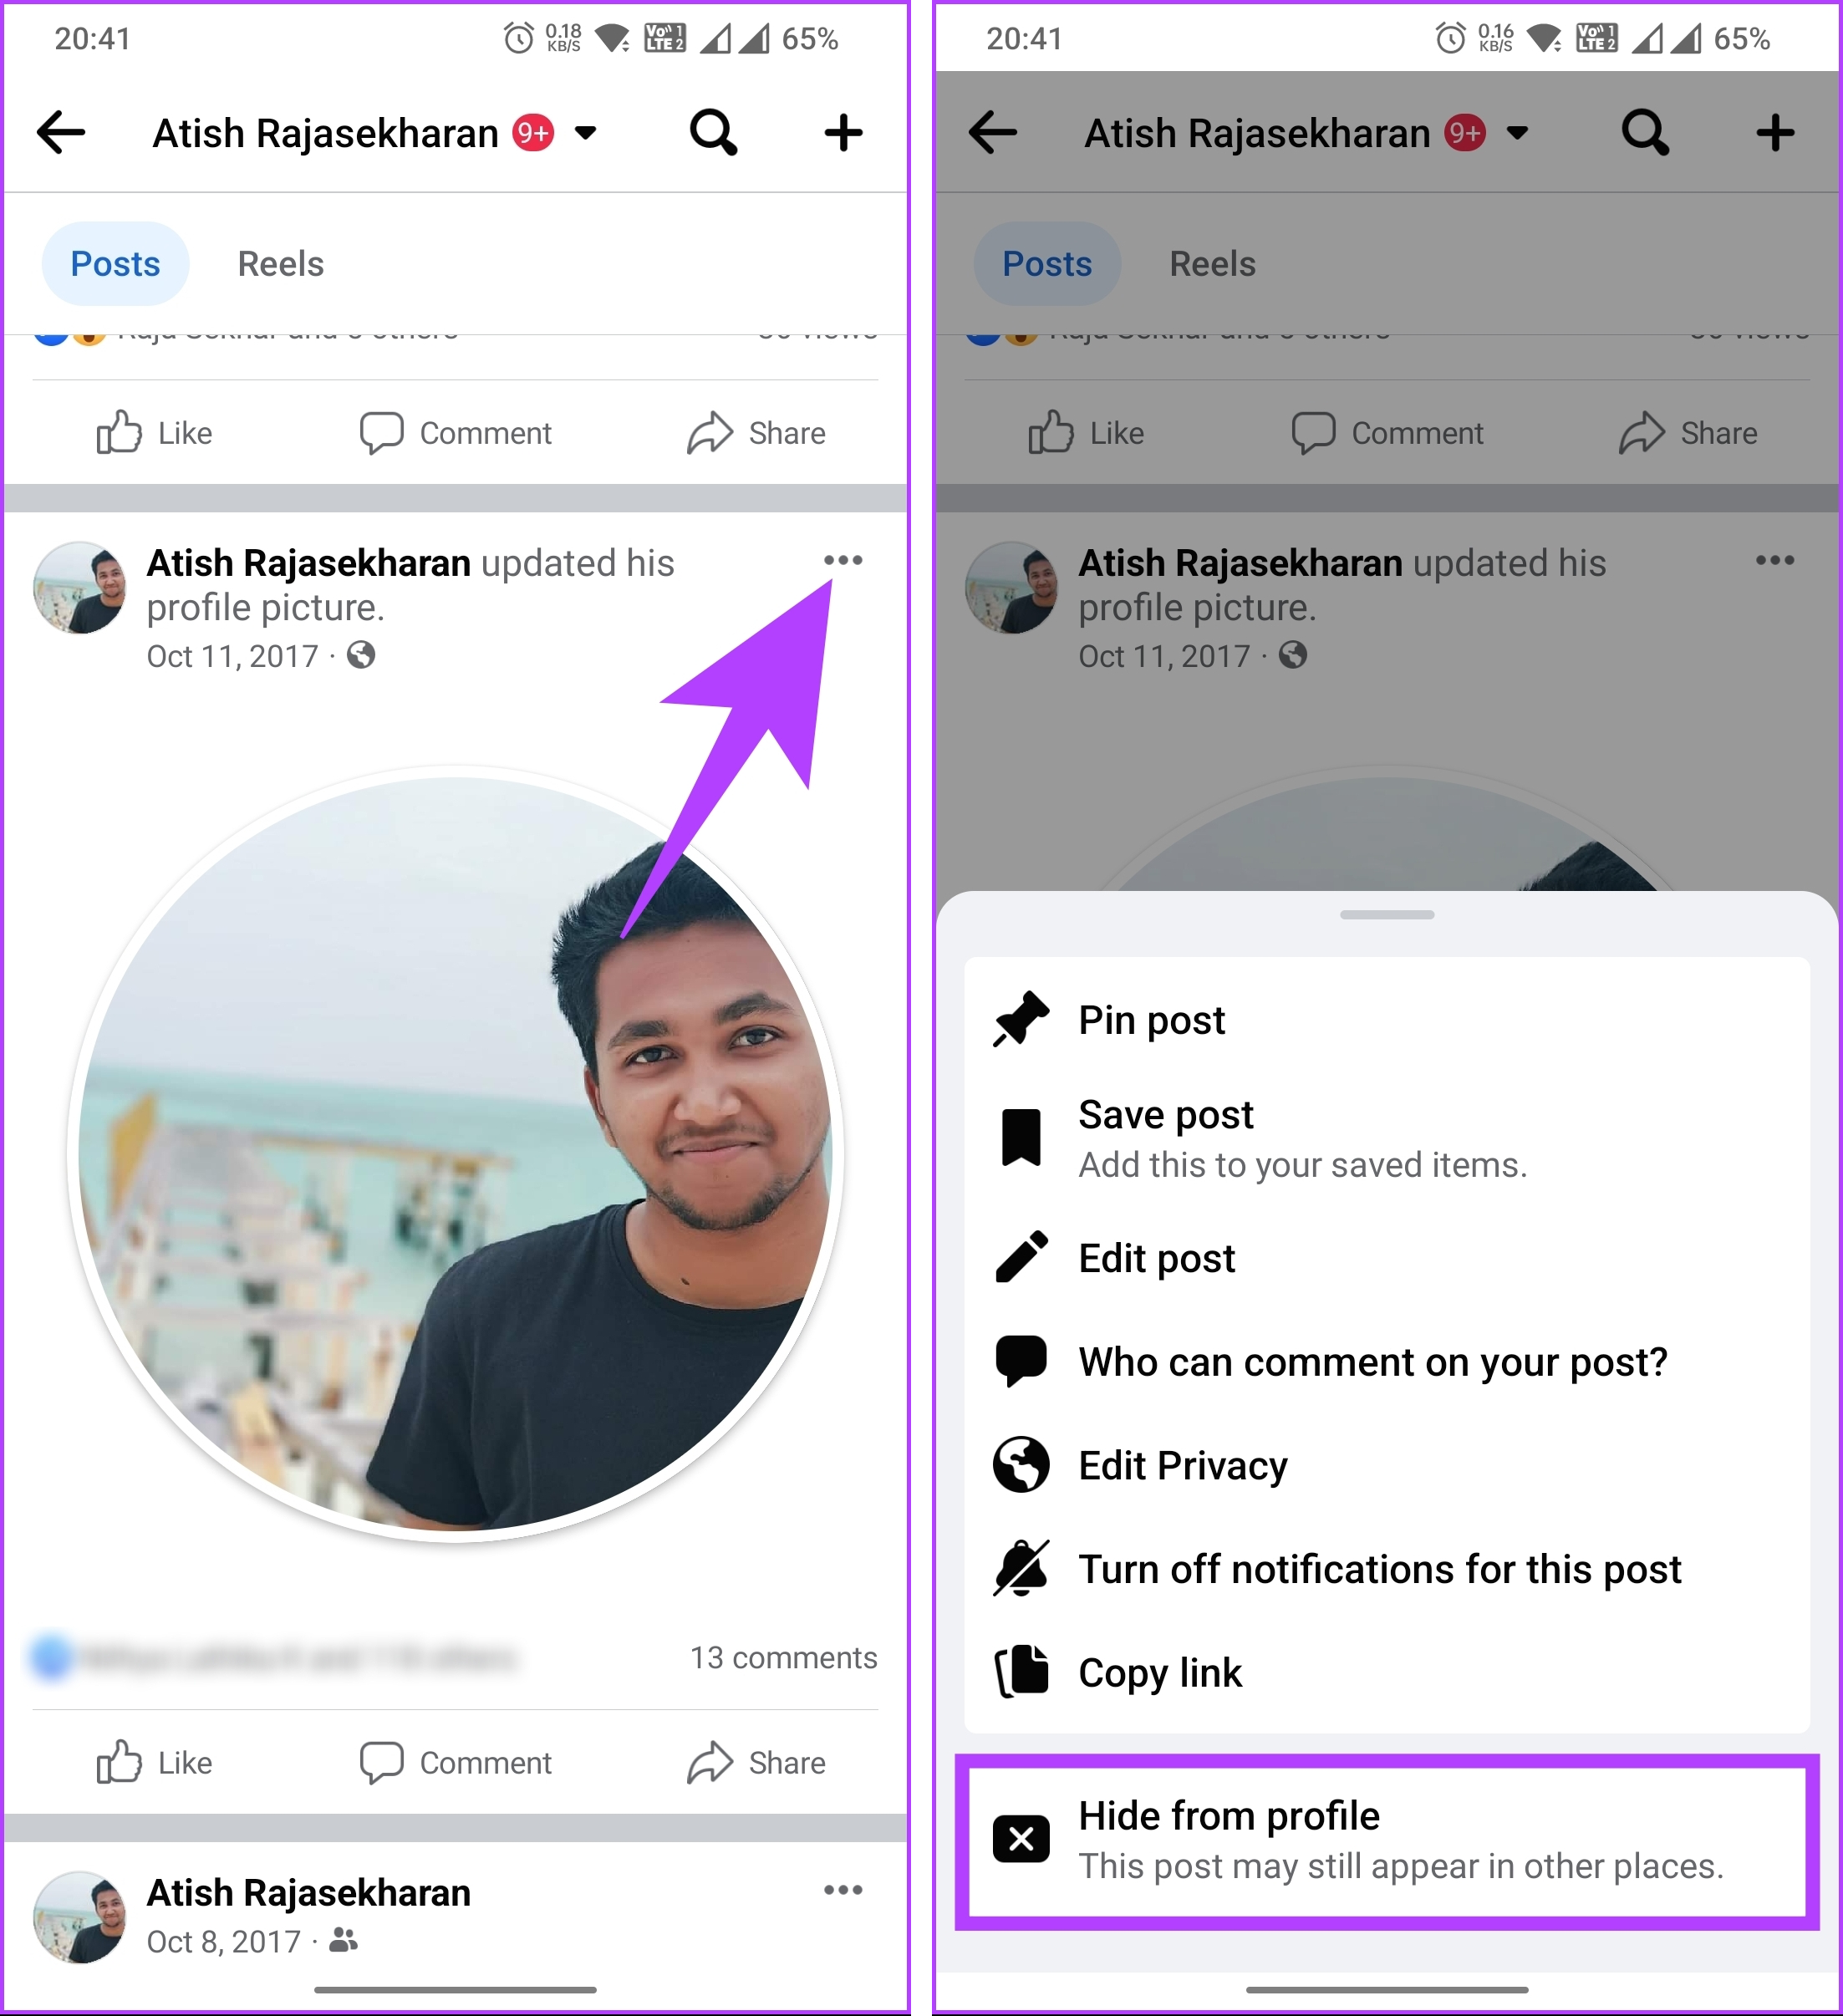
Now, go to your profile and look for the profile picture you posted on your timeline.
Step 5: Tap the three-dot icon at the top right corner and select Hide from profile.
Note: You can also change your name on Facebook.
FAQs
By default, your Facebook profile picture is visible to the public, meaning anyone who visits your profile or comes across it can see it. However, you can adjust the privacy settings for your profile picture. You can limit its visibility to only your friends, a custom list of people, or even yourself.
Changing your profile picture on Facebook to Only Me means that only you can see the picture. By selecting this privacy option, your profile picture will not be visible to your friends, acquaintances, or anyone else on Facebook.
To change your profile picture specifically for Facebook Messenger, open the Messenger app on your device > tap on your profile picture at the top left corner > tap on Edit next to your current profile picture > choose the source of your new profile picture > adjust the position and size of the picture as desired > tap on Save to set your new profile picture on Messenger.
It’s important to note that changing your profile picture on Messenger is separate from changing your profile picture on Facebook. Updating your profile picture on Messenger will only affect your Messenger profile, while changing it on the main Facebook platform will update your profile picture across Facebook and Messenger.
Considering a temporary change? Use Facebook’s temporary profile picture feature. Set an expiration date for your new picture, and it will automatically revert to your original one after a set time.
Was this helpful?
Last updated on 30 May, 2024
Read Next
 How to Leave a WhatsApp Group Without Anyone Knowing
How to Exit a WhatsApp Group Silently Note: The steps remain the same regardless of which platform you use.
How to Leave a WhatsApp Group Without Anyone Knowing
How to Exit a WhatsApp Group Silently Note: The steps remain the same regardless of which platform you use.
 How to Block Someone on LinkedIn Without Them Knowing
What Happens When You Block a LinkedIn Member The person you block will no longer be able to see your LinkedIn profile.
How to Block Someone on LinkedIn Without Them Knowing
What Happens When You Block a LinkedIn Member The person you block will no longer be able to see your LinkedIn profile.
 6 Ways to Take a Screenshot on Snapchat Without Them Knowing
Method 1: Use Android Screen Recording to Secretly Screenshot Snaps or Stories Most Android devices come with native screen recording options.
6 Ways to Take a Screenshot on Snapchat Without Them Knowing
Method 1: Use Android Screen Recording to Secretly Screenshot Snaps or Stories Most Android devices come with native screen recording options.
 How to Read WhatsApp Messages Without Sender Knowing
Method 1: Dive Into Notification History (Android) You can read WhatsApp messages without letting the sender know by accessing the Notification History on your Android smartphone.
How to Read WhatsApp Messages Without Sender Knowing
Method 1: Dive Into Notification History (Android) You can read WhatsApp messages without letting the sender know by accessing the Notification History on your Android smartphone.
 What Is WhatsApp Profile Picture Size and How to Add Any Picture to It
What’s the Best Size for a WhatsApp profile Picture While WhatsApp has opened up to many new features, from sharing HD photos to screen sharing, it remains stringent on its
What Is WhatsApp Profile Picture Size and How to Add Any Picture to It
What’s the Best Size for a WhatsApp profile Picture While WhatsApp has opened up to many new features, from sharing HD photos to screen sharing, it remains stringent on its
 3 Ways to Fix Picture-In-Picture Not Working in Facebook Messenger
Common Fixes Restart device - Long-press the physical Power button and tap Reboot to restart Android.
3 Ways to Fix Picture-In-Picture Not Working in Facebook Messenger
Common Fixes Restart device - Long-press the physical Power button and tap Reboot to restart Android.
 How to Change Name, Profile, and Team Picture in Microsoft Teams
How to Change Your Name and Profile Picture in Microsoft Teams The process differs slightly for mobile apps.
How to Change Name, Profile, and Team Picture in Microsoft Teams
How to Change Your Name and Profile Picture in Microsoft Teams The process differs slightly for mobile apps.
 How to Change Discord Profile Picture on Any Device
While other Discord users might not remember your username, there is a chance they might remember your profile picture.
How to Change Discord Profile Picture on Any Device
While other Discord users might not remember your username, there is a chance they might remember your profile picture.
The article above may contain affiliate links which help support Guiding Tech. The content remains unbiased and authentic and will never affect our editorial integrity.