The Windows Blue Screen of Death (BSOD) is a famous (or infamous) screen that greets users whenever Windows encounters a fatal error and closes immediately to prevent any damage. There’s no shortage of things that cause the BSOD, but quite a few fixes are involved, too.
In this article, we’ll be giving you some general troubleshooting tips to solve as many issues as possible that cause this error.
Common BSOD Causes
The Blue Screen (or Black Screen after Windows 11 24H2) is the result of a large number of potential, fatal errors. For clarity, later versions of Windows have added error codes to the screen to aid in troubleshooting, and well over 250 codes exist. Some major reasons might include:
- Compatibility issues with hardware and drivers
- Outdated Operating System files and software
- Memory or storage corruption or failure
- Malware or viruses
- Coding errors
- Power-related problems and component damage
Blue Screen of Death Windows 11 Fix
If your version of Windows 11 is acting up, fear not. We’re going to cast the net wide and give you some broad troubleshooters to help.
Run Your Antivirus
Before trying anything else, it’s a good idea to run your antivirus software to check for malware. Existing malware can cause further harm to your computer and might prevent other fixes from being successful in the long run.
Update Your Windows
A fully updated Windows operating system, both in terms of cumulative updates and emergency patches, is vital to the overall health of your computer. The Windows team irons out difficulties and patches bugs with every release, one of which may be causing your BSOD. It’s always good to keep Windows 11 fully updated, especially after 24H2.
Check Your Hardware
Hardware components are big culprits in BSODs, as they aren’t part of the Microsoft ecosystem by default, and they and their drivers may clash with your version of Windows 11. You can manually update your drivers through Device Manager (accessible via the search bar). It’s also a good idea to disconnect any hardware you might’ve added just before the errors started happening. If they stop, you’ve found your culprit.
Check for Corrupted Drivers
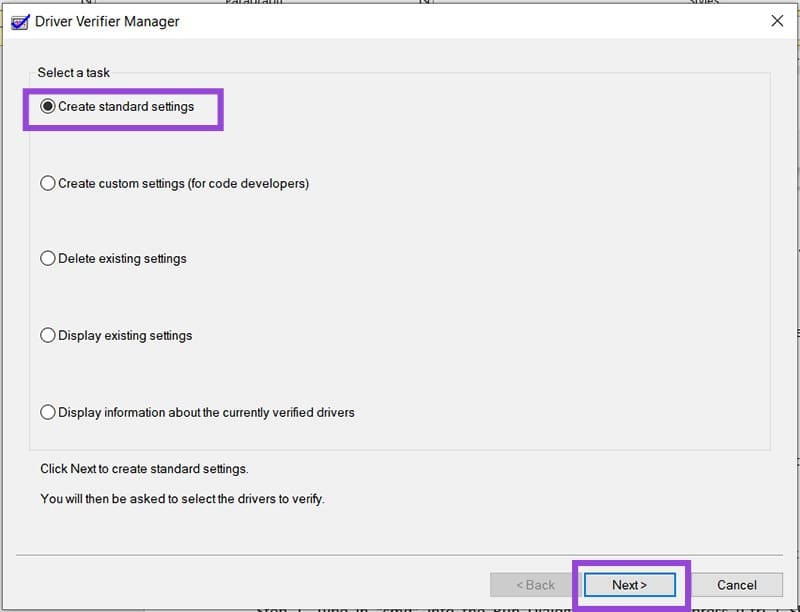
The Driver Verifier Manager is a powerful utility that tests all drivers to detect potential corruption. Here’s how to run it:
Step 1. Find Command Prompt in the search bar and right-click it, choosing to run as Admin.
Step 2. In Command Prompt, type “Verifier” and press “Enter.”
Step 3. Choose “Create standard settings” and then “Next.”
Step 4. Select “Automatically select all drivers installed on this computer” and click “Finish.”
Step 5. The utility will scan and report any errors. Reboot once done.
Startup Troubleshooter
If you’re getting a BSOD in Windows 11 before startup is even finished, it might be helpful to use Windows’ advanced startup tools to fix things. Here’s what to do:
Step 1. Restart your machine and press one of the Function keys (it may be in a different location depending on the computer) to start your PC with Advanced Startup Options.
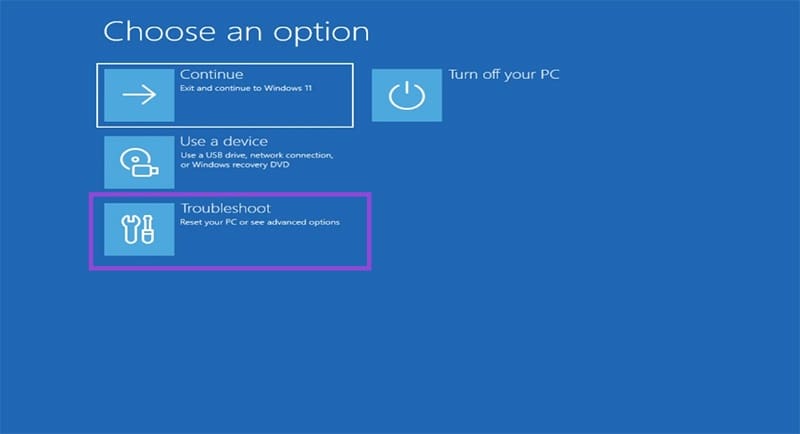
Step 2. Click on “Troubleshoot” and click on “Advanced options.”
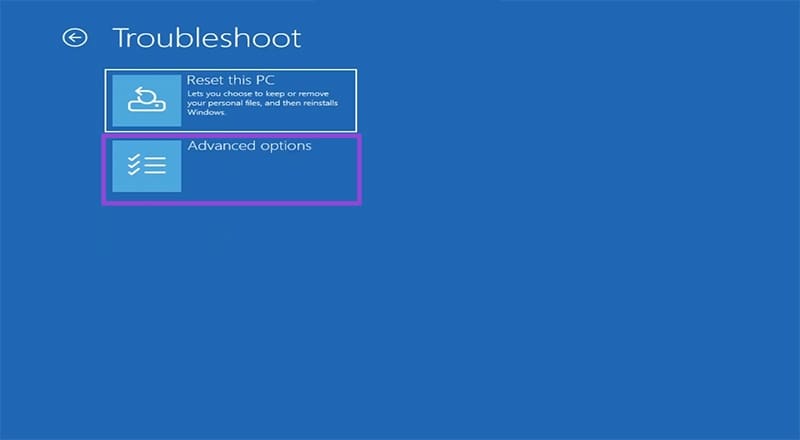
Step 3. Click “Startup Repair” and let the process run.

Step 4. If this doesn’t work, you can then try restoring from a system save point, via “System Restore,” or reset your PC (last resort) via the “Reset this PC” option.
Command Prompt Checks
Running a disk check and an SFC scan in Command Prompt are good ways to detect storage errors and system file corruption, respectively. To run a disk check:
Step 1. Open up Command Prompt as the Administrator via the search bar.
Step 2. In the Command Prompt window, type “chkdsk [disk name] /r” and press “Enter.” The “/r” will check for bad sectors. Include “/f” to fix any corruption found.
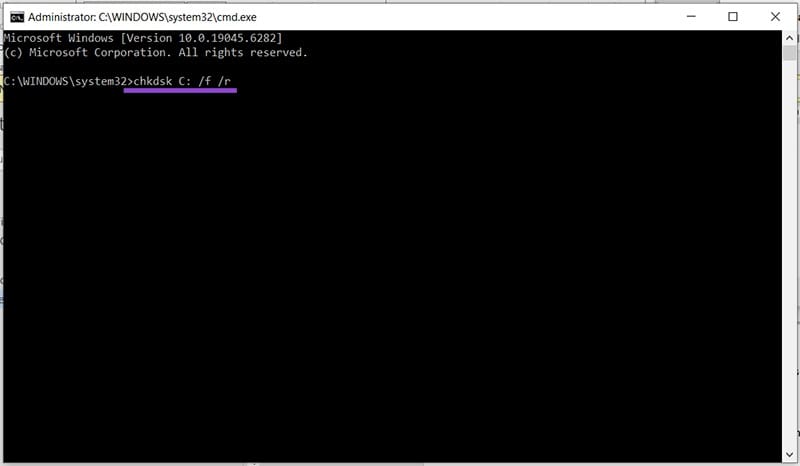
Step 3. Restart your machine once done.
To run the SFC scan:
Step 1. Type: “sfc /scannow” and press “Enter.” The scan process will begin, which may take some time, depending on your drive.
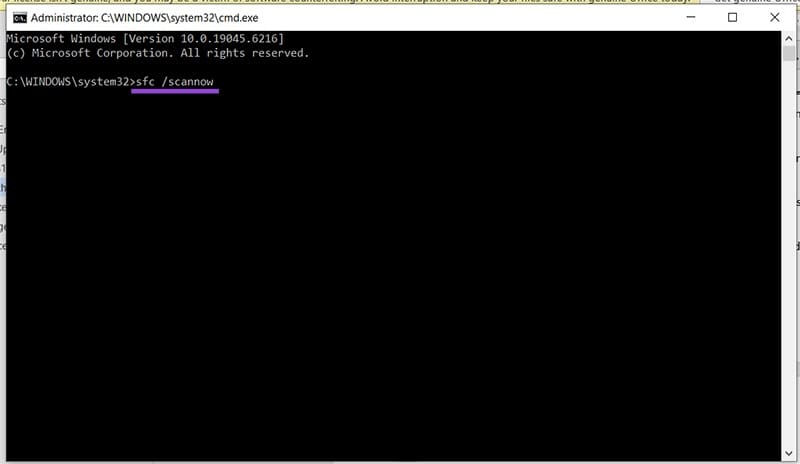
Step 2. Reboot your machine.
Was this helpful?
Last updated on 11 September, 2025
Read Next
 5 Fixes for Blue Screen of Death When PC Is Idle on Windows 11
Try Basic Fixes Uninstall Windows update: If you notice the Blue Screen of Death when Windows 11 is idle after an update, you should roll back the Windows update.
5 Fixes for Blue Screen of Death When PC Is Idle on Windows 11
Try Basic Fixes Uninstall Windows update: If you notice the Blue Screen of Death when Windows 11 is idle after an update, you should roll back the Windows update.
 6 Ways to Fix White Screen of Death on Windows
Try These Fixes First Force restart your computer: An application or program suddenly stopped working can cause a White Screen of Death (WSOD).
6 Ways to Fix White Screen of Death on Windows
Try These Fixes First Force restart your computer: An application or program suddenly stopped working can cause a White Screen of Death (WSOD).
 4 Ways to Fix Pink Screen of Death on Windows
Basic Fixes Disconnect external devices: Loose or damaged external peripherals can cause the pink screen of death.
4 Ways to Fix Pink Screen of Death on Windows
Basic Fixes Disconnect external devices: Loose or damaged external peripherals can cause the pink screen of death.
 3 Fixes for Black Screen of Death on Samsung Galaxy Phone
Try Basic Fixes Force restart your phone: Press and hold the power button (or side button) and volume down button simultaneously until the device turns off and the Samsung logo
3 Fixes for Black Screen of Death on Samsung Galaxy Phone
Try Basic Fixes Force restart your phone: Press and hold the power button (or side button) and volume down button simultaneously until the device turns off and the Samsung logo
 How to Solve Vertical Blue Lines Appearing on Laptop Screen
Check if the Error is Software or Hardware-based To fix the vertical blue lines on your laptop screen, you need to find the root cause.
How to Solve Vertical Blue Lines Appearing on Laptop Screen
Check if the Error is Software or Hardware-based To fix the vertical blue lines on your laptop screen, you need to find the root cause.
 Top 6 Ways to Fix Amazon Echo Stuck on Blue Light
An Amazon Echo speaker or display can be of great help if you wish to add a touch of smartness to your home.
Top 6 Ways to Fix Amazon Echo Stuck on Blue Light
An Amazon Echo speaker or display can be of great help if you wish to add a touch of smartness to your home.
 6 Ways to Get an Off-Screen Window Back on Screen on Windows
While using Microsoft Windows, I had a window that had somehow fallen completely off of my screen.
6 Ways to Get an Off-Screen Window Back on Screen on Windows
While using Microsoft Windows, I had a window that had somehow fallen completely off of my screen.
 5 Fixes for Windows Security App Showing White Screen on Windows 11
Common Fixes Reboot PC: Press the Windows + X shortcut to open the Power User Menu, select Shut down or sign out, and click Restart.
5 Fixes for Windows Security App Showing White Screen on Windows 11
Common Fixes Reboot PC: Press the Windows + X shortcut to open the Power User Menu, select Shut down or sign out, and click Restart.
The article above may contain affiliate links which help support Guiding Tech. The content remains unbiased and authentic and will never affect our editorial integrity.