Smartphone keyboards did not see a substantial feature update for quite a while until Microsoft decided to update the Swiftkey keyboard with AI features and all that it needs to beat almost every keyboard on the market. In this article, we are going to tell you about Swiftkey Settings. You should know how to use it to the fullest.
What Are the Best Features of SwiftKey Keyboard?
Swiftkey keyboard has always been the first to introduce new industry-defining features to their keyboards, and, with the new and updated Swiftkey keyboards, the features have only improved:
- Smart AI Editor/Composer: Swiftkey keyboard includes a powerful AI-based text editor that can help you fix advanced grammar issues in your text, change the tone, or use the Composer feature to generate more text from the prompts you give.
- Microsoft Copilot: You can now access the complete Microsoft Copilot straight from your keyboard. It can search for information, get answers, generate text, and do much more.
- Incognito Mode: The incognito mode prevents the Swiftkey keyboard from learning from your typing history where you don’t want it. Searching for something confidential? This feature comes in handy, then.
- Clipboard Sync: Swiftkey keyboards can swiftly sync to the clipboard on your Windows PC and other devices. To use this feature, you must sign in with the same Microsoft account on all devices and turn it on.
- AI-based Sticker, Meme, and Design Generator: You can generate high-quality stickers, memes, and designs based on text prompts that can be sent across messaging apps. This feature is powered by OpenAI’s latest image gen model, Dall E 3.
Swiftkey Settings You Should Know to Use It to the Fullest
This section will explore Swiftkey settings and features that elevate your keyboard usage experience.
1. In Built Message Editor/Composer
Swiftkey keyboard features Microsoft Editor, which gives AI-based advanced grammar corrections and suggestions, helps you modify the tone of the text for various use cases, and also allows you to generate text from prompts:


Step 1: Start by typing the text you wish to check for Grammar issues, suggestions, or to modify the tone.
Step 2: Now, click the Editor icon (the one with a pen and page); the icon will either be pinned to the keyboard’s top bar or in the more items triple dot menu.
Step 3: Once you click it, you will be first taken to the Editor, which will analyze the text for issues and improvements. When the analysis finishes, you can change the text in one click using the Replace option.
Step 4: Click the Tone option from the top bar navigation to modify the text’s tone. This will generate the exact text in various tones; you can choose the one you prefer.
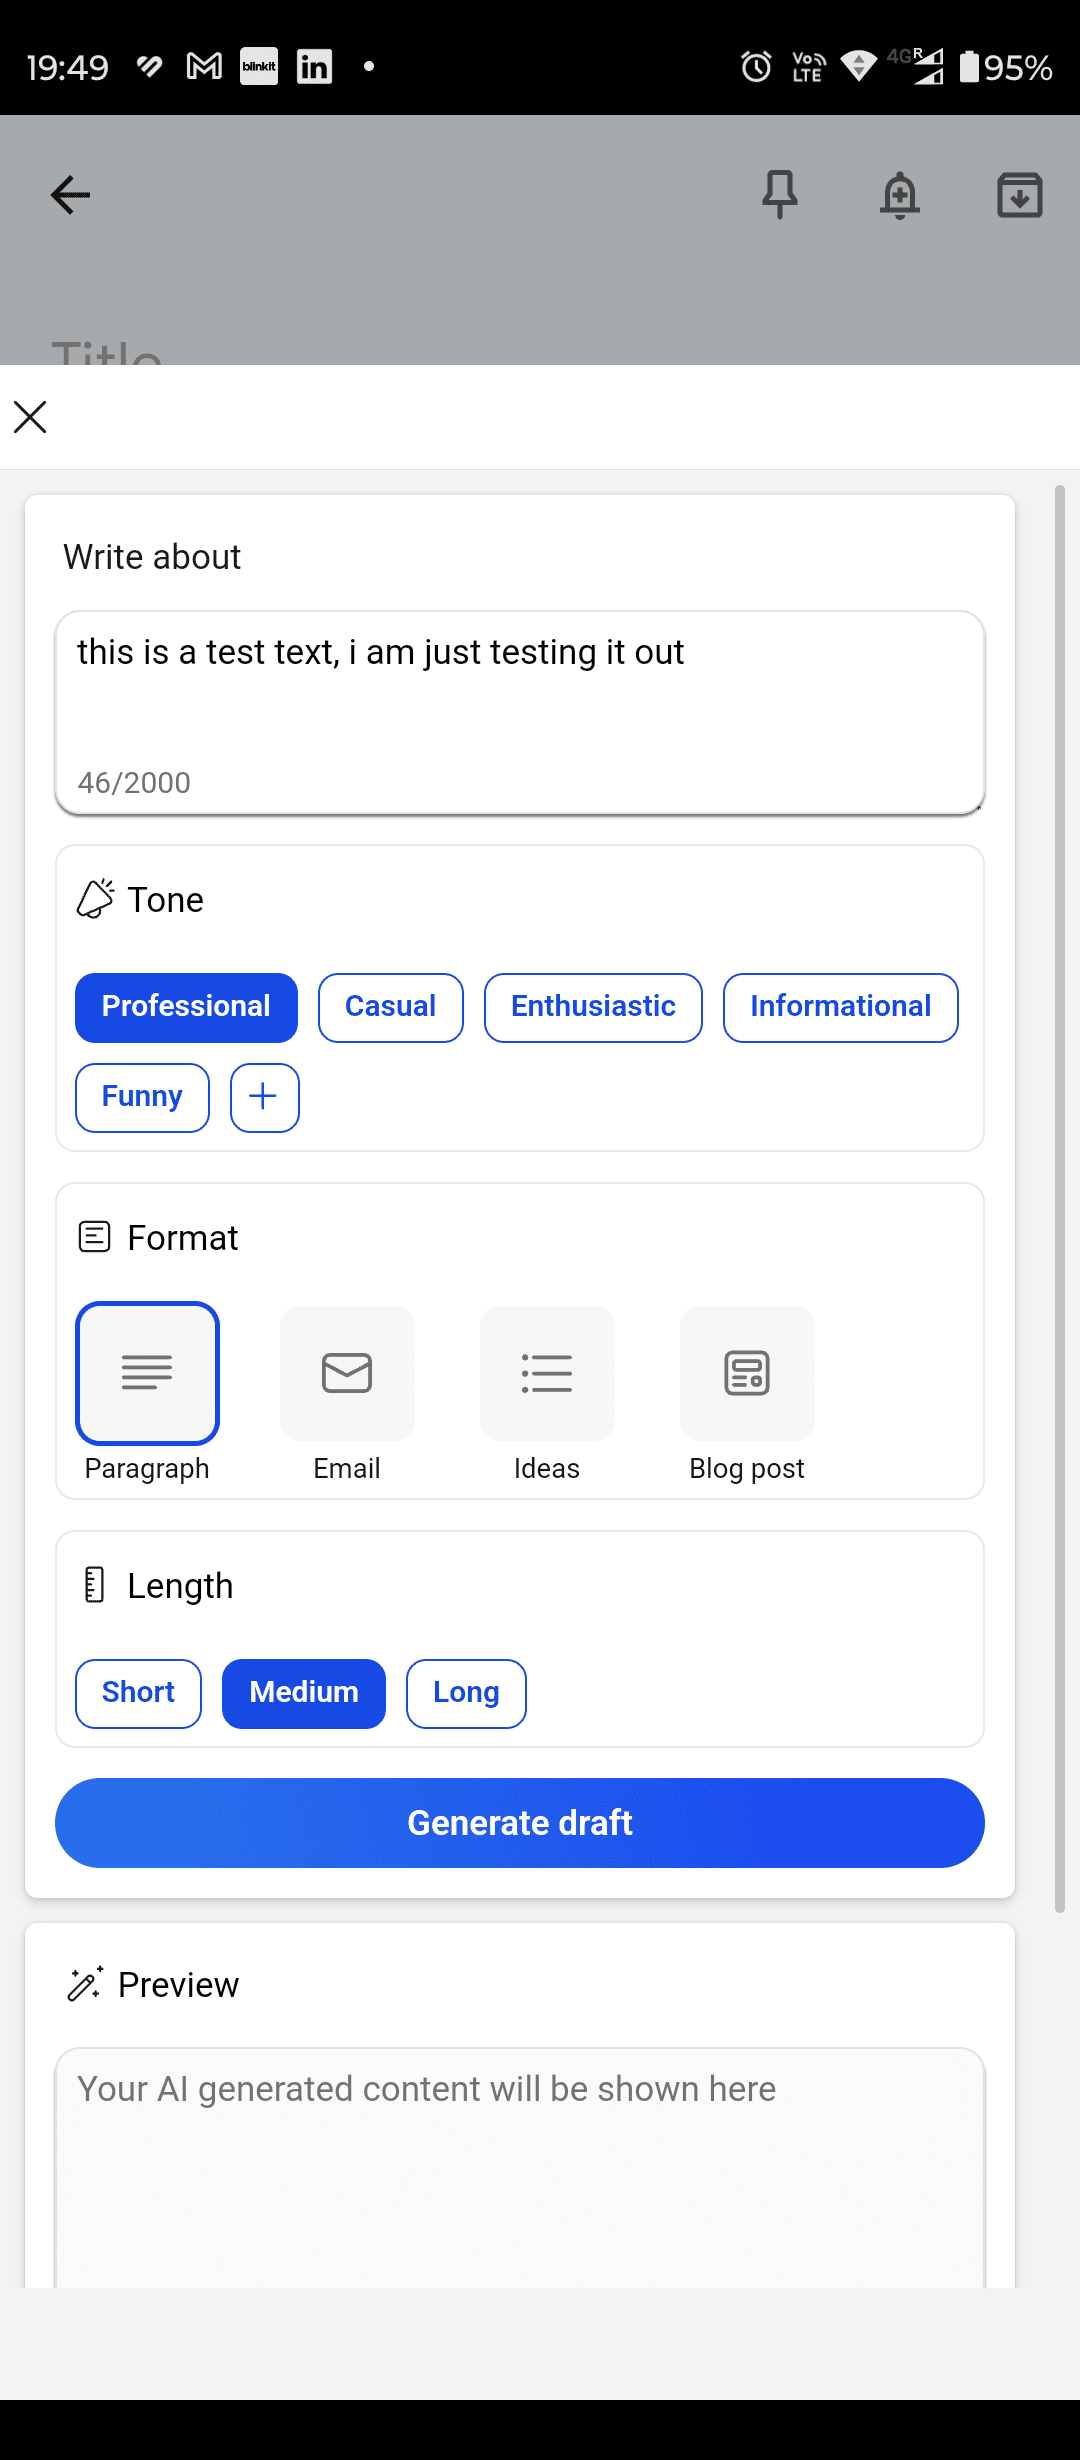
Step 5: Finally, click the Compose option to compose a text based on a prompt. You can define the prompt, length, type, and tone here. Once the text is generated, you can copy it.
2. Copilot AI
The Copilot AI extension in the Swiftkey keyboard is handy. It gives you access to the complete Chatbot, a capable browser with Bing search as the default, text tone modifier, and text composer.

Step 1: To use the Copilot AI feature, click the Copilot AI icon pinned to the top bar of the keyboard. From there, you can use the Chatbot, Search the web, modify the tone of your text, or compose new text.
Step 2: Click the Ask Me Anything button in the Chat tab to chat. To use the Search feature, click the Search option and start searching like usual.
Step 3: To modify Tone, click the Tone option; the text is automatically fetched; click the arrow button to proceed. To use the Compose option, go to the Compose tab, type the prompt, select tone, type, and length, and proceed.
3. Incognito Mode
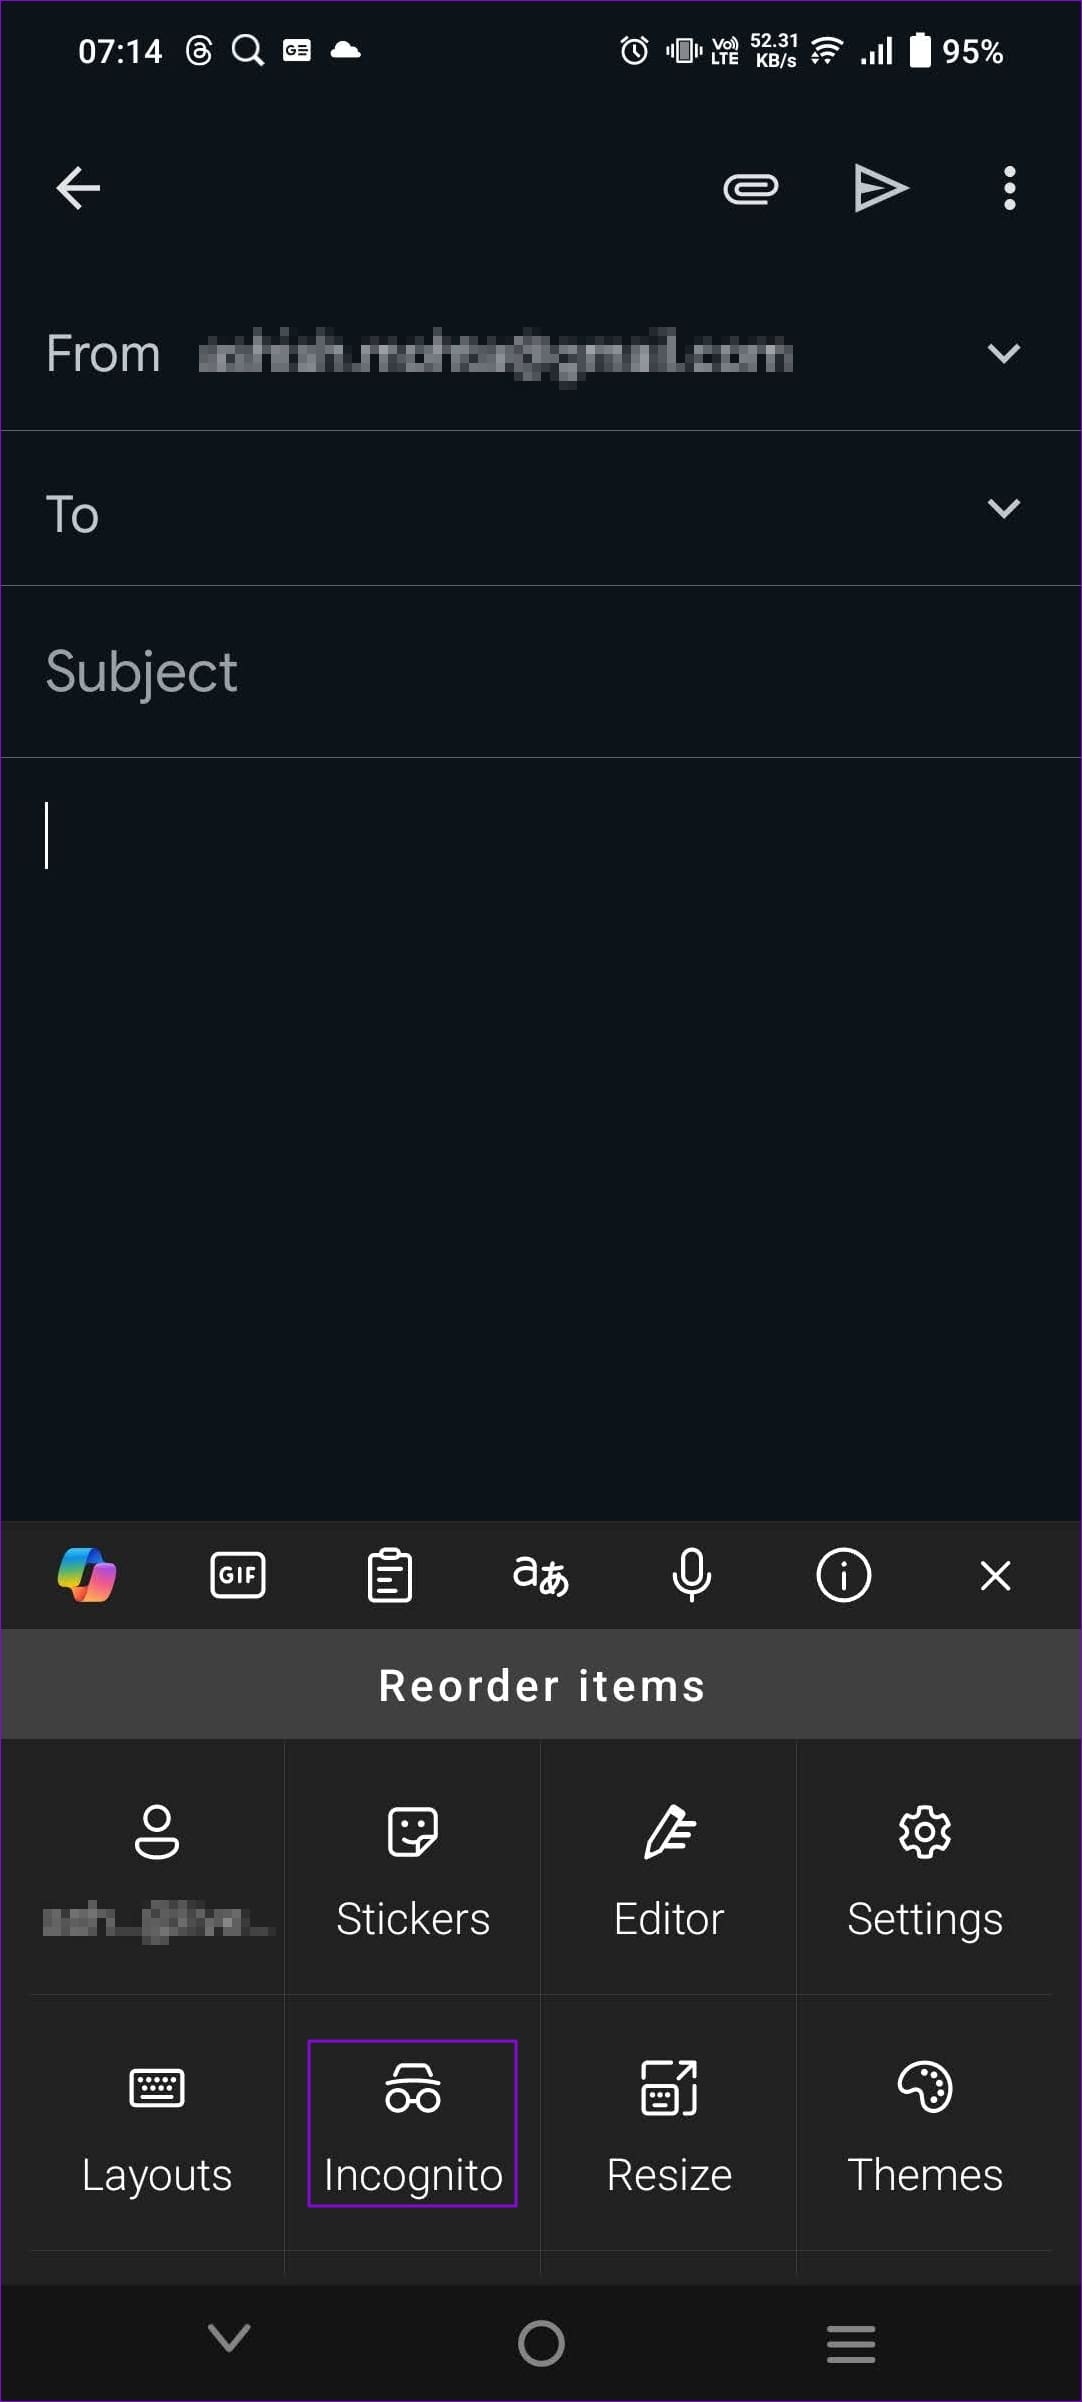
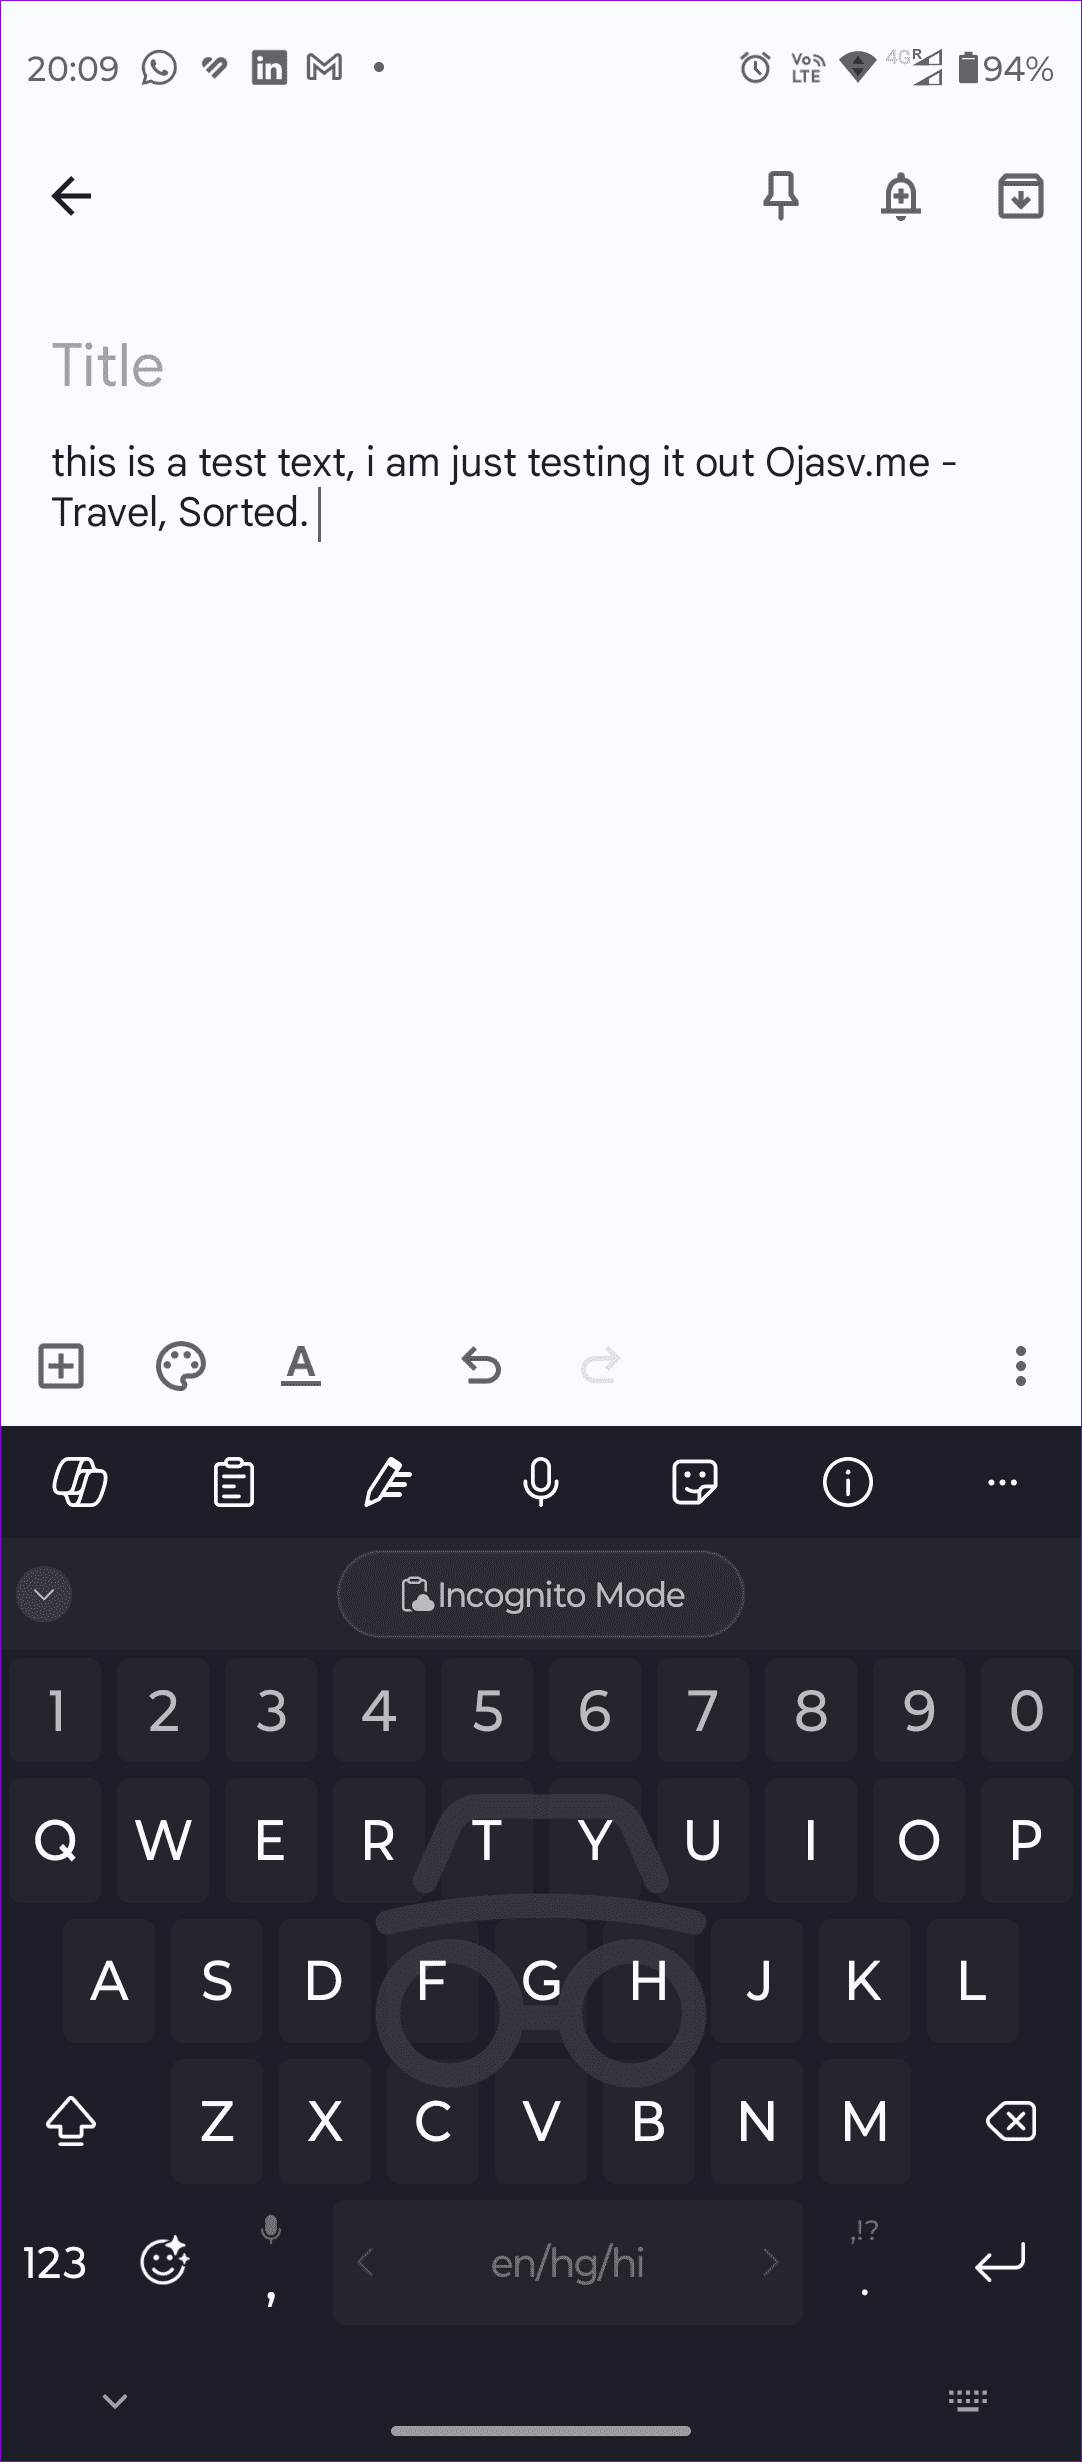
The Incognito mode feature prevents Swiftkey from learning from typing sessions where you don’t want it to. It can be enabled from the triple-dot menu in the top bar. Just click on the triple-dot button, then click the Incognito option. This will enable the Incognito mode to exit and repeat the same process.
4. Clipboard Syncing
Clipboard Syncing is a productivity-based feature that syncs your clipboard to your Windows PC and other smartphones or tablets with a Swiftkey keyboard.
Note: Ensure you are logged in to the Swiftkey keyboard using the same account you use on your Windows PC.
Step 1: Go to Windows Settings > System > Clipboard to start Clipboard Syncing on your Windows keyboard.
Step 2: Now, please turn on the Clipboard history across devices option, then select the Automatically sync text that I copy option.

Step 4: In the Swiftkey keyboard, open Clipboard by clicking the Clipboard icon pinned to the top bar.
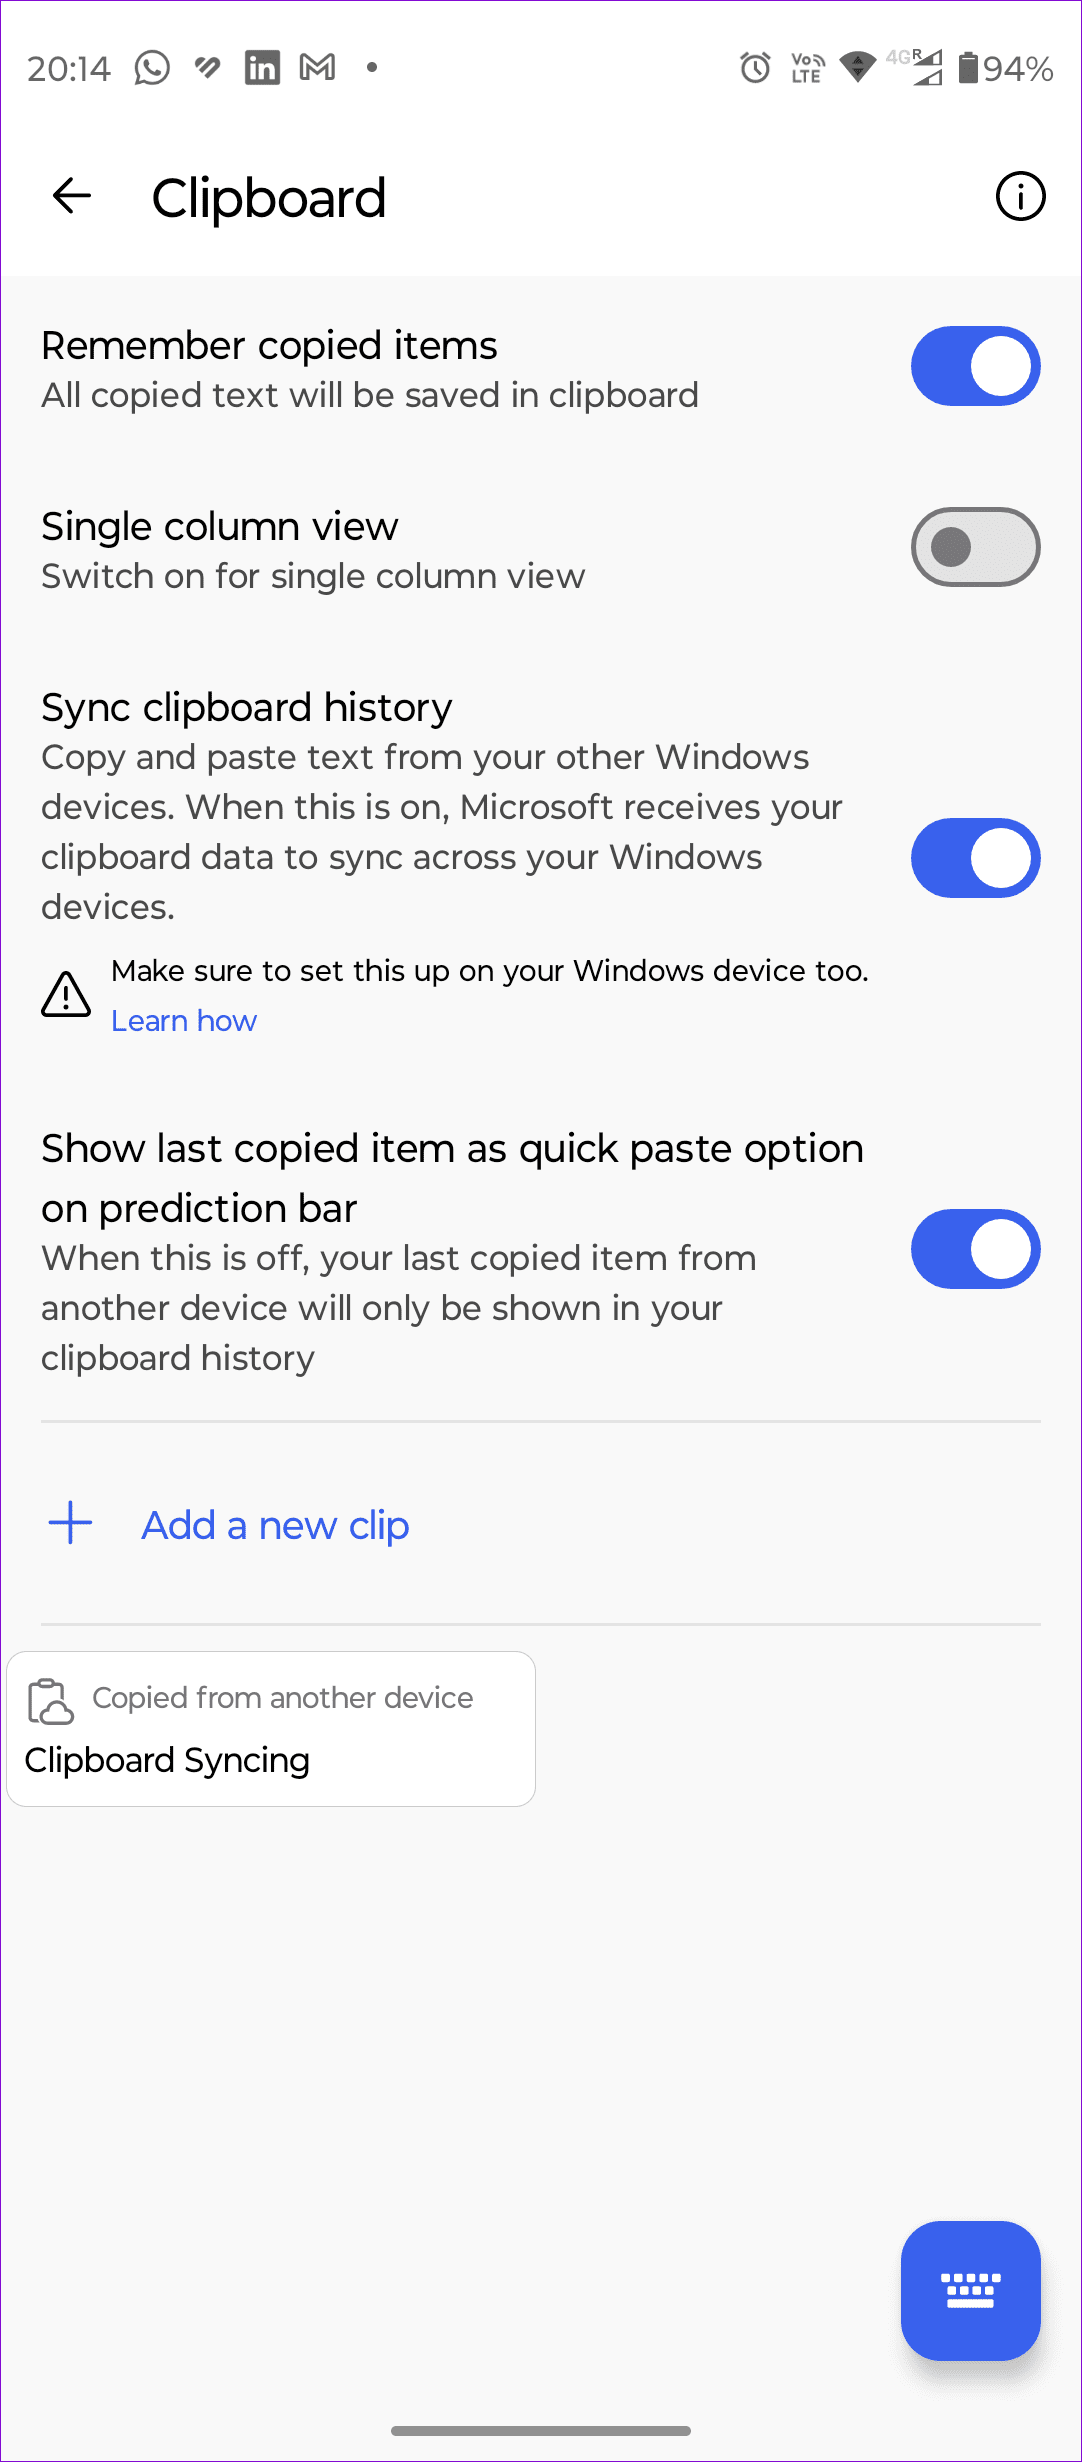
Step 5: Now, open the Clipboard settings and turn on the Sync Clipboard History option. This will start syncing the clipboards across devices. To sync Clipboard history with other smartphones, follow the same process.

5. AI-Based Stickers, Memes, and Designs
Powered by Dall E 3, this feature allows you to generate Stickers, memes, and designs based on text prompts.
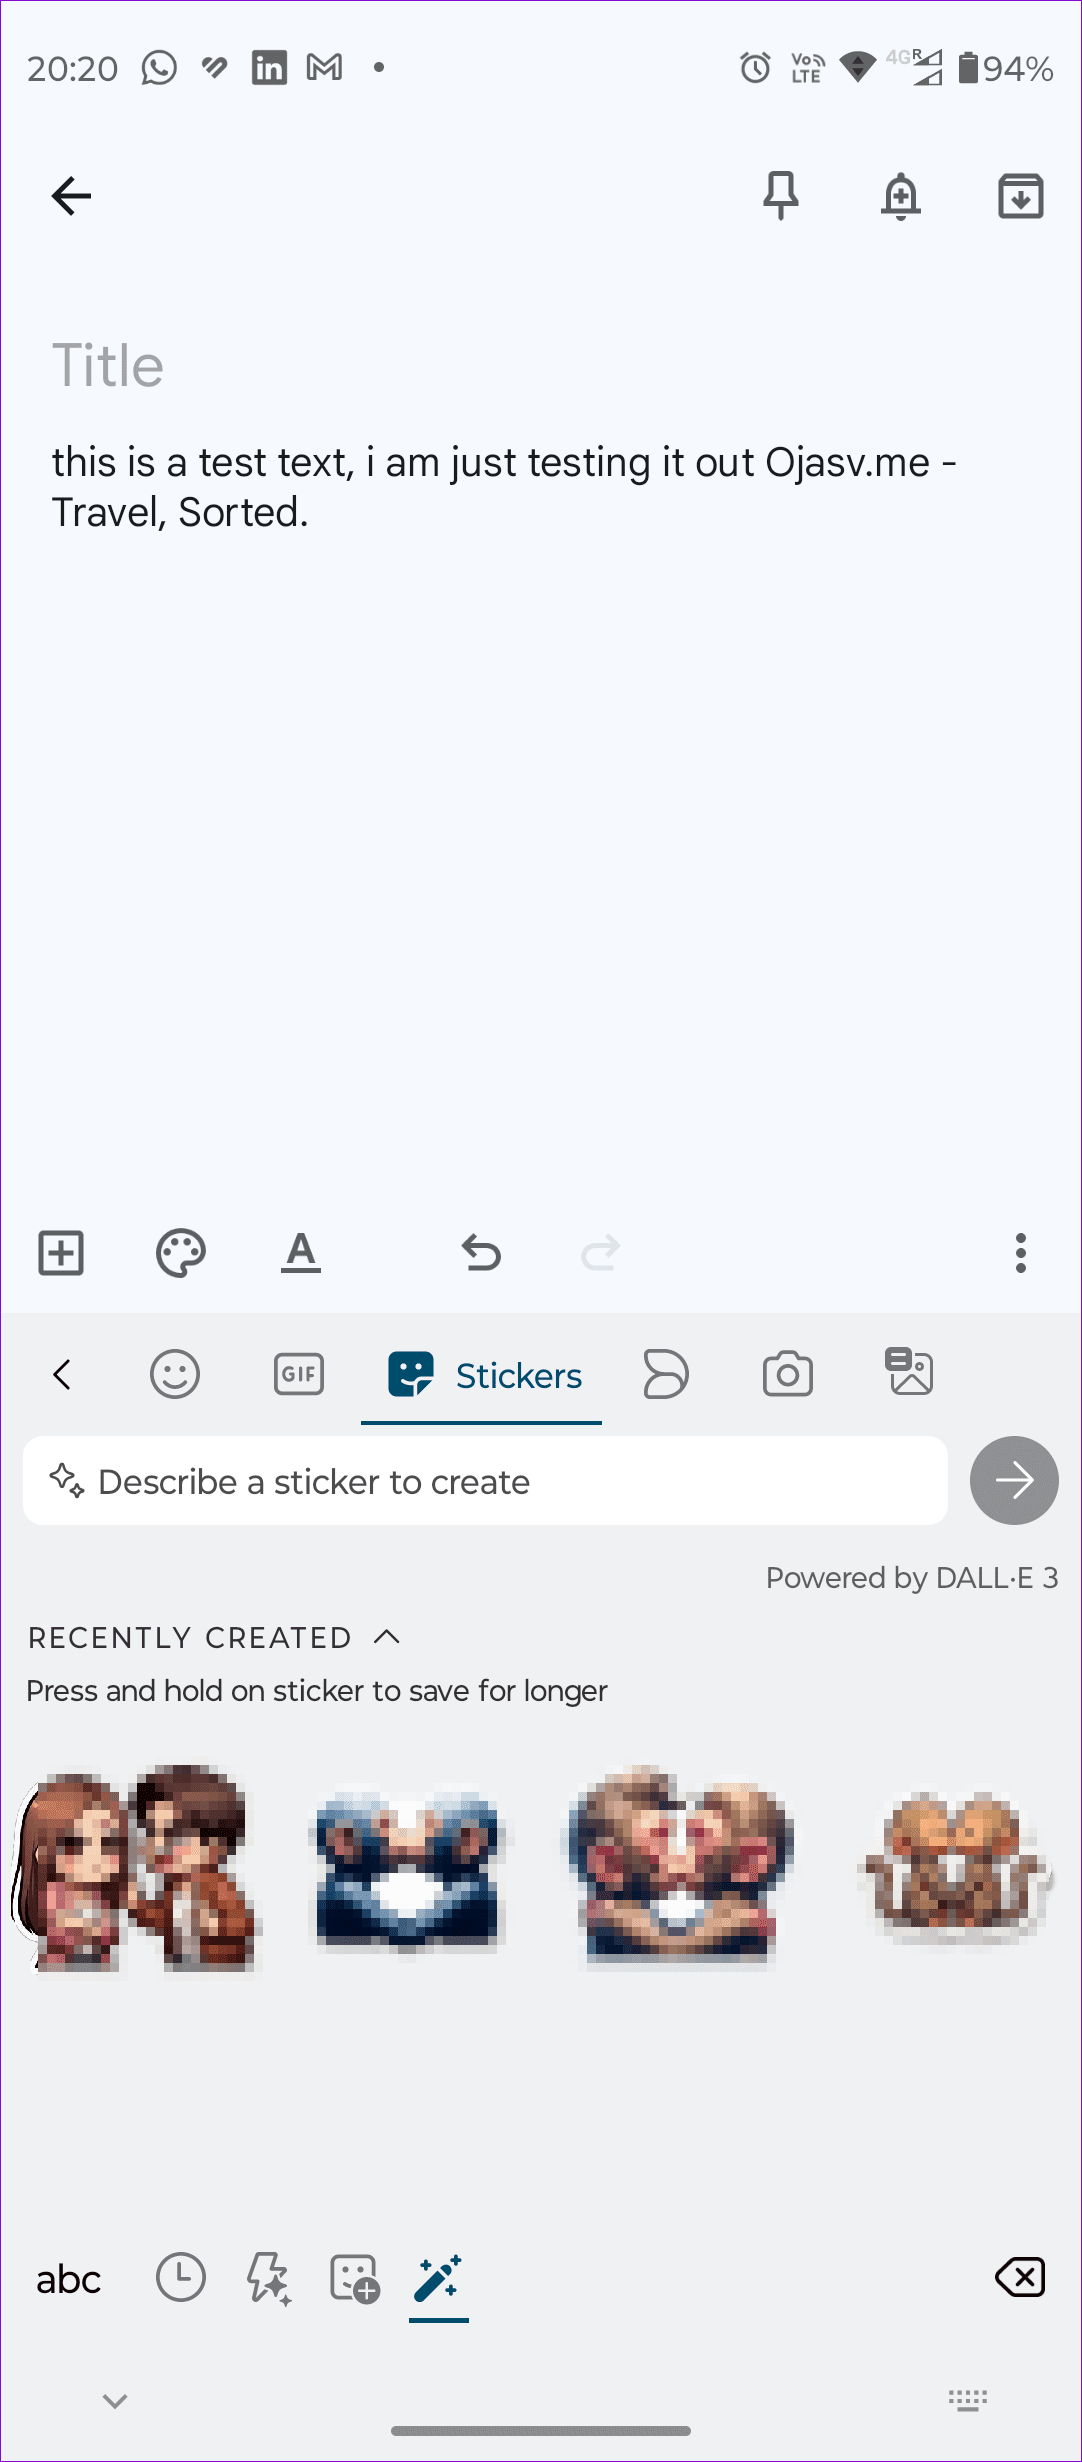

Step 1: To create AI-based stickers, memes, and designs on the Swiftkey keyboard, click the triple dot icon in the top bar and then open the sticker option.
Step 2: You will see the sticker packs. To generate a sticker, click the Sticker generator icon and define your text prompt.
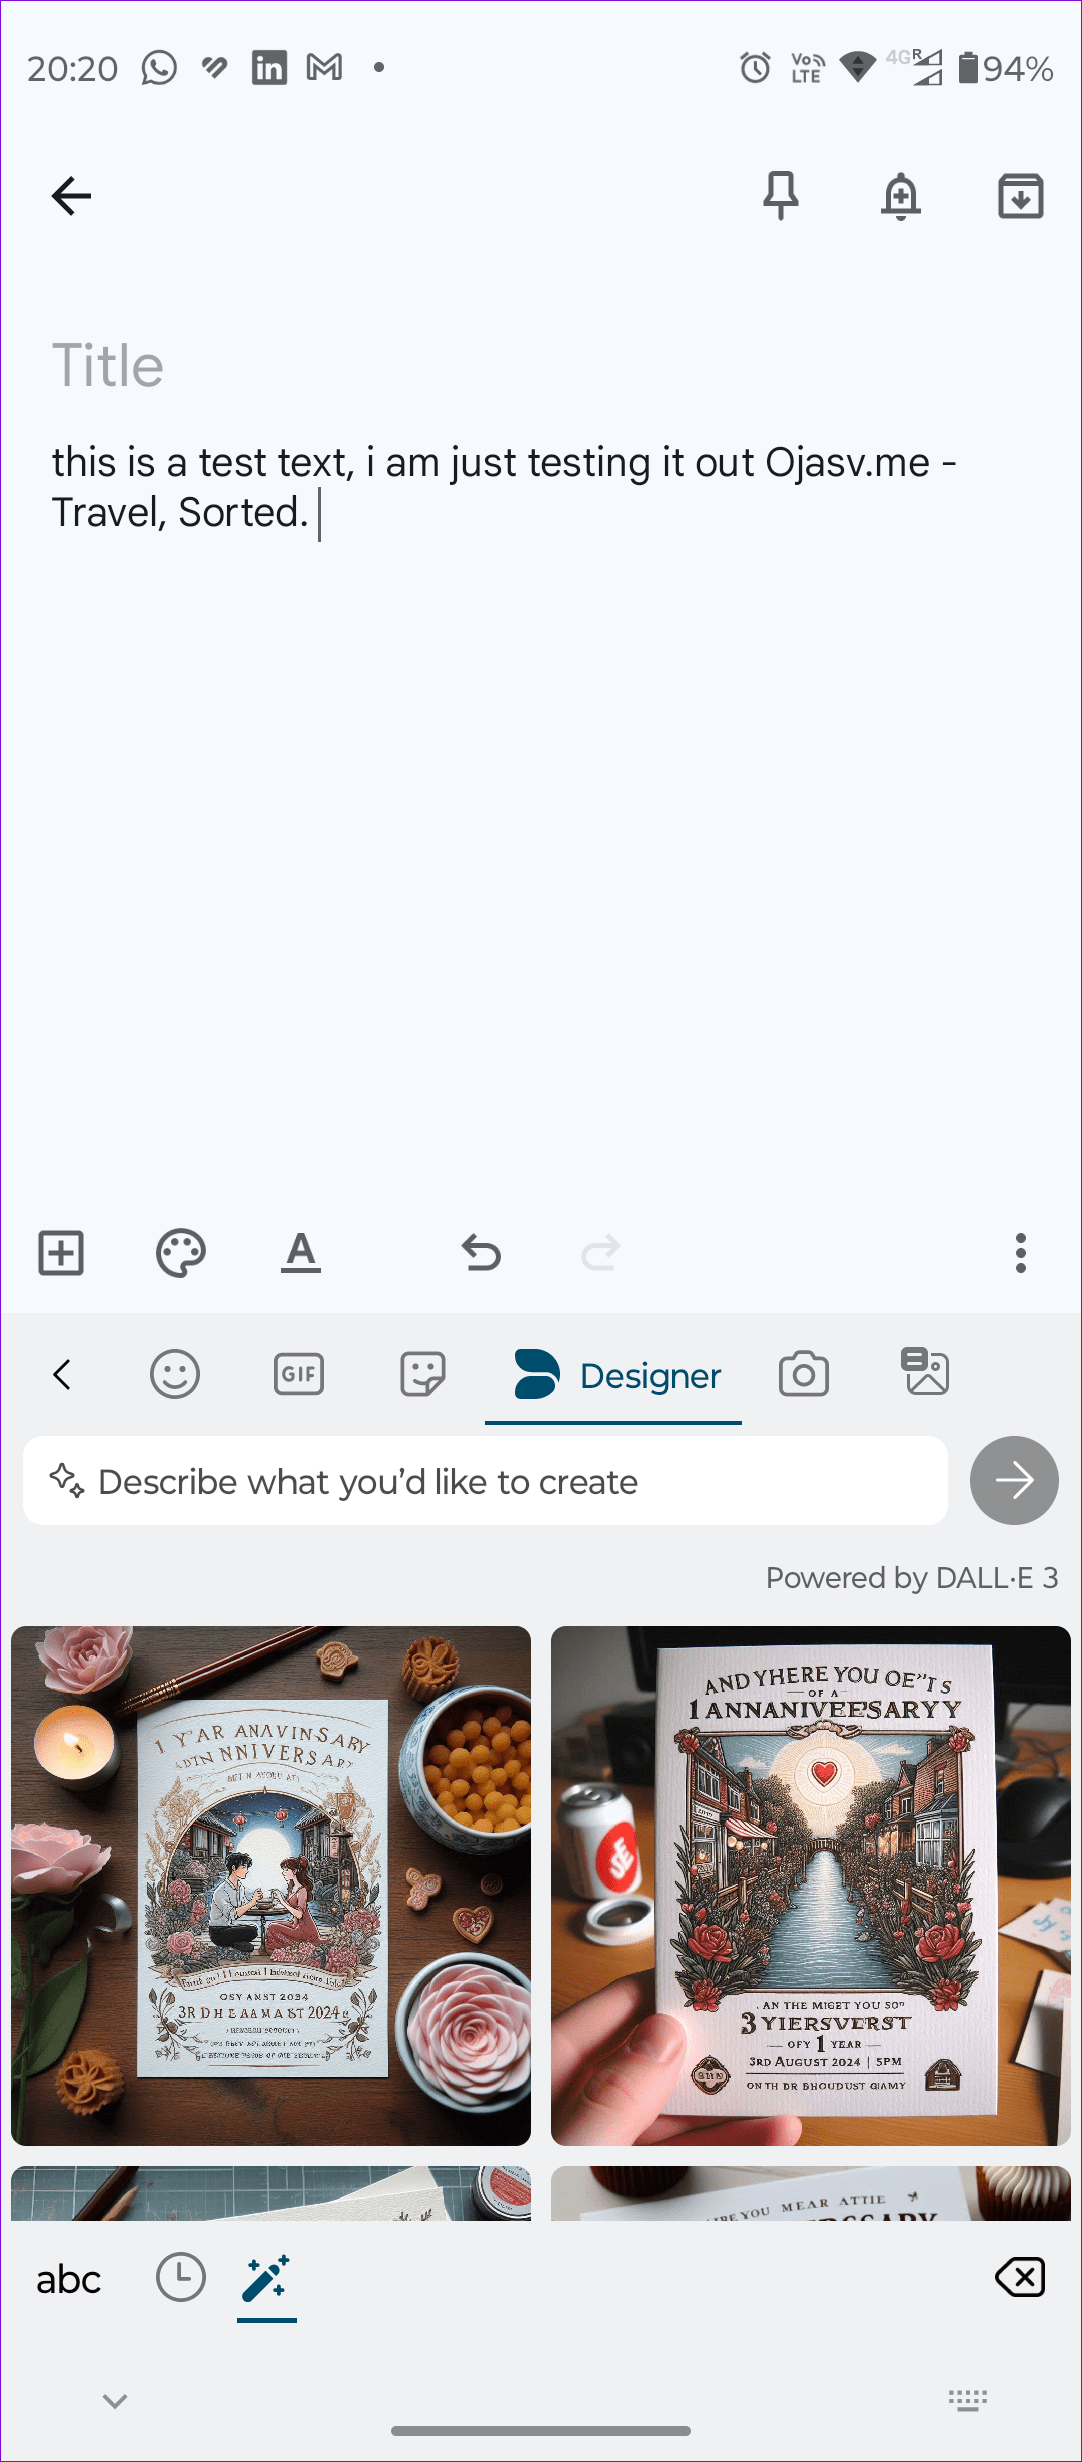
Step 3: To use the Meme generator and Designer, follow the same process in the Meme generator and Designers tabs, respectively. It will generate multiple versions based on your prompt; select the one you like.
Was this helpful?
Last updated on 01 August, 2024
Read Next
 Google Photos Link Sharing Permissions and Settings Explained: A Detailed Guide
Recently, a controversial post appeared on the internet that said ‘photos in Google Photos are semi-public,’ which is both true and false.
Google Photos Link Sharing Permissions and Settings Explained: A Detailed Guide
Recently, a controversial post appeared on the internet that said ‘photos in Google Photos are semi-public,’ which is both true and false.
 13 Helpful Zoom Video Settings That You Might Not Know
Zoom has taken the world by storm.
13 Helpful Zoom Video Settings That You Might Not Know
Zoom has taken the world by storm.
 How to Access and Edit Facebook Group Settings
How to Edit Facebook Group Settings on Desktop If you use Facebook on your desktop, here's how to access and edit group settings Step 1: Open Facebook in your web
How to Access and Edit Facebook Group Settings
How to Edit Facebook Group Settings on Desktop If you use Facebook on your desktop, here's how to access and edit group settings Step 1: Open Facebook in your web
 5 Instagram Privacy Settings That You Should Know
Basic Ways Make your profile private: Go to Settings > Account Privacy and enable Private Profile.
5 Instagram Privacy Settings That You Should Know
Basic Ways Make your profile private: Go to Settings > Account Privacy and enable Private Profile.
 How to Open Google Assistant Settings
On Android Method 1: Use the "Hey Google, open Assistant Settings" Command The easiest way to open Google Assistant settings is to ask the Assistant itself to open the settings
How to Open Google Assistant Settings
On Android Method 1: Use the "Hey Google, open Assistant Settings" Command The easiest way to open Google Assistant settings is to ask the Assistant itself to open the settings
 A Guide to Facebook Friend Request Settings
Sending Facebook friend requests is the easiest thing you can do.
A Guide to Facebook Friend Request Settings
Sending Facebook friend requests is the easiest thing you can do.
 How to Adjust AutoCorrect Settings in Microsoft Word
How to Enable or Disable AutoCorrect on Microsoft Word By default, the AutoCorrect feature relies on the library of the words from the language you've chosen to use in the
How to Adjust AutoCorrect Settings in Microsoft Word
How to Enable or Disable AutoCorrect on Microsoft Word By default, the AutoCorrect feature relies on the library of the words from the language you've chosen to use in the
 How to Manage Netflix Subtitle Settings on Any Device
Method 1: Change Netflix Subtitles Style and Size on iPhone and iPad While the Netflix iOS app does not have any native options to change the subtitle settings, you can
How to Manage Netflix Subtitle Settings on Any Device
Method 1: Change Netflix Subtitles Style and Size on iPhone and iPad While the Netflix iOS app does not have any native options to change the subtitle settings, you can
The article above may contain affiliate links which help support Guiding Tech. The content remains unbiased and authentic and will never affect our editorial integrity.

