Basic Fixes
- Check Screensaver settings: You should check the wait time selected for your screensaver.
- Keep your mouse on a polished surface: The Screensaver activates when your mouse pointer remains stationary. That’s why using a polished surface like a Mousepad is recommended so that the mouse pointer doesn’t get activated automatically.
- Check connected devices: Ensure that other programs or connected devices (especially gaming controllers) are not preventing the screensaver from activating.
- Update Windows 11: Installing the latest version of the OS will remove the bugs causing this issue.
Fix 1: Update Display Drivers
Since we are talking about Screensaver, you need to check if the Display Drivers on your Windows 11 PC or Laptop have been updated to the latest version.
Step 1: Open Device Manager and then select Display Adapters.
Step 2: Right-click on your Display Driver and then select Update Driver.
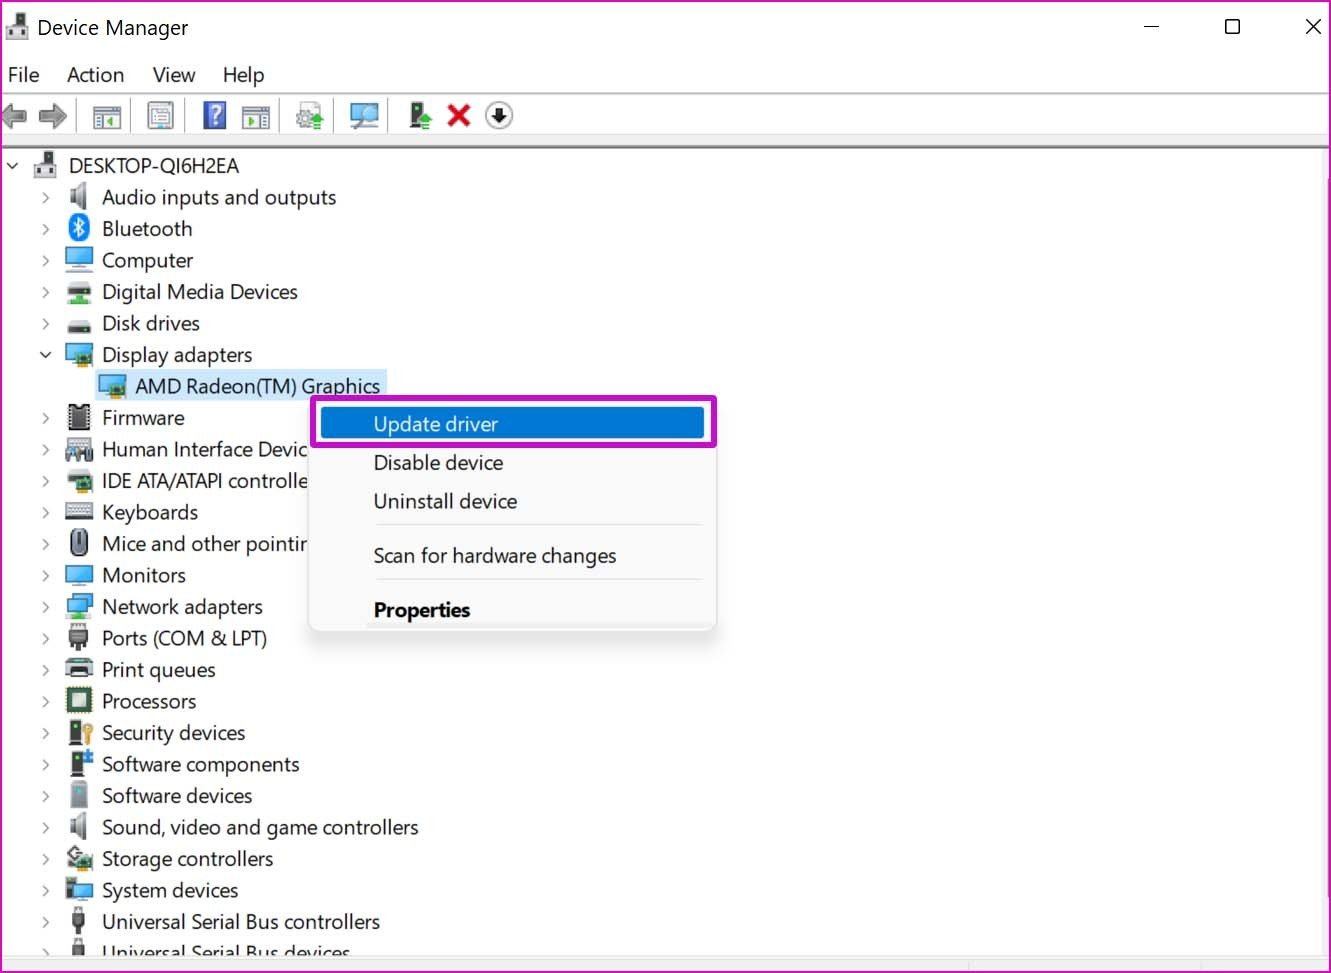
Step 3: Follow the on-screen process to finish updating the Display Drivers.
Fix 2: Check Sleep Mode Settings
The Sleep settings may have been set to turn off the screen or Sleep before the Screensaver gets activated.
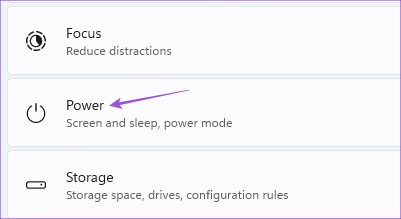
Step 1: Open Settings and then scroll down to select Power and Battery (Laptop) or Power (PC) from the right pane.
Step 2: Click on Screen and Sleep. Then click the drop-down menu next to When plugged in, turn off my screen after, and then select a time slightly more than that of your Screensaver.

For example, if your Screensaver Wait time is 5 minutes, the Sleep Mode should activate after 10 minutes.
Step 3: After that, close the window and wait for some time to check if the problem is solved.
You can also read our post if Sleep Mode is not working on Windows 11.
Fix 3: Run Power Troubleshooter
Step 1: Open Settings and then click on Troubleshoot on the right side.
Step 2: Click on Other Troubleshooters.
Step 3: Scroll down and then click on Run next to Power.

Step 4: Wait till the Power Troubleshooter has finished running and detecting the issues.
Step 5: Follow the on-screen instructions to finish the troubleshooting process.

Fix 4: Run SFC Scan
SFC or System File Checker scan is another repair tool that scans and fixes the corrupted system files on your Windows 11 computer. Such damaged files may be causing this issue.
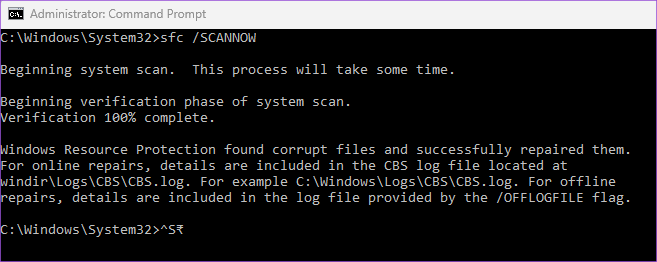
Step 1: Open Command Prompt as administrator.

Step 2: Type the following command and press Enter to begin the SFC scan.

sfc / SCANNOW
Step 3: Wait till the process is completed. You will be notified of all the corrupt files that were found and fixed.
Step 4: After that, close the window and check if the problem is solved.
Was this helpful?
Last updated on 16 May, 2024
Read Next
 3 Ways to Fix Screensaver Not Working on Mac
Basic Troubleshooting Change the screensaver - Sometimes, your currently selected Screensaver might need fixing.
3 Ways to Fix Screensaver Not Working on Mac
Basic Troubleshooting Change the screensaver - Sometimes, your currently selected Screensaver might need fixing.
 How to Set and Customize Screensaver on Mac
One of the best ways to improve your experience is by customizing your device with screensavers when using your Mac.
How to Set and Customize Screensaver on Mac
One of the best ways to improve your experience is by customizing your device with screensavers when using your Mac.
 8 Fixes for “Your Device Is Missing Important Security and Quality Fixes” on Windows
Is there anything more frustrating than seeing the "Your Device Is Missing Important Security and Quality Fixes" message when waiting for your Windows updates to complete?
8 Fixes for “Your Device Is Missing Important Security and Quality Fixes” on Windows
Is there anything more frustrating than seeing the "Your Device Is Missing Important Security and Quality Fixes" message when waiting for your Windows updates to complete?
 9 Fixes for Windows Subsystem for Android Not Working on Windows 11
Reminder: Windows Subsystem for Android and the Amazon App Store will no longer be available in the Microsoft Store after March 5, 2025.
9 Fixes for Windows Subsystem for Android Not Working on Windows 11
Reminder: Windows Subsystem for Android and the Amazon App Store will no longer be available in the Microsoft Store after March 5, 2025.
 5 Fixes for Netflix App Not Working on Windows 11
Basic Fixes Check if Netflix is down: Though unlikely, Netflix might be facing some downtime with its servers in your region.
5 Fixes for Netflix App Not Working on Windows 11
Basic Fixes Check if Netflix is down: Though unlikely, Netflix might be facing some downtime with its servers in your region.
 5 Fixes When Wireless Display Feature is Not Working on Windows 11
Basic Fixes: Ensure your devices support Miracast and Wi-Fi Direct protocol: One essential prerequisite for using the wireless display feature on Windows 11 is that all your devices, including your
5 Fixes When Wireless Display Feature is Not Working on Windows 11
Basic Fixes: Ensure your devices support Miracast and Wi-Fi Direct protocol: One essential prerequisite for using the wireless display feature on Windows 11 is that all your devices, including your
 4 Fixes if Chrome Remote Desktop Is Not Working on Windows 11
Fix 1: Disable PIN-Less Authentication Chrome Remote Desktop lets you pair your trusted devices with your computer.
4 Fixes if Chrome Remote Desktop Is Not Working on Windows 11
Fix 1: Disable PIN-Less Authentication Chrome Remote Desktop lets you pair your trusted devices with your computer.
 4 Fixes When the Windows File Explorer Stuck at ‘Working on It’
Basic Fixes: Update Windows: It's nice to start with a Windows Update since this will fix minor glitches that may trigger the problem.
4 Fixes When the Windows File Explorer Stuck at ‘Working on It’
Basic Fixes: Update Windows: It's nice to start with a Windows Update since this will fix minor glitches that may trigger the problem.
The article above may contain affiliate links which help support Guiding Tech. The content remains unbiased and authentic and will never affect our editorial integrity.