Basic Fixes
- Enable and disable Airplane mode: You may begin your troubleshooting regime by enabling and disabling Airplane mode from the Action Center on your Windows 11 PC.
- Reconnect your USB Wi-Fi adapter: This will help ensure that the USB Wi-Fi adapter is connected properly to your PC.
- Update Windows 11 version: Installing the latest version of Windows 11 can surely help fix the issue.
Fix 1: Turn on Maximize Compatibility in iPhone Hotspot Settings
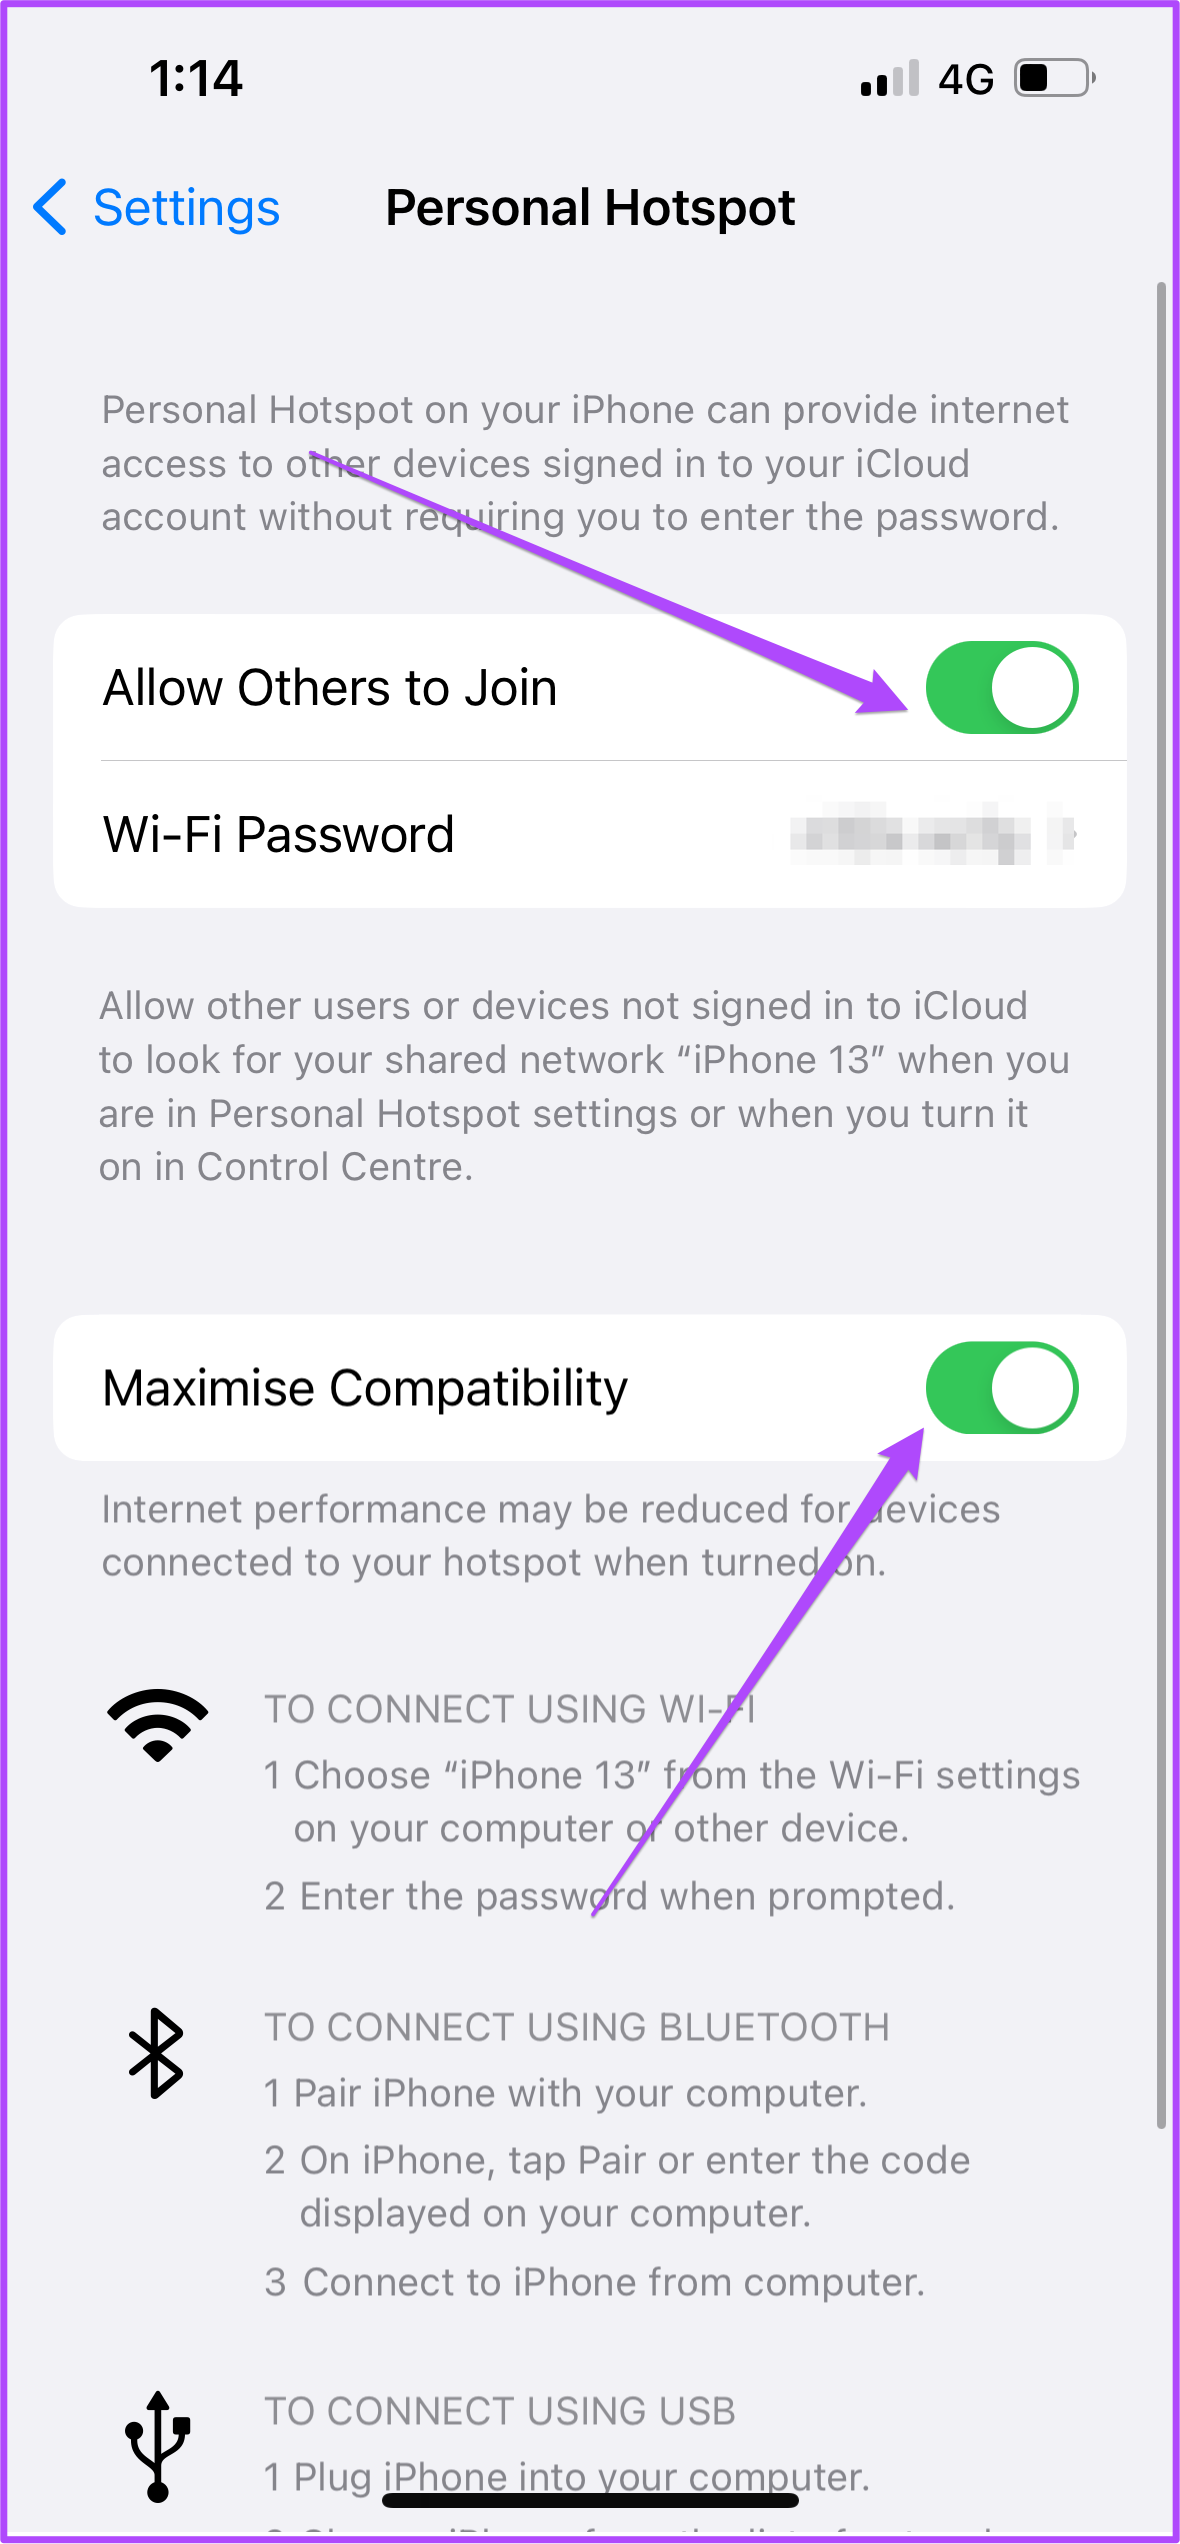
Since the Windows platform is outside the Apple ecosystem, enable Maximize Compatibility for your iPhone Hotspot.
Open Settings > Personal Hotspot > enable Maximize Compatibility.
Tip: You should also enable the toggle for Allow Other to Join.

Fix 2: Disable Randomize MAC Address on Windows 11 PC
This feature prevents location tracking while using public Wi-Fi networks. Your Windows 11 PC assigns a random Mac address to enable the same.
Open Settings > Network and Internet > Wi-Fi > Turn off Randomize MAC Address.
Fix 3: Turn on Allow Bluetooth Devices to Find This PC
Another way to increase compatibility and quickly connect your PC to iPhone Hotspot is by turning on this feature.
Open Settings > Bluetooth and devices > View more devices > More Bluetooth settings > Allow Bluetooth devices to find this PC.

Fix 4: Reset Network Settings
If the troubleshooting solutions above didn’t help, try resetting the Network on your Windows 11 computer. Note that this will remove all your network customizations and set them to default. Yes, that means you must configure some of it again.
Open Settings > Network and internet > Advanced network settings > click on Network reset under More Settings > Reset now > choose Yes to confirm.

Your PC will now restart. Once you see the home screen, check whether your iPhone hotspot is showing up.
Alternative: Connect Your iPhone to Windows PC via USB
If none of the steps worked till now, your last resort is to connect your iPhone to the Windows PC via USB cable. We recommend using Apple’s official USB cable. While third-party cables would work, they can be unreliable. Also, you must download and install iTunes on your PC.
After downloading iTunes, sign in with your Apple ID. Then, connect your iPhone to your Windows PC.
Step 1: Open Settings > Personal Hotspot > enable Allow Others to Join and Maximize Compatibility.
Step 2: Connect your iPhone with the Windows 11 PC via the USB cable. Keep your iPhone screen turned on during this process.
If you use a third-party USB cable, iTunes might not recognize your iPhone and stop tethering.
Step 3: Open iTunes on your Windows 11 PC.
Step 4: Tap on Trust in the pop-up on your iPhone screen.
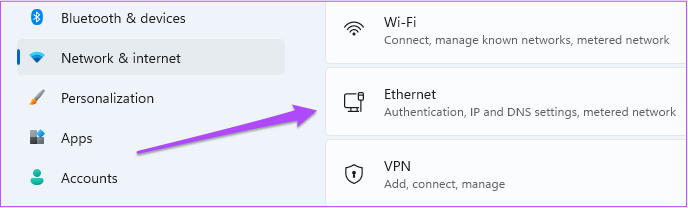
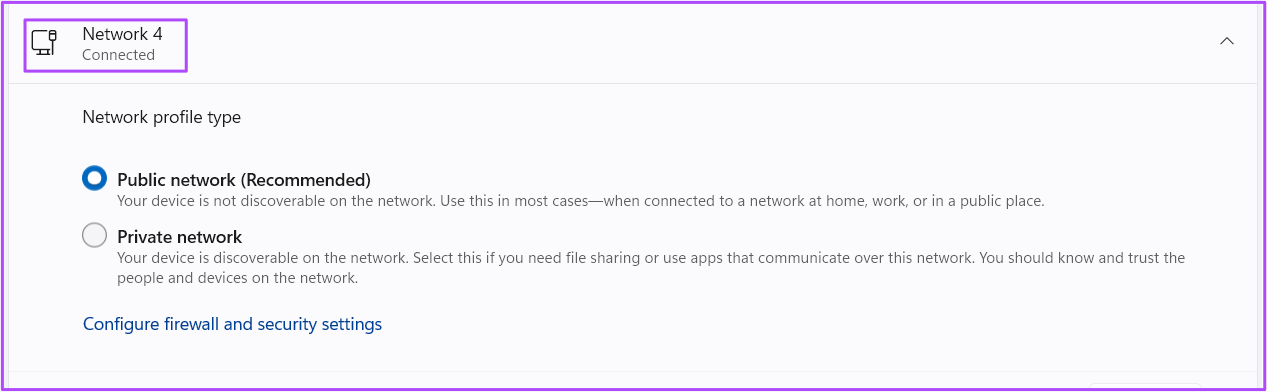
Step 5: Open Settings on Windows 11 and click on Network & Internet > Ethernet.
Step 6: Click on Sign In next to the Ethernet network name for iPhone Hotspot.
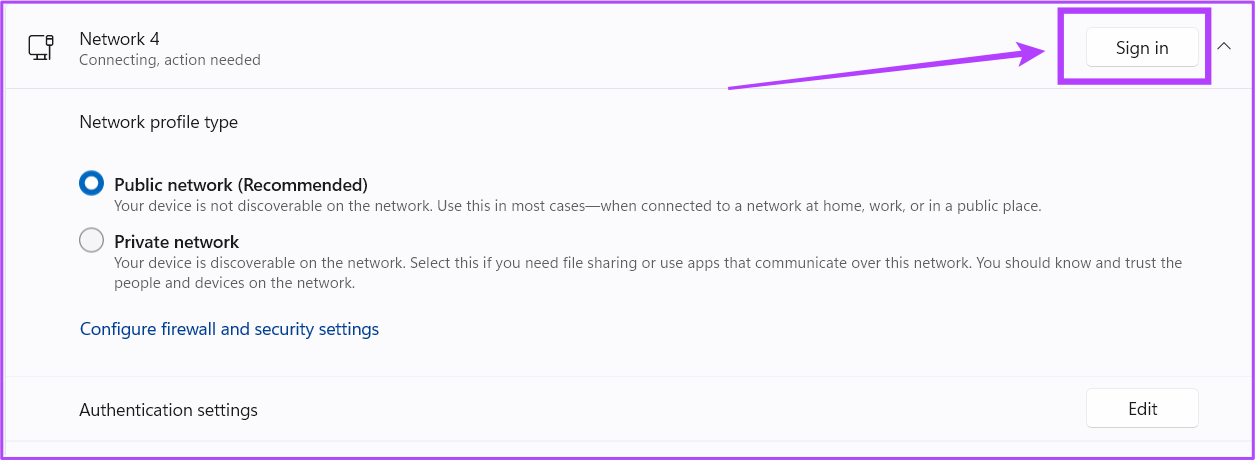
After your Windows PC connects to the iPhone Hotspot over USB, it’ll show Connected under the network name.
Was this helpful?
Last updated on 02 July, 2024
Read Next
 4 Best Fixes for Windows 10 Mobile Hotspot Grayed Out
Basic Fixes Check network connection: Ensure there are no problems with network connectivity or the router/modem.
4 Best Fixes for Windows 10 Mobile Hotspot Grayed Out
Basic Fixes Check network connection: Ensure there are no problems with network connectivity or the router/modem.
 12 Best Fixes for Windows 10 Laptop Won’t Connect to iPhone Hotspot
I usually travel light with my Windows laptop and iPhone.
12 Best Fixes for Windows 10 Laptop Won’t Connect to iPhone Hotspot
I usually travel light with my Windows laptop and iPhone.
 2 Ways to Fix iPhone Hotspot Not Showing Up on Android
https://youtu.be/U75VRX50Yzw Basic Fixes Toggle airplane mode: Toggling Airplane Mode essentially resets the radios on your phone.
2 Ways to Fix iPhone Hotspot Not Showing Up on Android
https://youtu.be/U75VRX50Yzw Basic Fixes Toggle airplane mode: Toggling Airplane Mode essentially resets the radios on your phone.
 How to Block Websites on iPhone and iPad
How to Block Specific Sites on iPhone and iPad The Screen Time functionality lets you easily block websites using the built-in Web Content restrictions.
How to Block Websites on iPhone and iPad
How to Block Specific Sites on iPhone and iPad The Screen Time functionality lets you easily block websites using the built-in Web Content restrictions.
 6 Best MagSafe Ring Holders for iPhones
Phone rings and grips have become incredibly popular with iPhone owners.
6 Best MagSafe Ring Holders for iPhones
Phone rings and grips have become incredibly popular with iPhone owners.
 Why Am I Receiving the Same Text Messages on Two iPhones
Basic Fixes Check the Apple account: Open Settings on the 2nd iPhone > Profile name > Choose the iPhone name > Remove from Account.
Why Am I Receiving the Same Text Messages on Two iPhones
Basic Fixes Check the Apple account: Open Settings on the 2nd iPhone > Profile name > Choose the iPhone name > Remove from Account.
 4 Ways to Fix Windows Laptop Not Connecting to Mobile Hotspot on Android
Try Basic Fixes Switch to Airplane Mode or Restart Devices: It will ensure the removal of temporary blocks that show up if the device is turned on for a long
4 Ways to Fix Windows Laptop Not Connecting to Mobile Hotspot on Android
Try Basic Fixes Switch to Airplane Mode or Restart Devices: It will ensure the removal of temporary blocks that show up if the device is turned on for a long
 7 Ways to Fix Mobile Hotspot Not Working on Windows 11
Try These Things First Turn off Bluetooth: Sometimes, the Bluetooth connection on your PC may interfere with the mobile hotspot.
7 Ways to Fix Mobile Hotspot Not Working on Windows 11
Try These Things First Turn off Bluetooth: Sometimes, the Bluetooth connection on your PC may interfere with the mobile hotspot.
The article above may contain affiliate links which help support Guiding Tech. The content remains unbiased and authentic and will never affect our editorial integrity.