Microsoft Word has features to create various documents, but did you know there’s a whole tab of additional tools hidden from view? It’s called the Developer tab, and it opens a world of possibilities for customization and automation. In this article, we’ll guide you through adding the Developer tab to the ribbon in Word on both Windows and Mac.
While you might not need the Developer tab for everyday tasks like writing letters or creating simple documents, it is a powerful tool for users who are comfortable with technical concepts and want to unlock the full potential of Microsoft Word. Now that you have an understanding of this, let’s start.
What Is Developer Tab in Microsoft Word and Its Use
The Developer tab in Microsoft Word is a hidden toolset aimed at users who want to go beyond basic document editing. It provides access to powerful features for creating custom forms, macros, and even building add-ins. Below are some of its notable uses and features:
- It lets you design interactive forms with elements like drop-down menus, checkboxes, text boxes, and buttons.
- It lets you automate repetitive tasks and extend Word’s functionality with code. You can record macros to capture and replay your actions later or write complex scripts for sophisticated automation.

- It gives access to the underlying structure of your document, tags, and code and technically manipulates content, which helps create custom templates or integrate with other applications.
- It helps set restrictions on editing, printing, and copying content to control how others interact with your documents. You can also use digital signatures for document security.
- It gives you access to legacy features like bookmarks, cross-references, and mail merge, which may be useful for specific document needs.
It is important to note that the Developer tab isn’t visible by default, unlike other tabs like Home or Insert. So, you must enable it manually. Let’s begin with enabling the feature on Windows.
Also Read: Best ways to indent a paragraph in Microsoft Word
How to Add the Developer Tab in Word on Windows
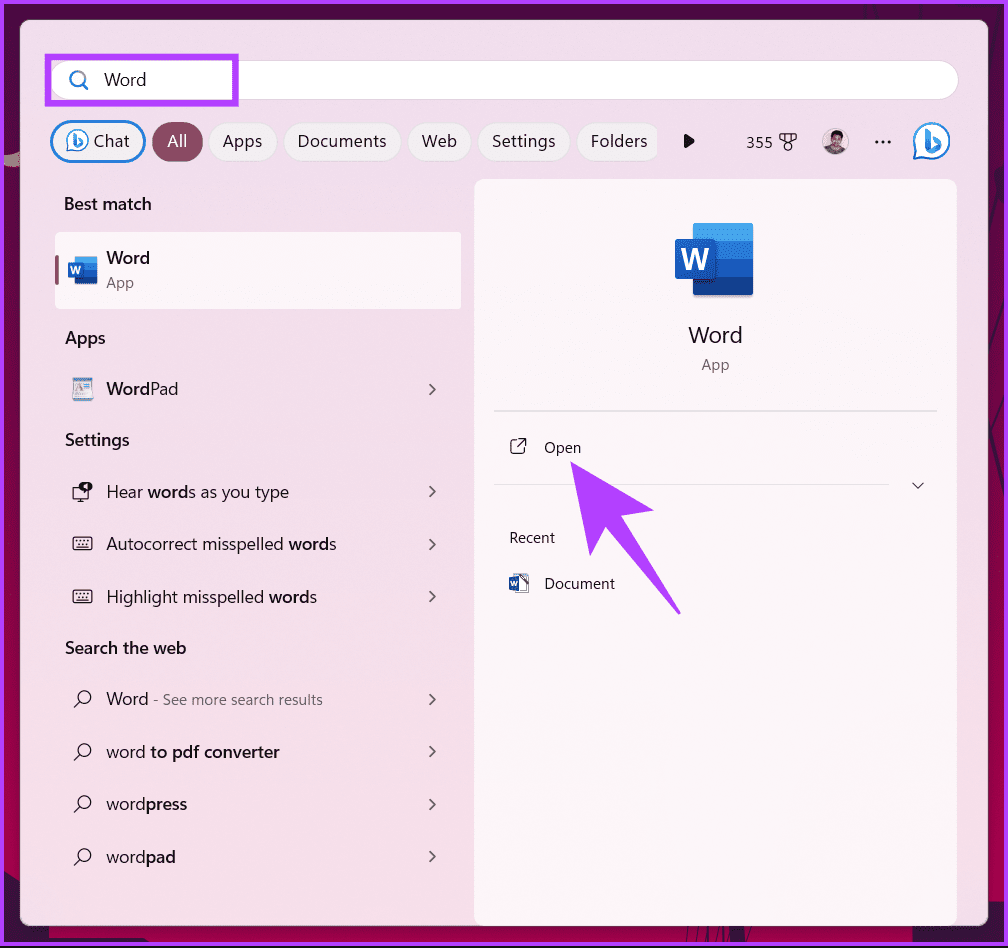
Step 1: Press the Windows key on your keyboard, type Microsoft Word, and click Open.
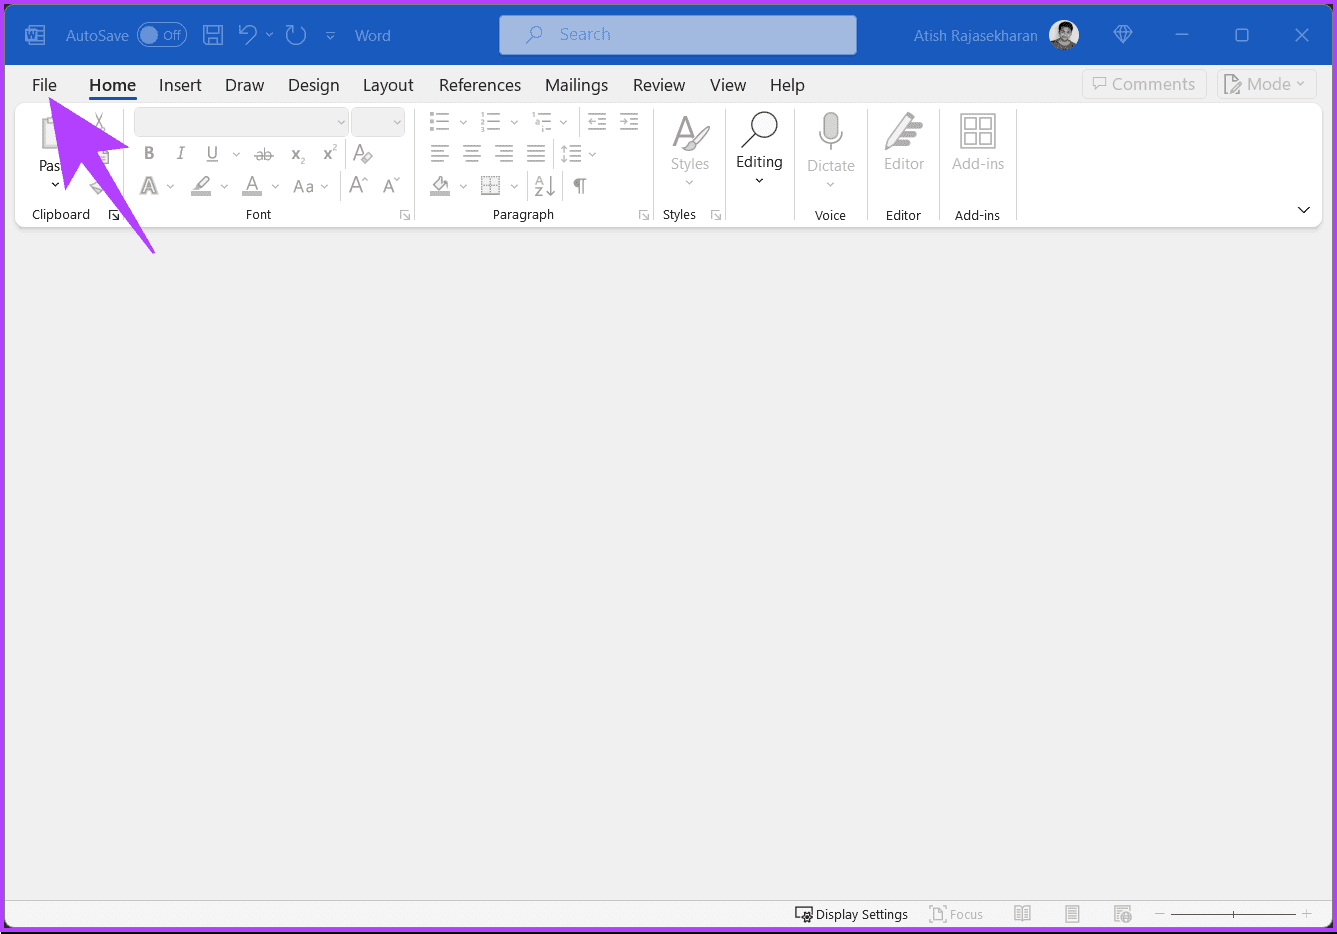
Step 2: Once opened, go to File from the toolbar.
Step 3: Select Options in the bottom left corner. This will open the Word Options window on your screen.

Step 4: Go to Customize Ribbon from the left in the Word Options window.
Step 5: You will see two boxes with several options. On the right-end side box (i.e., below Customize the Ribbon), scroll down and check the box next to Developer.
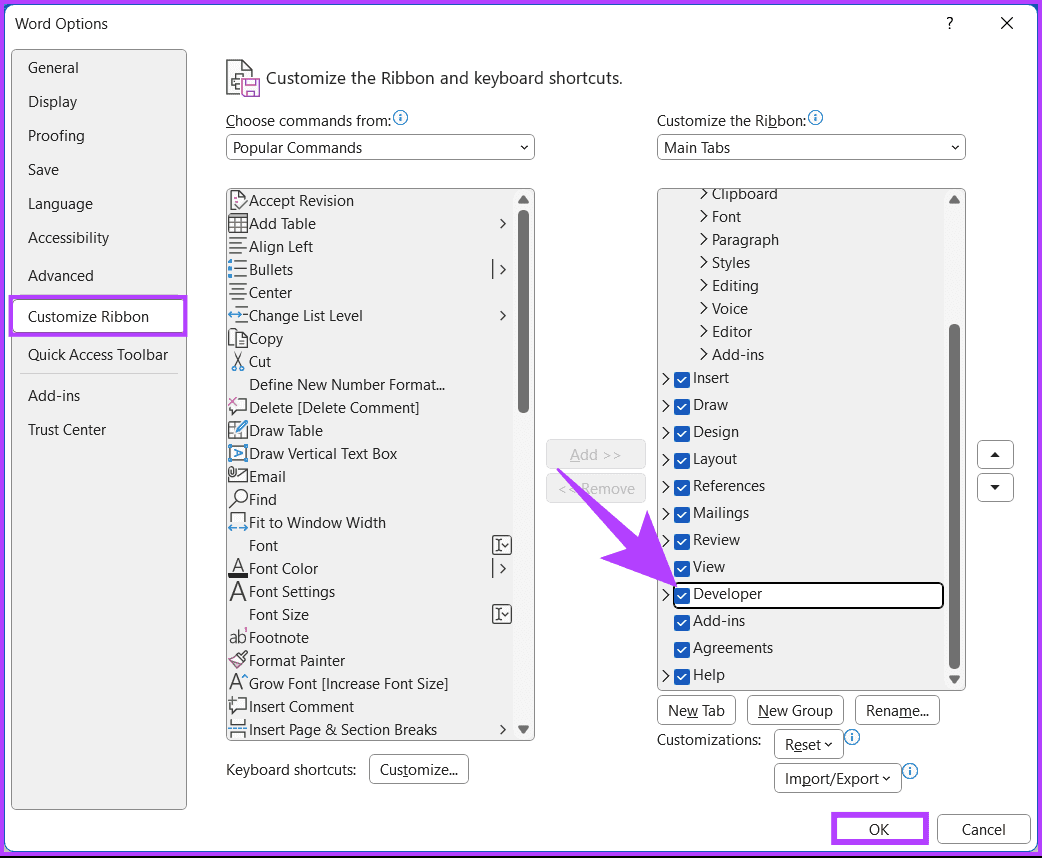
If you don’t see the Developer tab, continue with the below steps.
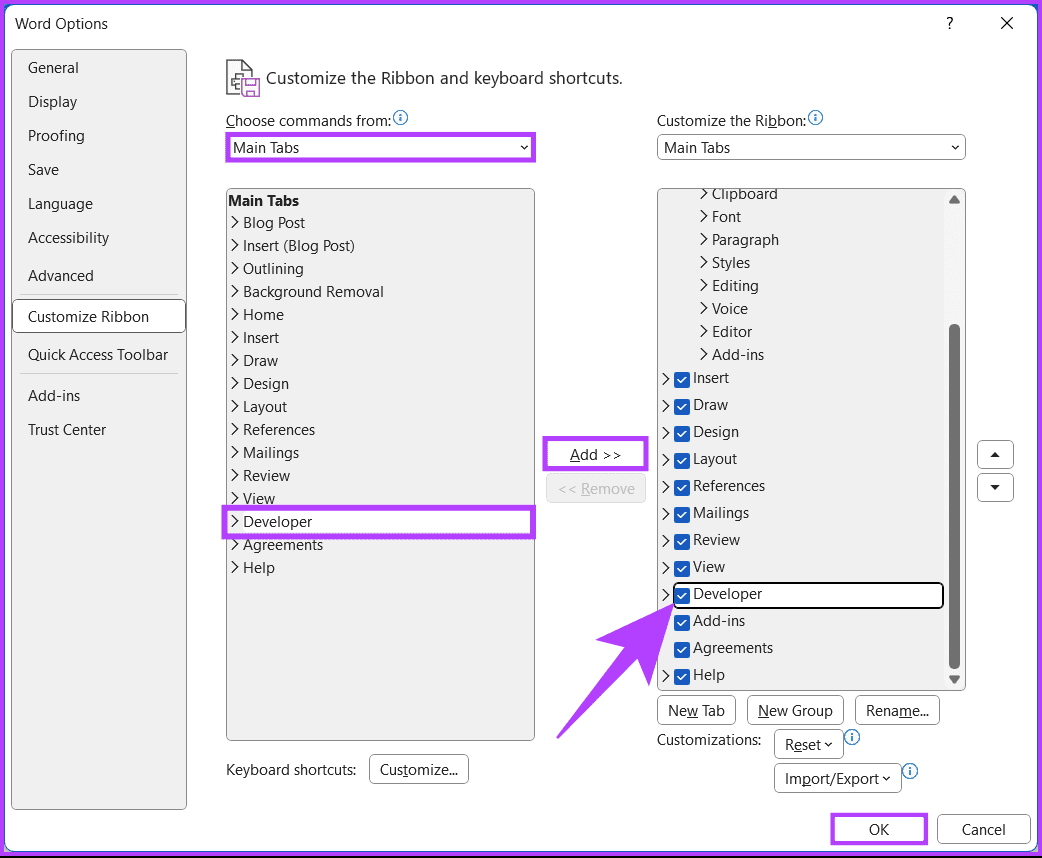
Step 6: On the left-end side box, select All Tabs in the Choose commands from the drop-down menu on the left.
Step 7: Now, select Developer and click on the Add button in the middle to bring it to the right-end side box, and to enable it, check the box next to it.
Step 8: Finally, click OK to finish and close the Word Options window.
That’s it. You have successfully added a developer tab to the Ribbon in Word. In contrast, if you ever want to disable this tab, follow the above steps, uncheck the Developer option, and click OK.
Also Read: How to print tracked changes and comments in Microsoft Word documents
How to Add the Developer Tab in Word on Mac
Unlike Windows, the steps to enable the developer tab on the ribbon in Word on Mac are slightly different. Follow the below-mentioned steps.
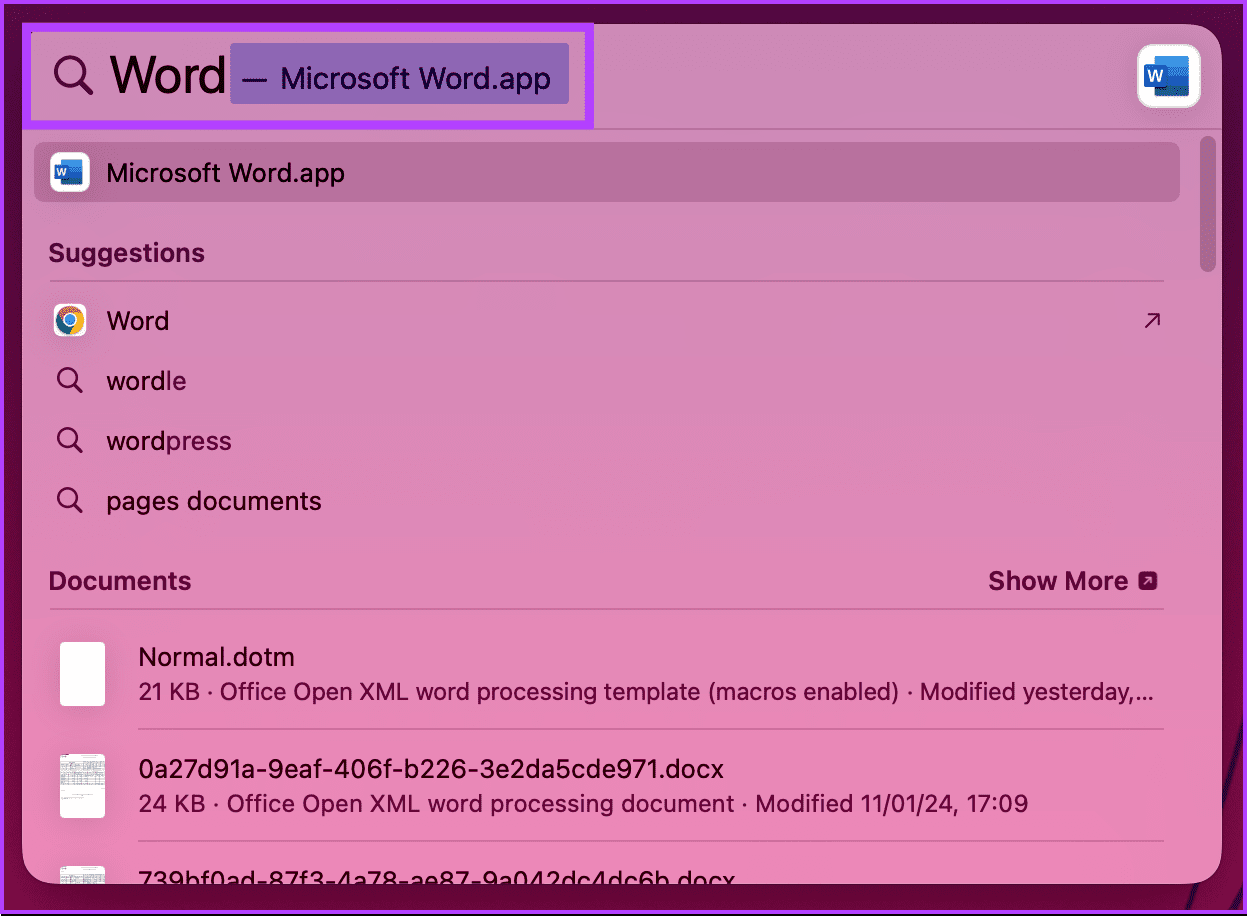
Step 1: Press the Command + Spacebar keys on your keyboard, type Word, and hit the Return key to launch Microsoft Word on your Mac.
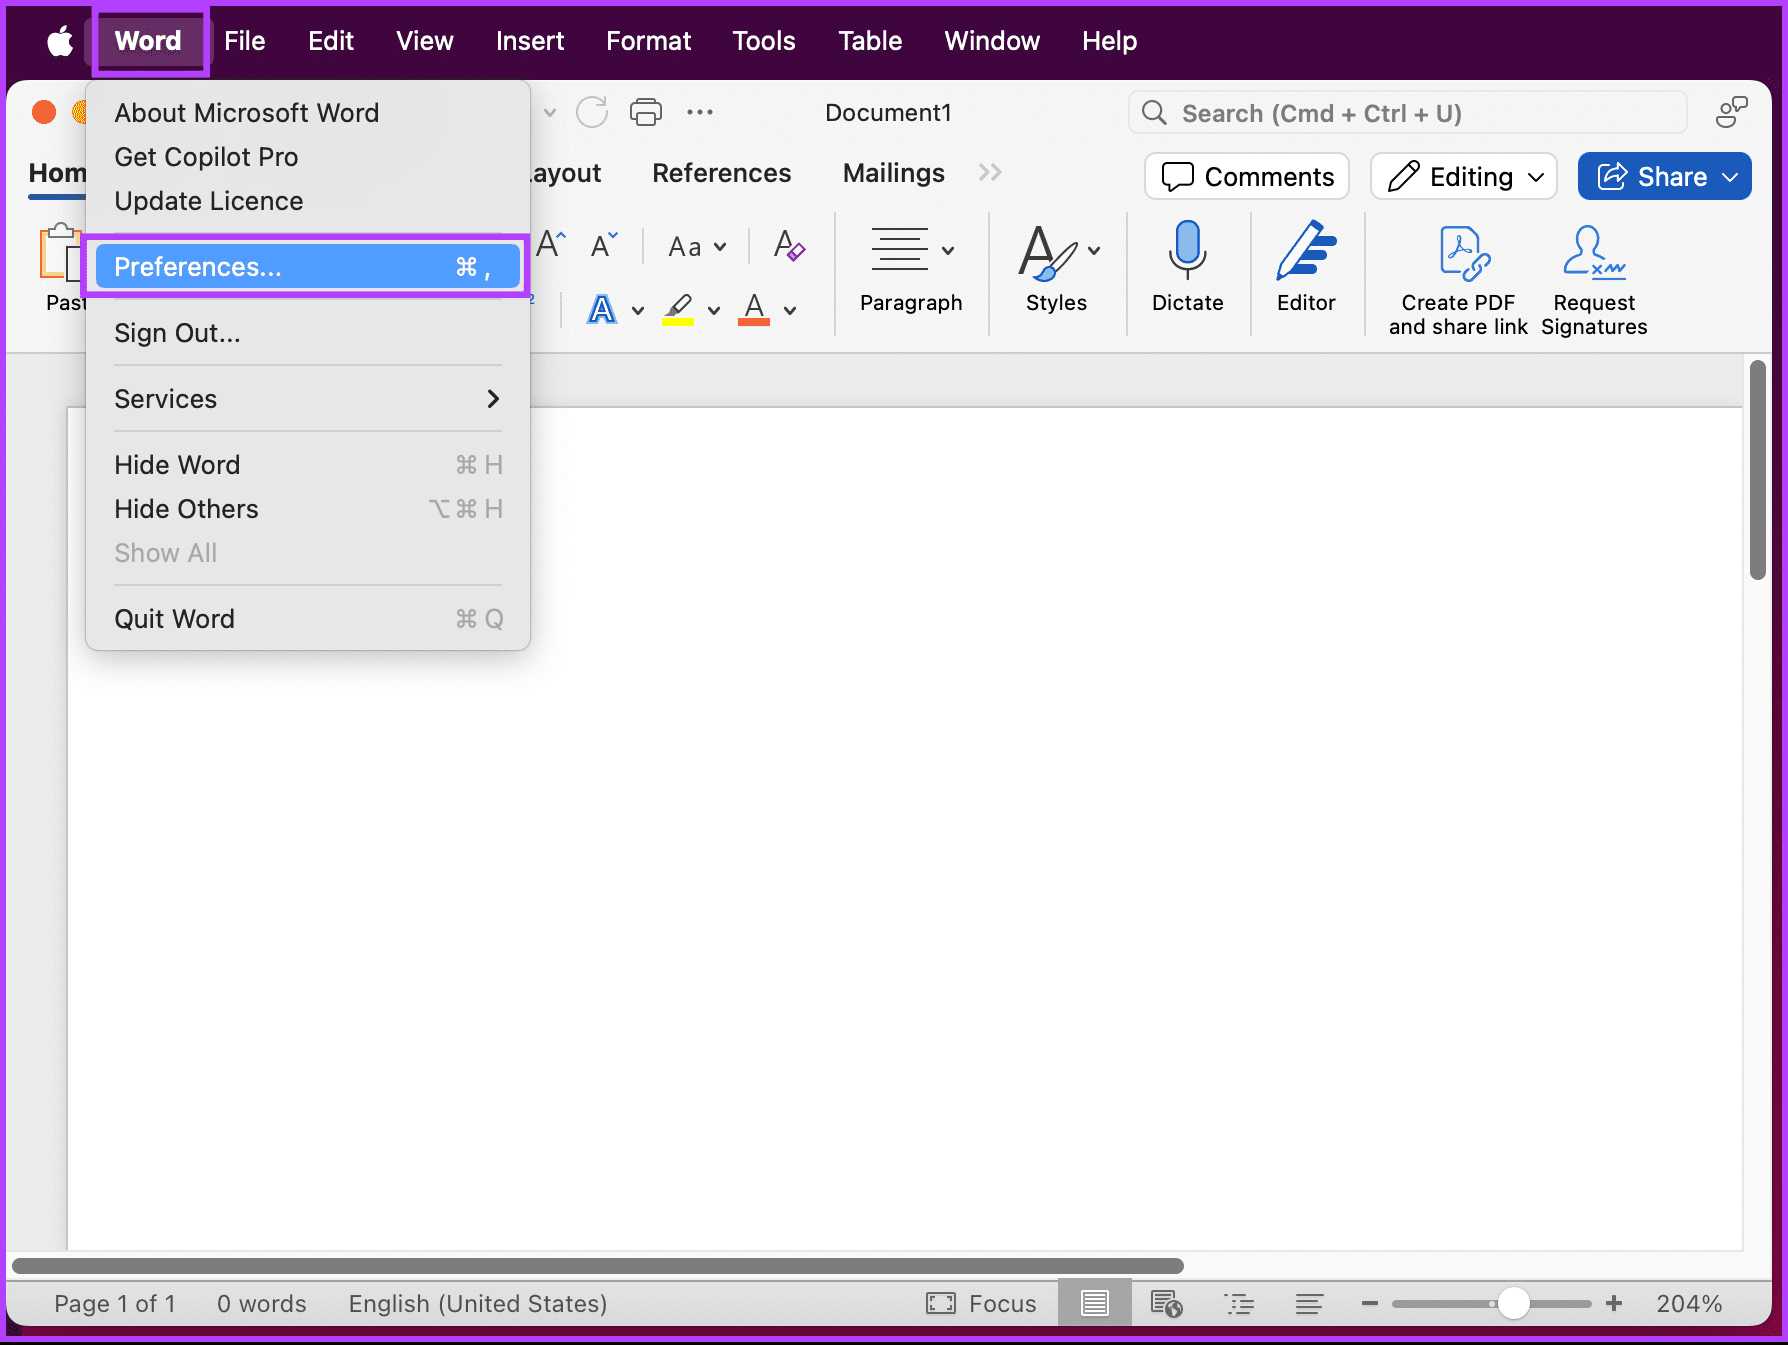
Step 2: Once launched, go to the Word option in the toolbar and choose Preferences from the drop-down menu.
Note: Alternatively, press Command + , to open Preferences.
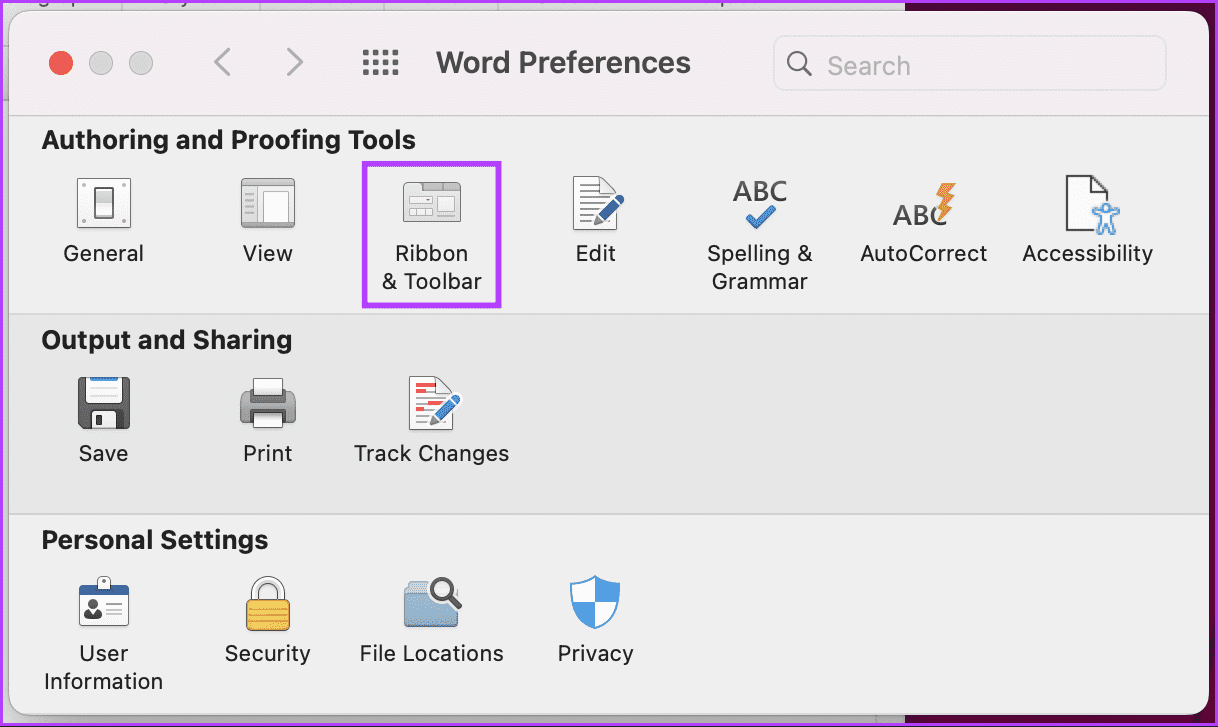
Step 3: Select ‘Ribbon & Toolbar’ from the Word Preferences window under ‘Authoring & Proofing Tools.’
Step 4: You will see two boxes with a bunch of options. On the right-end side box (i.e., below Customize the Ribbon), under Main Tabs, scroll down and check the box next to Developer. Finally, click Save.
If you don’t see the Developer tab, continue with the below steps.

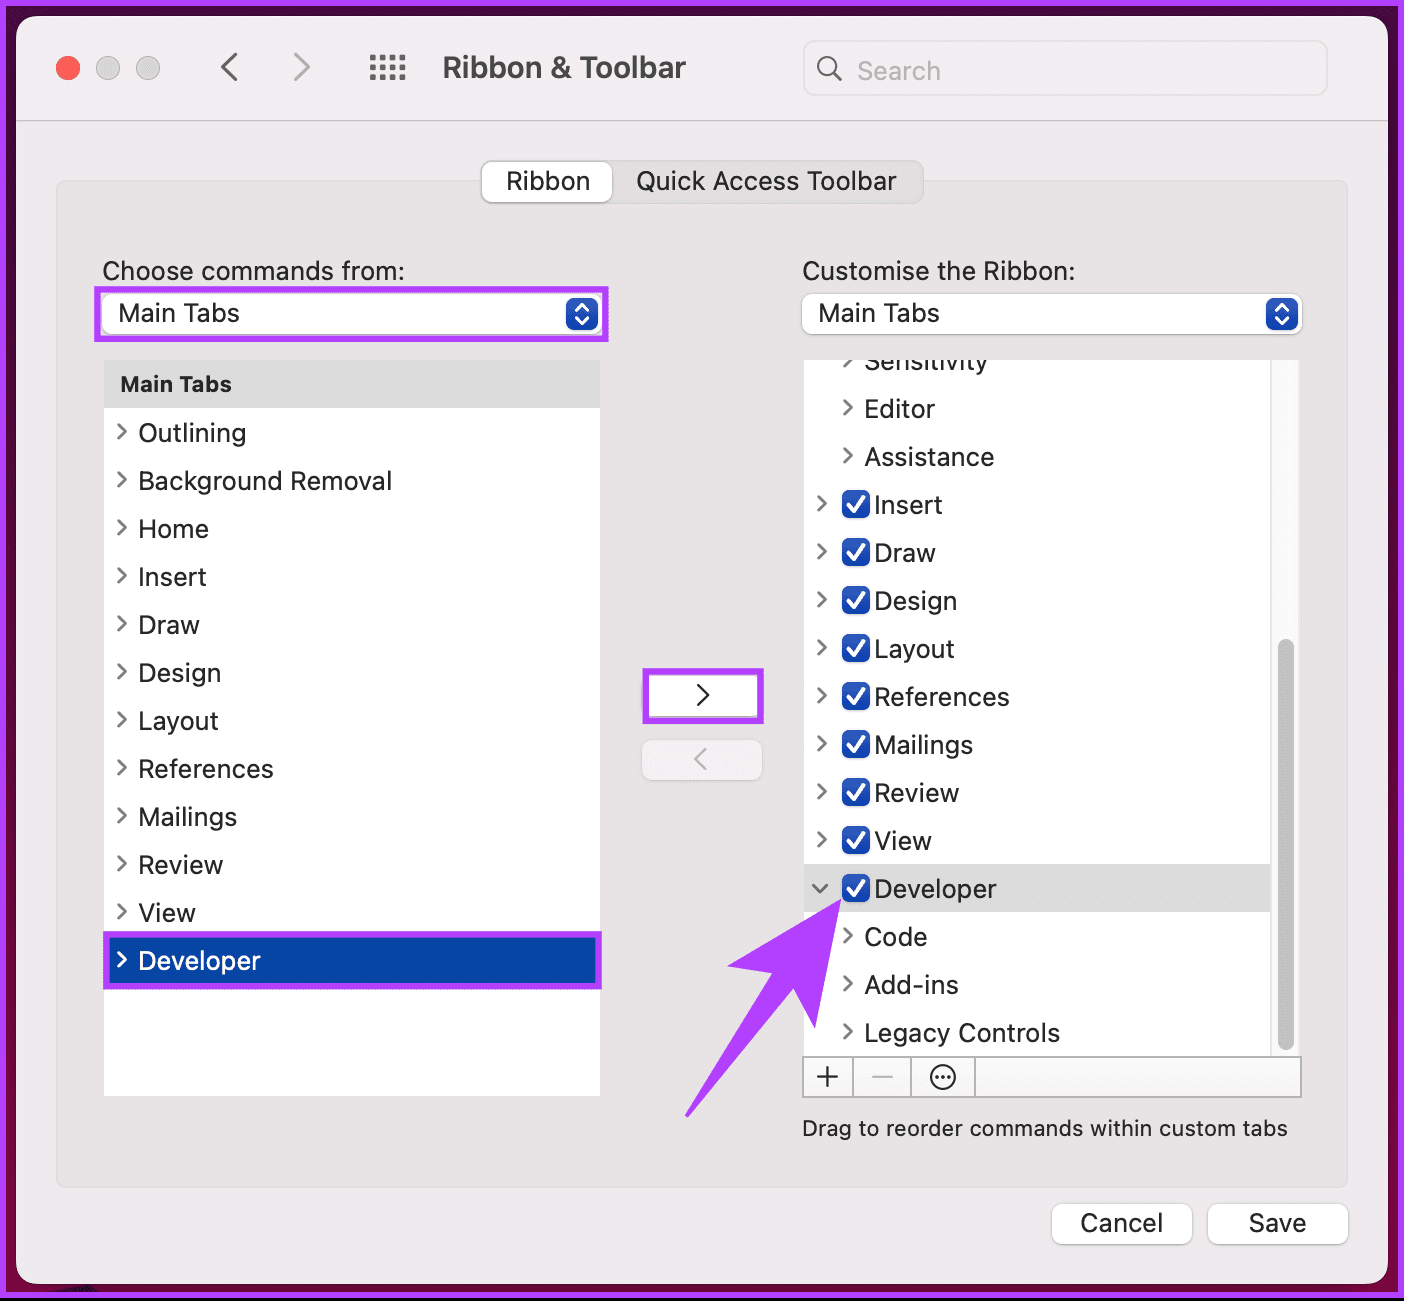
Step 5: On the left-end side box, select All Tabs in the Choose commands from the drop-down menu on the left.
Step 6: Now, select Developer and click on the Add button in the middle to bring it to the right-end side box, and to enable it, check the box next to it.
Step 7: Finally, click Save to finish and close the Word Options window.
There you go. You will see the Developer tab in Word’s toolbar. If you want to disable the Developer tab, follow the same steps and uncheck the box next to Developer in the ‘Ribbon & Toolbar’ window.
FAQs on Adding Developer Tab in Word
The Developer tab is available in most versions of Microsoft Word, including Word 2010, Word 2013, Word 2016, Word 2019, and Microsoft 365. However, some editions may have limited functionality.
Yes, the Developer tab allows you to record and run macros. The Record Macro option lets you record a series of actions, and then you can play back those actions later. This is a powerful feature for automating repetitive tasks.
Yes, you can customize the Developer tab by adding or removing commands to suit your needs better. This can be done through the Customize Ribbon section in the Word Options dialog box. You can add new groups and commands or create your macros and add them to the ribbon.
Enable Developer Mode
Whether you’re a seasoned developer or just beginning to explore these possibilities, knowing how to add the Developer tab to the Ribbon in Word unlocks a host of advanced functionalities and elevates your document creation game. You may also want to learn how to manage manual and automatic page breaks in Microsoft Word.
Was this helpful?
Last updated on 23 January, 2024
Read Next
 How to Restore the Classic File Explorer Ribbon in Windows 11
There are many reasons you would like to return to the old classic file explorer ribbon from the modern design.
How to Restore the Classic File Explorer Ribbon in Windows 11
There are many reasons you would like to return to the old classic file explorer ribbon from the modern design.
 10 Best Android Developer Options You Must Try
Have you ever tried out the Developer Options on your Android phone?
10 Best Android Developer Options You Must Try
Have you ever tried out the Developer Options on your Android phone?
 5 Ways to Fix Android “Developer Options” Not Showing Up
Developer Options on Android let you control various aspects of your phone that you otherwise can't.
5 Ways to Fix Android “Developer Options” Not Showing Up
Developer Options on Android let you control various aspects of your phone that you otherwise can't.
 Apple Pages vs Microsoft Word: Which Word Processing Software Is Better
Every major tech company out there is offering their version of the productivity suite.
Apple Pages vs Microsoft Word: Which Word Processing Software Is Better
Every major tech company out there is offering their version of the productivity suite.
 Google Docs vs. Microsoft Word Online: Which Word Processor Is Better
Google Docs goes toe-to-toe with Microsoft Word, especially with the Microsoft 365 subscription.
Google Docs vs. Microsoft Word Online: Which Word Processor Is Better
Google Docs goes toe-to-toe with Microsoft Word, especially with the Microsoft 365 subscription.
 How to Add Page Numbers in Microsoft Word
Microsoft Word is the preferred choice for many, especially those subscribed to the Microsoft 365 ecosystem.
How to Add Page Numbers in Microsoft Word
Microsoft Word is the preferred choice for many, especially those subscribed to the Microsoft 365 ecosystem.
 3 Best Ways to Add Tags in Microsoft Word
Have you ever searched for a file using a particular keyword in your Windows File Explorer?
3 Best Ways to Add Tags in Microsoft Word
Have you ever searched for a file using a particular keyword in your Windows File Explorer?
 6 Ways to Fix Black Screen on Pressing Alt + Tab on Windows
Fix 1: Change the Display Mode of the Application (Game) The black screen issue usually appears when tabbing out of a full-screen game.
6 Ways to Fix Black Screen on Pressing Alt + Tab on Windows
Fix 1: Change the Display Mode of the Application (Game) The black screen issue usually appears when tabbing out of a full-screen game.
The article above may contain affiliate links which help support Guiding Tech. The content remains unbiased and authentic and will never affect our editorial integrity.