Method 1: Use the Notes Web App
Note: You can’t view or edit any notes within the Notes app’s ‘On My iPhone’ folder. If you still want to access them, you must move the notes to a folder in the iCloud section of the Notes app.
Step 1: Go to iCloud, log in with your Apple ID credentials, and sign in to your account.
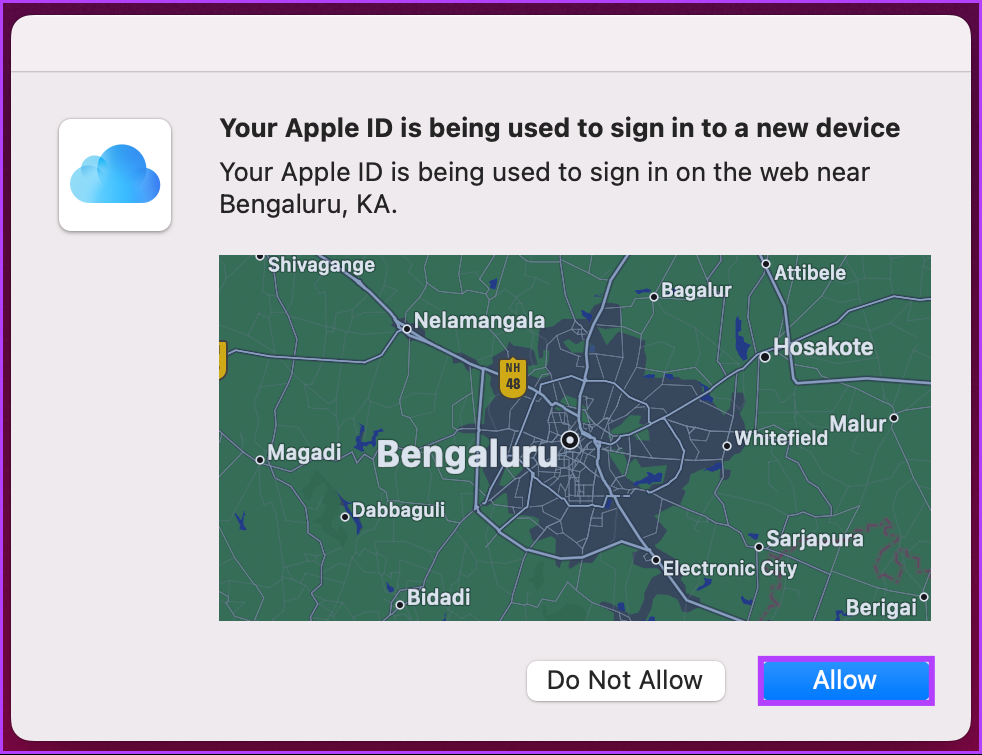
Step 2: A pop-up will appear on your other Apple device (iPhone, Mac, or iPad) that says, ‘Your Apple ID is being used to sign into a new device.’ Click Allow.
Step 3: Once you do, you will get a verification code that you will need to enter into your Windows PC, where you want to access Apple Notes.
Step 4: On the next screen, you will be asked if you ‘Trust this browser?’. Click on Trust.
Step 5: You will land on your iCloud account. From here, click on Notes.

That’s about it. You have access to your Apple Notes. You can read your notes, edit them, create new notes, and add or rename folders. However, the Notes web app does not allow you to archive or lock notes.
If you can’t see your notes, go to your iPhone’s settings > Apple ID > tap on iCloud > toggle on the switch next to Notes.
Method 2: Create a Progressive Web App (PWA) for Apple Notes
Step 1: Go to iCloud. Log in with your Apple ID credentials and sign in to your account.
Step 2: You will get a pop-up on your other Apple device. Click Allow.
Step 3: Once you do, you will get a verification code that you must enter into your Windows PC, where you want to access Apple Notes.
Step 4: On the next screen, you will be asked if you ‘Trust this browser?’ click Trust.
Step 5: You will land on your iCloud account. From here, click on Notes.
Step 6: After the Notes web app finishes loading, click on the three-dot Chrome menu at the top right corner.
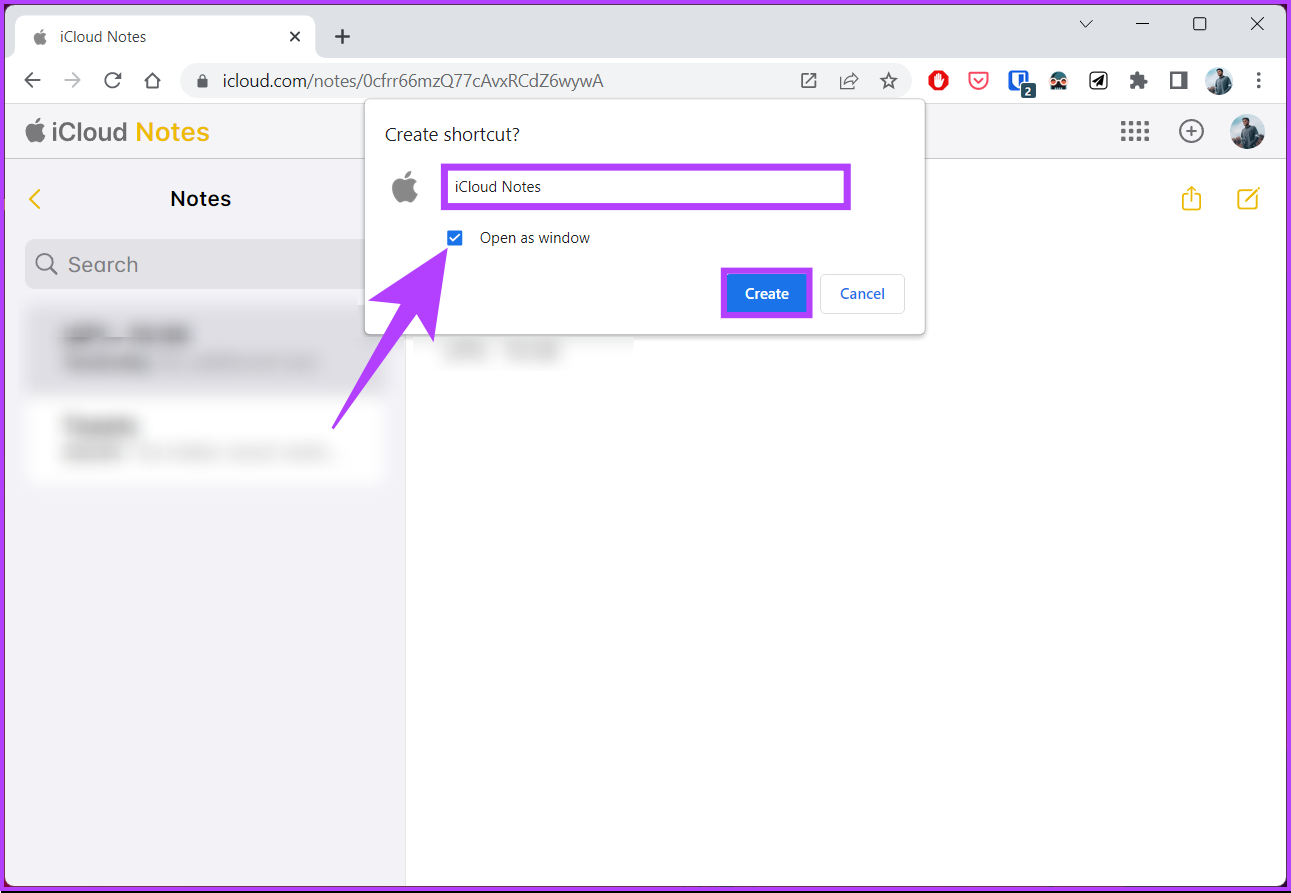
Step 7: From the drop-down, click on More Tools > choose Create Shortcut.

Step 8: In the Create shortcut? prompt, name the web app > check the box next to Open as Window > click Create.
There you go. When you open the Apple Notes shortcut web app, it will open in a dedicated Chrome or Edge window without the address bar and offer an app-like experience. You can view, add, edit, or share notes without issues.
Also Read: How to sync Apple Notes with OneNote
Method 3: Sync Apple Notes to Gmail
If you have a Google account added to your iPhone, syncing the Apple Notes app on Gmail is possible. However, the catch is that only new notes you create within the Gmail folder on your iPhone’s Notes app will sync, not your old notes or the notes in other folders.
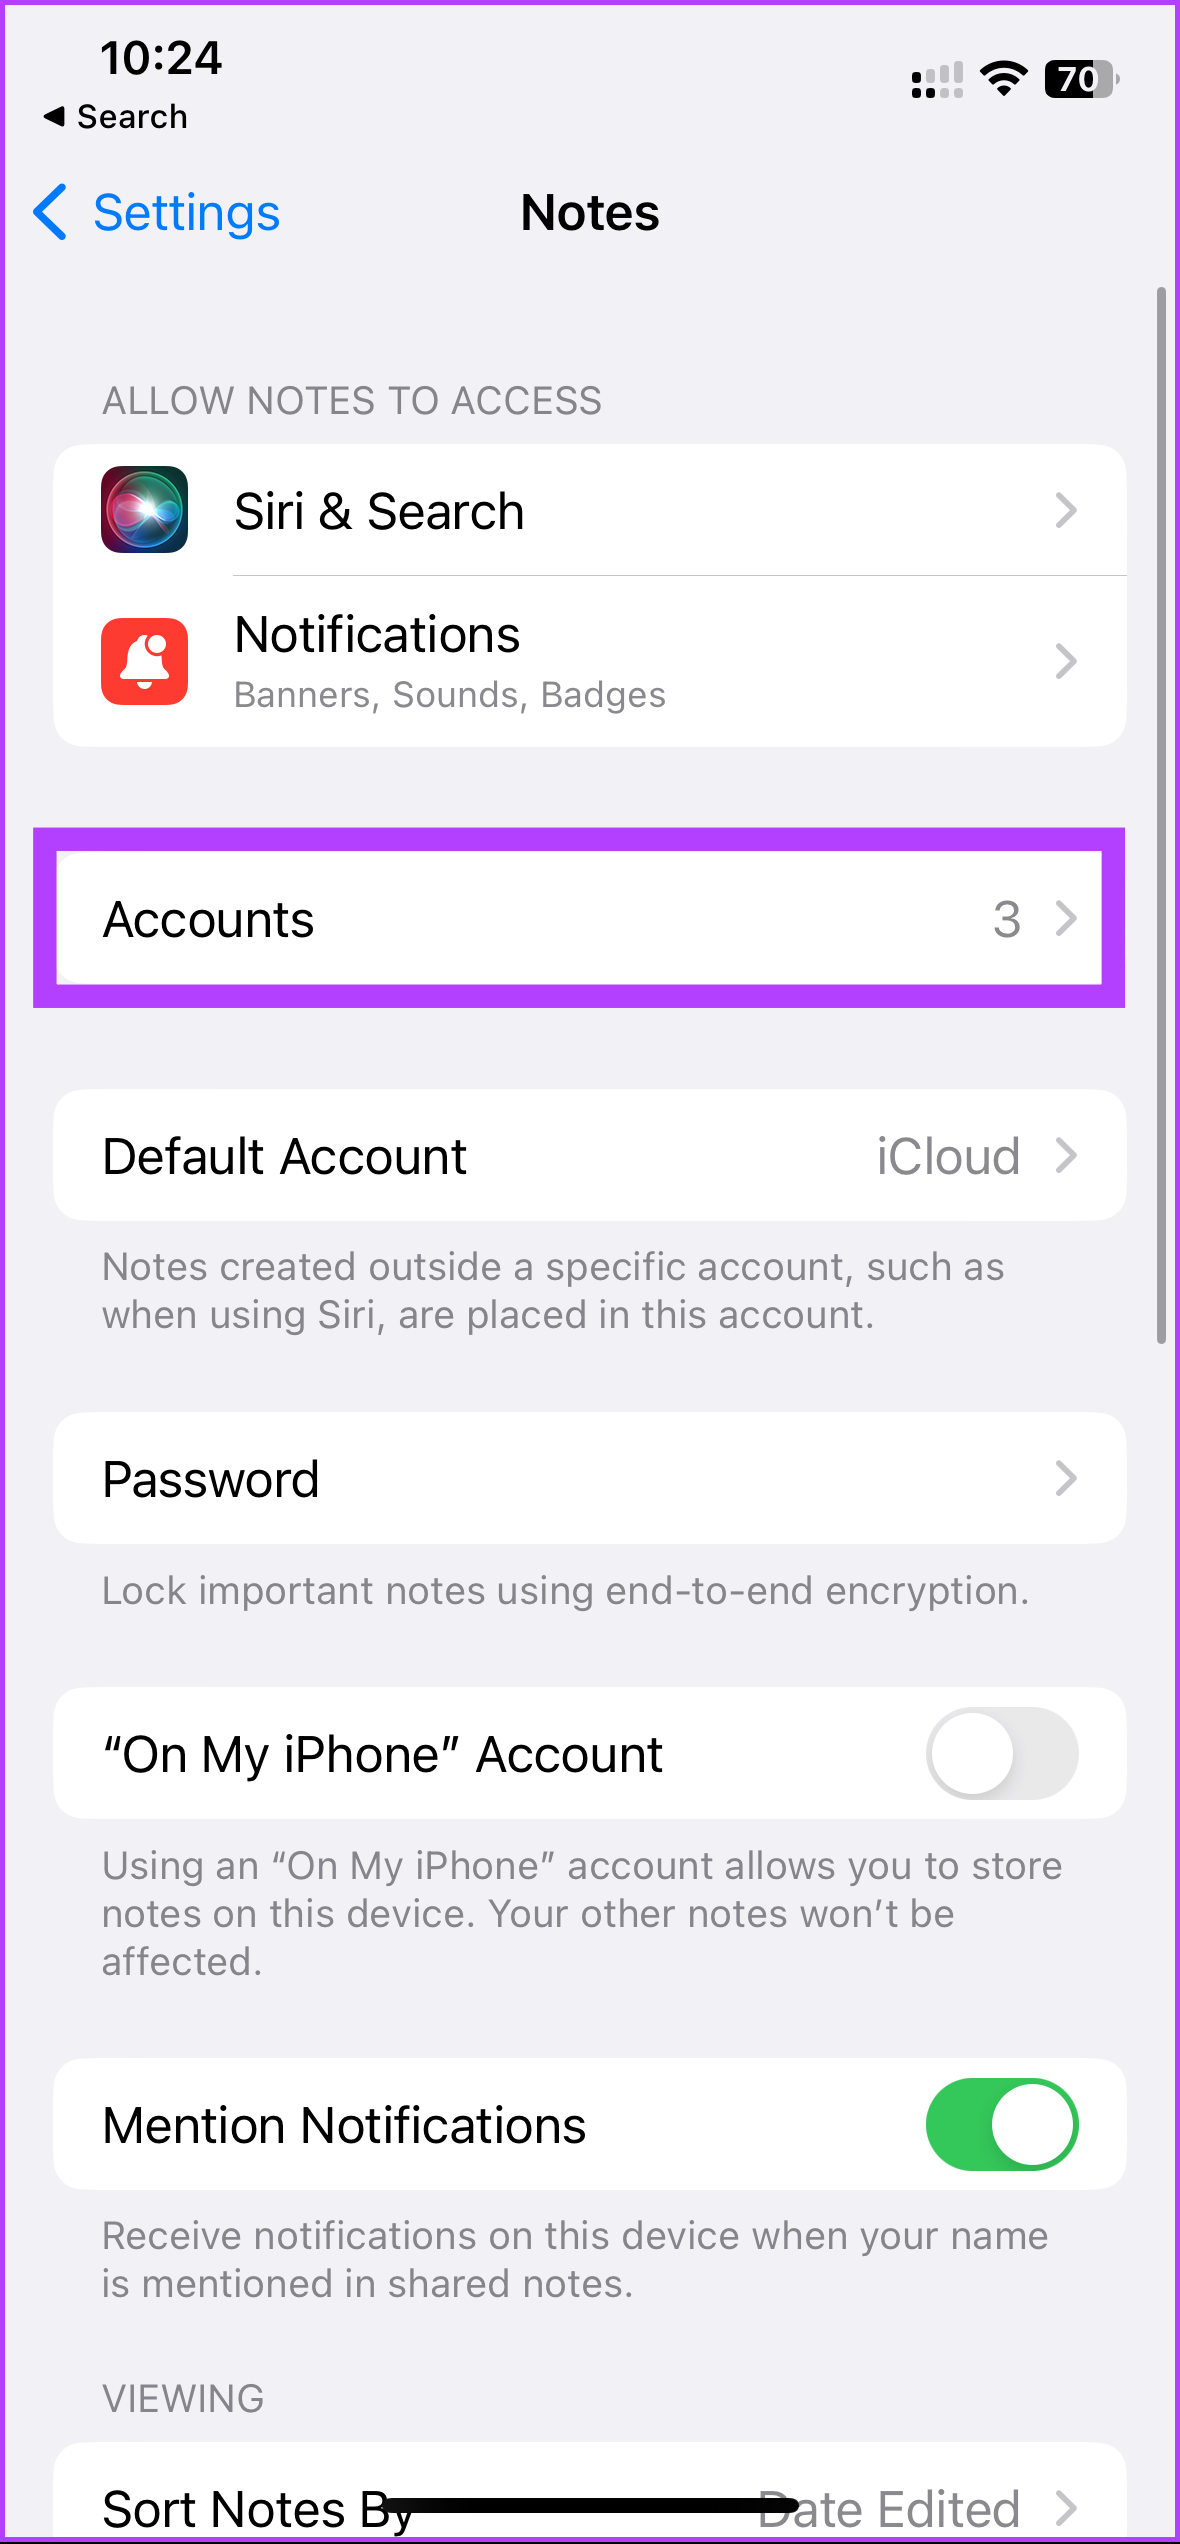
Step 1: Go to the Settings app on your iPhone > scroll down and tap on Notes.
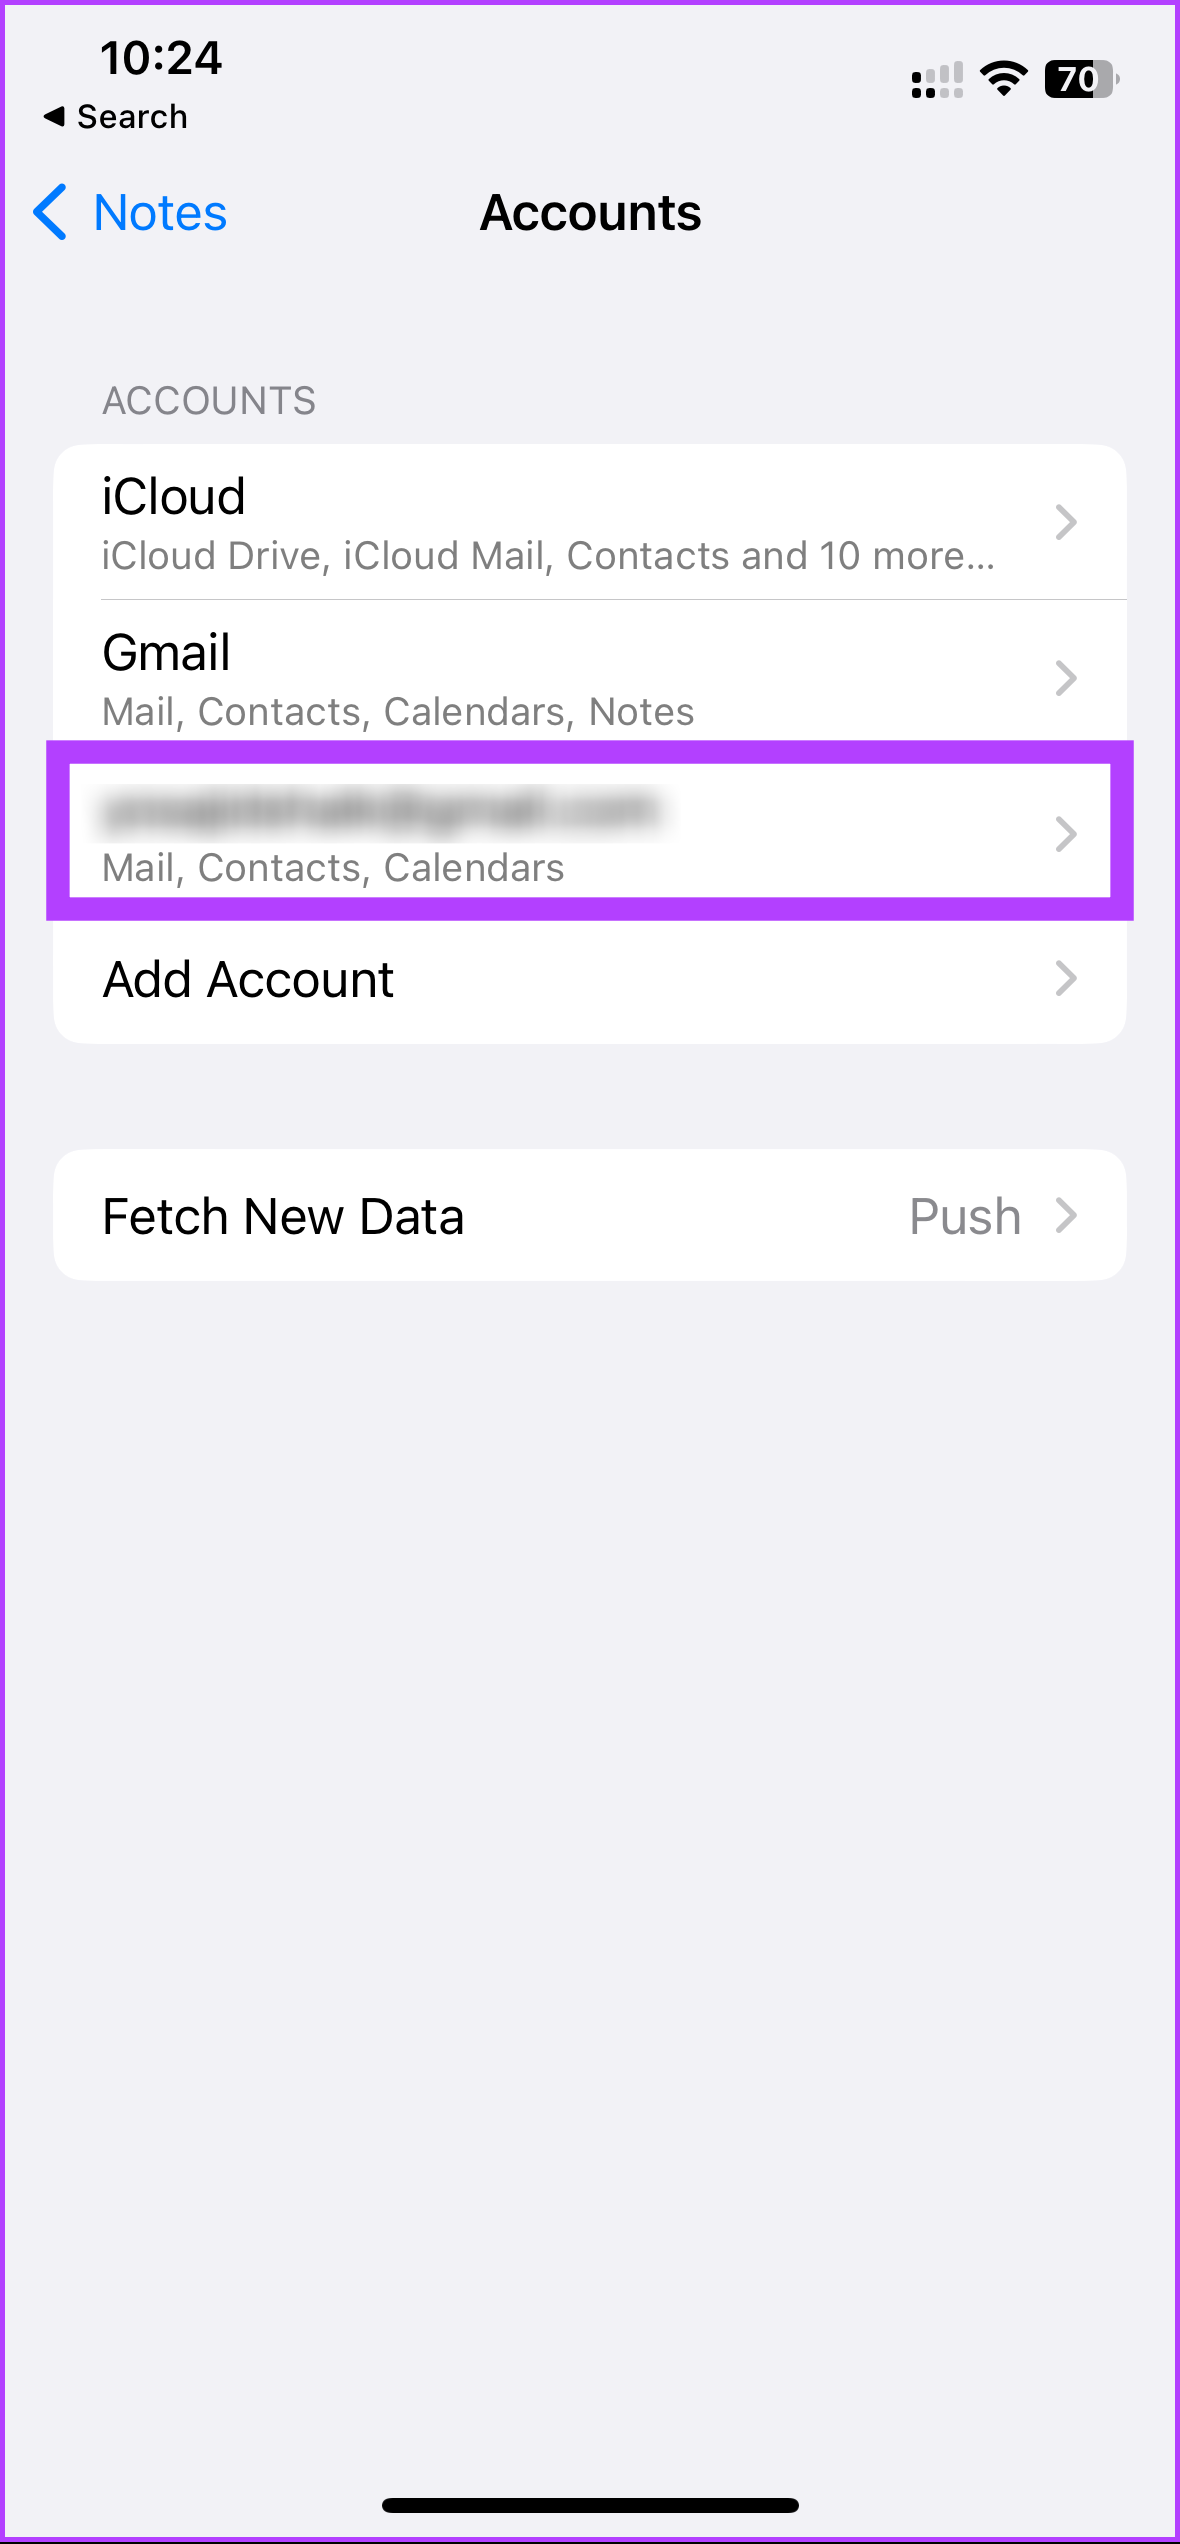
Step 2: Under Notes, tap on Accounts > tap on the Gmail account to which you want to sync your notes.
Step 3: Under Gmail account settings, toggle on the button next to Notes.
Once you do the above steps, you will see a separate Notes folder under the Gmail header in the Notes app. Any note you create within it is accessible via the Gmail web app on your PC.
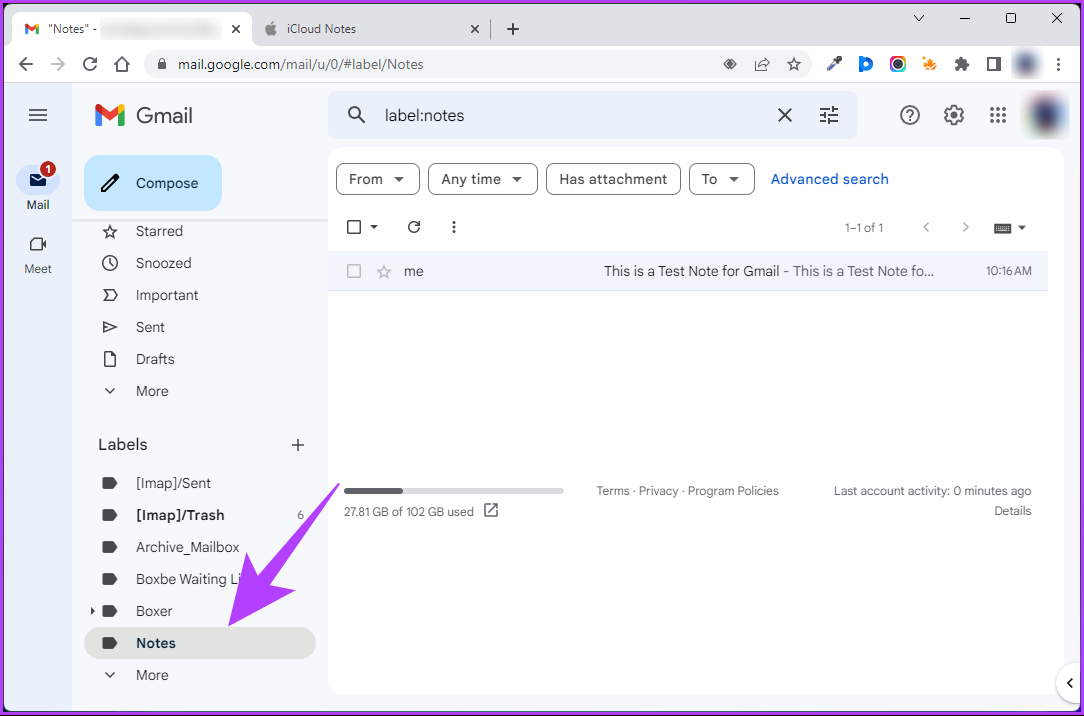
Step 4: Go to Gmail from your preferred browser on your Windows or Mac computer.
Step 5: Under Label, select Notes to view your synced Apple Notes.
Note that Gmail does not allow you to edit these notes through its web app. You can only do that on your iPhone; check our detailed guide to view iPhone notes in Gmail.
FAQs
Apple Notes is not officially available for Windows as it is a native app of the Apple ecosystem. However, this article mentions different ways to access Apple Notes on Windows.
Yes, you can. In fact, we have a dedicated guide to help you save Apple Notes as a PDF on your iPhone, iPad, or Mac.
The Notes app on the iPhone stores the notes in a database file stored locally. The exact location of the file may vary depending on the version of iOS and the device you are using. However, the Notes data is generally stored in the “Notes” folder of the device’s internal storage.
Was this helpful?
Last updated on 30 May, 2024
Read Next
 3 Ways to Access Google Keep Notes on Windows 11
Method 1: Access Google Keep Notes on the Web Google Keep lets you create, sync, and access notes across multiple devices.
3 Ways to Access Google Keep Notes on Windows 11
Method 1: Access Google Keep Notes on the Web Google Keep lets you create, sync, and access notes across multiple devices.
 How to Access Sticky Notes on iPhone, Android, and Mac
Sticky Notes has been a part of the Windows operating system for years.
How to Access Sticky Notes on iPhone, Android, and Mac
Sticky Notes has been a part of the Windows operating system for years.
 6 Best Ways to Access Windows Tools on Windows 11
Windows Tools carries useful utilities like Event Viewer, Task Scheduler, and System Configuration Tool, organized into a folder for easy access.
6 Best Ways to Access Windows Tools on Windows 11
Windows Tools carries useful utilities like Event Viewer, Task Scheduler, and System Configuration Tool, organized into a folder for easy access.
 Top 8 Ways to Fix Sticky Notes Not Working on Windows 10
Recently, Sticky Notes received a much-needed update for the Windows 10.
Top 8 Ways to Fix Sticky Notes Not Working on Windows 10
Recently, Sticky Notes received a much-needed update for the Windows 10.
 6 Ways to Recover Deleted Sticky Notes in Windows 10
Microsoft improved Sticky Notes with Windows 10 while retaining the simplicity of taking notes that came with the classic version.
6 Ways to Recover Deleted Sticky Notes in Windows 10
Microsoft improved Sticky Notes with Windows 10 while retaining the simplicity of taking notes that came with the classic version.
 4 Best Ways to Put Sticky Notes on Desktop in Windows 10
Sticky Notes is one of the coolest apps ever created.
4 Best Ways to Put Sticky Notes on Desktop in Windows 10
Sticky Notes is one of the coolest apps ever created.
 3 Ways to Fix Sticky Notes App Not Working on Windows 11
Try Basic Fixes Update the Sticky Notes app: Using an outdated app version can cause problems.
3 Ways to Fix Sticky Notes App Not Working on Windows 11
Try Basic Fixes Update the Sticky Notes app: Using an outdated app version can cause problems.
 5 Ways to Fix Quick Access Not Working on Windows 11
https://youtu.be/NlAnVpZD1hA Fix 1: Check File Explorer Options If Quick Access is not showing your recently opened files and frequently used folders, check File Explorer's Options to ensure the feature is
5 Ways to Fix Quick Access Not Working on Windows 11
https://youtu.be/NlAnVpZD1hA Fix 1: Check File Explorer Options If Quick Access is not showing your recently opened files and frequently used folders, check File Explorer's Options to ensure the feature is
The article above may contain affiliate links which help support Guiding Tech. The content remains unbiased and authentic and will never affect our editorial integrity.