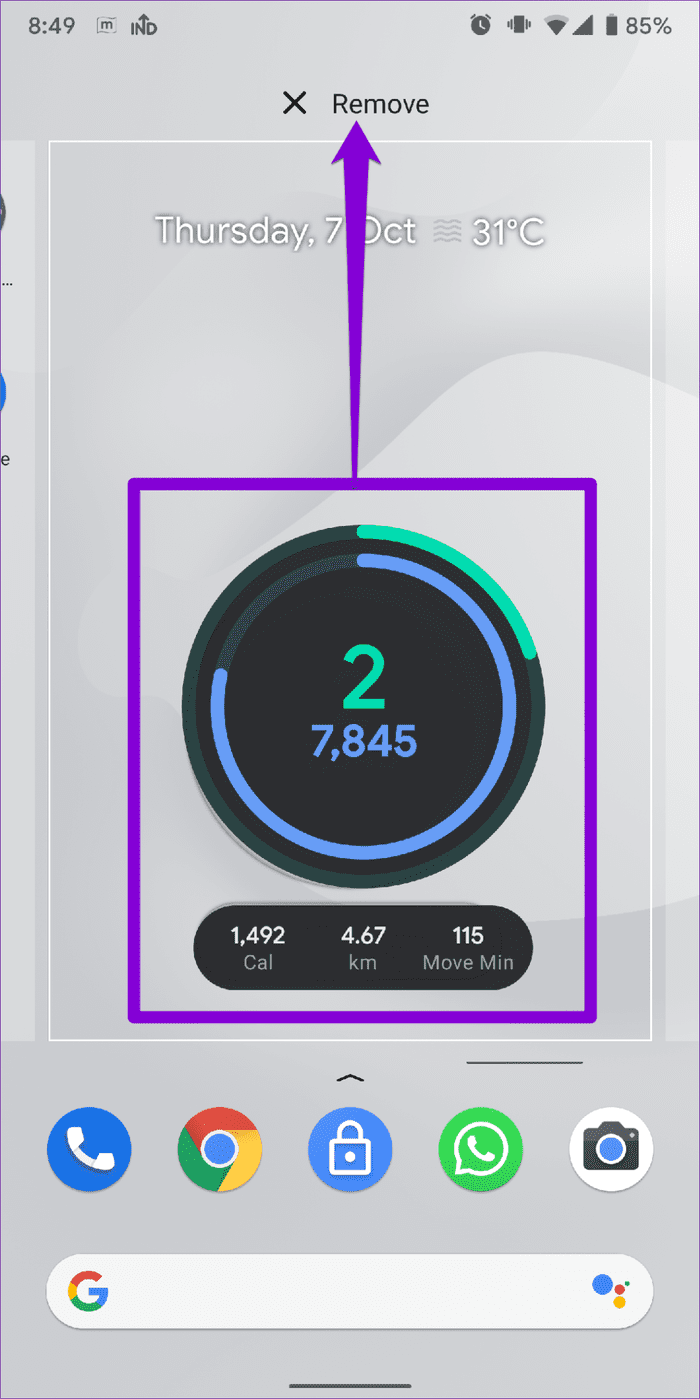
Fix 1: Re-Add the Widget
Removing and re-adding the widget on Android has seemed to work well while fixing widget-related issues.
Step 1: Hold the widget and drag it to the Remove option at the top of the screen.
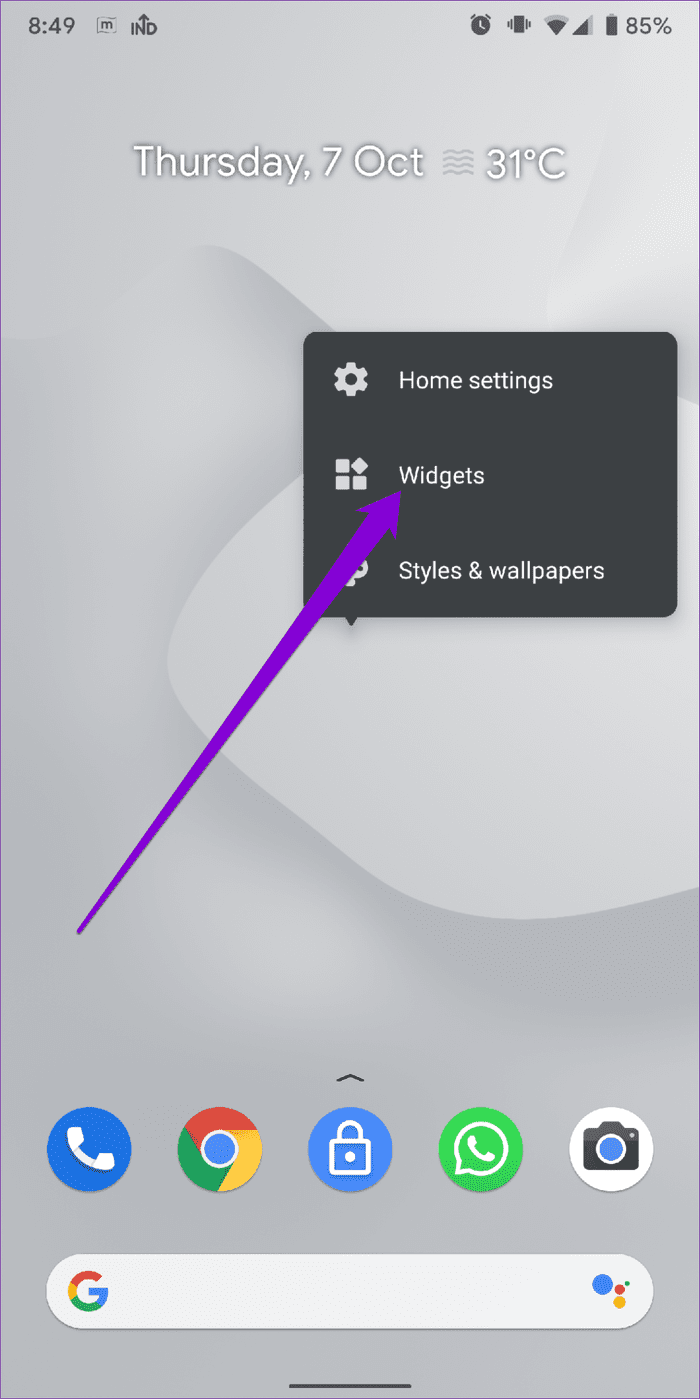
Step 2: Tap and hold anywhere on your home screen, then select Widgets from the menu that pops up. Now, add your widget again to see if it is working properly.
Fix 2: Turn off Power Saver
Android’s battery saver often reduces an app’s ability to work in the background. The same holds for app widgets. Thus, you can try turning it off.
Bring down the quick settings panel. Click on the Battery Saver icon to toggle it off.
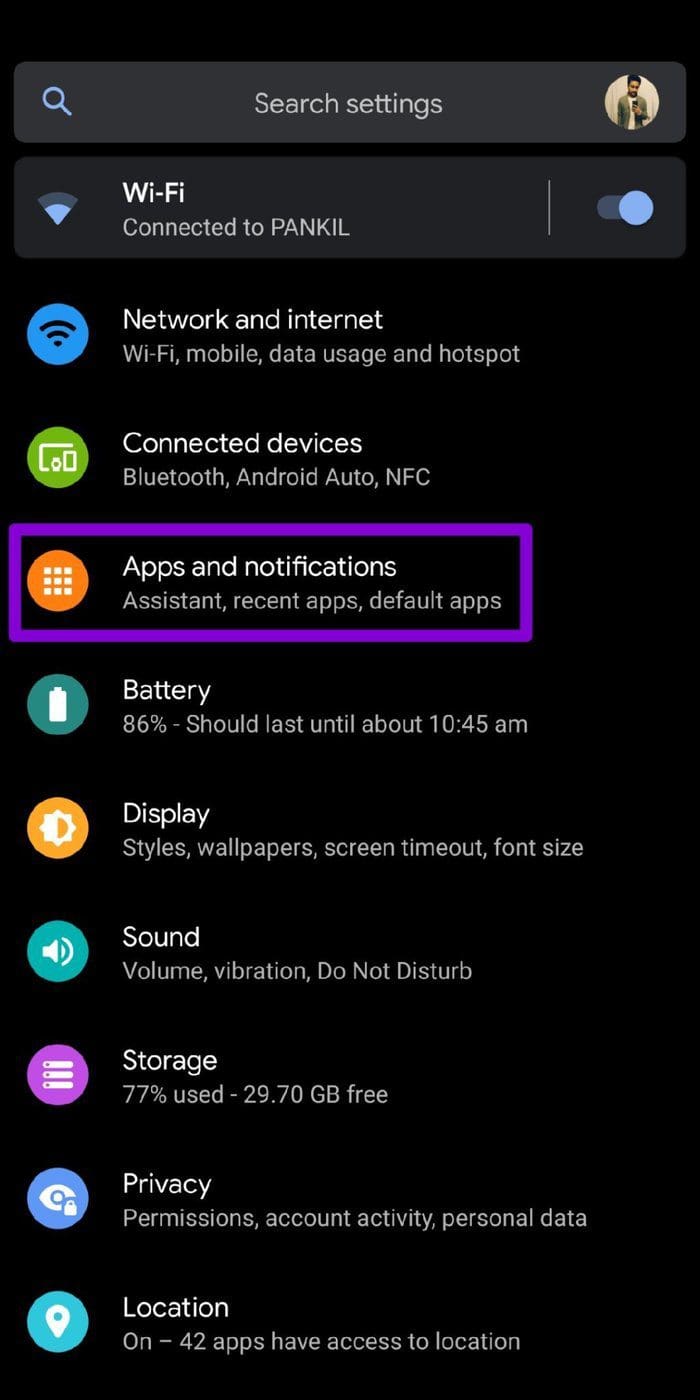
Fix 3: Allow the App to Run in the Background
Aside from the system battery saver, you also need to ensure the app associated with the widget isn’t prohibited from working in the background.
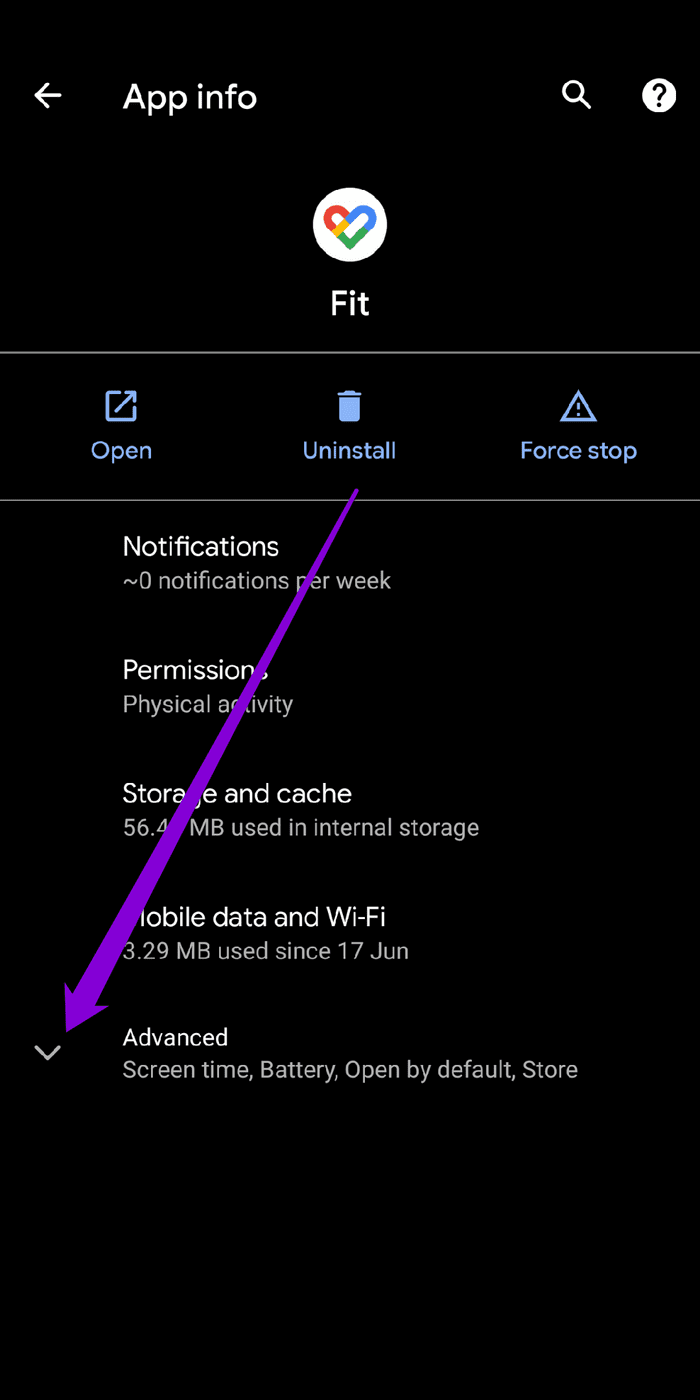
Step 1: Open the Settings app on your phone. Go to Apps and Notifications, then tap the app associated with the widget.

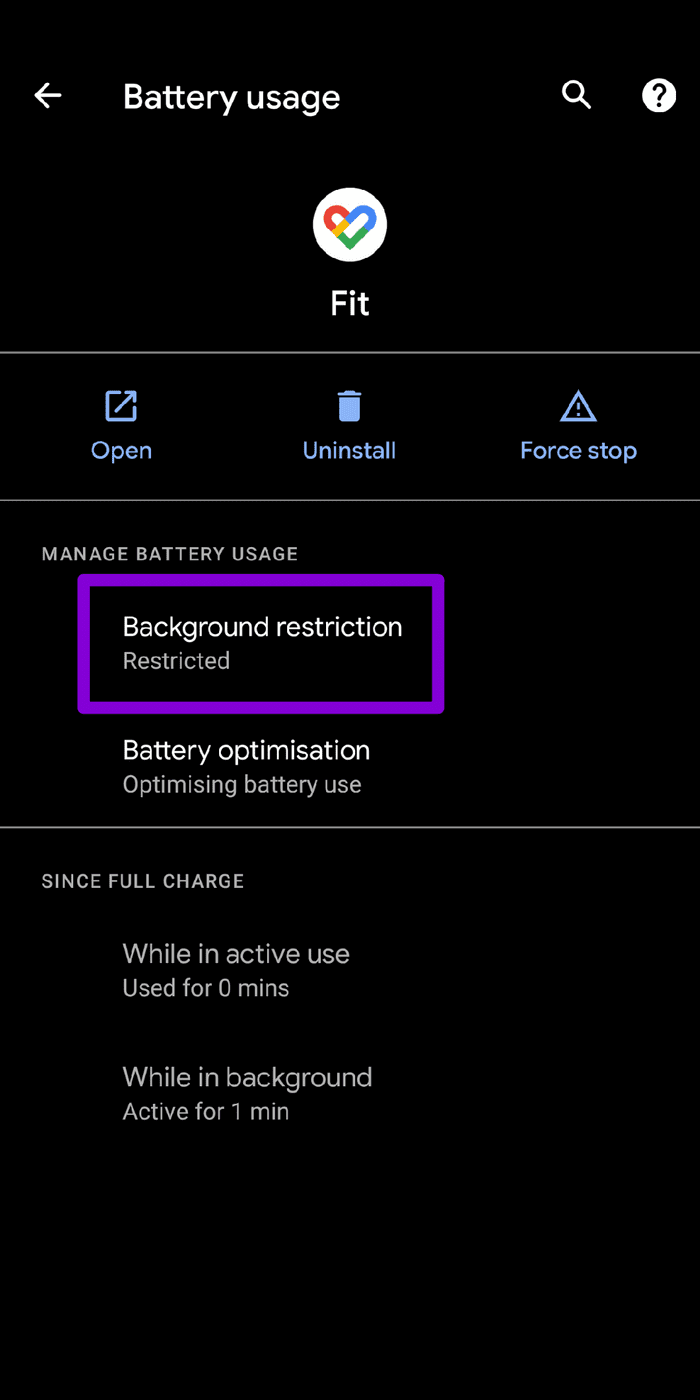
Step 2: On the app info page, expand the Advanced menu and go to Battery.

Step 3: Under Manage Battery Usage, tap on the Background restriction option followed by Remove to allow the app to work in the background.
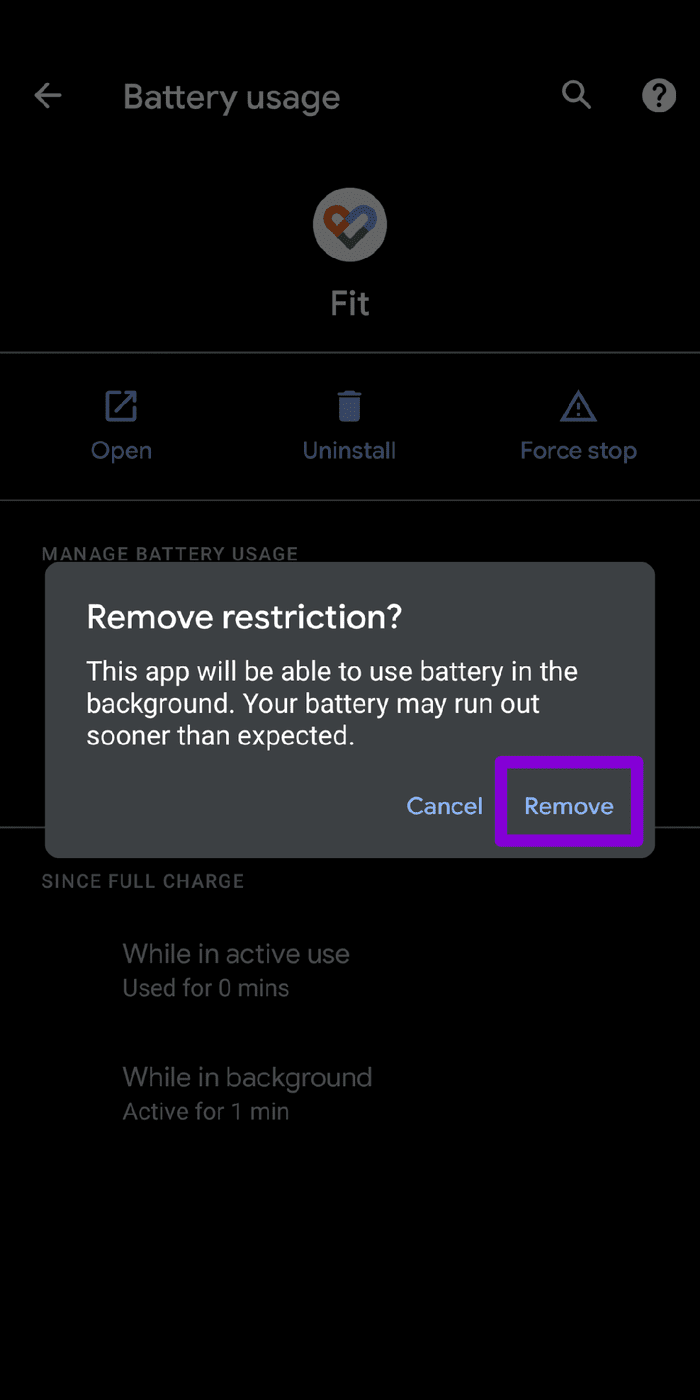
Step 4: Restart the app and re-add the app widget, then verify it fixes the problem.
Fix 4: Clear App Cache and Data
Apps on our phones often collect cache data as we continue to use them. While this cache data helps the app and widget load things faster, it can get corrupted over time. Here’s how to clear it.
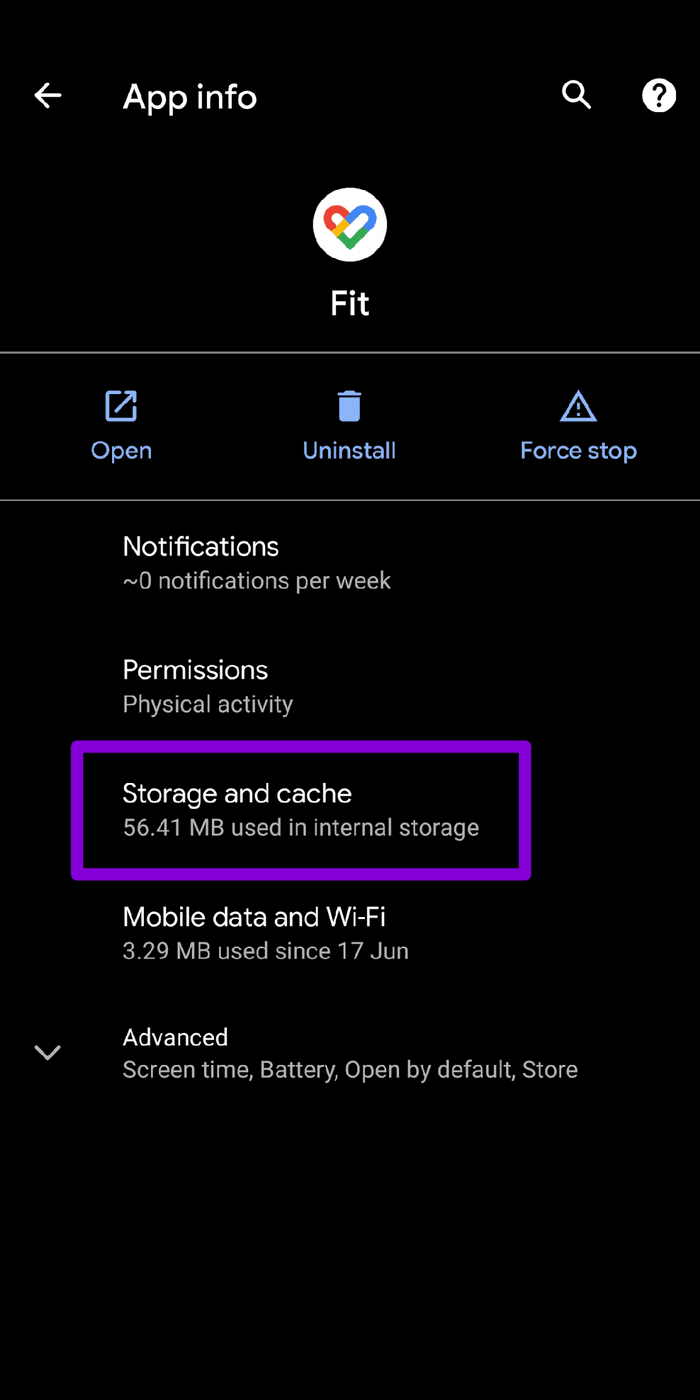
Step 1: Open the Settings app on your phone. Go to Apps and Notifications, then tap the app associated with the widget.
Step 2: Go to Storage and Cache and tap on the Clear cache button to remove cache data. The app should now purge any cache data and load things from scratch.

Step 3: Lastly, if the issue persists, repeat the above steps to clear app data instead.
Was this helpful?
Last updated on 05 April, 2024
Read Next
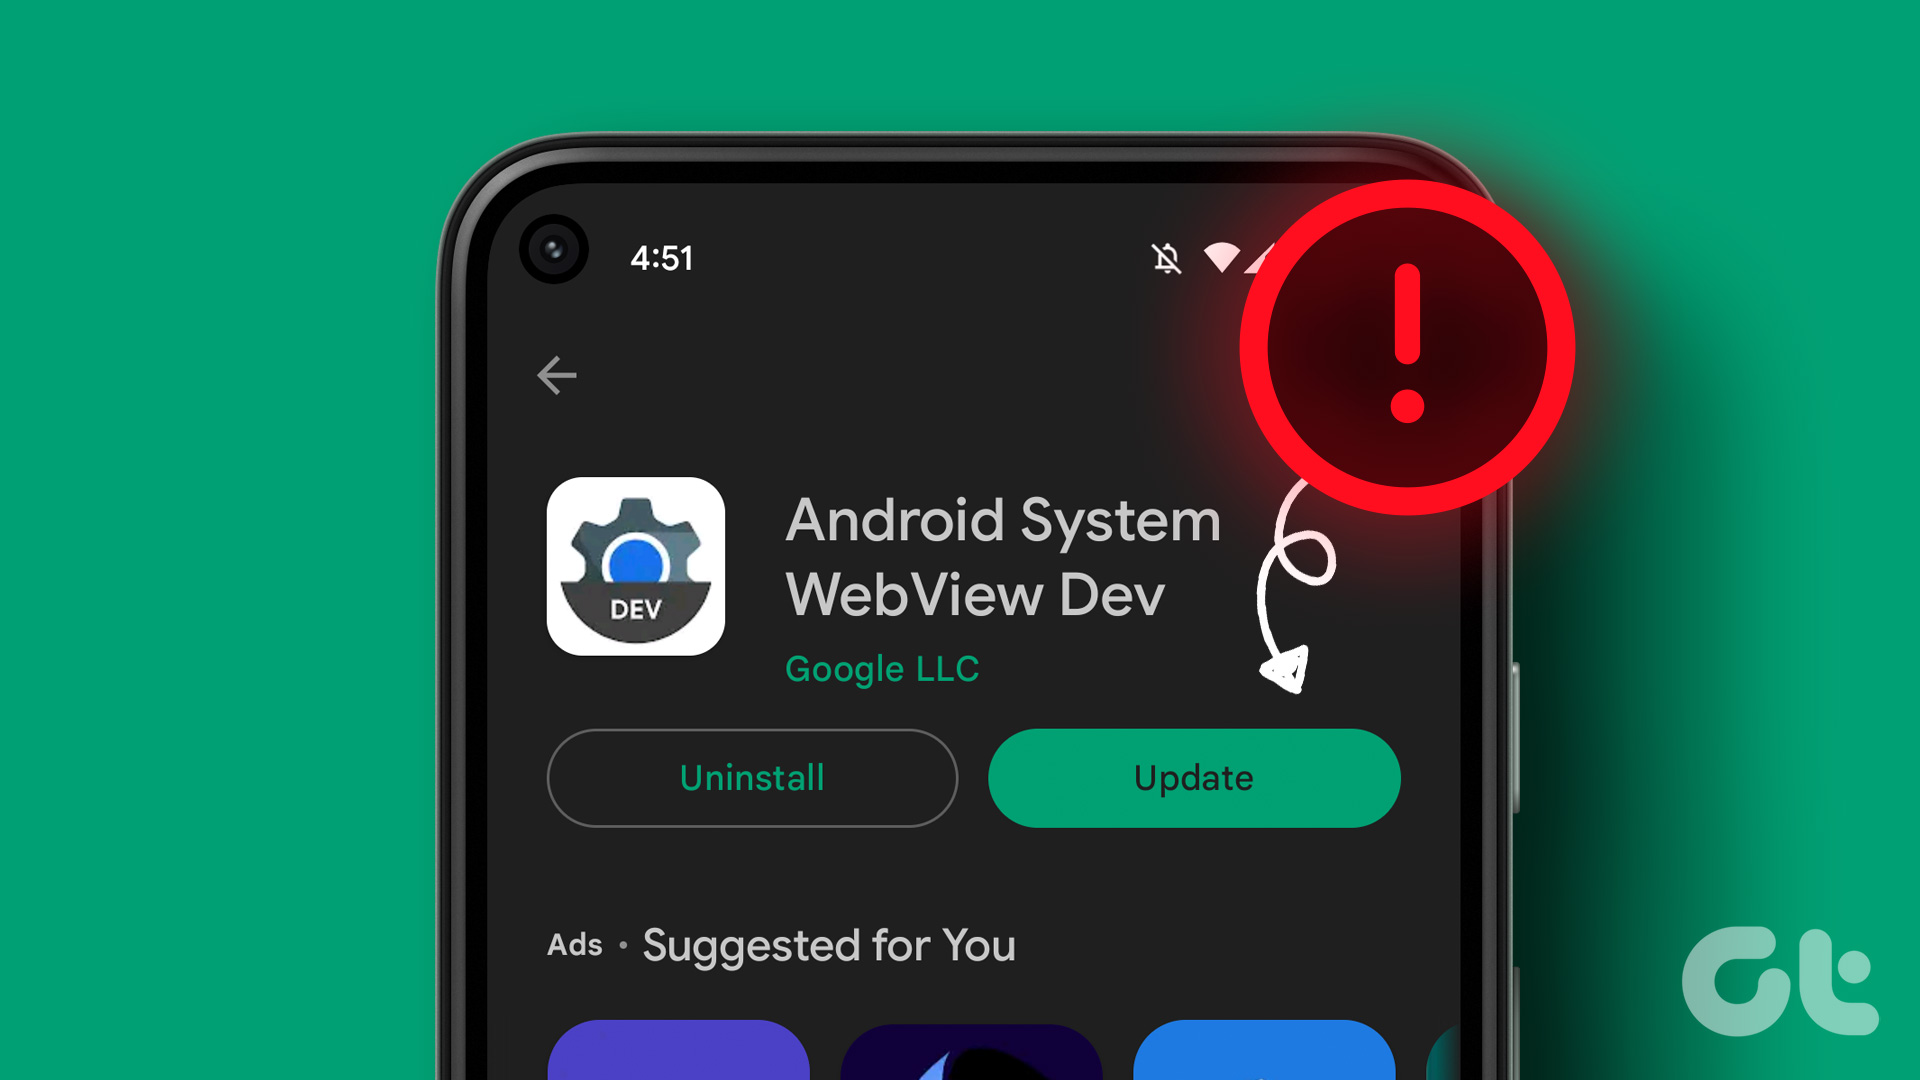 5 Ways to Fix Android System WebView Not Updating Issue
Fix 1: Turn Off Bluetooth As weird as it may sound, try updating the WebView app by turning off Bluetooth on your phone.
5 Ways to Fix Android System WebView Not Updating Issue
Fix 1: Turn Off Bluetooth As weird as it may sound, try updating the WebView app by turning off Bluetooth on your phone.
 5 Ways to Fix Apps Not Updating on Android
Basic Fixes Check network connection: Ensure there's no problem with the network connectivity on your Android device.
5 Ways to Fix Apps Not Updating on Android
Basic Fixes Check network connection: Ensure there's no problem with the network connectivity on your Android device.
 5 Ways to Fix Live Location Not Updating on Android and iPhone
Fix 1: Ensure Location Services Are Enabled Enabling location services on your phone is the most basic step before you can share your live location.
5 Ways to Fix Live Location Not Updating on Android and iPhone
Fix 1: Ensure Location Services Are Enabled Enabling location services on your phone is the most basic step before you can share your live location.
 5 Ways to Fix Location Sharing Not Updating in Google Maps on Phone
Common Fixes Check your internet connection - Google Maps will fail to update the location if your internet is unstable.
5 Ways to Fix Location Sharing Not Updating in Google Maps on Phone
Common Fixes Check your internet connection - Google Maps will fail to update the location if your internet is unstable.
 4 Ways to Fix Apps Not Updating on Android TV
Basic Fixes Check internal storage: App updates need sufficient storage on your Android TV in the long run.
4 Ways to Fix Apps Not Updating on Android TV
Basic Fixes Check internal storage: App updates need sufficient storage on your Android TV in the long run.
 5 Ways to Fix WhatsApp Live Location Not Updating on Android and iPhone
Try Basic Fixes Update WhatsApp: An outdated app version can also cause performance issues, especially if you haven't updated it in a long time.
5 Ways to Fix WhatsApp Live Location Not Updating on Android and iPhone
Try Basic Fixes Update WhatsApp: An outdated app version can also cause performance issues, especially if you haven't updated it in a long time.
The article above may contain affiliate links which help support Guiding Tech. The content remains unbiased and authentic and will never affect our editorial integrity.