Try Basic Fixes
- Check program compatibility: Programs and games that worked perfectly on Windows 10 may not necessarily be compatible with Windows 11. Hence, check whether the program you’re installing is compatible with Windows 11. Typically, you can find such information on the app provider’s website.
- Run the installer as administrator: Most third-party app installations on Windows require administrative approval. Right-click on the installer file and select Run as administrator. Then, follow the on-screen prompts to see if the program installs successfully.
Fix 1: Run Program Install and Uninstall Troubleshooter
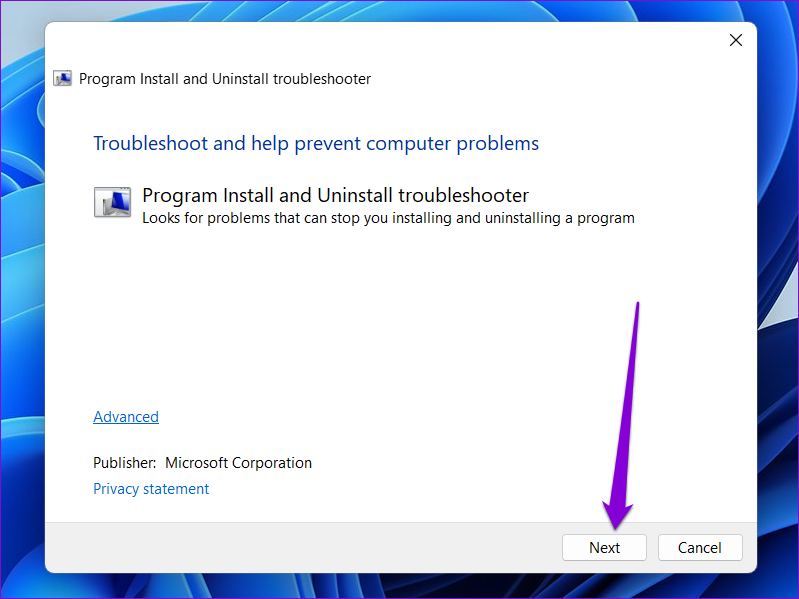
If the issue persists, turn to one of the Windows troubleshooters for help. Microsoft offers a Program Install and Uninstall troubleshooter that can automatically detect and fix any corrupted registry keys preventing program installations on Windows. Here’s how to use it.
Step 1: Get the Program Install and Uninstall Troubleshooter from Microsoft.
Step 2: Double-click on the troubleshooter to run it > click Next.
Step 3: Select Installing on the following screen. The tool will automatically start looking for any issues with the Registry files.

Step 4: Select the program you’re trying to install. If you can’t find it, select Not listed > Next.

From there, follow the on-screen instructions to finish the troubleshooting process. After that, try installing the program again.
Fix 2: Check Windows App Installation Settings
Windows 11 allows you to restrict app installation from sources other than the Microsoft Store to improve security. Windows will block all third-party app installations from unknown sources if you’ve previously enabled this setting. Here’s how to change that.
Step 1: Press the Windows key + I to open the Settings app and head to Apps > Advanced app settings on your right.

Step 2: Use the drop-down menu next to Choose where to get apps and select Anywhere, but let me know if there’s a comparable app in the Microsoft Store.

Fix 3: Uninstall the Previous Version of the Program or Software
Another reason Windows may fail to install a third-party program or software is if an older version of that program is available on your PC. If so, remove the older version of the program before running the installer again.
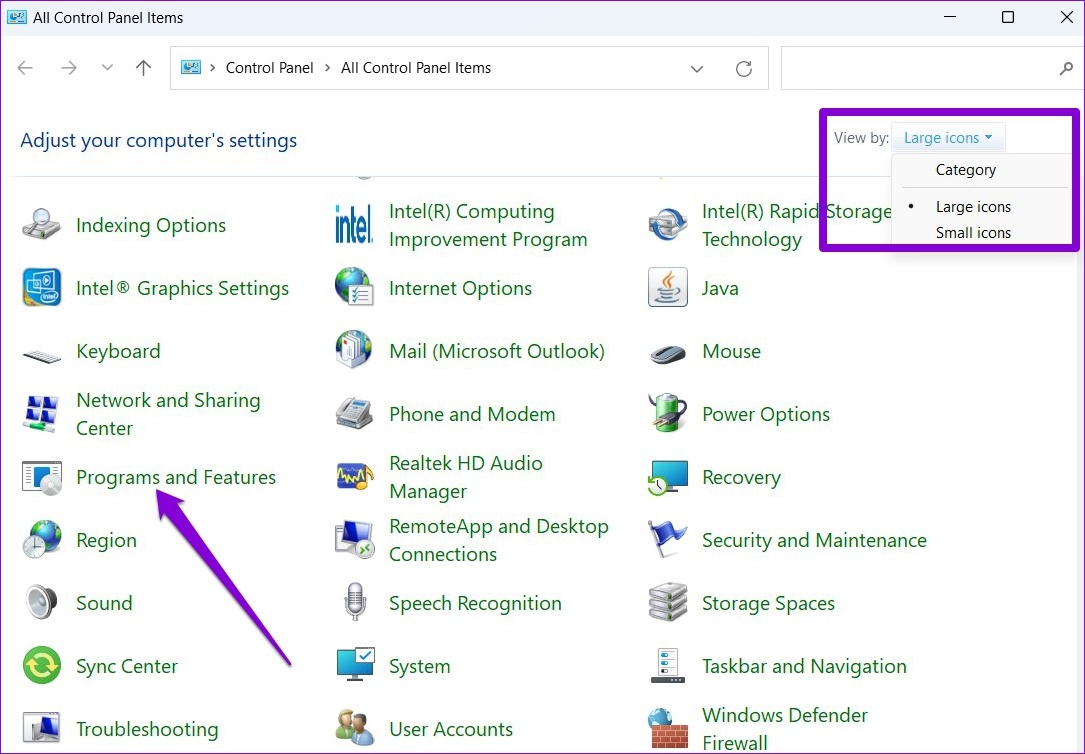
Step 1: Press the Windows key + R to launch the Run dialog box, type control, and press Enter.
Step 2: Switch the view type to large or small icons using the drop-down menu at the top right > click on Programs and Features.
Step 3: Select the program you wish to remove and click on Uninstall/Change at the top.

From there, follow the on-screen instructions to remove the program. Once removed, try running the installer again.
Fix 4: Enable Developer Mode
Enabling Developer Mode on Windows lets you sideload apps from almost any source. As suggestive of its name, the setting is meant for developers to install and test their apps. However, if you’re certain about the software’s credibility you’re trying to install, you can enable Developer Mode on Windows to install that program. Here’s how.
Step 1: Press the Windows key + I to launch the Settings app and navigate to Privacy & security > For developers.

Step 2: Enable the toggle for Developer Mode.

Was this helpful?
Last updated on 02 August, 2024
3 Comments
Leave a Reply
Read Next
 Top 9 Ways to Fix Unable to Change Default Programs in Windows 10
The apps offered by Microsoft are great.
Top 9 Ways to Fix Unable to Change Default Programs in Windows 10
The apps offered by Microsoft are great.
 4 Ways to Fix Unable to Install Drivers on Windows 11
Try Basic Fixes Install Windows updates: The driver installation issue may be limited to your Windows build.
4 Ways to Fix Unable to Install Drivers on Windows 11
Try Basic Fixes Install Windows updates: The driver installation issue may be limited to your Windows build.
 3 Ways to Change Priority Levels for Programs on Windows 10 and Windows 11
When Should You Change the Priority Level of a Program By default, Windows 11 assigns different priority levels to each process based on its importance.
3 Ways to Change Priority Levels for Programs on Windows 10 and Windows 11
When Should You Change the Priority Level of a Program By default, Windows 11 assigns different priority levels to each process based on its importance.
 5 Ways to Fix Startup Programs Not Launching on Windows 10 or 11
Try Basic Fixes Install Windows updates: A buggy or outdated Windows build could cause such issues.
5 Ways to Fix Startup Programs Not Launching on Windows 10 or 11
Try Basic Fixes Install Windows updates: A buggy or outdated Windows build could cause such issues.
 3 Ways to Run Old Programs in Compatibility Mode on Windows 11
Method 1: Modify Program Properties You can configure a program to run in compatibility mode by modifying its properties.
3 Ways to Run Old Programs in Compatibility Mode on Windows 11
Method 1: Modify Program Properties You can configure a program to run in compatibility mode by modifying its properties.
 3 Ways to Repair Broken Apps and Programs In Windows 11
Method 1: Using Apps and Features in the Settings App The first step for the native or third-party app is to use the Settings app.
3 Ways to Repair Broken Apps and Programs In Windows 11
Method 1: Using Apps and Features in the Settings App The first step for the native or third-party app is to use the Settings app.
 7 Ways to Force Uninstall Programs on Windows 11
Method 1: Uninstall Programs Using the File Explorer Step 1: Firstly, open the Start Menu, type the name of the program you want to uninstall in the search bar, and choose
7 Ways to Force Uninstall Programs on Windows 11
Method 1: Uninstall Programs Using the File Explorer Step 1: Firstly, open the Start Menu, type the name of the program you want to uninstall in the search bar, and choose
 How to Access the Old Add or Remove Programs Panel and Other Classic Features in Windows 10
Windows 10 is a dramatic improvement over its predecessors in terms of both speed and stability.
How to Access the Old Add or Remove Programs Panel and Other Classic Features in Windows 10
Windows 10 is a dramatic improvement over its predecessors in terms of both speed and stability.
The article above may contain affiliate links which help support Guiding Tech. The content remains unbiased and authentic and will never affect our editorial integrity.


when I go to APPS > Advanced App settings… the menuoption to get apps from anywhere is not there
developer mode didnt change that either
Hi! I’ve got no help on how to install a software on Windows 11. My settings miss the ‘Everywhere’ install option and gpedit.msc does not run. It says it is missing.
Hi, please go to Settings > System > About. On the About page, scroll down to the “Windows Specifications” section. If you see the words “in S mode” to the right of the Edition entry, you’re using an S Mode PC. In that case, refer to this guide to switch out of S mode.