Try These Things First
- Turn off Bluetooth: Sometimes, the Bluetooth connection on your PC may interfere with the mobile hotspot. Hence, turn off Bluetooth to see if that helps.
- Disable VPN: Your mobile hotspot might not work on your Windows 11 computer if you’re connected to a VPN on your smartphone or even on your computer itself. To rule out this possibility, disconnect from the VPN and see if the problem persists.
Fix 1: Run Network Adapter Troubleshooter
Troubleshooters are built into Windows 11 to detect and fix various computer problems. Hence, start with the Network Adapter troubleshooter to let it fix the mobile hotspot issue for you.
Step 1: Press the Windows + S keys to open Windows Search, type troubleshooting settings, and press Enter.

Step 2: Go to Other troubleshooters.
Step 3: Scroll down to locate Network Adapter and click on Run next to it to begin troubleshooting.

Fix 2: Start the Mobile Hotspot Service
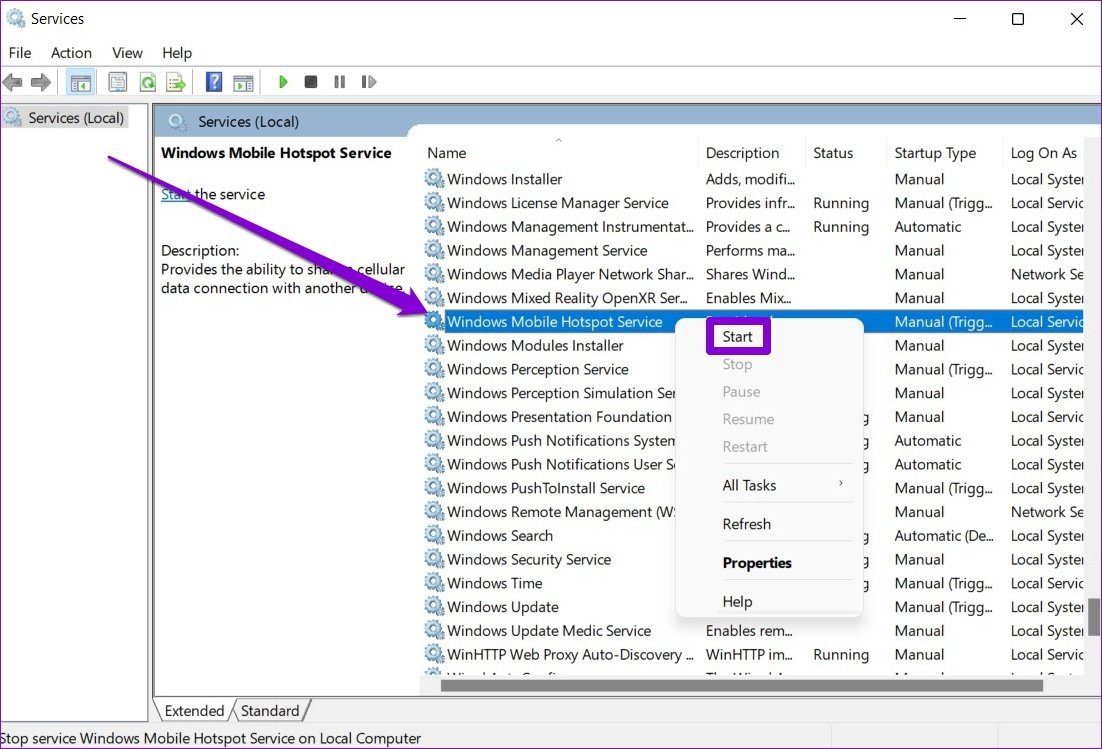
Mobile Hotspot service is a small program that needs to work in the background for the hotspot to work. Ideally, this service should start every time you turn on the mobile hotspot. But if that isn’t happening, try starting it manually by following the steps below.
Step 1: Open the Start menu, type services, and press Enter.
Step 2: Scroll down to locate and right-click on Windows Mobile Hotspot Services > select Start from the resulting menu.
Check to see if the mobile hotspot works now.
Fix 3: Change the Startup Type of the WLAN AutoConfig Service
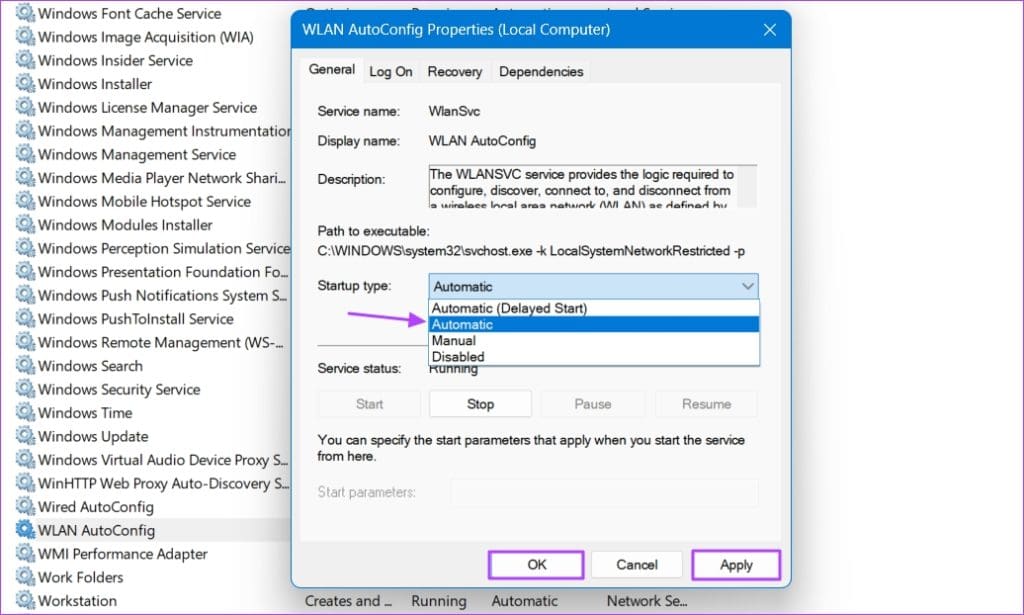
The WLAN AutoConfig service is another important Windows service that ensures your computer detects and connects to wireless networks. If this service is set to start manually instead of automatically, you might face the problem at hand. To fix this, change the startup type of the service.
Step 1: Open the Services window, right-click the WLAN AutoConfig Service, and choose Properties.

Step 2: Change the Startup type to Automatic > click Apply > OK to save the changes.
Fix 4: Check Network Adapter
If the issue persists, check the network adapter settings on your PC to see if the problem is with them. Here’s how.
Step 1: Press Windows + I keys to open Settings. Switch to the Network and internet tab on your left > go to Advanced network settings.

Step 2: Next, click on More network adaptor options. This will open a Network connections window.

Step 3: Then, right-click the network adapter for your mobile hotspot and choose Properties.
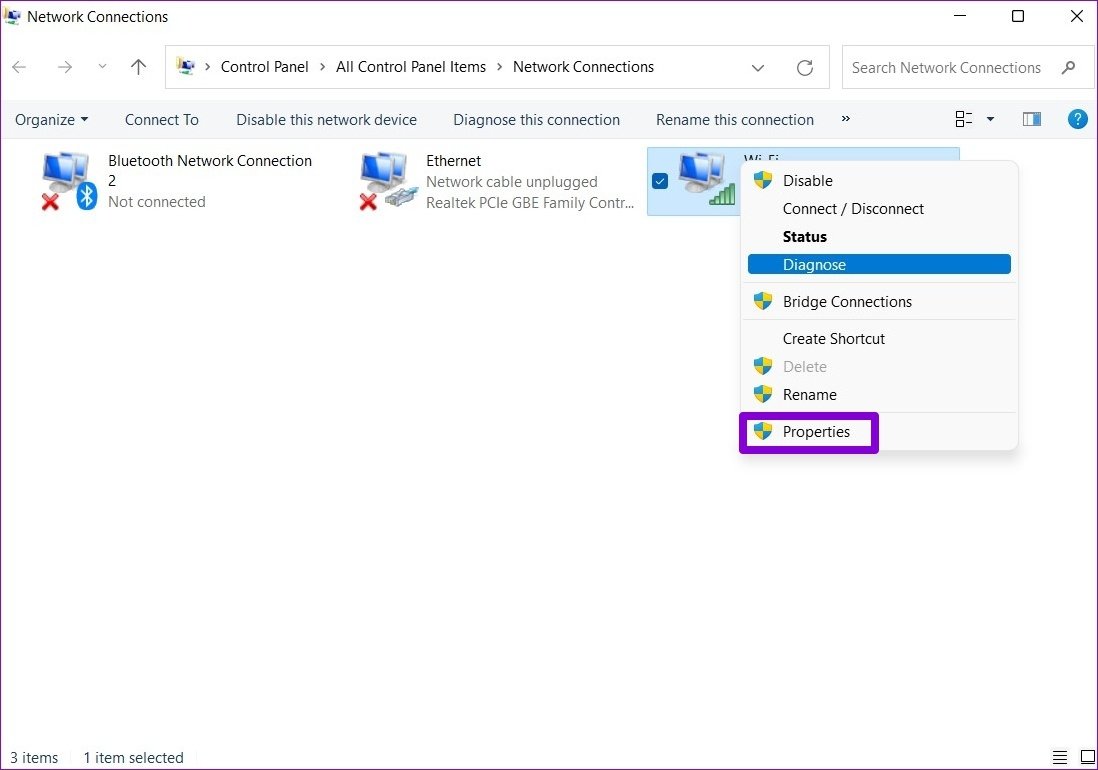
Step 4: Under Sharing, uncheck the box for Allow other network users to connect through this computer’s Internet connection.
Step 5: Restart your PC before using the hotspot again.

Fix 5: Tweak Windows Registry
If you’re still bothered by the mobile hotspot issues, try tweaking Windows Registry files on your PC.
Before proceeding, it’s important to know that registry files are critical for the Windows operating system. Hence, you should start cautiously and spare time to backup your registry files beforehand.
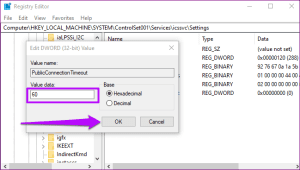
Step 1: Press Windows + R keys to open the Run dialog > type regedit > press Enter.

Step 2: Use the address bar at the top to navigate to the following key:
HKEY_LOCAL_MACHINESYSTEMCurrentControlSetServicesWlanSvcParametersHostedNetworkSettings
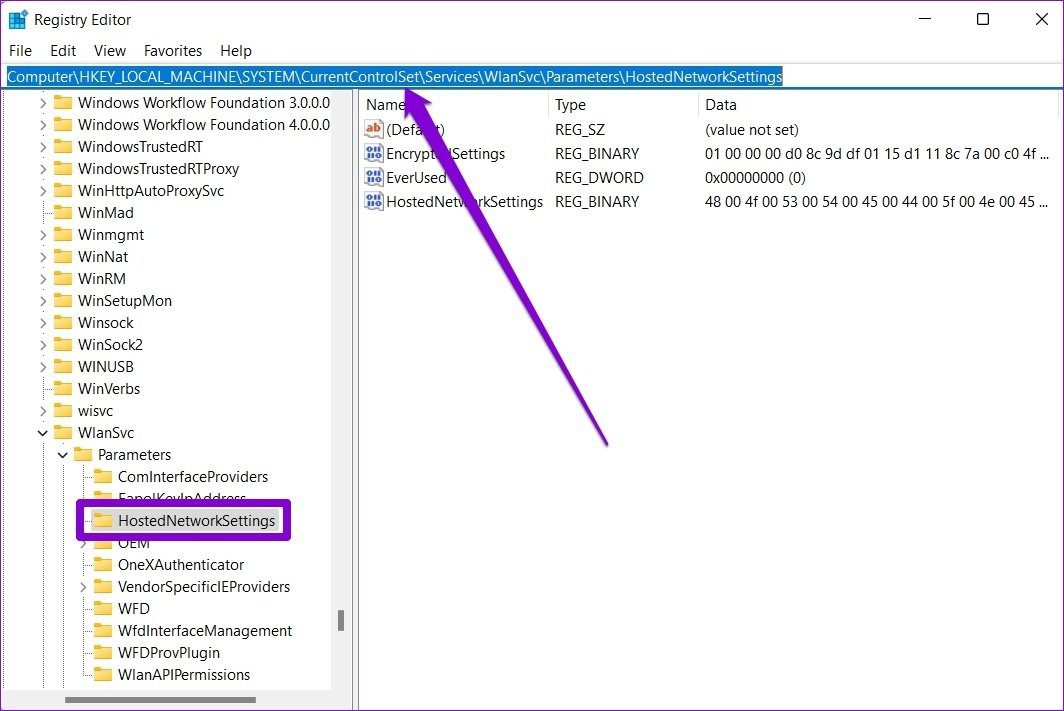
Step 3: On your right, locate HostedNetworkSettings. Right-click on it and select Delete.

After that, restart your PC and see if you can use a mobile hotspot now.
Fix 6: Uninstall a Recent Windows Update
If the problem started after you downloaded a Windows update, there’s probably an issue with that update causing the current problem. You can uninstall that update to fix it. Here’s how:
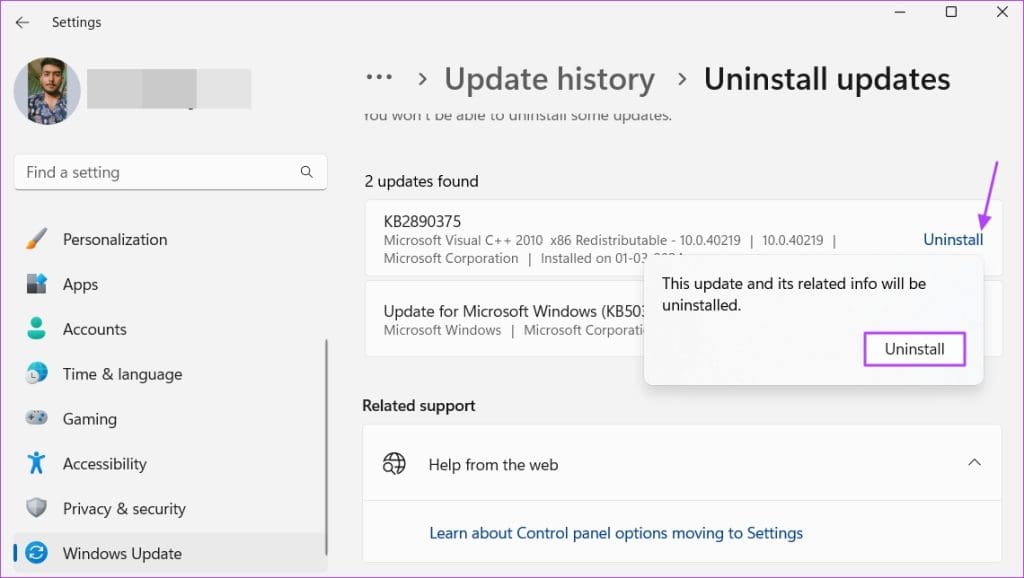
Step 1: Launch the Settings app, select Windows Update from the left sidebar, and click Update history on the right.

Step 2: Select Uninstall updates. Then, click Uninstall next to the update after which you started facing the problem. Click Uninstall again to confirm your decision.
After that, restart your computer, and you should no longer be facing the problem.
Fix 7: Reset Network Settings
If nothing works, you might have to reset existing network settings on your PC as a last resort. Here’s how:
Step 1: Open the Settings app, navigate to the Network & Internet tab, and click on Advanced network settings.
Step 2: Under More settings, click on Network reset.
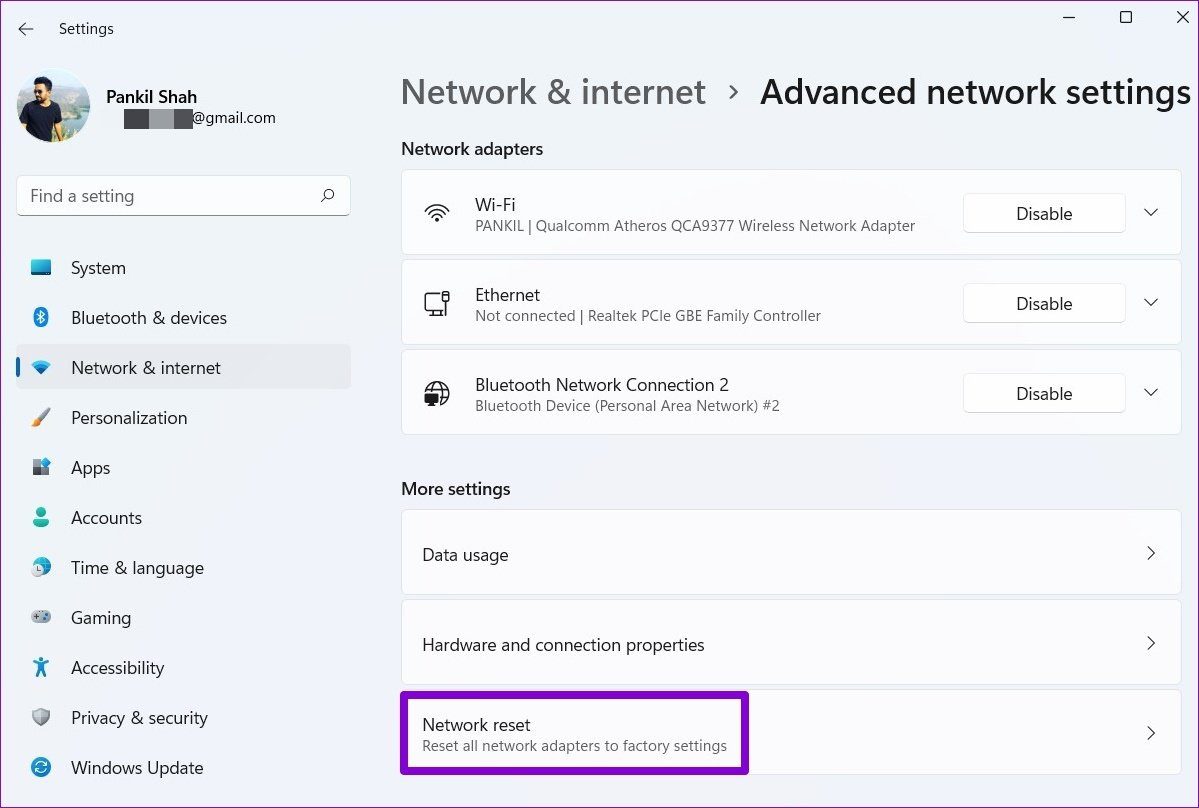
Step 3: Lastly, click on Reset now next to Network reset.

Wait for the process to finish, and reboot your PC afterward to see if that resolves the issue.
Also Read: How to fix your “Connection was interrupted” error on Chrome
Was this helpful?
Last updated on 26 August, 2024
Read Next
 4 Ways to Fix Windows Laptop Not Connecting to Mobile Hotspot on Android
Try Basic Fixes Switch to Airplane Mode or Restart Devices: It will ensure the removal of temporary blocks that show up if the device is turned on for a long
4 Ways to Fix Windows Laptop Not Connecting to Mobile Hotspot on Android
Try Basic Fixes Switch to Airplane Mode or Restart Devices: It will ensure the removal of temporary blocks that show up if the device is turned on for a long
 4 Ways to Fix Windows Mobile Hotspot Keeps Turning off
Fix 1: Disable Mobile Hotspot Power Saving Disable the power saving feature to prevent Windows from automatically turning off the hotspot when not in use.
4 Ways to Fix Windows Mobile Hotspot Keeps Turning off
Fix 1: Disable Mobile Hotspot Power Saving Disable the power saving feature to prevent Windows from automatically turning off the hotspot when not in use.
 Top 7 Ways to Fix Android Mobile Hotspot Not Working
We are relying on mobile hotspot more than ever in the work from home situation.
Top 7 Ways to Fix Android Mobile Hotspot Not Working
We are relying on mobile hotspot more than ever in the work from home situation.
 Top 9 Ways to Fix Mobile Hotspot Not Working on Samsung Galaxy Phones
Mobile hotspot comes in handy when your office or home Wi-Fi is facing an outage.
Top 9 Ways to Fix Mobile Hotspot Not Working on Samsung Galaxy Phones
Mobile hotspot comes in handy when your office or home Wi-Fi is facing an outage.
 4 Best Fixes for Windows 10 Mobile Hotspot Grayed Out
Basic Fixes Check network connection: Ensure there are no problems with network connectivity or the router/modem.
4 Best Fixes for Windows 10 Mobile Hotspot Grayed Out
Basic Fixes Check network connection: Ensure there are no problems with network connectivity or the router/modem.
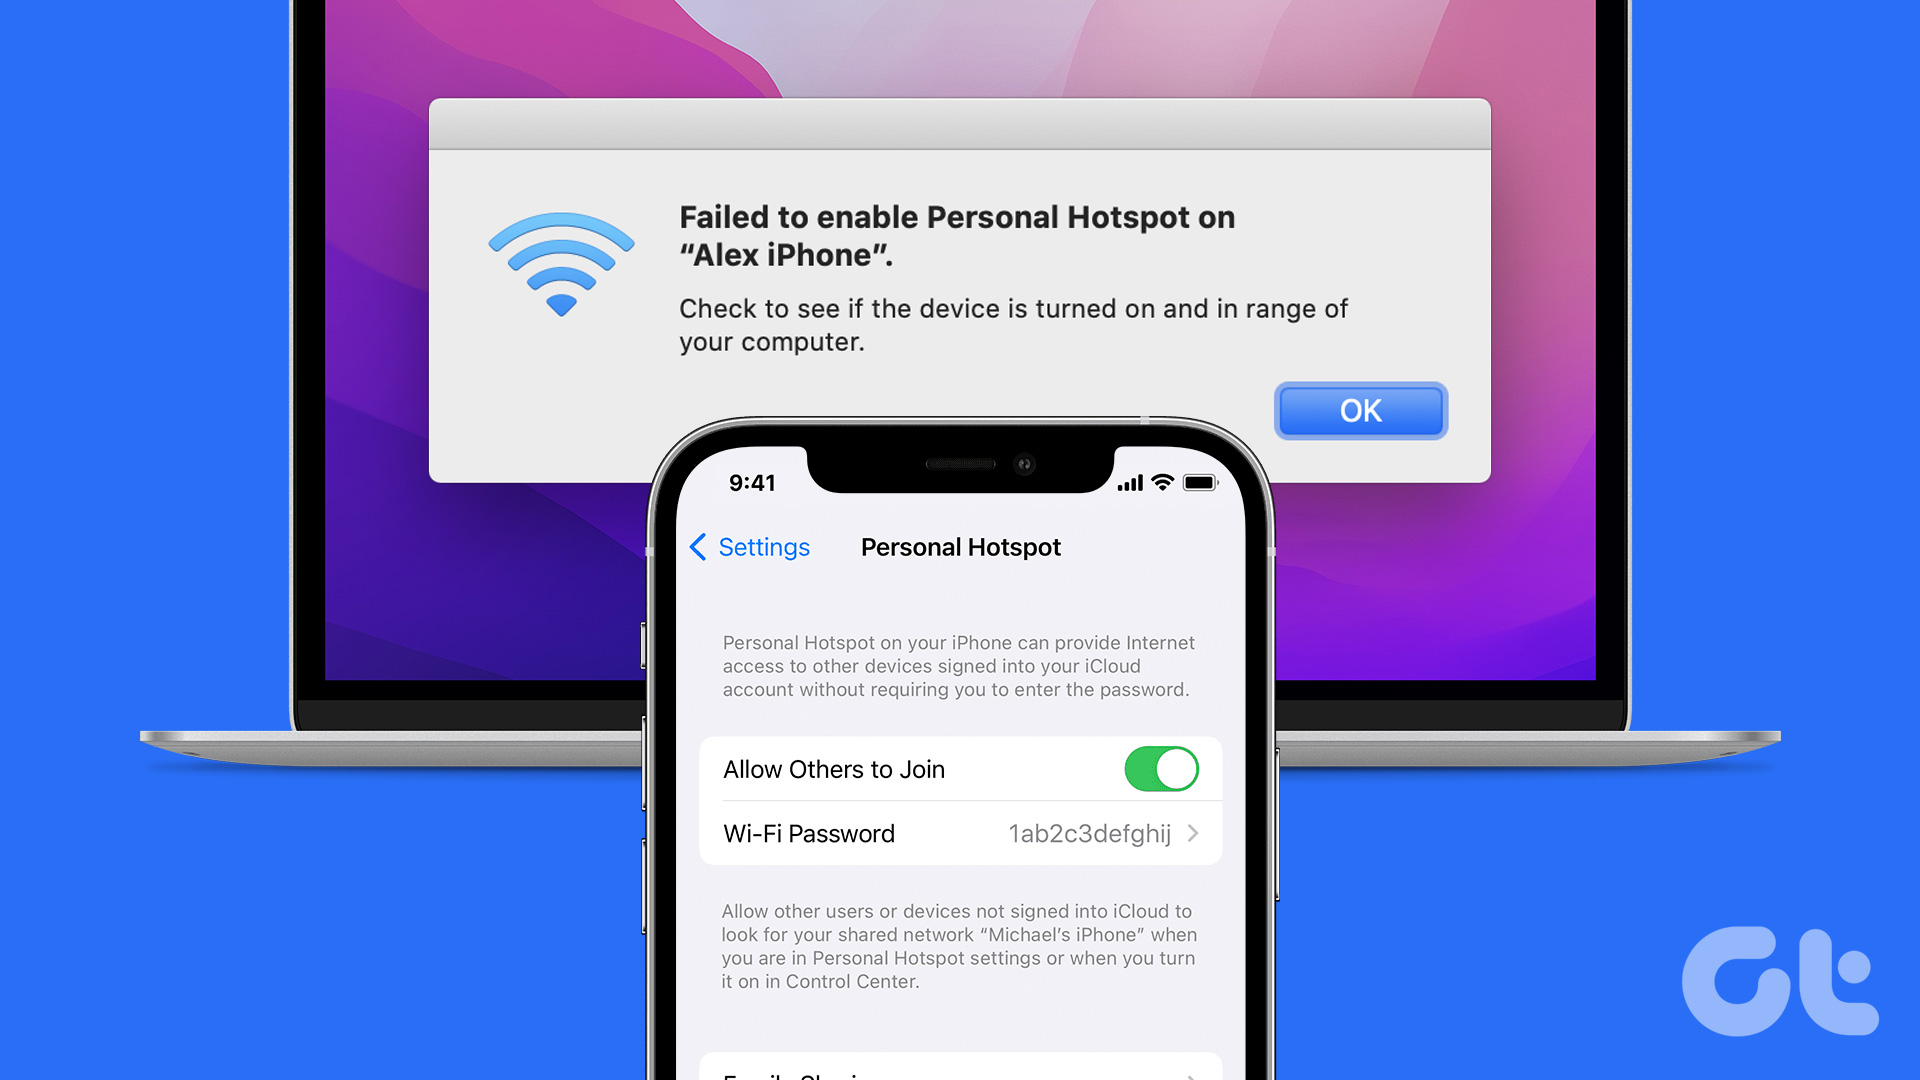 4 Ways to Fix iPhone Hotspot Not Working With Mac
Basic Fixes Turn on hotspot and mobile data manually: You can check and manually enable the Hotspot and Mobile Data on your iPhone and Mac, which go hand-in-hand.
4 Ways to Fix iPhone Hotspot Not Working With Mac
Basic Fixes Turn on hotspot and mobile data manually: You can check and manually enable the Hotspot and Mobile Data on your iPhone and Mac, which go hand-in-hand.
 How to Connect Amazon Echo to Mobile Hotspot
A working internet connection is essential for the proper functioning of a smart device like Amazon Echo.
How to Connect Amazon Echo to Mobile Hotspot
A working internet connection is essential for the proper functioning of a smart device like Amazon Echo.
 4 Fixes for iPhone’s Hotspot Not Showing on Windows 11
Basic Fixes Enable and disable Airplane mode: You may begin your troubleshooting regime by enabling and disabling Airplane mode from the Action Center on your Windows 11 PC.
4 Fixes for iPhone’s Hotspot Not Showing on Windows 11
Basic Fixes Enable and disable Airplane mode: You may begin your troubleshooting regime by enabling and disabling Airplane mode from the Action Center on your Windows 11 PC.
The article above may contain affiliate links which help support Guiding Tech. The content remains unbiased and authentic and will never affect our editorial integrity.

