Try Basic Fixes
- Perform a power cycle: Performing a power cycle can help discharge residual power from the capacitor and reset all the temporary configurations. First, power off your computer and unplug all the external devices. Then, press and hold the physical power button for around 15 seconds. After that, turn on your computer and see if Windows shows the Wi-Fi option.
- Install Windows updates: If you’re using an outdated build of Windows 11, you’re highly likely to face such issues. Go ahead and install any pending updates by heading over to Settings > Windows Update.
Fix 1: Enable Wi-Fi Adapter
One of the most prominent reasons why the Wi-Fi option may go missing is if the Wi-Fi adapter on your PC is disabled. Here’s how to enable it.
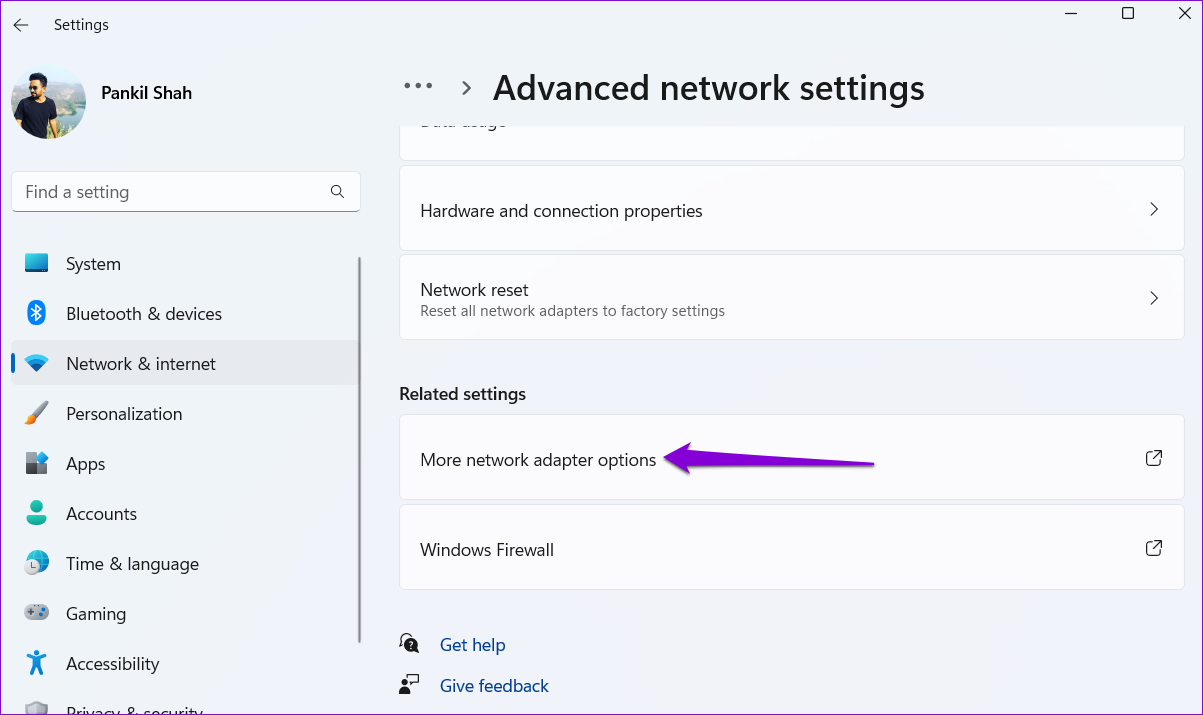
Step 1: Press the Windows key + I to open the Settings app and head to Network & internet > Advanced network settings.

Step 2: Under Related settings, click on More network adapter options.
Step 3: If the Wi-Fi adapter is disabled, it’ll be grayed out. Right-click on it and select Enable from the resulting menu.

Fix 2: Run Network Adapter Troubleshooter
Windows 11 carries a bunch of troubleshooters that can diagnose and fix minor issues on their own. You can try running the network adapter troubleshooter and allow it to fix the missing Wi-Fi option in Windows 11. Here’s how:
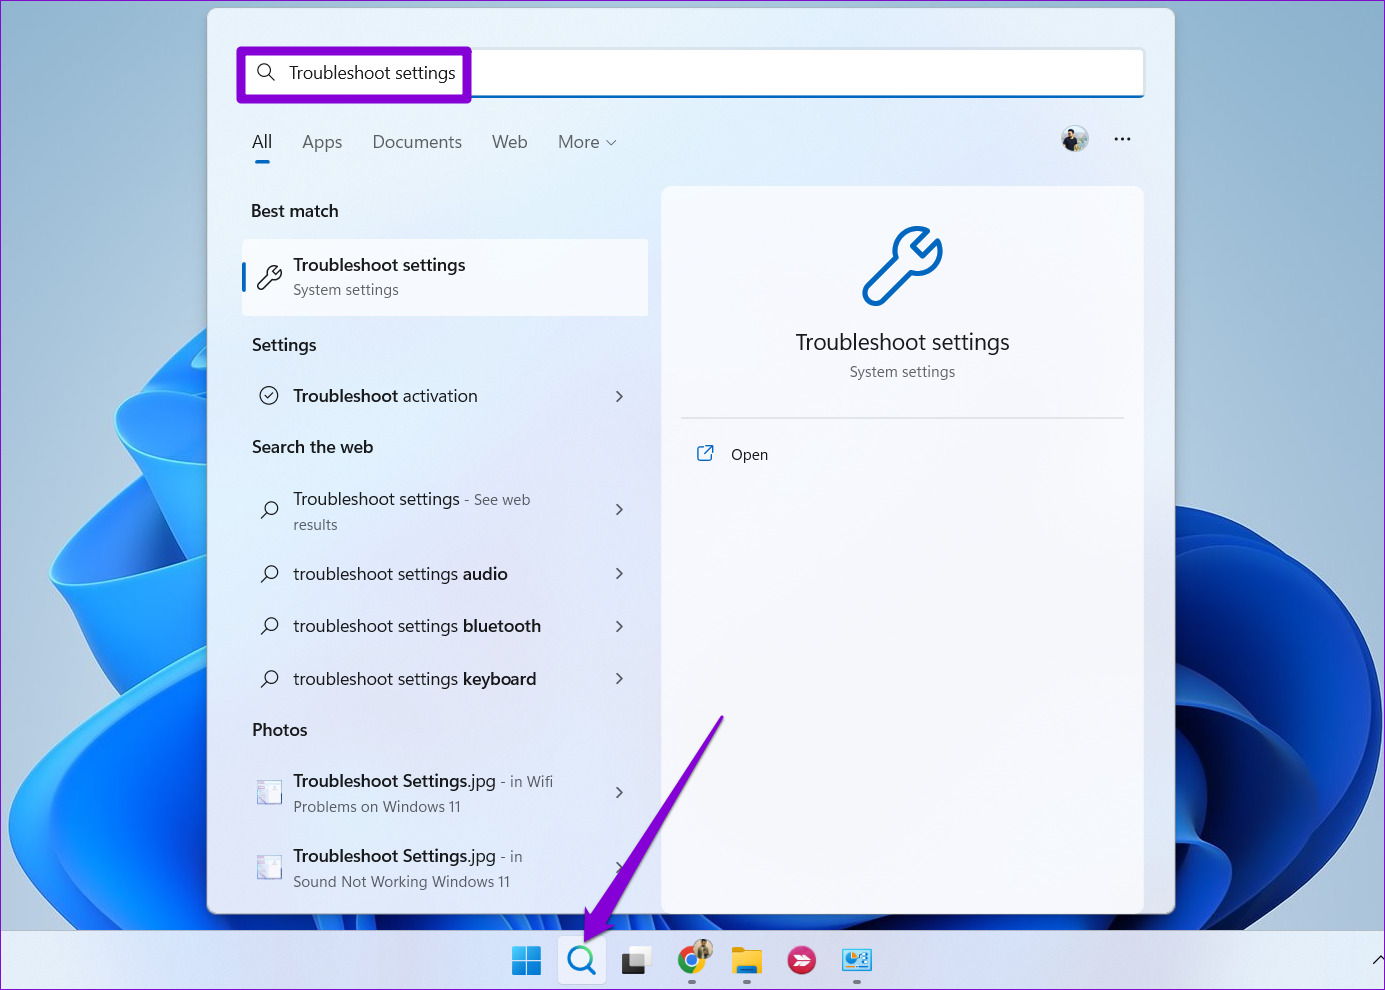
Step 1: Click the search icon on the taskbar, type in troubleshoot settings, and press Enter.
Step 2: Go to Other troubleshooters.
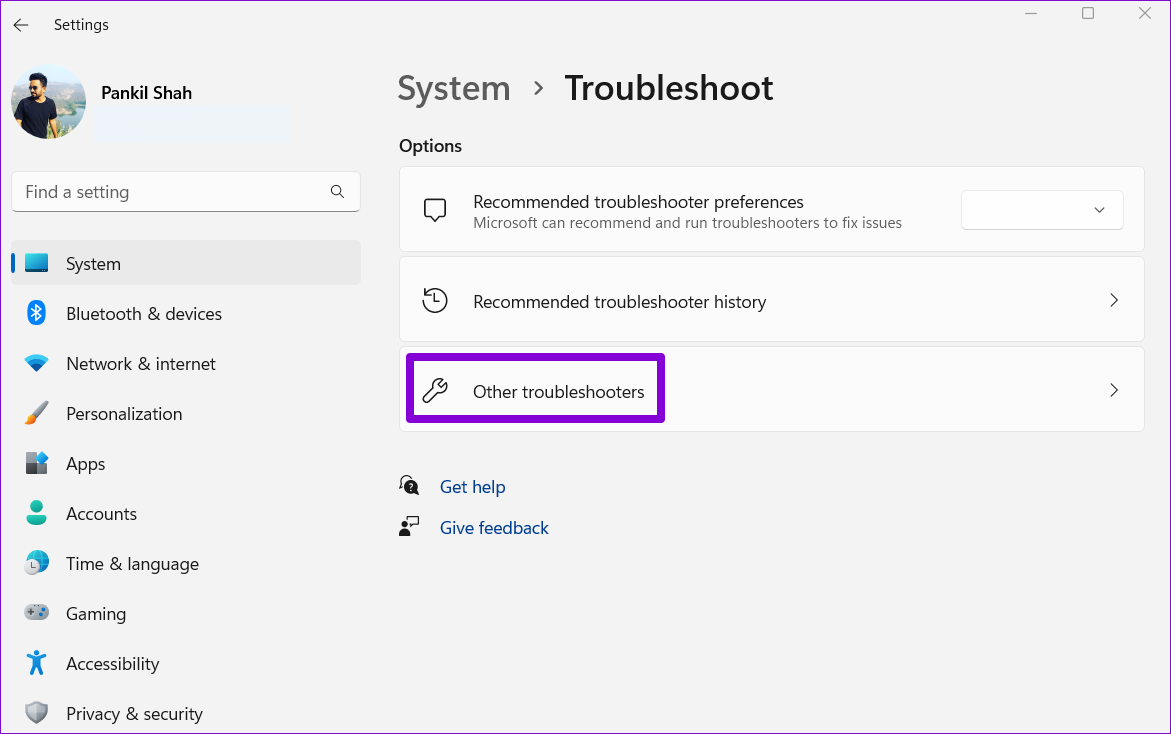
Step 3: Locate Network and Internet and click the Run button next to it.

Wait for the troubleshooter to detect any issues and then follow the on-screen instructions to resolve them.
Fix 3: Restart the WLAN AutoConfig Service
WLAN AutoConfig is a system service responsible for managing Wi-Fi networks on Windows. If this service is not running on your Windows 11 PC, the Wi-Fi option may not appear. Here’s how you can fix that.
Step 1: Press the Windows key + R to open the Run dialog. Type services.msc in the box and press Enter.
Step 2: Locate and double-click the WLAN AutoConfig service to open its properties.
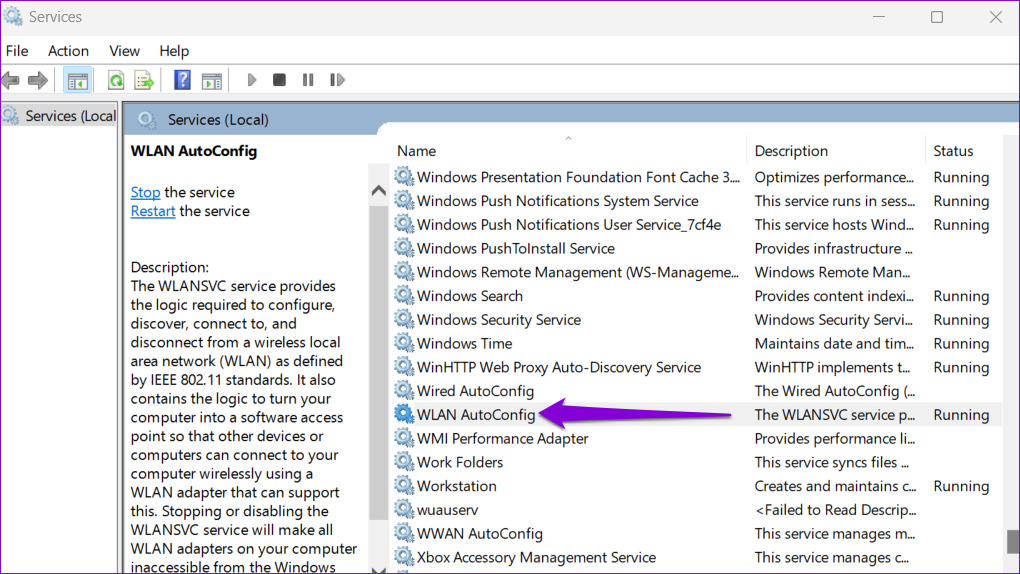
Step 3: Use the drop-down menu to change the Startup type to Automatic and hit Apply followed by OK.
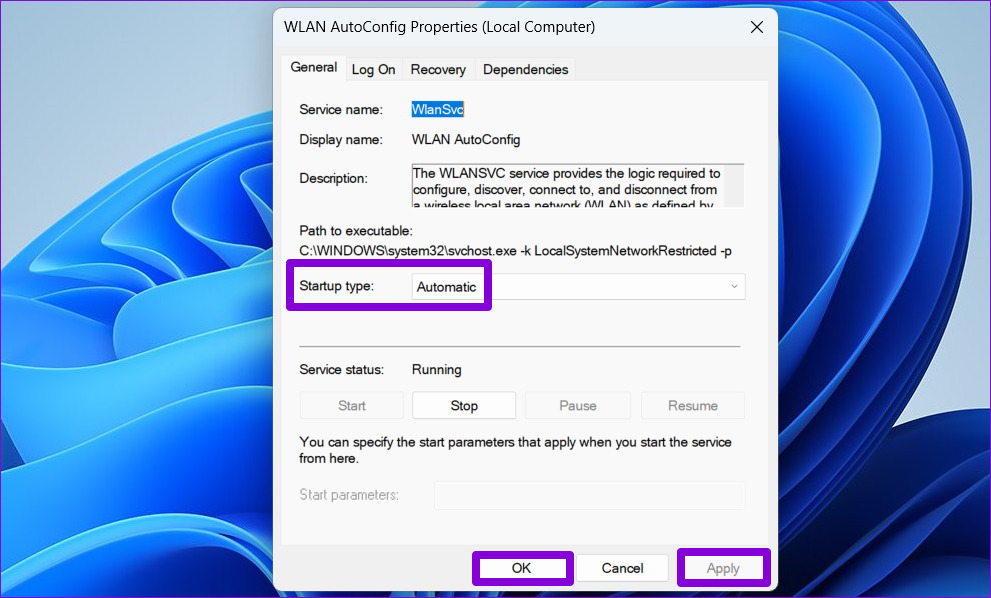
Restart your PC after this and check if the Wi-Fi option appears.
Fix 4: Update or Reinstall Drivers
Malfunctioning or outdated drivers can lead to all kinds of Wi-Fi issues on Windows 11. If that seems to be the case, you can try updating them to see if that brings back the missing Wi-Fi option.
Step 1: Press the Windows key + S, type in device manager, and select the first result that appears.

Step 2: Find and expand the Network adapters. Right-click on the Wi-Fi driver and choose the Update driver option.

After updating the driver, see if the Wi-Fi icon is back. If that doesn’t work, follow the same steps above to uninstall the Wi-Fi driver. Once removed, restart your PC and Windows will automatically reinstall the Wi-Fi drivers again.
Fix 5: Reset Network Settings
If updating the drivers doesn’t help, it’s time to reset the current network settings on your PC. Doing so will remove all the network adapters from your PC and reinstate all your network settings to their default values. Here’s how to do it.
Step 1: Press the Windows key + I to open the Settings app and head to Network & internet > Advanced network settings.
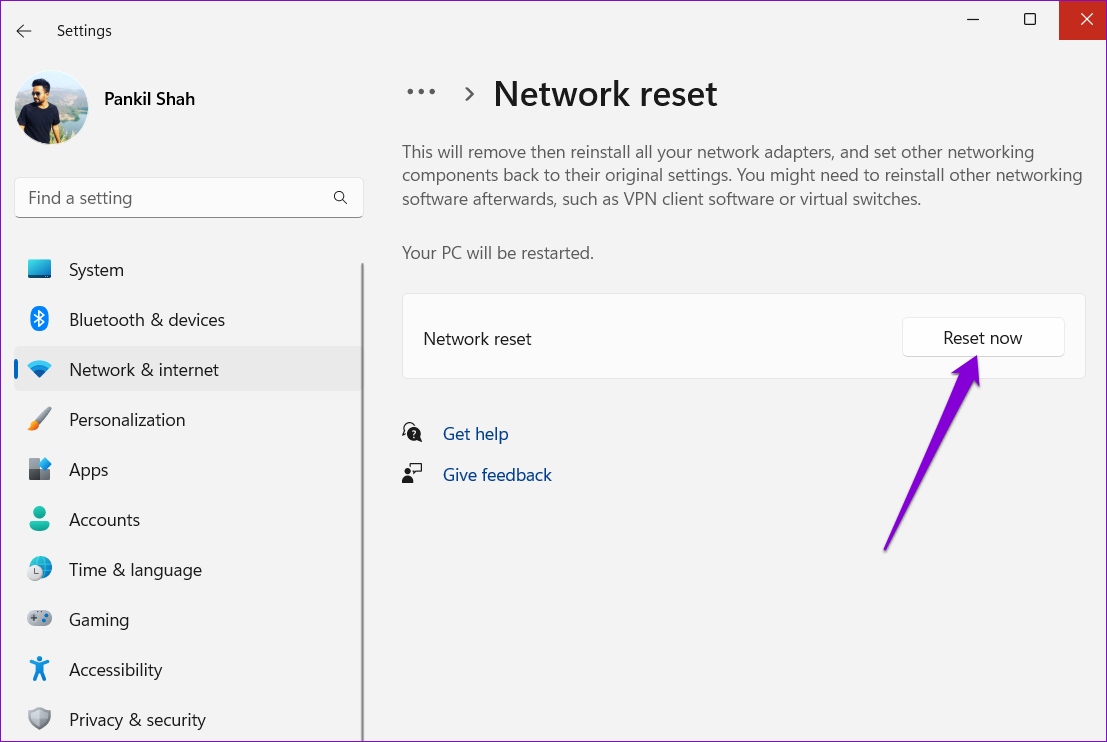
Step 2: Under More settings, click on Network reset.

Step 3: Click the Reset now button.
Fix 6: Reset Network Devices and Network Stack
Another thing you can do to restore the missing Wi-Fi option is reset all the network devices, TCP/IP, and flush the DNS cache. Here are the steps for the same.
Step 1: Right-click on the Start icon and select Terminal (Admin) from the list.
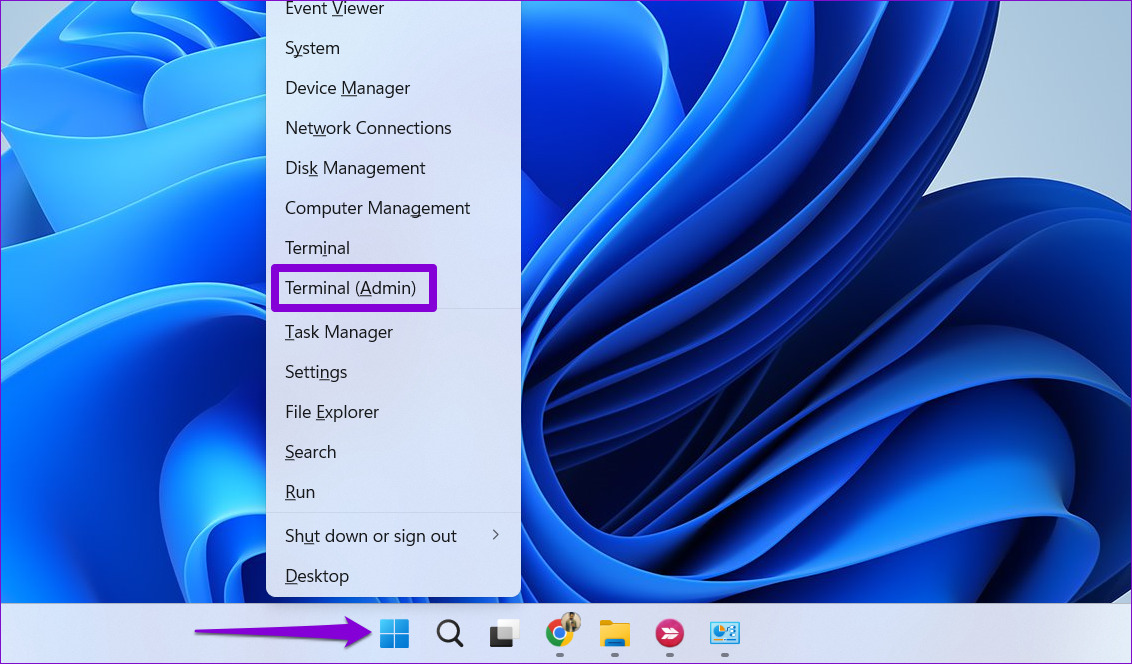
Step 2: Run the following commands in the console and press Enter after each one:
netsh int ip reset
netsh advfirewall reset
netsh winsock reset
ipconfig /flushdns
ipconfig /release
ipconfig /renew

Once all the commands are executed, restart your computer, and check if the Wi-Fi option is restored.
Fix 7: Try System Restore
If you can’t seem to pin down a particular reason behind the disappearance of the Wi-Fi option, you can perform a system restore as a last resort.
Step 1: Open the search menu, type in create a restore point and press Enter.

Step 2: Under the System Protection tab, click the System Restore button.
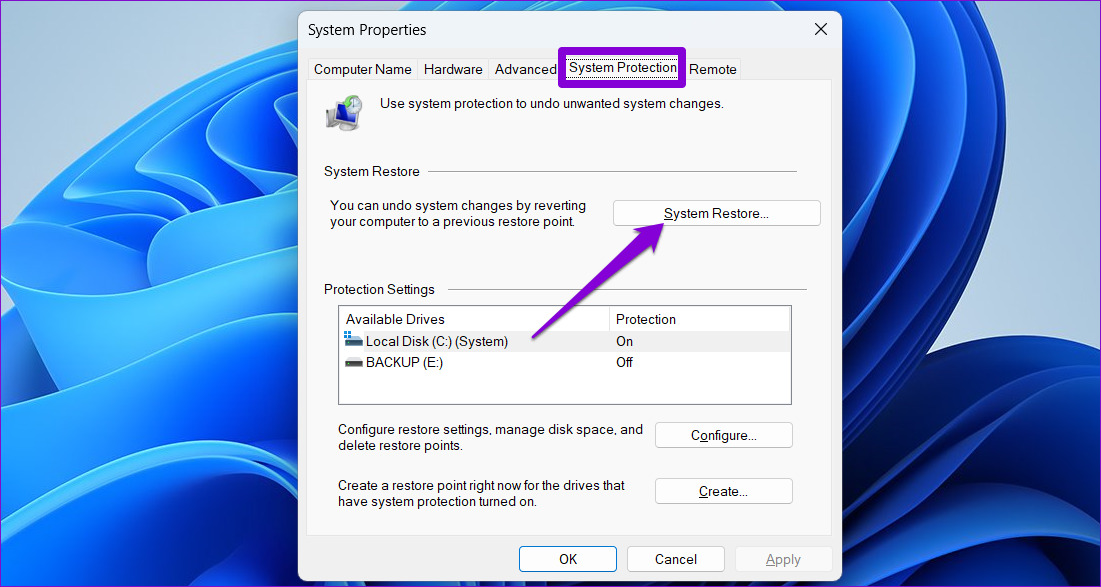
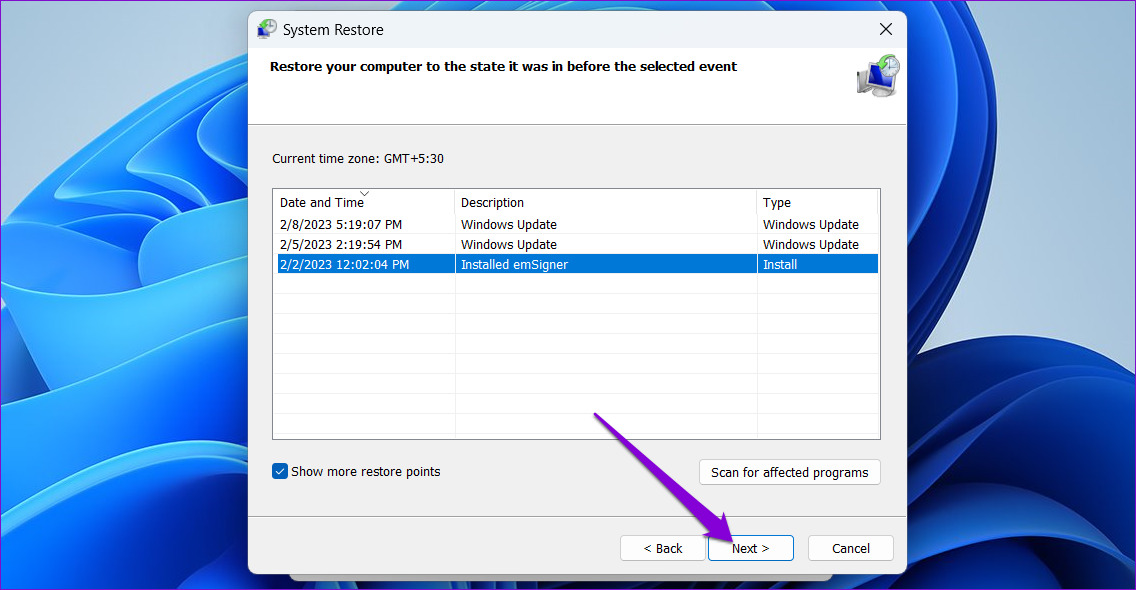
Step 3: Pick the restore point before the problem first appeared and hit Next.
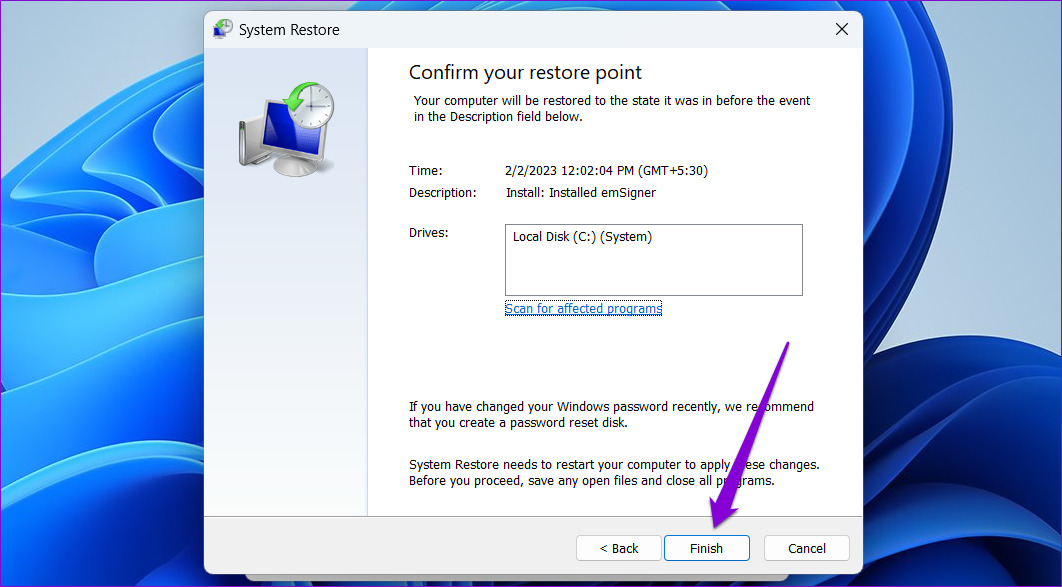
Step 4: Click Finish.
Was this helpful?
Last updated on 08 July, 2024
6 Comments
Leave a Reply
Read Next
 5 Ways to Fix Background Apps Permissions Option Missing on Windows 11
Fix 1: Configure Background App Permissions via Battery Settings You can manage background app permissions in various ways in Windows 11.
5 Ways to Fix Background Apps Permissions Option Missing on Windows 11
Fix 1: Configure Background App Permissions via Battery Settings You can manage background app permissions in various ways in Windows 11.
 5 Ways to Fix Dual Boot Option Not Showing on Windows 11
Fix 1: Enable Dual Boot Option Using Command Prompt Sometimes, the dual boot option goes missing when upgrading the operating system.
5 Ways to Fix Dual Boot Option Not Showing on Windows 11
Fix 1: Enable Dual Boot Option Using Command Prompt Sometimes, the dual boot option goes missing when upgrading the operating system.
 6 Ways to Fix Windows Hello Fingerprint Option Unavailable or Not Working
Basic Fixes Restart PC: Restart your PC to fix any temporary bugs and glitches.
6 Ways to Fix Windows Hello Fingerprint Option Unavailable or Not Working
Basic Fixes Restart PC: Restart your PC to fix any temporary bugs and glitches.
 4 Fixes for “Compress to ZIP File” Option Not Working in Windows 11
Try Basic Fixes Try another file or folder: Compressing another file or folder should help confirm if it's a system-wide issue.
4 Fixes for “Compress to ZIP File” Option Not Working in Windows 11
Try Basic Fixes Try another file or folder: Compressing another file or folder should help confirm if it's a system-wide issue.
 5 Best Gallery Apps With Hide Photos Option for Android
Many times, we want to hide some sensitive photos and videos from our phones.
5 Best Gallery Apps With Hide Photos Option for Android
Many times, we want to hide some sensitive photos and videos from our phones.
 Instagram Restrict vs. Block: Which Privacy Option Should You Use
What Does Restrict Mean on Instagram Touted as an anti-bullying feature, restrict on Instagram helps avoid unwanted interactions without letting the other person know about it.
Instagram Restrict vs. Block: Which Privacy Option Should You Use
What Does Restrict Mean on Instagram Touted as an anti-bullying feature, restrict on Instagram helps avoid unwanted interactions without letting the other person know about it.
 Missing Cast Option in Chrome? Here’s How to Add It Back to the Toolbar
Chrome lets you cast your browser tabs or the entire screen to all the nearby devices with Chromecast support.
Missing Cast Option in Chrome? Here’s How to Add It Back to the Toolbar
Chrome lets you cast your browser tabs or the entire screen to all the nearby devices with Chromecast support.
 2 Ways to Fix Discord Not Opening on Windows 10 and Windows 11
Try Basic Fixes End Discord processes: Press Ctrl + Shift + Esc to launch the Task Manager.
2 Ways to Fix Discord Not Opening on Windows 10 and Windows 11
Try Basic Fixes End Discord processes: Press Ctrl + Shift + Esc to launch the Task Manager.
The article above may contain affiliate links which help support Guiding Tech. The content remains unbiased and authentic and will never affect our editorial integrity.

Thank you so much!!! Method 2 helped me sort it out
Cosmic! Troubleshooting à la Solution 3 solved my issue. Thank you 3000!
Great article and instruction.
Method 6 finally did the trick.
Thank you so much!
Thankx man, finally solved the problem after reaching on step 4…
you are a lifesaver, thank you so much!!
I installed Windows 11 as a second RAM on steam deck, the problem with WiFi was not solved, although it works on the steam system