Basic Fixes:
- Disable 5G: While 5G provides faster data transfer speeds, it can increase the device’s battery drain. When this happens, use the settings menu and disable 5G on your Samsung Galaxy phone.
- Use Dark Mode: Phones usually have light mode by default. However, switching to Dark Mode can not only save battery but also protect your eyes, especially if you use your phone well into the night.
- Check for software and app updates: Software bugs can cause higher battery drain, especially if you’ve updated to a new software version. So, check and install the latest software updates to fix this issue. Ensure you update all your apps as well for similar reasons.
- Disable Location services: While Location services help improve the accuracy of apps, like maps, they can also drain your device’s battery faster. So, disable Location services when not used on your Samsung Galaxy phone.
Fix 1: Uninstall Battery Consuming Apps
Certain apps might consume more battery than others on your Samsung Galaxy phone. In this case, identify such apps, and if they’re no longer required, uninstall them from your phone. Here’s how to do it.
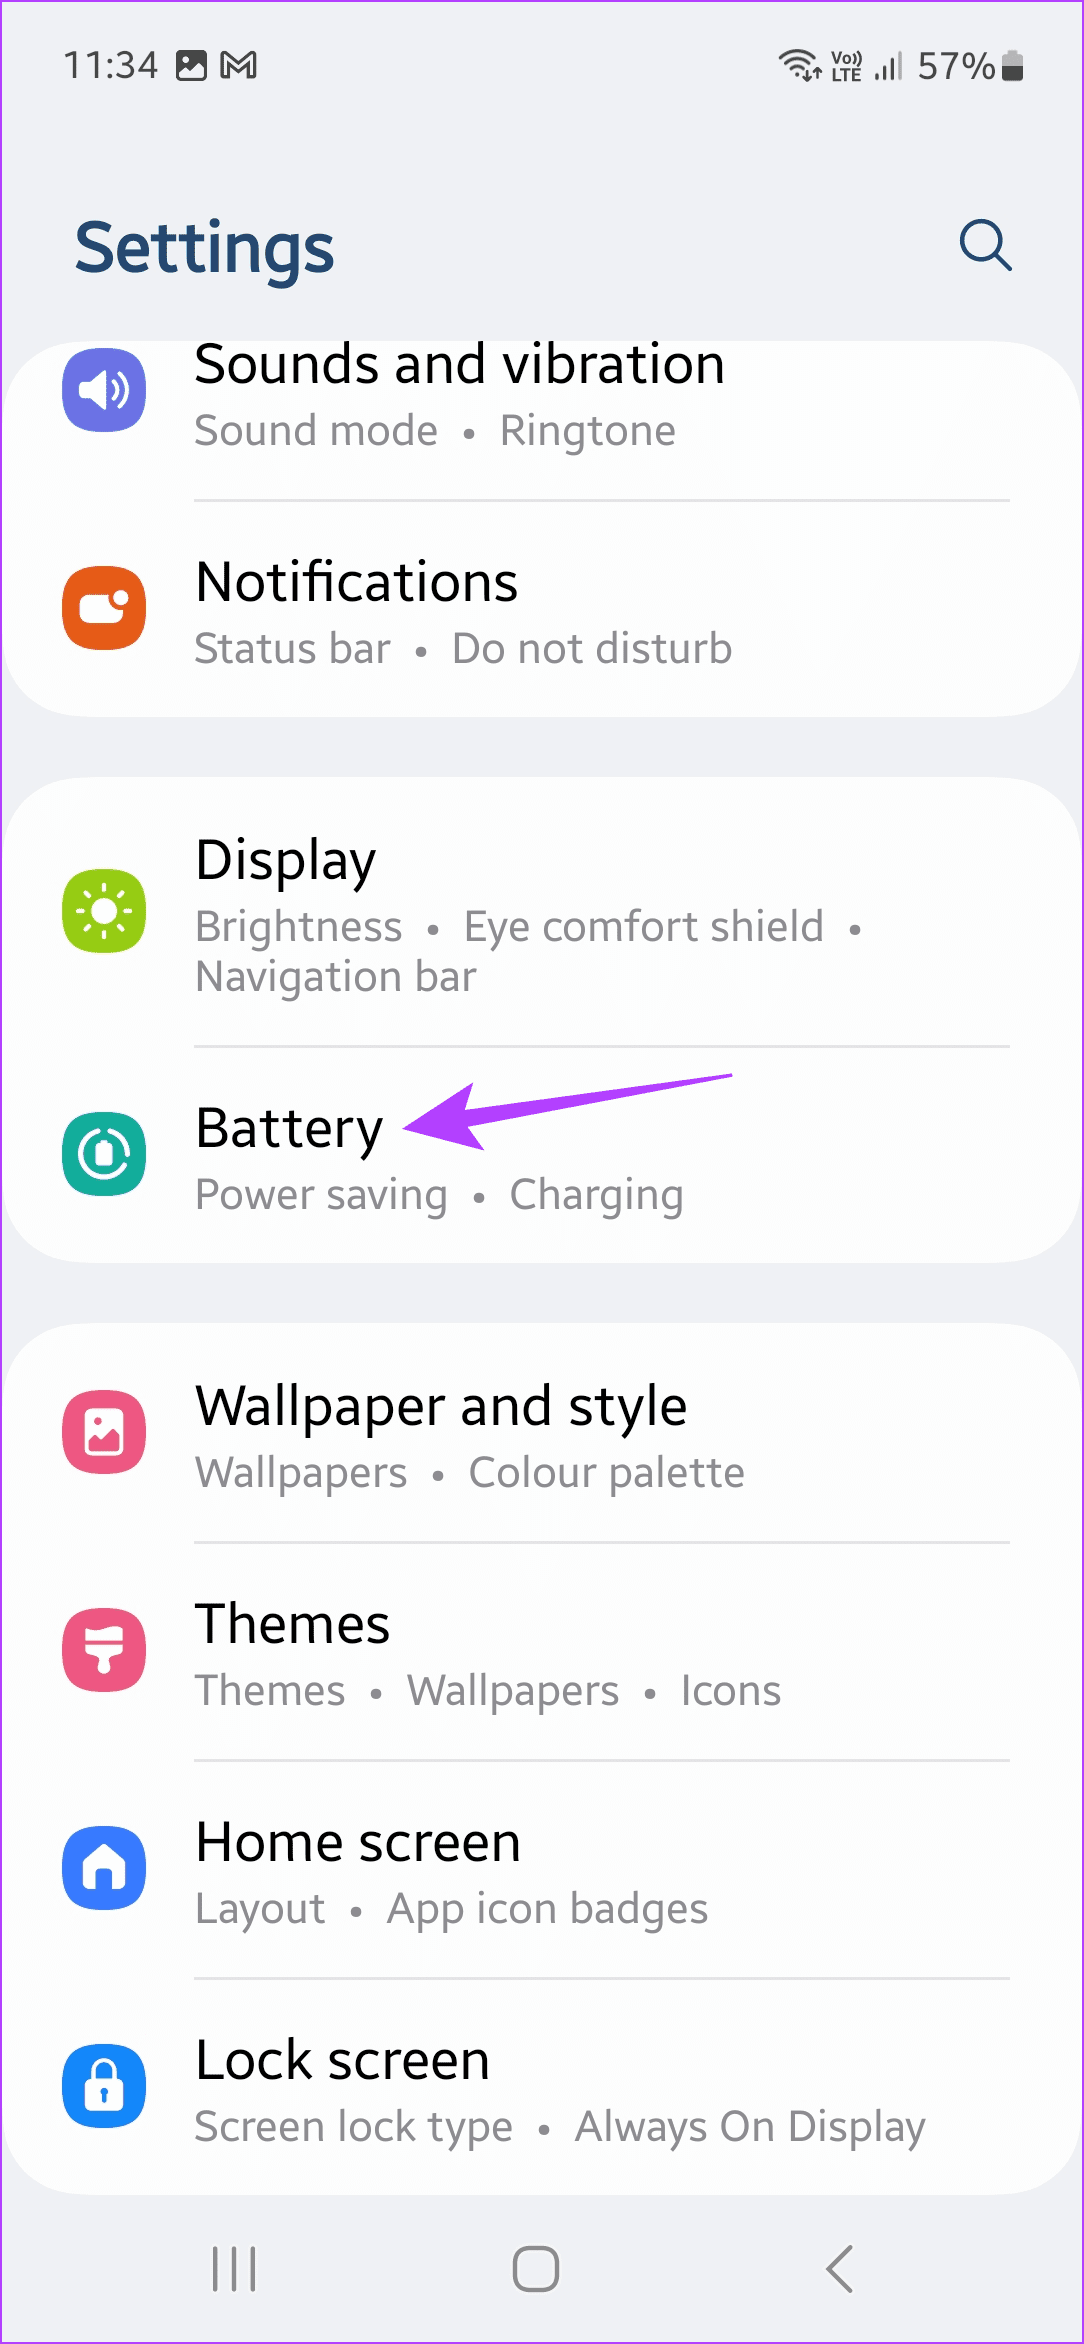
Step 1: Open Settings and tap on Battery.
Step 2: Scroll down and check battery consumption for apps.

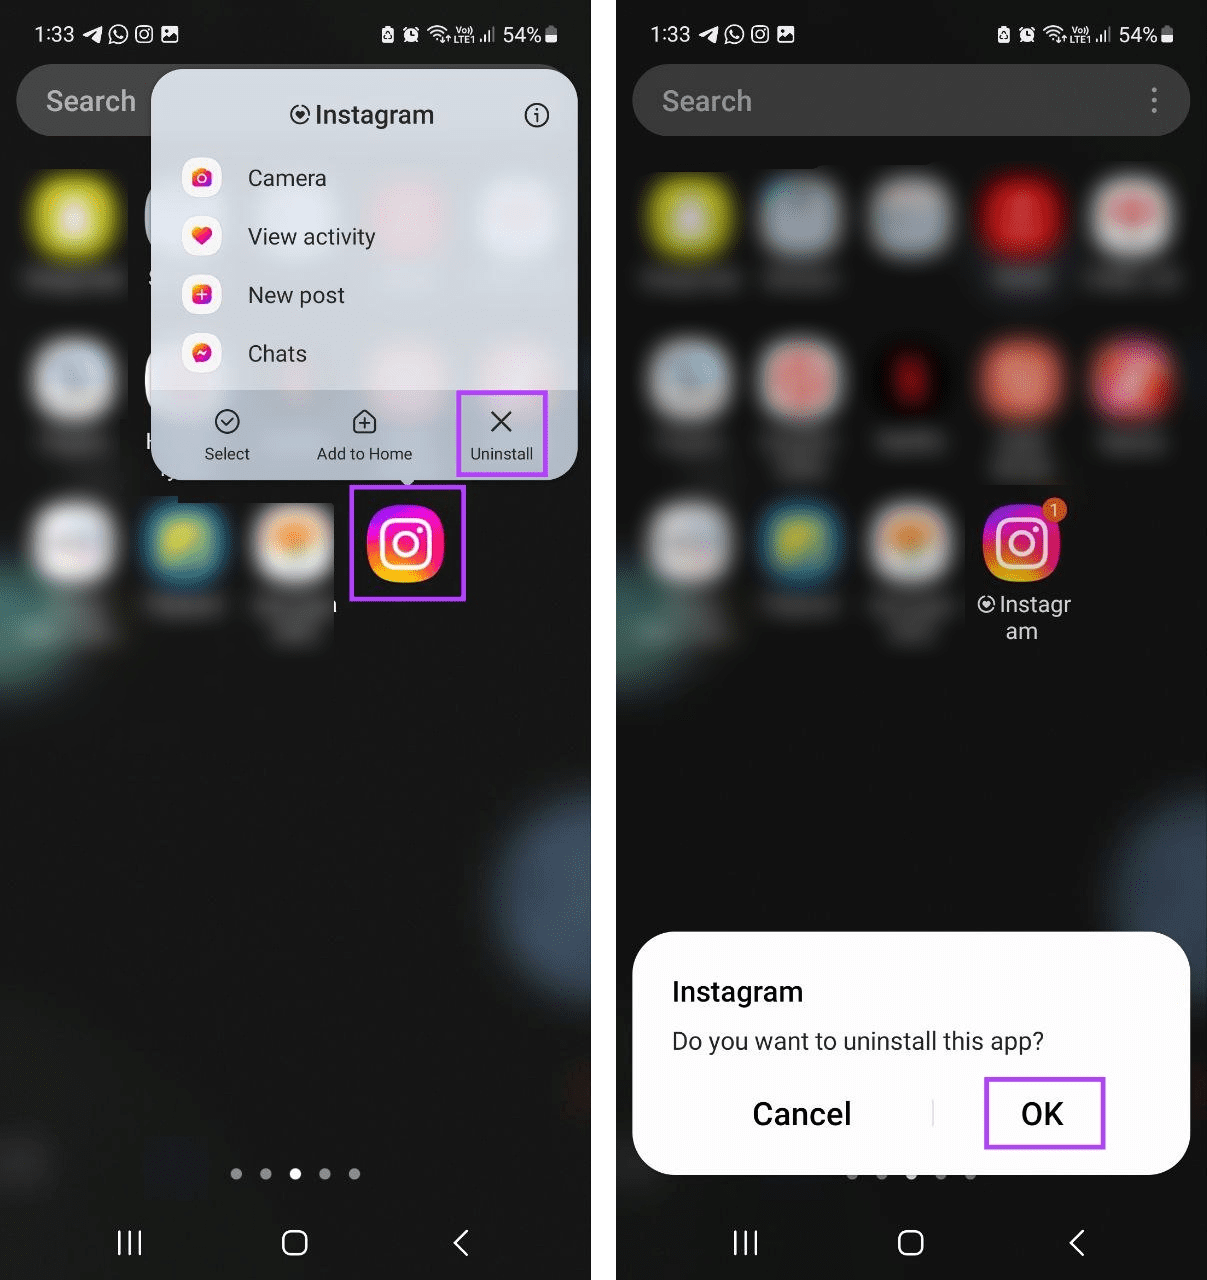
Step 3: Then, long-press the relevant app and tap on Uninstall. Tap OK to confirm.
Repeat these steps and uninstall any other apps consuming too much battery on your Samsung Galaxy phone.
Fix 2: Optimize Samsung Phone
Background apps, storage issues, app malware, etc., can cause an uptick in battery usage on your Samsung Galaxy phone. To fix this, optimize your phone. This will help detect and resolve such issues, fixing other related issues as well. Here’s how to do it.
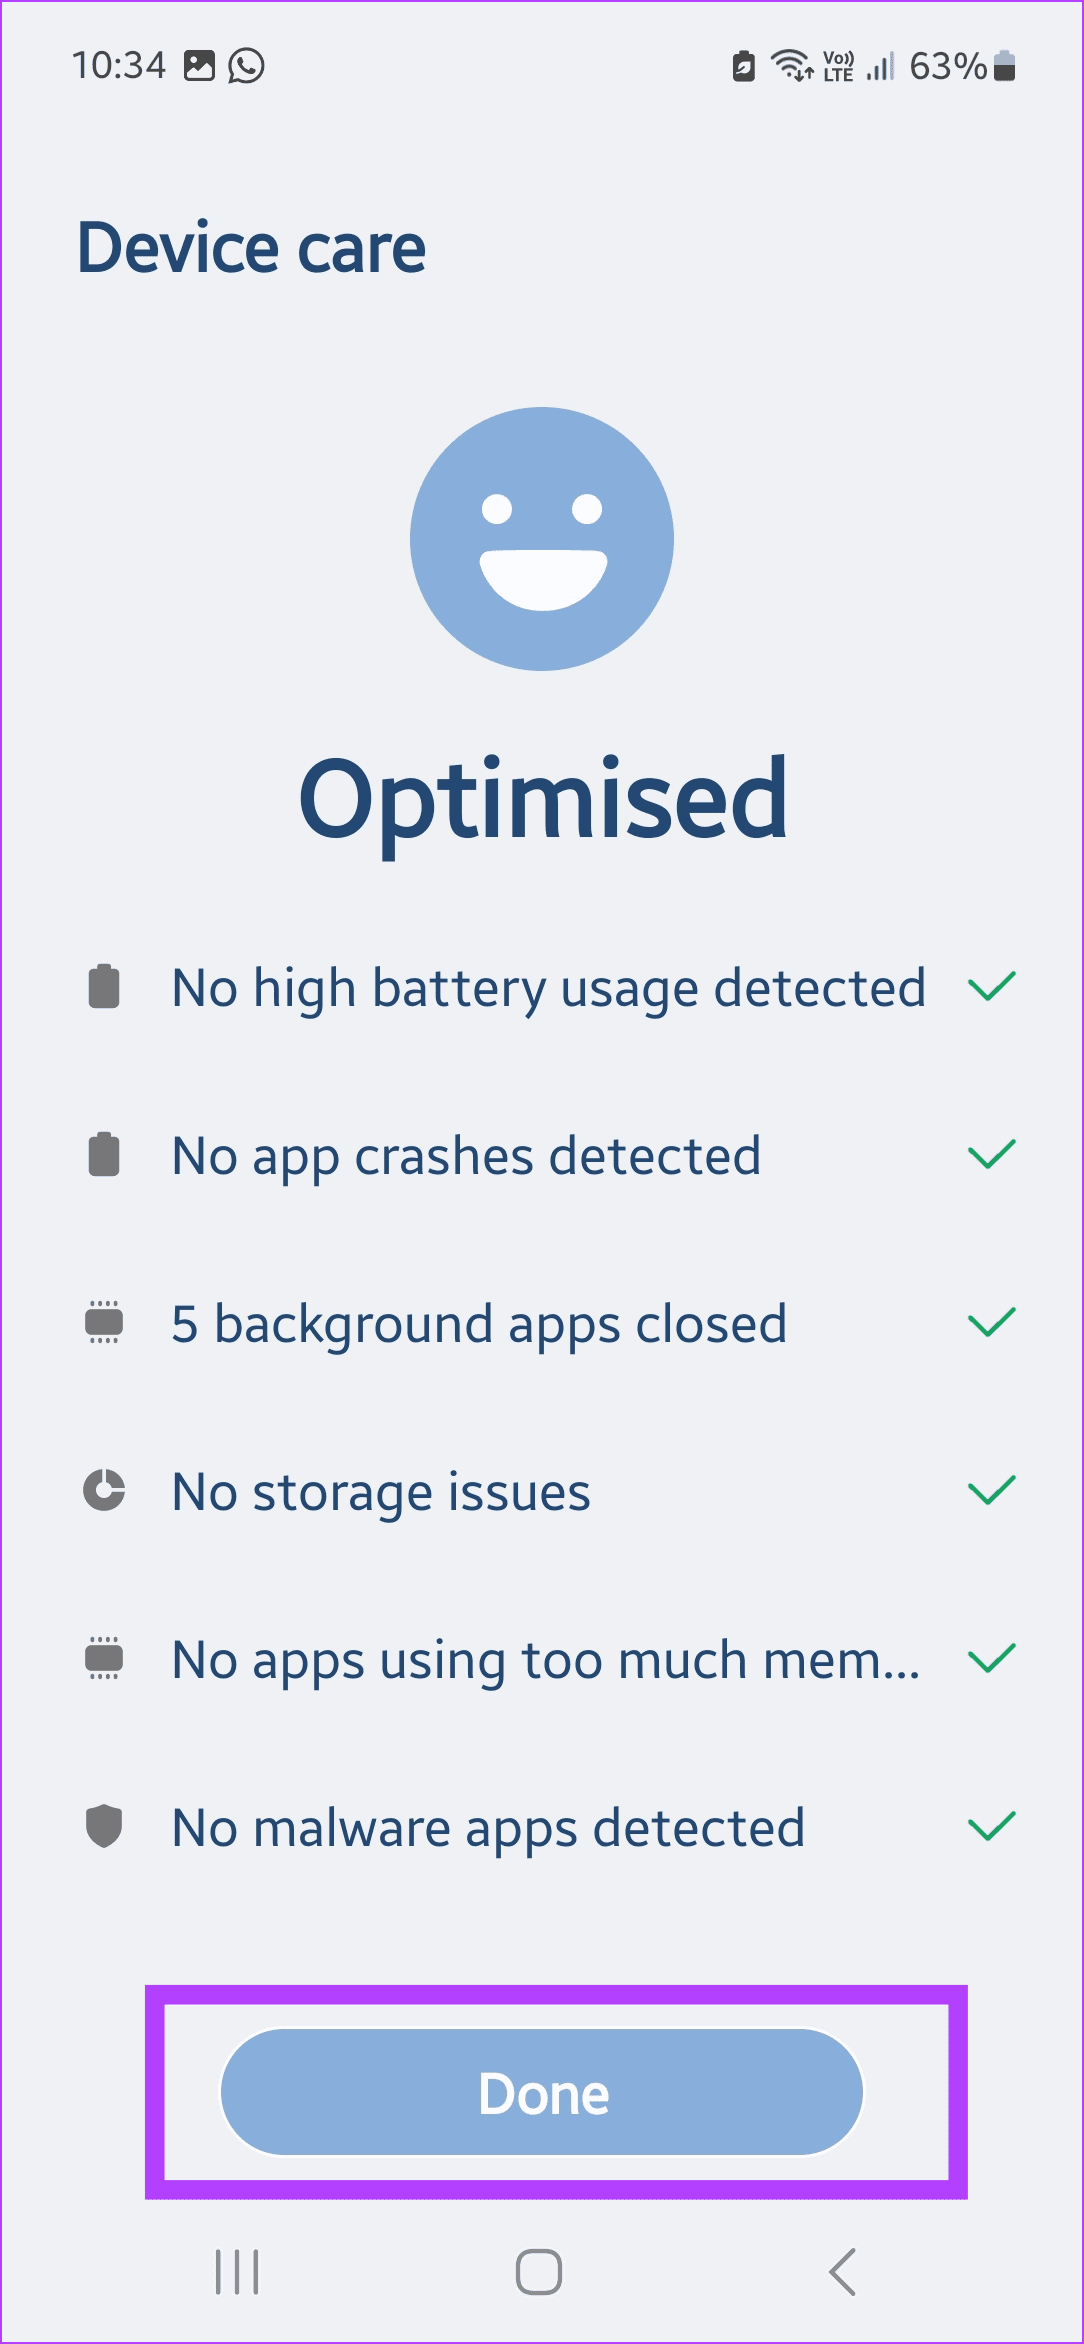
Step 1: Open Settings and tap on Device care. Tap on Optimize now.
Step 2: Wait for your device to optimize. If no issues are detected, tap on Done.


Fix 3: Restrict Battery Usage for Apps
While you can uninstall the unnecessary apps, certain apps might be used occasionally. So, instead of constantly reinstalling them, restrict their battery usage. This will ensure the app stays on your Samsung phone but doesn’t affect the battery usage. Here’s how to do it.
Step 1: Open Settings → Battery. Tap on Background usage limits.
Step 2: Enable the Put unused apps to sleep toggle.
Step 3: Use the Sleeping apps or Deep sleeping apps options to restrict app usage.


Please note putting the apps in a deep sleep will cease all app functions. Check out our guide to learn how to manage sleeping apps on your Samsung Galaxy phone.
Fix 4: Enable Adaptive Battery Protection
Enabling Adaptive Power Saving mode helps ensure your Samsung Galaxy phone conserves battery when not in use. This can prevent battery drain from background apps when your phone is idle. Follow the below steps to enable it.
Step 1: Open Settings → Battery. Tap on Power saving.
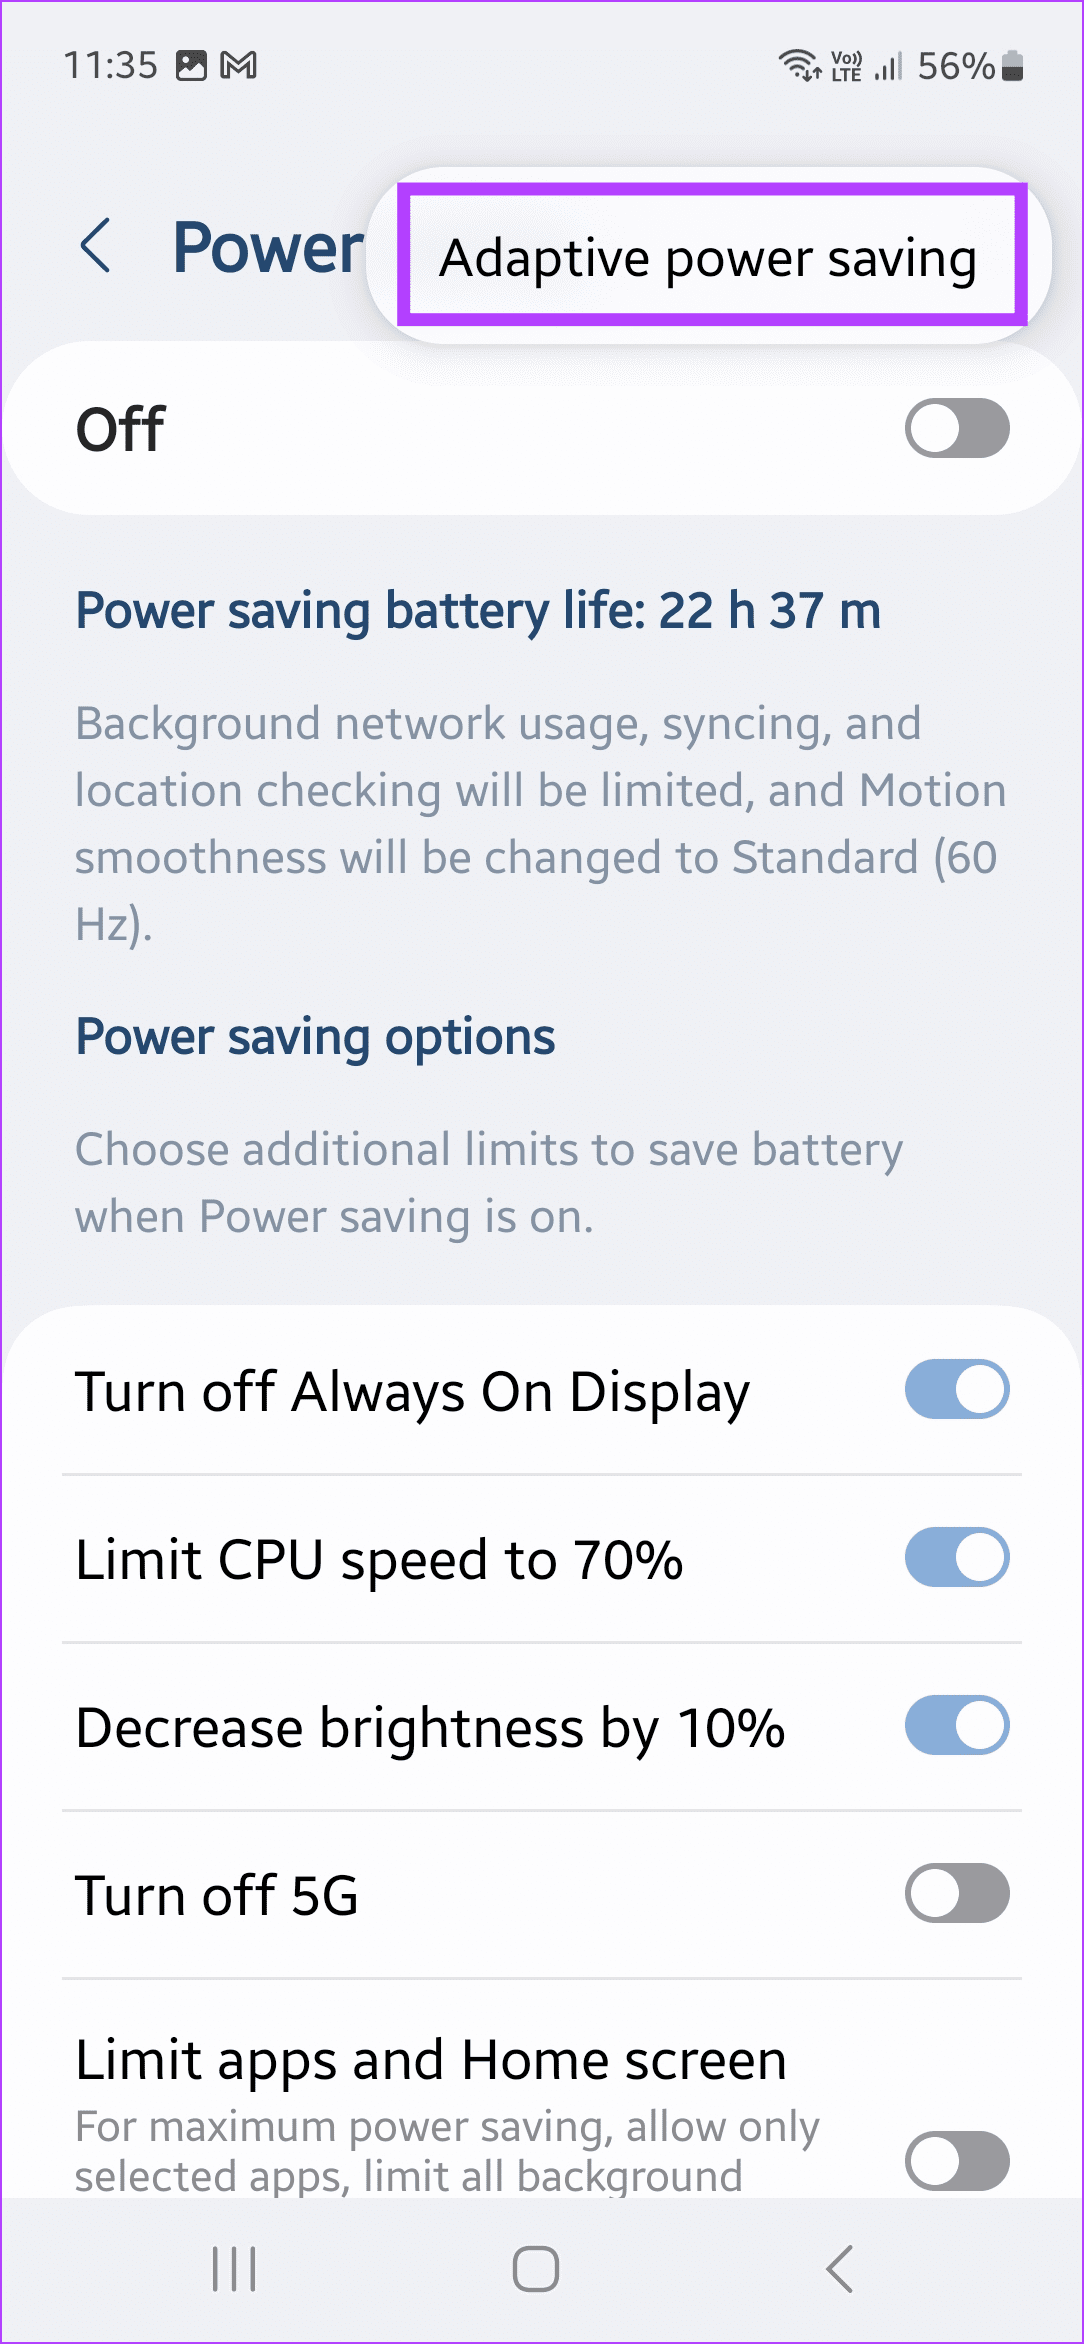
Step 2: Tap the three-dot icon at the top-right corner → Adaptive power saving.
Step 3: Turn on the toggle for Off. This will enable Adaptive Power Saving.


Fix 5: Disable Always On Display
While Always On Display helps deliver information at a glance, it can drain the battery in the long run. This happens as your phone’s screen remains on. So, disable Always On Display and see if this improves your Samsung phone’s battery life. Here’s how.
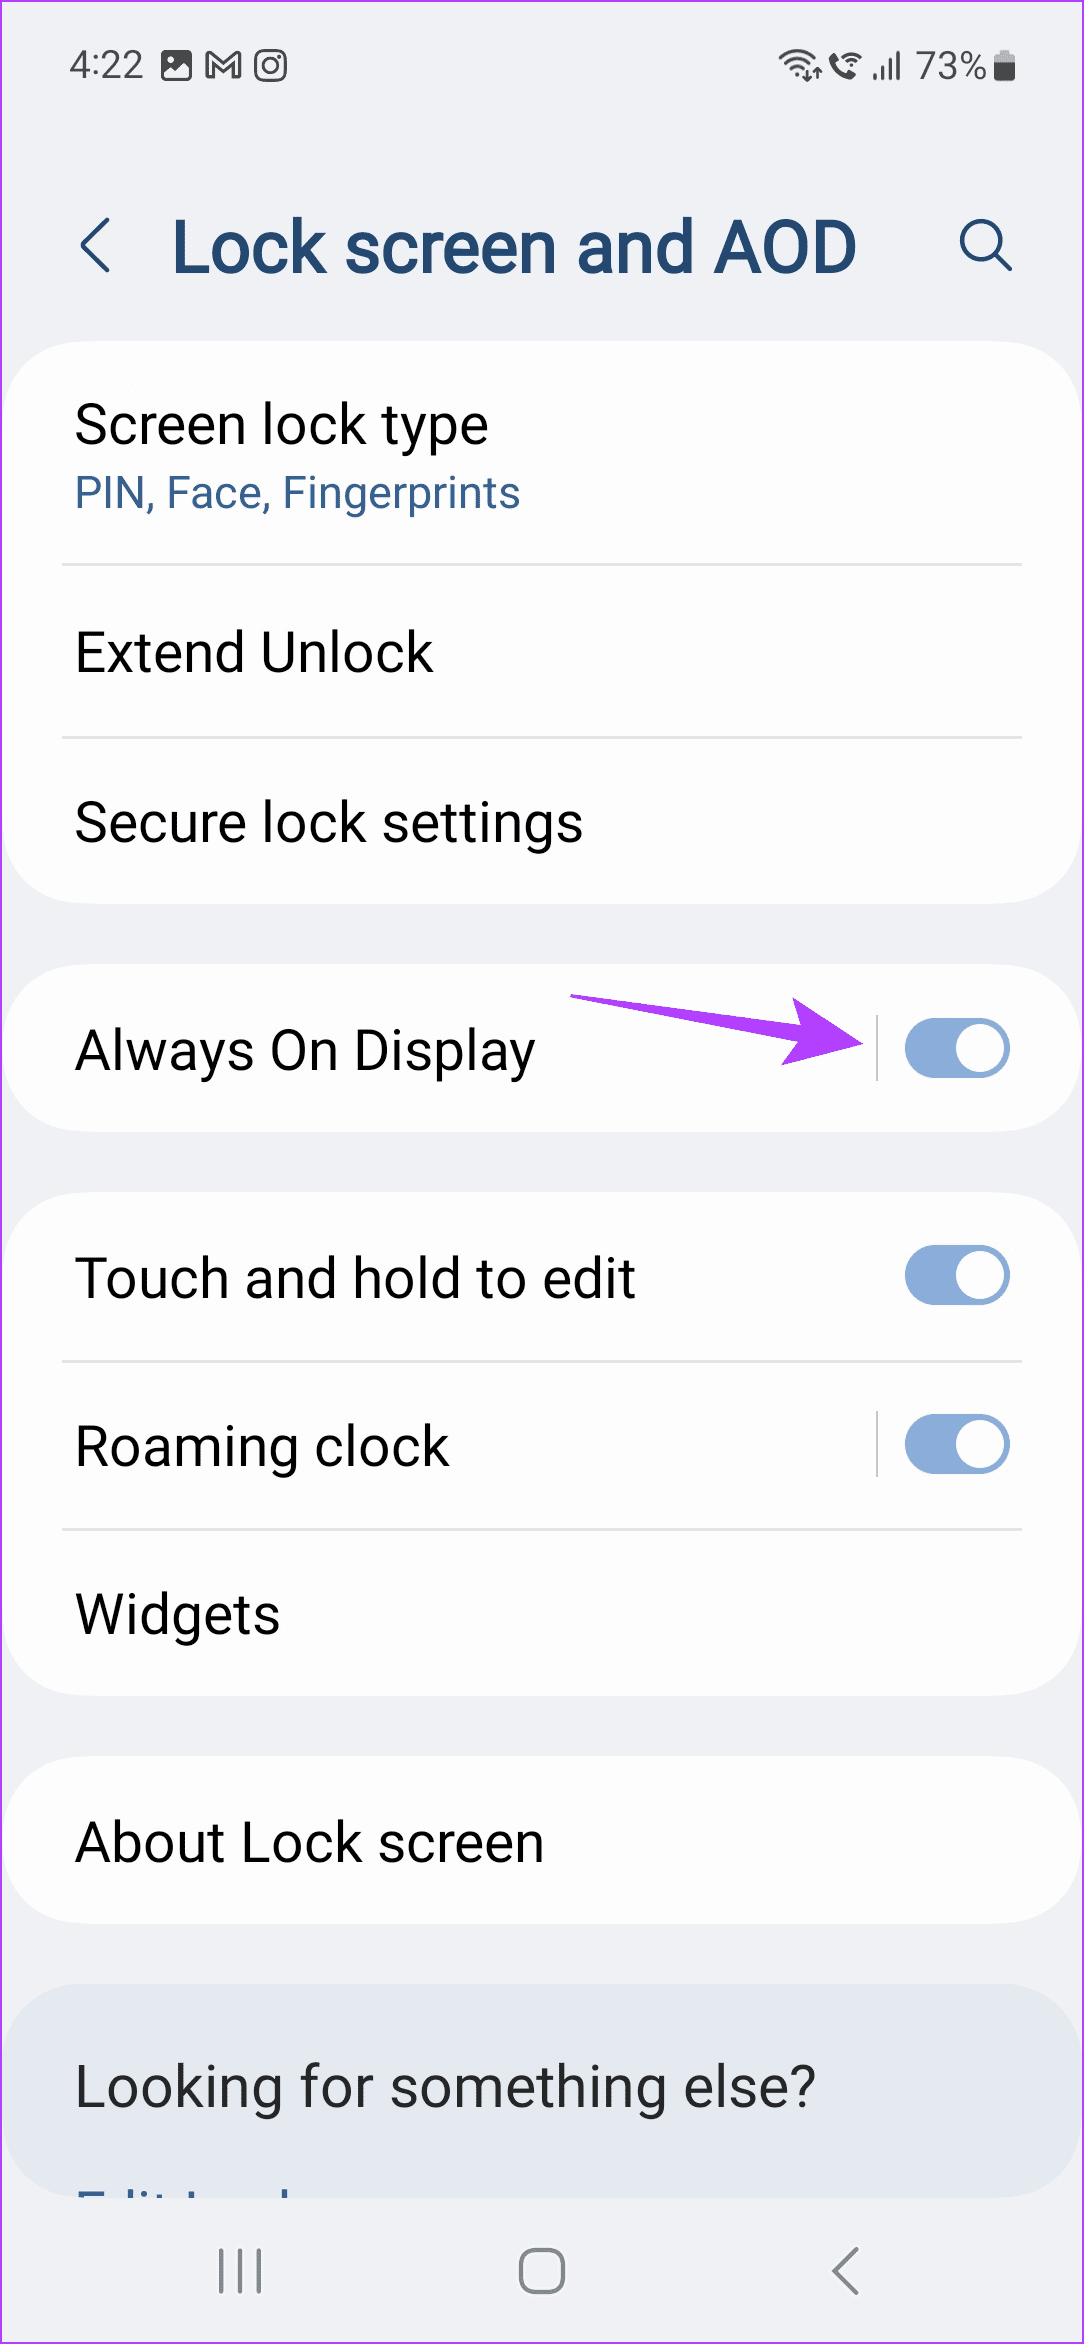
Step 1: Open Settings and tap on Lock screen and AOD.
Step 2: Turn off the Always On Display toggle.

Also Read: How to fix Samsung One UI battery drain
Fix 6: Set Motion Smoothness to Standard
Going for a higher refresh rate can help make your Samsung phone’s animations, like scrolling, smoother and better. However, this can also cause higher battery drain in the long run. So, switch to the standard refresh rate and see if this positively impacts your device’s battery life. Here’s how to do it.
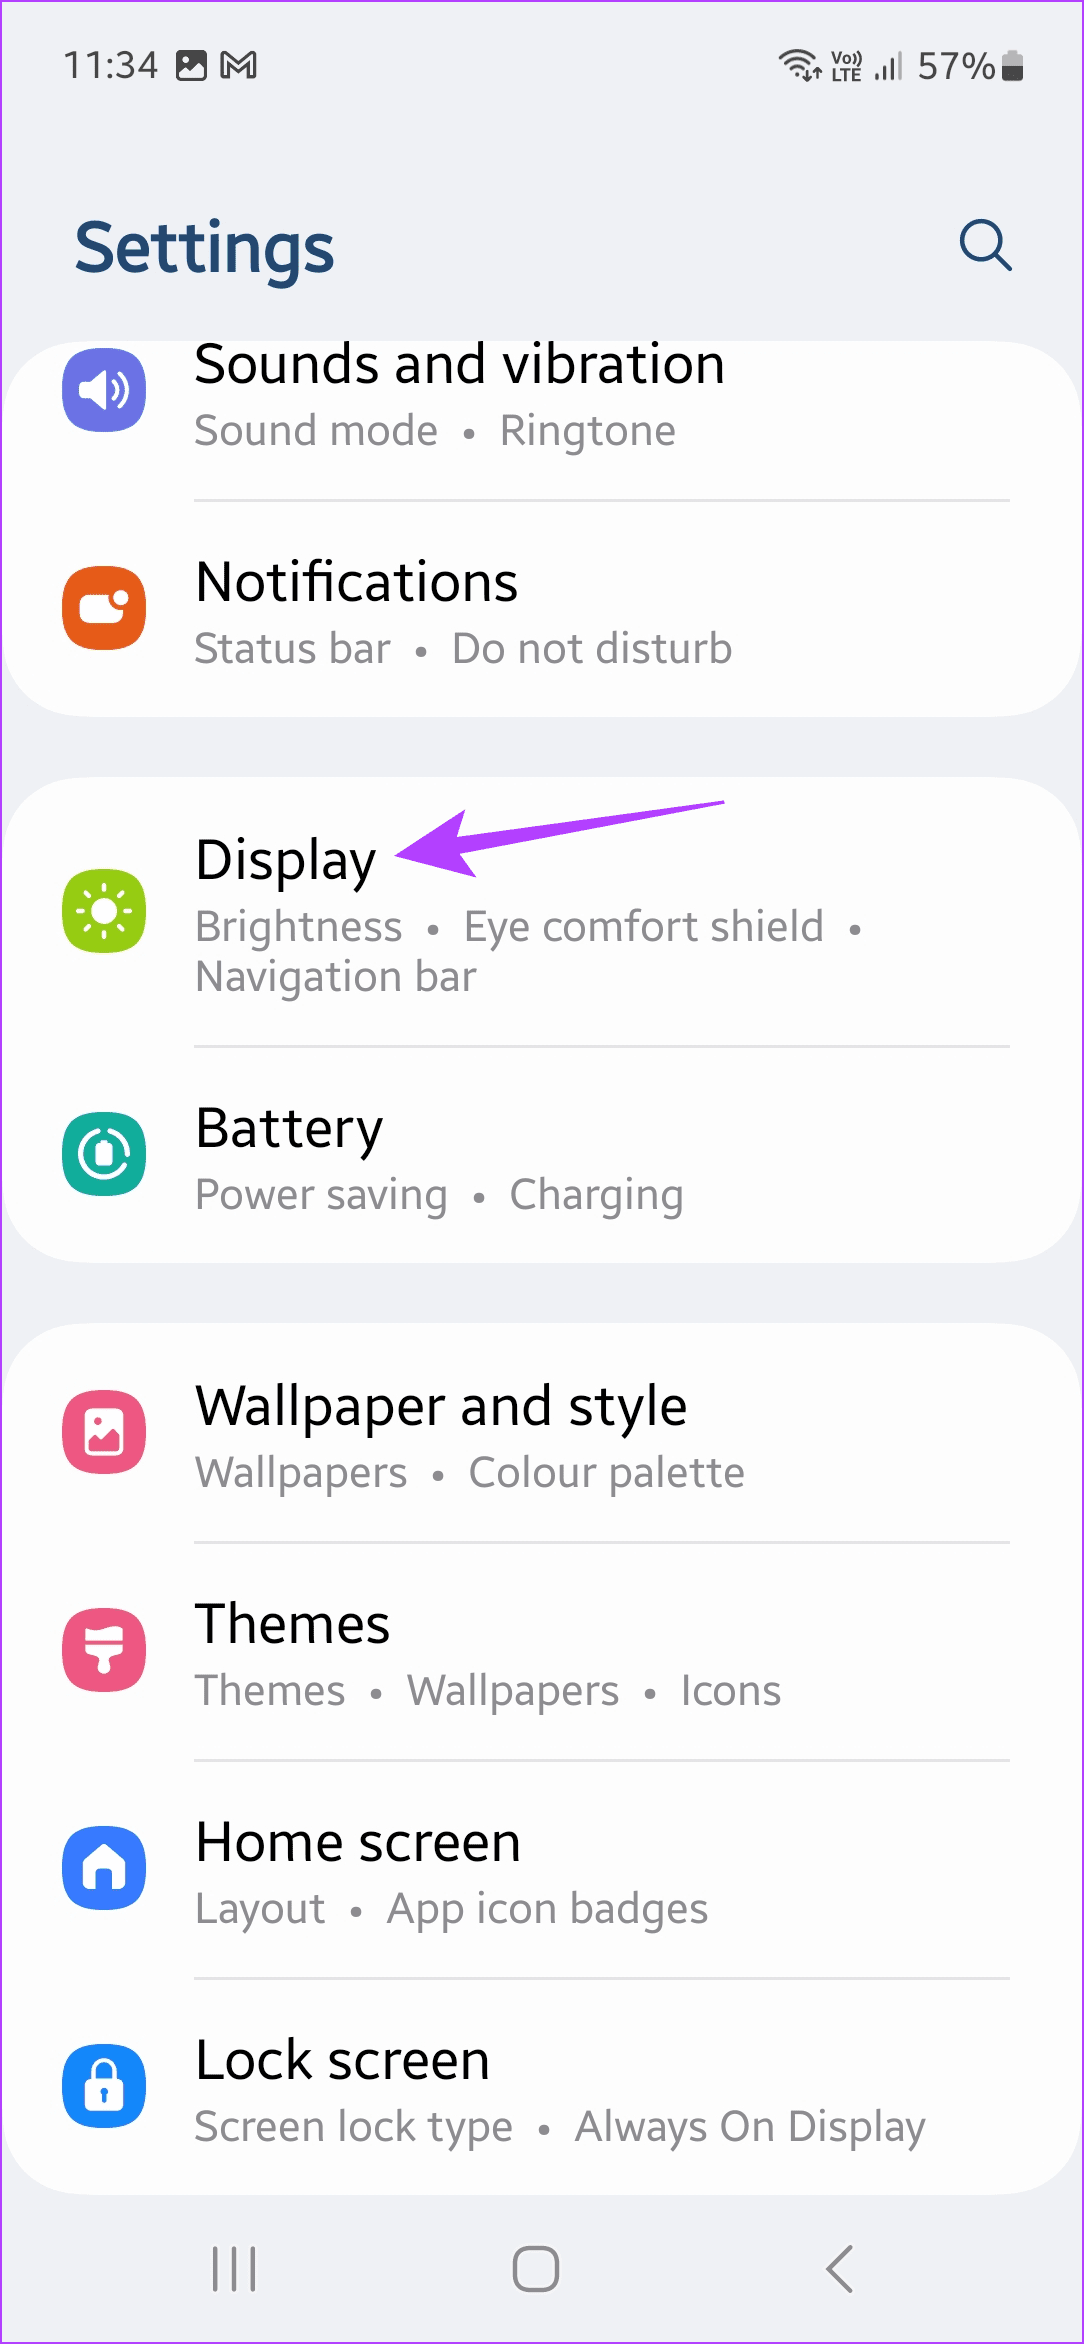
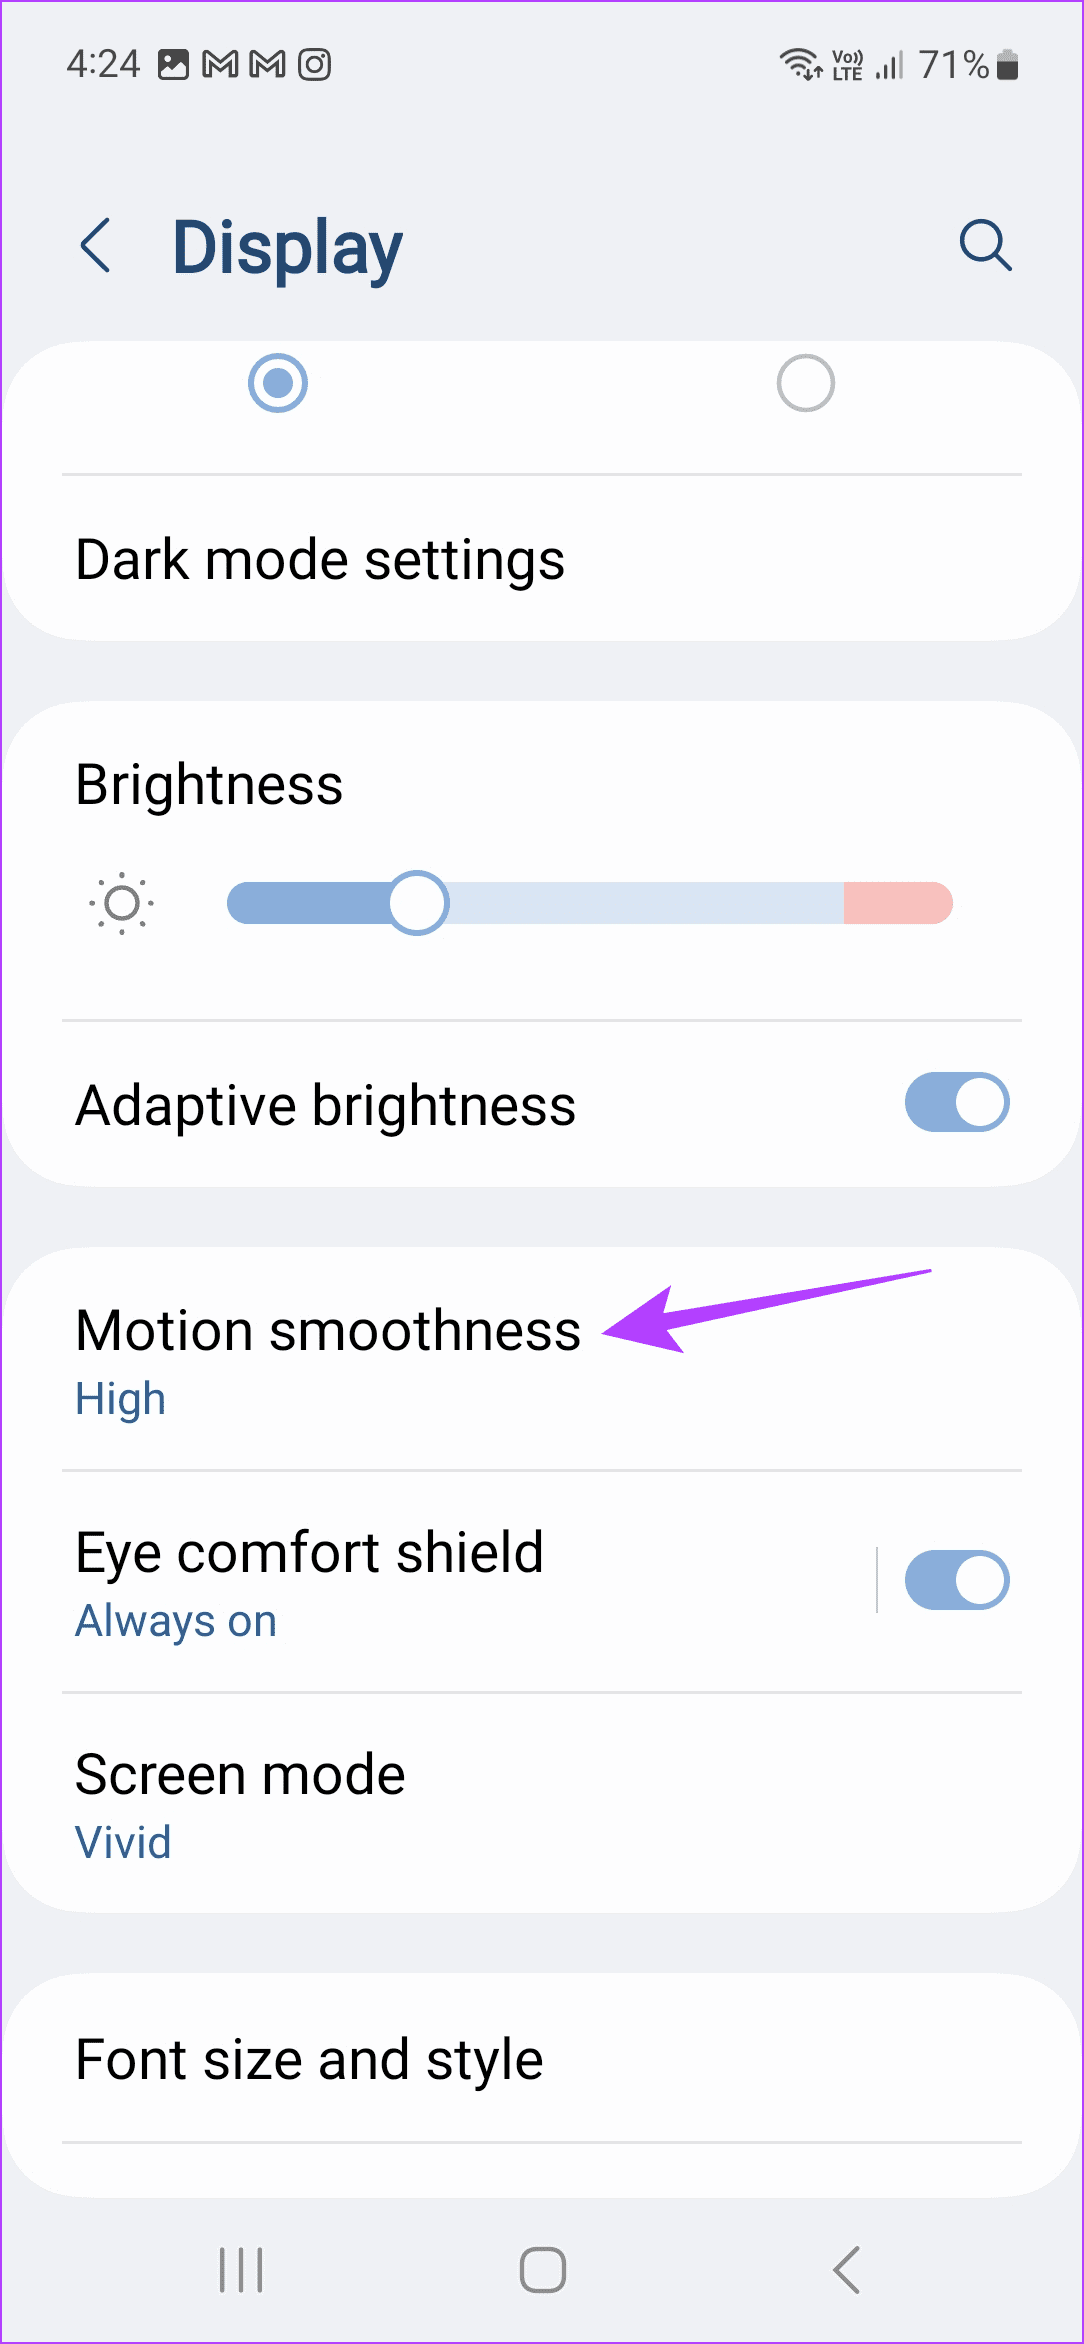
Step 1: Open Settings and tap on Display. Tap on Motion smoothness.
Step 2: Select Standard and tap on Apply to confirm.

Fix 7: Wipe Cache Partition
Device caches can also cause battery drain issues. While you can’t clear the device cache using the settings menu, you can enter the recovery mode on your Samsung phone and wipe the cache partition. This will help clear any corrupt device cache and fix the issue. Here’s how to do it.
Step 1: Press and hold the volume up and Power buttons until your phone turns on.
Step 2: Use the device touch screen or the volume buttons to navigate and select Wipe Cache Partition.
Step 3: Press the Power button to confirm. Then, restart your phone and check.

Also Read: How to fix Android Recovery Mode not working
Fix 8: Factory Reset Your Samsung Phone
If your Samsung Galaxy phone is still experiencing rapid battery drain, you can use the factory reset option. This will delete all phone data and reset it to default settings. Do this if you see the device battery drain after updating to the new One UI version. Here’s how.
Tip: Doing this will delete all device data. So, ensure to backup data before proceeding.
Step 1: Open Settings and tap on General management. Tap Reset.

Step 2: Tap on Factory data reset. Tap on Reset to confirm.

Wait for the reset process to finish. Then, set up your Samsung Galaxy phone and try using it for a while to see if the issue has been fixed.
Was this helpful?
Last updated on 01 July, 2024
Read Next
 5 Ways to Fix Samsung One UI Battery Drain
Basic Fixes: Turn off Always On Display: While Always On Display gives you an easy view of all your current notifications, date, time, etc., keeping it on increases the battery
5 Ways to Fix Samsung One UI Battery Drain
Basic Fixes: Turn off Always On Display: While Always On Display gives you an easy view of all your current notifications, date, time, etc., keeping it on increases the battery
 6 Ways to Fix Google App Battery Drain on Android
Fix 1: Clear the Cache of the Google App This is a simple solution you can try before moving to more rigorous methods of controlling battery drain.
6 Ways to Fix Google App Battery Drain on Android
Fix 1: Clear the Cache of the Google App This is a simple solution you can try before moving to more rigorous methods of controlling battery drain.
 5 Ways to Fix Chrome Battery Drain Issue on Android
Basic Fixes: Force stop Google Chrome app: Chrome can still operate in the background even if you close the app.
5 Ways to Fix Chrome Battery Drain Issue on Android
Basic Fixes: Force stop Google Chrome app: Chrome can still operate in the background even if you close the app.
 How to Fix MIUI Battery Drain Issue on Redmi Devices
Basic Fixes: Check for software updates: If you've recently updated to a new MIUI version, software-related bugs can cause higher-than-normal battery drain.
How to Fix MIUI Battery Drain Issue on Redmi Devices
Basic Fixes: Check for software updates: If you've recently updated to a new MIUI version, software-related bugs can cause higher-than-normal battery drain.
 How to Fix Overnight Battery Drain on Android Phone
Basic Fixes: Close background apps and restart your phone: Often, we ignore basic solutions that may be effective.
How to Fix Overnight Battery Drain on Android Phone
Basic Fixes: Close background apps and restart your phone: Often, we ignore basic solutions that may be effective.
 7 Ways to Fix Battery Drain Issue on Windows 11
Fix 1: Change Power Plan The first thing you need to do is set the default power plan on your laptop to prioritize longer battery life over performance.
7 Ways to Fix Battery Drain Issue on Windows 11
Fix 1: Change Power Plan The first thing you need to do is set the default power plan on your laptop to prioritize longer battery life over performance.
 11 Ways to Fix iOS 17 Battery Drain Issue on iPhone
If you have an eligible device, installing the latest iOS 17 update seems a no-brainer.
11 Ways to Fix iOS 17 Battery Drain Issue on iPhone
If you have an eligible device, installing the latest iOS 17 update seems a no-brainer.
 How to Prevent Battery Drain When Windows Laptop Lid Is Closed
Common Fixes Unplug external devices: Disconnect all plugged-in devices (e.g., USB devices, external hard drives, etc.) to prevent them from waking up the laptop when the lid is closed.
How to Prevent Battery Drain When Windows Laptop Lid Is Closed
Common Fixes Unplug external devices: Disconnect all plugged-in devices (e.g., USB devices, external hard drives, etc.) to prevent them from waking up the laptop when the lid is closed.
The article above may contain affiliate links which help support Guiding Tech. The content remains unbiased and authentic and will never affect our editorial integrity.