Method 1: Clear Temporary Files Using the Settings App
The Settings app on Windows gives you a complete breakdown of different temporary files stored on your PC. Here’s how you can use it to get rid of temporary files.
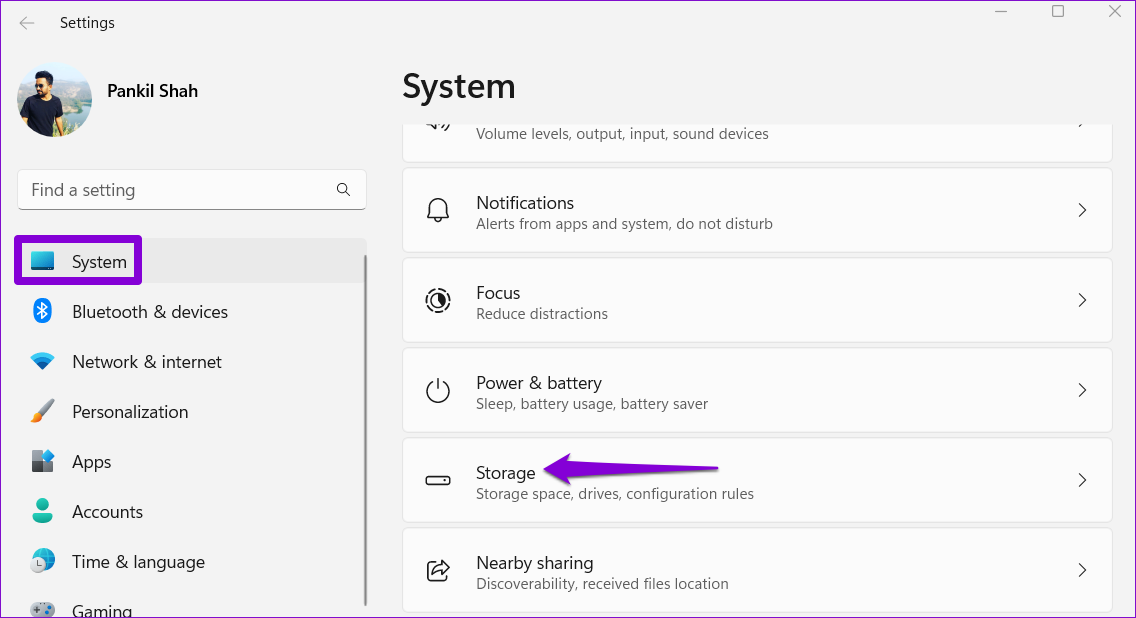
Step 1: Press the Windows key + I to open the Settings app and head to System > Storage.
Step 2: Click on Temporary files.
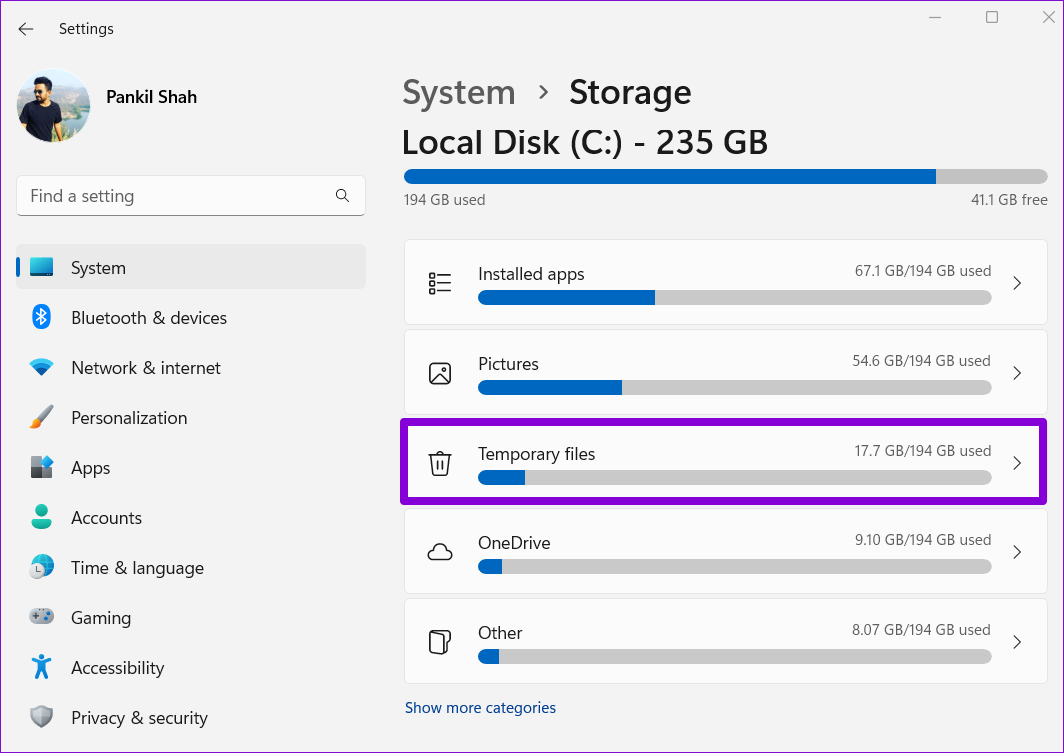
Step 3: Windows will present you with a list of different temporary files along with the amount of storage occupied.
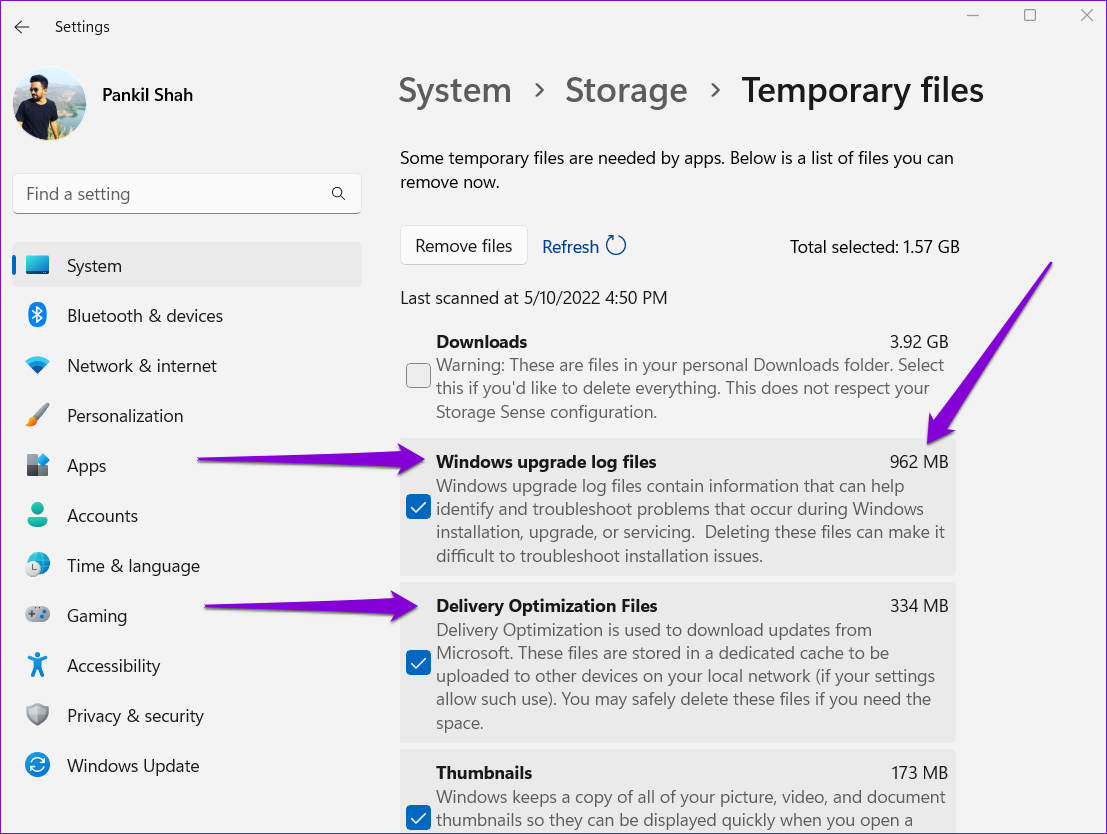
Step 4: Use the checkboxes to select the files that you want to delete. Once selected, you’ll see the amount of storage occupied by the selected files at the top.

Warning: This list also includes files you’ve downloaded from the internet. If you want to keep those files, make sure you uncheck Downloads.
Step 5: Finally, click the Remove files button.

Method 2: Clear Temporary Files With Disk Cleanup
Another way to clear temporary files on Windows is via the Disk Cleanup utility. Unlike the Settings app, Disk Cleanup lets you clear temporary files for each drive partition separately. Here’s how to use it.
Step 1: Click the search icon on the taskbar, type in disk cleanup, and select the first result that appears.

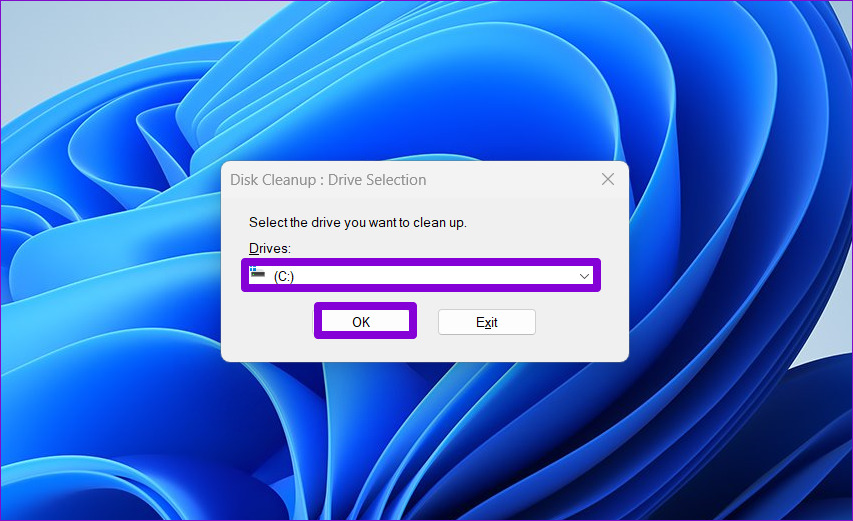
Step 2: Use the drop-down menu to select a drive from which you wish to clear temporary files. Then, click OK.
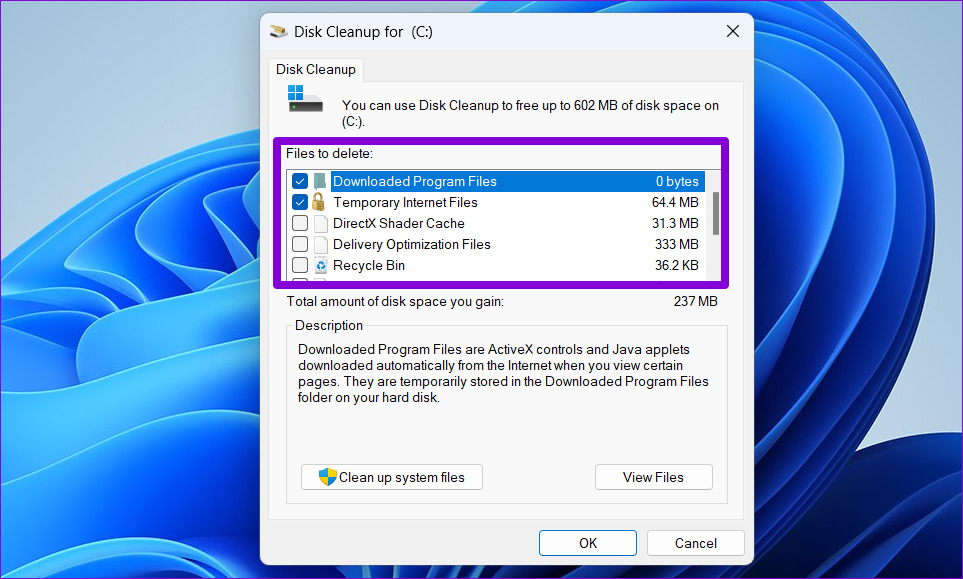
Step 3: Under Files to delete, use the checkboxes to select the temporary files you want to remove. You can select a file type to view its description.
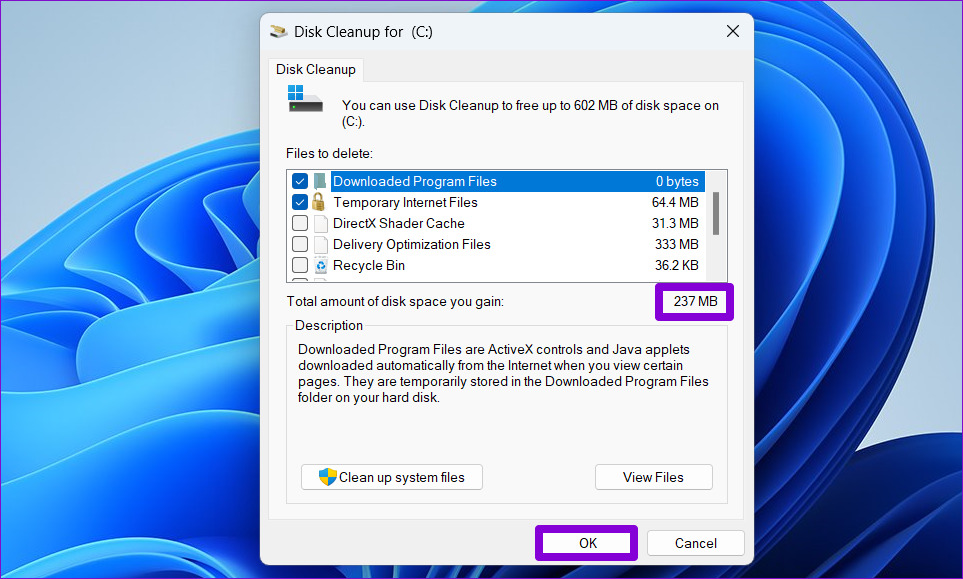
Step 4: After you select relevant options, you’ll see how much total storage those files occupy. Then, click OK to proceed.
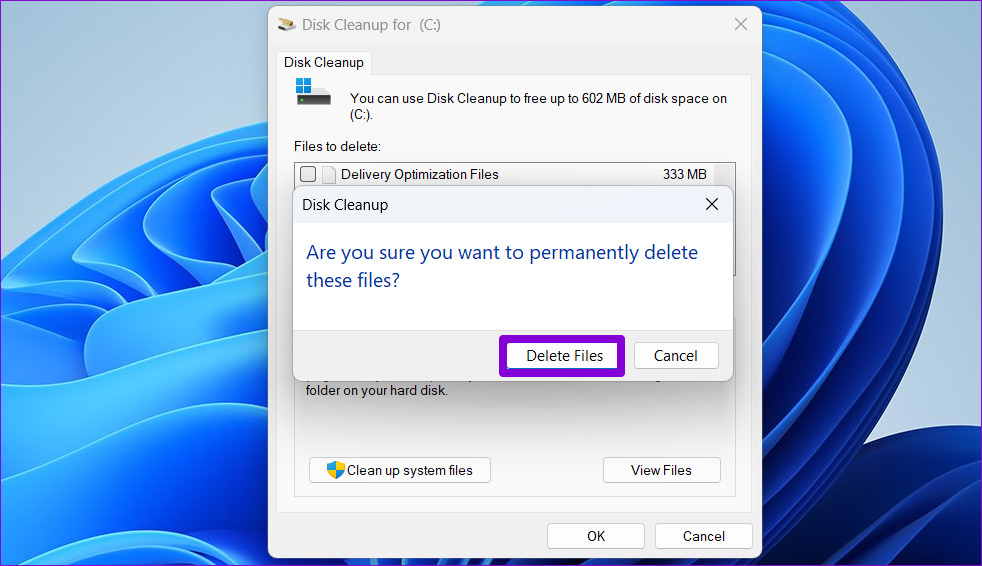
Step 5: When a confirmation prompt appears, click the Delete Files button.
Method 3: Clear Temporary Files Manually From the Temp Folder
On Windows, the Temp folder serves as the storage location for all temporary files. Emptying this folder is another way to delete temporary files on Windows 11. Here’s how you can go about it.
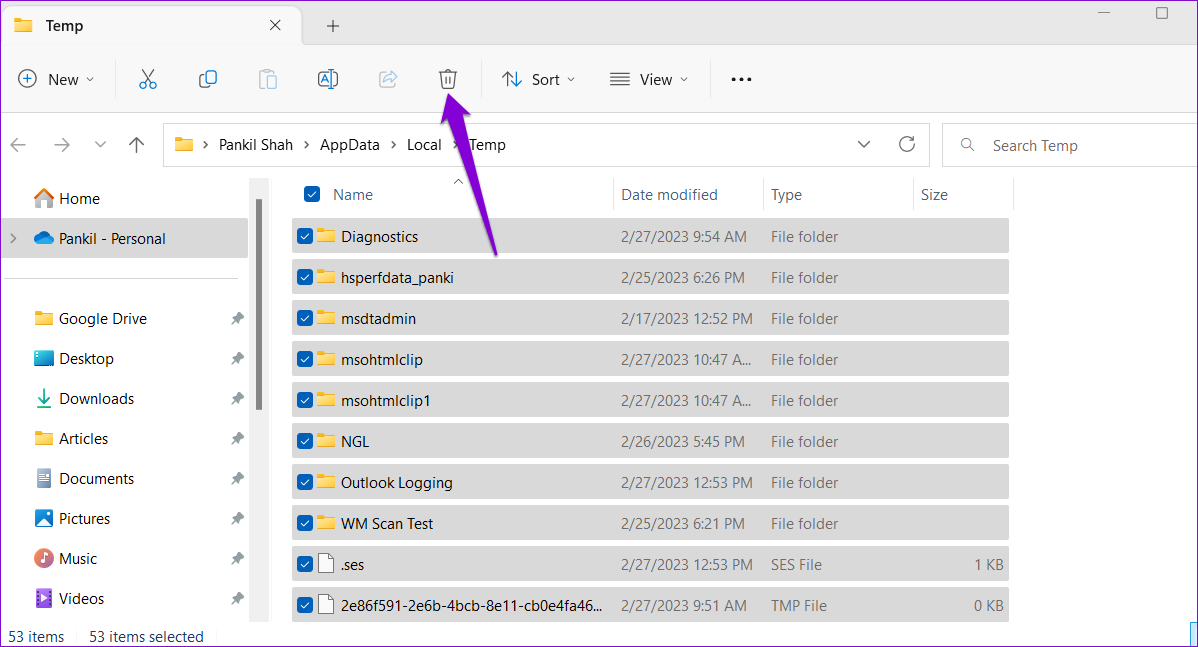
Step 1: Press the Windows key + R to open the Run dialog. Type %temp% in the Open field and press Enter.
Step 2: Press Ctrl + A to select all the files and folders within the Temp folder and click the trash icon at the top to delete them.
Method 4: Clear Temporary Files Using the Command Prompt
If you’re an avid Windows user who is familiar with Command Prompt, you can also clear temporary files on Windows with a single command. Here’s how:
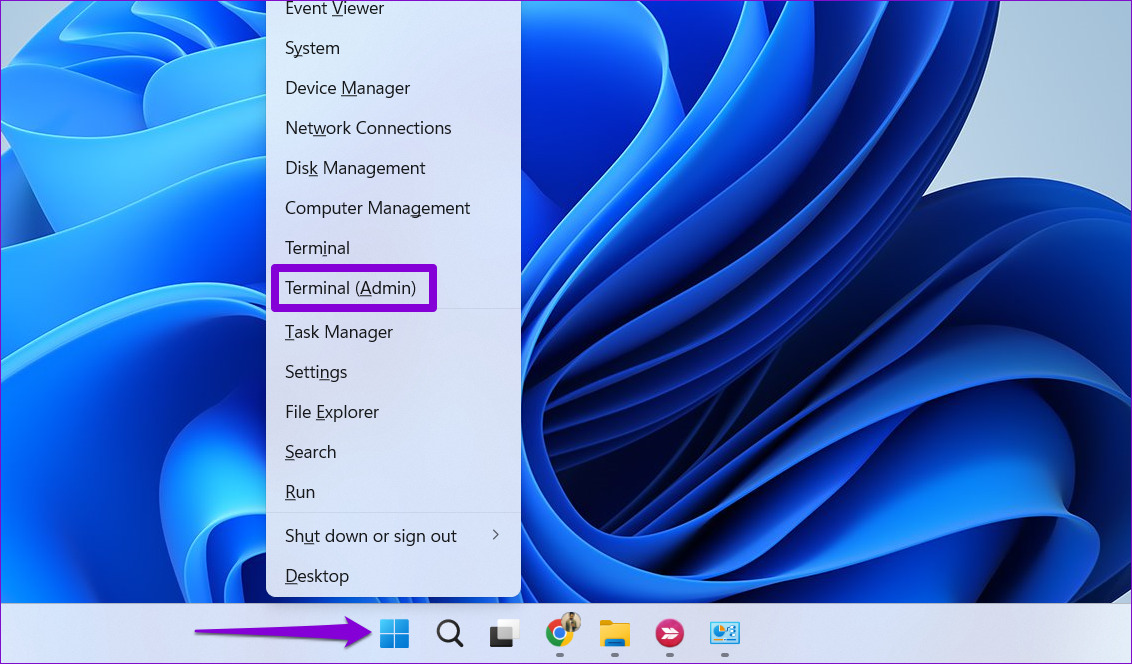
Step 1: Right-click on the Start icon and select Terminal (Admin) from the list.
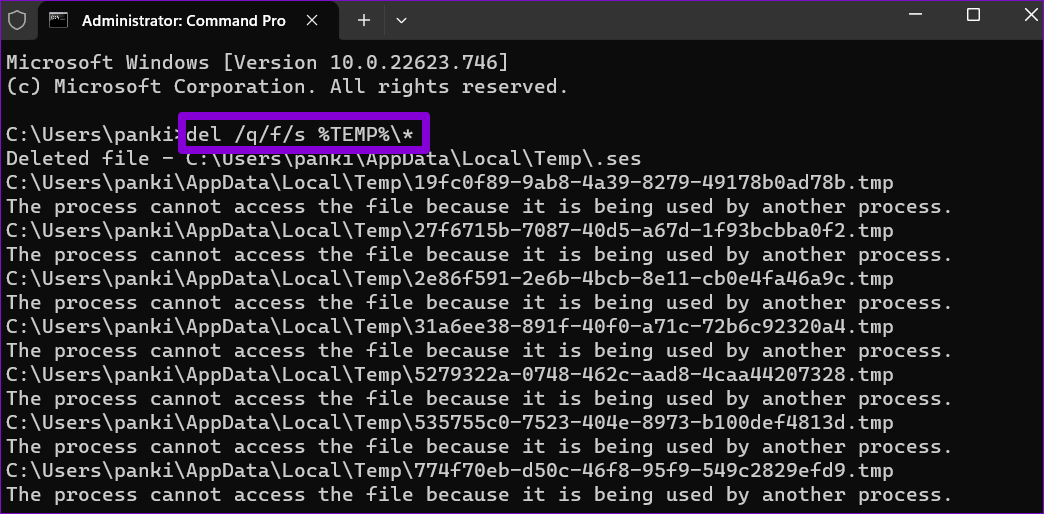
Step 3: Paste the following command in the console and press Enter to clear all the temporary files.
del /q/f/s %TEMP%\*
Method 5: Clear Temporary Files Automatically Using Storage Sense
Although cleaning temporary files is quite easy, repeating this task manually every few weeks can be tedious. Thankfully, Windows 11 also lets you automate this entire process using Storage Sense. Here’s how:
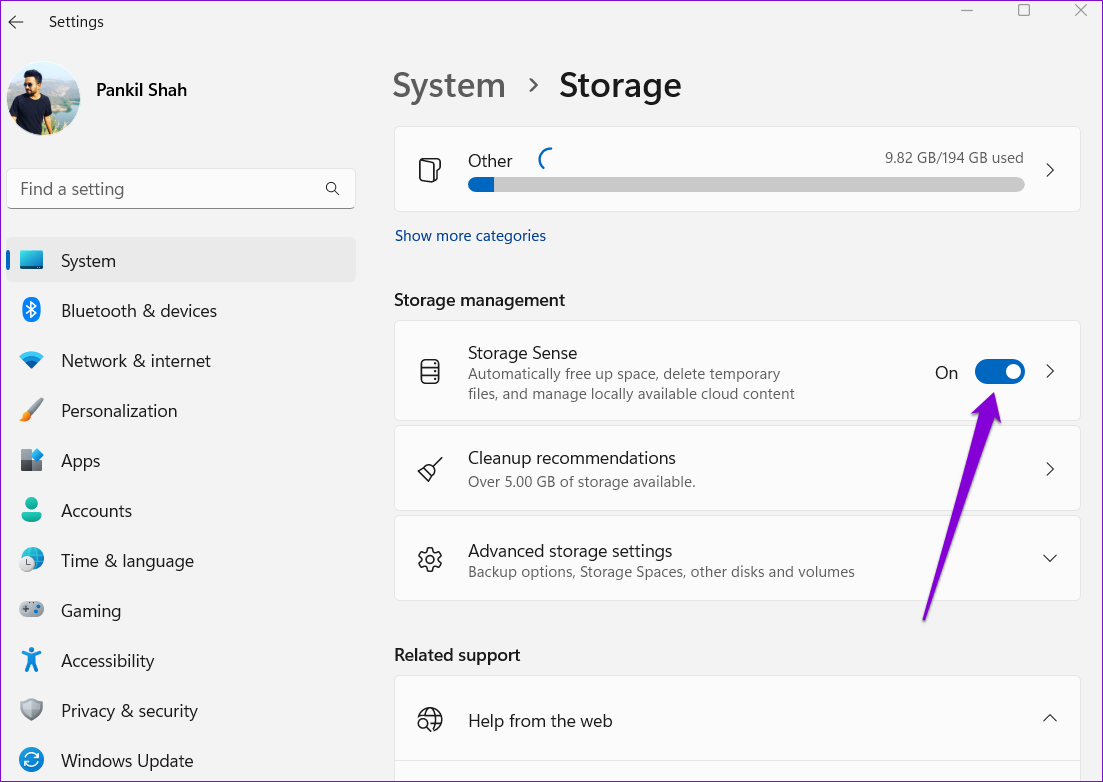
Step 1: Press the Windows key + I to open the Settings app and head to System > Storage.
Step 2: Under Storage management, enable the switch next to Storage Sense.
Step 3: Click on Storage Sense to view additional settings.
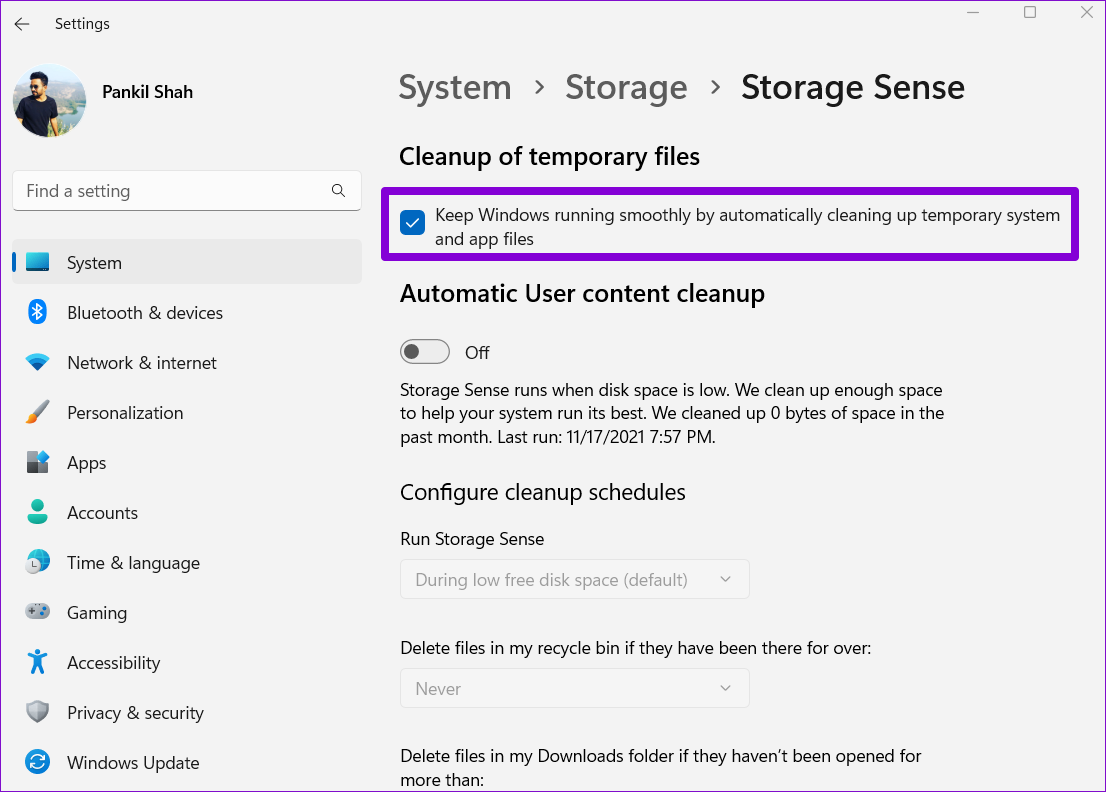
Step 4: Under Cleanup of temporary files, check the box that reads Keep Windows running smoothly by automatically cleaning up temporary system and app files.
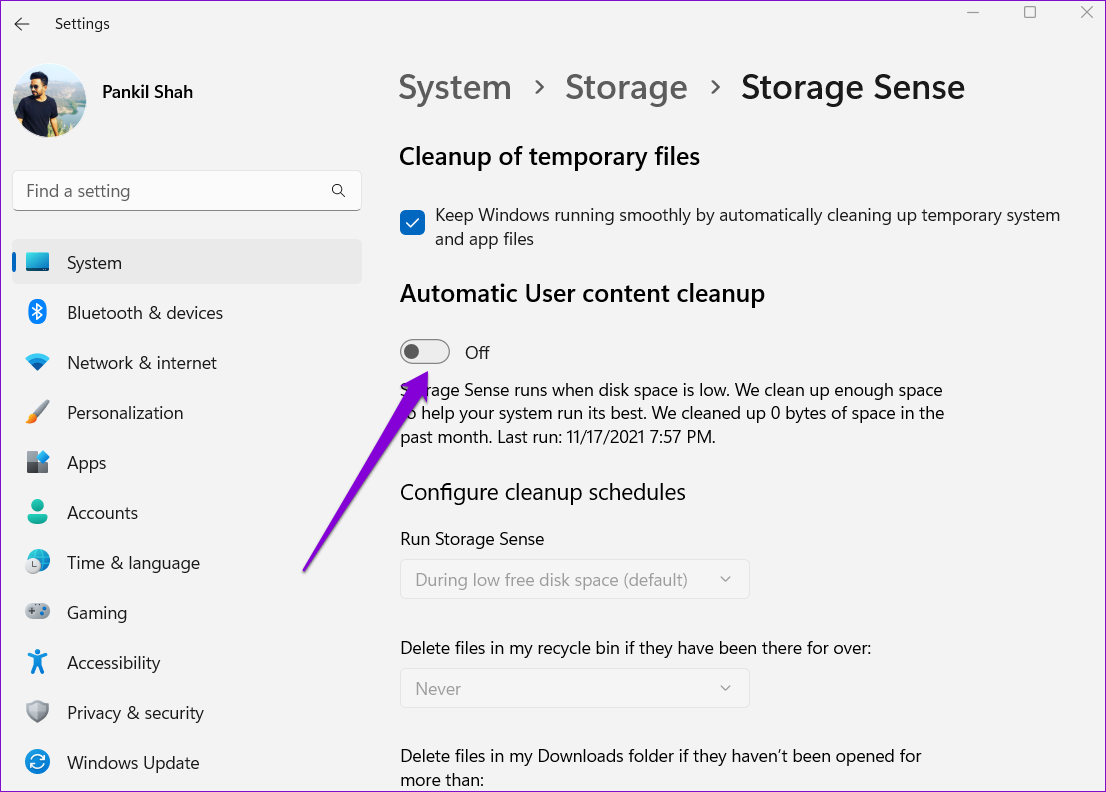
Step 5: Turn on the Automatic User content cleanup option to configure cleanup schedules.
Step 6: Use the drop-down menu under Run Storage Sense to select from the available options: Every day, Every week, Every month, or During low free disk space.

You can also configure Storage Sense to delete files from the Recycle Bin and the Downloads folder at regular intervals.

Windows will automatically run storage sense based on the selected configuration and delete temporary files from your PC. Alternatively, you can run the Storage Sense manually by hitting the Run Storage Sense now button.

Was this helpful?
Last updated on 08 August, 2024
Read Next
 Top 3 Ways to Fix Windows Temporary Files Not Deleting
Fix 1: Use Disk Cleanup Disk Cleanup is a disk maintenance utility built into the Windows operating system to help users clear unwanted system files from their PC's hard drive.
Top 3 Ways to Fix Windows Temporary Files Not Deleting
Fix 1: Use Disk Cleanup Disk Cleanup is a disk maintenance utility built into the Windows operating system to help users clear unwanted system files from their PC's hard drive.
 5 Fixes for Logged in With a Temporary Profile Error on Windows
Try Basic Fixes Disable the antivirus program: Sometimes antivirus programs on your PC can interfere with Windows and force it to log you in with a temporary profile.
5 Fixes for Logged in With a Temporary Profile Error on Windows
Try Basic Fixes Disable the antivirus program: Sometimes antivirus programs on your PC can interfere with Windows and force it to log you in with a temporary profile.
 How to Disconnect iPhone From Mac (Temporary or Permanently)
Basic Ways Unpair Bluetooth connection: Do note that turning off Bluetooth will also disconnect your Mac and iPhone from other Apple devices.
How to Disconnect iPhone From Mac (Temporary or Permanently)
Basic Ways Unpair Bluetooth connection: Do note that turning off Bluetooth will also disconnect your Mac and iPhone from other Apple devices.
 3 Ways to Delete Old Windows Update Files From Windows 10 and 11
Method 1: Delete Old Windows Update Files via Settings The Storage section of the Settings app provides a detailed breakdown of all temporary files on your PC, including old Windows
3 Ways to Delete Old Windows Update Files From Windows 10 and 11
Method 1: Delete Old Windows Update Files via Settings The Storage section of the Settings app provides a detailed breakdown of all temporary files on your PC, including old Windows
 How to Enable or Disable Confirm on Delete Files Pop-up in Windows 10
Windows 10 packs multiple safety and security features to help you save your data from deleting due to accidental clicks and presses.
How to Enable or Disable Confirm on Delete Files Pop-up in Windows 10
Windows 10 packs multiple safety and security features to help you save your data from deleting due to accidental clicks and presses.
 3 Ways to Fix if You Can’t Delete Files on Google Drive
Basic Fixes Try other methods: If a certain method doesn't work, you may try a different one to delete the file.
3 Ways to Fix if You Can’t Delete Files on Google Drive
Basic Fixes Try other methods: If a certain method doesn't work, you may try a different one to delete the file.
 Samsung My Files vs Google Files: Which File Manager Is Better on Galaxy Phones
Samsung apps are bundled to replace the official Google Apps in the One UI.
Samsung My Files vs Google Files: Which File Manager Is Better on Galaxy Phones
Samsung apps are bundled to replace the official Google Apps in the One UI.
The article above may contain affiliate links which help support Guiding Tech. The content remains unbiased and authentic and will never affect our editorial integrity.