How to Use Google DNS on Windows
Here’s how you can switch to Google DNS on your Windows PC.
Step 1: Open the Control Panel and select Network and Internet.

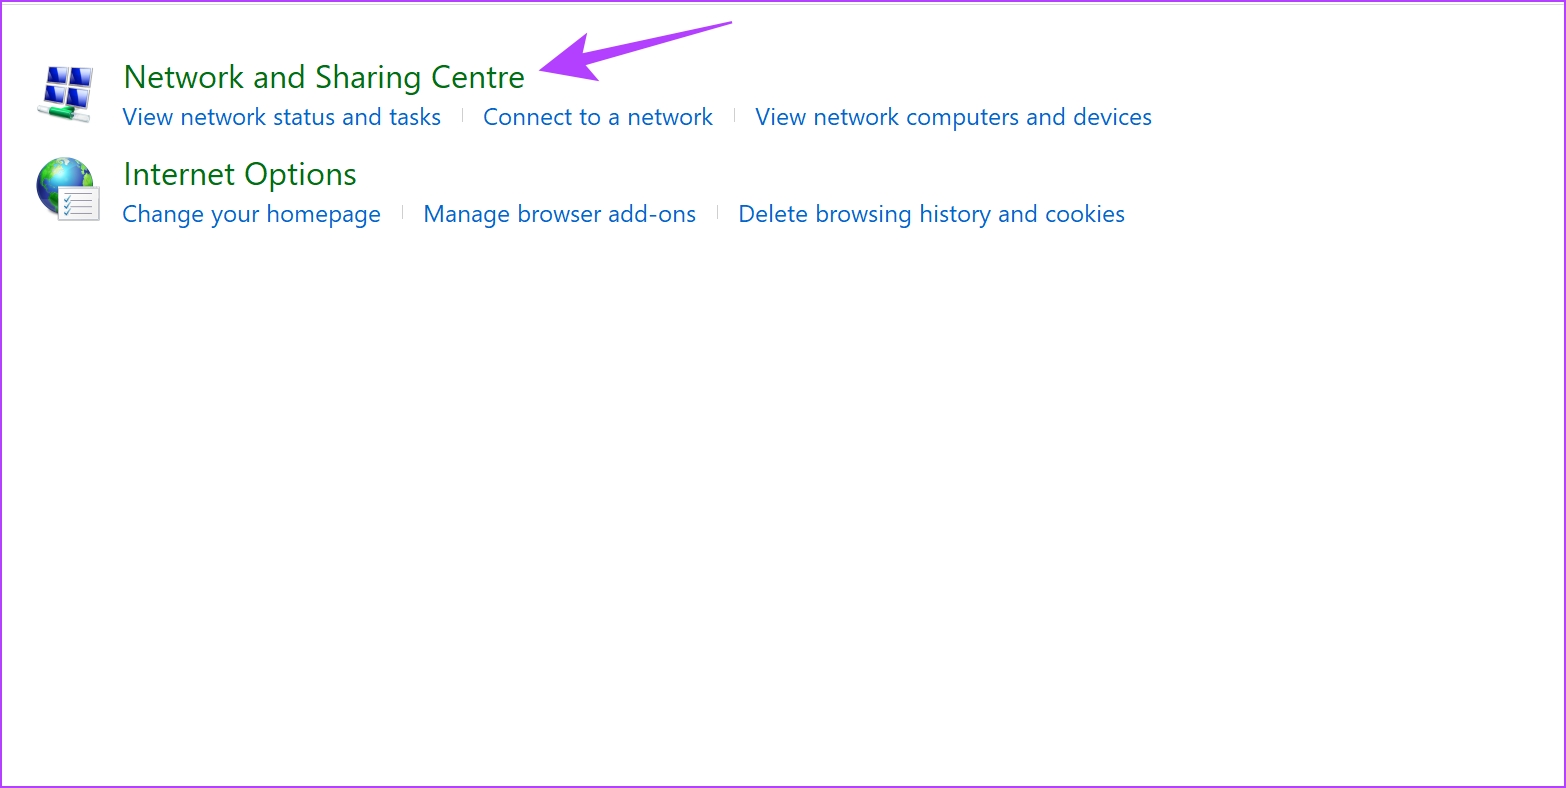
Step 2: Open Network and Sharing Center.
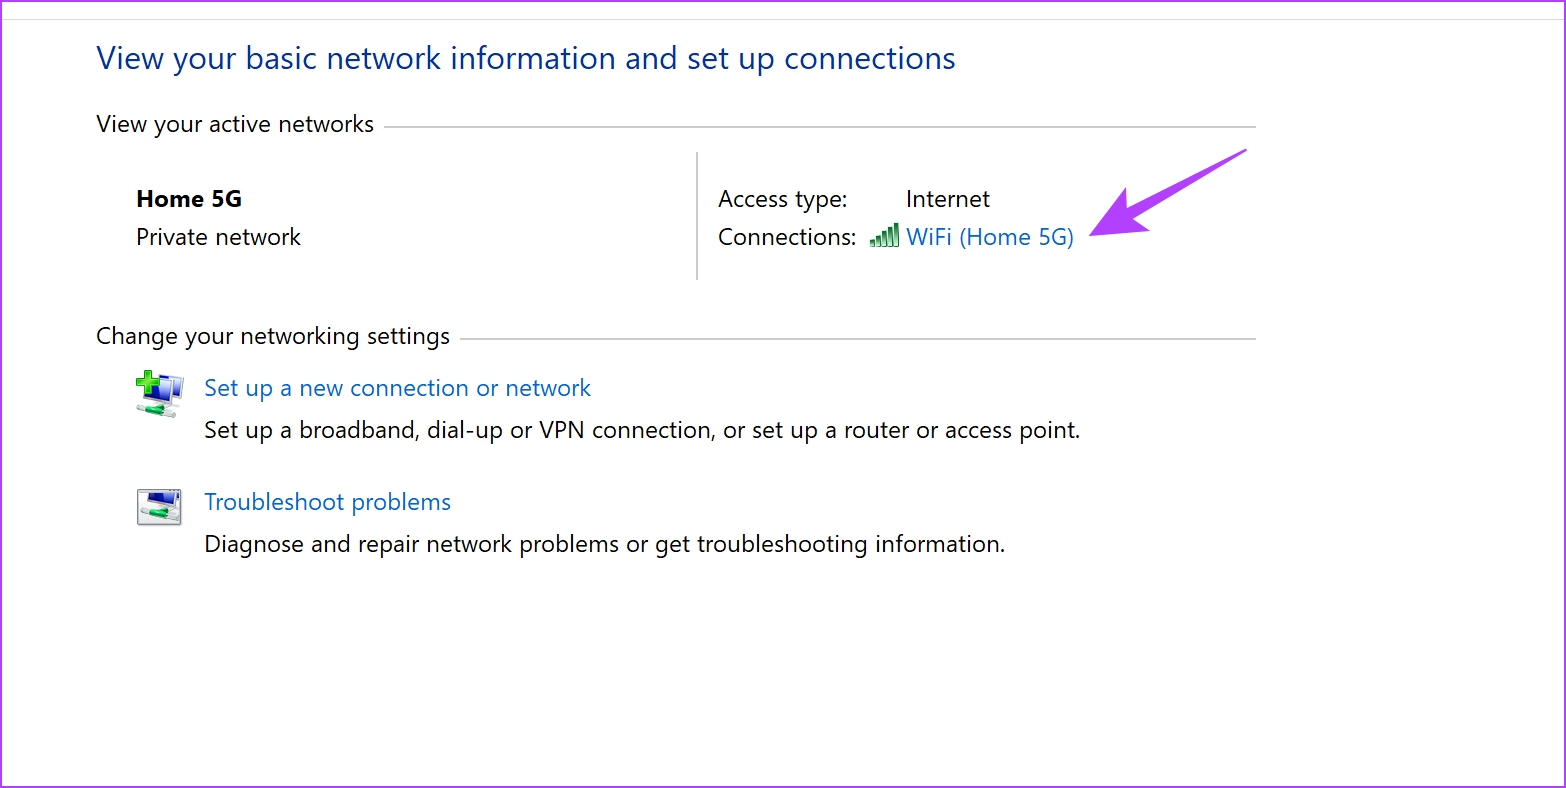
Step 3: Select your network.
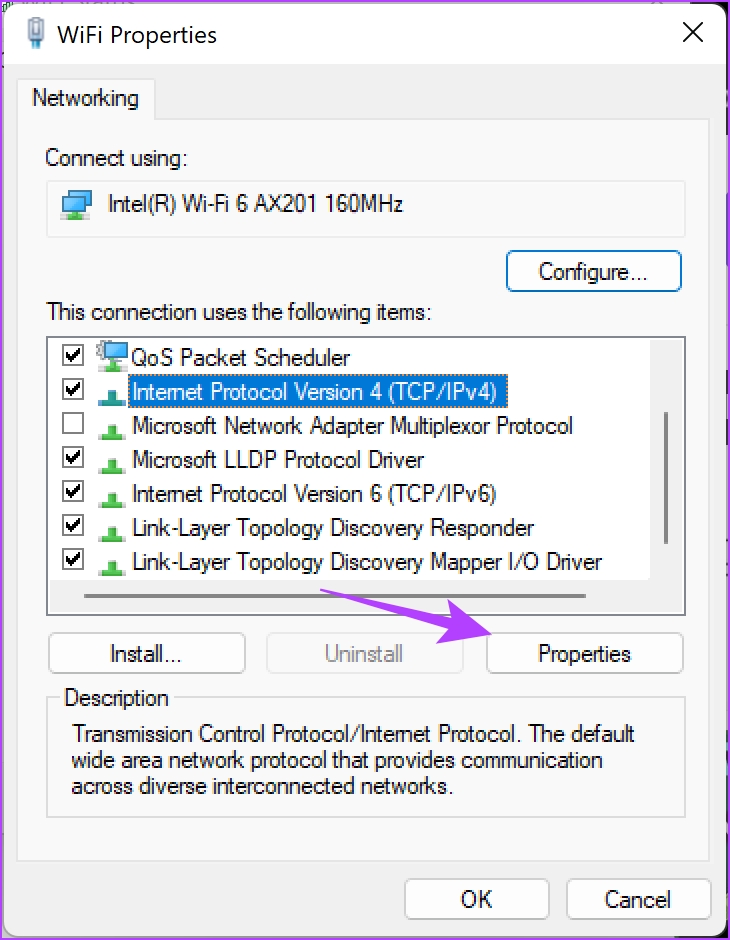
Step 4: Now, select Properties.

Step 5: Check the box next to Internet Protocol Verison and click on Properties.

Step 6: Check the box for Use the following DNS server addresses to enter the DNS server address manually.
Step 7: Now, enter the address 8.8.8.8 in the ‘Preferred DNS server’ box and 8.8.4.4 in the ‘Alternative DNS server’ box. These are the addresses for the Google DNS server IPv4.
Or, you can also use Google Public DNS IPv6 version – 2001:4860:4860::8888, and 2001:4860:4860::8844 (alternative).
Step 8: Lastly, click on OK to apply the changes.


Also Read: 5 best DNS servers for gaming for low ping in 2024.
How to Use Google Public DNS Servers on Mac
Here’s how you can switch to Google DNS on your Mac.
Step 1: Click on the Apple logo icon in the toolbar and select System Settings.

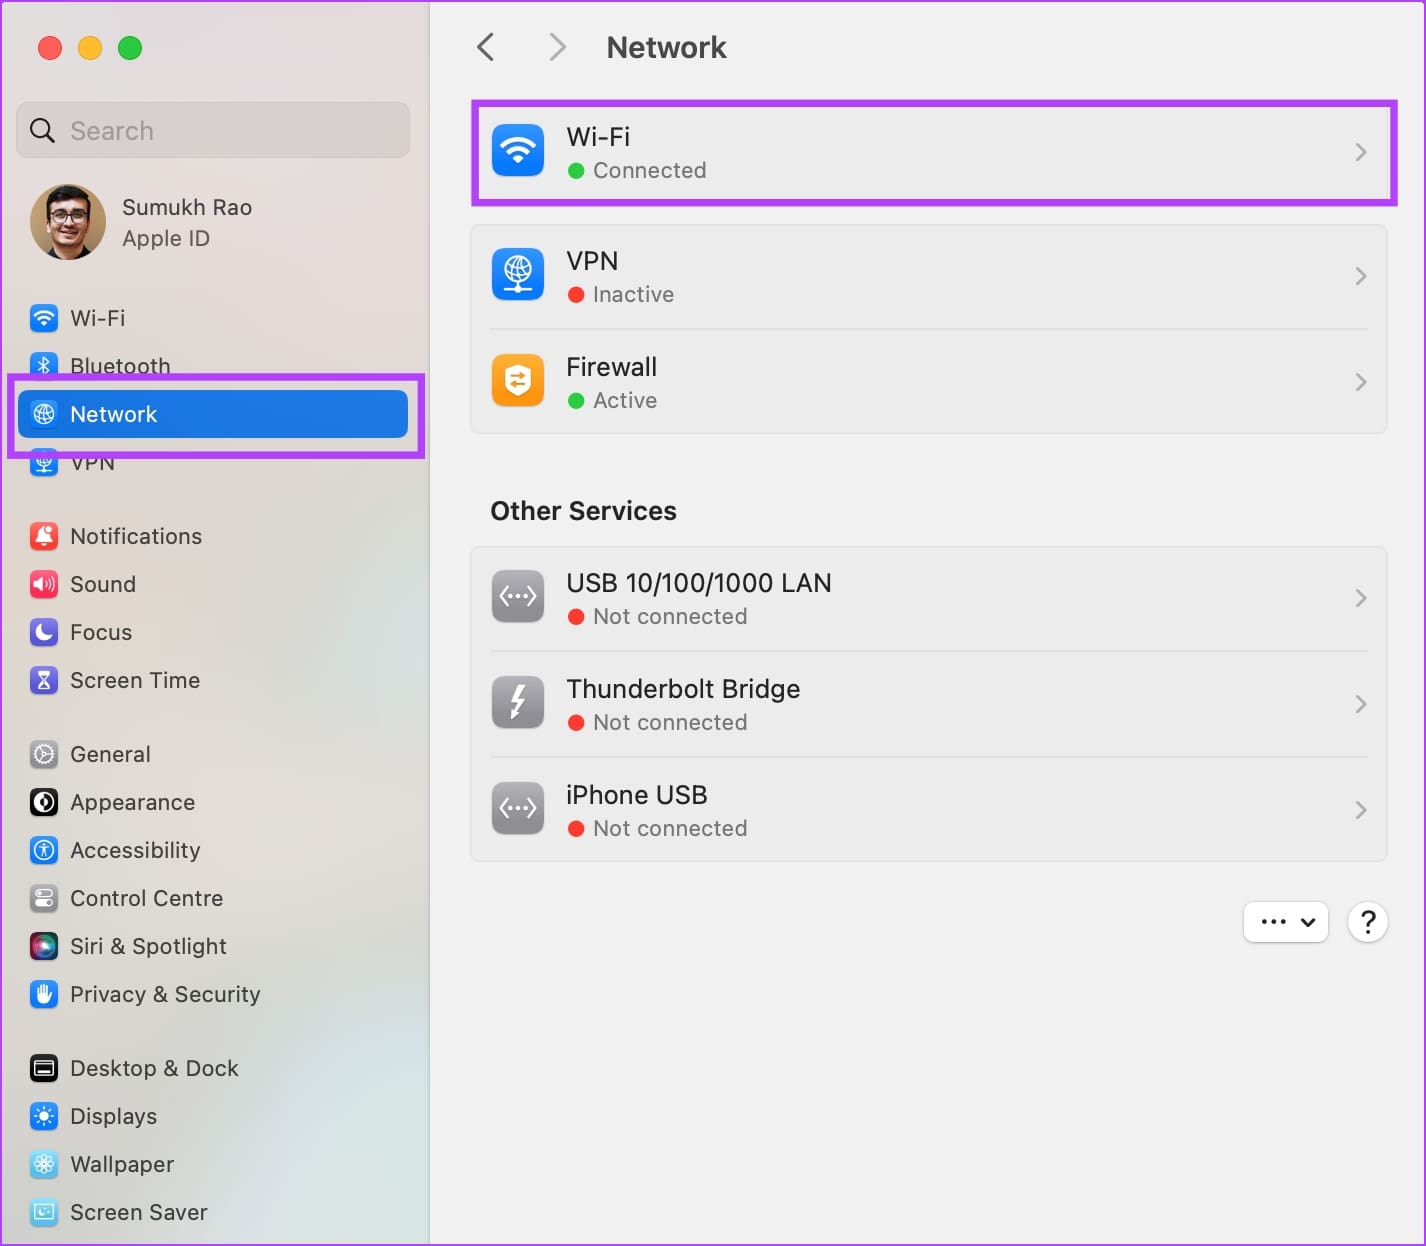
Step 2: Select Network in the sidebar and select Wi-Fi.
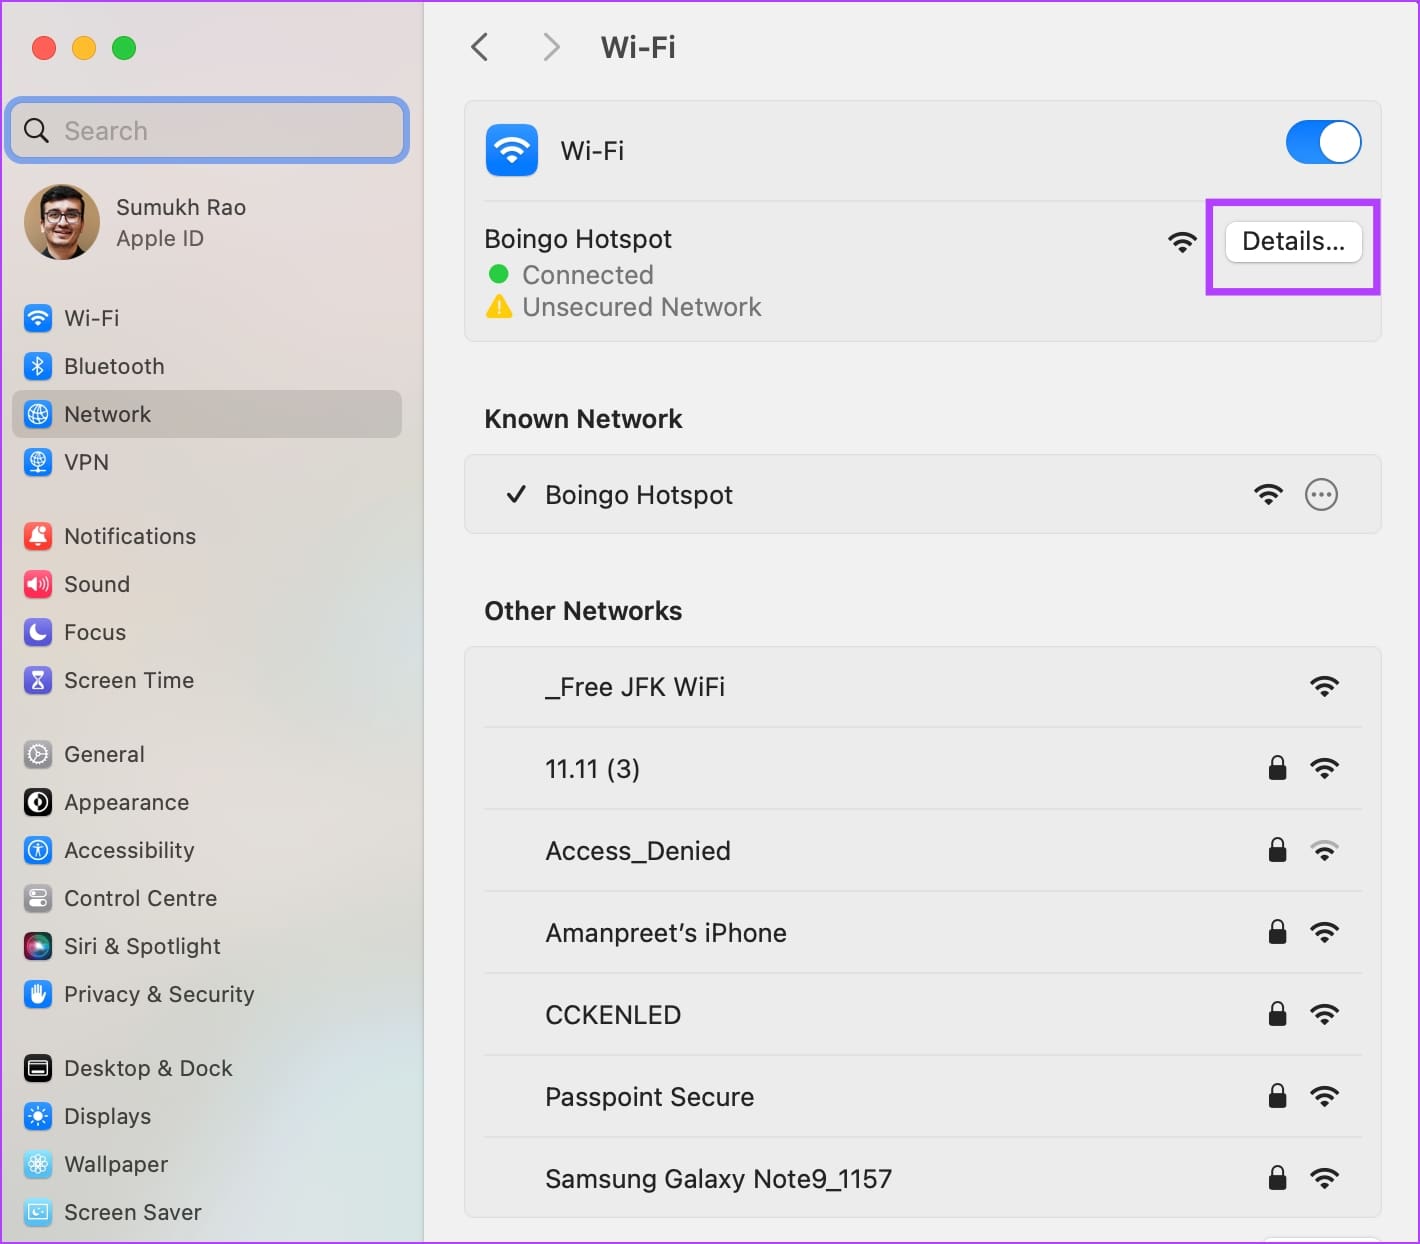
Step 3: Tap on Details next to the connected Wi-Fi network.
Step 4: Click on DNS in the sidebar.
Step 5: Click on the + icon in the DNS server box.
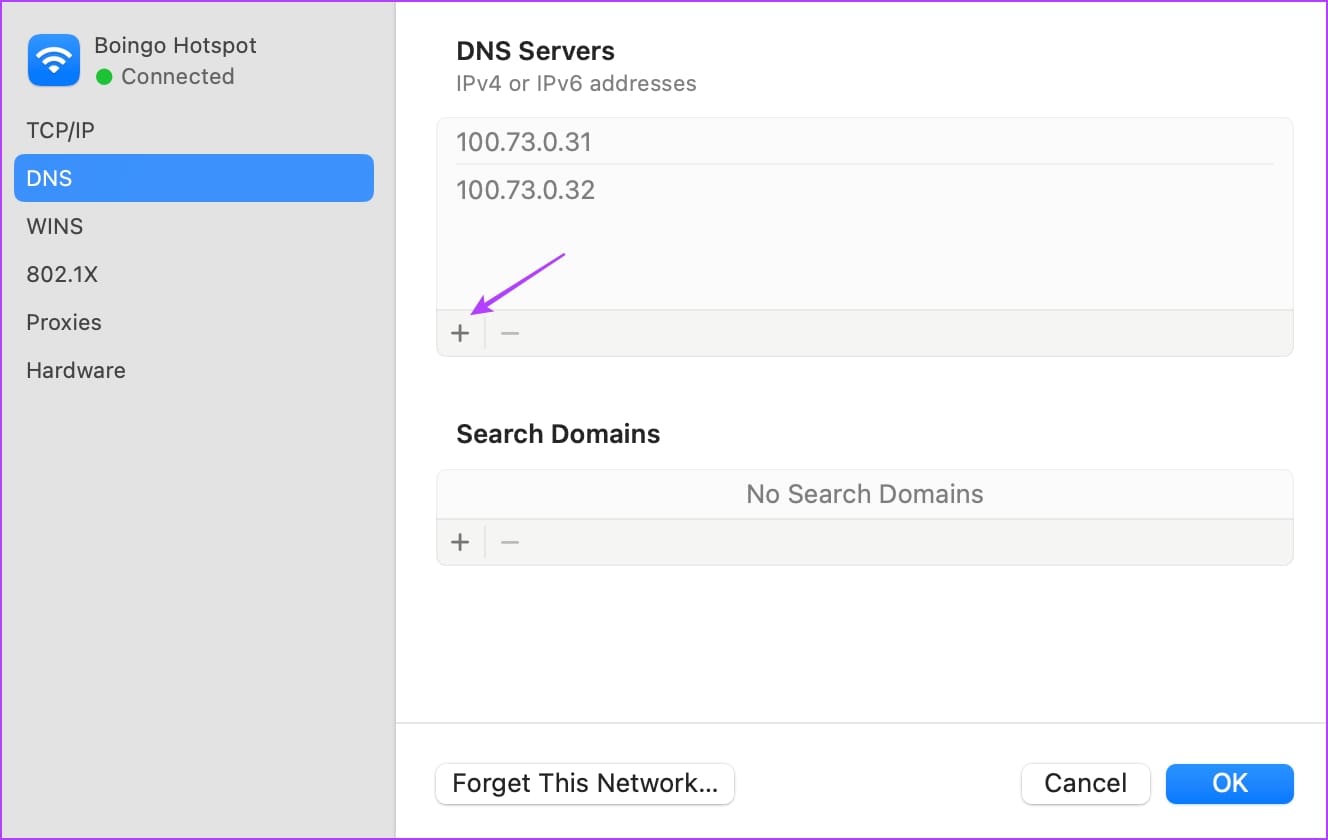
Step 6: Now, enter the address 8.8.8.8 or 8.8.4.4. These are the addresses for the Google DNS server IPv4.
Or, you can also use Google Public DNS IPv6 version – 2001:4860:4860::8888 or 2001:4860:4860::8844 (alternative)

Also Read: How to fix certain websites not loading on Mac.
Why Use Google’s DNS Servers
Here are some of the key features and advantages of the public DNS resolution provided by Google:
- Google has a distributed network of DNS servers globally, which ensures a reliable DNS resolution service.
- Google DNS provides faster DNS resolution than most servers. It directs queries to the nearest data center, reduces latency, and improves response times
- Additionally, Google Public DNS temporarily stores frequently accessed domain names, which can further improve performance.
- Google DNS protects from DNS spoofing, DDoS attacks, and several other security threats and vulnerabilities.
- Google DNS does not store IP addresses or personal information that can be mapped to the user.
When your computer needs to resolve a domain name into an IP address, it will send a request to the DNS address. Google’s primary DNS addresses are as follows:
- IPv4: 8.8.8.8 and 8.8.4.4 (alternative)
- IPv6: 2001:4860:4860::8888, and 2001:4860:4860::8844 (alternative)
Both the above addresses – IPv4 and IPv6 are different versions of the protocol, and the latter is designed to meet the requirements of ever-advancing computer network infrastructures.
Also Read: How to flush DNS cache on Windows.
Was this helpful?
Last updated on 04 September, 2024
Read Next
 6 Easy Ways to Flush DNS Cache on Windows 11 and 10
Have you ever encountered trouble accessing a website or service and wondered why it wasn't loading?
6 Easy Ways to Flush DNS Cache on Windows 11 and 10
Have you ever encountered trouble accessing a website or service and wondered why it wasn't loading?
 2 Easy Ways to Clear DNS Cache on Android
Method 1: Clear DNS Cache on Google Chrome, Microsoft Edge, and Brave Browser Google Chrome, and other Chromium-based browsers on Android, namely Microsoft Edge and Brave, have an inbuilt option
2 Easy Ways to Clear DNS Cache on Android
Method 1: Clear DNS Cache on Google Chrome, Microsoft Edge, and Brave Browser Google Chrome, and other Chromium-based browsers on Android, namely Microsoft Edge and Brave, have an inbuilt option
 5 Best DNS Servers for Gaming for Low Ping in 2024
In the heat of battle, especially in competitive online gaming, every millisecond counts.
5 Best DNS Servers for Gaming for Low Ping in 2024
In the heat of battle, especially in competitive online gaming, every millisecond counts.
 How to Switch Google Accounts in Chrome for iOS, iPad and Android
Things to Know Before Switching Google Accounts in Chrome When you switch Google accounts in Chrome, your browsing history, bookmarks, passwords, and other settings associated with the current account will
How to Switch Google Accounts in Chrome for iOS, iPad and Android
Things to Know Before Switching Google Accounts in Chrome When you switch Google accounts in Chrome, your browsing history, bookmarks, passwords, and other settings associated with the current account will
 How to Switch Between KM and Miles in Google Maps and Apple Maps
How to Change Kilometers to Miles in Apple Maps To change KM to Miles (or vice versa) on iPhone, iPad, and Mac, all you need to do is change your
How to Switch Between KM and Miles in Google Maps and Apple Maps
How to Change Kilometers to Miles in Apple Maps To change KM to Miles (or vice versa) on iPhone, iPad, and Mac, all you need to do is change your
 Firefox vs Firefox Focus: Should You Switch
Firefox Focus is a strange name for a browser, and the fact that it’s developed by none other Mozilla is even weirder.
Firefox vs Firefox Focus: Should You Switch
Firefox Focus is a strange name for a browser, and the fact that it’s developed by none other Mozilla is even weirder.
 Google Photos Explained: Should Everyone Switch to It?
It was always surprising that Google didn’t have a strong product for photo management.
Google Photos Explained: Should Everyone Switch to It?
It was always surprising that Google didn’t have a strong product for photo management.
 4 Ways to Switch Back to Google Assistant From Gemini
Method 1: Using Google App Step 1: Open the Google app on your Android phone.
4 Ways to Switch Back to Google Assistant From Gemini
Method 1: Using Google App Step 1: Open the Google app on your Android phone.
The article above may contain affiliate links which help support Guiding Tech. The content remains unbiased and authentic and will never affect our editorial integrity.