How to Install Proton GE on Steam Deck
Step 1: Hold the power button and select Switch to Desktop on your Steam Deck.
You must install ProtonUp-Qt to install Proton GE on your Steam Deck. It’s a graphical user interface (GUI) that simplifies installing and managing Proton versions on Linux systems.
Step 2: To install ProtonUp-Qt, launch the Discover app.
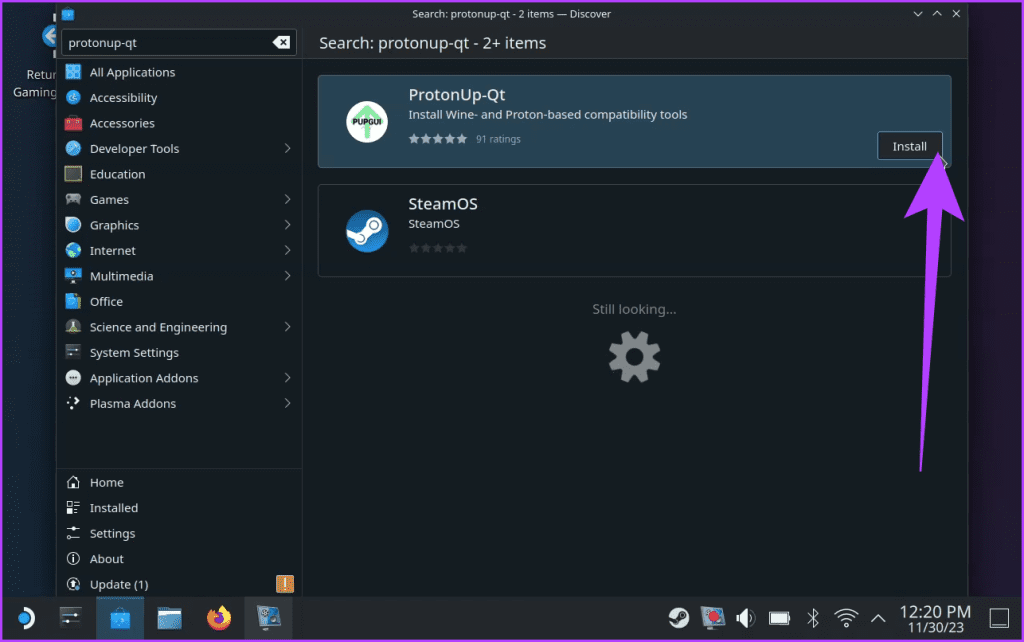
Step 3: Search for ProtonUp-Qt and click on Install.
Step 4: After installing ProtonUp-Qt, go to Start > Utilities > ProtonUp-Qt to launch it.
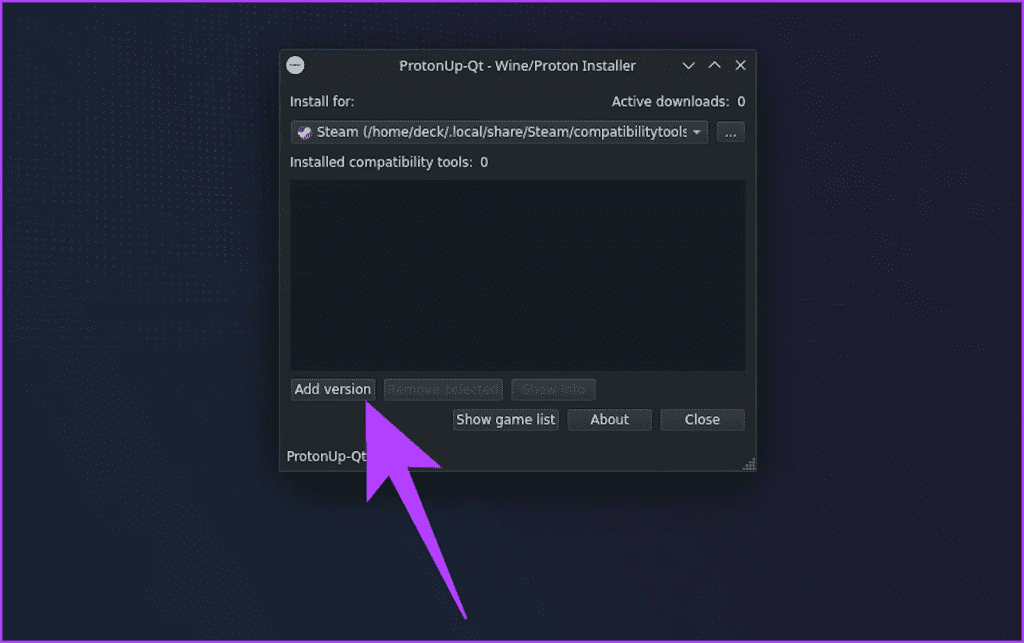
Step 5: From the following prompt, click on Add version.
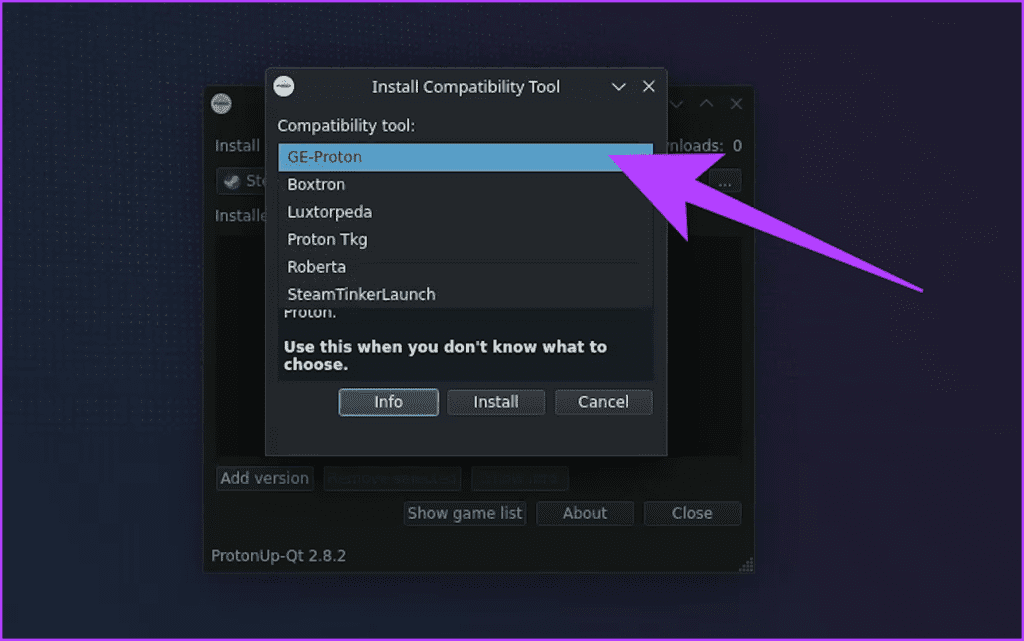
Step 6: Now, click on the Compatibility tool. The app will list available Proton versions, including Proton GE. Select that.
Step 7: Click Install to start the download and installation of Proton-GE. Once the installation is complete, a window will appear (shown below).
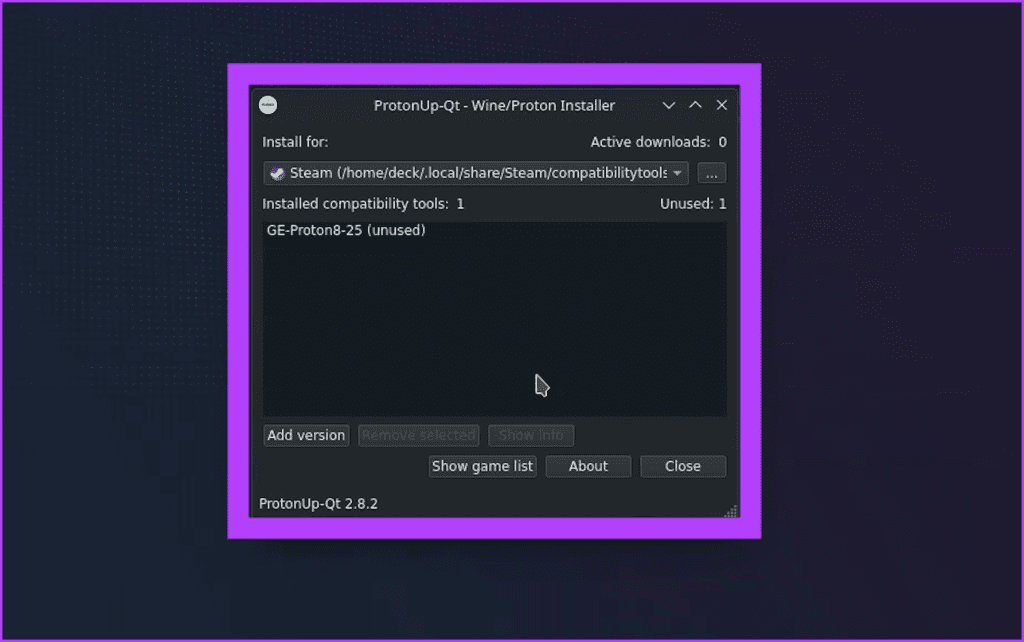
And that’s it. Proton-GE has been installed on your Steam Deck.
How to Use Proton GE on Steam Deck by Forcing Compatibility
Even after installing Proton GE, the Steam Deck will still use Valve’s default Proton tool to run games. You must force the compatibility tool from the Steam app to ensure that your Deck uses Proton GE. Here’s how to do that.
Step 1: Launch the Steam app and right-click on the game you wish to use Proton GE with.
Step 2: Select Properties from the drop-down menu.
Step 3: You will now be taken to your game’s launch settings. Here, tap or click on Compatibility.
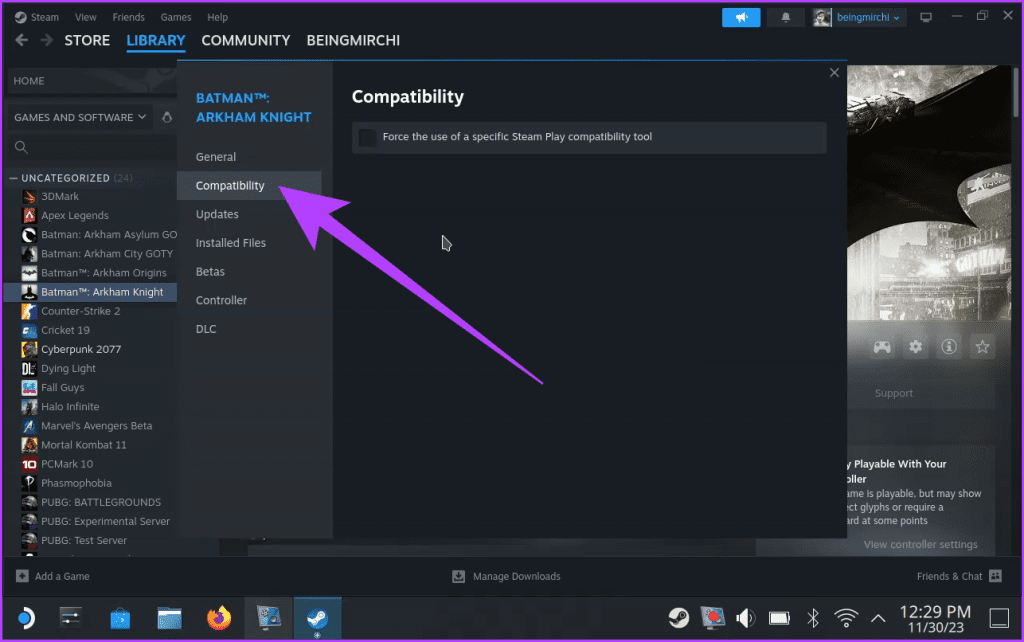
Step 4: Now, check the box for Force the use of a specific Steam Play compatibility tool. Select GE-Proton from the drop-down list.
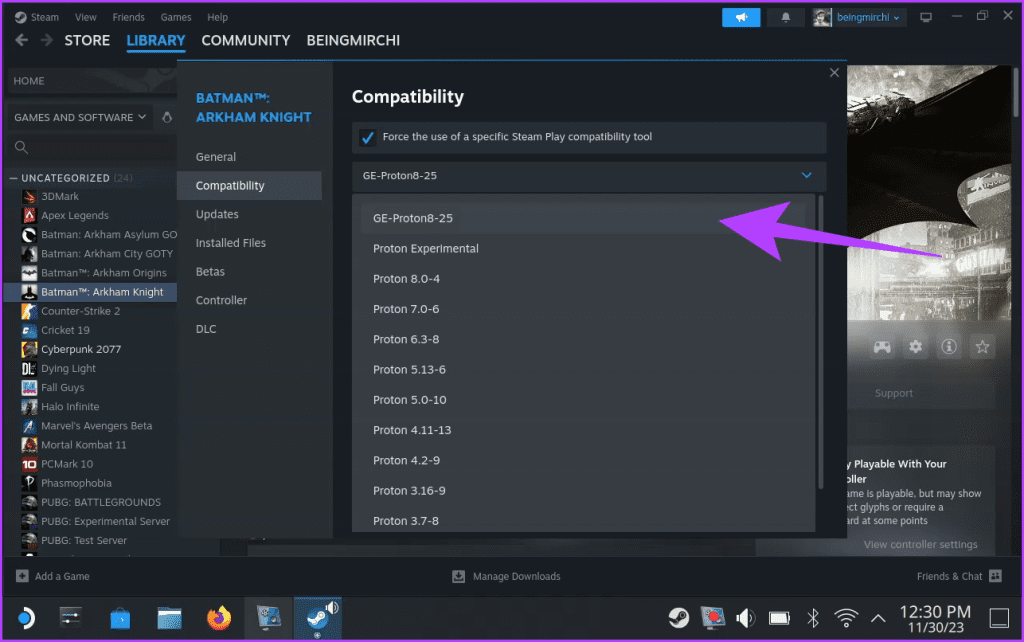
The next time you launch the game, Proton GE will be deployed instead of the default SteamOS Proton version.
How to Update Proton GE
To ensure you’re always running the latest and most optimized version of Proton GE, periodically revisit ProtonUp-Qt. The application will notify you of available updates.
Click on Update to download and install the latest Proton GE version. Alternatively, force-check for updates too. Here’s how to manually update the Proton GE on Steam Deck.
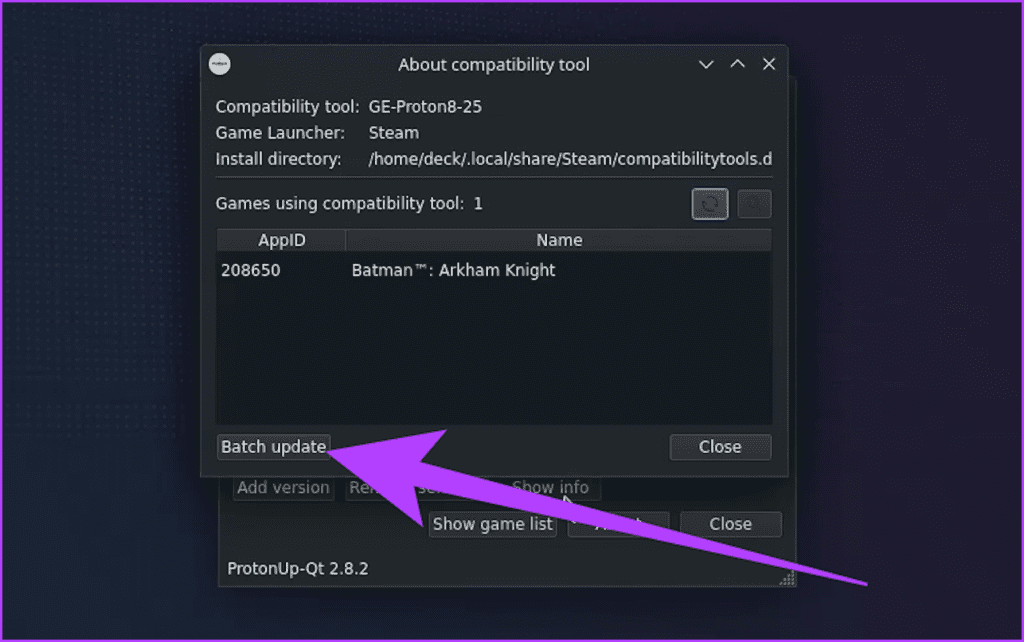
Step 1: Launch the ProtonUp-Qt tool. Select GE-Proton- under Installed compatibility tools > click on Show info.
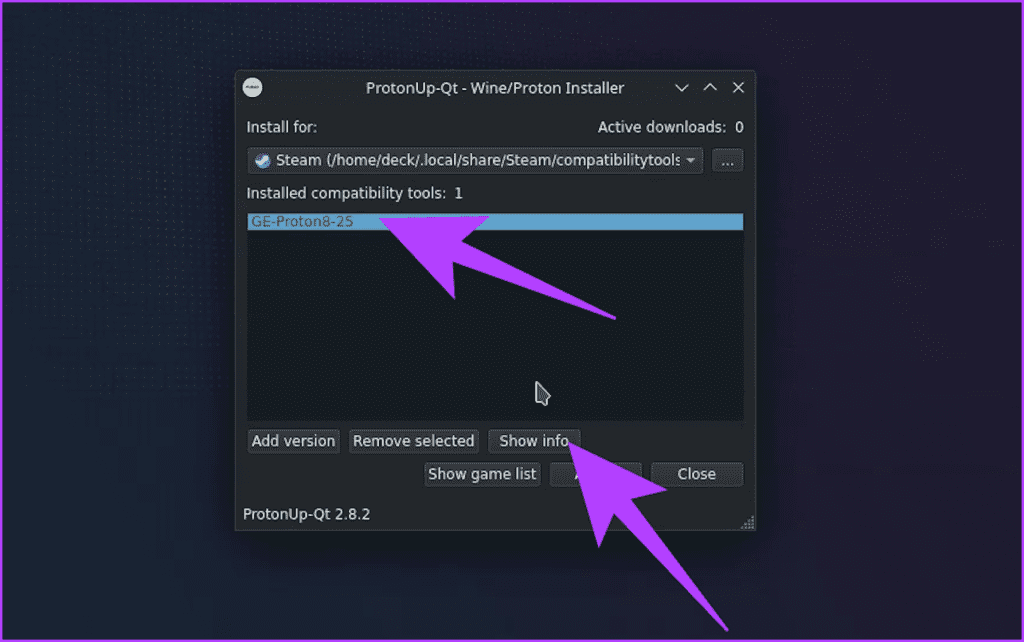
Step 2: To update the tool, click on Batch Update.
Step 3: Select the New version if available in the new window. Then, click on Batch update to install it.
Was this helpful?
Last updated on 01 July, 2024
Read Next
 How to Install and Play Apex Legends on Steam Deck
Is Apex Legends Playable on Steam Deck Before we get into the nitty-gritty of installation, let's address the burning question: Is Apex Legends compatible with the Steam Deck?
How to Install and Play Apex Legends on Steam Deck
Is Apex Legends Playable on Steam Deck Before we get into the nitty-gritty of installation, let's address the burning question: Is Apex Legends compatible with the Steam Deck?
 How to Install EmuDeck on Steam Deck
Valve's Steam Deck is one of the most powerful handheld gaming consoles on the market, giving you the power of a gaming PC in a portable format.
How to Install EmuDeck on Steam Deck
Valve's Steam Deck is one of the most powerful handheld gaming consoles on the market, giving you the power of a gaming PC in a portable format.
 7 Best Steam Deck Protective Cases That You Can Buy
The Valve Steam Deck has been gaining popularity quickly thanks to its performance.
7 Best Steam Deck Protective Cases That You Can Buy
The Valve Steam Deck has been gaining popularity quickly thanks to its performance.
 How to Watch Movies on Steam Deck
Stream YouTube, Netflix, or Other Websites on Steam Deck Step 1: Ensure your Steam Deck is connected to the Internet.
How to Watch Movies on Steam Deck
Stream YouTube, Netflix, or Other Websites on Steam Deck Step 1: Ensure your Steam Deck is connected to the Internet.
 How to Connect AirPods and Other Bluetooth Accessories to Steam Deck
Put Bluetooth Accessories Into Pairing Mode Before connecting your AirPods or other Bluetooth accessories to the Steam Deck, you must put them into pairing mode.
How to Connect AirPods and Other Bluetooth Accessories to Steam Deck
Put Bluetooth Accessories Into Pairing Mode Before connecting your AirPods or other Bluetooth accessories to the Steam Deck, you must put them into pairing mode.
 How to Factory Reset a Steam Deck: A Complete Guide
Your Steam Deck is a powerful handheld gaming PC, but like any computer, it can accumulate glitches and performance issues over time.
How to Factory Reset a Steam Deck: A Complete Guide
Your Steam Deck is a powerful handheld gaming PC, but like any computer, it can accumulate glitches and performance issues over time.
 How to Check, Calibrate, and Disable the Gyro on Steam Deck
If you're the proud owner of a Steam Deck, you're already well-versed in the joys of portable gaming.
How to Check, Calibrate, and Disable the Gyro on Steam Deck
If you're the proud owner of a Steam Deck, you're already well-versed in the joys of portable gaming.
 How to Optimize Steam Deck’s Performance in Games
Valve's Steam Deck is easily one of the best handheld gaming consoles.
How to Optimize Steam Deck’s Performance in Games
Valve's Steam Deck is easily one of the best handheld gaming consoles.
The article above may contain affiliate links which help support Guiding Tech. The content remains unbiased and authentic and will never affect our editorial integrity.