How to View Version History in Microsoft Excel for PC or Mac
Accessing an older version of an Excel workbook on your PC or Mac only takes a few steps. Here’s how you can go about it.
Step 1: Launch the Microsoft Excel app on your computer and open the file for which you want to see the version history.
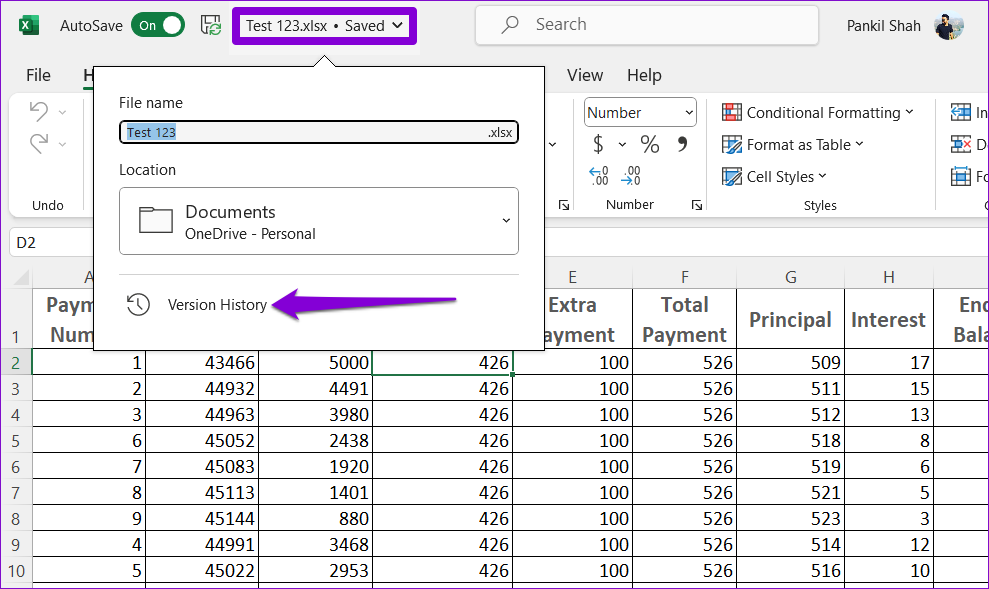
Step 2: Click the file name at the top and select Version History from the resulting menu.
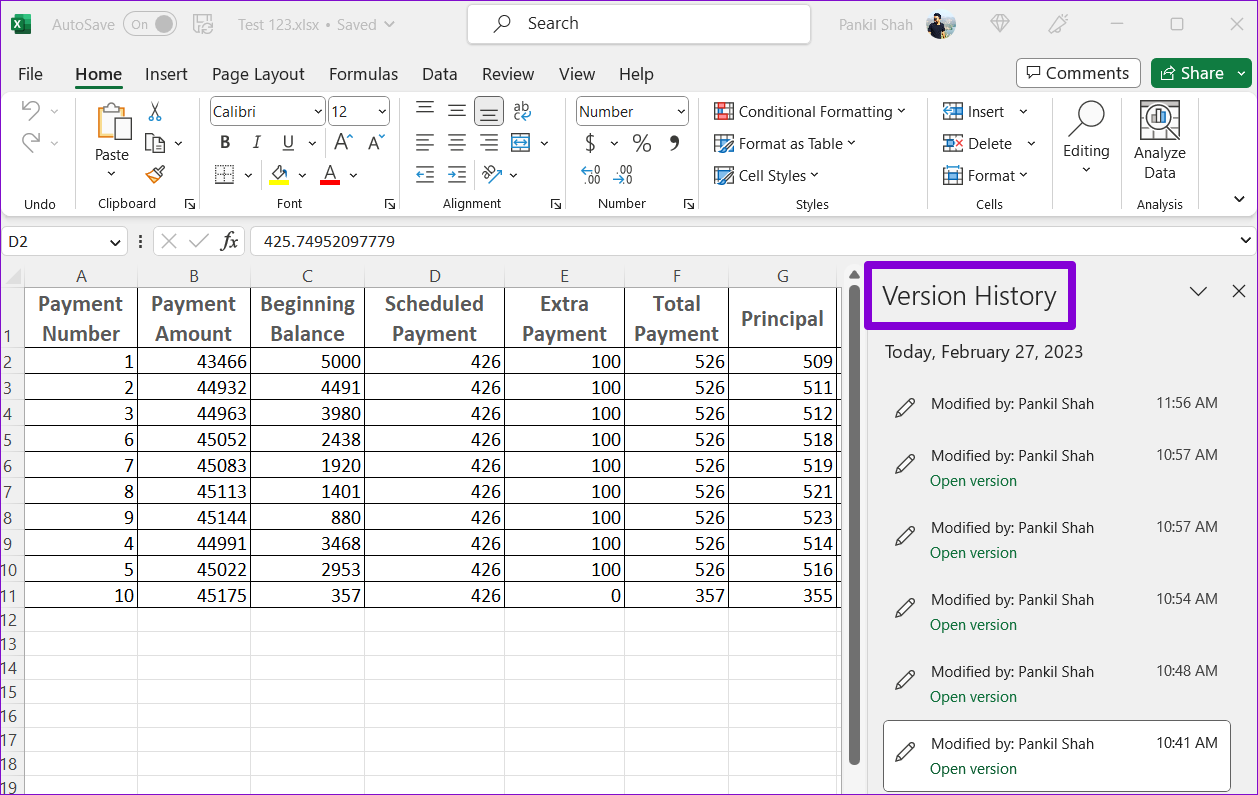
Step 3: In the Version History panel that appears on your right, you will see various versions of your workbook. Select the version you want to view to open it in a separate Excel window. You can then copy content from the previous version if you want.
How to Restore Previous Version of a Workbook in Microsoft Excel for PC or Mac
Once you’ve gone through all of the previous versions of an Excel workbook, you can easily restore to any of them and save it as a separate file. Here’s how to do it.
Step 1: Launch Microsoft Excel on your PC or Mac and open the workbook.
Step 2: Click the file name at the top and select Version History from the resulting menu.
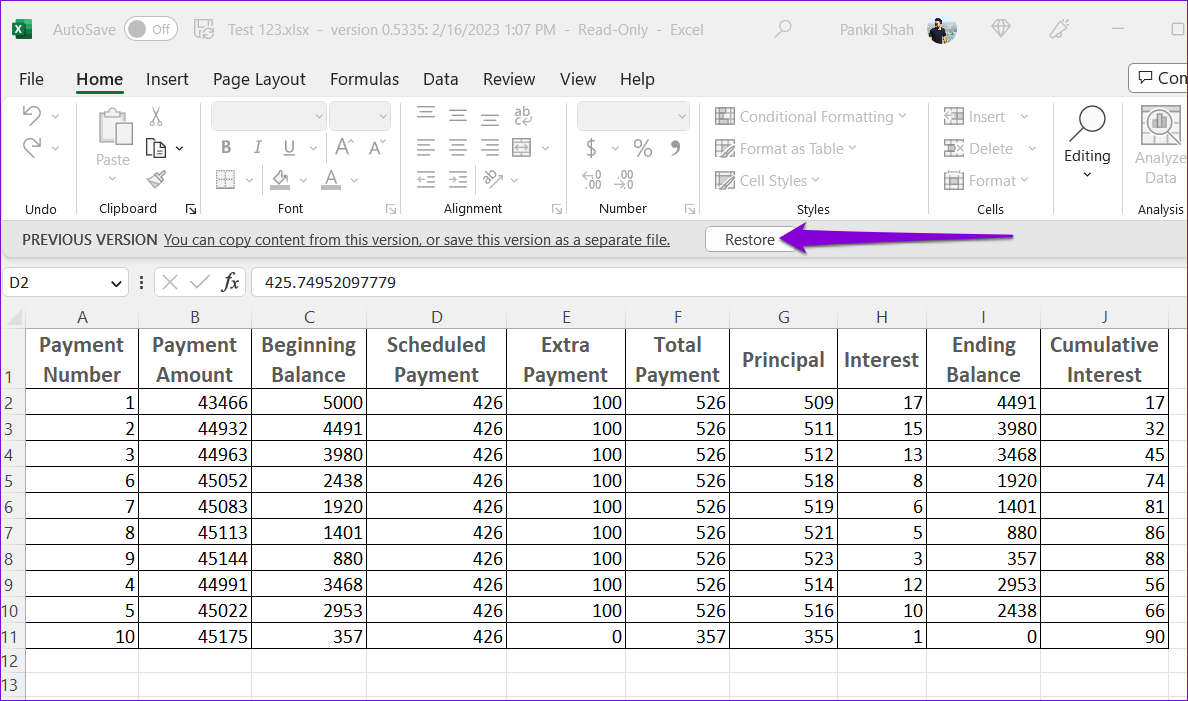
Step 3: In the Version History panel, select the version you want to restore.
Step 4: Click the Restore button at the top.
After you restore the version, you can make the desired changes and save the Excel workbook as a separate file.
How to View Version History in Microsoft Excel Online
Viewing the version history of a workbook in Microsoft Excel Online is similar to that of the desktop version. Here are the steps you can follow.
Step 1: Open any web browser and visit Microsoft Excel for Web. Sign in with your Microsoft account and open the workbook for which you want to view the version history.
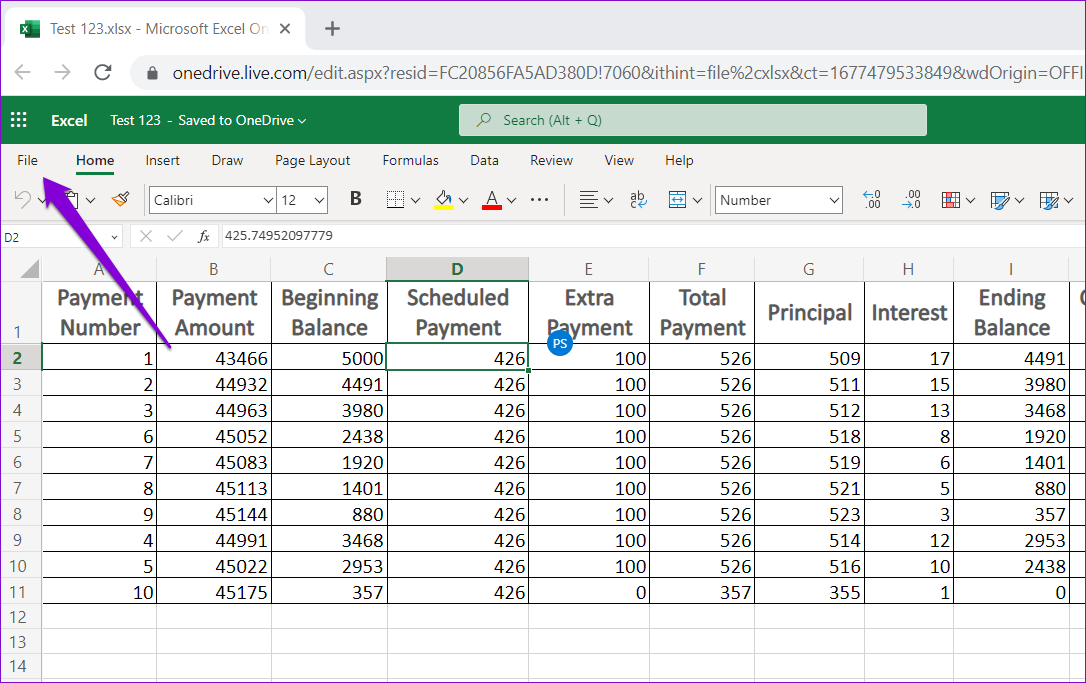
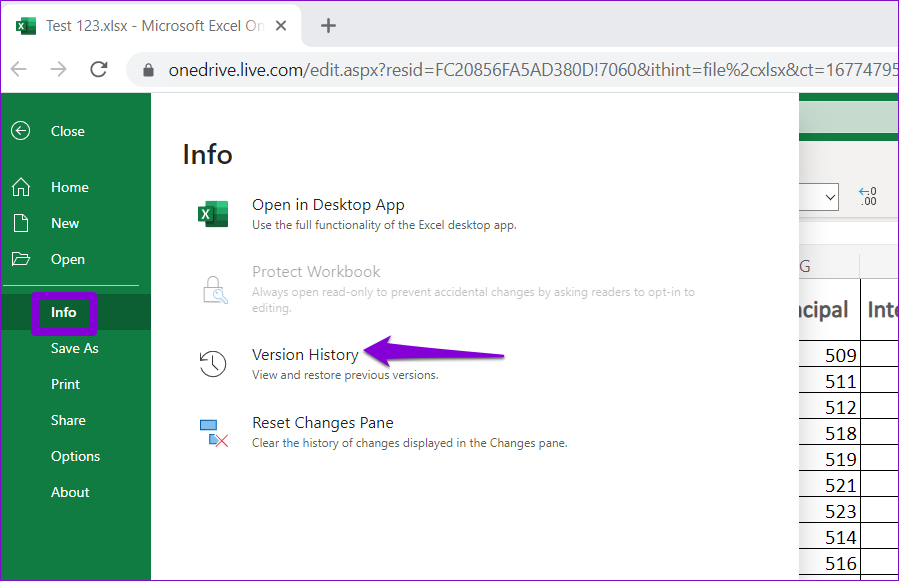
Step 2: Click the File menu in the top-left corner.
Step 3: Switch to the Info tab and click Version History.
Step 4: In the Version History panel, you’ll see various versions of the workbook, along with the date, time, and author name.
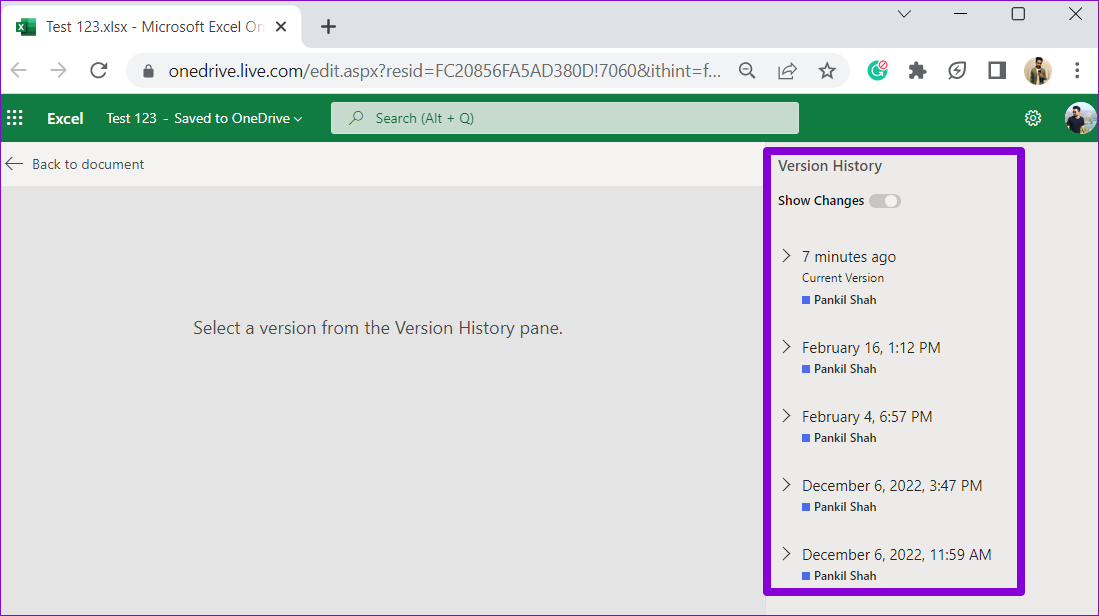
Step 5: Select the version you want to view. The specified version should open in the same window.

How to Restore Previous Version of a Workbook in Microsoft Excel Online
After you find the previous version of a workbook that you want to use, you can restore that version and start working on it. Alternatively, you can download the older version of the workbook and edit it using Excel’s desktop app. Here’s how to do both.
Step 1: Visit Excel for Web in your preferred browser and open your workbook.
Step 2: Click the file name at the top and select Version History from the menu that appears.
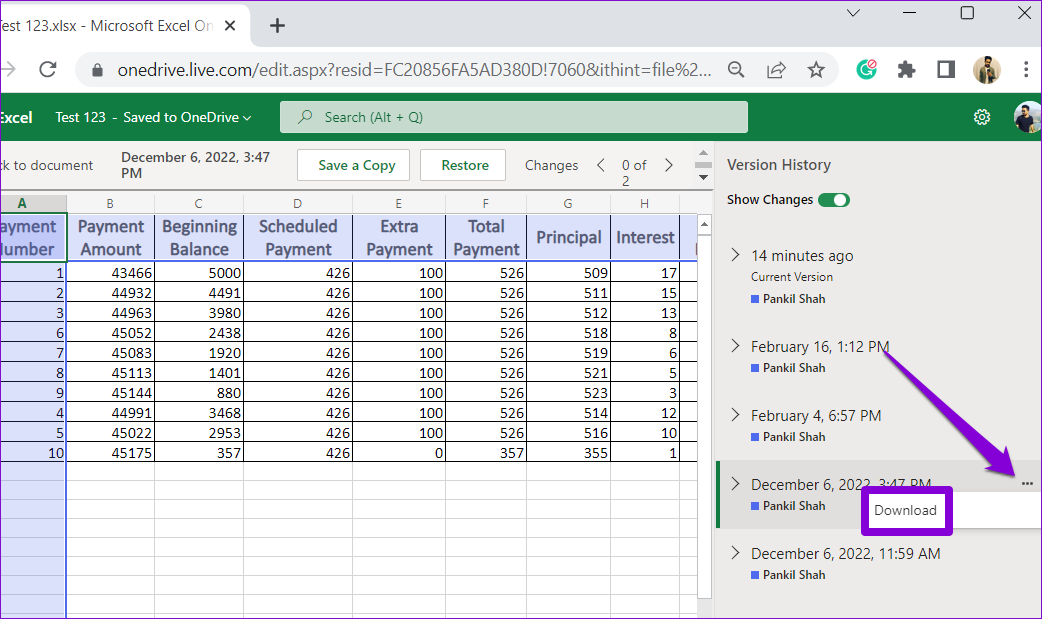
Step 3: In the Version History panel, locate the version you want to use. Click the three horizontal dots next to it and select Download to save the file on your computer and edit it using the desktop app.
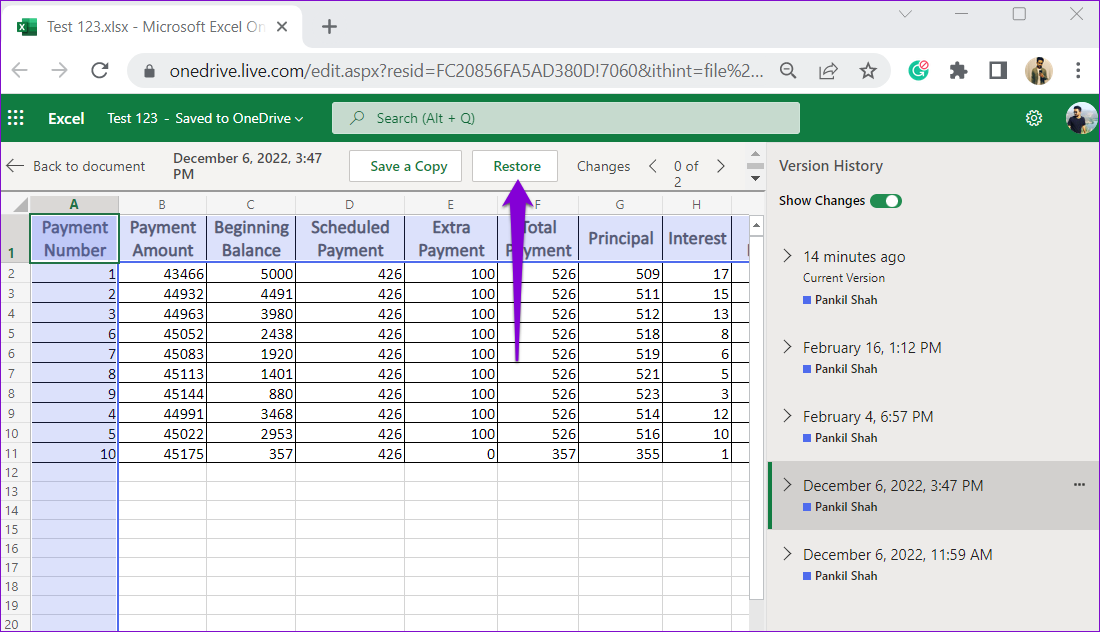
Alternatively, you can restore to the previous version by clicking the Restore button at the top.
Was this helpful?
Last updated on 26 July, 2024
Read Next
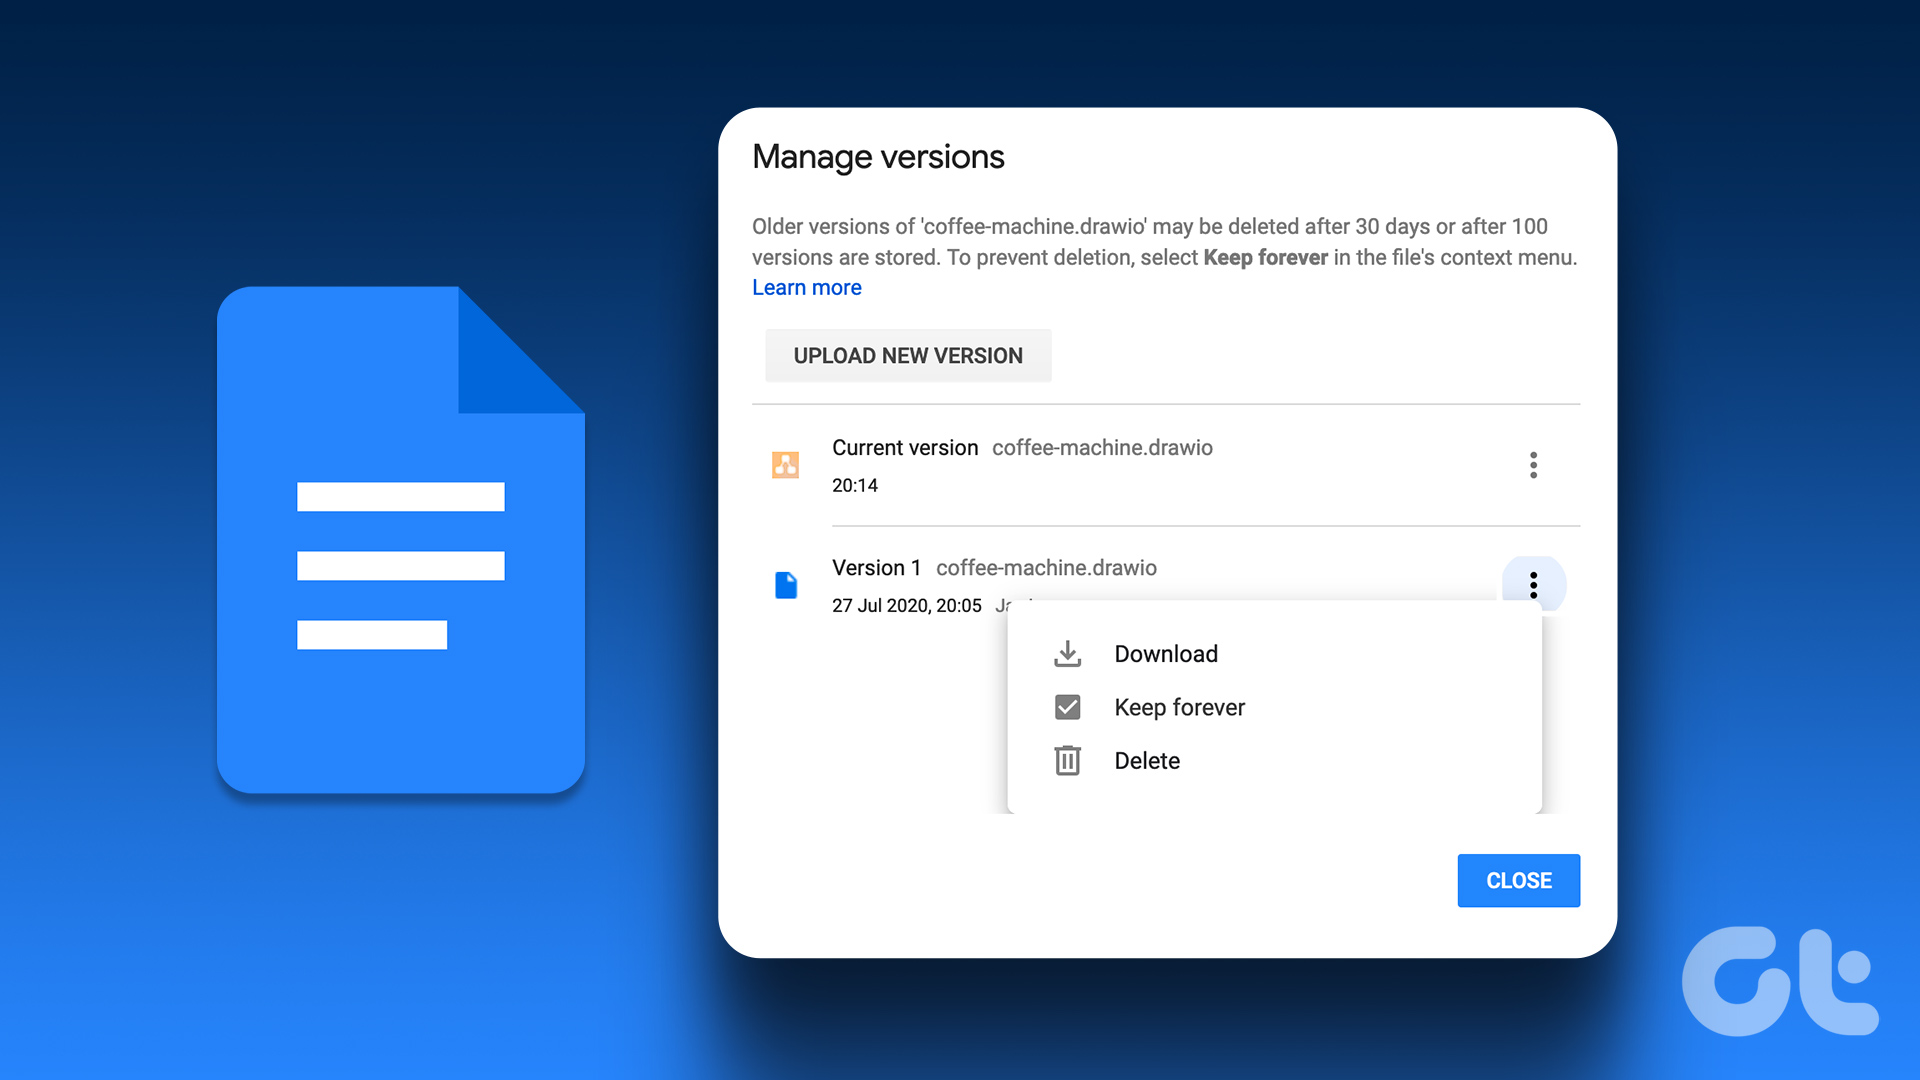 How to View and Manage Version History in Google Docs
Google Docs automatically saves previous document versions as you work on it.
How to View and Manage Version History in Google Docs
Google Docs automatically saves previous document versions as you work on it.
 How to Update Android Auto to the Latest Version
Over the years, there have been several debates to answer which is the better driving interface, Android Auto or Apple CarPlay.
How to Update Android Auto to the Latest Version
Over the years, there have been several debates to answer which is the better driving interface, Android Auto or Apple CarPlay.
 4 Ways to Fix ‘Your Device Isn’t Compatible With This Version’ on Android
Fix 1: Update Android Version The app you are trying to download may not be compatible with an older version of Android OS.
4 Ways to Fix ‘Your Device Isn’t Compatible With This Version’ on Android
Fix 1: Update Android Version The app you are trying to download may not be compatible with an older version of Android OS.
 3 Ways to Check App Version on iPhone and Android
How to Find App Version on iPhone Method 1: From Settings Step 1: Open Settings on your iPhone.
3 Ways to Check App Version on iPhone and Android
How to Find App Version on iPhone Method 1: From Settings Step 1: Open Settings on your iPhone.
 4 Ways to Check the .NET Framework Version on Windows 11
Method 1: Visit the Installation Folder Browsing the .NET Framework installation folder on Windows 11 is a nifty trick to check its version details.
4 Ways to Check the .NET Framework Version on Windows 11
Method 1: Visit the Installation Folder Browsing the .NET Framework installation folder on Windows 11 is a nifty trick to check its version details.
 How to Download ORCA MSI Editor Standalone Version
How to Download and Install the ORCA MSI Editor Downloading the standalone MSI installer file is quite difficult.
How to Download ORCA MSI Editor Standalone Version
How to Download and Install the ORCA MSI Editor Downloading the standalone MSI installer file is quite difficult.
 6 Ways to Export Microsoft Teams Chat History
Microsoft Teams has become integral to modern workplace communication, facilitating information sharing and collaboration.
6 Ways to Export Microsoft Teams Chat History
Microsoft Teams has become integral to modern workplace communication, facilitating information sharing and collaboration.
 How to Use the Filter and Sort Data Function in Microsoft Excel
Things to Note About Using the Filter and Sort Function The Filter function allows you to extract data from a data set that fits your criteria.
How to Use the Filter and Sort Data Function in Microsoft Excel
Things to Note About Using the Filter and Sort Function The Filter function allows you to extract data from a data set that fits your criteria.
The article above may contain affiliate links which help support Guiding Tech. The content remains unbiased and authentic and will never affect our editorial integrity.