What Is an OBS Virtual Camera
OBS virtual camera is a tool that helps add components and customize your video feed in a meeting.
With the OBS virtual camera, you can do so much more – create a ‘scene’ with your video, a screen capture, logos, text, image, and branding, and use it as your video feed in a meeting.
Advantages of OBS Virtual Camera
You can be as creative as you want while using an OBS virtual camera as your video feed. Here are some of the advantages :
- Use branding and logos: You can easily use logos, text, and other graphics on your video feed while you share it on your video call.
- Create a custom layout for a video feed: You can create a layout for how your video feed is shown. This can be a mix of your display contents, video camera feed, some images, branding, etc. Further, you can position your video camera feed wherever you want while you share the contents of your display.
- Share multiple windows at once: You can create a layout that displays two app windows at once, which effectively lets you share two display windows at once in a video feed.
- Share a part of your window: You can share a particular area of your window while sharing your screen.
- Adjust your sound output: You can customize, fine-tune, mix, and adjust your audio output on a video call.
- Improve video quality: OBS virtual camera has numerous tools to adjust and improve your video quality.
- Switch between different scenes: You can create multiple scenes, with each scene containing different content, and switch between the two as your video feed in a meeting.
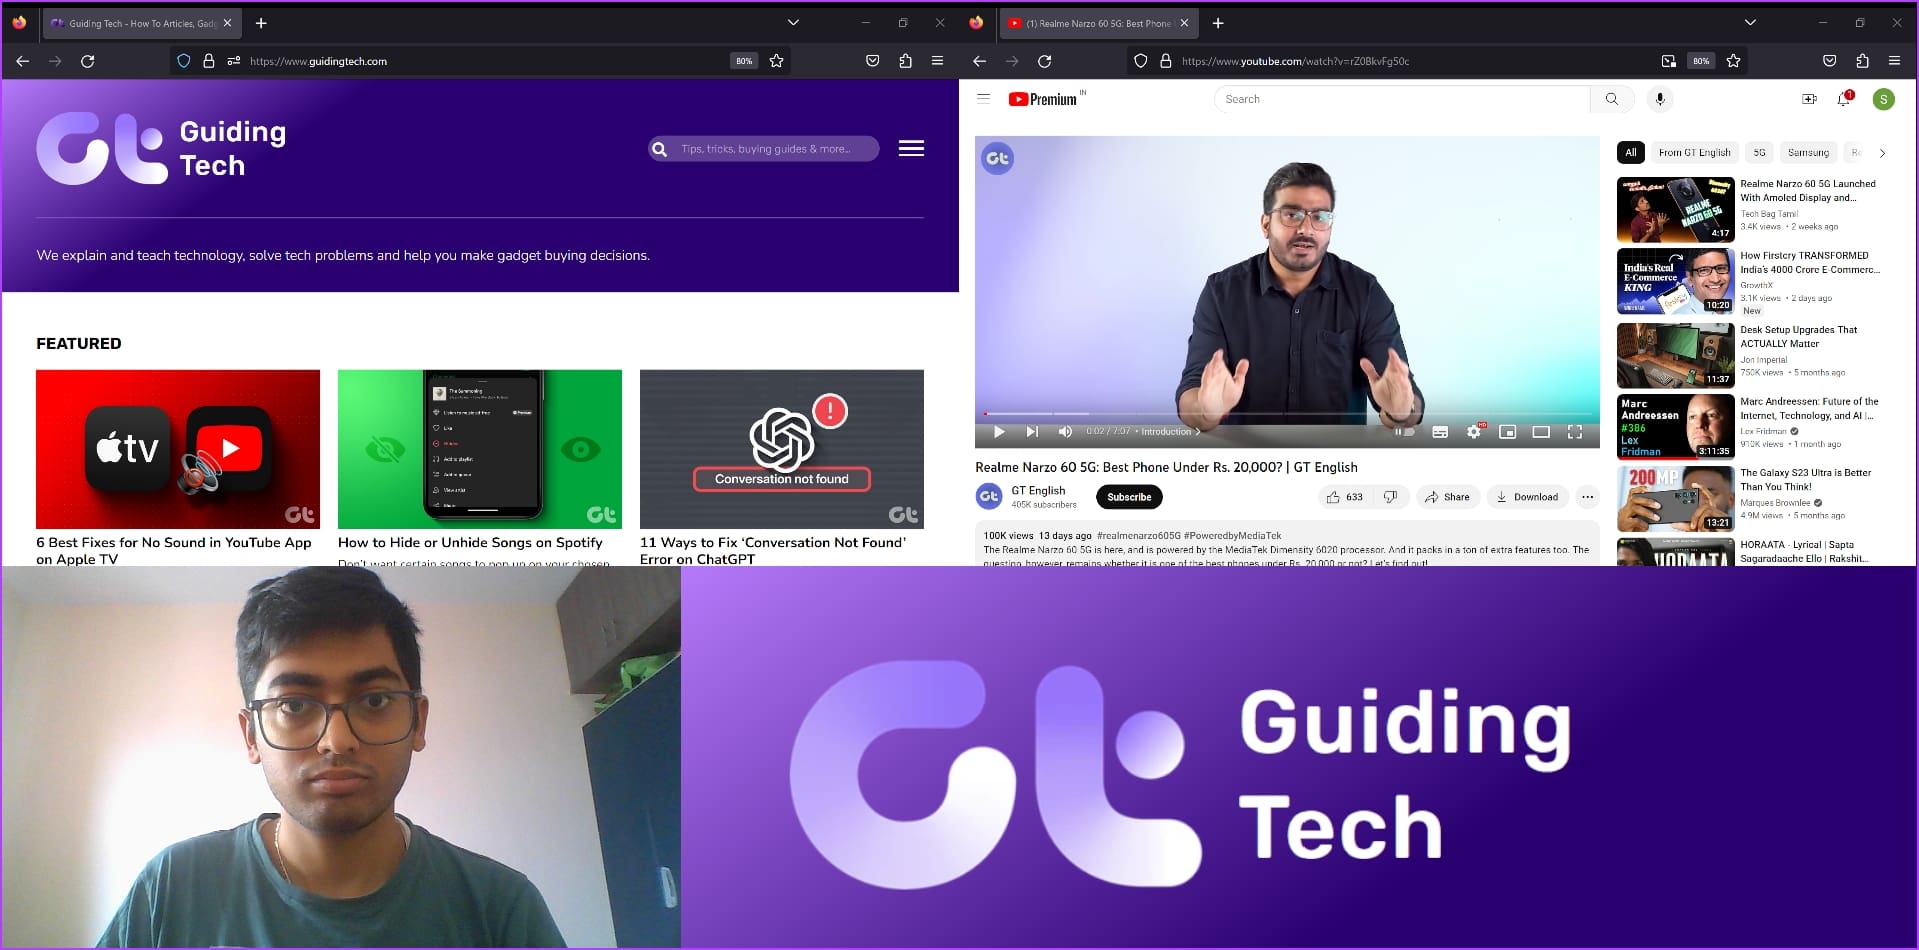
Here’s how we created an OBS scene with two windows, a picture – the logo of our website, and our webcam. All of this will be displayed when you turn on your video and select the source as OBS virtual camera on Zoom, Google Meet, Teams, and more.
How to Set Up OBS Virtual Camera
Here’s how to set up an OBS virtual camera on your Windows or Mac device. We first need to understand a few terms before we get started.
Scenes:
A Scene is a collection of various components you want to add to your video feed while using the OBS virtual camera as a video source in your video meeting. You can create multiple scenes and switch between them in your video call.
Sources:
A Source is a component that you can add to a Scene. A source can be an app window, your webcam, a picture, a logo, etc. You can add multiple sources and create a layout for all these sources by resizing them and fitting them in the way you want in a Scene.
With that out of the way, let’s get to the setup process.
Step 1: Download and install the OBS Studio application on your device. Once you install OBS Studio, open the application.
Step 2: Click on the ‘+’ icon in the Sources menu.

Step 3: You will see various components that you can add. You can explore all options and add them one after the other as a source. Or, you can take a look at the example below.
We’ll create a basic screen-sharing window with our video inside it. Hence, we’ll add a display capture, which shares the content of our entire screen. You can also select the Window option if you just want to share a single window.

Step 4: Rename the source if needed and click on OK.
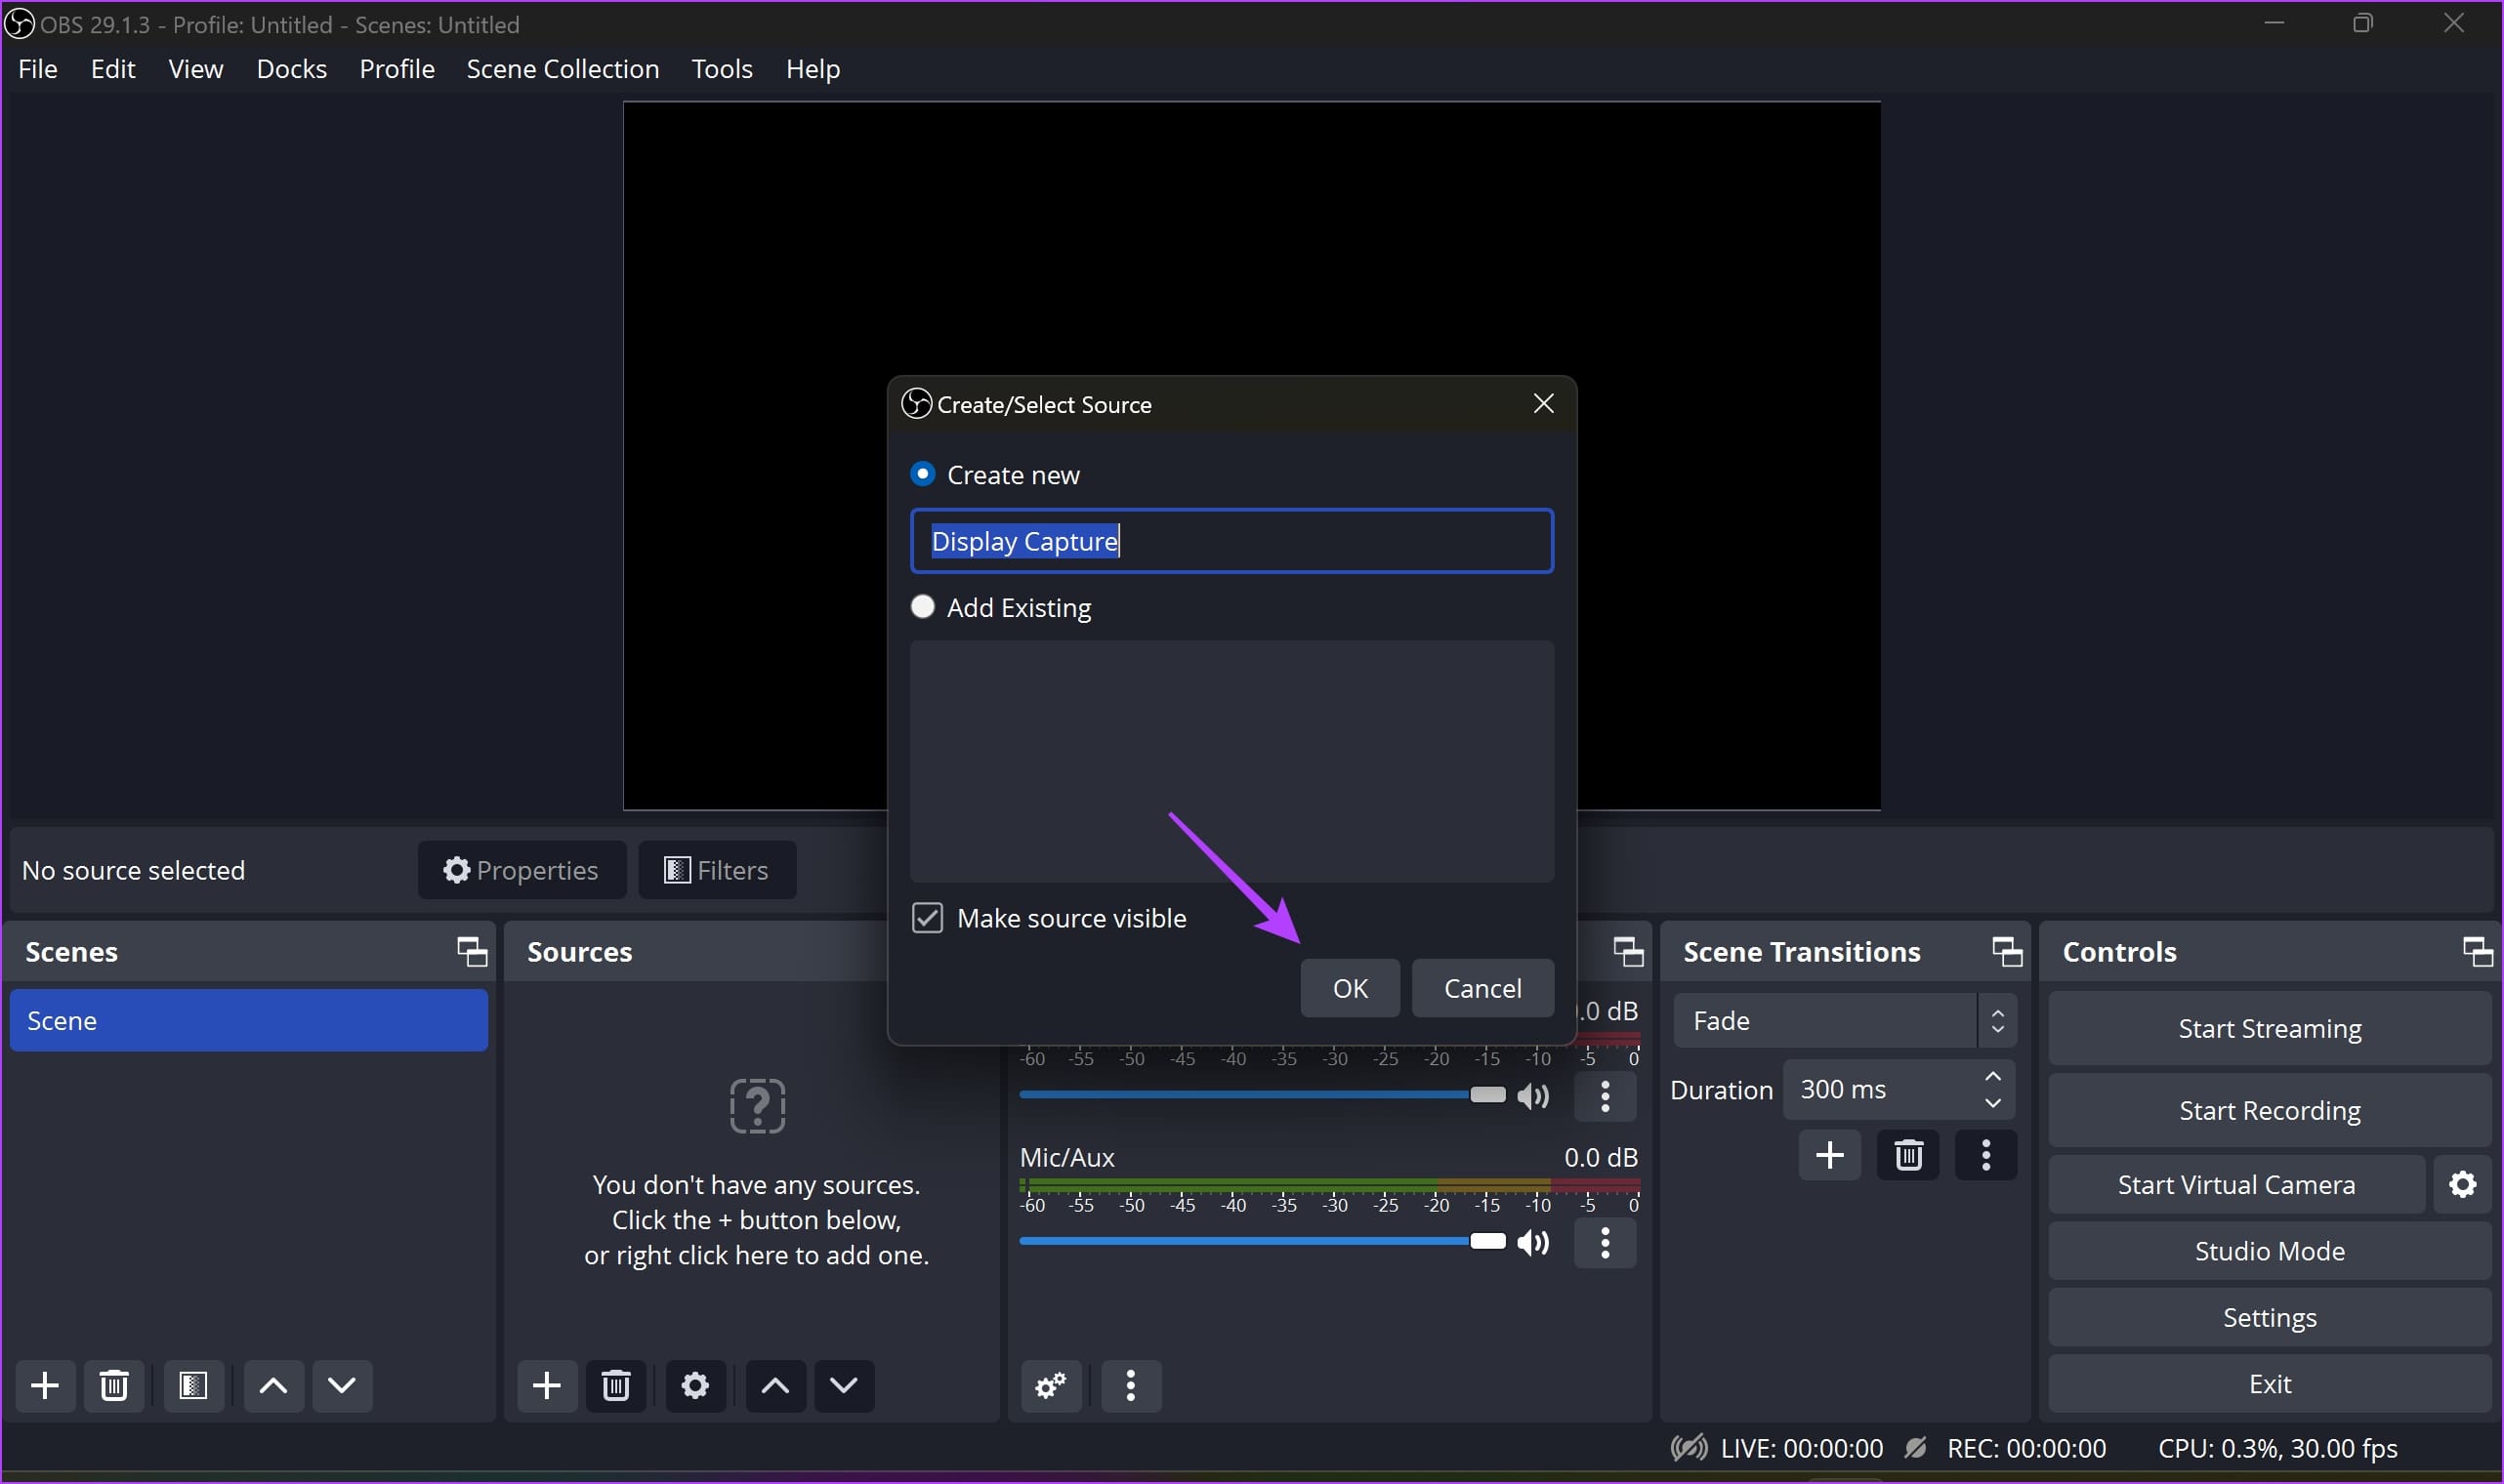
Step 5: Resize or zoom in or out of the window so that all the contents you want fit inside the black-colored box.

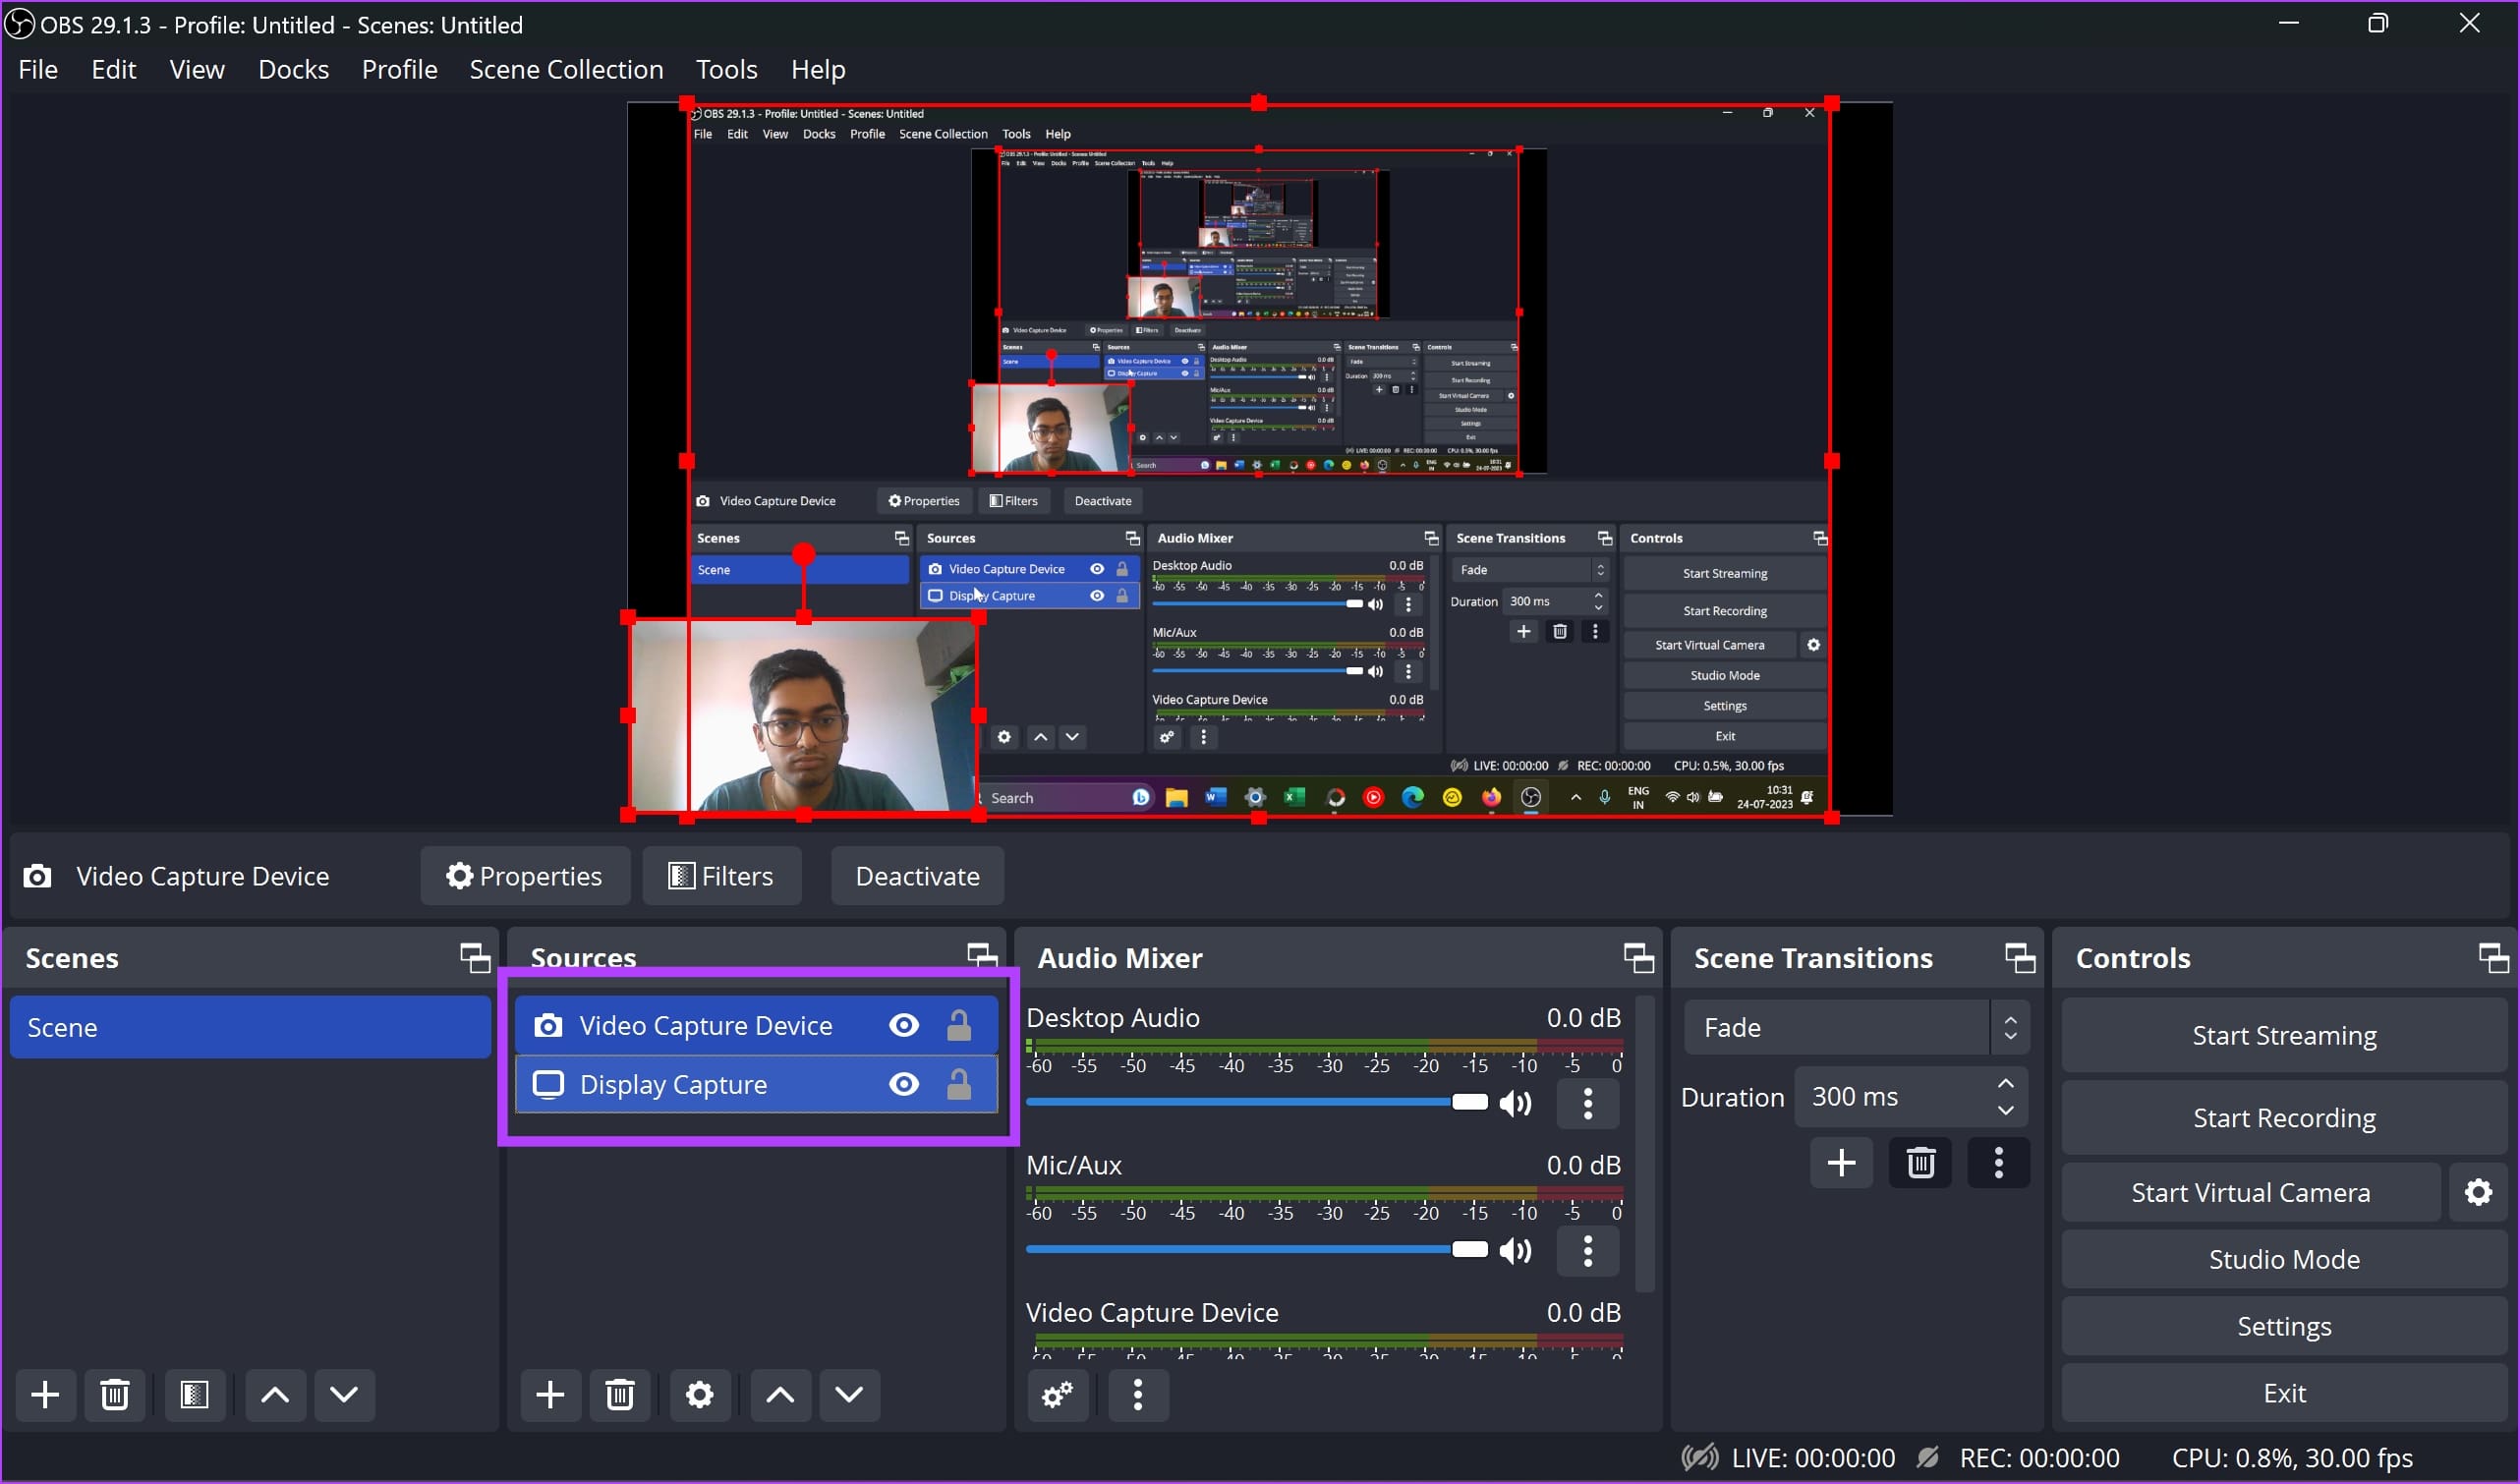
Step 6: Next, we’ll add our webcam to OBS. Click on the Video Capture Device option when adding a new source.

Step 8: Select a webcam and click on OK.

Step 7: Adjust the window, move it around, and place the window wherever you want.

Step 8: We’ll need to horizontally flip the sources since they appear to be inverted when you share the Scene in a video feed. So, select all the sources.
Step 9: Right-click and select Transform > Flip Horizontal.

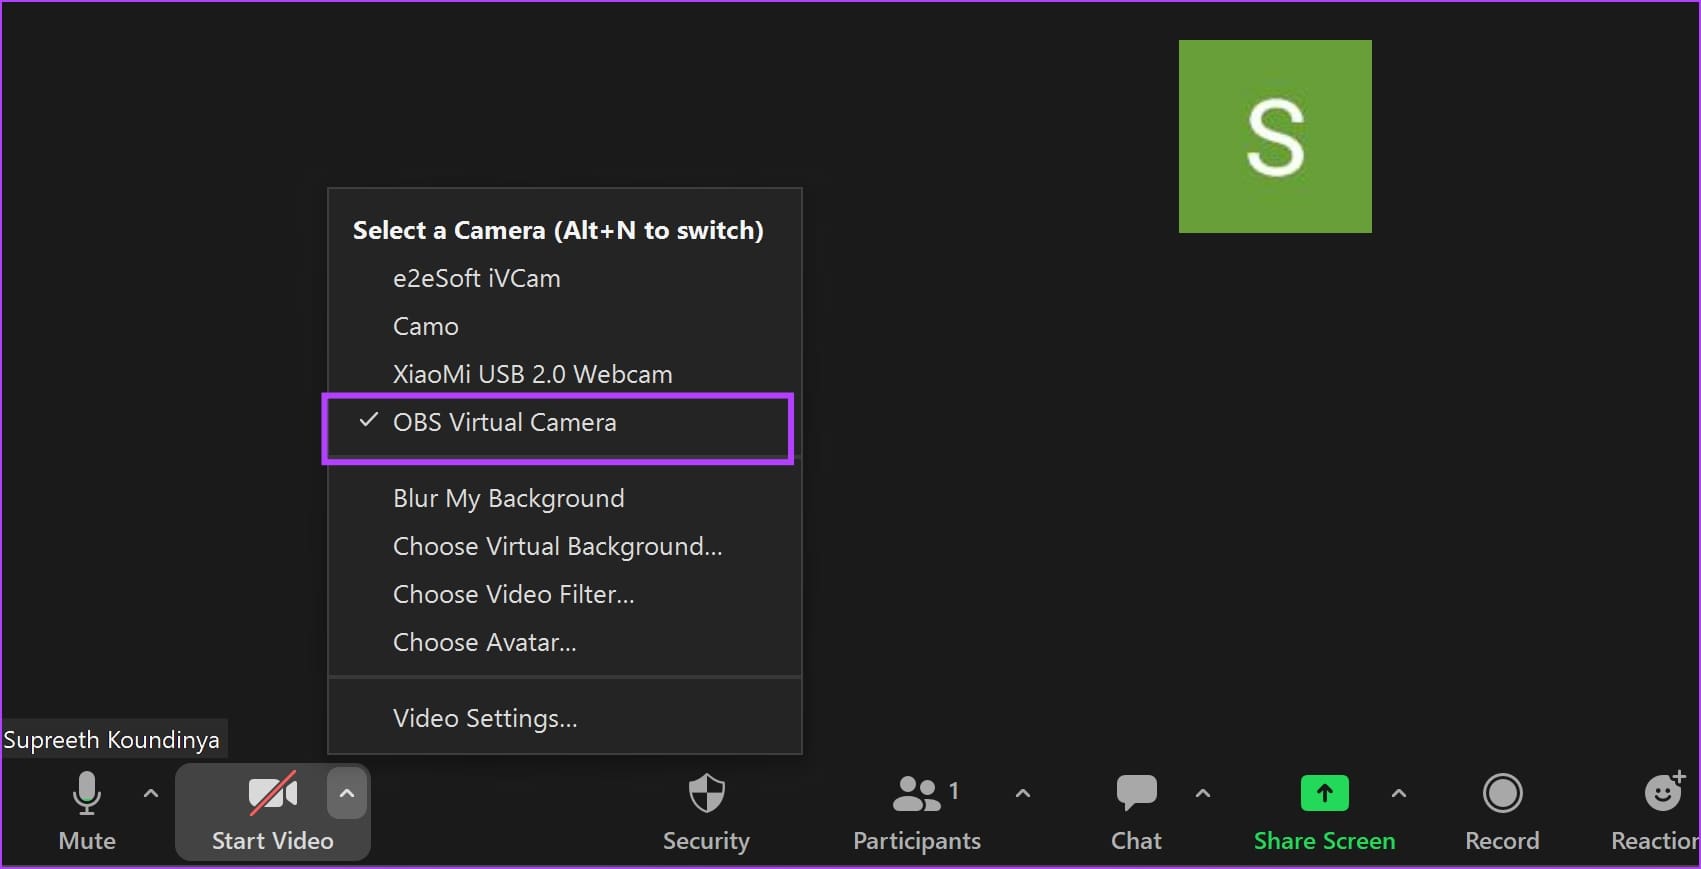
Step 10: You are now ready to share your virtual camera. Click on Start Virtual Camera in the bottom right corner.

Step 11: In your video conferencing tool, click on the OBS Virtual Camera option under video.
Your virtual camera will be shared. Further, you can always go back to the OBS studio app and switch between different scenes, add or remove sources, and modify your feed.
Also Read: How to fix background blur not working in Zoom app.
Was this helpful?
Last updated on 05 August, 2024
Read Next
 6 Ways to Fix OBS Keeps Crashing on Windows
Preliminary Fixes Run OBS Studio as Administrator: If OBS crashes on startup, it's best to give it a shot by giving the app an administrative privilege.
6 Ways to Fix OBS Keeps Crashing on Windows
Preliminary Fixes Run OBS Studio as Administrator: If OBS crashes on startup, it's best to give it a shot by giving the app an administrative privilege.
 How to Increase Virtual Memory on Windows 11
Steps to Increase Virtual Memory on Windows 11 Increasing virtual memory on Windows 11 isn't rocket science.
How to Increase Virtual Memory on Windows 11
Steps to Increase Virtual Memory on Windows 11 Increasing virtual memory on Windows 11 isn't rocket science.
 7 Ways to Fix Java Virtual Machine Launcher Error on Windows
Java Virtual Machine (JVM) is a program that ensures Java apps can run on any machine.
7 Ways to Fix Java Virtual Machine Launcher Error on Windows
Java Virtual Machine (JVM) is a program that ensures Java apps can run on any machine.
 How to Record High-Quality Gameplay Videos Using OBS Studio
How to Setup OBS Studio to Recording Game Play Before recording your gameplay, you must set up OBS Studio.
How to Record High-Quality Gameplay Videos Using OBS Studio
How to Setup OBS Studio to Recording Game Play Before recording your gameplay, you must set up OBS Studio.
 Your iPhone Can Now Take Pictures Like a $10,000 Camera — Thanks to Leica’s New Camera App
Over the years, phones have become synonymous with pocket cameras.
Your iPhone Can Now Take Pictures Like a $10,000 Camera — Thanks to Leica’s New Camera App
Over the years, phones have become synonymous with pocket cameras.
 How to Take Pictures or Record Videos Using Your Mac’s Camera
Webcams are generally used for video conferencing.
How to Take Pictures or Record Videos Using Your Mac’s Camera
Webcams are generally used for video conferencing.
 4 Ways to Fix WhatsApp Camera Zoomed in Problem
Try Basic Fixes Reinstall WhatsApp after taking the chat backup.
4 Ways to Fix WhatsApp Camera Zoomed in Problem
Try Basic Fixes Reinstall WhatsApp after taking the chat backup.
 3 Ways to Fix Facebook Messenger Camera Not Working on Android and iPhone
Fix 1: Enable Camera Permission for Messenger Like any other app, Messenger needs permission to access your phone's camera.
3 Ways to Fix Facebook Messenger Camera Not Working on Android and iPhone
Fix 1: Enable Camera Permission for Messenger Like any other app, Messenger needs permission to access your phone's camera.
The article above may contain affiliate links which help support Guiding Tech. The content remains unbiased and authentic and will never affect our editorial integrity.