Want to modify your Windows 11 settings or try new features without risking your main system stability? You can easily do this by creating a bootable copy of your Windows 11 system on a USB drive. This “portable Windows” allows you to make any alterations or test new functionalities without affecting your computer’s main operating system. You can use a free tool like Rufus to create a USB-compatible version of Windows, called Windows To Go.
How to Use Rufus to Create a USB-compatible Version of Windows
Step 1: Go to the Rufus website – rufus.ie and download the latest version of the software.
Step 2: Run Rufus.exe.

Step 3: Insert your USB drive.
Step 4: Back up all files.
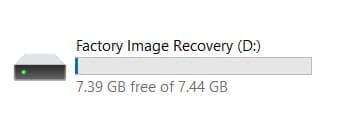
Note: Using the USB to store Windows To Go will erase all the data that is on it, so ensure you’ve backed it up first. If you can get a brand-new, that’s even better.
Create the Bootable Windows 11 USB
Once your USB has been wiped, you can use Rufus to create a copy of your Windows system, called a ‘bootable’ system.
Step 1: Launch Rufus.
Step 2: Under Device, choose your USB drive.
Step 3: Under ‘Boot selection’, choose your Windows 11 ISO file.
Step 4: In ‘Image option’, choose Windows To Go.
Step 5: Under ‘Partition scheme’, select ‘GPT.’
Step 6: Click ‘Start.’

Step 7: Choose your preferred version of Windows 11.

Boot From the USB Drive
Plug the USB into whichever device you want to run the system on. This will load the operating system from the USB, not the computer, meaning you can change what you want and simply unplug it when you’re done.
Step 1: Restart your computer.
Step 2: While it boots up, press the key for your boot menu (this varies by brand, so Google to see what it is for your computer).
Step 3: From the menu, choose to boot from your USB drive.
Step 4: Set up Windows 11.
You’ll now go through the normal steps of setting up your system, just like opening a computer for the first time. Once you complete the setup, the USB will remember your settings for as long as it stays plugged in, so you don’t have to do it every time. Your computer will run of the Windows system saved in the USB and will use those details until you change it.
Use Windows Without Changing Your Computer
Your computer should run exactly like normal when it’s set up. Anything you save to the system while you’re running it from the USB won’t carry over to your computer’s system when you unplug it. This means you can change system settings and try experimental features without worrying about causing damage to your computer’s system.
Was this helpful?
Last updated on 23 June, 2025
Read Next
 7 Ways to Fix Windows 11 Updates Not Downloading or Installing
Fix 1: Run the Windows Update Troubleshooter Windows 11 includes a dedicated troubleshooter that can automatically scan, detect, and fix any issues with Windows Updates.
7 Ways to Fix Windows 11 Updates Not Downloading or Installing
Fix 1: Run the Windows Update Troubleshooter Windows 11 includes a dedicated troubleshooter that can automatically scan, detect, and fix any issues with Windows Updates.
 3 Ways to Prevent Users From Installing New Software on Windows 11
Method 1: Turn Off Windows Installer via Group Policy The Group Policy Editor on Windows lets you make various administrative-level changes.
3 Ways to Prevent Users From Installing New Software on Windows 11
Method 1: Turn Off Windows Installer via Group Policy The Group Policy Editor on Windows lets you make various administrative-level changes.
 How to Stop a Specific Windows Update From Installing
Method 1: Hide a Windows Update Using the Show or Hide Updates Troubleshooter Microsoft's "Show or hide updates" tool makes it simple to stop a specific Windows Update from installing
How to Stop a Specific Windows Update From Installing
Method 1: Hide a Windows Update Using the Show or Hide Updates Troubleshooter Microsoft's "Show or hide updates" tool makes it simple to stop a specific Windows Update from installing
 How to Fix Optional Features Missing or Not Installing on Windows 11
Fix 1: Disable Metered Connection Windows has a metered connection feature that reduces data consumption and helps save on internet bills.
How to Fix Optional Features Missing or Not Installing on Windows 11
Fix 1: Disable Metered Connection Windows has a metered connection feature that reduces data consumption and helps save on internet bills.
 3 Ways to Fix DirectX Not Installing Error on Windows 11
Basic Fixes Check the internet connection: The DirectX web installer requires internet connectivity to download files from the server.
3 Ways to Fix DirectX Not Installing Error on Windows 11
Basic Fixes Check the internet connection: The DirectX web installer requires internet connectivity to download files from the server.
 5 Ways to Fix Windows Keeps Installing the Same Update
Fix 1: Run the Windows Update Troubleshooter Whenever you encounter any issues with Windows Updates, you should first run the built-in troubleshooter.
5 Ways to Fix Windows Keeps Installing the Same Update
Fix 1: Run the Windows Update Troubleshooter Whenever you encounter any issues with Windows Updates, you should first run the built-in troubleshooter.
 Top 5 Fixes For ‘No Device Drivers Were Found’ While Installing Windows 11/10
Preliminary Fixes Check/Switch the USB Ports: One common cause of this error is the USB port being used.
Top 5 Fixes For ‘No Device Drivers Were Found’ While Installing Windows 11/10
Preliminary Fixes Check/Switch the USB Ports: One common cause of this error is the USB port being used.
 Top 9 Ways to Fix Mac Apps Stuck on Installing
The macOS ecosystem has useful apps and services to elevate your experience.
Top 9 Ways to Fix Mac Apps Stuck on Installing
The macOS ecosystem has useful apps and services to elevate your experience.
The article above may contain affiliate links which help support Guiding Tech. The content remains unbiased and authentic and will never affect our editorial integrity.