How to Enable Narrator on Windows 11
To get started, you must first enable the Narrator tool on your Windows 11 PC. Here’s how to do it.
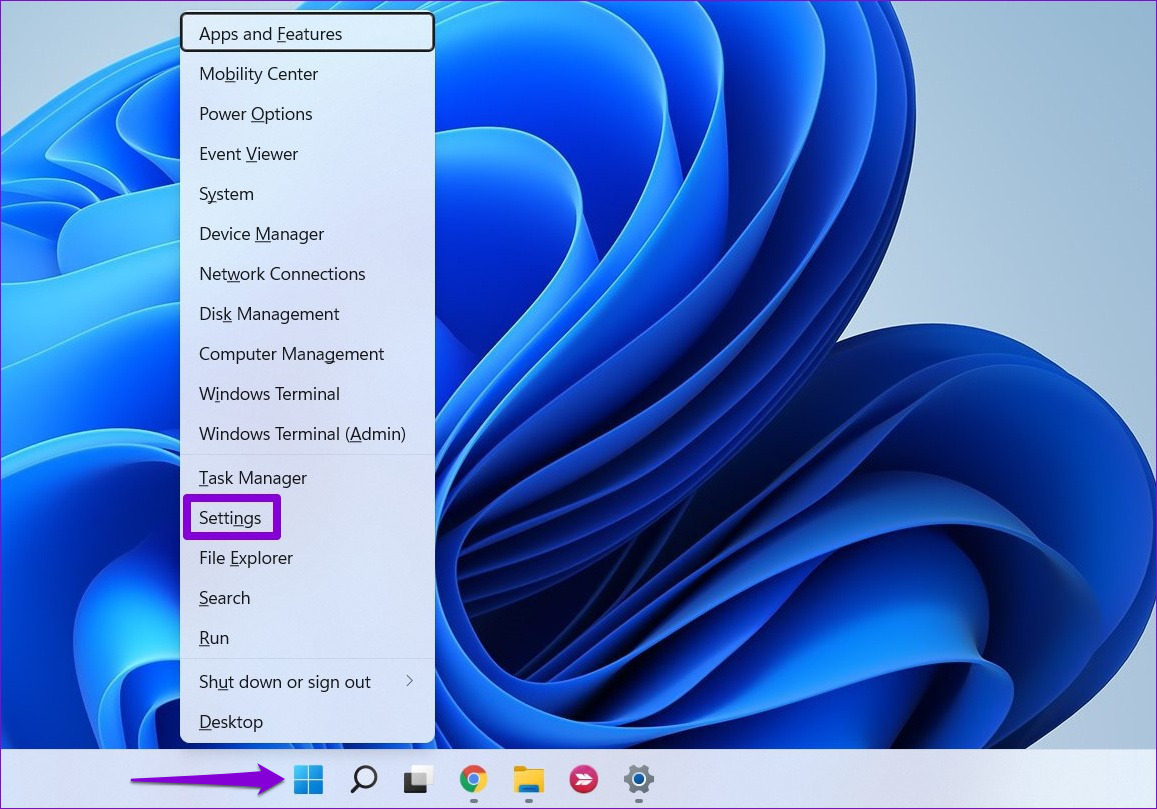
Step 1: Right-click on the Start icon and select Settings from the menu that appears.
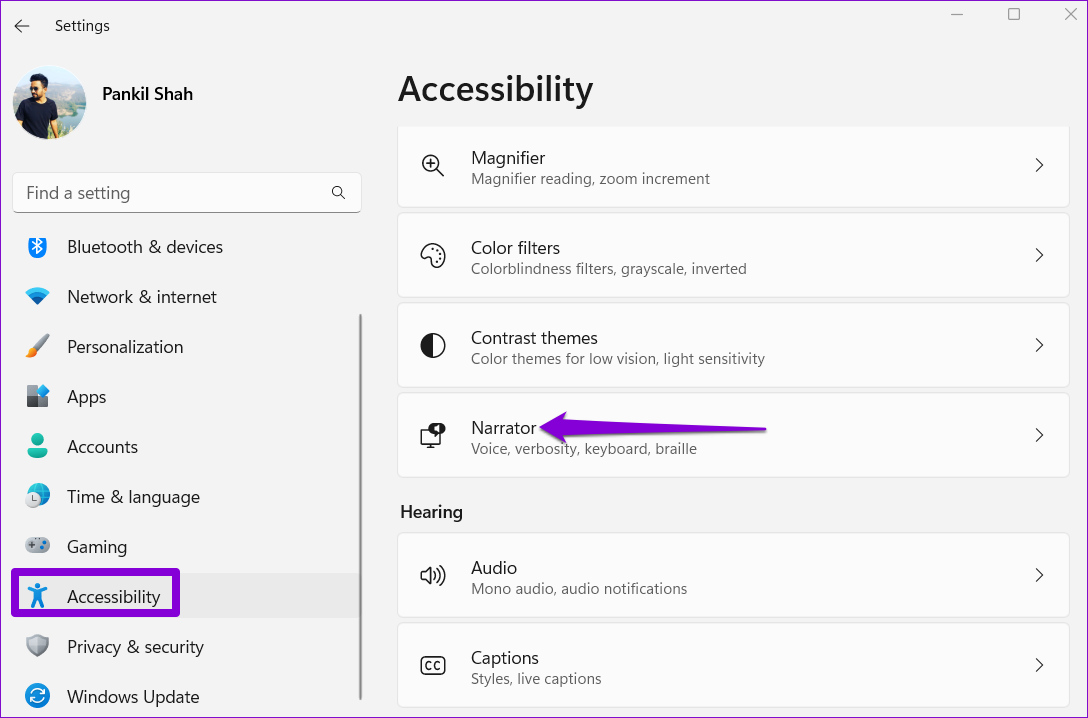
Step 2: Navigate to the Accessibility tab > click on Narrator.
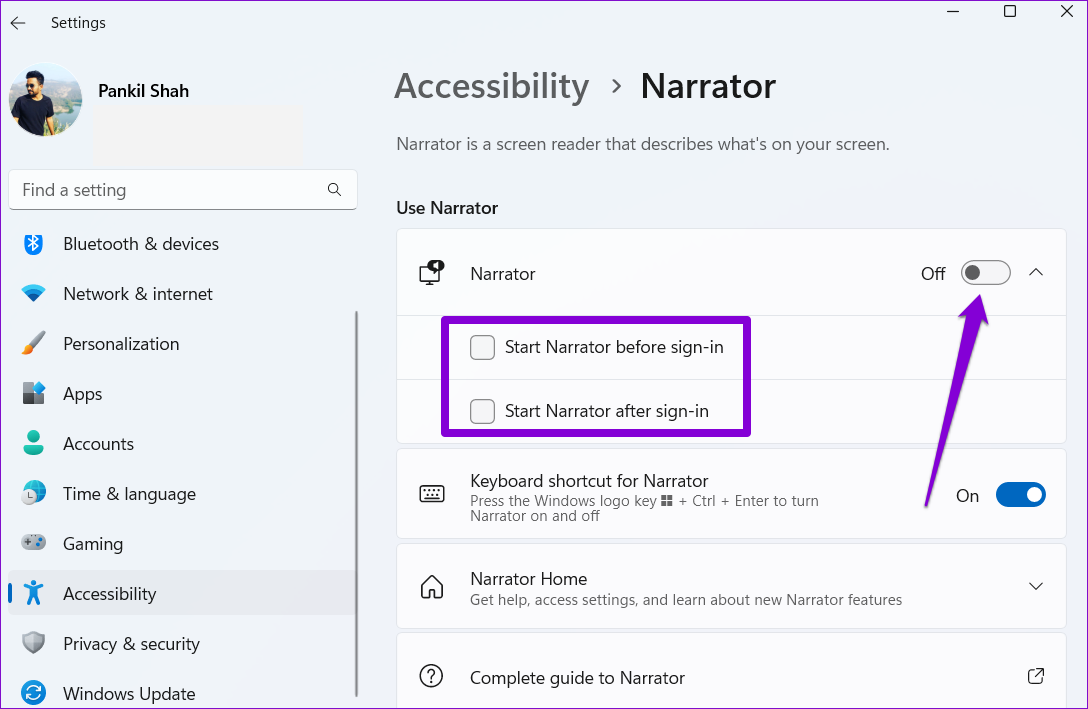
Step 3: Enable the toggle for the Narrator to start using it immediately. Optionally, configure the Narrator to start automatically before or after you sign in or enable the Keyboard shortcut for the Narrator toggle.
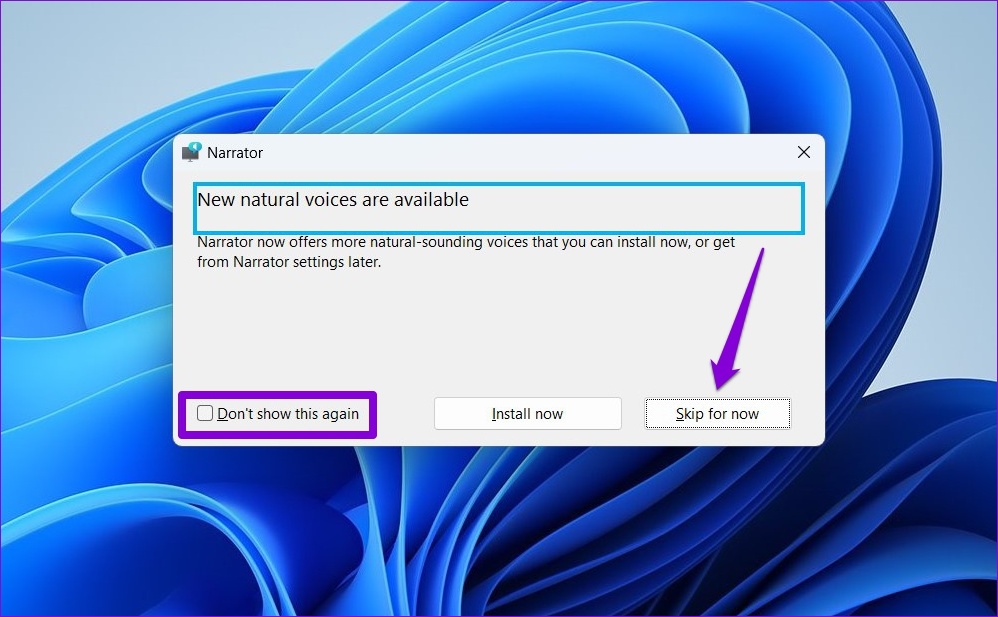
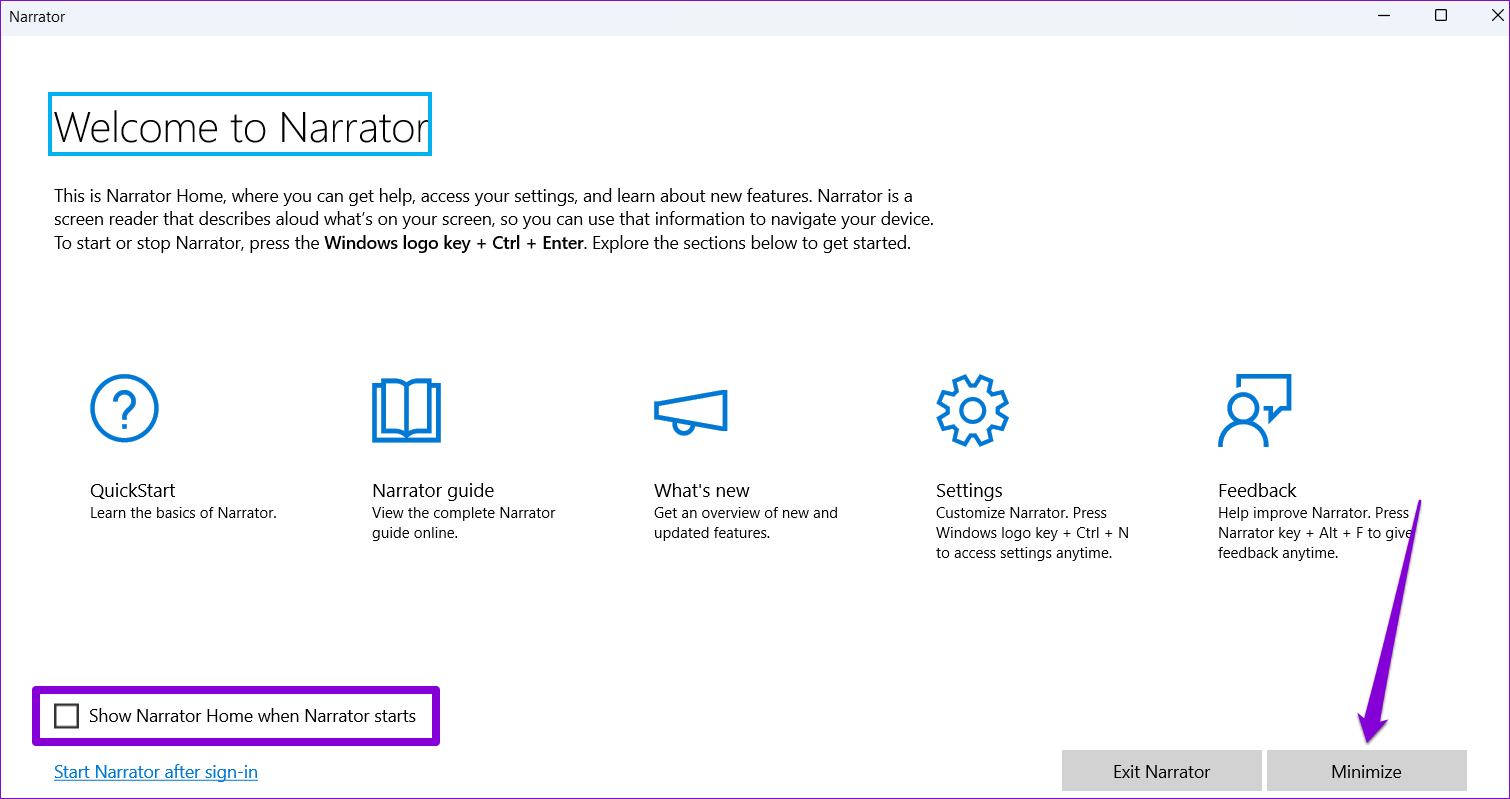
After enabling Narrator from the Settings menu or via the Windows key + Ctrl + Enter keyboard shortcut, a Narrator dialog will appear on your screen. If you don’t wish to see this dialog every time you launch Narrator, check the box for Don’t show this again and click Skip for now.
This will open Narrator Home, where you can read about some of its functions and commands. Uncheck the box for Show Narrator Home when Narrator starts if you don’t want Narrator Home to pop up every time you use Narrator. Then, click on Minimize to start using Narrator.
How to Make the Narrator Read Your Screen Out Loud
Once you’ve enabled the Narrator tool, you can make Windows 11 read text out loud. To try it out, open any web page or document on your PC and press the Windows key + Ctrl + Enter to access Narrator. The Narrator will then start reading the text and display a blue rectangle to highlight the word being read.

You can also use your mouse to highlight a specific paragraph or line, and the Narrator will start reading it. Similarly, you can use the Narrator on any screen to make Windows 11 read emails, web pages, documents, and more.
How to Customize Narrator’s Settings on Windows 11
By default, the Narrator will describe everything on your screen, including interface elements such as buttons, icons, controls, and more. However, if you want to use the Narrator to read emails, web pages, or documents, you must modify the Narrator’s settings using the steps below.
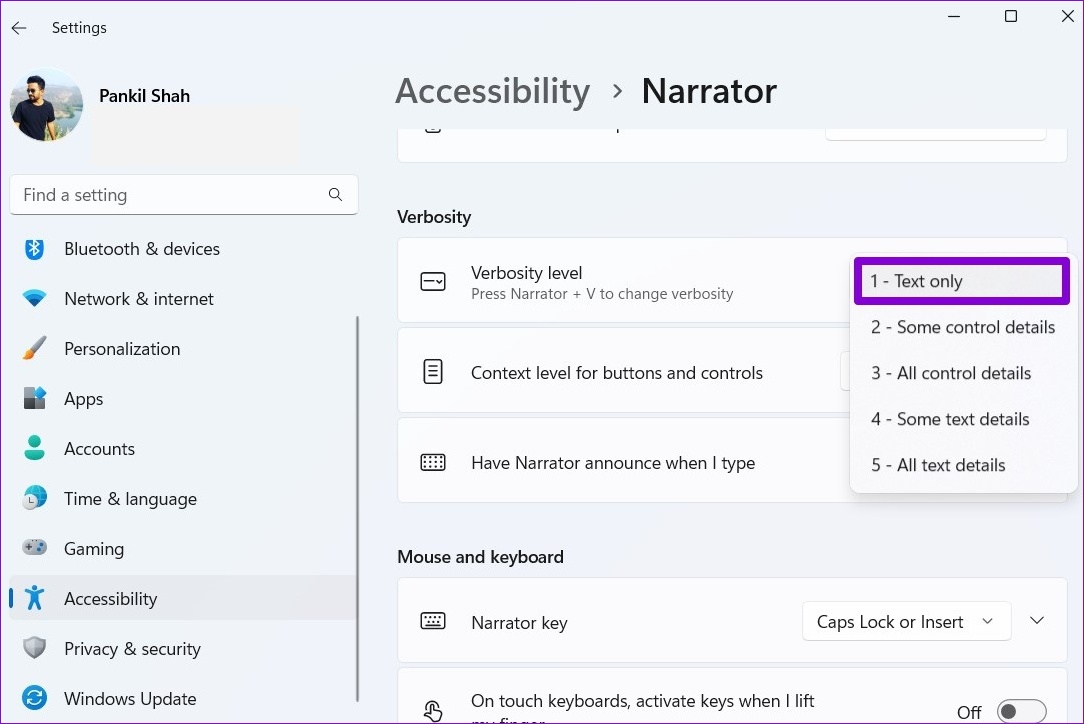
Step 1: Press the Windows key + I to open the Settings app and go to Accessibility > Narrator.
Step 2: Scroll down to the Verbosity section. Then, use the drop-down menu next to the Verbosity level and select Text only.
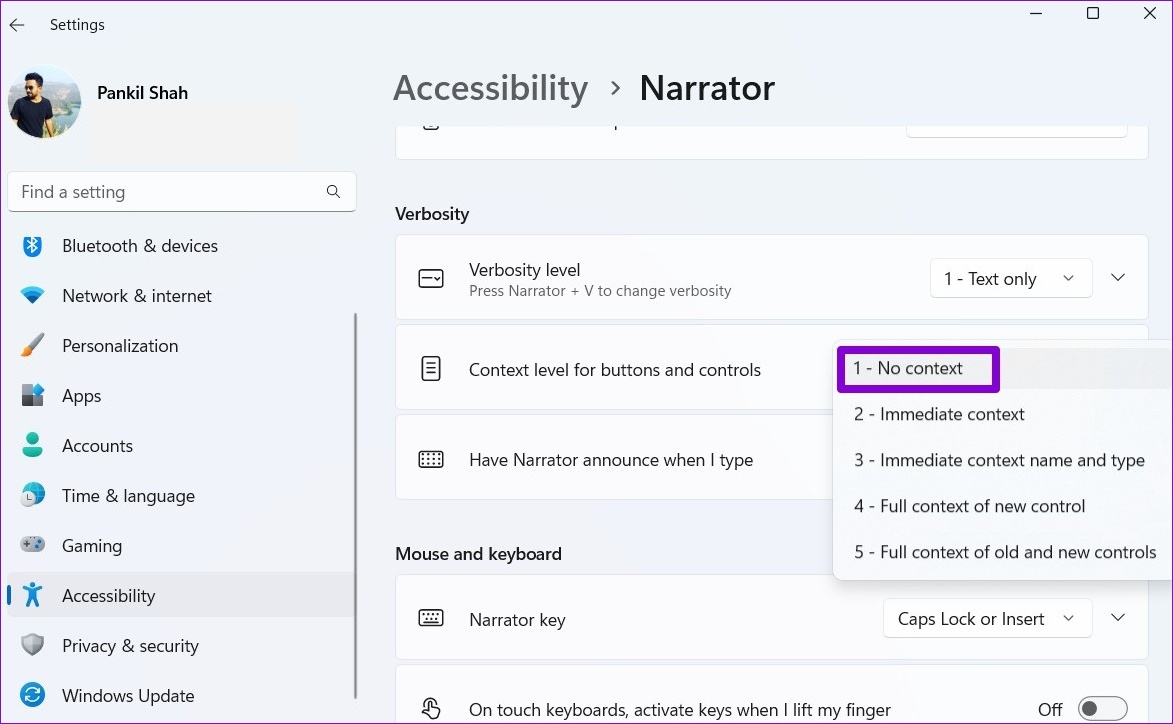
Step 3: Use the drop-down menu next to the Context level for buttons and controls and select No context.
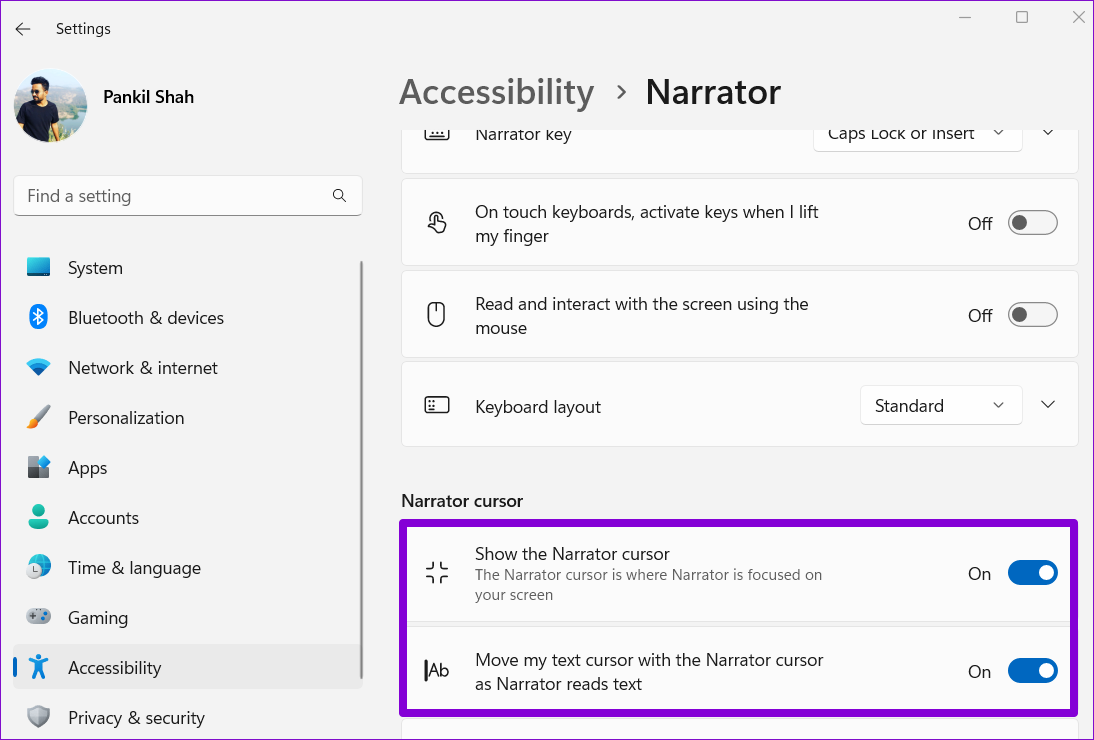
Optionally, you can enable the Narrator cursor from the same menu so that the cursor moves as the Narrator reads your screen out loud.
How to Change Narrator’s Voice on Windows 11
The Narrator’s default voice on Windows 11 when reading the text out loud may sound robotic. Fortunately, Windows lets you change and adjust the Narrator’s voice to your liking.
Step 1: Click the search icon on the taskbar, type narrator voice, and select the first result that appears.
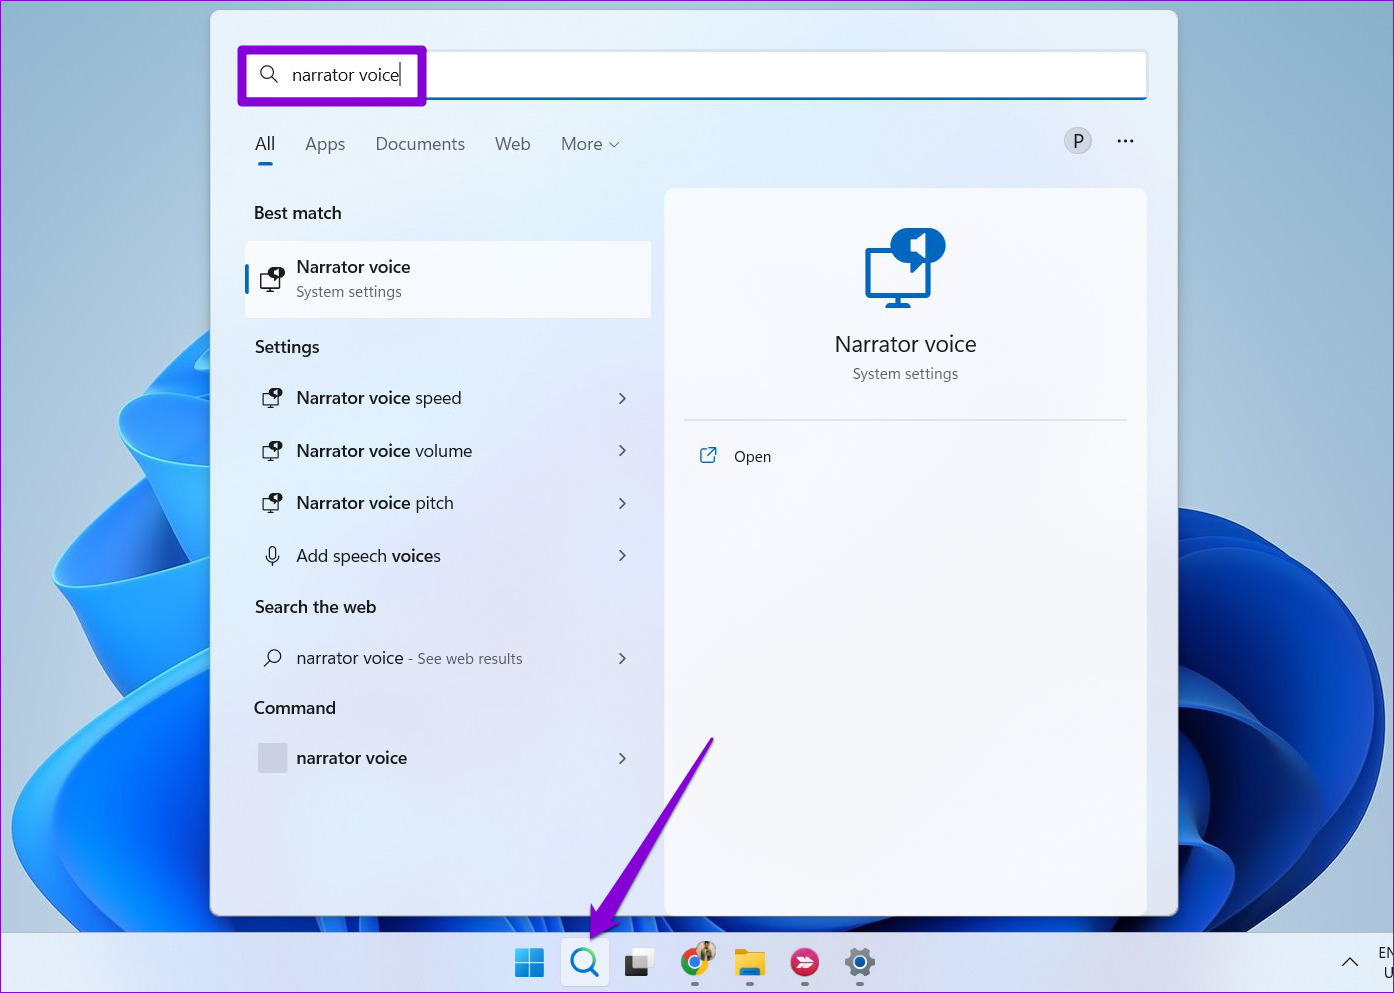
Step 2: Use the drop-down menu next to Choose a voice to select a voice you like.

Step 3: Under Choose a voice, use the sliders to adjust the narration’s Speed, Pitch, and Volume.

Additionally, you can also download natural voices for the Narrator. For that, click the Add button next to Add natural voices.
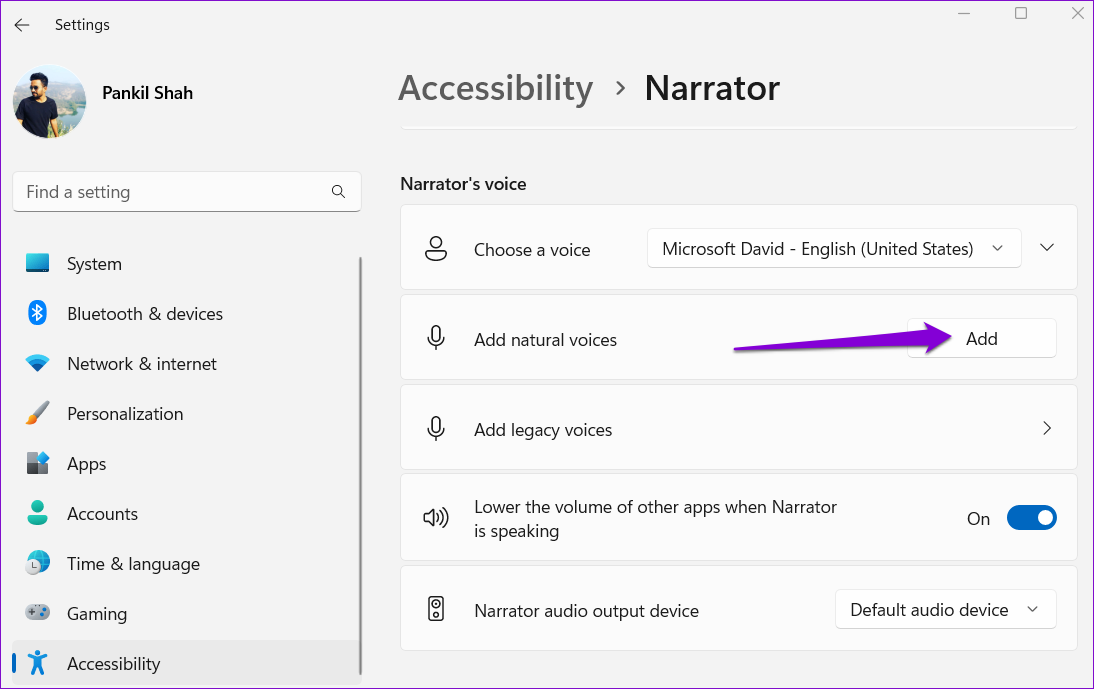
Select the voice you wish to download and click on Install. You can also preview the voice before downloading it.

Was this helpful?
Last updated on 25 April, 2024
1 Comment
Leave a Reply
Read Next
 Does Bumble Have Read Receipts and How to Tell if Someone Read Your Message
Does Bumble Show Read Receipts?
Does Bumble Have Read Receipts and How to Tell if Someone Read Your Message
Does Bumble Show Read Receipts?
 5 Ways to Fix Low or Loud Alarm Volume on iPhone
Common Fixes Restart iPhone - Press and hold either of the volume buttons with the side button and drag the power off slider to shut down.
5 Ways to Fix Low or Loud Alarm Volume on iPhone
Common Fixes Restart iPhone - Press and hold either of the volume buttons with the side button and drag the power off slider to shut down.
 6 Ways to Fix Microsoft Word Opens Files in Read-Only Mode in Windows 10 or 11
Fix 1: Modify File Properties If the issue in question is limited to a select few Word documents, the read-only file attribute may be enabled for those files.
6 Ways to Fix Microsoft Word Opens Files in Read-Only Mode in Windows 10 or 11
Fix 1: Modify File Properties If the issue in question is limited to a select few Word documents, the read-only file attribute may be enabled for those files.
 4 Ways to Fix Folder Keeps Reverting to Read-Only in Windows 11
https://youtu.be/MnJG_EO0Lck Try Basic Fixes Disable any third-party antivirus program: Third-party antivirus programs can sometimes interfere with Windows processes and cause problems.
4 Ways to Fix Folder Keeps Reverting to Read-Only in Windows 11
https://youtu.be/MnJG_EO0Lck Try Basic Fixes Disable any third-party antivirus program: Third-party antivirus programs can sometimes interfere with Windows processes and cause problems.
 How to Generate and Read a Battery Report on Windows 11
Lithium-ion batteries have been immensely useful in making devices super portable.
How to Generate and Read a Battery Report on Windows 11
Lithium-ion batteries have been immensely useful in making devices super portable.
 5 Fixes When Read Aloud Is Not Working in Microsoft Word for Windows
Fix 1: Add the Read Aloud Option Is the Read Aloud option missing from Microsoft Word?
5 Fixes When Read Aloud Is Not Working in Microsoft Word for Windows
Fix 1: Add the Read Aloud Option Is the Read Aloud option missing from Microsoft Word?
 Top 7 Ways to Fix OneNote Read-Only Status
Microsoft OneNote is one of the oldest and feature-rich note-taking apps out there.
Top 7 Ways to Fix OneNote Read-Only Status
Microsoft OneNote is one of the oldest and feature-rich note-taking apps out there.
 2 Fixes for Read Receipts Not Working on WhatsApp
Basic Fixes Force quit and relaunch: This will give the app a fresh start and should make the feature work.
2 Fixes for Read Receipts Not Working on WhatsApp
Basic Fixes Force quit and relaunch: This will give the app a fresh start and should make the feature work.
The article above may contain affiliate links which help support Guiding Tech. The content remains unbiased and authentic and will never affect our editorial integrity.


I can’t change the narrator’s voice in Windows 11. I have added two natural voices and would like to use them, but I always get the male UK English speaker’s voice which was installed. How can I override this?