There’s a lot you can do in Microsoft 365 and the latest version of Excel that doesn’t involve formulae or complex calculations. Inserting images, for example. While this seems like a simple task on the face of it, there are always ways it can go wrong or go more easily.
In this article, we’ll be showing you how to insert a picture in Excel cell.
Inserting Pictures the Wrong Way
Before we start, it might be helpful to look at what not to do. Dragging and dropping a picture into Excel might seem like the most logical choice, but if it isn’t copied into a cell directly, then it won’t stay put. Even dragging your picture over your desired cell won’t keep it fixed if you resize things or add new rows or columns. You need to paste directly into a cell for best results.
How to Insert a Picture in Excel Cell – A Few Different Methods.
With Microsoft Excel, insert pictures in cells is pretty straightforward, but there are a few ways to get the job done:
Using the Menu Function
This is the easiest method of pasting an image into a cell. Here’s what you need to do:
Step 1. Open up your spreadsheet and click the cell in which you want to insert the picture.
Step 2. Click the “Insert” tab, then click the “Pictures” icon in the “Illustrations” subsection.
Step 3. From the dropdown menu, hover over “Place in Cell.”
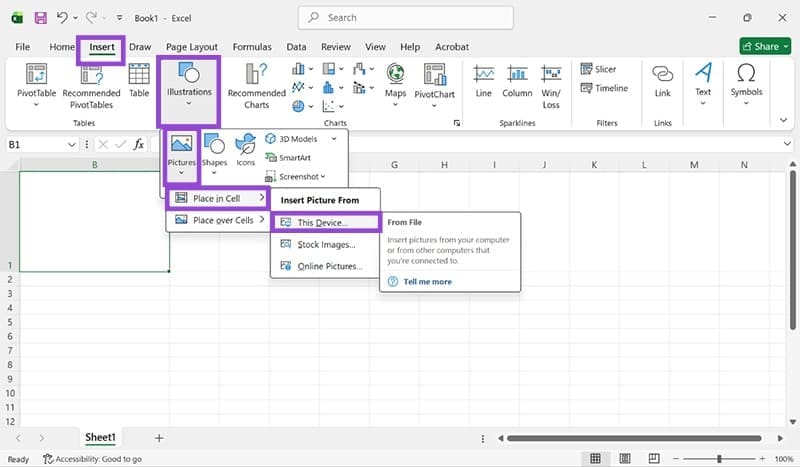
Step 4. In the next menu, you can choose to add an image from your device, a stock image, or one from online. Click your desired choice.
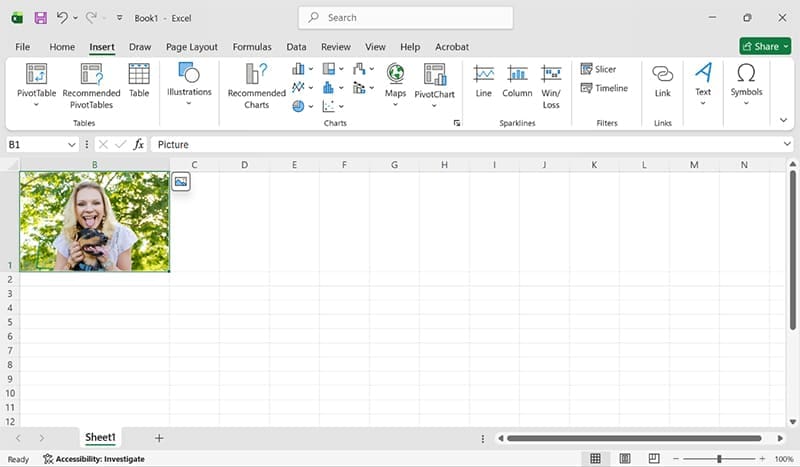
Step 5. The picture will then appear in your cell.
Pasting From the Clipboard
If you’re looking for the quickest method of getting things done, you can use the Context Menu to paste in an image copied to your clipboard. Here’s how:
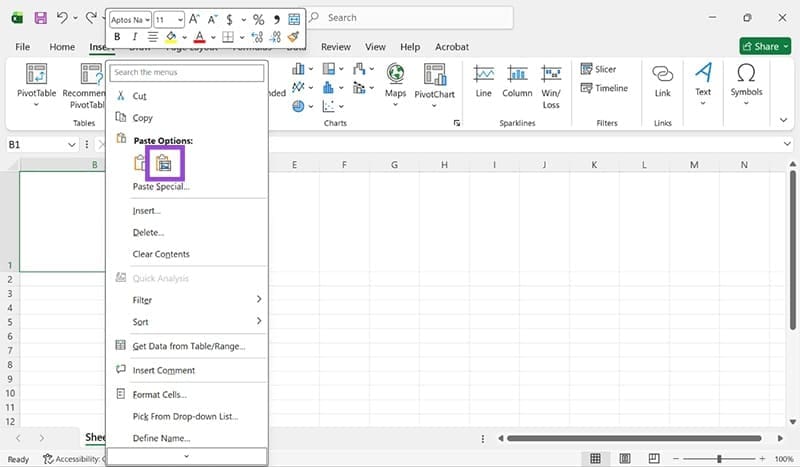
Step 1. Right-click your target cell, then navigate to the “Paste Options” subsection in the context menu.
Step 2. Click the furthest right icon, the “Paste Picture in Cell” option.
Step 3. The image will be added to your cell.
If you’re hoping to use the Paste keyboard shortcut (Ctrl + V), then we’ve got bad news. This option will only paste images over cells.
Over Cell to In Cell
Say you’ve already got a picture pasted in, but it’s over several cells. It’s very easy to get that floating image locked into a cell. Here’s how:
Step 1. Click your floating image.
Step 2. Navigate to the “Picture Format” tab.
Step 3. Click “Place in Cell.”
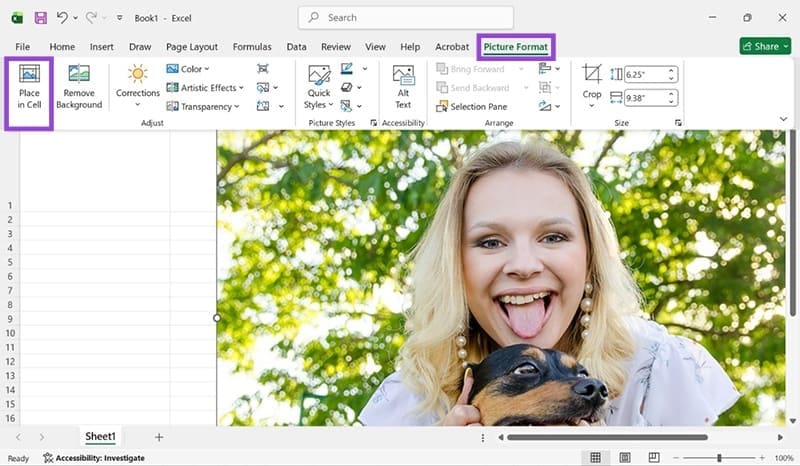
Step 4. The image will be inserted in the closest cell to the top-left corner of the image.
Using A Shape
If you have an older version of Excel or are looking for another way to get things done, you can insert a shape into the cell first and insert a picture into that. To do this:
Step 1. Right-click your cell and switch to the “Insert” tab.
Step 2. Under the “Illustrations” subgroup, choose “Shapes.”
Step 3. Click and drag the shape out in the cell while holding the Alt key to draw in the cell.

Step 4. Once placed, head to the “Shape Format” tab and select “Shape Fill.”
Step 5. From the dropdown list, choose “Picture” near the bottom.
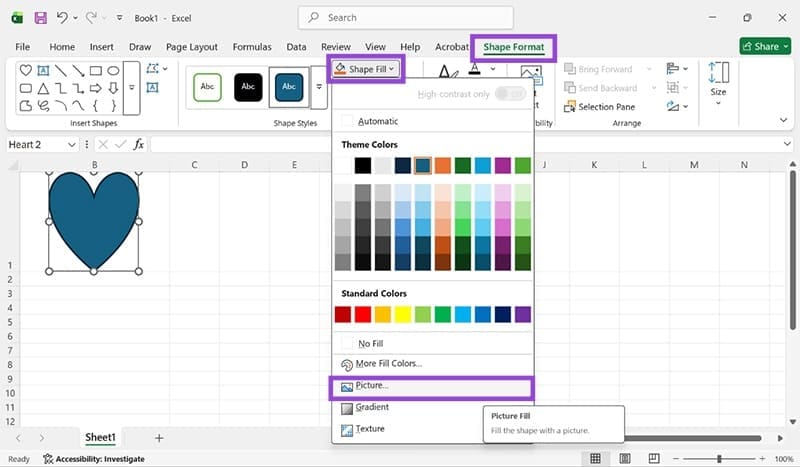
Step 6. Choose the local or online source of your picture and confirm.
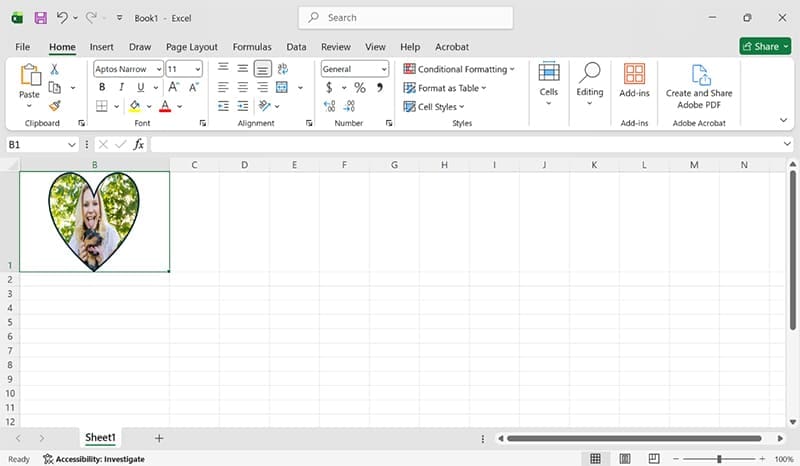
Step 7. The picture will be inserted, trimmed to the dimensions of your shape.
Was this helpful?
Last updated on 23 November, 2025
Read Next
 5 Ways to Jump to Cell A1 in MS Excel Real Quick
Method 1: Using Keyboard Shortcuts One of the easiest ways to return to the A1 cell is to use keyboard shortcuts.
5 Ways to Jump to Cell A1 in MS Excel Real Quick
Method 1: Using Keyboard Shortcuts One of the easiest ways to return to the A1 cell is to use keyboard shortcuts.
 3 Ways to Insert a PDF Document into an Excel Spreadsheet on Windows
Method 1: Insert a PDF Document in Excel Spreadsheet Here's how you can insert a PDF into Excel and make sure the document is visible and easily accessible on the
3 Ways to Insert a PDF Document into an Excel Spreadsheet on Windows
Method 1: Insert a PDF Document in Excel Spreadsheet Here's how you can insert a PDF into Excel and make sure the document is visible and easily accessible on the
 How to Fix Green Cell or Green Line Error in Google Sheets
Google Sheets users are facing an issue where they view a green line after some cells, or the cell carrying a green border.
How to Fix Green Cell or Green Line Error in Google Sheets
Google Sheets users are facing an issue where they view a green line after some cells, or the cell carrying a green border.
 3 Best Ways to Clear the Cell Content in Google Sheets
Google Sheets is ranked high in the list of popular spreadsheet tools.
3 Best Ways to Clear the Cell Content in Google Sheets
Google Sheets is ranked high in the list of popular spreadsheet tools.
 3 Ways to Insert an Excel Spreadsheet into a Word Document
Method 1: Using the Insert Table Option The Insert tab on the Word Ribbon has different options, including an Insert Table button, which can be used to insert an Excel
3 Ways to Insert an Excel Spreadsheet into a Word Document
Method 1: Using the Insert Table Option The Insert tab on the Word Ribbon has different options, including an Insert Table button, which can be used to insert an Excel
 3 Ways to Fix Prime Video Picture-in-Picture Not Working on Android and iPhone
Basic Fixes Restart Prime Video: Restart the Prime Video app and your smartphone to eliminate bugs and glitches.
3 Ways to Fix Prime Video Picture-in-Picture Not Working on Android and iPhone
Basic Fixes Restart Prime Video: Restart the Prime Video app and your smartphone to eliminate bugs and glitches.
 4 Ways to Fix Picture-In-Picture Mode Not Working on Android
Try Basic Fixes Update the problematic app: If the picture-in-picture mode is not working due to a buggy app build, you should be able to fix it by updating the
4 Ways to Fix Picture-In-Picture Mode Not Working on Android
Try Basic Fixes Update the problematic app: If the picture-in-picture mode is not working due to a buggy app build, you should be able to fix it by updating the
 3 Fixes for Picture-in-Picture Not Working in Telegram
Basic Fixes Force quit and relaunch Telegram: This will give the app a fresh start on your iPhone or Android phone.
3 Fixes for Picture-in-Picture Not Working in Telegram
Basic Fixes Force quit and relaunch Telegram: This will give the app a fresh start on your iPhone or Android phone.
The article above may contain affiliate links which help support Guiding Tech. The content remains unbiased and authentic and will never affect our editorial integrity.