Microsoft has been steadily adding AI features into Edge through Copilot, from the sidebar assistant to inline writing tools and image generation. But for most people, these are just bloatware and don’t add to the experience. Luckily, you can disable Copilot AI features if you go through a few different menus. Here’s how.
Option 1 – Disable the Copilot Sidebar Button
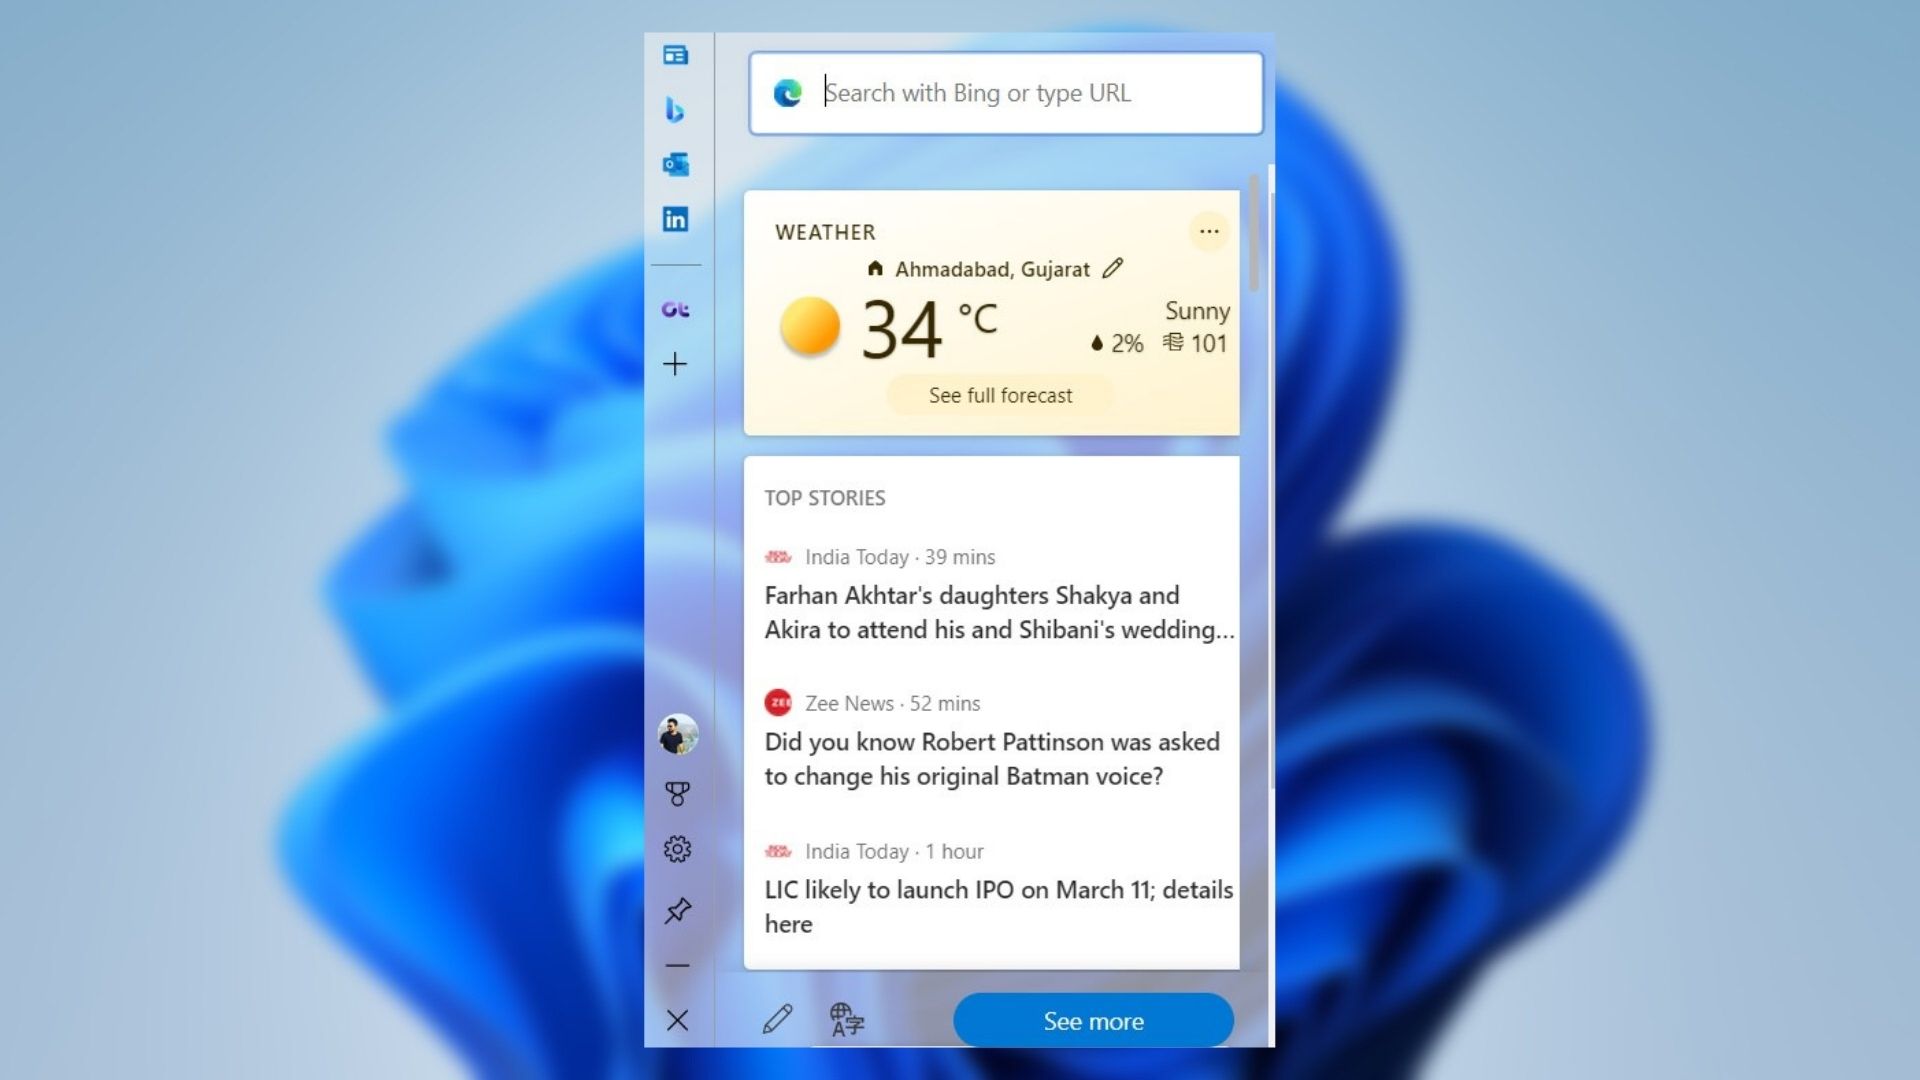
The most visible Copilot element in Edge is by far the button that sits in the top-right corner of the browser. Removing it won’t disable Copilot itself, but it prevents you from accidentally clicking on it, which is how most users end up there.
Step 1. In Microsoft Edge, click on the three-dot icon (⋯) in the top-right corner, then select “Settings.”
Step 2. Search for “Sidebar” in the text field on the left.
Step 3. Select “Copilot and sidebar” from the results.

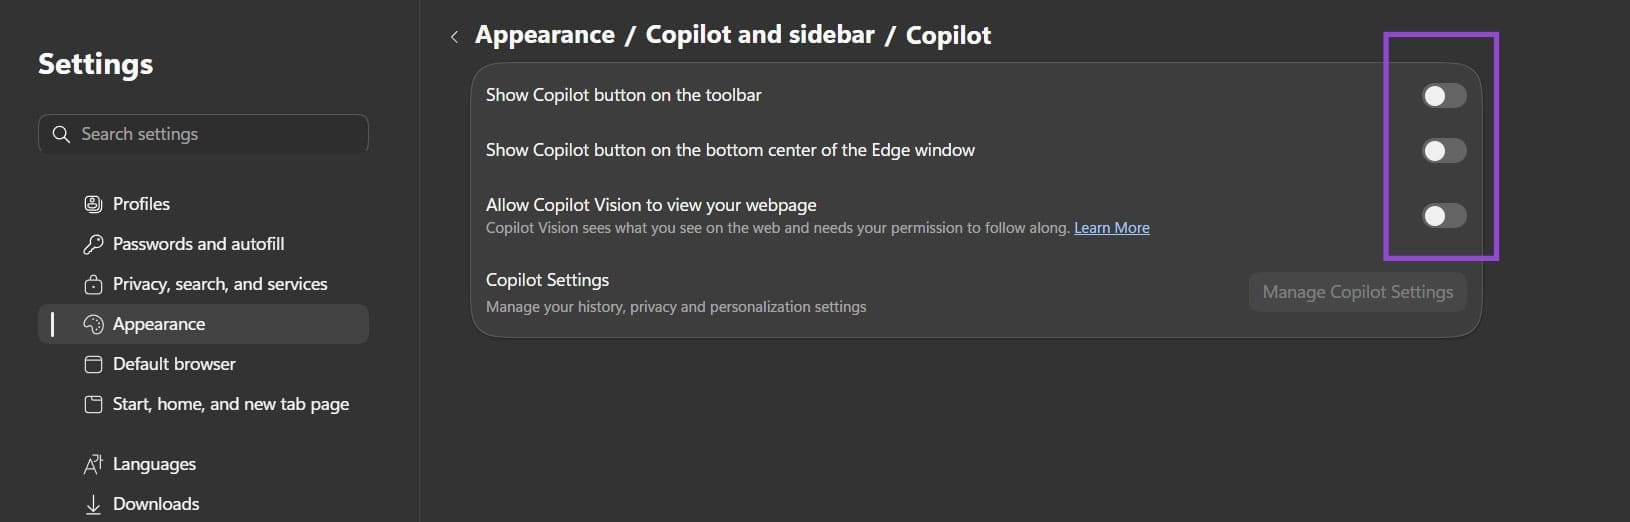
Step 4. Go to the “Copilot” option in the menu (under “App-specific settings”).
Alternative: You can also right-click the Copilot button in the toolbar directly and select “Hide Copilot” to directly get to the settings.
Step 5. Disable all toggles in those settings.
Option 2 – Disable Copilot AI Features in Privacy Settings
Some AI controls in Edge are housed in the sidebar itself via the Privacy settings. These usually run in the background, optimizing the search and providing suggestions based on your results. Here’s how to disable all Copilot AI features in this case.
Step 1. Go to “Settings” and search for “Copilot.”
Step 2. In “Copilot settings,” go to “Manage Copilot Settings.”

Step 3. The sidebar will open. Click on “Privacy.”
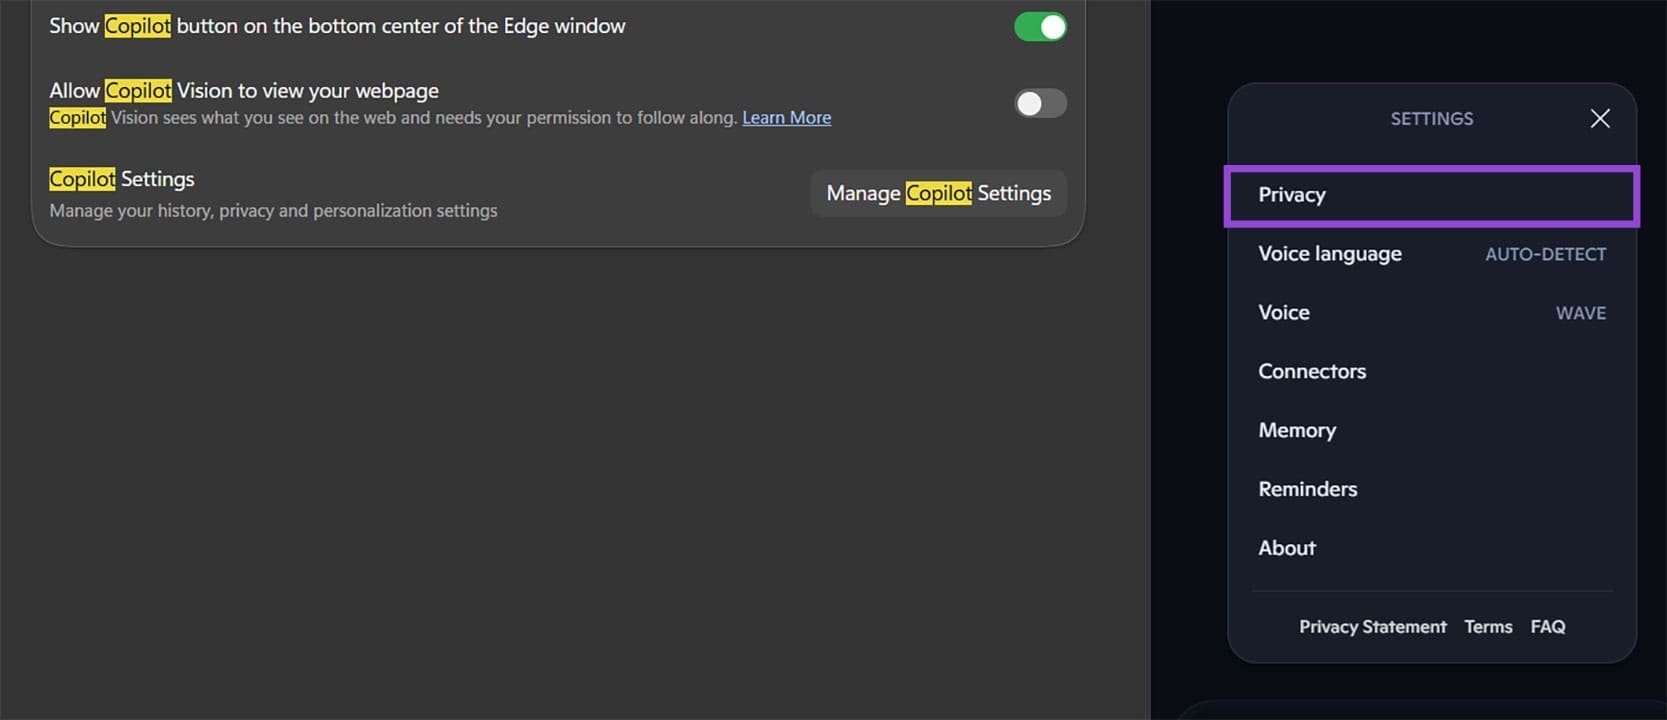
Step 4. In the new menu, disable all toggles that show up.

Additionally, you can click on the “Delete data” button to remove all browsing data from being used by Copilot.
Option 3 – Disable Copilot New Tab Page
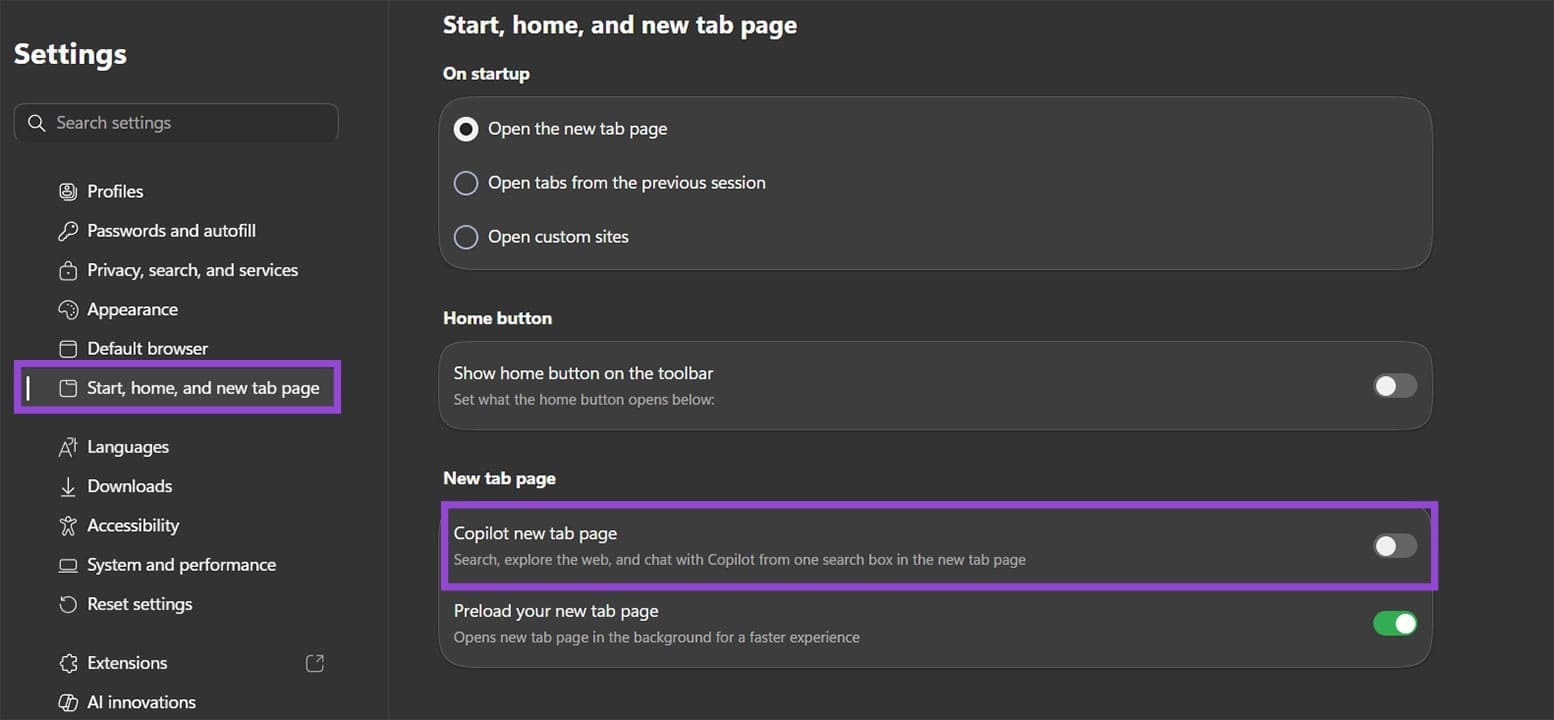
Copilot can also be used as a “default search engine” to redirect your new tab page to the AI chatbot. This can also be turned off.
Step 1. Open “Settings” and go to Start > Home > New tab page.
Step 2. Toggle off “Copilot new tab page.”
Option 4 – Block Copilot via Group Policy or Registry (for Advanced Users)
If you want a more permanent fix, or you’re managing Edge across multiple machines, you can disable Copilot entirely through Windows Group Policy or the Registry Editor. This prevents the feature from being re-enabled through standard settings. We’ll use the Registry Editor since it’s simpler to implement on a single device and is available on Windows Home.
Step 1. Press “Win + R,” type “regedit,” then hit “Enter” to open the Registry Editor.
Step 2. Go to the following address (you can enter it in the search bar):
HKEY_LOCAL_MACHINE\SOFTWARE\Policies\Microsoft\Edge
Step 3. If the “Edge” key doesn’t exist, right-click on the “Microsoft” folder, select “New,” then choose “Key,” and name it “Edge.”
Step 4. Inside the Edge key, right-click and add a “DWORD (32-bit) Value.” Name it “HubsSidebarEnabled” and set its value to “0.”
Step 5. Create a second DWORD named “CopilotPageContext” and set it to “0” as well.
Step 6. Restart Edge for the changes to take effect. With these registry values in place, the Copilot sidebar will be locked off and won’t be accessible through normal Settings.
Note that editing the registry incorrectly can cause system issues. If you’re not comfortable with this step, sticking with the options above is the safer approach.
Was this helpful?
Last updated on 16 April, 2026
Read Next
 How to Remove Copilot and Disable Other AI Features on Windows 11
AI is an increasingly prominent part of modern life, and it’s becoming a bigger feature on computers and other devices, too.
How to Remove Copilot and Disable Other AI Features on Windows 11
AI is an increasingly prominent part of modern life, and it’s becoming a bigger feature on computers and other devices, too.
 How to Remove Copilot From Microsoft Edge
Method 1.
How to Remove Copilot From Microsoft Edge
Method 1.
 How to Use Copilot in Edge Browser
There are many great features in Microsoft’s Edge browser, not least of which is the integration of Microsoft’s AI chatbot, Copilot.
How to Use Copilot in Edge Browser
There are many great features in Microsoft’s Edge browser, not least of which is the integration of Microsoft’s AI chatbot, Copilot.
 Copilot Not Working in Edge – 6 Easy Fixes
The Copilot sidebar in Microsoft Edge is a handy way to ask questions, perform tasks, and get assistance in a jiffy.
Copilot Not Working in Edge – 6 Easy Fixes
The Copilot sidebar in Microsoft Edge is a handy way to ask questions, perform tasks, and get assistance in a jiffy.
 Tired of the AI Assistance? Here’s How to Disable Copilot in Office 365
Copilot is an AI assistant that comes as standard in most Microsoft 365 subscriptions.
Tired of the AI Assistance? Here’s How to Disable Copilot in Office 365
Copilot is an AI assistant that comes as standard in most Microsoft 365 subscriptions.
 6 Cool Things You Can Do with Telegram’s New Microsoft Copilot AI Bot
Telegram's latest addition is the integration of Microsoft’s Copilot AI bot.
6 Cool Things You Can Do with Telegram’s New Microsoft Copilot AI Bot
Telegram's latest addition is the integration of Microsoft’s Copilot AI bot.
 Three Ways You Can Get More Accurate Responses From Microsoft Copilot
We love Microsoft Copilot but there’s also an uncomfortable truth you’ve probably seen yourself – it doesn’t always give the best results to prompts.
Three Ways You Can Get More Accurate Responses From Microsoft Copilot
We love Microsoft Copilot but there’s also an uncomfortable truth you’ve probably seen yourself – it doesn’t always give the best results to prompts.
 How to Use the Edge Bar in Microsoft Edge on Windows 11
How to Enable Edge Bar in Microsoft Edge Step 1: Launch Microsoft Edge on your PC > click the three-dot menu icon at the top right > select Settings.
How to Use the Edge Bar in Microsoft Edge on Windows 11
How to Enable Edge Bar in Microsoft Edge Step 1: Launch Microsoft Edge on your PC > click the three-dot menu icon at the top right > select Settings.
The article above may contain affiliate links which help support Guiding Tech. The content remains unbiased and authentic and will never affect our editorial integrity.

