Notepad has a well-established reputation of being a no-frills, no-fuss, and no-format program, which strips back everything but the basics. With Windows 11, this has all changed, combining it with many of the best features of the now-defunct WordPad. There are tabs, Copilot assistance, and, most recently, there’s the ability to make tables. In this article, we’ll be looking at how to create tables in Windows 11 Notepad.
Adding the Tables
As of version 11.2510.6.0, Notepad now has the ability to create and insert tables. Notepad has always been low-tech, so users might be confused as to why it needs it in the first place. Regardless of whether you need it or not, it’s good to know that when it comes to creating tables, Notepad is there, and you can make it work for you.
Create Tables in Windows 11 Notepad Easily
If you’re familiar with inserting a table in Microsoft Word, the process is much the same in Notepad. Let’s take a look at how to create a Notepad table in two ways:
Add via the Context Menu
A quick right-click will have your table inserted in no time:
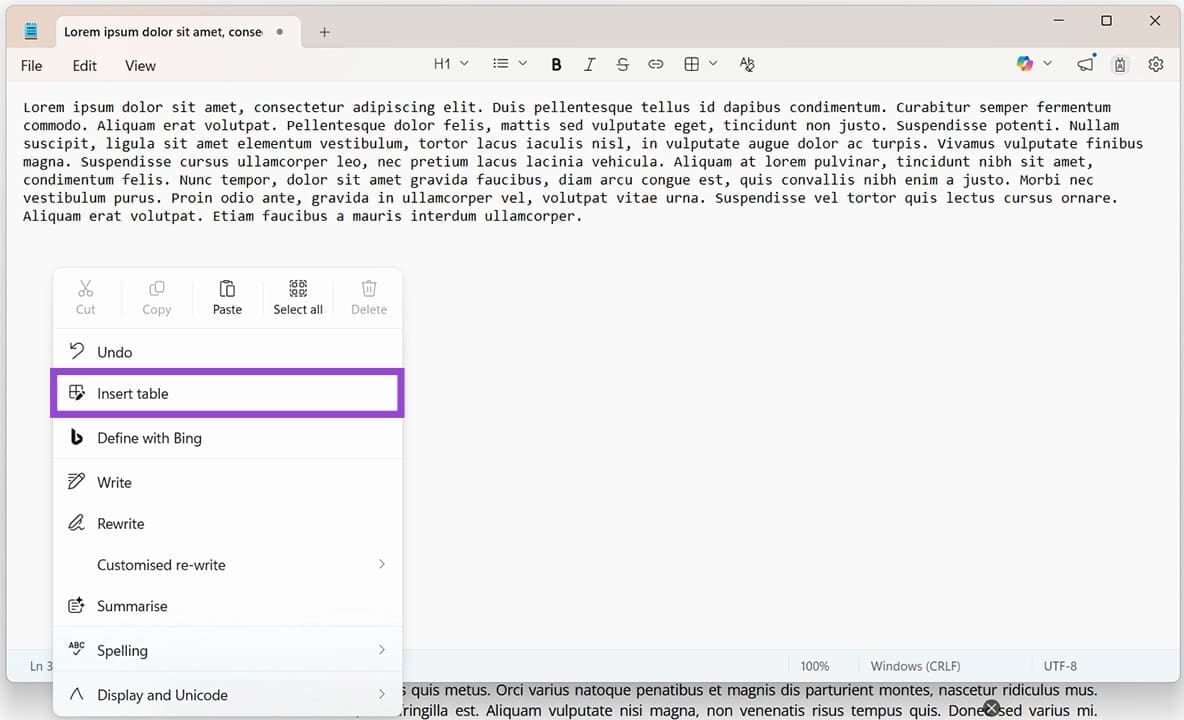
Step 1. Right-click anywhere in the main Notepad window to open the menu.
Step 2. Click “Insert table” in the context menu that pops up.
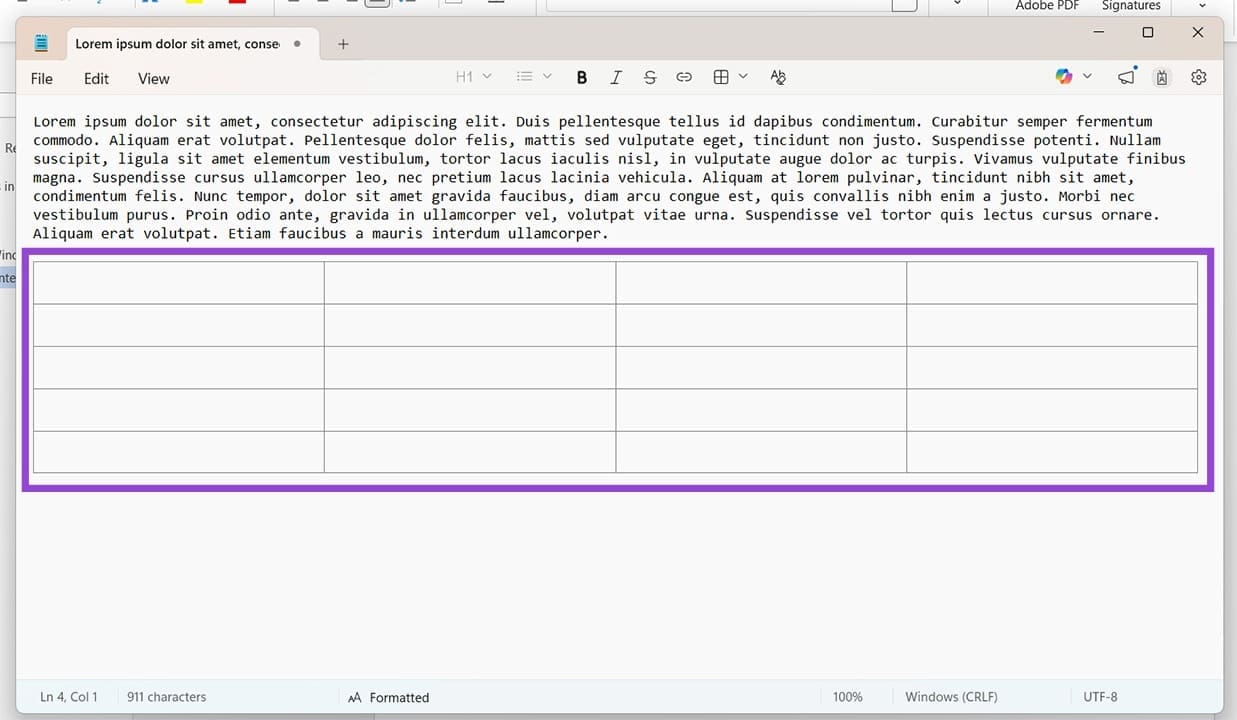
Step 3. Choose the number of rows and columns you require and click the “Insert” button once done.
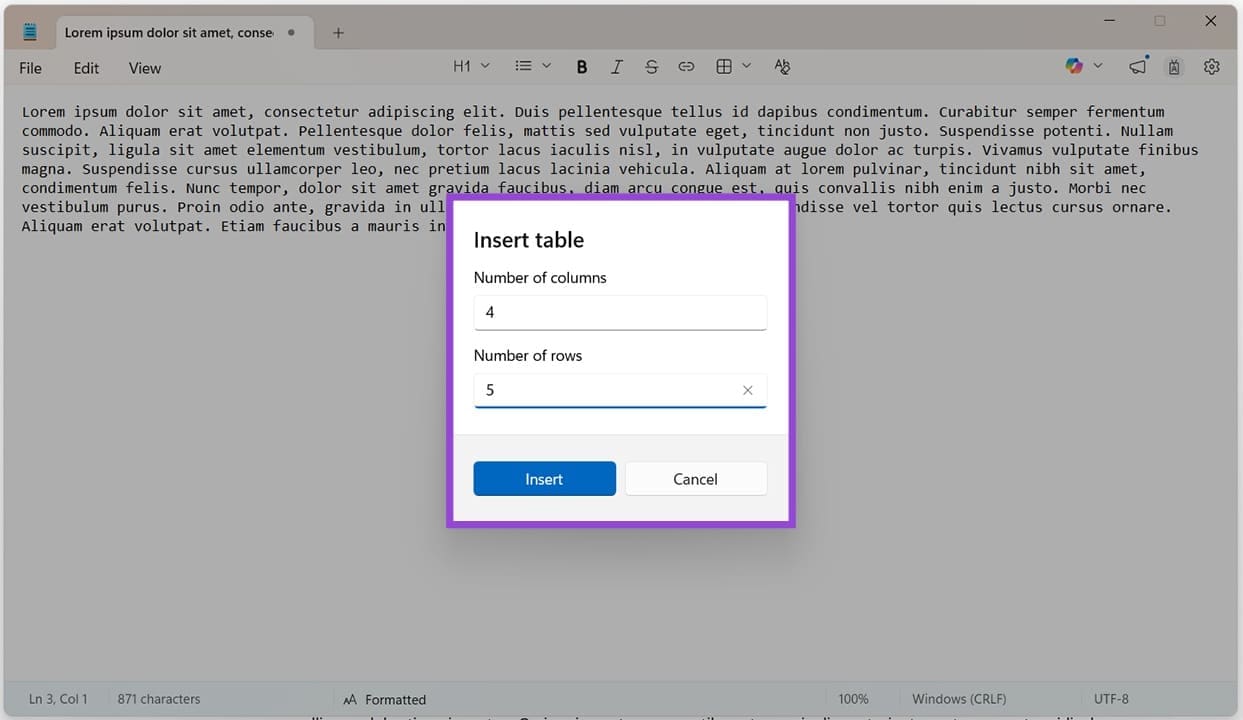
Step 4. Your table will then be inserted.
Insert via the Top Menu
Notepad now comes with a table insert in the top menu. Like Word, it’s easy to use:
Step 1. Click the Table Icon in the top menu.
Step 2. In the dropdown menu that appears, drag your mouse over the number of rows and columns you want your table to have.
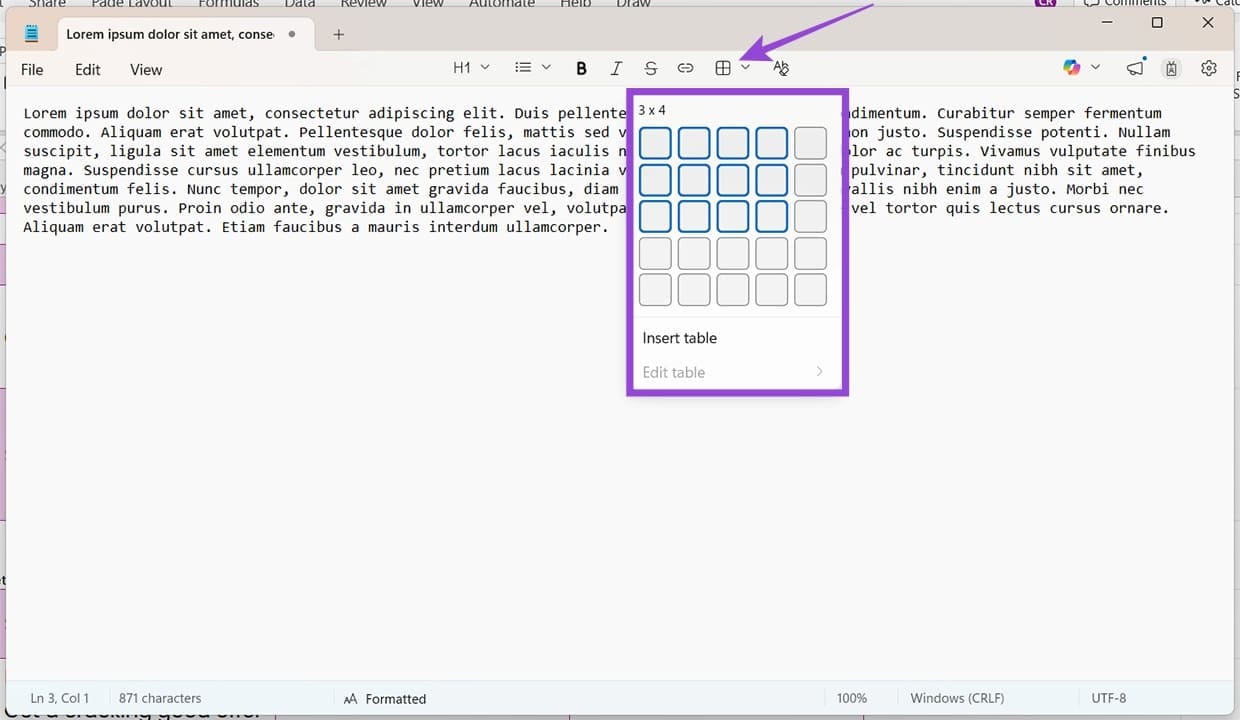
Step 3. Left-click once done, and the table will be inserted.
Edit Tables in Notepad
Besides being able to create tables, Notepad also allows you to edit them. This can be done via the top menu and the context menu:
Via the Top Menu
Here’s how the top menu works:
Step 1. Click anywhere inside your table and click the Table icon in the top menu.
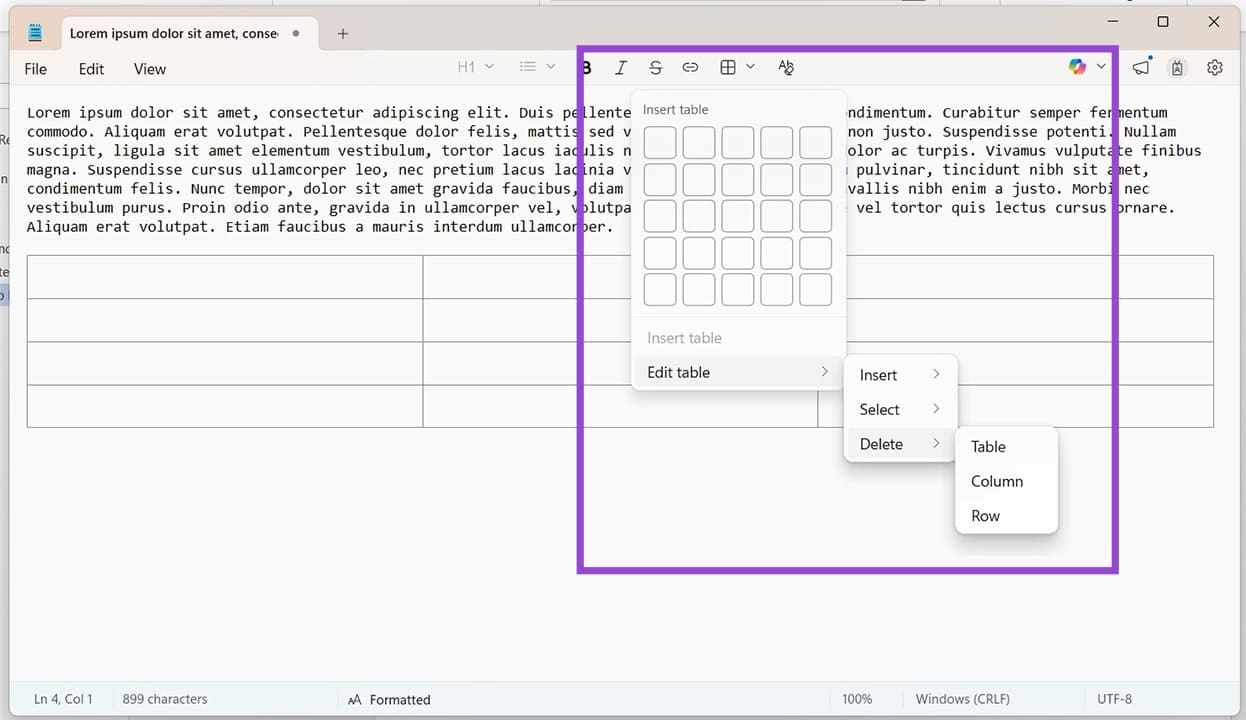
Step 2. From the dropdown menu, you can choose to “Insert” rows and columns above and below, or left and right, respectively.
Step 3. “Select” will allow you to highlight a whole row, column, or the entire table itself.
Step 4. “Delete” offers you the choice of removing a row, column, or the whole table.
Via the Context Menu
While the options for editing the table in the context menu are the same as above, the means of accessing them are different:
Step 1. Right-click on your inserted table.
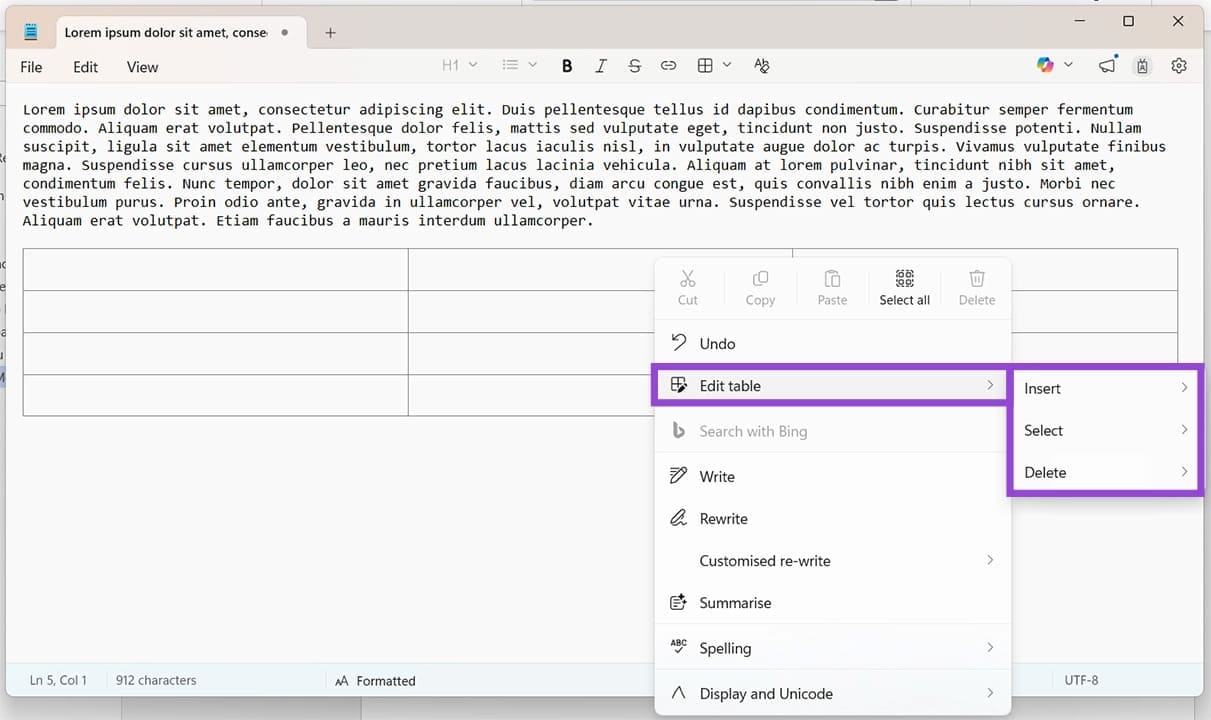
Step 2. Choose “Edit table” from the dropdown menu and choose from the three options.
Was this helpful?
Last updated on 10 April, 2026
Read Next
 How to Create and Customize Tables in Canva
How to Make a Table Using Elements in Canva Canva makes it easy to create a table with different cell sizes and customize it to suit your needs.
How to Create and Customize Tables in Canva
How to Make a Table Using Elements in Canva Canva makes it easy to create a table with different cell sizes and customize it to suit your needs.
 How to Make Excel Tables With Multiple Header Rows Easier to Use
Sometimes we complicate our lives, and that includes Excel spreadsheets.
How to Make Excel Tables With Multiple Header Rows Easier to Use
Sometimes we complicate our lives, and that includes Excel spreadsheets.
 3 Ways to Format Tables in Google Sheets
Method 1.
3 Ways to Format Tables in Google Sheets
Method 1.
 How to Fix Notepad Missing Issue in Windows 11/10
Method 1: Install Notepad From Optional Features Microsoft has made Notepad an optional feature.
How to Fix Notepad Missing Issue in Windows 11/10
Method 1: Install Notepad From Optional Features Microsoft has made Notepad an optional feature.
 4 Ways to Fix Notepad Not Opening on Windows 11
Basic Fixes Restart PC: Press the Windows + X shortcut to open the Power User Menu.
4 Ways to Fix Notepad Not Opening on Windows 11
Basic Fixes Restart PC: Press the Windows + X shortcut to open the Power User Menu.
 How to Get Classic Notepad Back in Windows 11
Windows 11 has brought with it many changes, and one such example is to the Microsoft staple, Notepad.
How to Get Classic Notepad Back in Windows 11
Windows 11 has brought with it many changes, and one such example is to the Microsoft staple, Notepad.
 How to Disable the Pin Tab in Notepad++
When the minds behind the open-source Notepad++ released version 8.7.2 of the software, they snuck in an interesting feature.
How to Disable the Pin Tab in Notepad++
When the minds behind the open-source Notepad++ released version 8.7.2 of the software, they snuck in an interesting feature.
 How to Get Back the Old Notepad Without AI Features
In March 2025, Microsoft decided to roll out new AI features in an updated version of the classic Notepad app.
How to Get Back the Old Notepad Without AI Features
In March 2025, Microsoft decided to roll out new AI features in an updated version of the classic Notepad app.
The article above may contain affiliate links which help support Guiding Tech. The content remains unbiased and authentic and will never affect our editorial integrity.