Are you tired of seeing the same old theme on your Windows PC? Do you want to change it and give a new look to your computer? Well, lucky for you, changing themes in Windows 11 is a cakewalk.
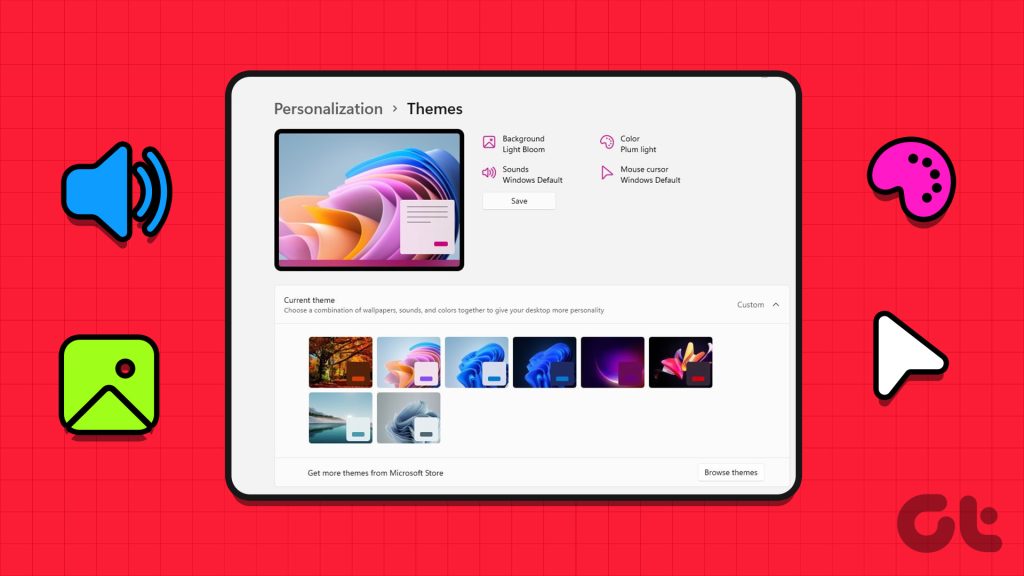
Whether you want a basic or artistic look, there are multiple ways to add a theme to your system. In this article, we’ll explore four ways to change the theme in Windows 11. So, let’s begin.
1. Using the Settings App
The quickest way to change a theme in Windows 11 is by utilizing the Settings app. All you need to do is access the Themes option in the Settings app and choose a theme. Let’s check out these steps in more detail:
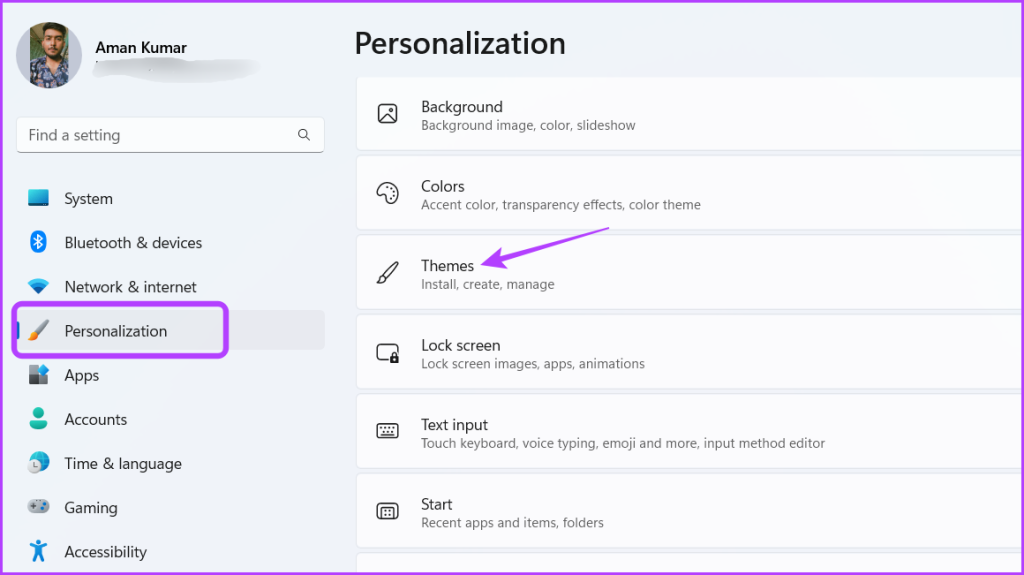
Step 1: Press the Windows + I keyboard shortcut to open the Settings app.
Step 2: Choose Personalization from the left sidebar and Themes from the right pane.
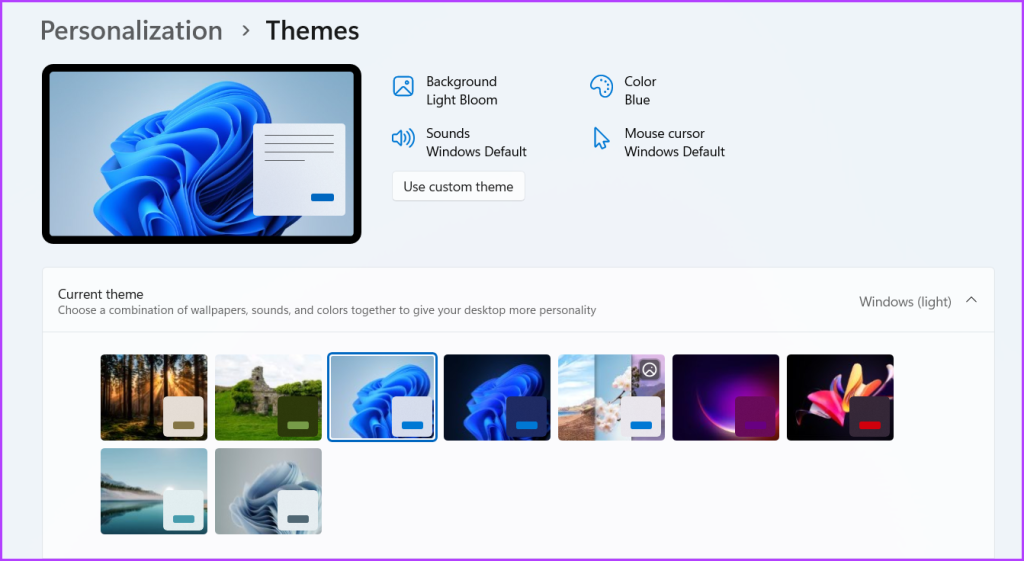
Step 3: In the Current theme section, you’ll see all the installed themes. Click on the theme of your choice to apply it.
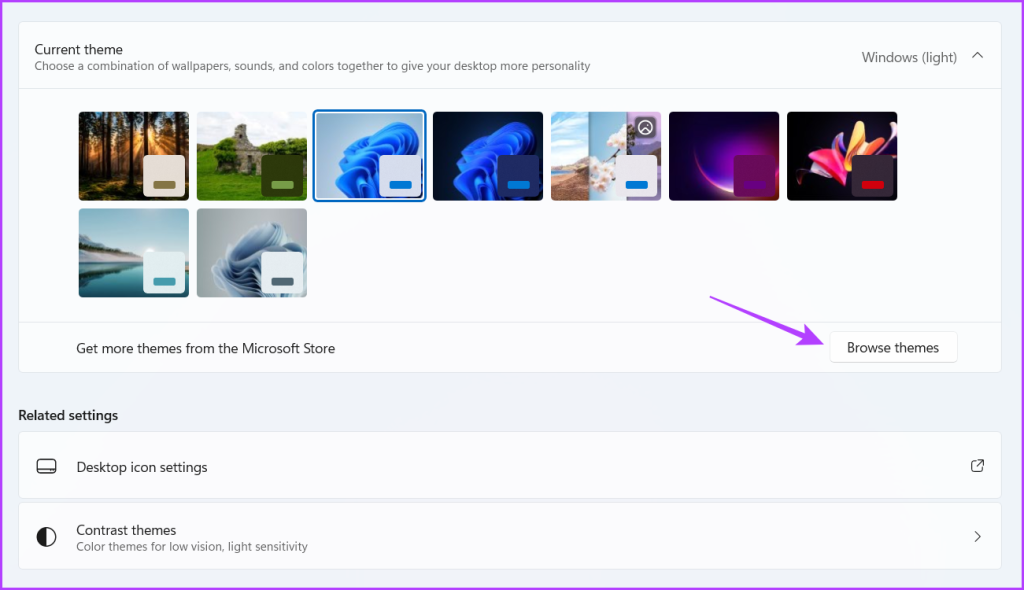
You can click on the Browse themes button to get new themes. Clicking that button will redirect you to the Microsoft Store, where you can download some cool Windows themes.
2. Using the Control Panel
The older version of Windows had a dedicated section in the Control Panel to change themes. However, Microsoft hid this option in Windows 11.
But there’s a way to access this section and change your system theme. Here’s how to access the old personalization section of the Control Panel and use it to change the theme in Windows 11.
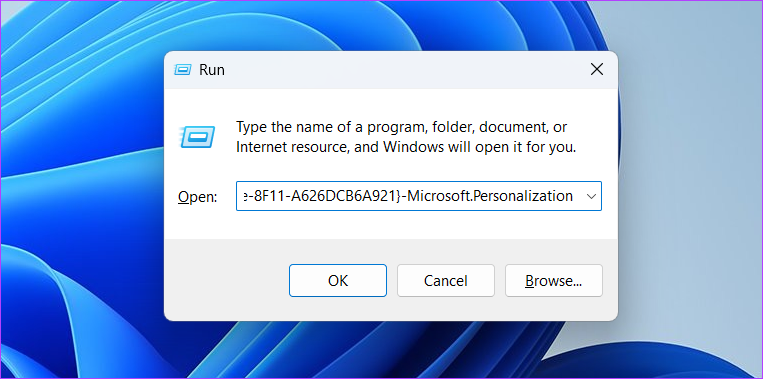
Step 1: Press the Windows + R keyboard shortcut to open the Run tool.
Step 2: Type the following command in the search bar and press Enter.
shell:::{ED834ED6-4B5A-4bfe-8F11-A626DCB6A921}-Microsoft.Personalization
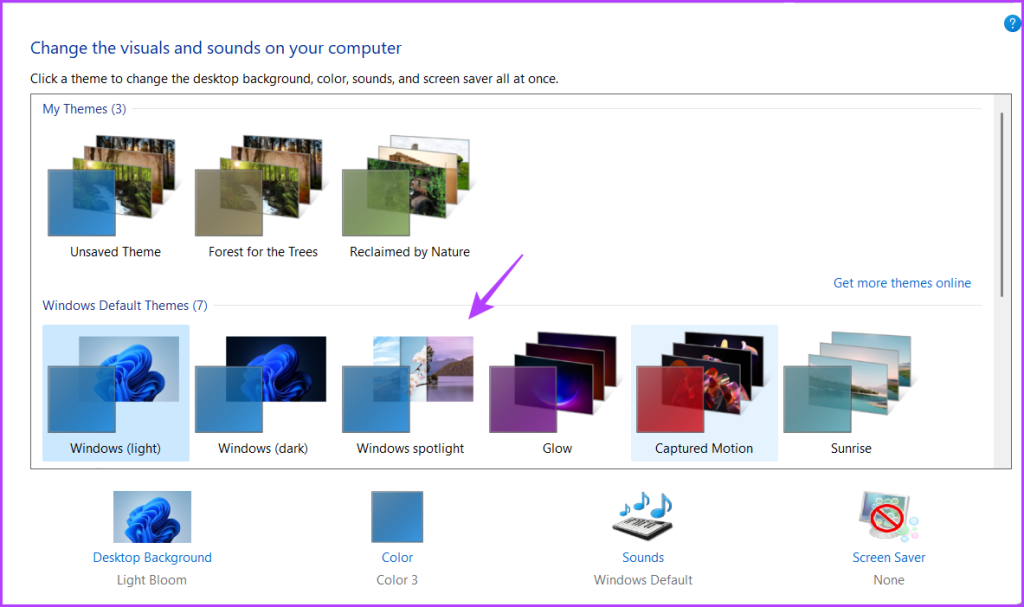
You can see all the available themes in the Personalization window. To install a theme, click on it.
3. Using File Explorer
The Microsoft Store is the go-to place to get new Windows themes. Installing the downloaded theme is via the Settings app (shown in method 1).
However, if the Settings app is not opening or working, you can use File Explorer to install the themes downloaded from the Microsoft Store. Here’s how:
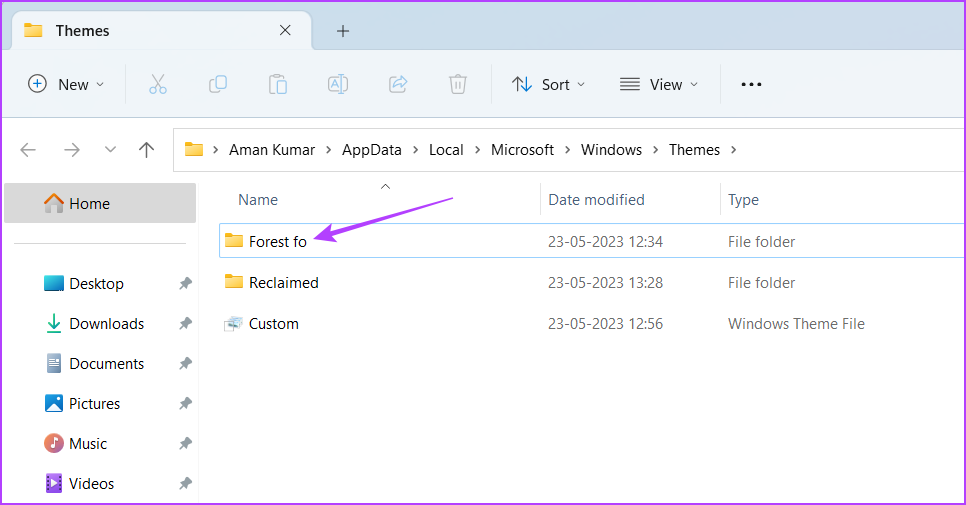
Step 1: Open the Run tool, paste the following command, and press Enter.
%LocalAppData%\Microsoft\Windows\Themes

Step 2: Open the downloaded theme’s folder.
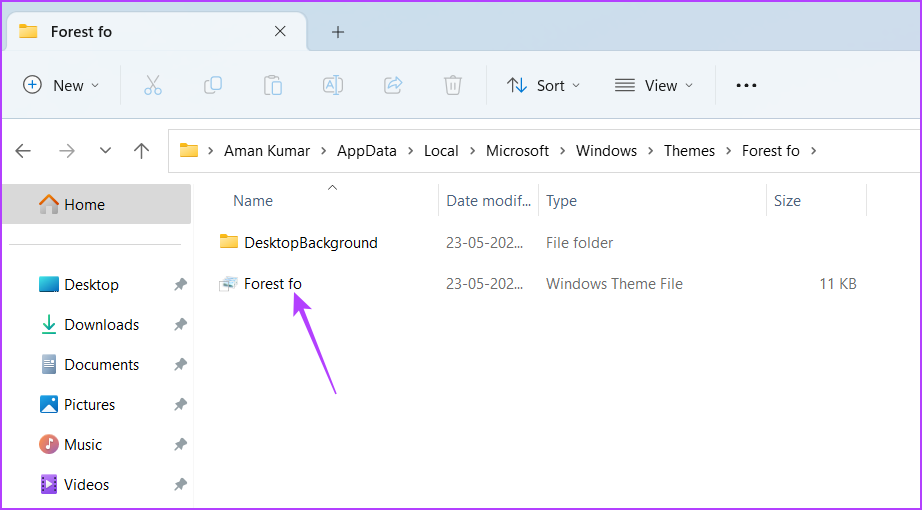
Step 3: Double-click on the .theme file to install that theme.
4. Using Command-Line Tools
Command line tools like Command Prompt and Windows PowerShell can also help you change the theme in Windows 11. However, to use these tools, you must have the location of the theme you want to install. So, first, let’s check out how to find the location of Windows themes.
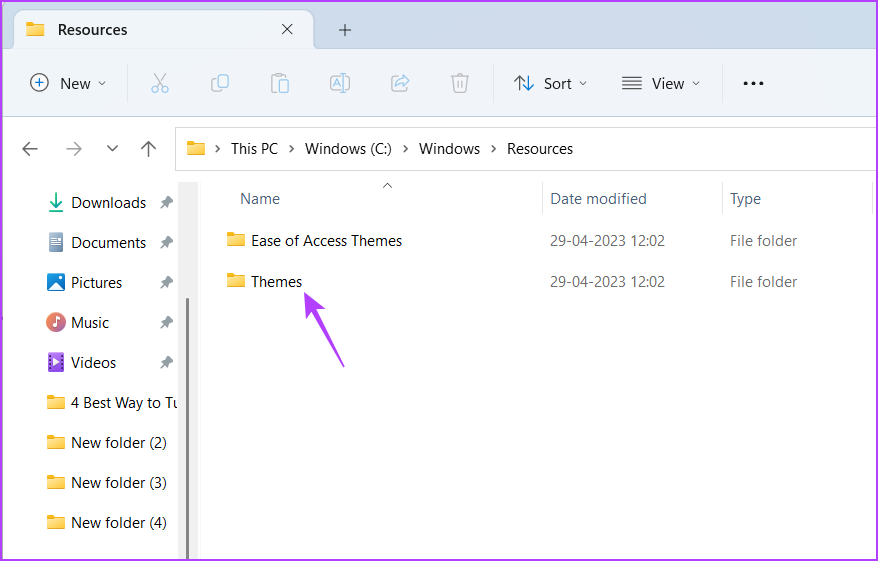
Step 1: Press the Windows + E keyboard shortcut to open the File Explorer.
Step 2: Open the drive in which you’ve installed the OS. It’s usually C drive for most users.

Step 3: Open the Windows folder.

Step 4: Open the Resources folder.

Step 5: Double-click on the Themes folder.
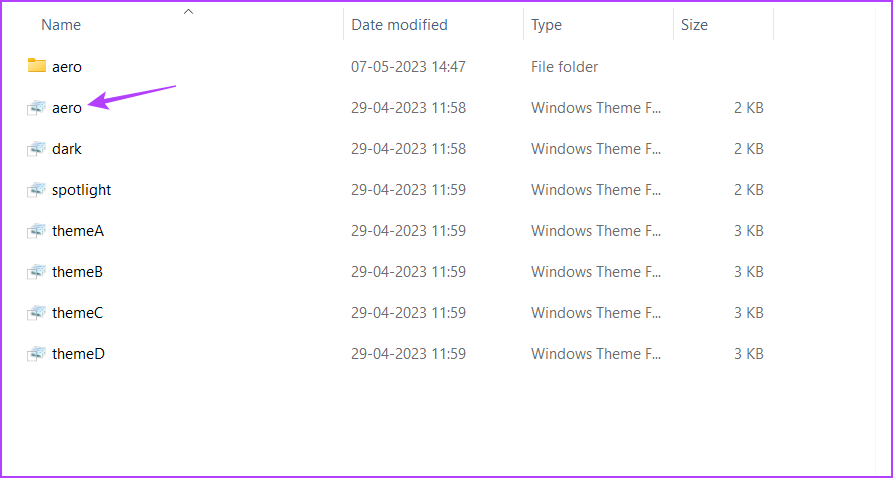
Step 6: Click the address bar and press the Ctrl + C keyboard shortcut to copy the location of the Themes folder.
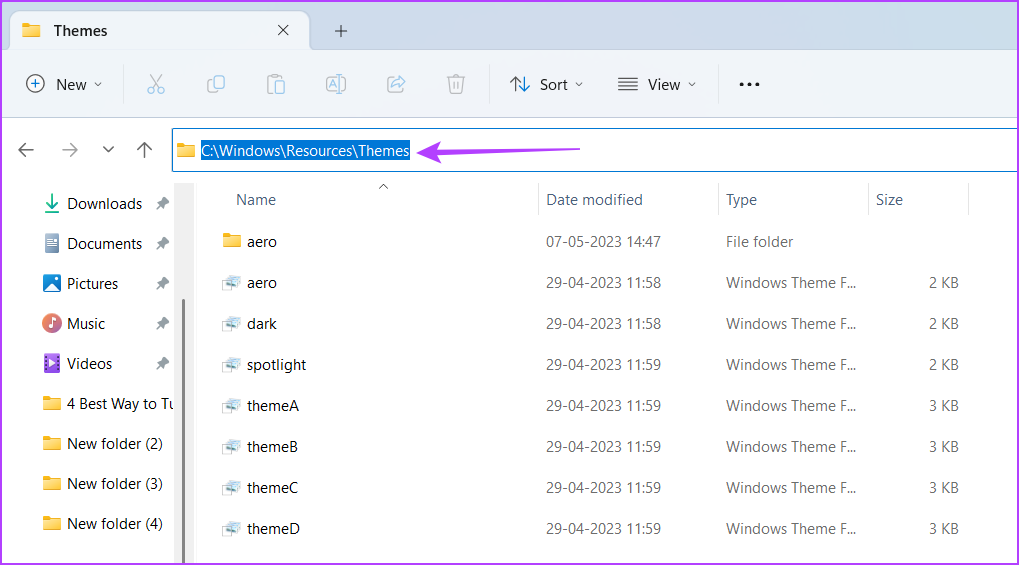
Also, note the name of the theme you want to apply from the available options.
After you have the folder location and the name of the theme, you’re all set to change themes using the Command-line tool. Here’s how to do it using Command Prompt:
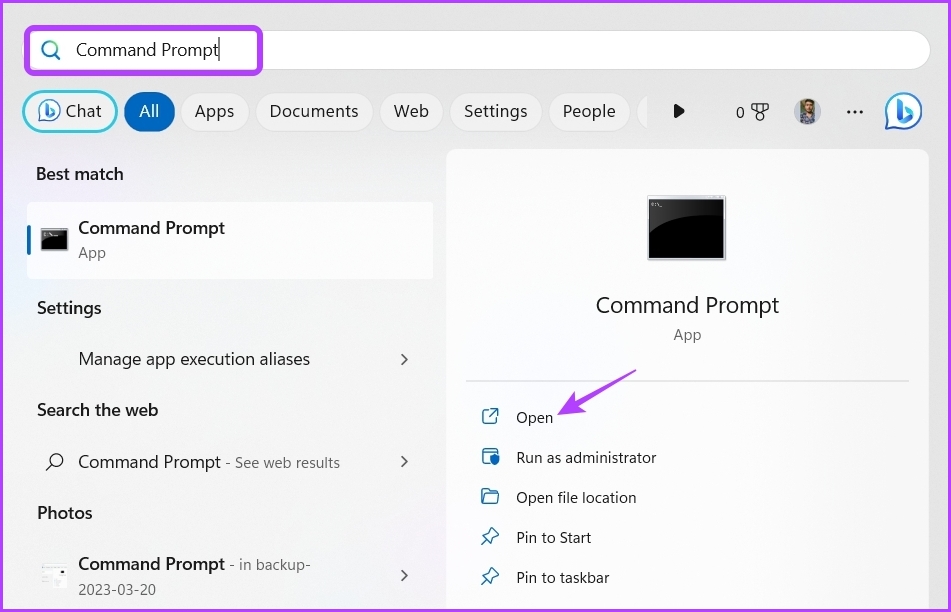
Step 1: Open the Start Menu, type Command Prompt in the search bar, and choose Run as administrator from the right pane.
Step 2: In the elevated Command Prompt window, paste the copied location of the Themes folder followed by the theme name you want to apply. For instance, if you want to apply the spotlight theme, the command will look like this:
C:\Windows\Resources\Themes\spotlight.theme
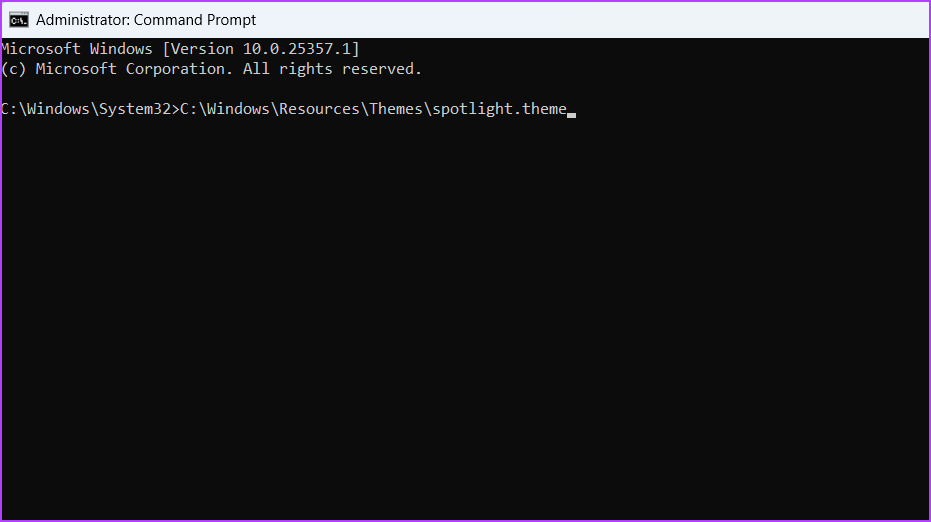
Step 3: Press Enter to execute the command.
To change themes using Windows PowerShell, follow these steps:
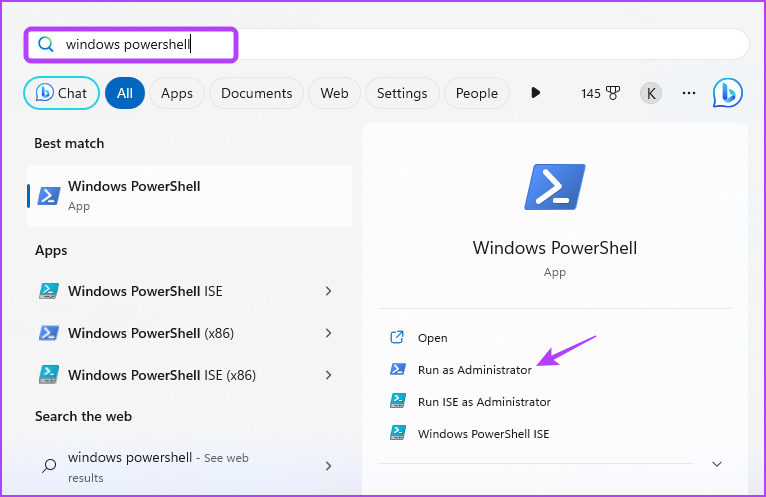
Step 1: Open the Start Menu, type Windows PowerShell, and choose Run as administrator from the right pane.
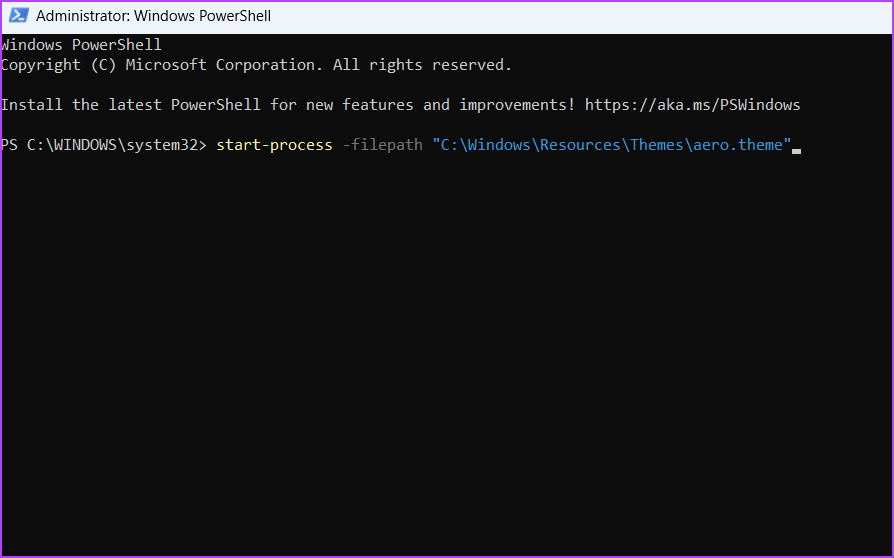
Step 2: In the elevated Command Prompt window, paste the following command and press Enter to apply the theme. Make sure to replace ThemeName with the name of your theme.
start-process -filepath "C:\Windows\Resources\Themes\ThemeName.theme"
Personalize Your Computer
Windows 11 comes with various personalization options, including the ability to change themes. You can change the theme to give a completely new to your system. There are multiple ways to change themes in Windows 11, and you can check them in the above methods.
Was this helpful?
Last updated on 29 May, 2023
Read Next
 How to Change or Remove Themes in Facebook Messenger
Things to Know About Messenger Chat Themes Any participant in the chat can change the Messenger theme.
How to Change or Remove Themes in Facebook Messenger
Things to Know About Messenger Chat Themes Any participant in the chat can change the Messenger theme.
 How to Change Instagram Chat Themes When They’re Not Working
How to Change Instagram Chat Theme in the Correct Manner The first thing to do to fix the Instagram chat themes not showing would be to follow the correct steps
How to Change Instagram Chat Themes When They’re Not Working
How to Change Instagram Chat Theme in the Correct Manner The first thing to do to fix the Instagram chat themes not showing would be to follow the correct steps
 5 Ways to Fix Samsung Themes Not Working Issue
Fix 1: Sign Out of Your Samsung Account Once you sign out of your Samsung account, restart your device, and sign in again to check if the problem is solved.
5 Ways to Fix Samsung Themes Not Working Issue
Fix 1: Sign Out of Your Samsung Account Once you sign out of your Samsung account, restart your device, and sign in again to check if the problem is solved.
 6 Ways to Fix if Google Chrome Keeps Changing Themes
Fix 1: Disable the "Customize Chrome Color Extraction" Flag A common reason Google Chrome may keep changing themes automatically is if the "Customize Chrome Color Extraction" flag is active.
6 Ways to Fix if Google Chrome Keeps Changing Themes
Fix 1: Disable the "Customize Chrome Color Extraction" Flag A common reason Google Chrome may keep changing themes automatically is if the "Customize Chrome Color Extraction" flag is active.
 3 Ways to Change Priority Levels for Programs on Windows 10 and Windows 11
When Should You Change the Priority Level of a Program By default, Windows 11 assigns different priority levels to each process based on its importance.
3 Ways to Change Priority Levels for Programs on Windows 10 and Windows 11
When Should You Change the Priority Level of a Program By default, Windows 11 assigns different priority levels to each process based on its importance.
 4 Best Ways to Change Computer Name in Windows 10
How do you identify your Windows 10 computer for connecting to it over a network?
4 Best Ways to Change Computer Name in Windows 10
How do you identify your Windows 10 computer for connecting to it over a network?
 Top 3 Ways to Change Windows 10 Keyboard to US
When you unbox a new Windows computer, you can choose and add your preferred keyboard layout and language during set up.
Top 3 Ways to Change Windows 10 Keyboard to US
When you unbox a new Windows computer, you can choose and add your preferred keyboard layout and language during set up.
 Top 4 Ways to Change New Outlook Back to Old (Classic View) Outlook on Windows and Mac
The new Outlook app for desktop boasts a modern and simplified design, aligning it more closely with the web version of Microsoft Outlook.
Top 4 Ways to Change New Outlook Back to Old (Classic View) Outlook on Windows and Mac
The new Outlook app for desktop boasts a modern and simplified design, aligning it more closely with the web version of Microsoft Outlook.
The article above may contain affiliate links which help support Guiding Tech. The content remains unbiased and authentic and will never affect our editorial integrity.