Google Sheets is a powerful spreadsheet application that allows you to create and edit spreadsheets on the go. Among the customization options offered by Google Sheets is the ability to change the default font. This article will guide you on how to change the default font in Google Sheets.
But first, why would you want to change the default font style? Well, changing the default font in Google Sheets can improve your spreadsheet’s overall aesthetic and make it stand out.
Whether you’re creating a budget spreadsheet, a report, or a presentation, the right font can help you convey your message more effectively. With that out of the way, let’s begin with the article.
How to Temporarily Change Default Font in Google Sheet
Temporarily changing the default font in Google Sheets is easy. You must select the font option from the Google Sheets toolbar. Now, from the drop-down menu, select the font you prefer.

Mind you, this is not a permanent solution, meaning when you open a new Google Sheets document, it will always open with a default font (Arial). This method is helpful for someone who wants to work on a single document and doesn’t want to make a theme or template out of it.
However, keep reading if you want to change the default font to your preferred one permanently.
Also read: How to convert Excel Spreadsheet into a Google Sheets document.
How to Permanently Set Default Font in Google Sheets
There are multiple ways to change the default font in Google Sheets to your preferred font. We will list two prominent ways. Let’s begin.
1. Using Custom Theme Settings
Setting up a custom theme lets you incorporate your preferred settings and customization, including font, color, etc. Follow the steps below.
Step 1: Go to Google Sheets and select Blank to create a new Sheet.

Step 2: Click on Format, and from the drop-down menu, select Theme.
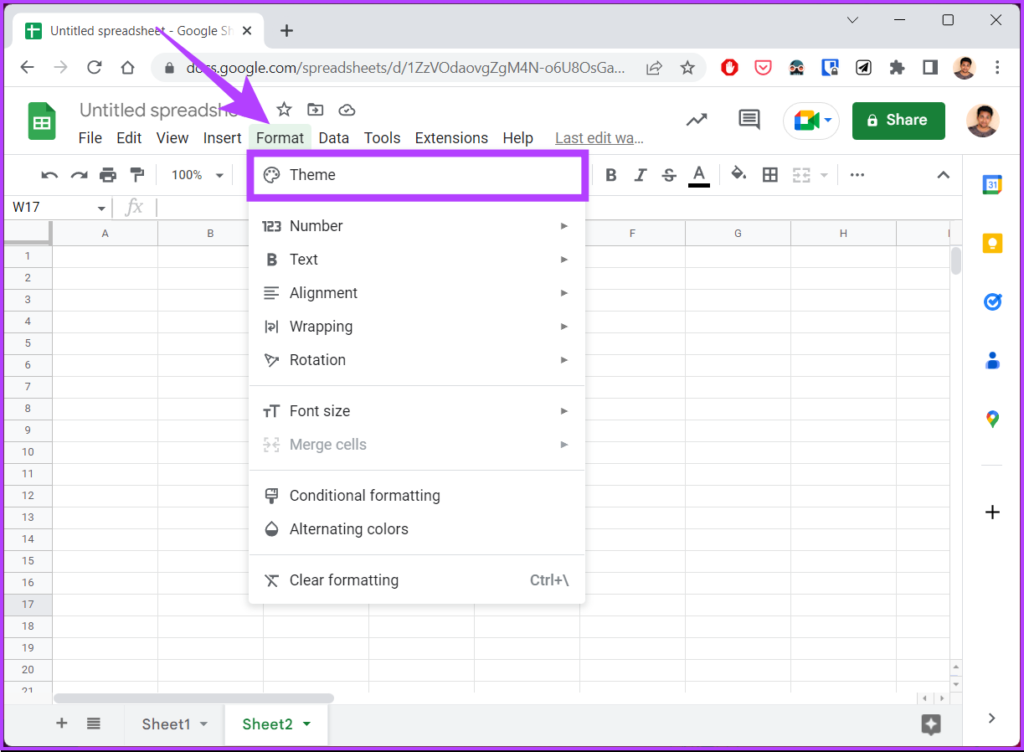
This will open the Themes side panel on the right. You will see previews for each Theme that you can quickly select and edit.
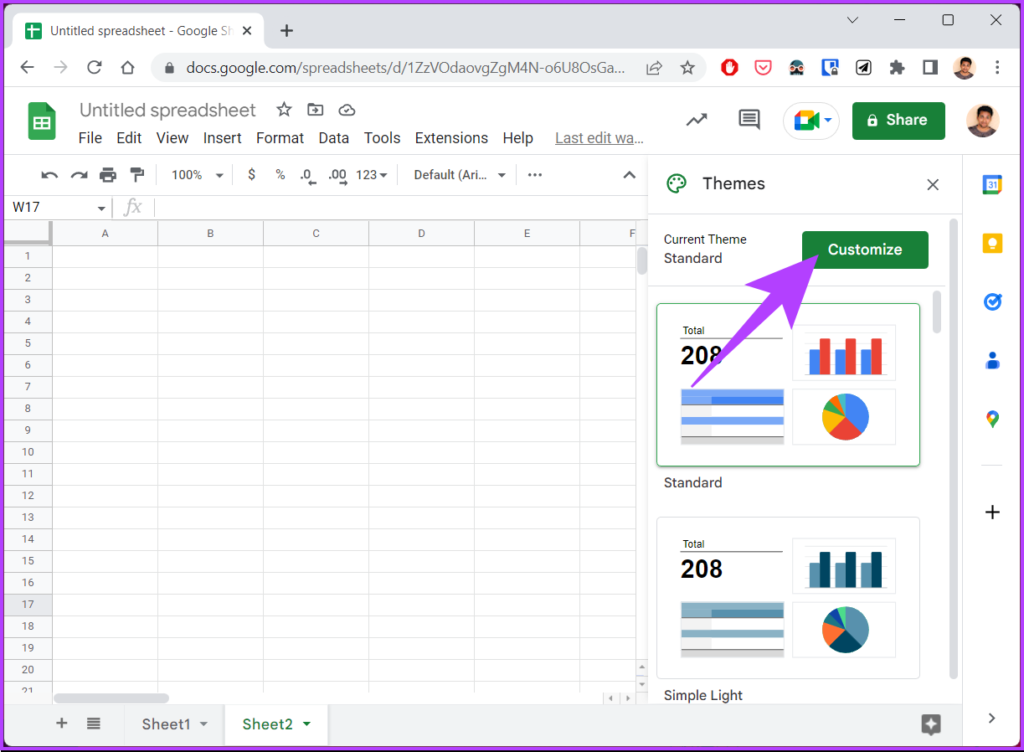
Step 3: Select the theme you want to customize and click Customize.
Step 4: Click on the Font option and select the font from the drop-down menu.

Step 5: Once selected, click Done.
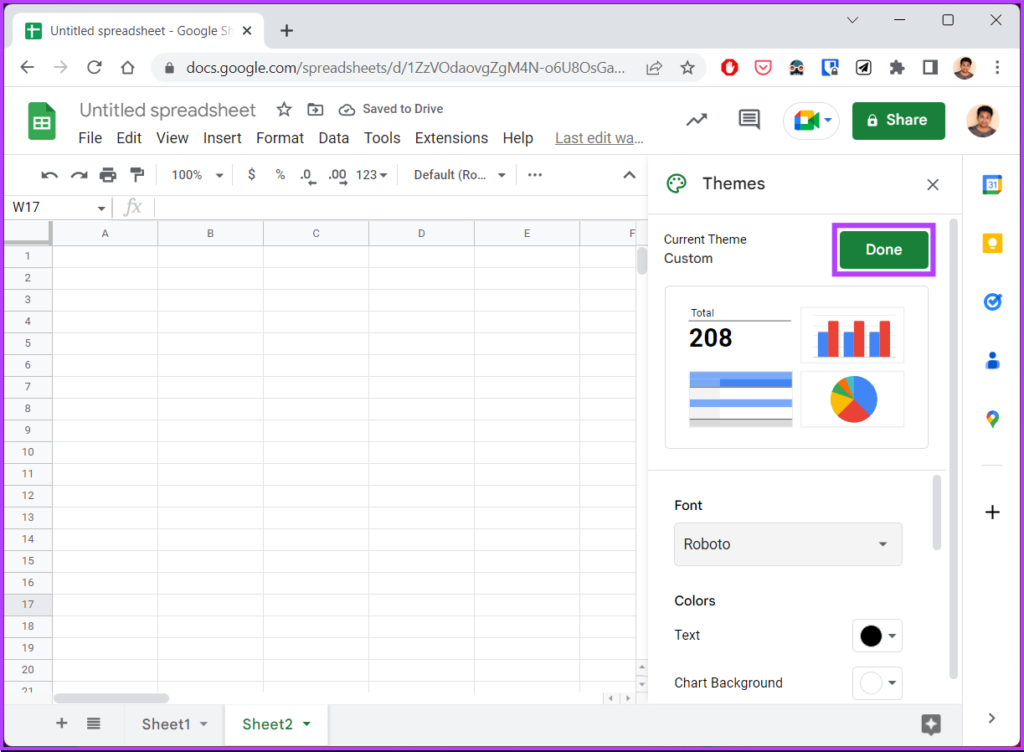
With this, the default font on the theme gets changed to your preferred font. However, this doesn’t make it a template for future documents. For that, continue reading.
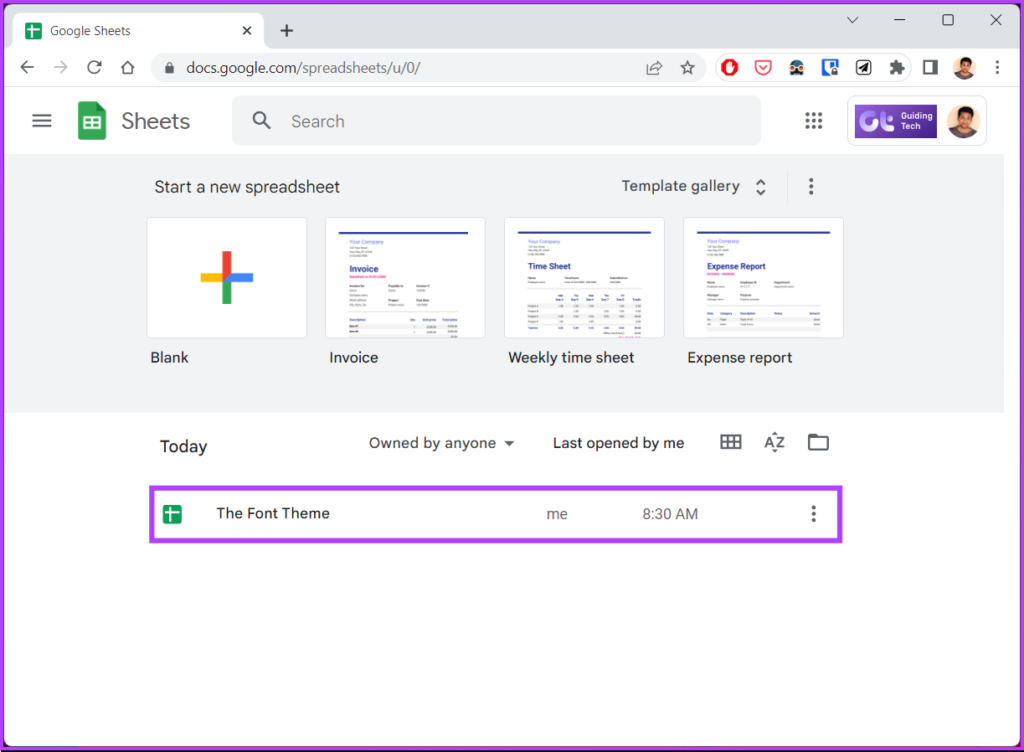
Step 6: Save this customized spreadsheet with a recognizable name, like ‘The Font Theme’, and click the Sheets home icon.

So, whenever you need to use the Sheets, open the file ‘The Font Theme’ from the Google Sheets homepage and continue with the steps below.
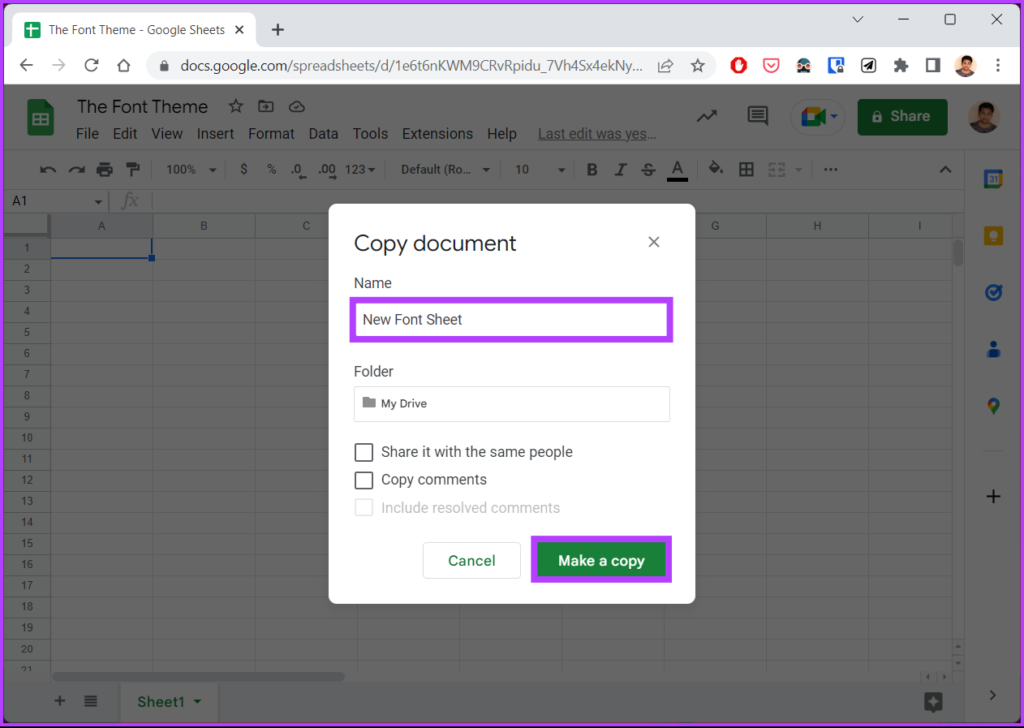
Step 7: Once opened, go to Files and select ‘make a copy’ of the document from the drop-down.

Step 8: Name the document and click the ‘Make a copy’ button.
Now, you can work on the document without changing settings. Moreover, the template document (with your settings) remains untouched for the next time. If the steps are too long to follow, move to the next method.
2. Using Apps Script
The Apps Script on Google Sheets can be used for different purposes, one of which is to set a default font. The steps may seem complicated but are simple to follow.
Step 1: Go to Google Sheets and select Blank to create a new Sheet.
Step 2: Select Extensions and choose Apps Script.

It will take you to a new window where you can edit the scripts.
Step 3: In the Script Editor, remove the existing code, if any, and type or copy the below code.
Note: We have set the font to Roboto with a font size of 14. You can change this to your preference and even set a custom range.
function onEdit(e) {
var ss = SpreadsheetApp.getActiveSheet();
var range = ss.getRangeList(["A2:E6"]);
range.setFontFamily("Roboto")
.setFontSize(14)
.setFontColor("#000000")
.setBackground("#ffffff");
}

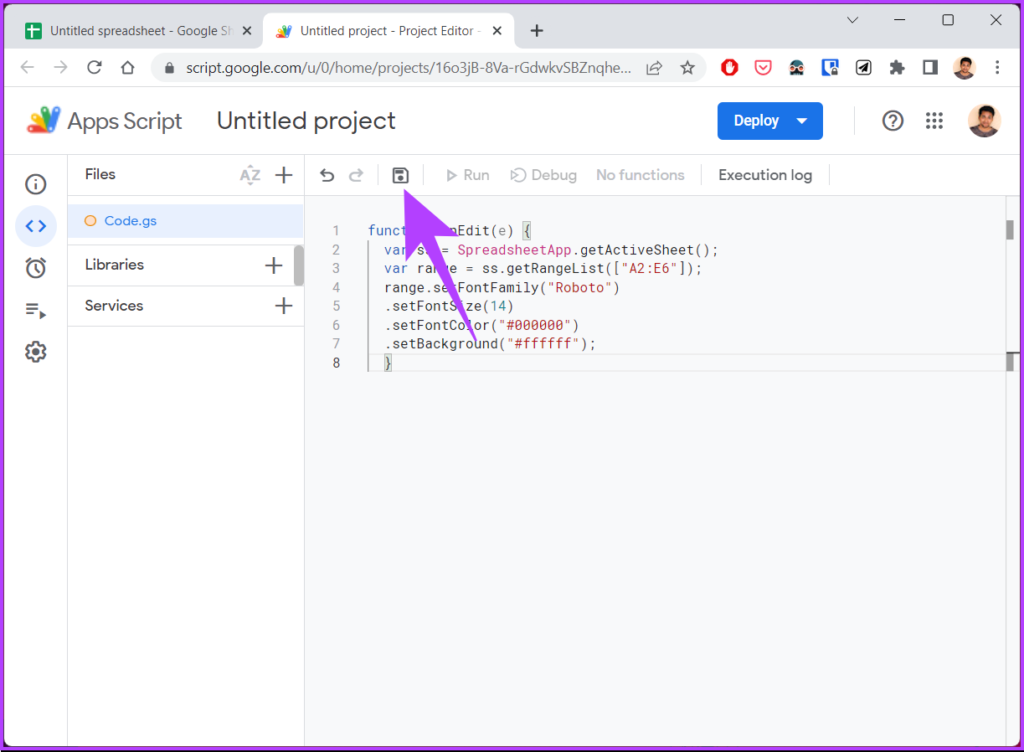
Step 4: Once you are done, click Save.
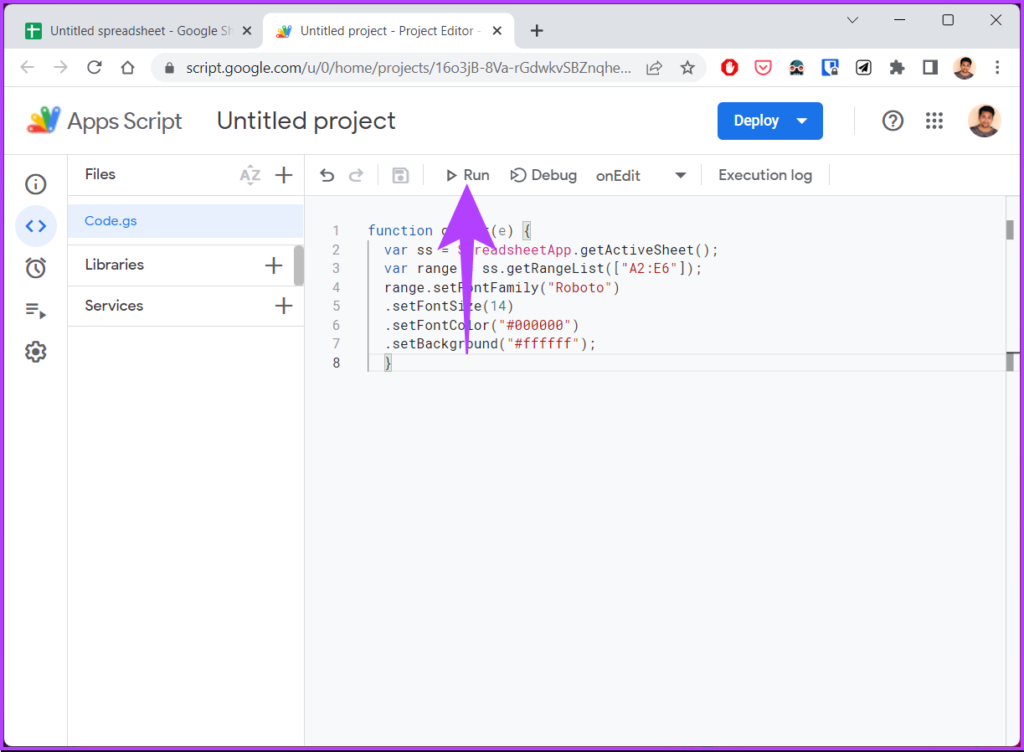
Step 5: Click Run (the play icon).
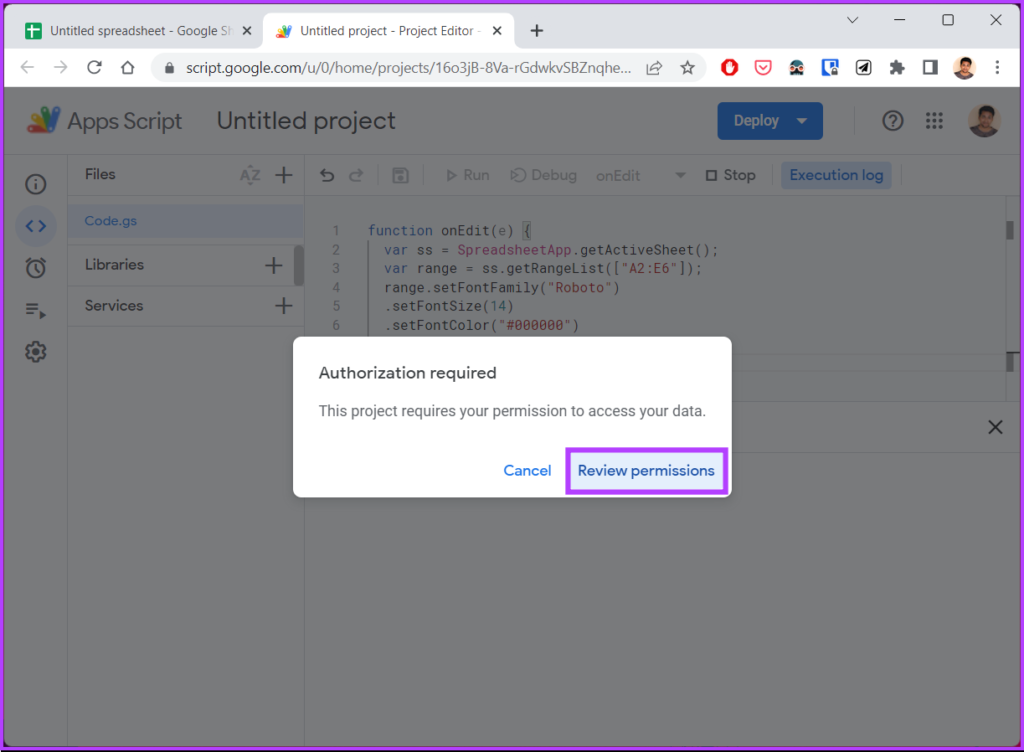
Step 5: In the Authorization required prompt, click Review permissions.
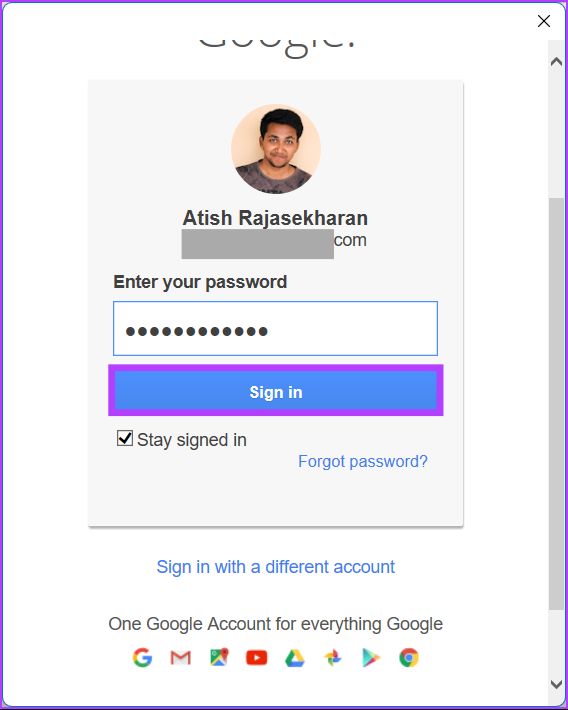
Step 6: Sign in with your Google Account.
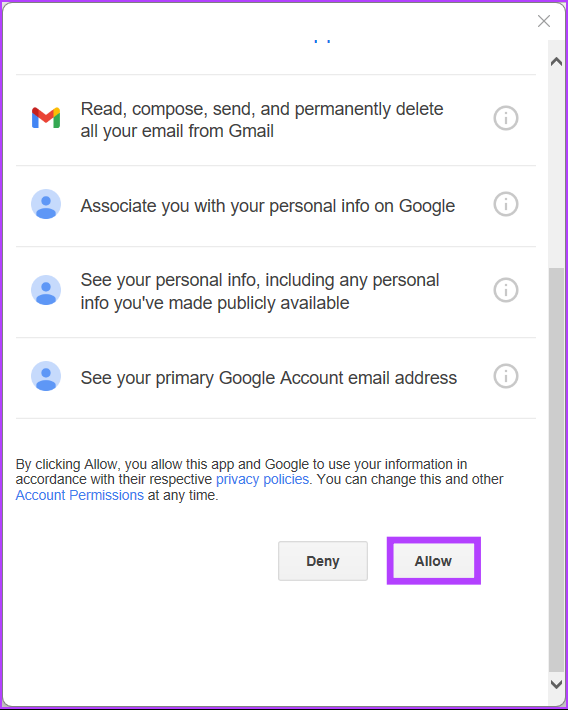
Step 7: Now, click Allow.
Once the script is executed, you will see the font has changed when you go back to the spreadsheet. However, this only makes the change in the current Google Spreadsheet. If you want to set the default font in Google Sheets to a new font with App Scripts, follow the below steps.
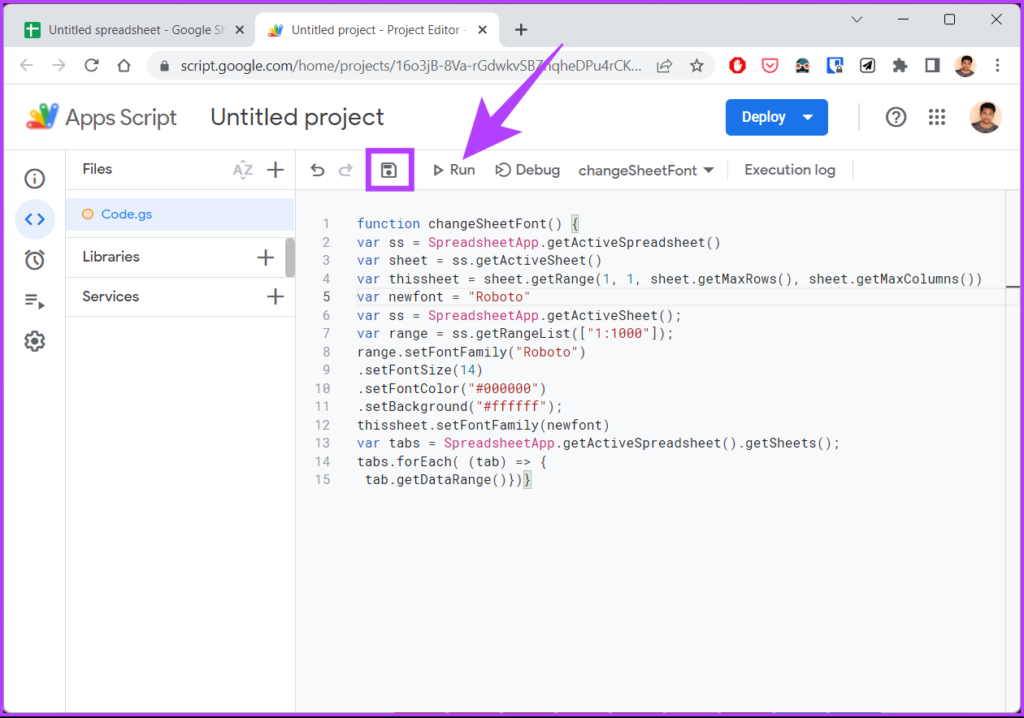
Step 8: In the Script Editor, type or copy the below code.
Note: We have used the font style Roboto and font size 14. You can replace them with your preferred style in the code.
function changeSheetFont() {
 var ss = SpreadsheetApp.getActiveSpreadsheet()
 var sheet = ss.getActiveSheet()
 var thissheet = sheet.getRange(1, 1, sheet.getMaxRows(), sheet.getMaxColumns())
 var newfont = "Roboto"
 var ss = SpreadsheetApp.getActiveSheet();
 var range = ss.getRangeList(["1:1000"]);
 range.setFontFamily("Roboto")
 .setFontSize(14)
 .setFontColor("#000000")
 .setBackground("#ffffff");
 thissheet.setFontFamily(newfont)
 var tabs = SpreadsheetApp.getActiveSpreadsheet().getSheets();
 tabs.forEach( (tab) => {
 tab.getDataRange()})}

Step 9: Finally, click Save and Run the script.
With this, you set a default font and font size for the entire spreadsheet. If your favorite font is missing, move on to the next section to learn how you can add them to the spreadsheet.
How to Add More Fonts in Google Sheets
Step 1: Go to Google Sheets and select Blank to create a new Sheet.
Step 2: Click on the font menu and from the drop-down menu, select More fonts.
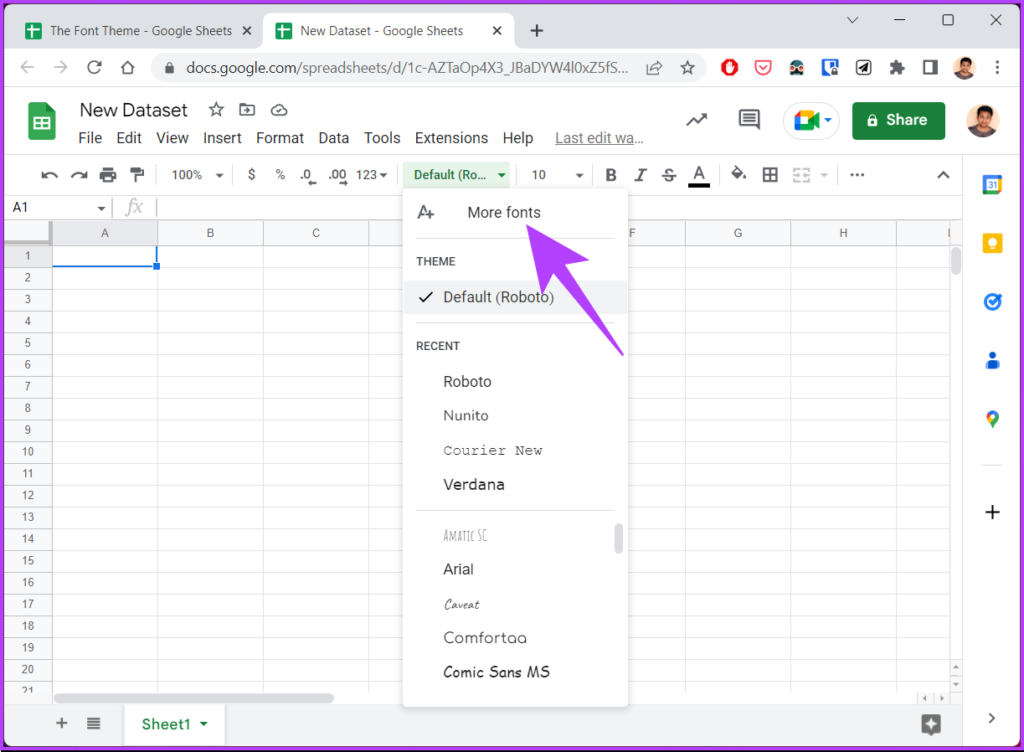
You will be taken to a new Font page where you can see all the fonts, including the font for different languages.
Step 3: Select the font of your choice from the list and click OK.
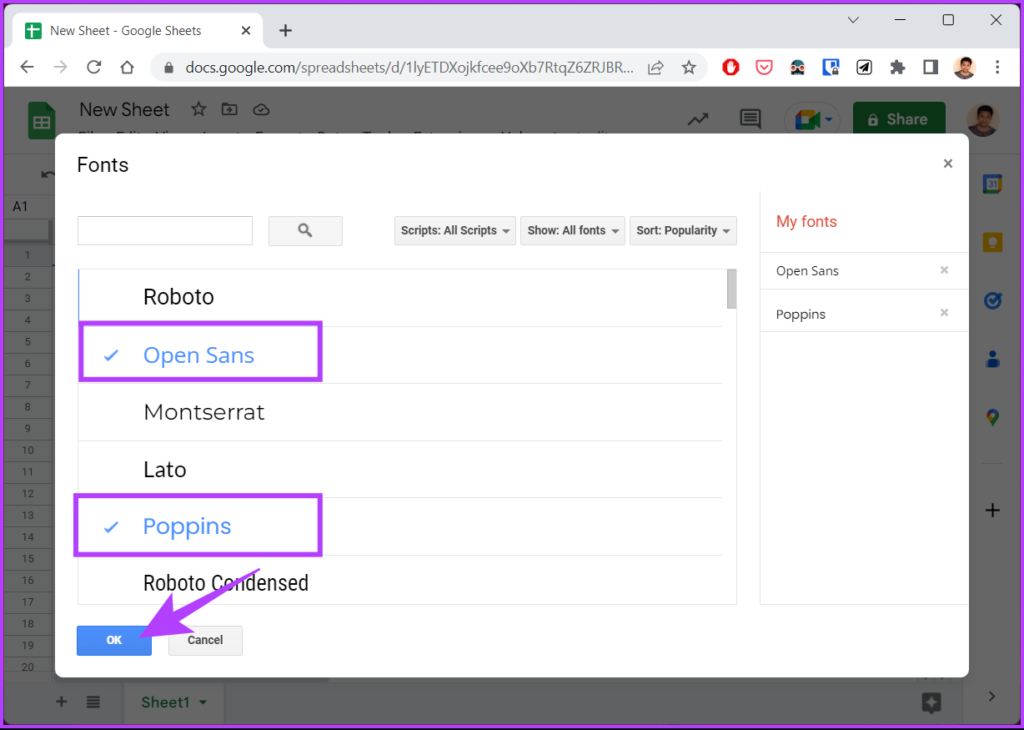
That’s it. With this, the font you added will appear on the main document, which you can use in the current and future documents. If you have any queries, check out the FAQ section below.
Tip: Learn how to change the default font and size in Google Docs.
FAQs on Changing Default Fonts in Google Sheets
Yes, it is possible to have multiple fonts in a single cell on Google Sheets. Here’s how you can do it; Select the cell(s) you want to format > Highlight the text within the cell that you want to format > click on the font option in the toolbar > Select the desired font from the drop-down menu.
Note: This method will change the font only for the selected text; the rest will remain unchanged.
Google Sheets uses Arial as the default font for new documents and cells within existing documents. However, you can change this to any font you like.
Multiple factors can slow down a Google Sheet, including many cells, complex formulae, large data sets, add-ons and scripts, an outdated browser and device, multiple sheets, external data connections, and shared access.
Personalize Your Preferences
So, this is how you can change the default font in Google Sheets and make your spreadsheets stand out. Additionally, changing the default font to your preference can improve your Google Sheet’s readability and make it more pleasant to the eye. You may also want to read about how to lock cells and rows in Google Sheets.
Was this helpful?
Last updated on 25 January, 2023
Read Next
 How to Change Default Font, Size, and Spacing in Google Docs
Change Default Text Font Type, Size, and Spacing in Google Docs You may believe the default text is too small, and the 1.15 spacing is a bit wider than you
How to Change Default Font, Size, and Spacing in Google Docs
Change Default Text Font Type, Size, and Spacing in Google Docs You may believe the default text is too small, and the 1.15 spacing is a bit wider than you
 How to Change Default System Font on Windows 11
How to Change the Default Font on Windows 11 Windows 11 comes pre-installed with a wide range of fonts.
How to Change Default System Font on Windows 11
How to Change the Default Font on Windows 11 Windows 11 comes pre-installed with a wide range of fonts.
 How to Change Font Style in Gmail on Web and Mobile
Change Default Text Style in Gmail on Web The compose menu in Gmail on the Web offers several formatting tools to change an email's text look and style.
How to Change Font Style in Gmail on Web and Mobile
Change Default Text Style in Gmail on Web The compose menu in Gmail on the Web offers several formatting tools to change an email's text look and style.
 How to Change Font Style and Size in Apple Mail App
Change Font Style in Apple Mail on Mac Step 1: Open the Mail app > compose a new message.
How to Change Font Style and Size in Apple Mail App
Change Font Style in Apple Mail on Mac Step 1: Open the Mail app > compose a new message.
 2 Ways to Change SMS and iMessage Color and Font on iPhone or iPad
What Does the Standard Message Color Represent The message bubbles are available in three different colors.
2 Ways to Change SMS and iMessage Color and Font on iPhone or iPad
What Does the Standard Message Color Represent The message bubbles are available in three different colors.
 How to Change Font Style in Microsoft Outlook
Change Font Style in Microsoft Outlook App for Windows Outlook Windows app doesn’t use plain text and opts for HTML to draft a message.
How to Change Font Style in Microsoft Outlook
Change Font Style in Microsoft Outlook App for Windows Outlook Windows app doesn’t use plain text and opts for HTML to draft a message.
 How to Change Font Style in Notes App on iPhone, iPad and Mac
Change Font Style in Notes App on iPhone and iPad Let's first show you how to change the font style of your notes in the Notes app on your iPhone
How to Change Font Style in Notes App on iPhone, iPad and Mac
Change Font Style in Notes App on iPhone and iPad Let's first show you how to change the font style of your notes in the Notes app on your iPhone
 2 Best Ways to Import Questions Into Google Forms From Google Sheets
Typically, when you create a Google Form, you need to perform several steps.
2 Best Ways to Import Questions Into Google Forms From Google Sheets
Typically, when you create a Google Form, you need to perform several steps.
The article above may contain affiliate links which help support Guiding Tech. The content remains unbiased and authentic and will never affect our editorial integrity.