Try Basic Fixes
- Check if Steam is down: If Steam servers face an outage, you might run into errors. You can visit Steamstat to ensure the Steam Store, community, and web APIs run normally. If Steam servers are down, wait for the company to resolve the issues.
- Turn off your antivirus program: An overly-protective antivirus program can also interfere with the Steam client and lead to such problems. To check for this possibility, temporarily disable your antivirus program and then use Steam again.
- Leave the Steam Beta program: While participating in Steam’s beta program gives you early access to new and upcoming features, it can also make the app unstable at times. Hence, it’s best to leave Steam’s beta program to avoid any issues.
Fix 1: End Steam Processes and Run It as an Administrator
A common reason Steam may crash on your PC is due to issues with its background processes. You can terminate the Steam-related processes and restart the app to see if that resolves the issue.
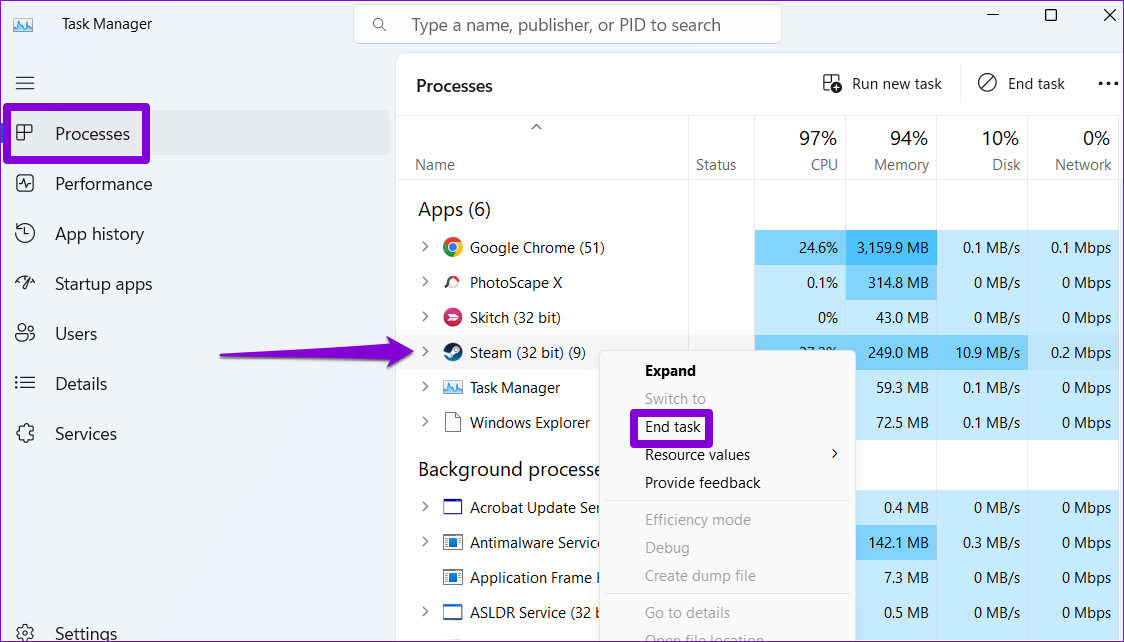
Step 1: Press the Ctrl + Shift + Esc shortcut to open the Task Manager.
Step 2: On the Processes tab, right-click on Steam and select End task.
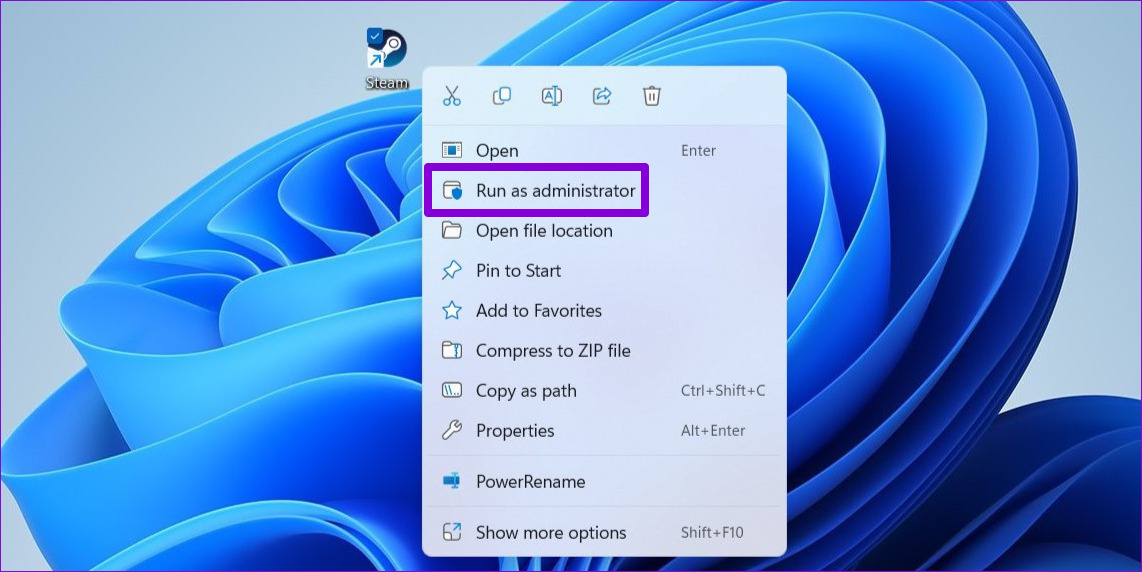
Step 3: Right-click on the Steam shortcut > select Run as administrator from the context menu.
Fix 2: Clear Steam App Cache
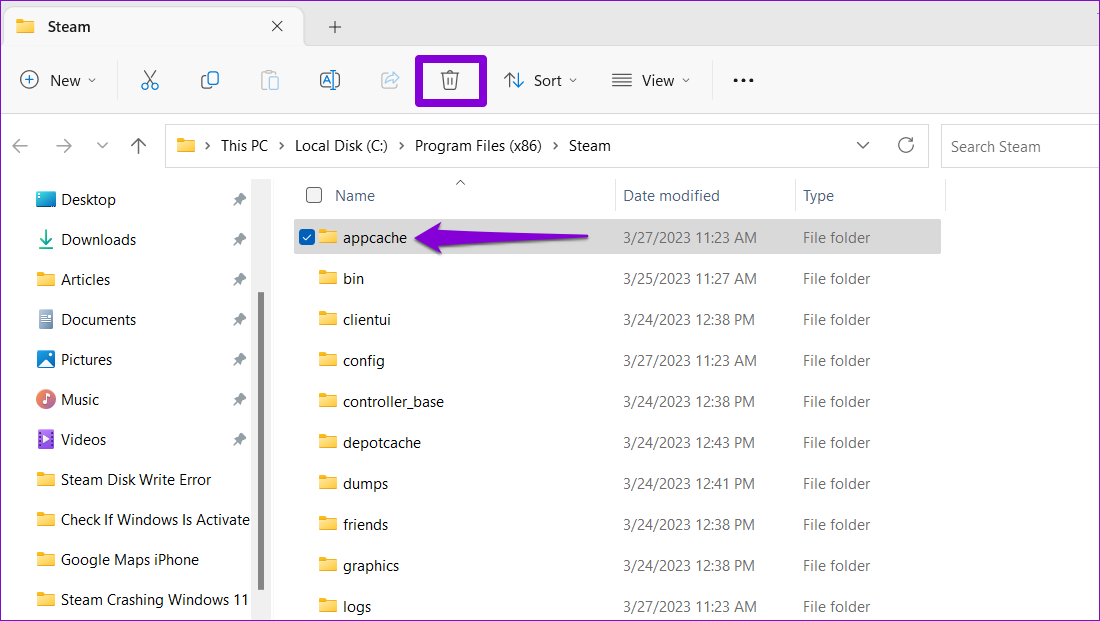
Overwhelming cache data can also cause the Steam app to misbehave on Windows. If that’s the case, getting rid of the Steam app cache will help.
Step 1: Press the Windows key + R to open the Run dialog box. Type the below command and press Enter.
C:\Program Files (x86)\Steam
Step 2: Select the appcache folder > click the trash icon at the top to delete it.
Fix 3: Delete the ClientRegistry.blob File
The “ClientRegistry.blob” file on your PC stores the registration data for all the games installed through Steam. If this file becomes inaccessible or corrupt, the Steam app may freeze or crash when installing games.
Deleting the “ClientRegistry.blob” file will force the Steam app to recreate it on your computer and resolve any issues with it.
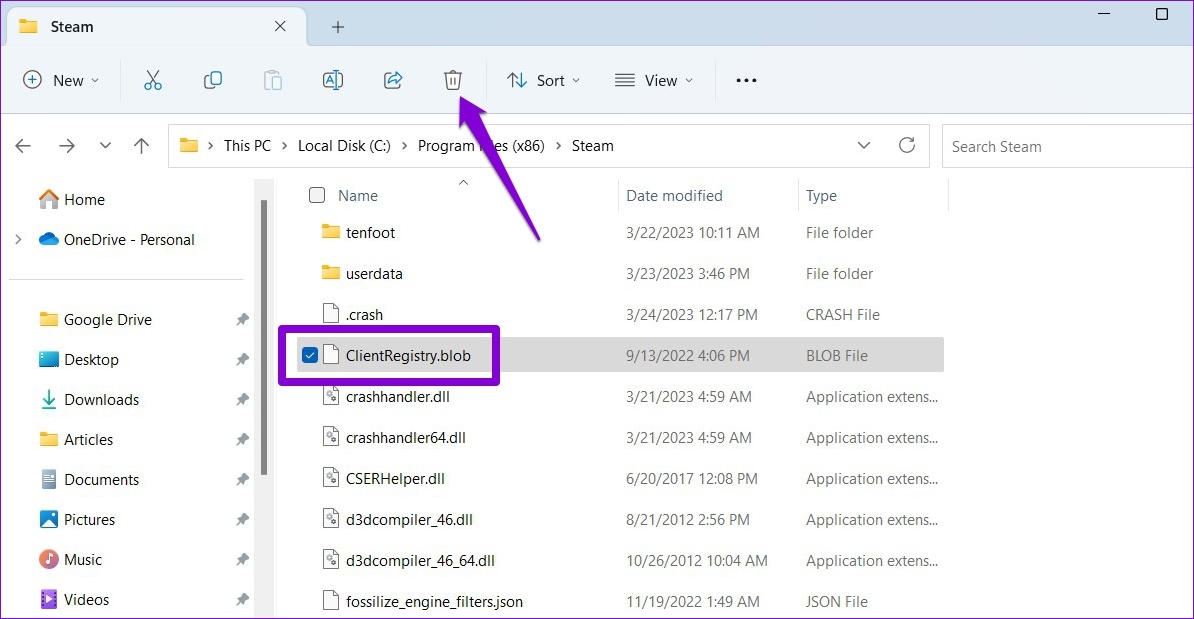
Step 1: Close the Steam app on your computer. Press the Windows key + E to open File Explorer and navigate to the folder where you have installed Steam. It’s typically in:
C:\Program Files (x86)\Steam
Step 2: Locate and select the ClientRegsitry.blob file and click the trash icon at the top to delete it.
Fix 4: Flush the Steam Configuration
Over time, configuration files may become corrupted or outdated, leading to performance issues. Flushing the Steam configuration effectively fixes issues with the app.
Press the Windows Key + R to open the Run dialog box. Type steam://flushconfig in the box and hit Enter. This will delete your download cache and log you out of the app. After that, you should be able to use the Steam app again.
Fix 5: Verify the Integrity of Game Files
If Steam only crashes when you open a specific game, some of the files associated with that game are likely corrupt or missing from your computer. Fortunately, Steam includes an option that can help you verify the integrity of the game files and fix issues with them. Here’s how to access it.
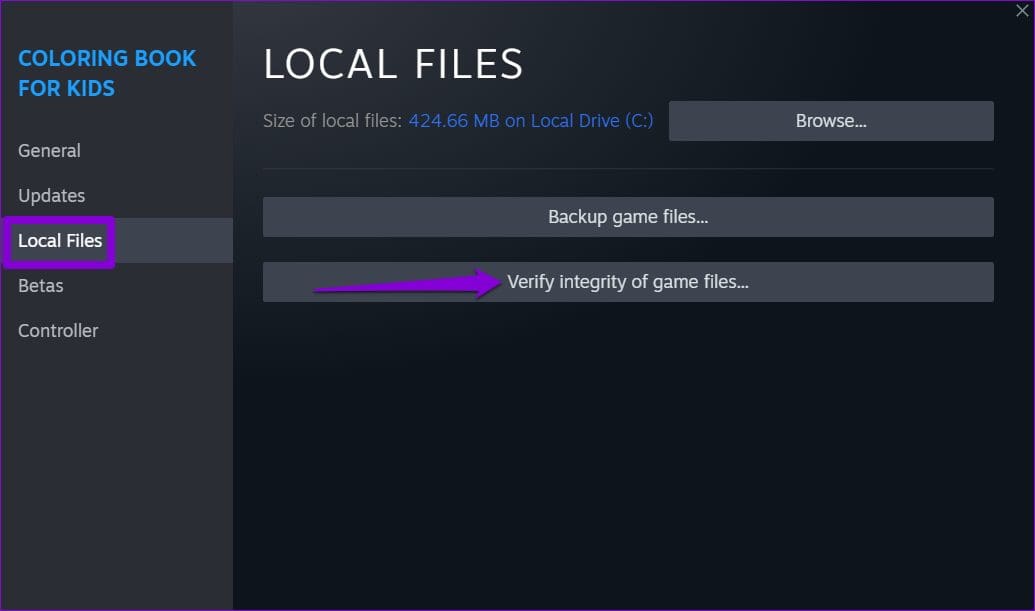
Step 1: In the Steam app, navigate to the Library menu. Right-click on the problematic game and select Properties.

Step 2: Select Local Files from the sidebar and click the Verify integrity of game files button.
Fix 6: Update Graphics Drivers
Another possible reason Steam may experience problems is if your PC’s graphics driver is outdated or malfunctioning. Here’s how to fix it.
Step 1: Right-click on the Start icon > select Device Manager from the list.
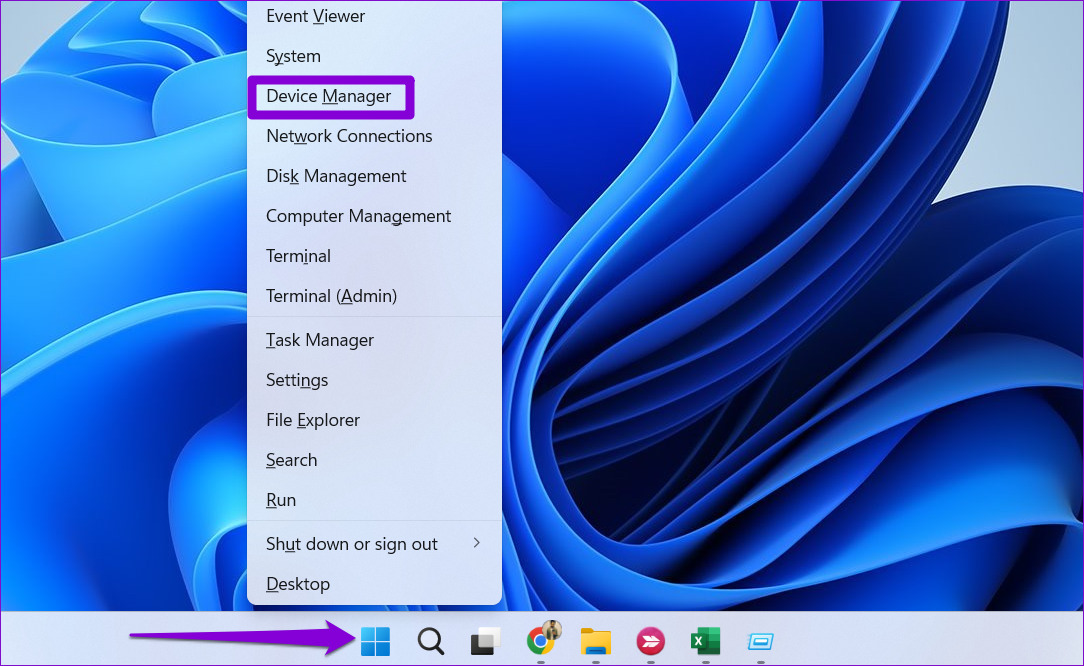
Step 2: Double-click on Display adapters to expand it. Right-click on your driver > select the Update driver.

Follow the on-screen prompts to finish updating the driver. After that, try to use Steam again.
Fix 7: Reinstall the Steam App
If all else fails, consider uninstalling and reinstalling the Steam client on your PC as a last resort. Here are the steps for the same.
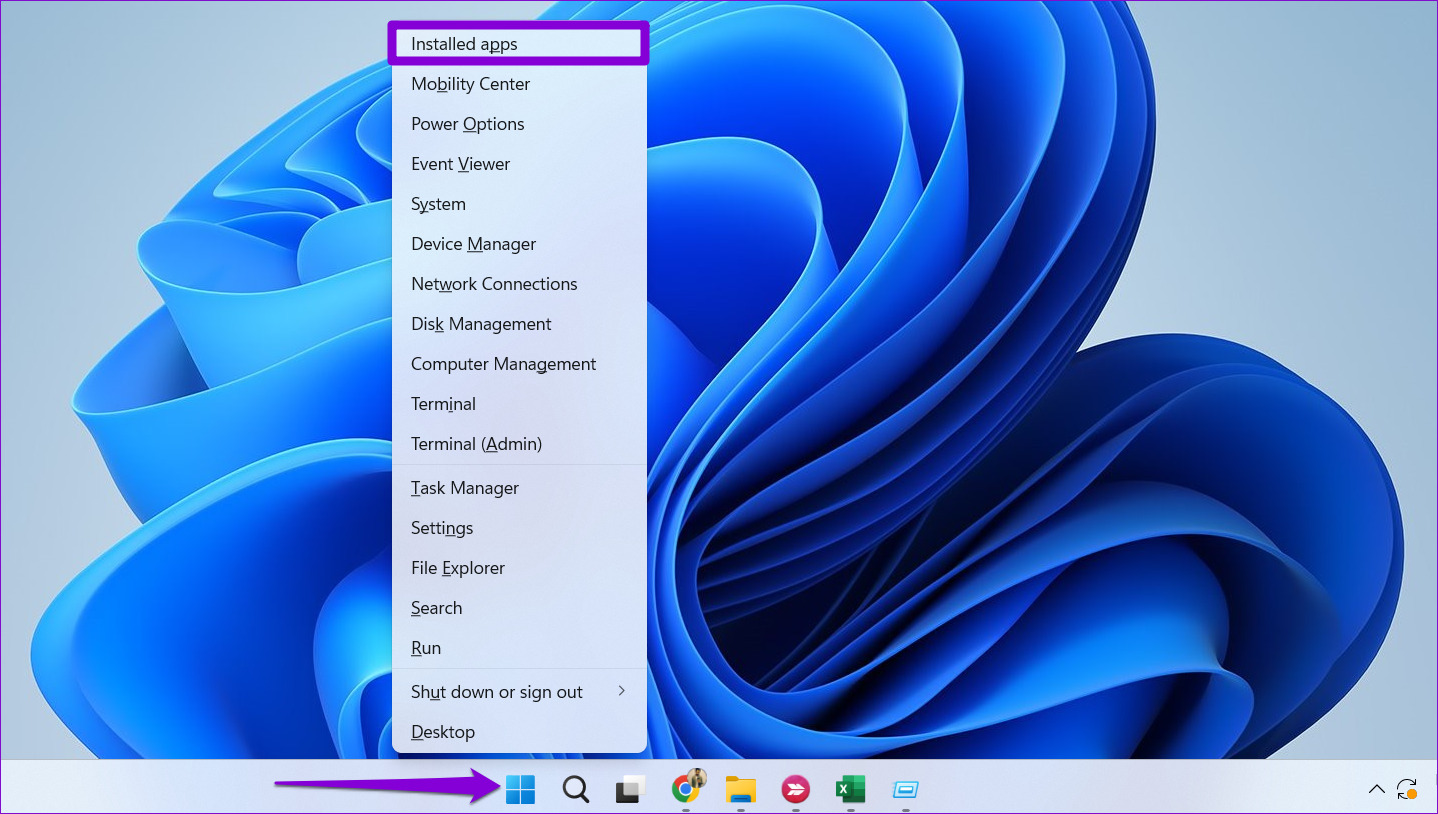
Step 1: Right-click on the Start icon > select Installed apps from the list.
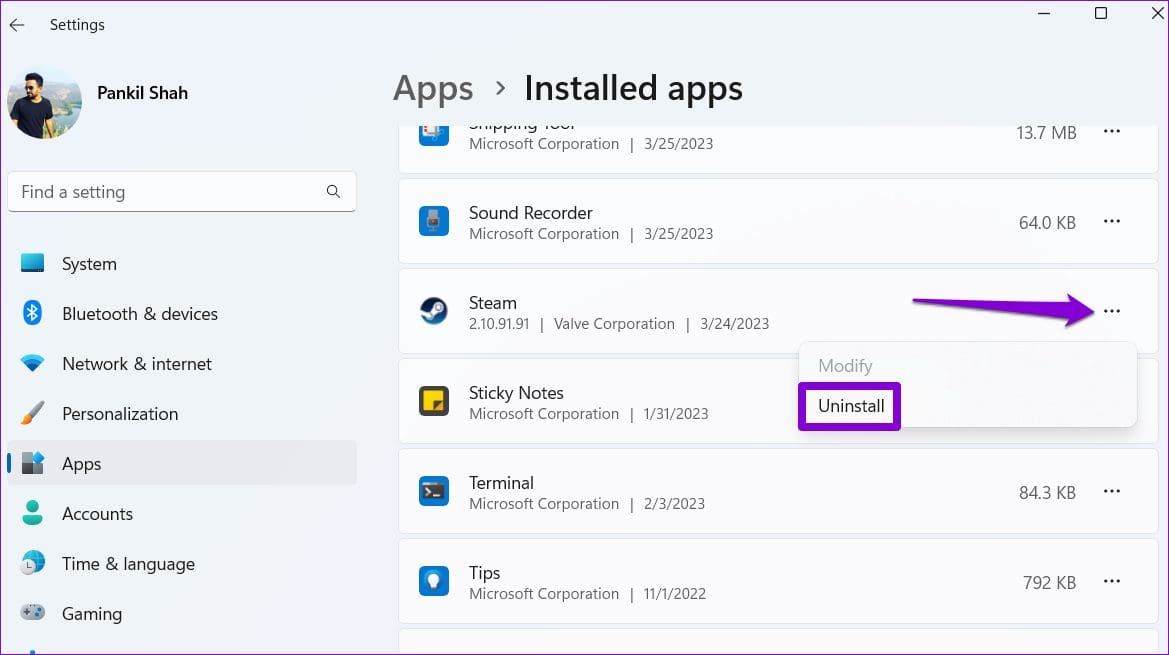
Step 2: Locate the Steam app on the list > click the three-dot menu icon next to it > select Uninstall.
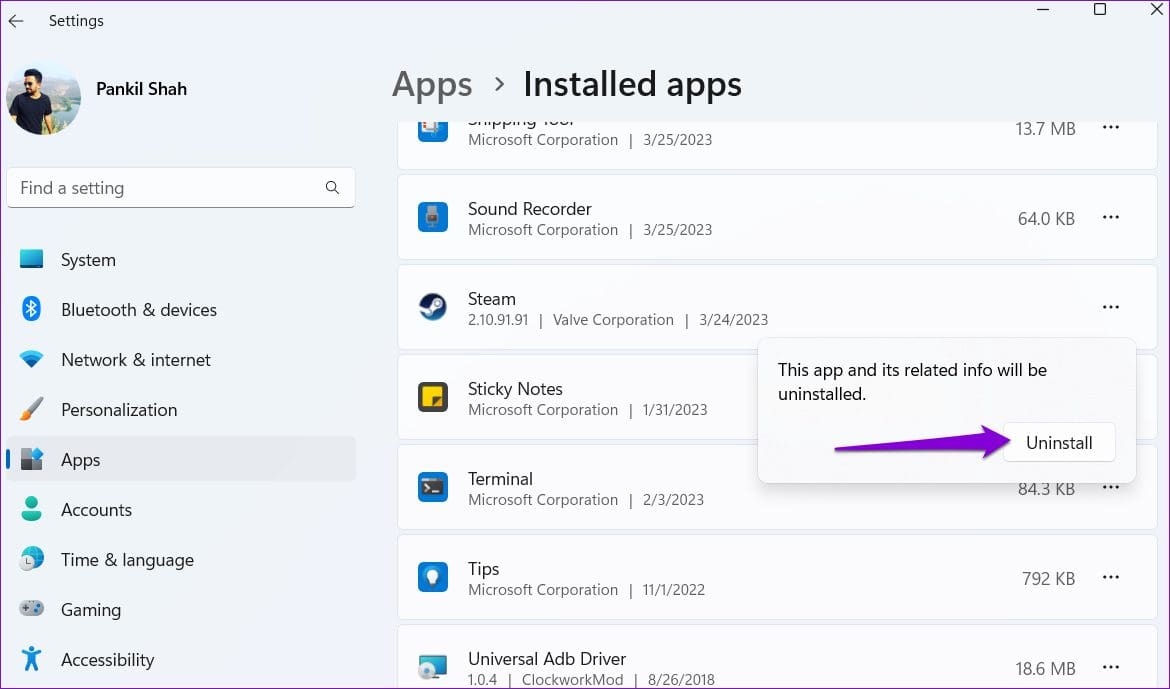
Step 3: Select Uninstall to confirm.
After removing that, download and install the Steam app again. Following this, it will work smoothly.
Was this helpful?
Last updated on 16 August, 2024
Read Next
 2 Ways to Fix the Telegram App Crashing on Windows 11
Basic Fixes Check the Telegram server status: Visit Downdetector to check for an active Telegram server outage.
2 Ways to Fix the Telegram App Crashing on Windows 11
Basic Fixes Check the Telegram server status: Visit Downdetector to check for an active Telegram server outage.
 6 Ways to Fix Microsoft Teams Crashing on Windows 11
Common Fixes Check service outage - Access Microsoft Service health and click Teams in the left sidebar to check service status.
6 Ways to Fix Microsoft Teams Crashing on Windows 11
Common Fixes Check service outage - Access Microsoft Service health and click Teams in the left sidebar to check service status.
 4 Ways to Fix Word Keeps Crashing on Windows
Basic Fixes Restart PC: Restart your PC to eliminate any temporary bugs and glitches.
4 Ways to Fix Word Keeps Crashing on Windows
Basic Fixes Restart PC: Restart your PC to eliminate any temporary bugs and glitches.
 Top 10 Ways to Fix Google Chrome Keeps Freezing or Crashing on Windows 10
Google Chrome is the go-to browser of millions across the world.
Top 10 Ways to Fix Google Chrome Keeps Freezing or Crashing on Windows 10
Google Chrome is the go-to browser of millions across the world.
 5 Ways to Fix Spotify Keeps Crashing Issue on Windows
Basic Fixes Restart Spotify: Open the Task Manager, right-click on Spotify, and select End Task.
5 Ways to Fix Spotify Keeps Crashing Issue on Windows
Basic Fixes Restart Spotify: Open the Task Manager, right-click on Spotify, and select End Task.
 5 Ways to Fix Discord Keeps Crashing on Windows Computer
https://youtu.be/_uU0Ob5vTWM Try Basic Fixes End Discord processes using Task Manager: Press Ctrl + Shift + Esc keys to open Task Manager.
5 Ways to Fix Discord Keeps Crashing on Windows Computer
https://youtu.be/_uU0Ob5vTWM Try Basic Fixes End Discord processes using Task Manager: Press Ctrl + Shift + Esc keys to open Task Manager.
 7 Best Ways to Fix Hogwarts Legacy Crashing Issue on Windows 11
Hogwarts Legacy is an open-world game set in the Harry Potter world.
7 Best Ways to Fix Hogwarts Legacy Crashing Issue on Windows 11
Hogwarts Legacy is an open-world game set in the Harry Potter world.
 4 Ways to Fix Firefox Not Opening on Windows 10 and Windows 11
Fix 1: Force Close Firefox Processes Sometimes, Firefox processes may become unresponsive on your PC, resulting in such issues.
4 Ways to Fix Firefox Not Opening on Windows 10 and Windows 11
Fix 1: Force Close Firefox Processes Sometimes, Firefox processes may become unresponsive on your PC, resulting in such issues.
The article above may contain affiliate links which help support Guiding Tech. The content remains unbiased and authentic and will never affect our editorial integrity.