Method 1: Use a Shortcut to Convert JPG to HEIC
I’ve created a Shortcut to help you quickly convert a JPG image to HEIC.
Step 1: Open the iCloud link to download the shortcut. Tap on Add Shortcut in the Shortcuts app.
Note: The above link may also open on your web browser—tap on Get Shortcut and open it in the Shortcuts app.
Step 3: Tap to run it, select all the photos you want to convert, and tap on Add. The selected photos will be converted and saved to the Recents album in the Photos app.


Also Read: Best shortcuts for Action button on iPhone 15 Pro
Method 2: Use a JPG to HEIC Converter on Web
There are various free websites to help you easily convert JPG to HEIC on your iPhone. Here’s a website we recommend, and here’s how to go about the conversion process on your iPhone.
Step 1: Visit Convertio – a free website to convert JPG to HEIC on iPhone.
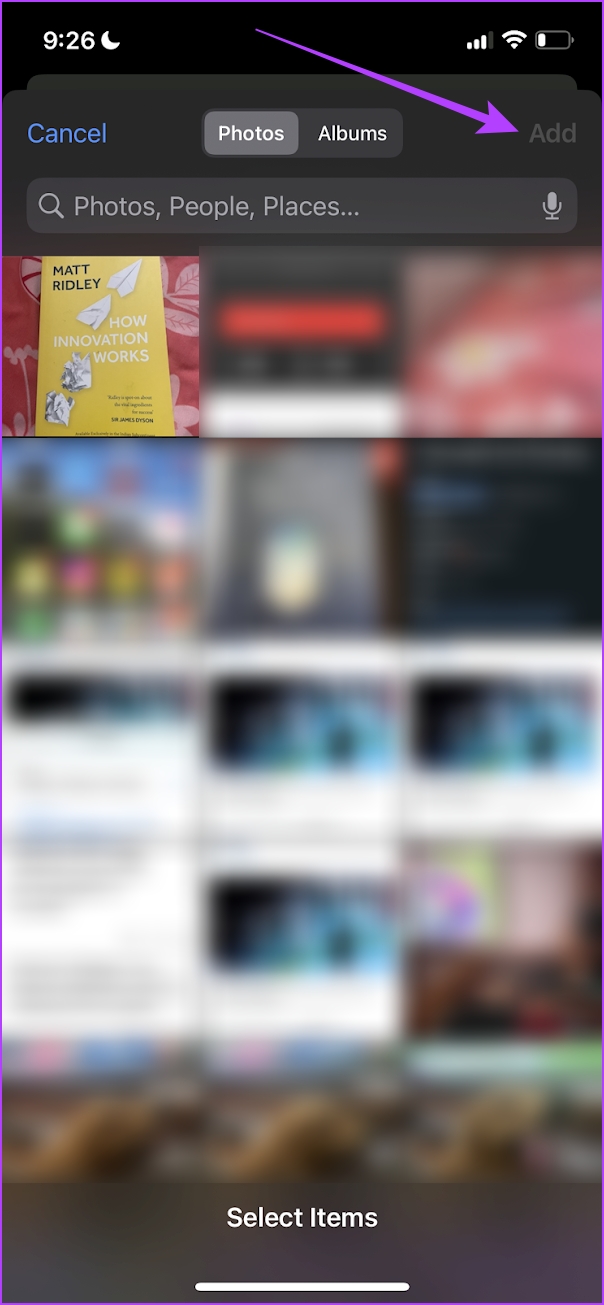
Step 2: Tap on choose files. Tap on Photo Library. You can also select a JPEG image from your files app.
Step 3: Select the photo and tap on Add.

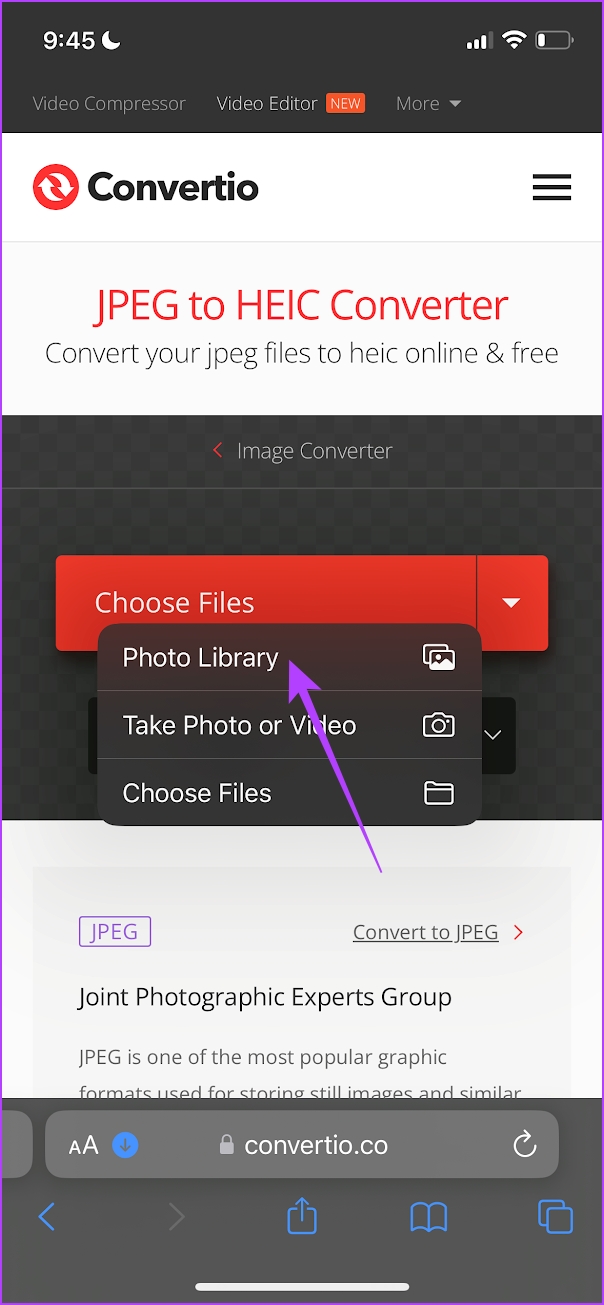
Step 4: Ensure you have selected the output format as HEIC and tap on Convert.
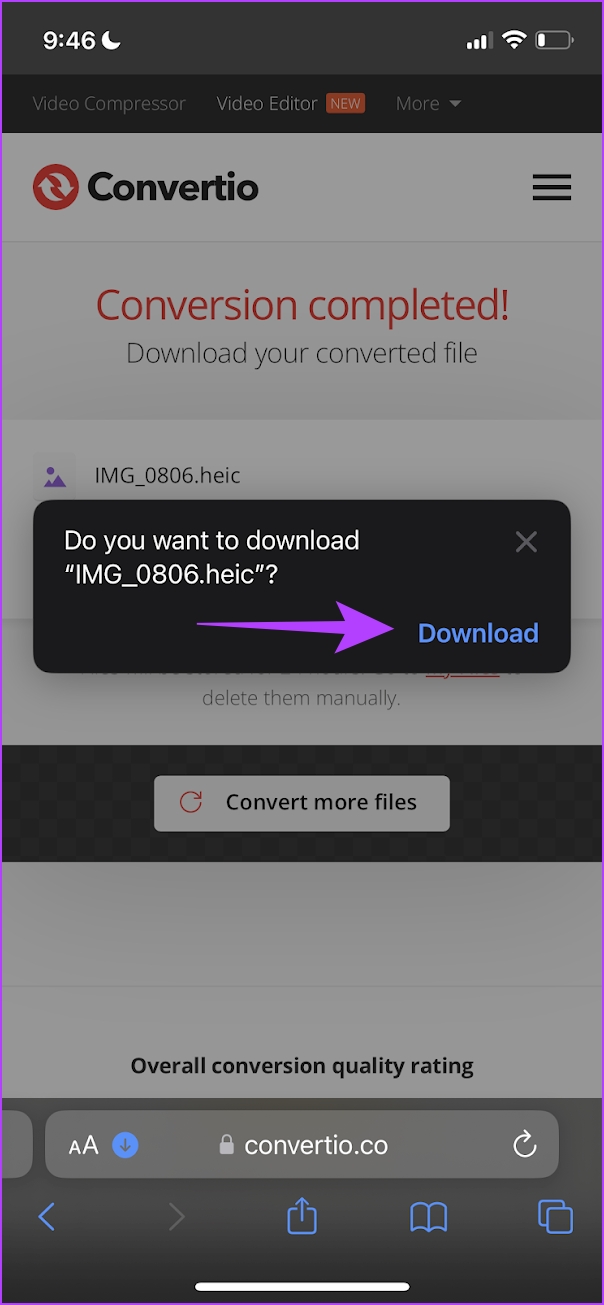
Step 5: Tap on Download to save the converted JPG image.
Step 6: Tap on Download. The downloaded image will appear in the Downloads folder of the Files app.


Also Read: How to convert RAW (DNG) photos to JPG on iPhone
Method 3: Use Image Converter – JPG PNG HEIC App on iPhone
There’s also an app that allows you to easily convert JPG to HEIC on iPhone. Here’s how to use it.
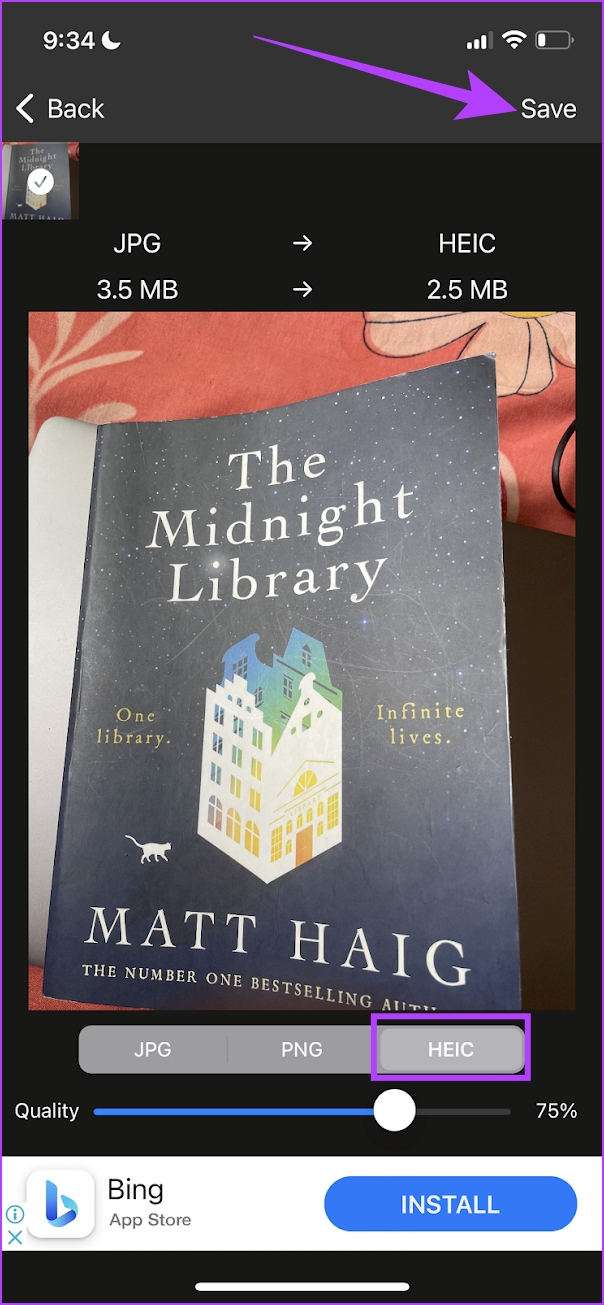
Step 1: Download Image Converter – JPG PNG HEIC from the App Store
Step 2: Once you open the app, tap on Allow Access to All Photos to grant the app permission to access your photo library. Select the photo you want to convert and tap on Next.
Step 3: Select the HEIC format > adjust the quality > tap on Save. You can directly save the photo to the Photos app by selecting Save to Photos.


Also Read: How to convert HEIC images to PNG on iPhone
Was this helpful?
Last updated on 09 July, 2024
Read Next
 6 Methods to Convert HEIC to JPG on Windows 11/10
Method 1: iOS 'Automatic' Transfer Mode iOS built-in solution allows you to instantly convert HEIC to JPG as soon as you connect it to a Mac or PC, making it
6 Methods to Convert HEIC to JPG on Windows 11/10
Method 1: iOS 'Automatic' Transfer Mode iOS built-in solution allows you to instantly convert HEIC to JPG as soon as you connect it to a Mac or PC, making it
 How to Convert HEIC to JPG on Android
Apple began implementing HEIC as the default image storage format for the iPhone in 2017.
How to Convert HEIC to JPG on Android
Apple began implementing HEIC as the default image storage format for the iPhone in 2017.
 How to Convert HEIC Images to PNG on iPhone the Easy Way
HEIC is the default photo format on the iPhone for a good reason.
How to Convert HEIC Images to PNG on iPhone the Easy Way
HEIC is the default photo format on the iPhone for a good reason.
 4 Ways to Convert WEBP Images to JPG/PNG on iPhone
What is a WEBP Image and Why Can't I View It WEBP format aims to compress the image to a size relatively lower than the PNG/JPEG formats while maintaining adequate
4 Ways to Convert WEBP Images to JPG/PNG on iPhone
What is a WEBP Image and Why Can't I View It WEBP format aims to compress the image to a size relatively lower than the PNG/JPEG formats while maintaining adequate
 How to Switch From HEIC to JPG on iPhone
Switch From HEIC to JPG Step 1: Go to iPhone Settings > Camera.
How to Switch From HEIC to JPG on iPhone
Switch From HEIC to JPG Step 1: Go to iPhone Settings > Camera.
 How to Download HEIC as JPG in iCloud on Windows and Mac
While HEIC is the default storage format in the iPhone (ever since iOS 11), you don’t need to stick with it.
How to Download HEIC as JPG in iCloud on Windows and Mac
While HEIC is the default storage format in the iPhone (ever since iOS 11), you don’t need to stick with it.
 2 Ways to Convert RAW (DNG) Photos to JPG on iPhone
Method 1: Turn RAW Images to JPG/PNG in the Files App The Files app on your iPhone is a Swiss Army knife that lets you modify, manage, and even convert
2 Ways to Convert RAW (DNG) Photos to JPG on iPhone
Method 1: Turn RAW Images to JPG/PNG in the Files App The Files app on your iPhone is a Swiss Army knife that lets you modify, manage, and even convert
 How to Convert JPG to PNG in Paint 3D on Windows PC
Paint 3D is a modern upgrade over the classic Microsoft Paint.
How to Convert JPG to PNG in Paint 3D on Windows PC
Paint 3D is a modern upgrade over the classic Microsoft Paint.
The article above may contain affiliate links which help support Guiding Tech. The content remains unbiased and authentic and will never affect our editorial integrity.

