Hardware Requirements for a Raid Set Up
Before you go into creating RAID 1 on Windows 11, take note of the following requirements:
- You should have a minimum of two drives.
- All drives involved need to have the same file type – NTFS works great.
- There must be a RAID controller; on Windows 11, you may use the built-in Storage Spaces feature as a software alternative.
- A motherboard that is compatible with RAID. This may be a problem for older motherboards.
Method 1: Via the Settings App
The Settings app is a central location that allows you to configure multiple operating system options. From appearance and behavior personalization to managing privacy and security, the app can accomplish so much. You may also use it to configure RAID options and create RAID 1, as shown below.
Step 1: Press the Windows + I keyboard shortcut on your keyboard to open the Settings app.
Step 2: Click the Storage option on the right pane.

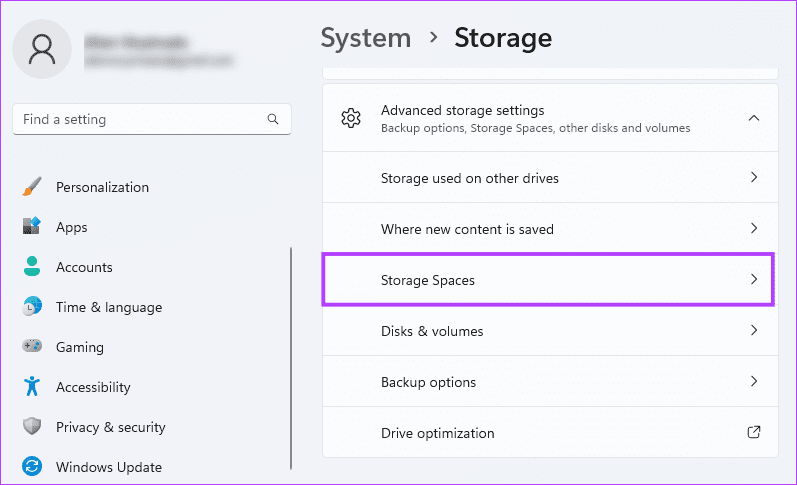
Step 3: Scroll down the right pane and click Advanced Storage Settings.

Step 4: Click Storage Spaces on the right pane.
Step 5: Click the Add button to create a RAID storage.

Step 6: Fill in the Name field, select the disk from which you want to create RAID 1, then click the Create button.

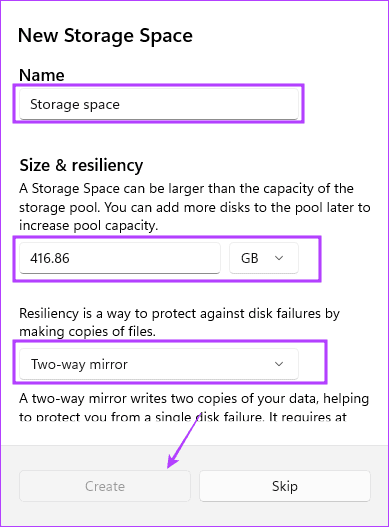
Step 7: Here, you fill in details for the space to which the pool in the previous window will belong. Enter a value for Name, pick the size you desire, select Two-way mirror for Resiliency, and click Create.
Method 2: Using the Control Panel
Control Panel is a utility that allows users to change and reconfigure certain options on the device. It comprises hardware and software configuration applets and may be used to manage specific drive functions, like creating RAIDS, as shown below.
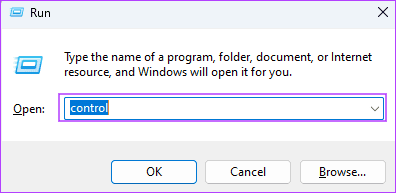
Step 1: Press the Windows + R keyboard shortcut to open the Run dialog, type control, and hit Enter.
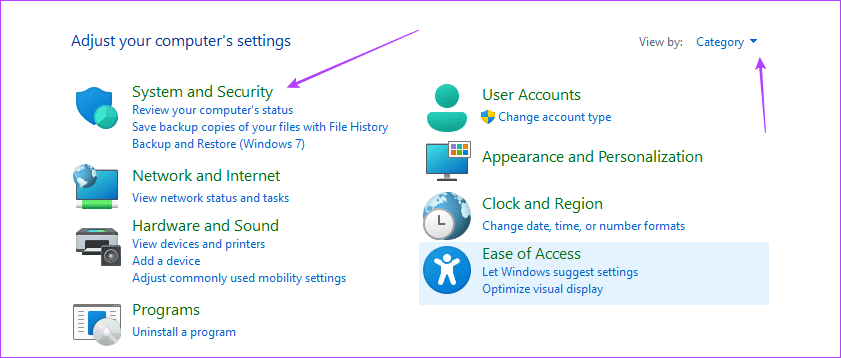
Step 2: In the top-right corner, make sure the View by option is set to Category and click System and Security.
Step 4: Click Storage Spaces.

Step 5: Click Create a new pool and storage space.

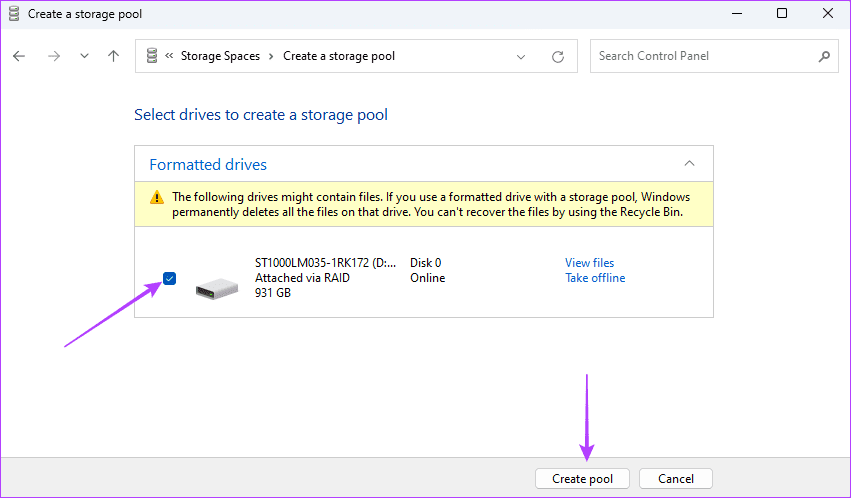
Step 6: Select your drive and click Create Pool.
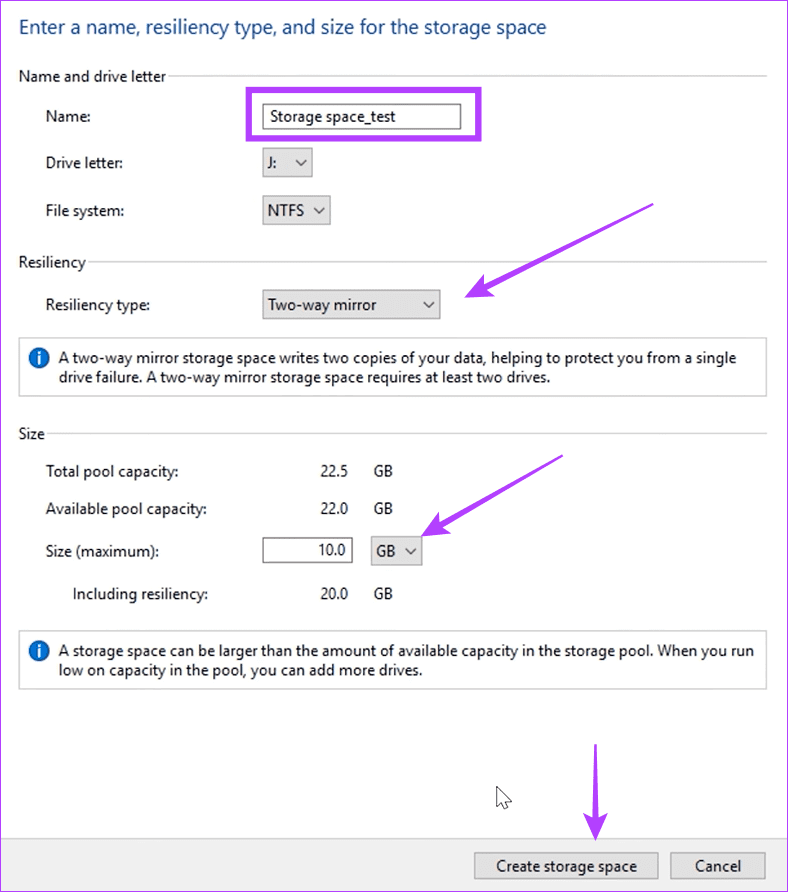
Step 7: Name the Storage Space. Use the drop-down next to Resiliency type to choose Two-way mirror, select an appropriate size, and then click Create storage space.
Method 3: From the Disk Management Settings
On Windows 11, you may use the Disk Management utility to manage hard drives and disks. The tool lets you create, resize, delete, format, and manage the drives on your computer. You may also employ this tool to create RAID 1 on Windows 11.
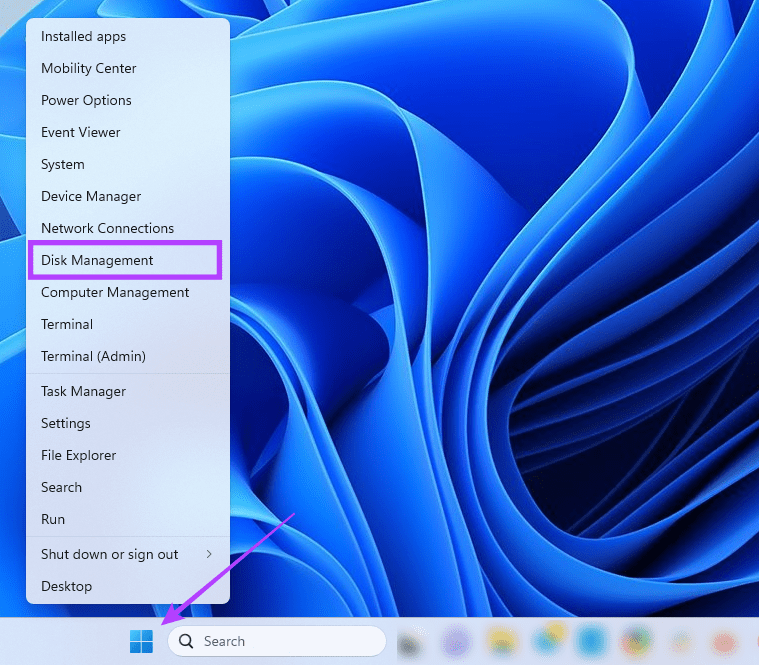
Step 1: Right-click the Start menu on your Taskbar, then select Disk Management.
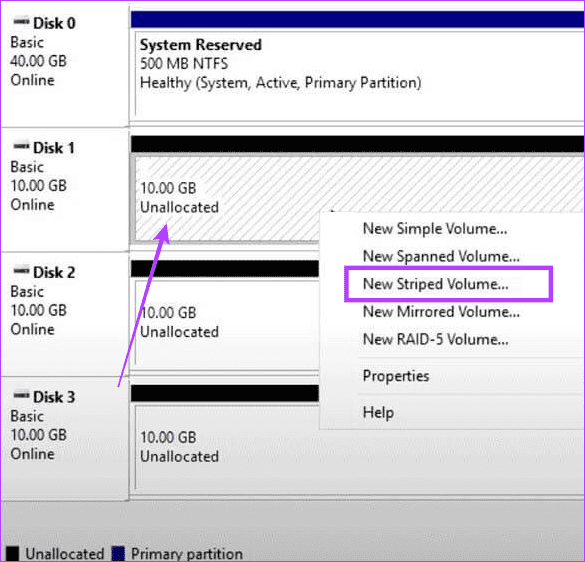
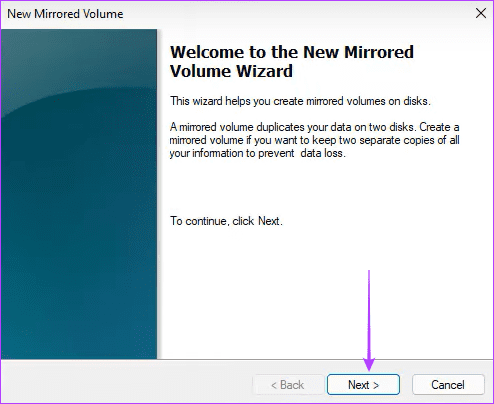
Step 2: Right-click on the Drive for your RAID, and select New Striped Volume.
Step 3: Click Next.
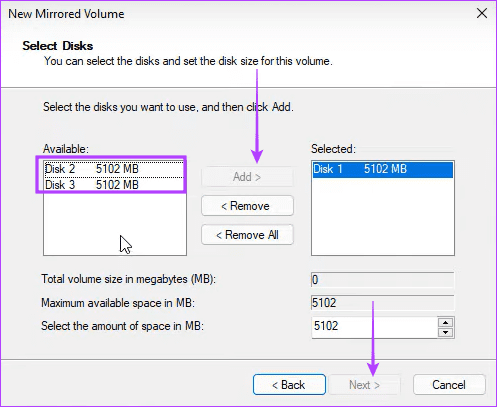
Step 4: Select the disk to RAID, click Add, then click Next.
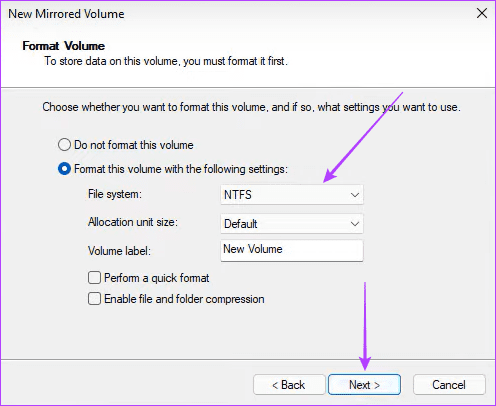
Step 5: Select NTFS and click Next.
Step 6: Click Finish and confirm your choice.
Method 4: Using the Command Prompt
The Command Prompt is a text-based interface allowing users to interact with the Windows operating system. It is a powerful tool that may be employed for system configuration, file management, troubleshooting, or even disk management. As shown below, you may use it to create a RAID 1 drive.
Step 1: Press the Windows + R keyboard shortcut to open the Run dialog.
Step 2: Type cmd and hit Control + Shift + Enter keyboard shortcut to open the Command Prompt with admin privileges.

Step 3: Type the below command and hit Enter to access drive and disk management:
diskpart

Step 4: Run the below command to see all available drives:
listdisk

Step 5: Run the command below, replacing N with a disk number for the RAID:
Select disk N
Step 6: Run the command below to convert the selected drive to a dynamic one:
convert dynamic
Step 7: Repeat steps 5 and 6 for other drives you need to be part of the RAID process.
Step 8: Enter the command below to create your RAID volume:
Create Volume RAID Disk 1, 2, 3

Step 8: Select the newly created RAID using the command below:
select volume 2
Step 9: Change the format and assign it a drive letter by running the two scripts below one after the other:
Format FS=NTFS Label=NewVolume
Assign Letter=E

Was this helpful?
Last updated on 12 August, 2024
Read Next
 How to Configure DD-WRT Advanced Settings on Routers
Router is one of the devices in your home, which is not given much attention.
How to Configure DD-WRT Advanced Settings on Routers
Router is one of the devices in your home, which is not given much attention.
 4 Ways to Fix Firefox Not Opening on Windows 10 and Windows 11
Fix 1: Force Close Firefox Processes Sometimes, Firefox processes may become unresponsive on your PC, resulting in such issues.
4 Ways to Fix Firefox Not Opening on Windows 10 and Windows 11
Fix 1: Force Close Firefox Processes Sometimes, Firefox processes may become unresponsive on your PC, resulting in such issues.
 3 Ways to Disable or Enable Search Highlights in Windows 10 and Windows 11
Method 1: Disable or Enable Search Highlights From the Settings App The Settings app on Windows allows you to control most things on your PC.
3 Ways to Disable or Enable Search Highlights in Windows 10 and Windows 11
Method 1: Disable or Enable Search Highlights From the Settings App The Settings app on Windows allows you to control most things on your PC.
 6 Ways to Fix Print Spooler Keeps Stopping on Windows 10 and Windows 11
Fix 1: Run Printer Troubleshooter Windows comes with a dedicated printer troubleshooter that can automatically diagnose and fix any printing issues on your PC.
6 Ways to Fix Print Spooler Keeps Stopping on Windows 10 and Windows 11
Fix 1: Run Printer Troubleshooter Windows comes with a dedicated printer troubleshooter that can automatically diagnose and fix any printing issues on your PC.
 9 Ways to Open Task Manager on Windows 10 and Windows 11
Task Manager is one of the most commonly used programs on Windows, regardless of its version.
9 Ways to Open Task Manager on Windows 10 and Windows 11
Task Manager is one of the most commonly used programs on Windows, regardless of its version.
 3 Ways to Launch Windows Terminal on Windows 11
Method 1: Launch Windows Terminal Using the Run Dialog The Run dialog lets you execute any program or command within the same network on your computer.
3 Ways to Launch Windows Terminal on Windows 11
Method 1: Launch Windows Terminal Using the Run Dialog The Run dialog lets you execute any program or command within the same network on your computer.
 5 Ways to Fix Windows Explorer High CPU Usage on Windows 11
Try Basic Fixes Restart the Windows Explorer process: There's a chance that Windows Explorer's high CPU usage is a one-time glitch.
5 Ways to Fix Windows Explorer High CPU Usage on Windows 11
Try Basic Fixes Restart the Windows Explorer process: There's a chance that Windows Explorer's high CPU usage is a one-time glitch.
 3 Ways to Fix Mouse Keeps Scrolling Automatically Windows 10 and Windows 11
https://youtu.be/1UZ3PWNr-lE Try Basic Fixes Disconnect and reconnect the mouse: Unplug your mouse cable or wireless adapter from your computer and reconnect it to a different port.
3 Ways to Fix Mouse Keeps Scrolling Automatically Windows 10 and Windows 11
https://youtu.be/1UZ3PWNr-lE Try Basic Fixes Disconnect and reconnect the mouse: Unplug your mouse cable or wireless adapter from your computer and reconnect it to a different port.
The article above may contain affiliate links which help support Guiding Tech. The content remains unbiased and authentic and will never affect our editorial integrity.

