Fix 1: Restart Windows Search Service
Windows Search service is an essential program responsible for indexing content and providing search results. If there’s an issue with that service, the indexing process will be interrupted. You can try restarting the Windows Search service to see if that helps.
Step 1: Press the Windows key + R to launch the Run command, type in services.msc, and press Enter.
Step 2: In the Services window, scroll down to locate Windows Search. Right-click on it and select Restart from the menu. If the service is not running, choose Start.

Fix 2: Enable Search Indexing on Low Battery
When your Windows laptop is low on battery, it may suspend some of the background processes like search indexing. And sometimes, these activities may fail to resume even after connecting your laptop to a power source. To avoid this, you can configure the indexing tool to ignore the power settings on Windows. Here’s how.
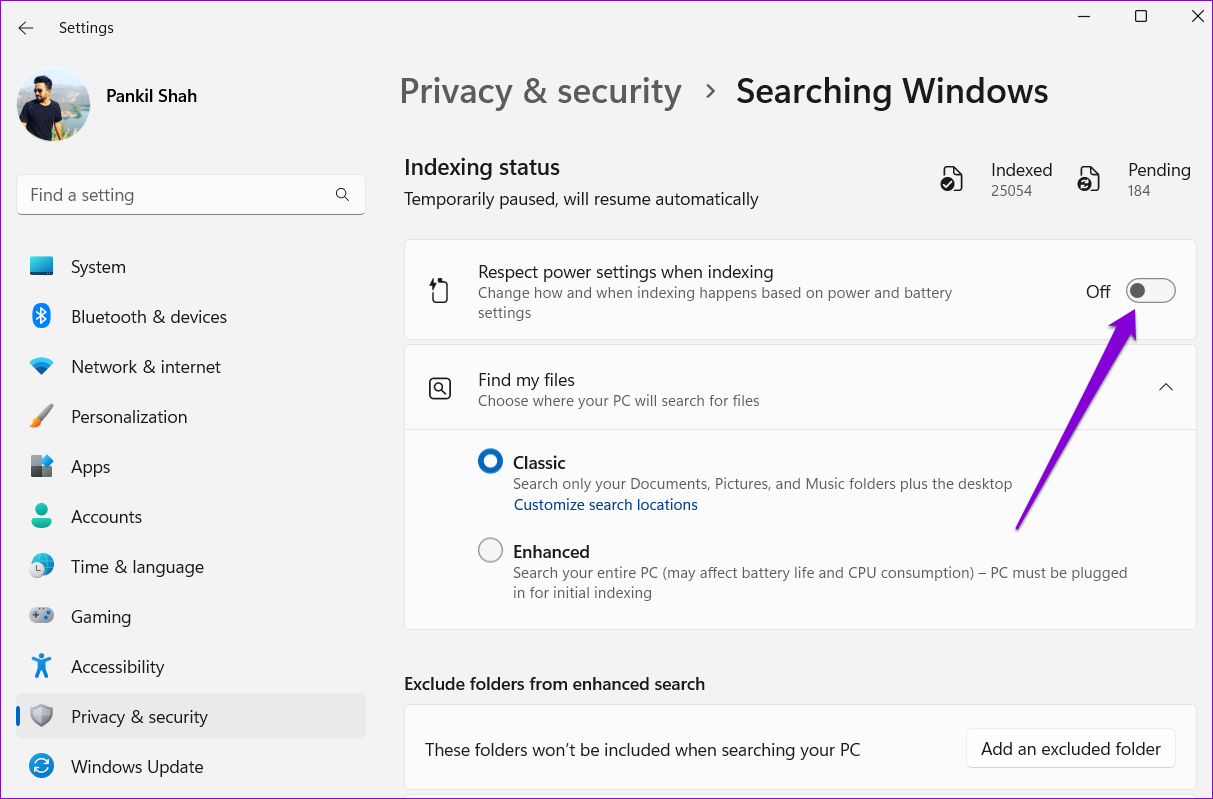
Step 1: Press the Windows key + I to launch the Settings app and head to Privacy & security > Searching Windows.
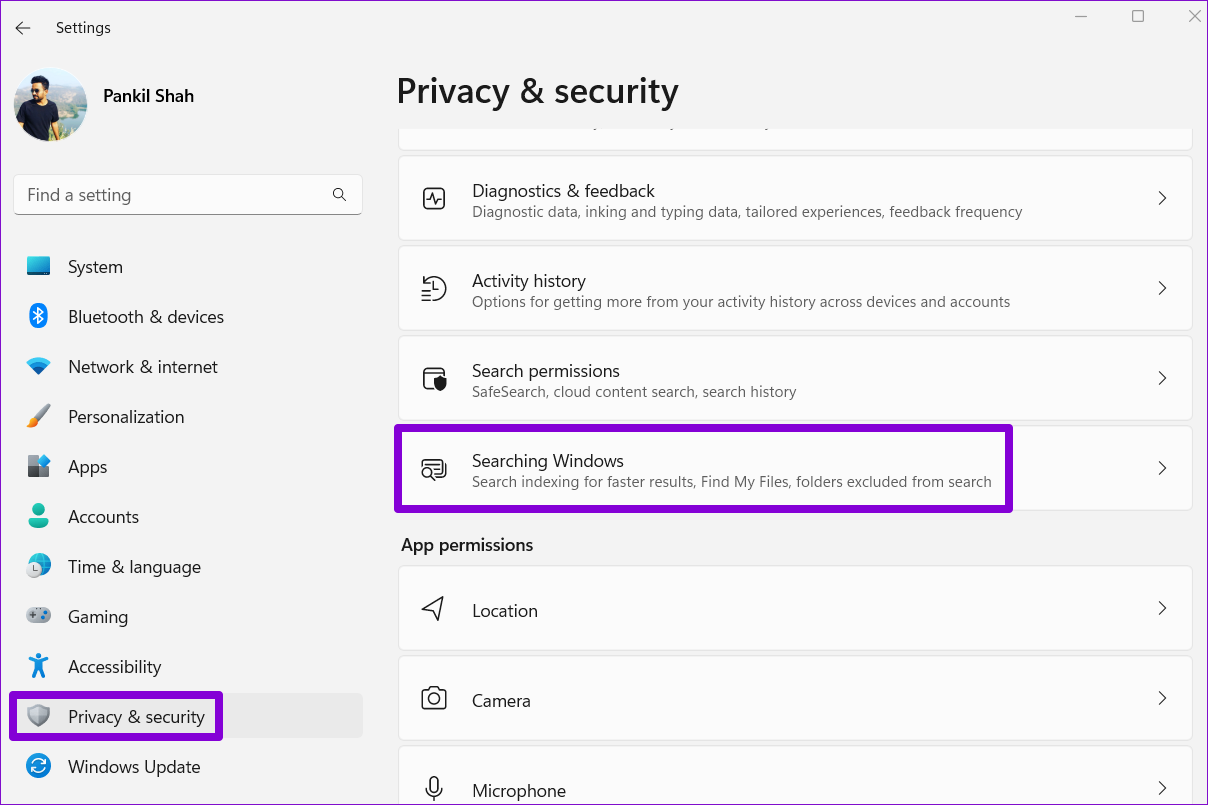
Step 2: Toggle off the switch next to Respect power settings when indexing.
Fix 3: Run SFC and DISM Scan
Corrupt or missing system files can also interrupt the indexing process on Windows. If that is the case, running an SFC (or System File Checker) and DISM (or Deployment Image Servicing and Management) scans will help.
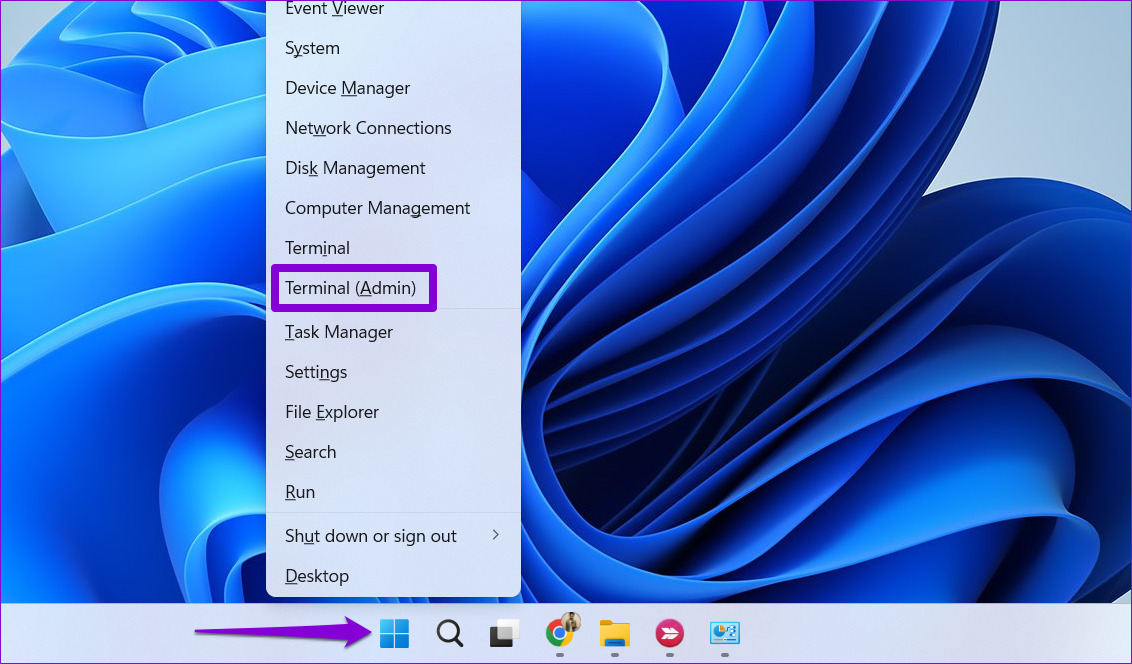
Step 1: Press the Windows key + X to access the Quick Link menu and select the Terminal (Admin) option from the list.
Step 2: Paste the command mentioned below and press Enter.
SFC /scannow

Step 3: Run the following commands and press Enter after each:
DISM /Online /Cleanup-Image /CheckHealth
DISM /Online /Cleanup-Image /ScanHealth
DISM /Online /Cleanup-Image /RestoreHealth

Fix 4: Rebuild Search Index
If the above solutions don’t work out, the search index library on your PC has likely become corrupted or inaccessible. In that case, your only option is to rebuild the index from scratch.
Note: This process can take anywhere from a few minutes to several hours, depending on your system and the amount of data.
Step 1: Press the Windows key + I to launch the Settings app. In the Privacy & security tab, select Searching Windows.
Step 2: Scroll down to click on Advanced indexing options.

Step 3: Click on Advanced.
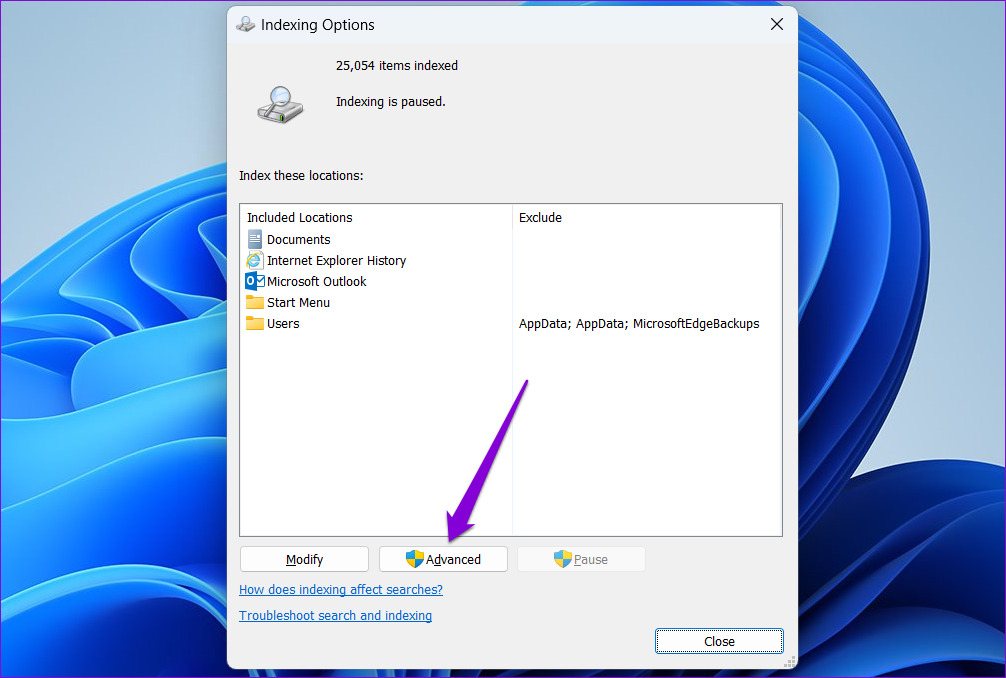
Step 4: Hit the Rebuild button under Troubleshooting.

Fix 5: Run System Restore
A recent change in the system settings or a firmware update may have led to such indexing issues on Windows. If you can’t figure out the exact cause, you can undo those recent changes by performing a system restore.
Step 1: Open the search menu, type in create a restore point and press Enter.

Step 2: Under the System Protection tab, click the System Restore button.

Step 3: Click Next to continue.
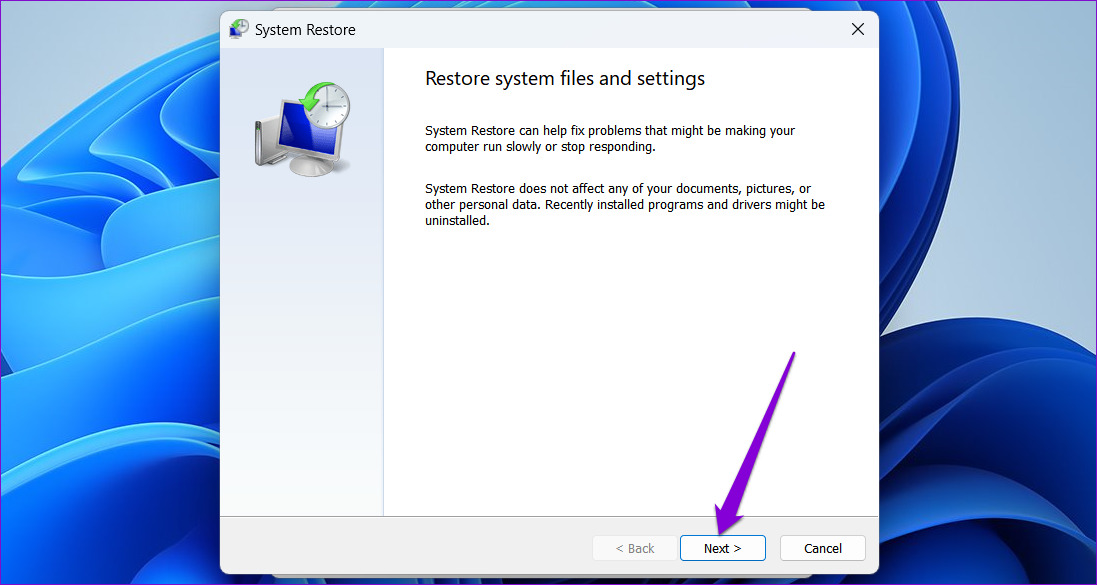
Step 4: Select the Recommended restore option and click Next. Then, click Finish.

Was this helpful?
Last updated on 07 August, 2024
Read Next
 11 Best Ways to Fix Google Chrome Sync Paused Problem
One of the best things about Google Chrome is cross-platform availability.
11 Best Ways to Fix Google Chrome Sync Paused Problem
One of the best things about Google Chrome is cross-platform availability.
 6 Ways to Fix Windows Security Not Opening or Working on Windows 11
Try Basic Fixes Uninstall any third-party antivirus program: Third-party antivirus programs can sometimes interfere with the Windows Security app and prevent it from opening on your Windows 11 PC.
6 Ways to Fix Windows Security Not Opening or Working on Windows 11
Try Basic Fixes Uninstall any third-party antivirus program: Third-party antivirus programs can sometimes interfere with the Windows Security app and prevent it from opening on your Windows 11 PC.
 7 Ways to Fix Windows Key Not Working in Windows 11
Basic Fixes Check for physical damage: There might be physical damage or dirt buildup on your keyboard.
7 Ways to Fix Windows Key Not Working in Windows 11
Basic Fixes Check for physical damage: There might be physical damage or dirt buildup on your keyboard.
 4 Ways to Fix Discord No Route Error on Windows 10 and Windows 11
Try Basic Fixes Restart your router: Since the "No Route" error mainly occurs when there's an interruption with your internet connection, you can start by restarting your router.
4 Ways to Fix Discord No Route Error on Windows 10 and Windows 11
Try Basic Fixes Restart your router: Since the "No Route" error mainly occurs when there's an interruption with your internet connection, you can start by restarting your router.
 4 Ways to Fix Telegram Notifications Not Working on Windows 10 and Windows 11
Try Basic Fixes Disable Do Not Disturb mode: The Telegram app may not be showing notifications due to the Do Not Disturb mode on your Windows PC.
4 Ways to Fix Telegram Notifications Not Working on Windows 10 and Windows 11
Try Basic Fixes Disable Do Not Disturb mode: The Telegram app may not be showing notifications due to the Do Not Disturb mode on your Windows PC.
 6 Ways to Fix Print Spooler Keeps Stopping on Windows 10 and Windows 11
Fix 1: Run Printer Troubleshooter Windows comes with a dedicated printer troubleshooter that can automatically diagnose and fix any printing issues on your PC.
6 Ways to Fix Print Spooler Keeps Stopping on Windows 10 and Windows 11
Fix 1: Run Printer Troubleshooter Windows comes with a dedicated printer troubleshooter that can automatically diagnose and fix any printing issues on your PC.
 6 Ways to Fix Airplane Mode Grayed Out on Windows 10 and Windows 11
Fix 1: Restart Radio Management Service Radio Management Service is an essential component that needs to run in the background for airplane mode to work.
6 Ways to Fix Airplane Mode Grayed Out on Windows 10 and Windows 11
Fix 1: Restart Radio Management Service Radio Management Service is an essential component that needs to run in the background for airplane mode to work.
 5 Ways to Fix “Your Computer Is Low on Memory” Error on Windows 10 and Windows 11
Try Basic Fixes Close unwanted apps and programs: Start by closing any unwanted apps and programs on your computer, especially the ones consuming a major chunk of your PC’s memory.
5 Ways to Fix “Your Computer Is Low on Memory” Error on Windows 10 and Windows 11
Try Basic Fixes Close unwanted apps and programs: Start by closing any unwanted apps and programs on your computer, especially the ones consuming a major chunk of your PC’s memory.
The article above may contain affiliate links which help support Guiding Tech. The content remains unbiased and authentic and will never affect our editorial integrity.