PDF is one of the most popular document formats and preferred mostly for creating and sending official documents. Some of those PDF files do require a signature. Many organizations like to use PDF format files as their official mode of communication and use Adobe Acrobat Reader to open, sign, and check PDF files.

One useful feature of Adobe Reader app is validating digital signatures in PDF files. That helps you to sign contracts, aggreements, or even authenticate documents. This post will show you how to validate digital signatures in Adobe Acrobat Reader on Mac and Windows.
Digital signatures in PDF files have eased the process of getting approvals or verifying documents. You can even protect your PDF files with a password to ensure confidentiality. You can easily validate digital signatures in Adobe Acrobat Reader on Mac or Windows. But, you should ensure you are using the latest version of Adobe Acrobat Reader.
Follow these steps to check for updates. The steps are the same for Windows and Mac users.
Step 2: Click on Help from the top menu bar.

Step 3: Select Check for Updates.

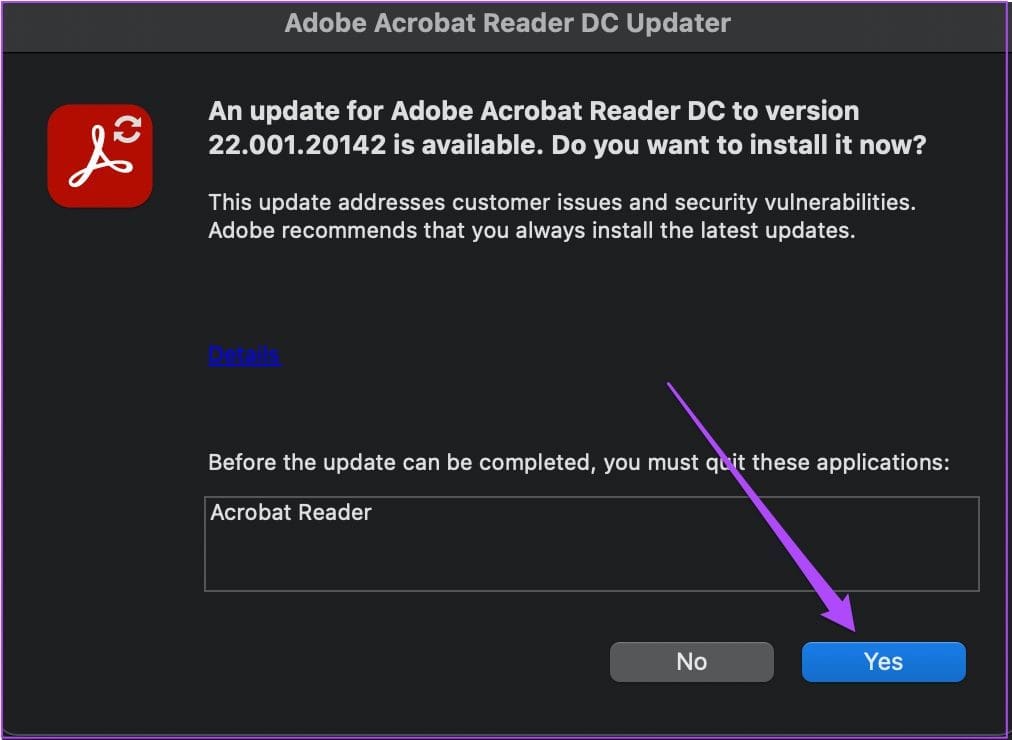
The app will check for updates.
Step 4: If an update is available, click on Yes to download and install it.
Validate Digital Signatures in PDF Files on Mac
For those using Adobe Acrobat Reader on Mac, you’ll need to enable a few options before checking for digital signature validation. Follow these steps to validate digital signatures in PDF files if you are a Mac user.
Step 1: Press Command + Spacebar to open Spotlight Search, type Adobe Acrobat Reader, and press Return.

Step 2: Open the PDF file wherein you want to validate the digital signature.
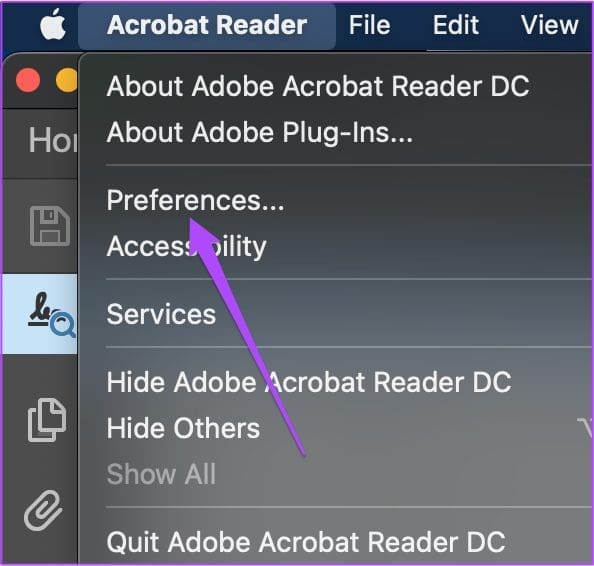
Step 3: Click on Adobe Reader in the top-left corner of the menu bar.

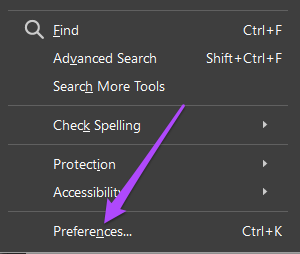
Step 4: Select Preferences from the list of options.
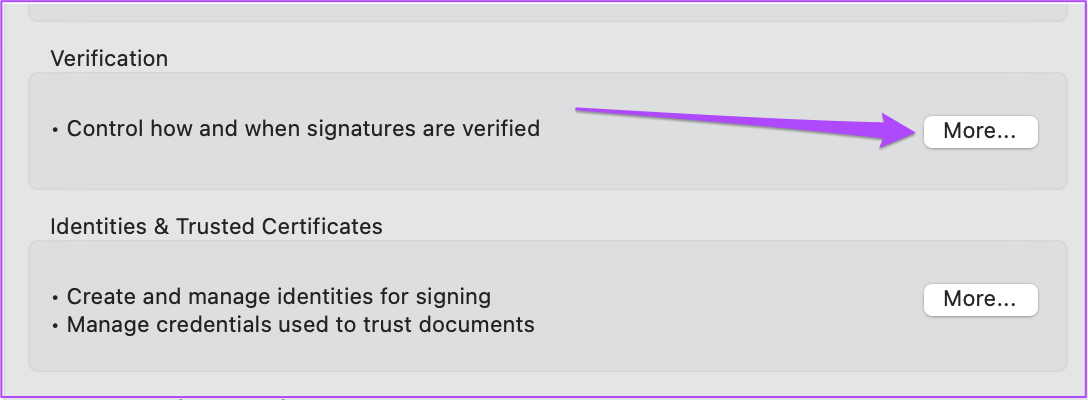
Step 5: In the Preferences window, click on Signatures from the left menu.

Step 6: Click on More under the Verification tab on the right.
Step 7: In the Signature Verification Preferences windows, click to uncheck the option of ‘Require Certificate Revocation.’

Step 8: Click on Ok.

Step 9: Click on Ok once again to confirm your action.

Step 10: Close the window and click on the digital signature in your document.

The Signature Validation Status window will open on your screen.
Step 11: Click on Signature Properties.

Step 12: Click on Validate Signature.

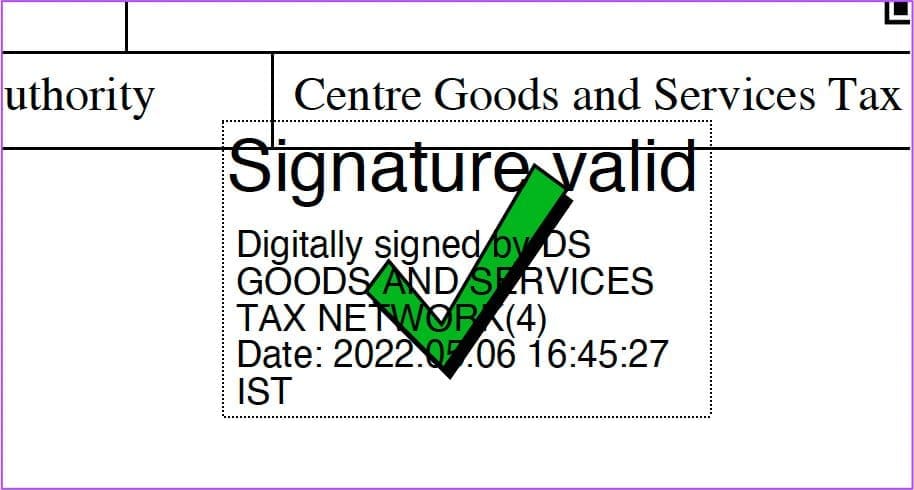
Step 13: Close the Signature Validation Status window and notice a green tick to denote that your signature has been validated.
Validate Digital Signatures in PDF Files on Windows
Adobe Acrobat Reader on Windows also needs to enable the signature validation option. However, the steps to enable the option to validate digital signatures in PDF files using Adobe Acrobat Reader are slightly different for Windows users.
Step 1: Open Adobe Acrobat Reader on your Windows system.

Step 2: Open the PDF file wherein you want to validate the digital signature.
Step 3: After your file opens, click on Edit in the top-left corner of the menu bar.
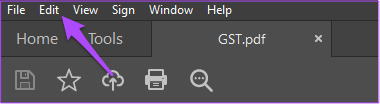
Step 4: Select Preferences from the list of options.
Step 5: Scroll down and click on Signatures from the left menu.

The rest of the steps to validate the digital signature remain the same as for Mac users – check from Step 10 onwards.
Check Validity of Digital Signature in PDF File
If you receive a PDF file with a validated digital signature, you can check the validity of the signature by following these steps which are the same for Mac and Windows.
Step 1: Open the PDF file with the validated digital signature.
Step 2: Right-click on the digital signature to reveal options.

Step 3: Click on Signature Properties.

In the Signature Properties window, you can check the Signing Time and Source of Trust for validating the signature.
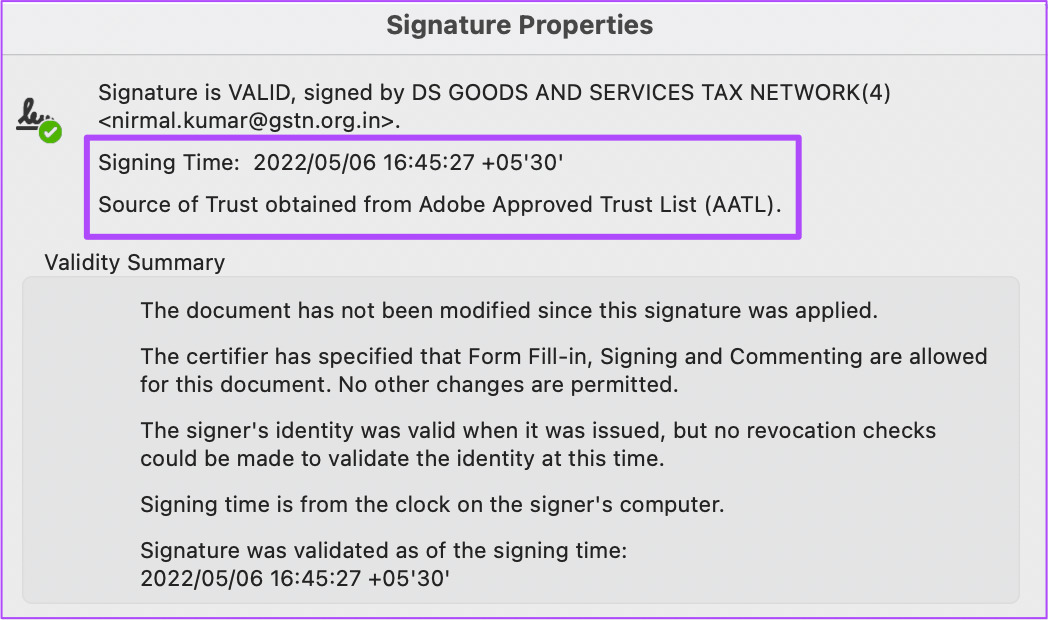
To check whether the document was modified after it was signed, click on the Show Signer’s Certificate button under ‘Signer Info.’

The certificate will open on your screen for the PDF file.
Check Digital Signature History in PDF File
The Signature Panel in Adobe Acrobat Reader allows you to check information about each digital signature in your PDF file. You can also view the history of changes that have been done in the digital signatures. Here’s how to do that in Adobe Acrobat Reader for Mac and Windows.
Step 1: Open your PDF file with the digital signature in Adobe Acrobat Reader on your Mac or Windows computer.
Step 2: Click on View in the top menu bar.

Step 3: Select Show/Hide from the list of options.

Step 4: Select Navigation Panes.

Step 5: Click on Signatures from the list of options.

The Signatures panel will open on the left side of your screen.
Step 6: Double click on the signature name or click the arrow alongside the signature to view the changes history.

Easily Validate Digital Signatures in PDFs
Digital Signature Validation is a great way to verify your official documents or approve them for further process in your company. The best part is that you can do this in Adobe Acrobat Reader for free. You don’t have to pay for the Adobe subscription.
Was this helpful?
Last updated on 23 June, 2022
Read Next
 How to Disable or Remove Recent Files in Adobe Reader and Acrobat DC
All Adobe Acrobat DC products (Pro, Standard, and Reader) are excellent PDF powerhouses.
How to Disable or Remove Recent Files in Adobe Reader and Acrobat DC
All Adobe Acrobat DC products (Pro, Standard, and Reader) are excellent PDF powerhouses.
 How to Open Files in Separate Windows on Adobe Acrobat Pro, Standard, and Reader DC
The tabbed-view in Adobe Acrobat Pro, Standard, and Reader DC is a mixed bag.
How to Open Files in Separate Windows on Adobe Acrobat Pro, Standard, and Reader DC
The tabbed-view in Adobe Acrobat Pro, Standard, and Reader DC is a mixed bag.
 How to Enable Scrolling By Default in Adobe Acrobat DC and Reader DC
Switching to your preferred page mode in Adobe Acrobat DC and Acrobat Reader DC often disables continuous scrolling.
How to Enable Scrolling By Default in Adobe Acrobat DC and Reader DC
Switching to your preferred page mode in Adobe Acrobat DC and Acrobat Reader DC often disables continuous scrolling.
 How to Fit Full Page to Window By Default in Adobe Acrobat DC and Reader DC
Adobe Acrobat DC and Acrobat Reader DC prefer fitting pages by width.
5 Fixes for Adobe Acrobat Reader Not Opening in Windows 11/10
Before starting the fixes, please note that Adobe Acrobat Reader DC and Adobe Acrobat Reader are the same now.
How to Fit Full Page to Window By Default in Adobe Acrobat DC and Reader DC
Adobe Acrobat DC and Acrobat Reader DC prefer fitting pages by width.
5 Fixes for Adobe Acrobat Reader Not Opening in Windows 11/10
Before starting the fixes, please note that Adobe Acrobat Reader DC and Adobe Acrobat Reader are the same now.
 How to Insert a Word File into a PDF Using Adobe Acrobat
Both Word and PDF files are very important in today’s work environment.
How to Insert a Word File into a PDF Using Adobe Acrobat
Both Word and PDF files are very important in today’s work environment.
 How to Open a PDF in Full Screen Mode Using Adobe Acrobat on Windows 11
While exchanging documents and forms, many prefer to convert those files to PDFs.
How to Open a PDF in Full Screen Mode Using Adobe Acrobat on Windows 11
While exchanging documents and forms, many prefer to convert those files to PDFs.
 How to Add and Edit a PDF Background Using Adobe Acrobat
Most PDFs have a white background, to ensure the black font is clearly legible.
How to Add and Edit a PDF Background Using Adobe Acrobat
Most PDFs have a white background, to ensure the black font is clearly legible.
The article above may contain affiliate links which help support Guiding Tech. The content remains unbiased and authentic and will never affect our editorial integrity.