Microsoft is continuing to improve its services for users, and this also extends to accessibility. If you have visual impairments or just need to give your eyes a break from the screen glare, then Night Light isn’t your only way to go anymore. In this article, we’ll be talking about the new Windows 11 screen tint feature and how to use it.
Testing the Tint
The screen tinting feature is brand new to Windows 11. So new, in fact, that many users won’t have it available on their machines just yet. Only those with build 26300.8497 will be able to use it for now. If this seems way above your current build number, that’s because you need to be a member of the Windows Insider Program to be able to test this feature.
If all goes well, this feature will likely be rolled out to all users a bit later.
What Does Screen Tinting Entail?
Screen tinting is a little different from the color filters you currently find in the Accessibility section of Settings. It adds a color as an overlay to your whole screen, which can go a long way to reducing eye strain during long sessions or just making colors seem more muted. Like the Night Light feature that’s kinder to your eyes, the “Screen tint” feature functions as an accessibility tool, but with more choice for color and tint strength.
Using the Windows 11 Screen Tint Feature
If you have the build and are part of the Insider Program, here’s what to do if you want to turn on (and customize) your screen tinting:
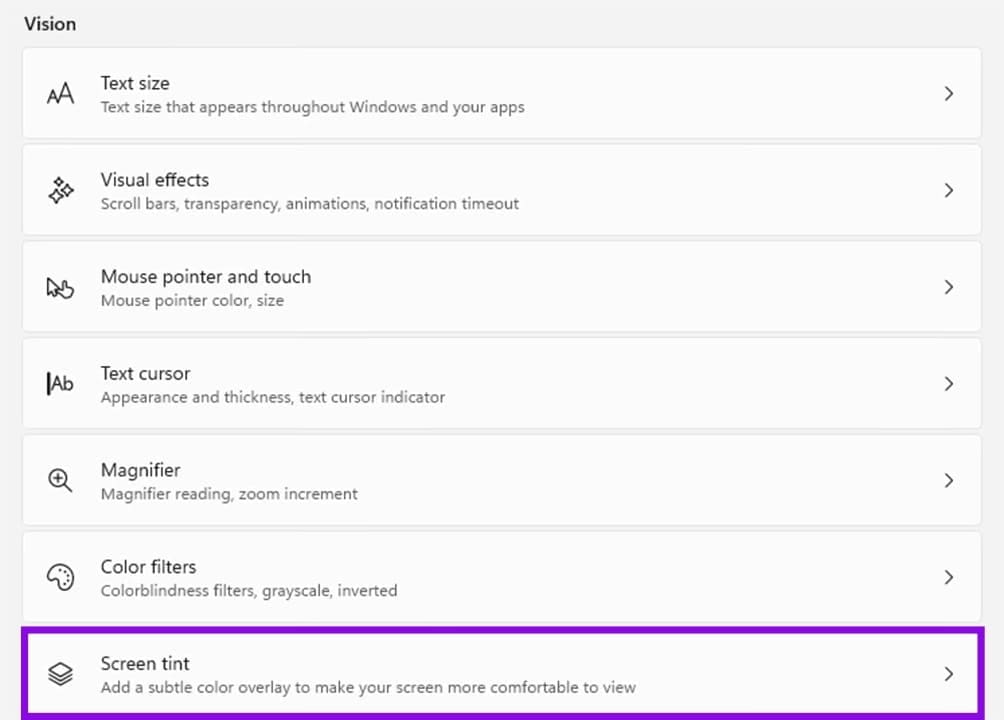
Step 1. Open “Settings” (Win + I) and then click the “Accessibility” tab in the sidebar.
Step 2. Under the “Vision” subsection, click “Screen tint” in the main window.
Step 3. In the “Screen tint” window, drag the “Show a color overlay” toggle to “On” to enable the tint.

Step 4. If you want to change the color of the tint overlay, simply click a “Tint color” preset, or hit “View colors” next to “Custom tint” for more options.
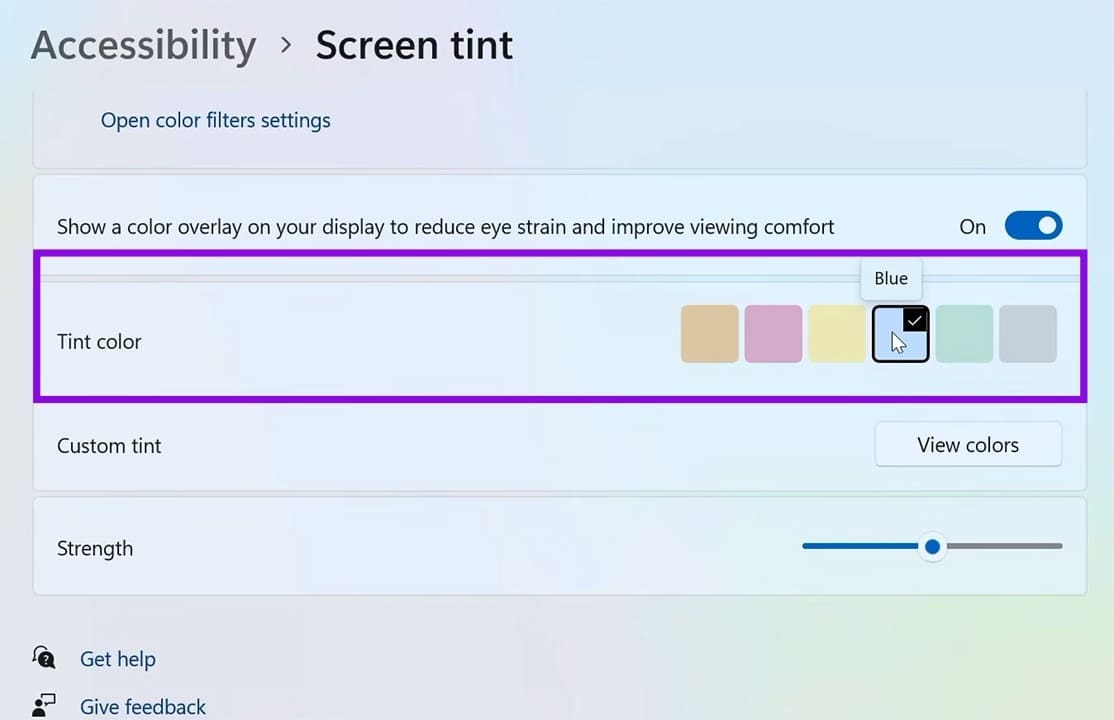
Step 5. Drag the “Strength” slider up and down to adjust the overlay intensity.
Screen Tint Alternatives
Even though “Screen tint” is a great feature to have, it’s not the only way of adjusting the colors on your screen. Let’s look at two alternatives.
Night Light
This feature removes the blue light from your screen, aiding with sleep and reducing eye strain. It can even be set to automatically turn on at a certain time. Here’s how to use it:
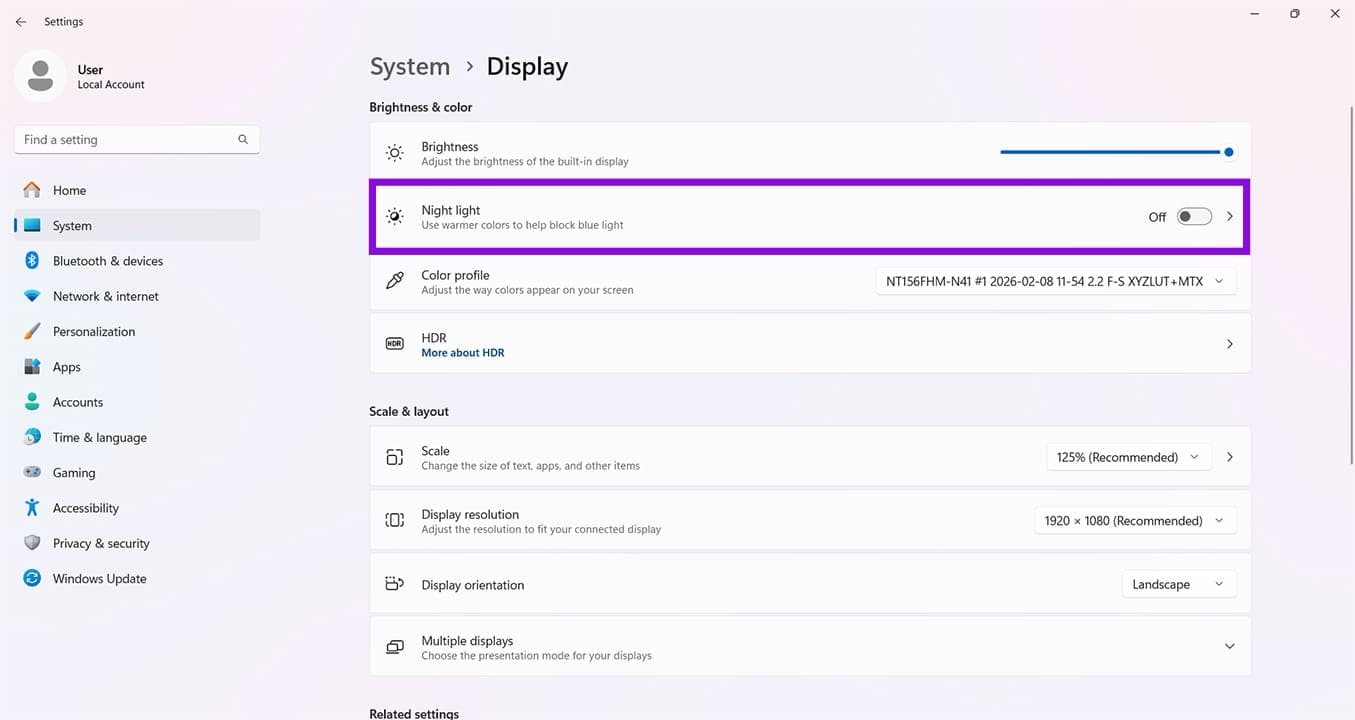
Step 1. Open “Settings” (Win + I) and head to “System.”
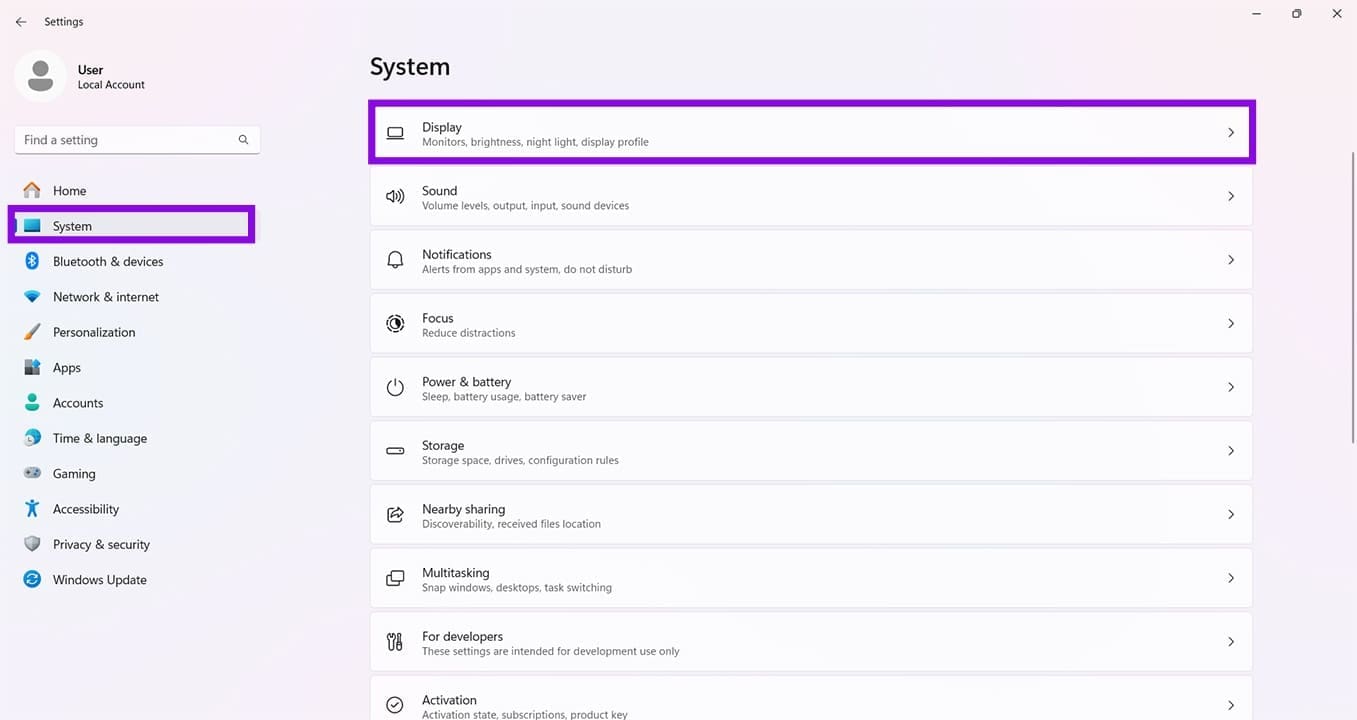
Step 2. Click on “Display.”
Step 3. Click the “Night light” option under “Brightness & color.”
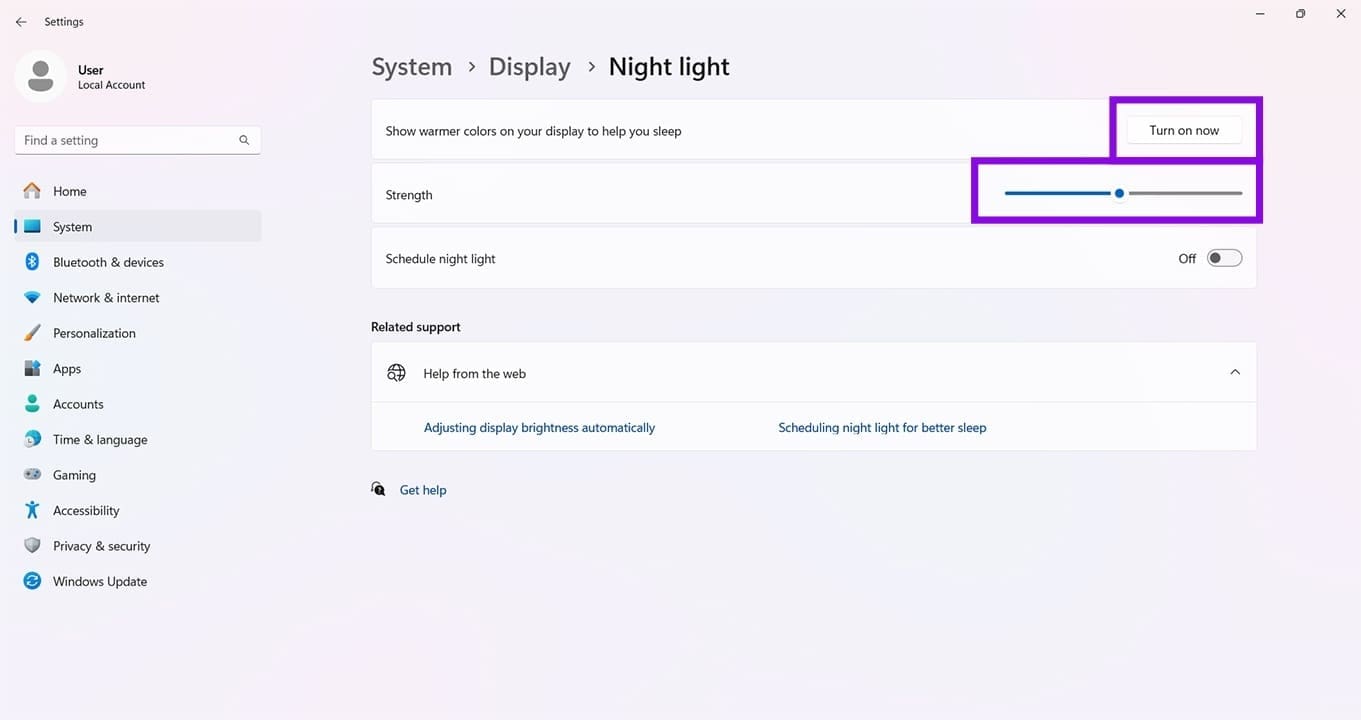
Step 4. Click “Turn on now” to activate the feature and drag the “Strength” slider for intensity.
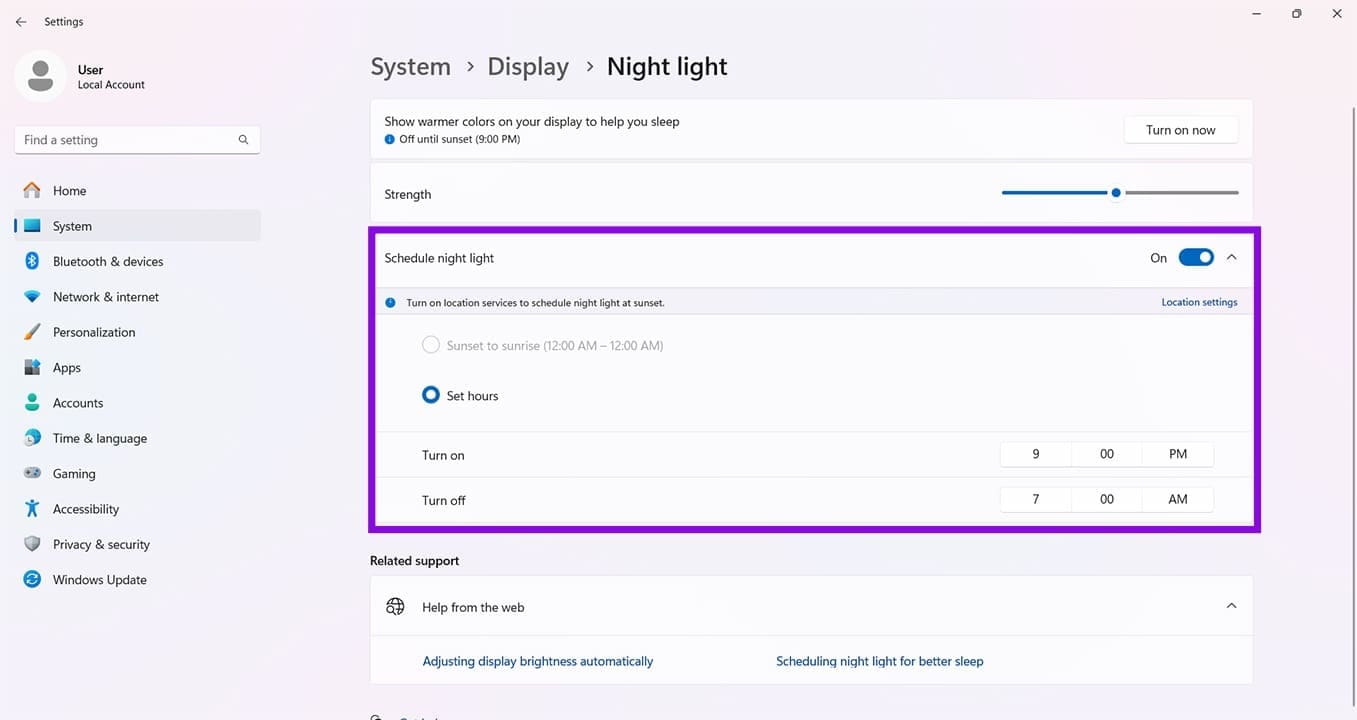
Step 5. Toggle the “Schedule night light” option to “On” to manually choose the start and end times for the feature.
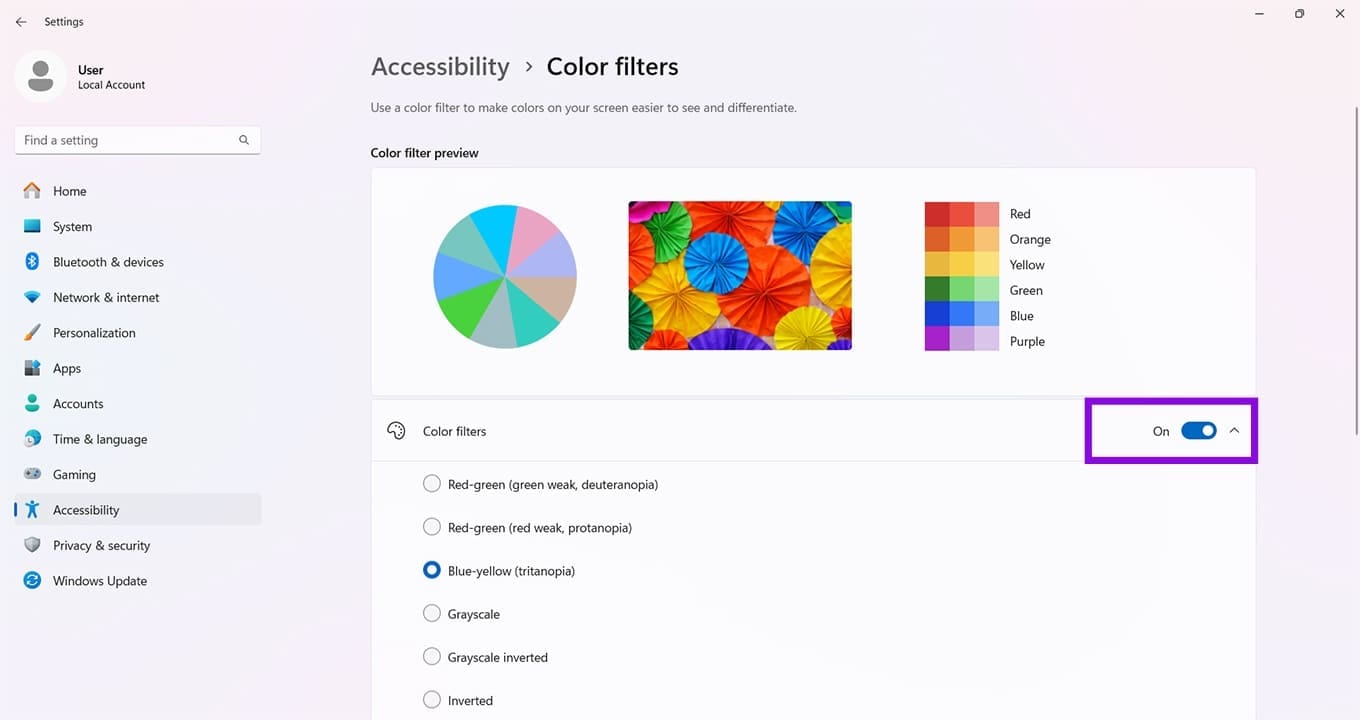
Color Filters
For forms of color blindness or visual impairment, Windows has the “Color filter” feature. It’s not a screen overlay per se, but it does adjust colors. Here’s how to use it:
Step 1. Open “Settings” and then click “Accessibility.”
Step 2. Click the “Color filters” option.
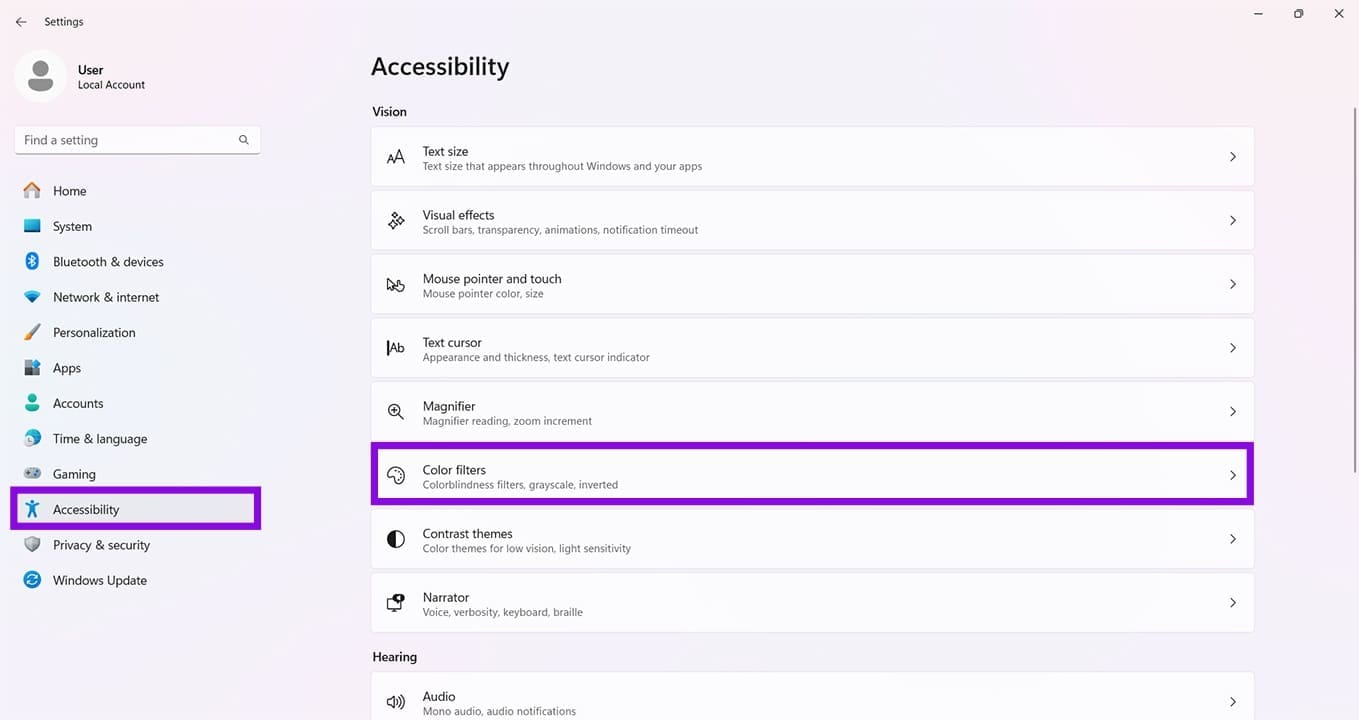
Step 3. Toggle the “Color filters” slider to “On” and choose your color setting.
Was this helpful?
Last updated on 03 June, 2026
Read Next
 5 Ways to Fix Yellow Tint Issue on Windows 11 Laptop Screen
https://youtu.be/690urJUURvM Basic Fixes: Turn off the Night Light: While Night Light helps reduce eye strain by turning your screen to a warmer shade, it can make the computer monitor screen
5 Ways to Fix Yellow Tint Issue on Windows 11 Laptop Screen
https://youtu.be/690urJUURvM Basic Fixes: Turn off the Night Light: While Night Light helps reduce eye strain by turning your screen to a warmer shade, it can make the computer monitor screen
 5 Fixes When Wireless Display Feature is Not Working on Windows 11
Basic Fixes: Ensure your devices support Miracast and Wi-Fi Direct protocol: One essential prerequisite for using the wireless display feature on Windows 11 is that all your devices, including your
5 Fixes When Wireless Display Feature is Not Working on Windows 11
Basic Fixes: Ensure your devices support Miracast and Wi-Fi Direct protocol: One essential prerequisite for using the wireless display feature on Windows 11 is that all your devices, including your
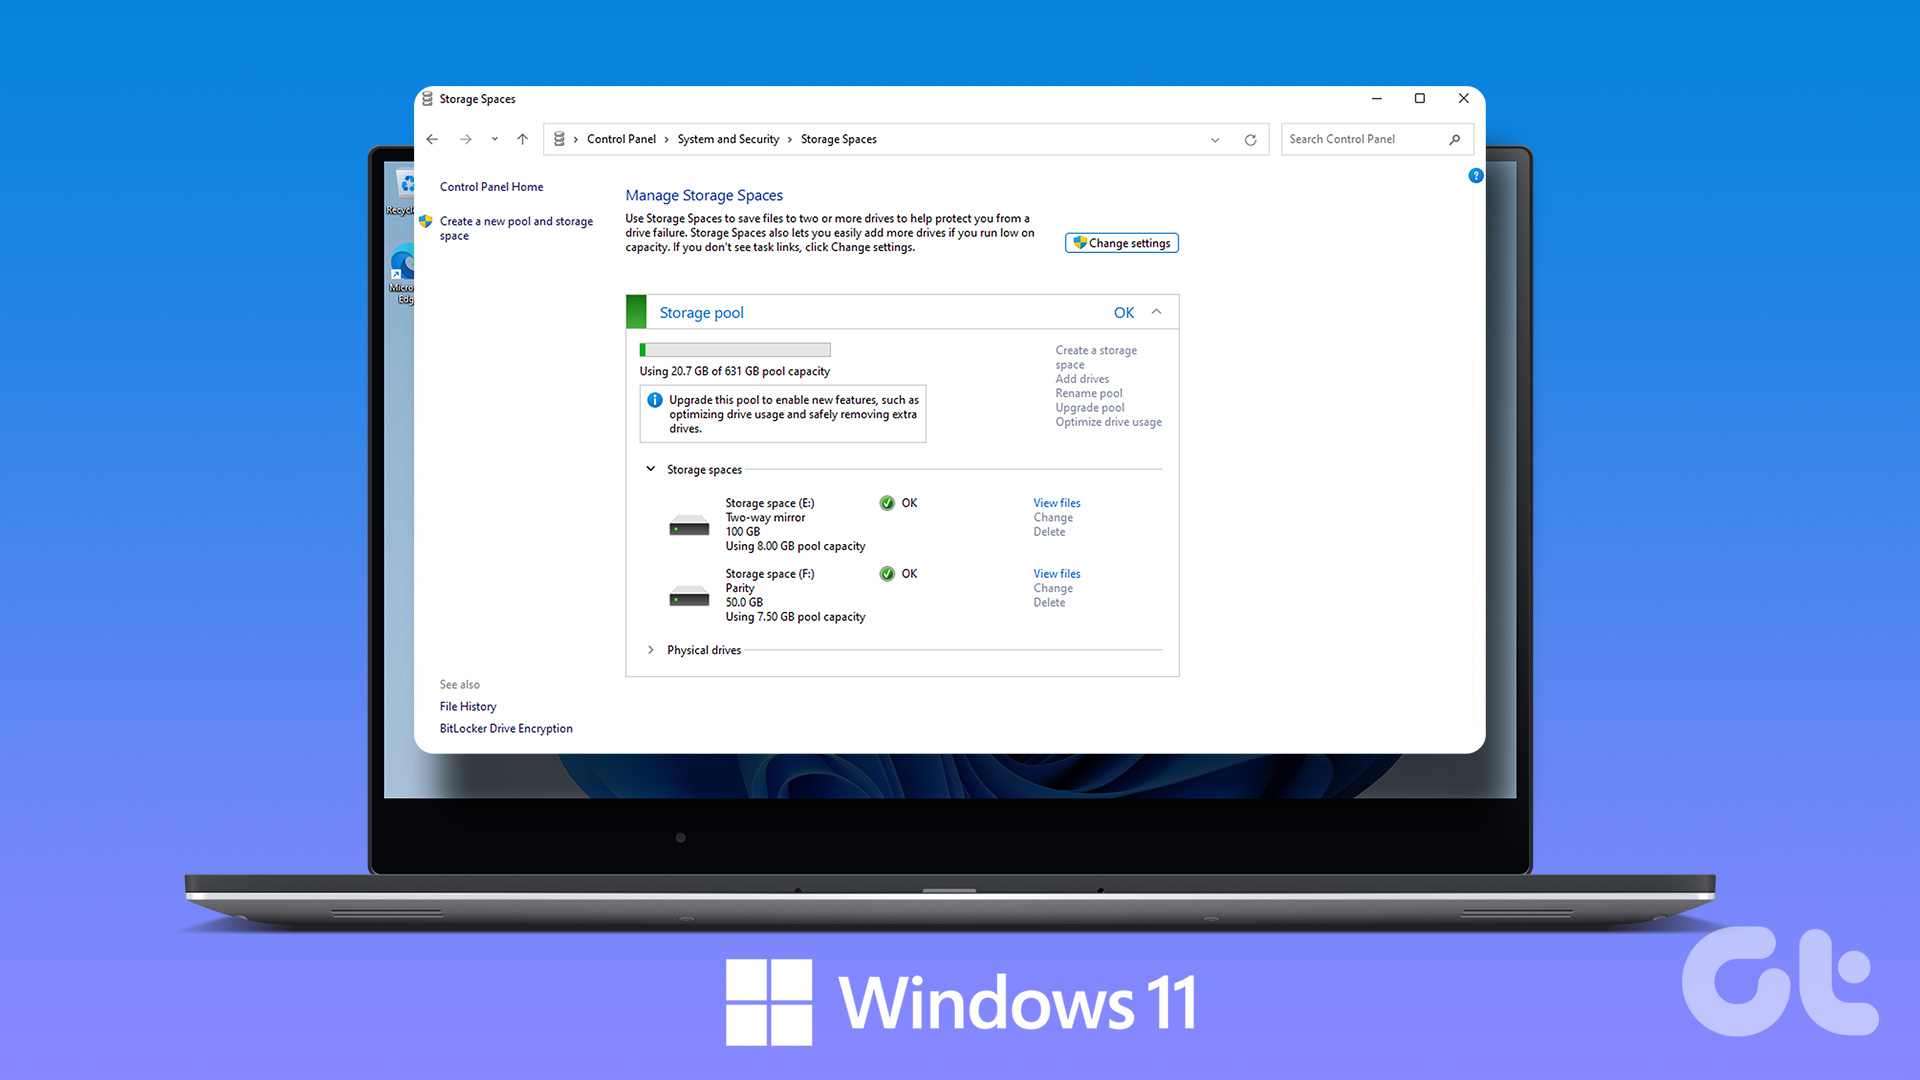 How to Create and Use the Storage Spaces Feature on Windows 11
What Are Storage Spaces in Windows 11 and Why Should You Create One Storage Spaces lets you create an array or group of two or more physical hard drives to create
How to Create and Use the Storage Spaces Feature on Windows 11
What Are Storage Spaces in Windows 11 and Why Should You Create One Storage Spaces lets you create an array or group of two or more physical hard drives to create
 What Is Microsoft’s New Recall Feature?
AI is becoming a more prominent part of the Windows operating system, with Microsoft’s Copilot AI now present in all of its main apps.
What Is Microsoft’s New Recall Feature?
AI is becoming a more prominent part of the Windows operating system, with Microsoft’s Copilot AI now present in all of its main apps.
 6 Best Wireless Earbuds With Ambient Sound Feature
Wireless earphones are small, compact, and don't have the most tangled dread - wires.
6 Best Wireless Earbuds With Ambient Sound Feature
Wireless earphones are small, compact, and don't have the most tangled dread - wires.
 What Is Facebook Take a Break Feature and How to Use it
What Is Take a Break Feature The Take a break feature lets you literally take a break from someone on Facebook without blocking or restricting them.
What Is Facebook Take a Break Feature and How to Use it
What Is Take a Break Feature The Take a break feature lets you literally take a break from someone on Facebook without blocking or restricting them.
 How to Use the Good Morning Feature on Your iPhone
How to Enable Sleep Focus to See the Good Morning Screen When you have a sleep schedule and Sleep Focus enabled, your iPhone will show you a Good Morning screen.
How to Use the Good Morning Feature on Your iPhone
How to Enable Sleep Focus to See the Good Morning Screen When you have a sleep schedule and Sleep Focus enabled, your iPhone will show you a Good Morning screen.
 How to Use the People Feature in the iPhone Photos App
Add Someone in Your People Album In the Photos album, you can add names to the people or even add new people.
How to Use the People Feature in the iPhone Photos App
Add Someone in Your People Album In the Photos album, you can add names to the people or even add new people.
The article above may contain affiliate links which help support Guiding Tech. The content remains unbiased and authentic and will never affect our editorial integrity.