While the Xbox Game Bar has some undeniably cool capabilities, such as real-time recording, performance monitoring, advanced screen capture, and even in-game browsers, it’s still one more process that runs in the background. And unlike most processes, unless you disable it at system start, it will eat up a bit of CPU performance. For gaming, this can translate into a small but sometimes noticeable drop in FPS.
If you’re not really using this utility, here’s how to uninstall Xbox Game Bar (Windows 11 version).
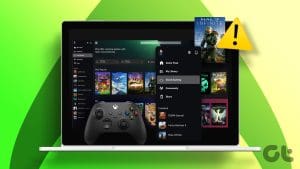
Uninstall Xbox Game Bar (Windows 11) Step by Step
You can’t really uninstall Xbox Game Bar from Windows like you would any other program by going into the “add or remove programs” utility. This is because the Xbox Game Bar is technically an added background utility built into Windows. Instead, what you’ll need to do is prevent it from running in the background.
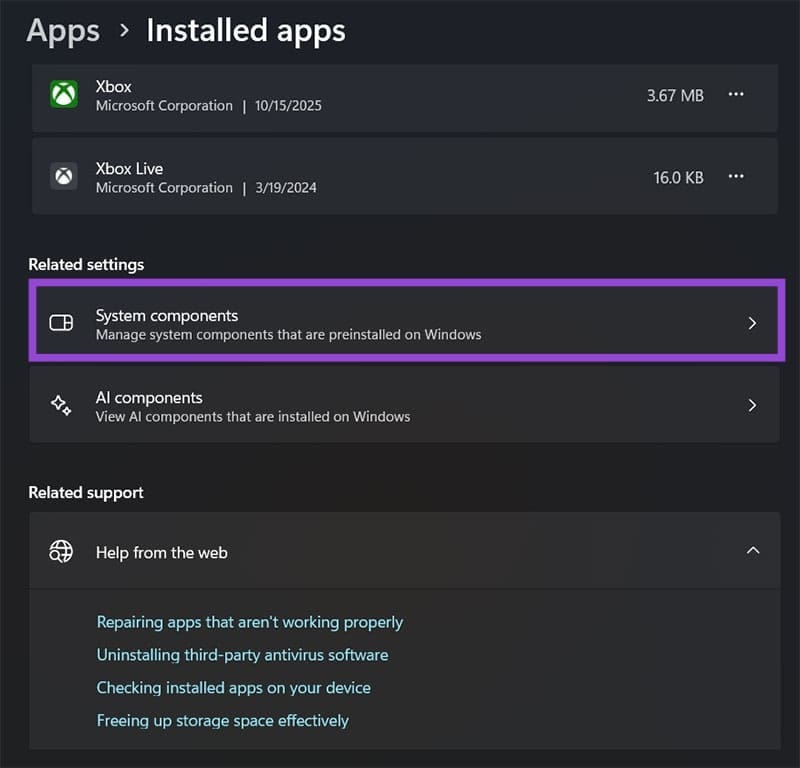
Step 1. Open the search bar and type in “program” or “remove program.” This should bring up “Add or remove programs” as the best match. Select that option. Alternatively, hit “Win + I” to enter Settings, select “Apps” from the sidebar, and choose the first option (“Installed Apps”).

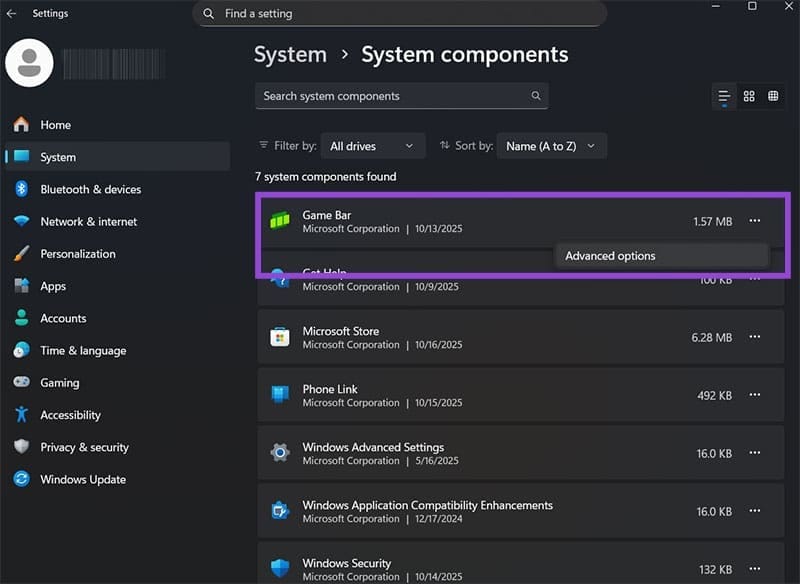
Step 2. Scroll down and select “System components.”
Step 3. Click on the three dots on the “Game Bar” entry and select “Advanced options.”
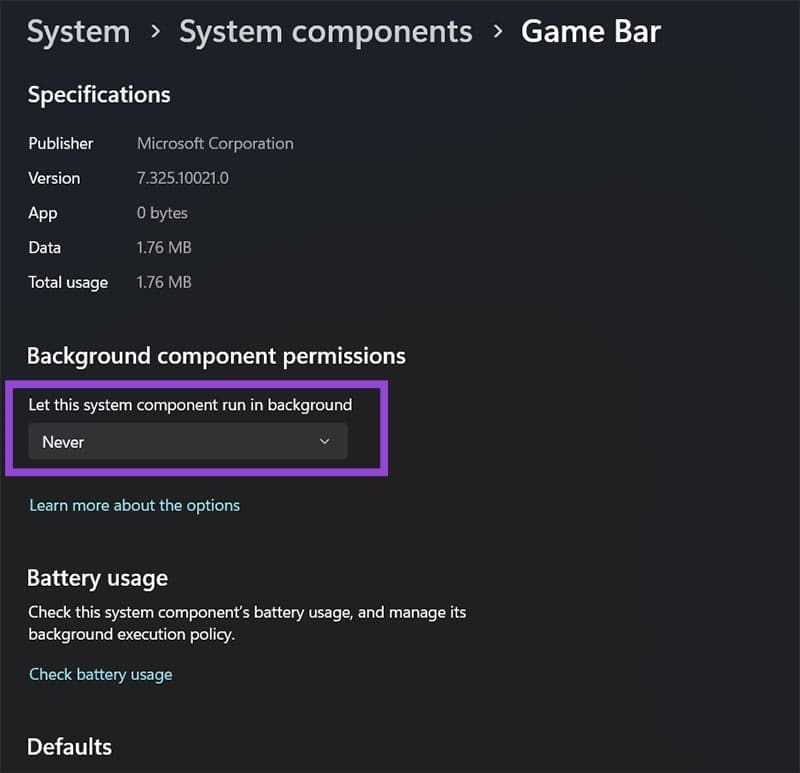
Step 4. In the “Background component permissions” section, select the option “Never.”
Step 5. Scroll down and hit “Terminate” to remove the current Game Bar process.
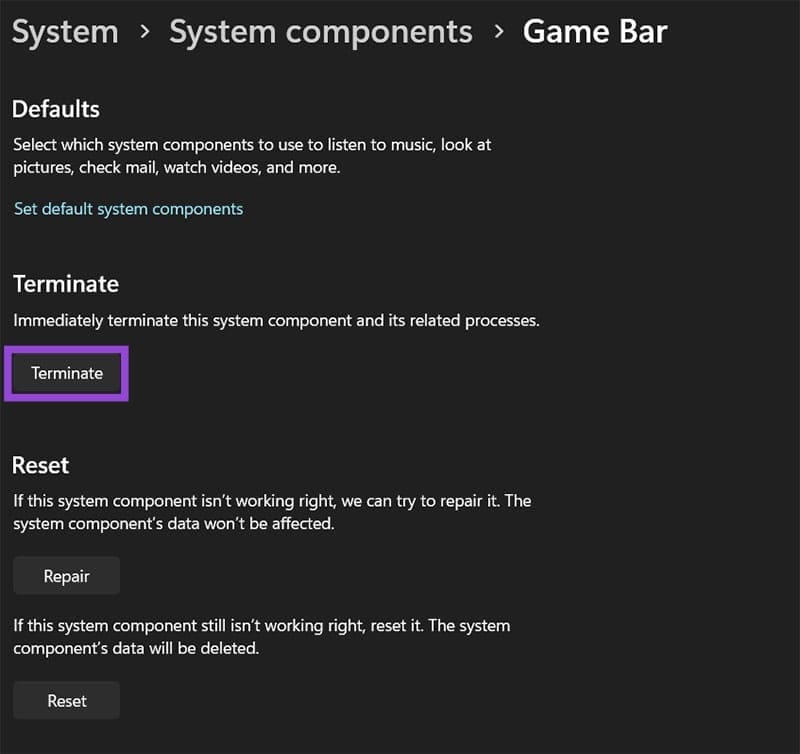
Once you do this, the Game Bar process should stop running, and pressing its keyboard shortcut (“Win + G”) shouldn’t do anything.
Uninstall Xbox Game Bar Ffrom Windows via Console Commands
If preventing the background process doesn’t work and you can still get the bar to appear, you can terminate the process and remove its keybinding via PowerTools. Alternatively, you can use console commands to try to get the process out of the system entirely.
Step 1. Hit “Win + X” or right-click on the Start menu, then select “Terminal (Admin).” This opens the Windows PowerShell console.
Step 2. Paste the following command and hit “Enter” to get an overview of Xbox processes:
dism /Online /Get-ProvisionedAppxPackages | Select-String PackageName | Select-String xbox
Step 3. Run the following command (all at once, PowerShell will warn you about pasting multiple lines and select “Run anyway” or “Yes”):
dism /Online /Get-ProvisionedAppxPackages | `
Select-String PackageName | `
Select-String xbox | `
ForEach-Object {$_.Line.Split(‘:’)[1].Trim()} | `
ForEach-Object { dism /Online /Remove-ProvisionedAppxPackage /PackageName:$_}

Step 3b. Alternatively, you can try the following command:
Get-ProvisionedAppxPackage -Online | `
Where-Object { $_.PackageName -match “xbox” } | `
ForEach-Object { Remove-ProvisionedAppxPackage -Online -PackageName $_.PackageName }
Step 3c. Here’s another option that might work, depending on your current system build, which only removes the overlay (and then you can terminate the background process normally as in the previous fix):
Get-AppxPackage -AllUsers Microsoft.XboxGamingOverlay | Remove-AppxPackage
Step 4. Restart the PC.
Using Third-Party Uninstallers
In some cases, a third-party uninstaller might be able to see and uninstall Xbox Game Bar Windows 11 files that are typically locked to user access. However, not all uninstallers will have this option or be able to fully delete background utilities, so you may need to try a few different solutions (or pay for premium, which might not be worth the hassle).
Was this helpful?
Last updated on 19 October, 2025
Read Next
 5 Ways to Fix Xbox Game Bar Not Working on Windows 11
Fix 1: Enable Xbox Game Bar in Windows Settings If you can't launch the Xbox Game Bar from your connected game controller on Windows 11, head to Windows Settings to
5 Ways to Fix Xbox Game Bar Not Working on Windows 11
Fix 1: Enable Xbox Game Bar in Windows Settings If you can't launch the Xbox Game Bar from your connected game controller on Windows 11, head to Windows Settings to
 4 Best Ways to Record Screen Without Xbox Game Bar on Windows 11
The Xbox Game Bar on your Windows 11 computer is a good built-in tool for screen recording.
4 Best Ways to Record Screen Without Xbox Game Bar on Windows 11
The Xbox Game Bar on your Windows 11 computer is a good built-in tool for screen recording.
 3 Ways to Disable Xbox Game Bar on Windows 11
Method 1: Using PowerShell Step 1: Press the Windows key, type PowerShell, and click Run as Administrator.
3 Ways to Disable Xbox Game Bar on Windows 11
Method 1: Using PowerShell Step 1: Press the Windows key, type PowerShell, and click Run as Administrator.
 8 Fixes for Microphone Not Working in Xbox Game Bar on Windows 11
Basic Fixes Reconnect the external microphone: Plug out the external connected microphone, wait a few seconds, and reconnect it.
8 Fixes for Microphone Not Working in Xbox Game Bar on Windows 11
Basic Fixes Reconnect the external microphone: Plug out the external connected microphone, wait a few seconds, and reconnect it.
 How to Solve Windows 10 Game Bar Not Working and Other Common Issues
With the recent Windows 10 version 1809 update, Microsoft pushed a bunch of improvements to the Xbox Game Bar.
How to Solve Windows 10 Game Bar Not Working and Other Common Issues
With the recent Windows 10 version 1809 update, Microsoft pushed a bunch of improvements to the Xbox Game Bar.
 6 Ways to Fix Xbox App Not Opening in Windows 11
Fix 1.
6 Ways to Fix Xbox App Not Opening in Windows 11
Fix 1.
 How to Fix Xbox App Not Downloading Games on Windows 11
Basic Fixes Check your network connection: Ensure your PC has a good internet connection to download games in the Xbox app.
How to Fix Xbox App Not Downloading Games on Windows 11
Basic Fixes Check your network connection: Ensure your PC has a good internet connection to download games in the Xbox app.
 5 Fixes for Cloud Gaming Not Working in Xbox App for Windows
Fix 1.
5 Fixes for Cloud Gaming Not Working in Xbox App for Windows
Fix 1.
The article above may contain affiliate links which help support Guiding Tech. The content remains unbiased and authentic and will never affect our editorial integrity.