Google Photos is the go-to app that allows you to view, edit, and organize pictures from any folder on your PC. But what happens when you want to add online pictures to that equation? Well, if you’re looking to sync Google Photos with Windows 11, then this article has you covered. We have a step-by-step guide to help
Taking the Scenic Route
There’s no easy way around it, and no direct way to connect Google Photos to your Photos app. That said, Photos can read picture files from any folder on your PC. By integrating with Google Drive, you can have a folder on your desktop that holds all your online pictures. It will take a few more steps than you might expect, but it will work.
Sync Google Photos With Windows 11 Through Google Drive
Photos will work with any synced folder on your PC, but the key is getting the Google Photos there first. You’ll need to sync these photos with Google Drive, download the desktop version of Drive, share it, and sync that folder with Photos. Let’s get started:
Download Your Google Photos to Your Desktop with Google Takeout
The first part can be done through any browser. You’ll need to add your Google Photos to your Drive through Google Takeout. Here’s what to do:
Step 1. Open your browser of choice and navigate to your Google Drive account. Sign in if need be.
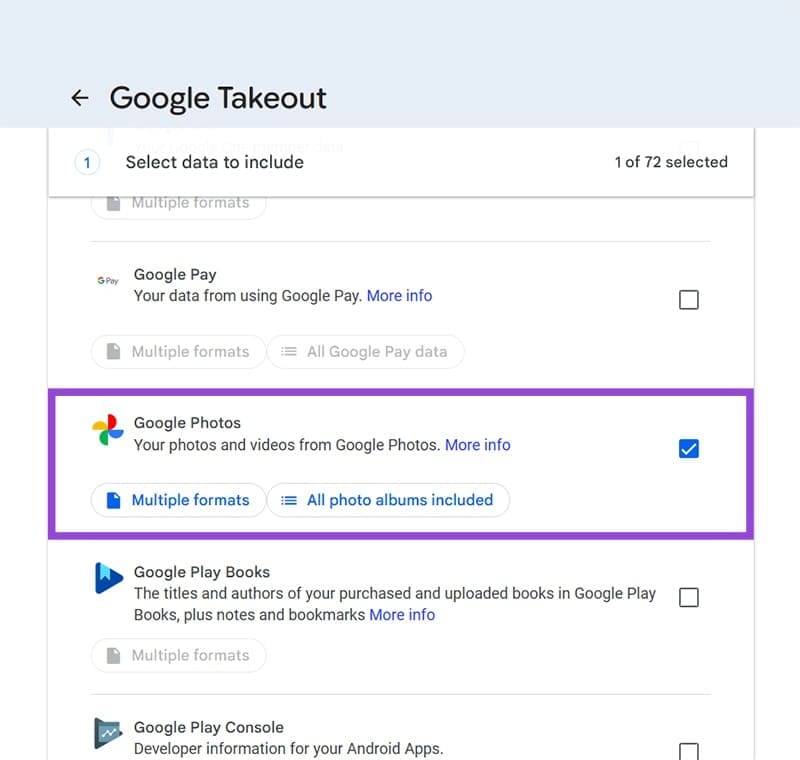
Step 2. In a separate tab, open Google Takeout.
Step 3. Deselect all options and navigate down to “Google Photos” and check it.
Step 4. Scroll further down and click the “Next Step” button.

Step 5. Set your “Transfer Destination” to “Add to Drive.”

Step 6. Choose the format and frequency of the folder update before clicking “Create export.”
Step 7. If you’ve chosen “.zip” as a format, you’ll need to unzip the folder in Google Drive.
Add Google Drive to Your Desktop
With Google Photos linked, the next step is to get Drive downloaded to your desktop:
Step 1. Download Google Drive for your desktop.
Step 2. Click the download and follow the steps to install.
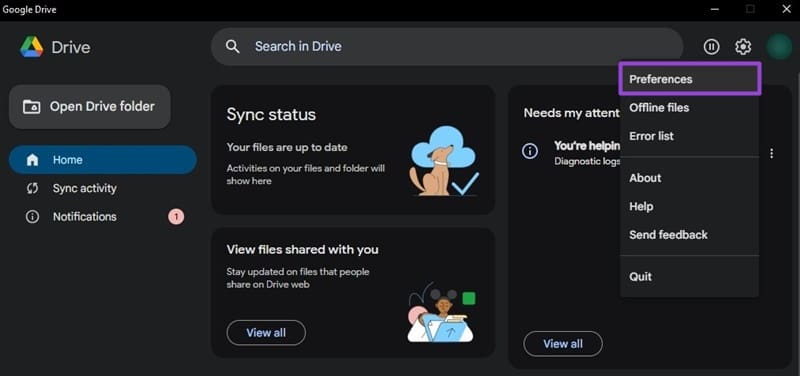
Step 3. Once installed, run Google Drive and sign in with your account.
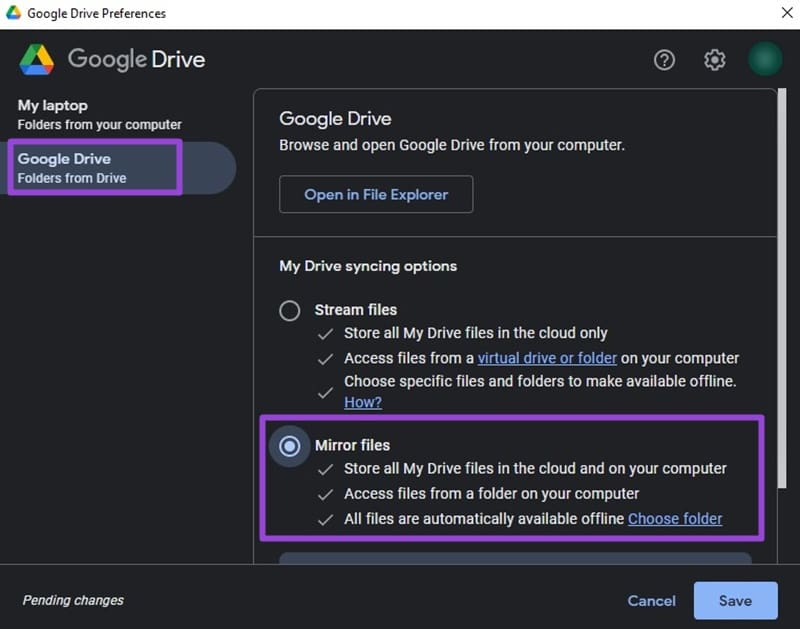
Step 4. Select the Settings icon and choose “Preferences.”
Step 5. In the next window, click Google Drive and choose “Mirror files.” You can also select a specific drive letter for your Drive files, and change it later in “Preferences” again.
Step 6. Your files will begin syncing with your PC. Allow the process to finish.
Add the Photos Folder to the Photos App
Now for the final step, the actual syncing with Photos. Here’s what to do:
Step 1. Open the Photos app via the Search Bar or shortcut.
Step 2. In the sidebar, click the Add Folder icon to the right of “Gallery.”
Step 3. Use Explorer to locate your Photos folder under the drive letter you saved it and the rest of your Google Drive.
Step 4. Allow the Google Photos to sync with your app and index. This might take some time.
Was this helpful?
Last updated on 21 December, 2025
Read Next
 How to Sync Apple Photos Library With Google Photos
How to Enable Backup & Sync in Google Photos To add the pictures in your Photos app to the Google Photos app, you first need to enable the automatic sync
How to Sync Apple Photos Library With Google Photos
How to Enable Backup & Sync in Google Photos To add the pictures in your Photos app to the Google Photos app, you first need to enable the automatic sync
 How to See All the Photos Shared via Facebook Messenger
Check Shared Photos on the Web Messaging is an important part of our lives and each platform that is offering IM services is trying to one-up the other.
How to See All the Photos Shared via Facebook Messenger
Check Shared Photos on the Web Messaging is an important part of our lives and each platform that is offering IM services is trying to one-up the other.
 How to Auto Sync Files and Photos to Google Drive on Android
Today, smartphones are more than just devices for tending to calls and messages.
How to Auto Sync Files and Photos to Google Drive on Android
Today, smartphones are more than just devices for tending to calls and messages.
 5 Ways to Fix Google Photos App Not Showing All Photos
Basic Fixes Check your network connection - Ensure your phone is connected to a good internet connection.
5 Ways to Fix Google Photos App Not Showing All Photos
Basic Fixes Check your network connection - Ensure your phone is connected to a good internet connection.
 How to Add New Contacts via WhatsApp Web
Use InTouch App to Add New Contacts Using WhatsApp Web InTouchApp is a contacts manager app that lets you add contacts directly via WhatsApp Web.
How to Add New Contacts via WhatsApp Web
Use InTouch App to Add New Contacts Using WhatsApp Web InTouchApp is a contacts manager app that lets you add contacts directly via WhatsApp Web.
 How to Send a Voice Message on iPhone (via iMessage)
Method 1.
How to Send a Voice Message on iPhone (via iMessage)
Method 1.
 Google Drive vs Google Photos: Which Is Best for Storing Photos
Google Drive vs Google Photos Comparison Key Differences Feature Google Drive Google PhotosFile Types All types Photos, Videos, GIFsOrganization Folders & Subfolders AlbumsPhoto Quality Original Original, High (compressed), Express (compressed)Storage
Google Drive vs Google Photos: Which Is Best for Storing Photos
Google Drive vs Google Photos Comparison Key Differences Feature Google Drive Google PhotosFile Types All types Photos, Videos, GIFsOrganization Folders & Subfolders AlbumsPhoto Quality Original Original, High (compressed), Express (compressed)Storage
 How to Remove Photos from Google Drive but Not Google Photos
Google Drive and Photos are two similar yet distinct products for storing photos and videos.
How to Remove Photos from Google Drive but Not Google Photos
Google Drive and Photos are two similar yet distinct products for storing photos and videos.
The article above may contain affiliate links which help support Guiding Tech. The content remains unbiased and authentic and will never affect our editorial integrity.