Method 1: How to Set Reminders Using the Google Calendar App
The Google Calendar app makes it easy to set reminders on your Android and sync them with your Google account. If you already use Google Calendar to manage your schedule, setting reminders within the app can help you keep track of everything in one place.
Step 1: Open the Google Calendar app, tap the plus icon in the bottom right corner, and select Reminder.
Step 2: Enter task details in the text box and specify the date and time for the reminder. Then, tap Save in the top right corner.


After you complete the above steps, your reminder will appear in the Google Calendar app. You can open the reminder and tap the pencil icon at the top to edit it.
To cancel the reminder, tap the three vertical dots icon at the top-right corner and select Delete.


Method 2: How to Set Reminders Using Google Assistant
Need to set a reminder quickly? You can use Google Assistant on your Android to set reminders on the fly with a quick voice command. Here are the steps for the same.
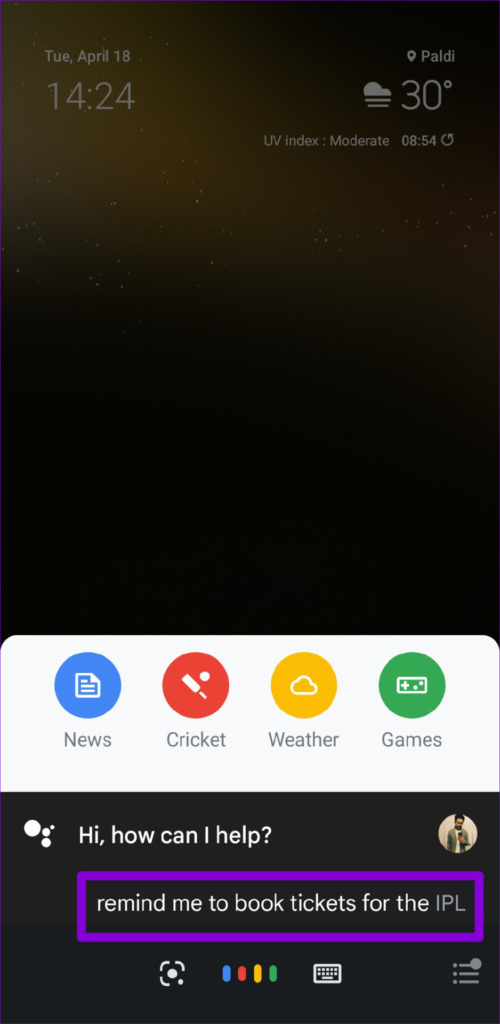
Step 1: Summon Google Assistant with “Hey Google” or “OK Google” wake words. When Google Assistant shows up, say “remind me to,” followed by what you want to be reminded about. For instance, you could say, “OK Google, remind me to book tickets for the IPL match.”
Step 2: Google Assistant will then ask when you want to be reminded of the task. Say the date and time, and Google Assistant will save your reminder.


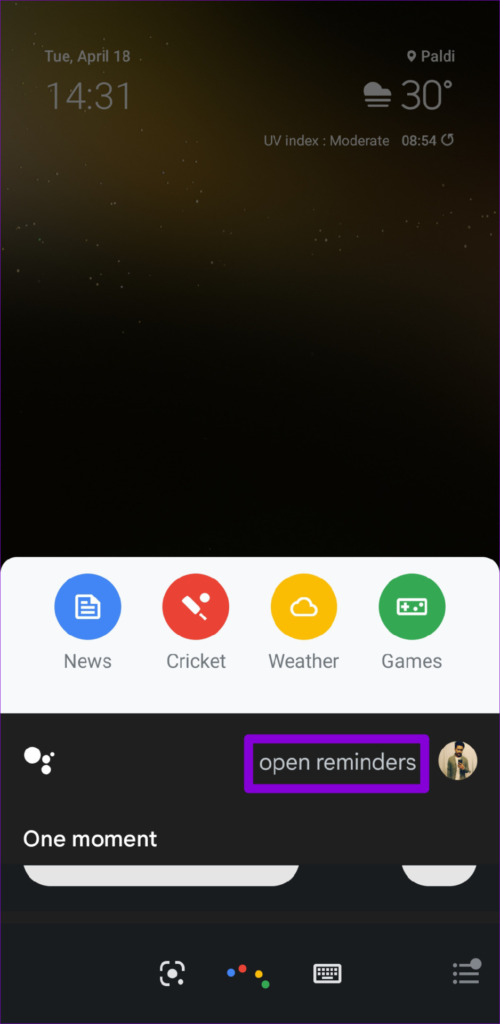
You can continue talking to Google Assistant to set more reminders. To view your reminders at any time, just say, “Hey Google, open reminders.”

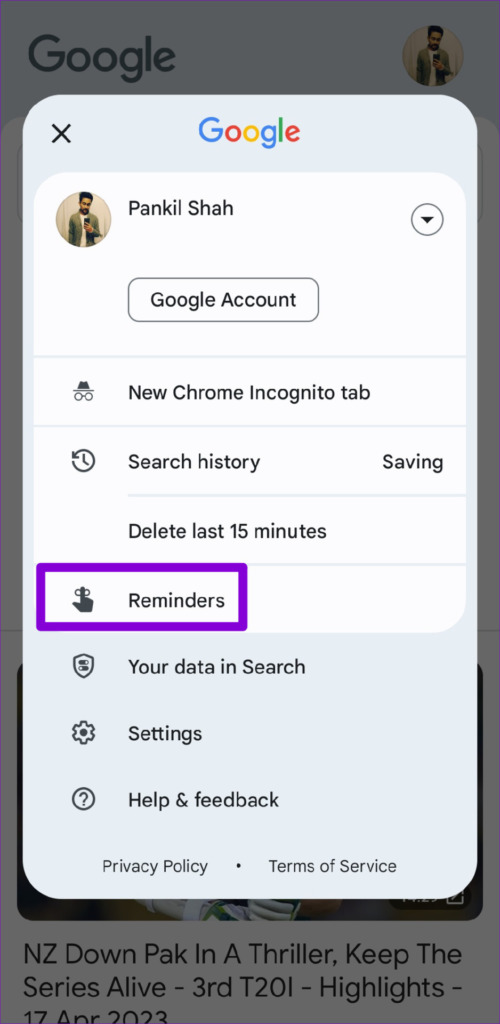
Alternatively, you can also view your reminders in the Google app. For that, open the Google app, tap on your profile picture in the top right corner, and select Reminders. You can then review your reminders and edit or delete them as necessary.


Method 3: How to Set Reminders Using the Google Keep App
While Google Keep is best known for its note-taking capabilities, it also offers the convenience of setting time or location-based reminders on your Android. Here are the steps you can use.
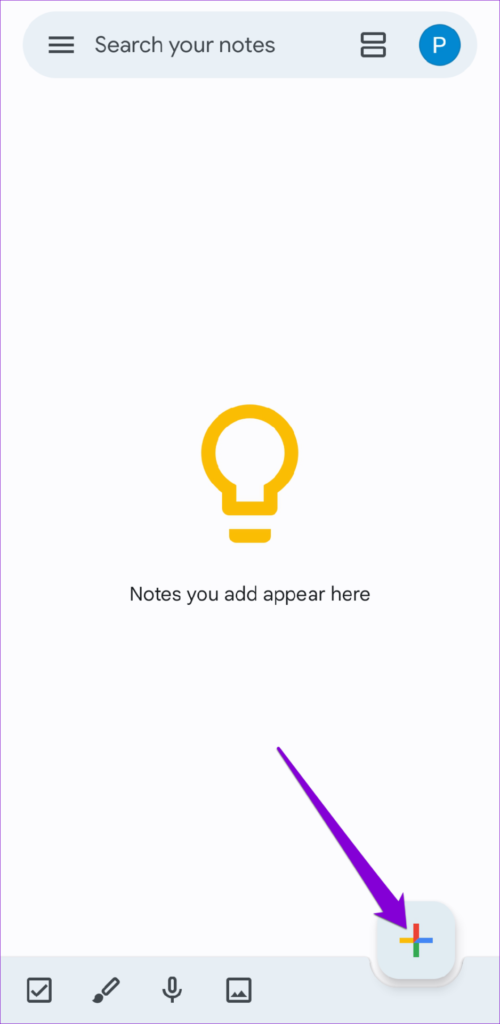
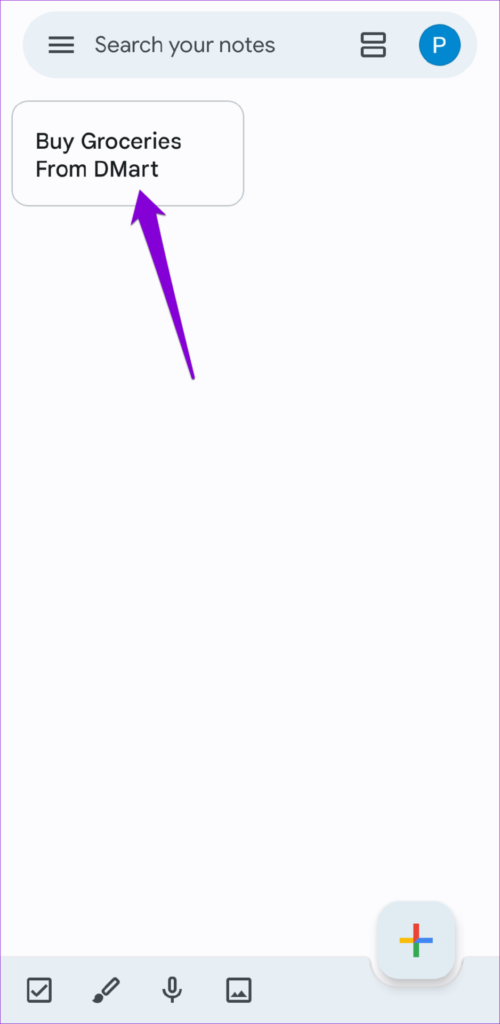
Step 1: Open the Google Keep app on your phone and create a new note or open an existing one.
Step 2: Tap the bell icon at the top.

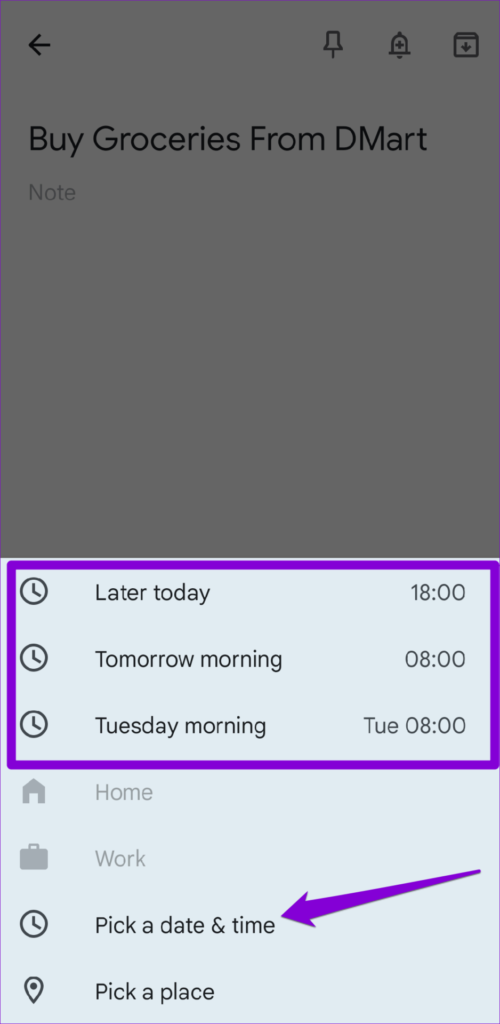
Step 3: You can choose a suggested date and time or specify one manually by selecting the Pick a date & time option. Use the drop-down menus to specify the date and time, and then hit Save.

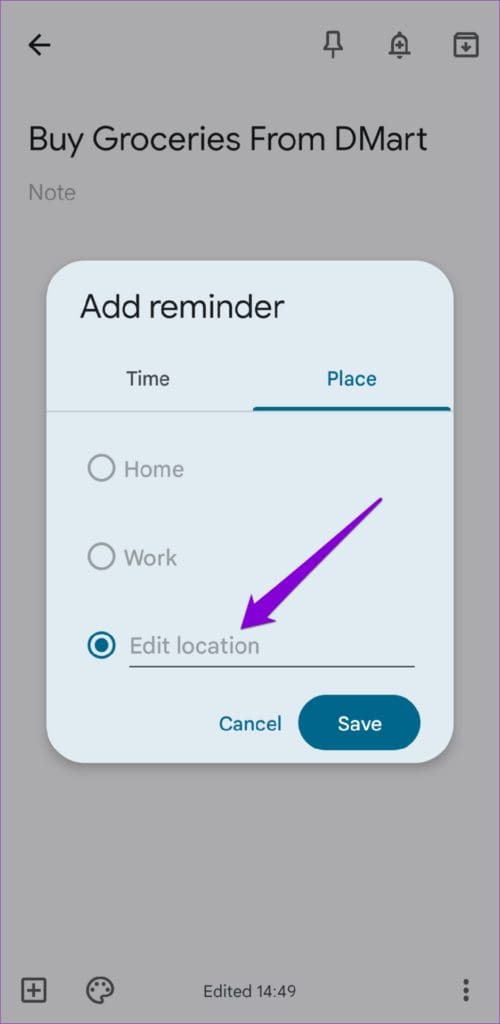
Alternatively, if you want to create a location-based reminder, select the Pick a place option. In the pop-up window that appears, select Edit location. Type the address in the search bar and select from the suggested results. Then, tap Save.


Method 4: How to Set Reminders Using the Reminder App (For Samsung Phones)
Samsung Galaxy phones have a built-in Reminder app that allows you to create reminders and sync them with the Samsung Calendar app. You can also view them in the Edge panel or the reminder widget.
To set a reminder on your Samsung Galaxy phone:
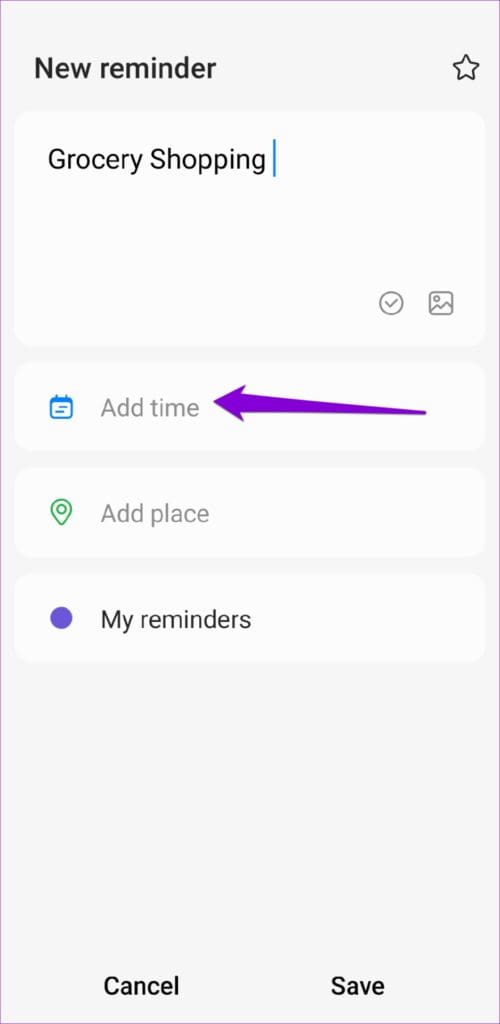
Step 1: Open the Reminder app, tap the plus icon at the bottom-right corner, and enter details about your task.
Step 2: Tap on Add time to specify the exact date and time for the reminder.


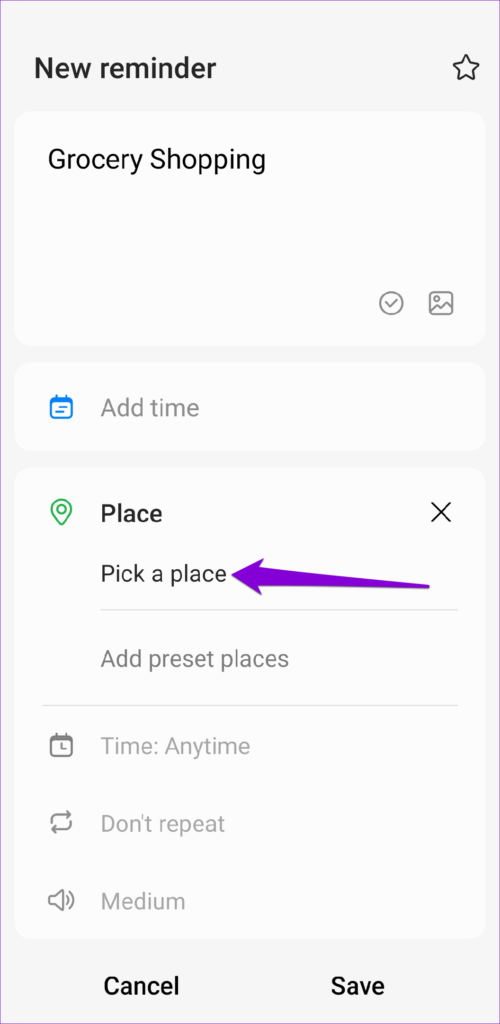
Step 3: You can also opt to set a location-based reminder. For that, tap on Add place and select the Pick a place option.
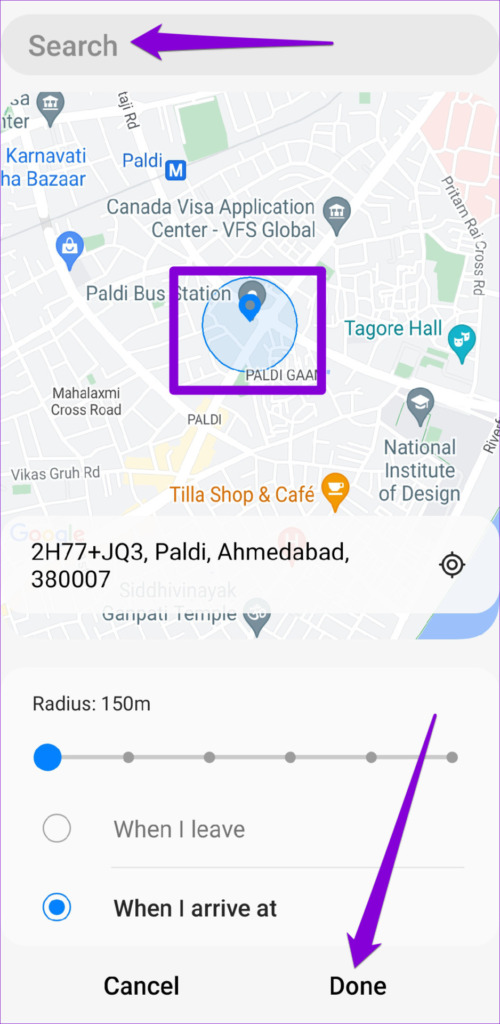
Step 4: Use the search box or drop a pin on the map to specify where you want to be alerted. Then, tap Done. Then, tap Save.

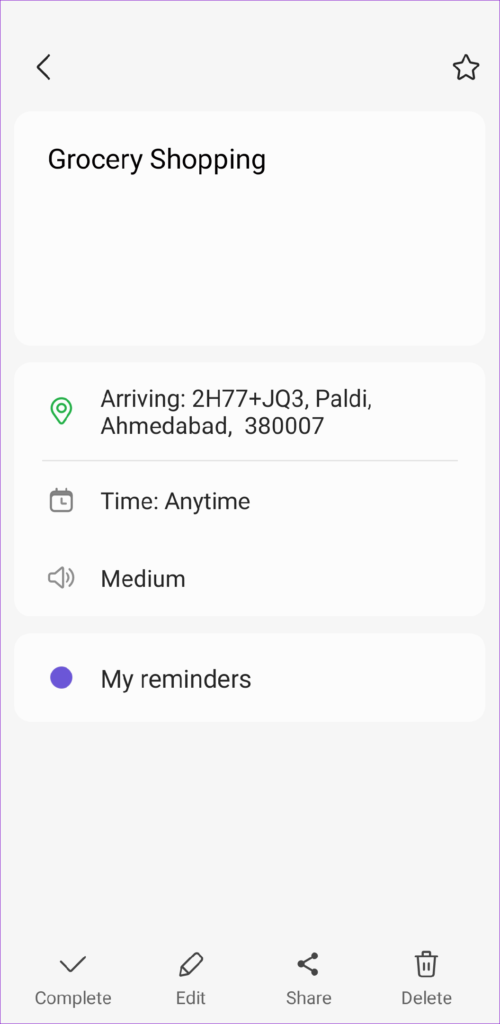
After you save it, your reminders will appear in the app, and you can open them to make any necessary edits, share them with others, or delete them.

Was this helpful?
Last updated on 02 August, 2024
Read Next
 7 Ways to Fix Reminders App Not Sending Notifications
Basic Fixes: Disable DND and Focus Mode: DND and Focus Mode can help block notifications to ensure you're not disturbed.
7 Ways to Fix Reminders App Not Sending Notifications
Basic Fixes: Disable DND and Focus Mode: DND and Focus Mode can help block notifications to ensure you're not disturbed.
 3 Ways to Set Up Reminders on Windows 11
Method 1: Set Up Reminders With Microsoft To Do Let’s start with the easiest method.
3 Ways to Set Up Reminders on Windows 11
Method 1: Set Up Reminders With Microsoft To Do Let’s start with the easiest method.
 5 Ways to Fix Outlook Reminders Not Popping Up in Windows
Fix 1: Check Microsoft Outlook Reminder Settings The first thing you'll need to do is review the Outlook reminder settings to ensure they are configured correctly.
5 Ways to Fix Outlook Reminders Not Popping Up in Windows
Fix 1: Check Microsoft Outlook Reminder Settings The first thing you'll need to do is review the Outlook reminder settings to ensure they are configured correctly.
 6 Ways to Set Reminders With Alerts on iPhone
Note: Before proceeding with the steps, download the Reminders app on your iOS device if you have not already done so.
6 Ways to Set Reminders With Alerts on iPhone
Note: Before proceeding with the steps, download the Reminders app on your iOS device if you have not already done so.
 5 Ways to Fix iPhone Reminders Not Working in iOS 17
Basic Fixes: Restart the Reminders app: If the Reminders app runs into unexpected glitches or bugs, it might not work as expected on your iPhone.
5 Ways to Fix iPhone Reminders Not Working in iOS 17
Basic Fixes: Restart the Reminders app: If the Reminders app runs into unexpected glitches or bugs, it might not work as expected on your iPhone.
 How to Turn off Google Assistant Bill Reminders
How Does Google Assistant Know When Your Bills Are Due Before starting, you must be wondering how Google gets all that information regarding your flights, packages, and bills.
How to Turn off Google Assistant Bill Reminders
How Does Google Assistant Know When Your Bills Are Due Before starting, you must be wondering how Google gets all that information regarding your flights, packages, and bills.
 How to Add Reminders for Instagram Posts and Stories on Mobile App
Who Can Create Reminders for Events on Instagram Reminders are a great way to ensure you remind your followers about any of your plans and events, and they are quite
How to Add Reminders for Instagram Posts and Stories on Mobile App
Who Can Create Reminders for Events on Instagram Reminders are a great way to ensure you remind your followers about any of your plans and events, and they are quite
 How to Add and Edit Outlook Calendar Reminders
Add Reminders to Outlook Calendar on Mobile The Outlook app on your iPhone and Android lets you quickly add reminders to your Outlook calendar on the go.
How to Add and Edit Outlook Calendar Reminders
Add Reminders to Outlook Calendar on Mobile The Outlook app on your iPhone and Android lets you quickly add reminders to your Outlook calendar on the go.
The article above may contain affiliate links which help support Guiding Tech. The content remains unbiased and authentic and will never affect our editorial integrity.