File History is a useful feature for Windows users that creates copies of previous versions of files at different points, making recovery easy if they are ever lost, damaged, or altered by accident. That said, sometimes backups themselves get corrupted, or there may not be enough space on your PC. So, if you’re looking to reset File History (Windows 11), this article will show you how to do that.
Keeping Track of Things
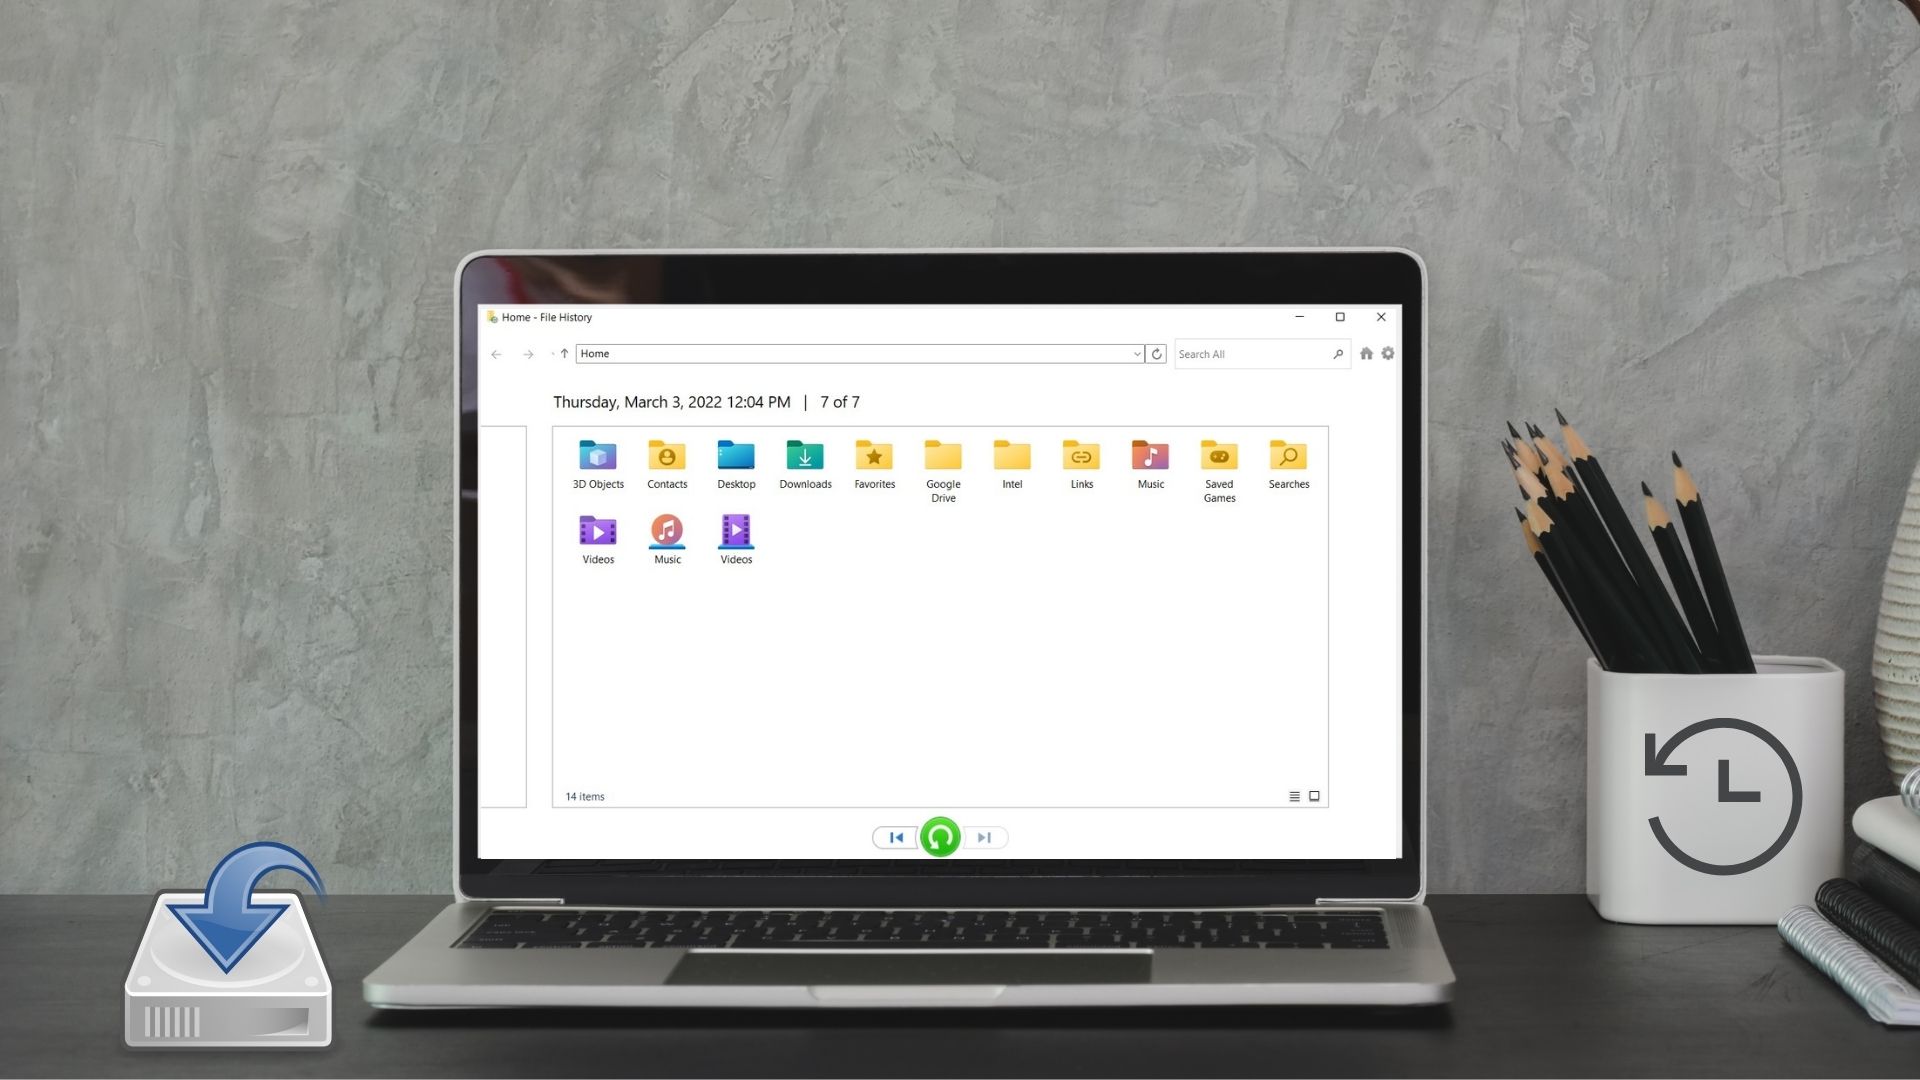
File History is a feature of Windows that creates backups of previous file states. It only does this for files within your username directory in Explorer, as that’s usually where the most important files are kept. The change journal in the NTFS file system keeps track of all these changes, enabling easier recovery in case of something going wrong.
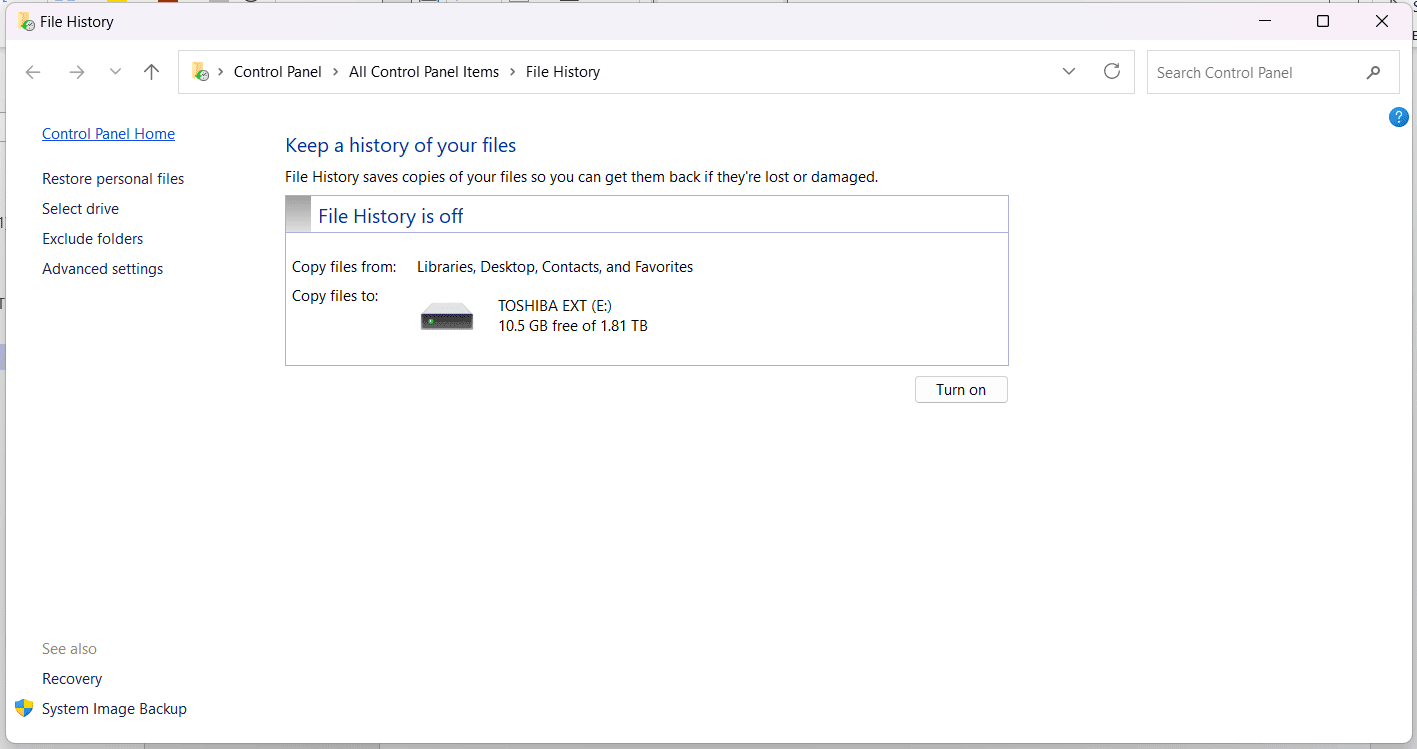
It’s important to know that File History isn’t enabled by default. To turn it on, you’ll have to visit the Control Panel to enable it. If it isn’t enabled on your PC, you won’t be able to find the file history folder in Explorer.
In case of backup corruption or space running out on your PC, it’s important to know how to reset the File History Cache. Remember that a reset won’t delete the File History folder in the backup drive.
Reset File History (Windows 11) in These Ways
In Windows 11, reset File History in one of two different ways:
Reset via Command Prompt
Command Prompt, as always, is ready to help you solve different issues. To use it to delete the entire File History folder, do the following:
Step 1. Open the Run Dialog (Win + R) and type “cmd” before pressing Ctrl + Shift + Enter to run as Admin.
Step 2. In Command Prompt, type “if exist “%UserProfile%\AppData\Local\Microsoft\Windows\FileHistory” RD /S /Q “%UserProfile%\AppData\Local\Microsoft\Windows\FileHistory”
and press “Enter.”
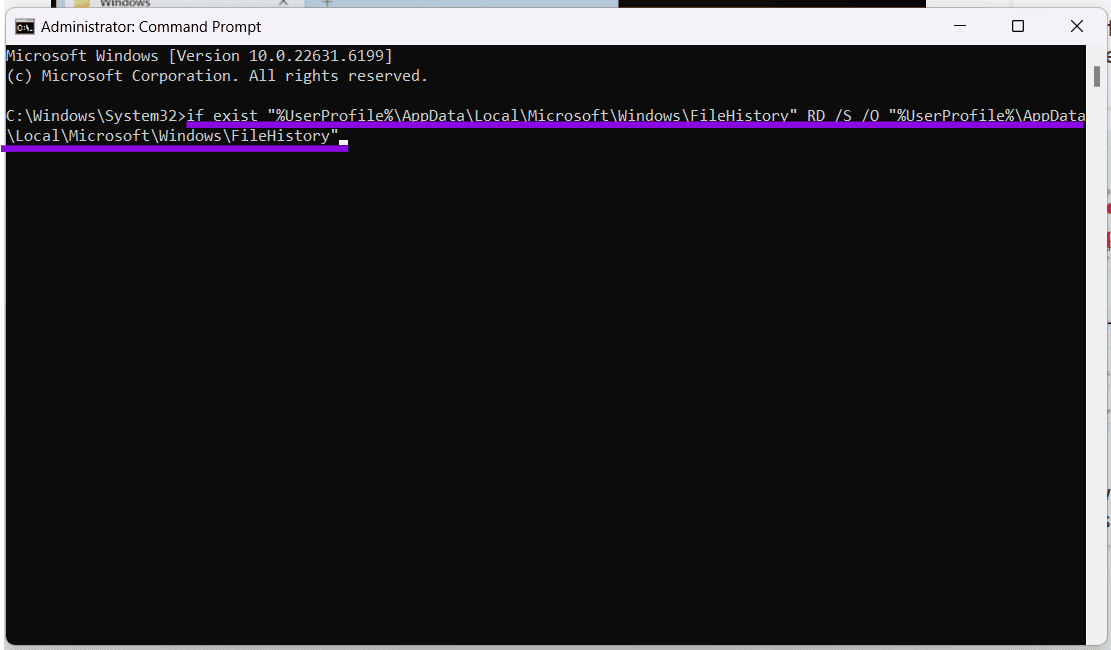
Step 3. Your file history folder should be deleted, and all file histories reset as a result.
Delete via Explorer
Another method to reset File History is to visit the directory directly in Windows Explorer. Here’s what to do:
Step 1. Open an Explorer window (Win + E).
Step 2. Navigate to your user profile, which, depending on the PC, could be your name.
Step 3. Enable “Hidden items” in the Explorer “View” menu or type “AppData” in the address bar. Click “App Data” and then “Local.”
Step 4. Select “Microsoft” and then “Windows.”
Step 5. Look for the “History” folder and double-click it.
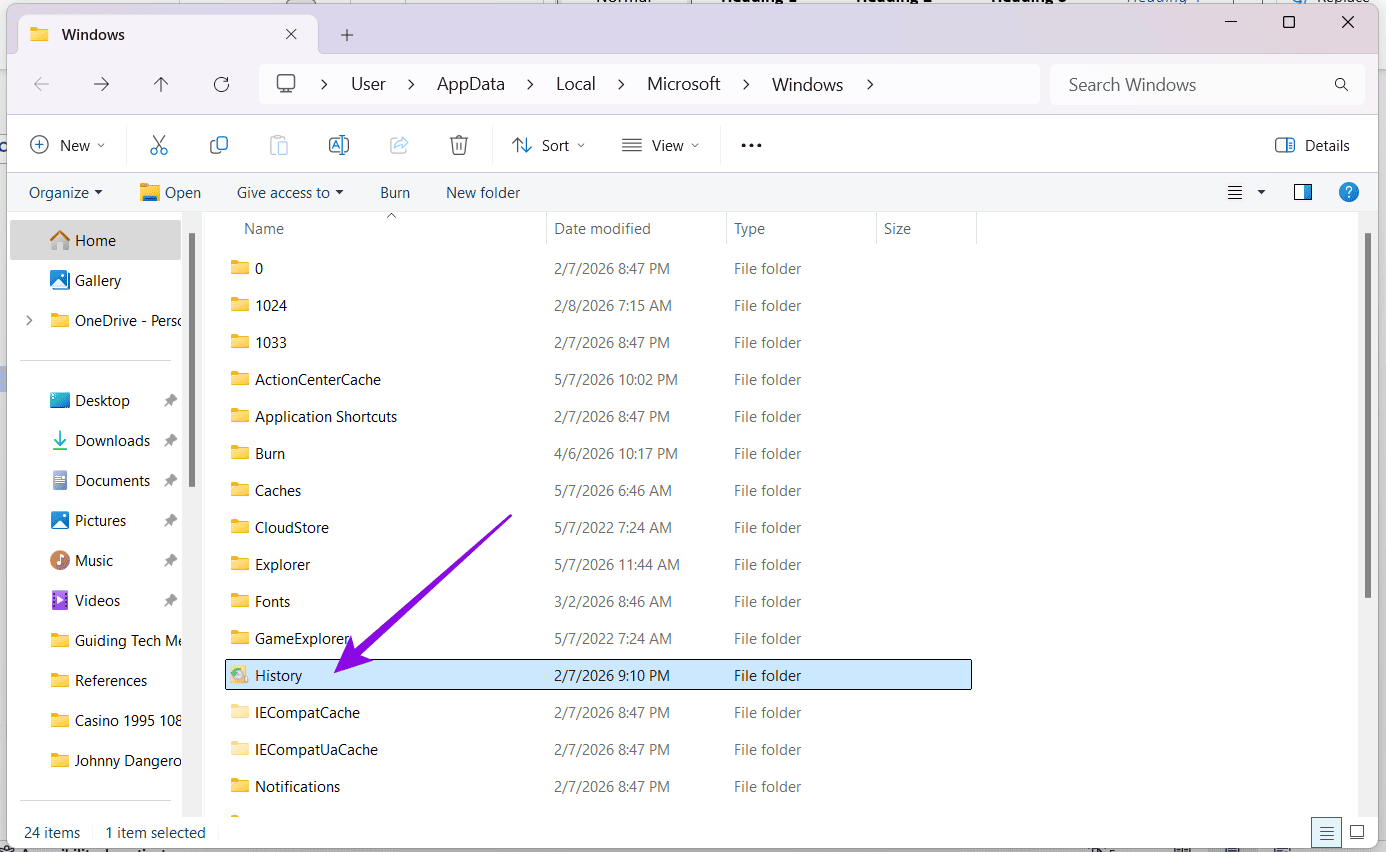
Step 6. Once inside, delete both the “Configuration” and “Data” folders. This will reset the file history for your files stored in your user profile.
Delete Recents
If, by file history, you’re looking to clear files from your Recents section in Explorer, then the process is simple and quick:
Step 1. In the “Recents” section of Explorer (under “Home”), right-click the file you want to remove.
Step 2. Select “Remove from list” in the context menu.
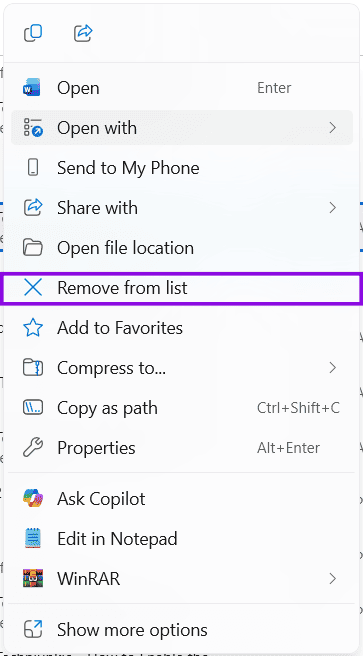
Step 3. The file will be removed from “Recents,” but not deleted from your PC. To remove a group of files, click one and Shift + click the last one to batch select. Right-click any one and choose the same option from the context menu.
Was this helpful?
Last updated on 11 May, 2026
Read Next
 How to Use File History to Backup and Restore Files on Windows 11
File History is a useful utility in Windows 11 to back up select files and folders to an external drive automatically.
How to Use File History to Backup and Restore Files on Windows 11
File History is a useful utility in Windows 11 to back up select files and folders to an external drive automatically.
 How to View and Reset Netflix Watch History
How to Delete Watch History on Netflix On Mobile and Desktop Step 1: Open the Accounts page on Netflix.
How to View and Reset Netflix Watch History
How to Delete Watch History on Netflix On Mobile and Desktop Step 1: Open the Accounts page on Netflix.
 How to Reset iPhone and What Happens When You Reset iPhone
https://youtu.be/VPnZOK4EqVQ How to Reset iPhone to Factory Settings Before we move on to erasing data or settings on the iPhone, check out the section below to ensure your data or
How to Reset iPhone and What Happens When You Reset iPhone
https://youtu.be/VPnZOK4EqVQ How to Reset iPhone to Factory Settings Before we move on to erasing data or settings on the iPhone, check out the section below to ensure your data or
 5 Best Ways To View Windows Update History In Windows 11
By constantly updating your Windows 11 operating system, you get access to new or improved features to deliver a better user experience.
5 Best Ways To View Windows Update History In Windows 11
By constantly updating your Windows 11 operating system, you get access to new or improved features to deliver a better user experience.
 How to View Command Prompt (CMD) History on Windows
Method 1: Use a Keyboard Shortcut There is a keyboard shortcut to view the history on CMD quickly.
How to View Command Prompt (CMD) History on Windows
Method 1: Use a Keyboard Shortcut There is a keyboard shortcut to view the history on CMD quickly.
 How to Bring Up Clipboard History in Windows 11
Whenever you copy something on a Windows PC or laptop, be it a piece of text, a hyperlink, or an image, it goes to a temporary storage area called the
How to Bring Up Clipboard History in Windows 11
Whenever you copy something on a Windows PC or laptop, be it a piece of text, a hyperlink, or an image, it goes to a temporary storage area called the
The article above may contain affiliate links which help support Guiding Tech. The content remains unbiased and authentic and will never affect our editorial integrity.