How to Create a Shared Album on Your iPhone
To create a Shared Album on your iPhone, it’ll need to run the latest version of iOS for iPhone, iPadOS for iPad, or macOS for Mac. You also need to set up and sign in to iCloud on your iPhone. The Shared Album is hosted on iCloud, making it easy to share with others. After meeting all these requirements, use the steps below to create your Shared Album.
Step 1: Open the Photos app > Tap the Plus icon > New Shared Album.
Step 2: Enter a name for your Shared Album and then tap the Next button.
Step 3: Choose people to invite from your contact or enter the email address and iMessage phone number of those you would like to share the album with.
Step 4: Tap Create to save all your changes and create the album folder.


Step 7: In your Shared Albums catalog, tap the newly created album folder.
Step 8: Tap the Plus sign to open your Photos Gallery.
Step 9: Select all the relevant images you would like to include in the Shared Album.
Step 10: After selecting the images, tap Add at the top-right corner of the screen.
Step 11: On the iCloud dialog box, provide a comment/note for your photo selection.
Step 12: Tap Post to save your changes.


All iMessage phone numbers and emails will receive a notification of their addition to your Shared albums. The recipients can access the album using a web browser.
Tip: Check out our post if Apple Photos not recognizing faces.
How to Add People to a Shared Album on Your iPhone
When you first create a Shared Album, you can provide the details (iMessage phone numbers and emails) of the recipients. Subsequently, you can also add more people. Here’s how to do so:
Step 1: Open the Photos app > Shared Albums > Tap on your shared album name > People icon.
Step 2: Enter the email addresses and iMessage phone numbers of those you want to add.

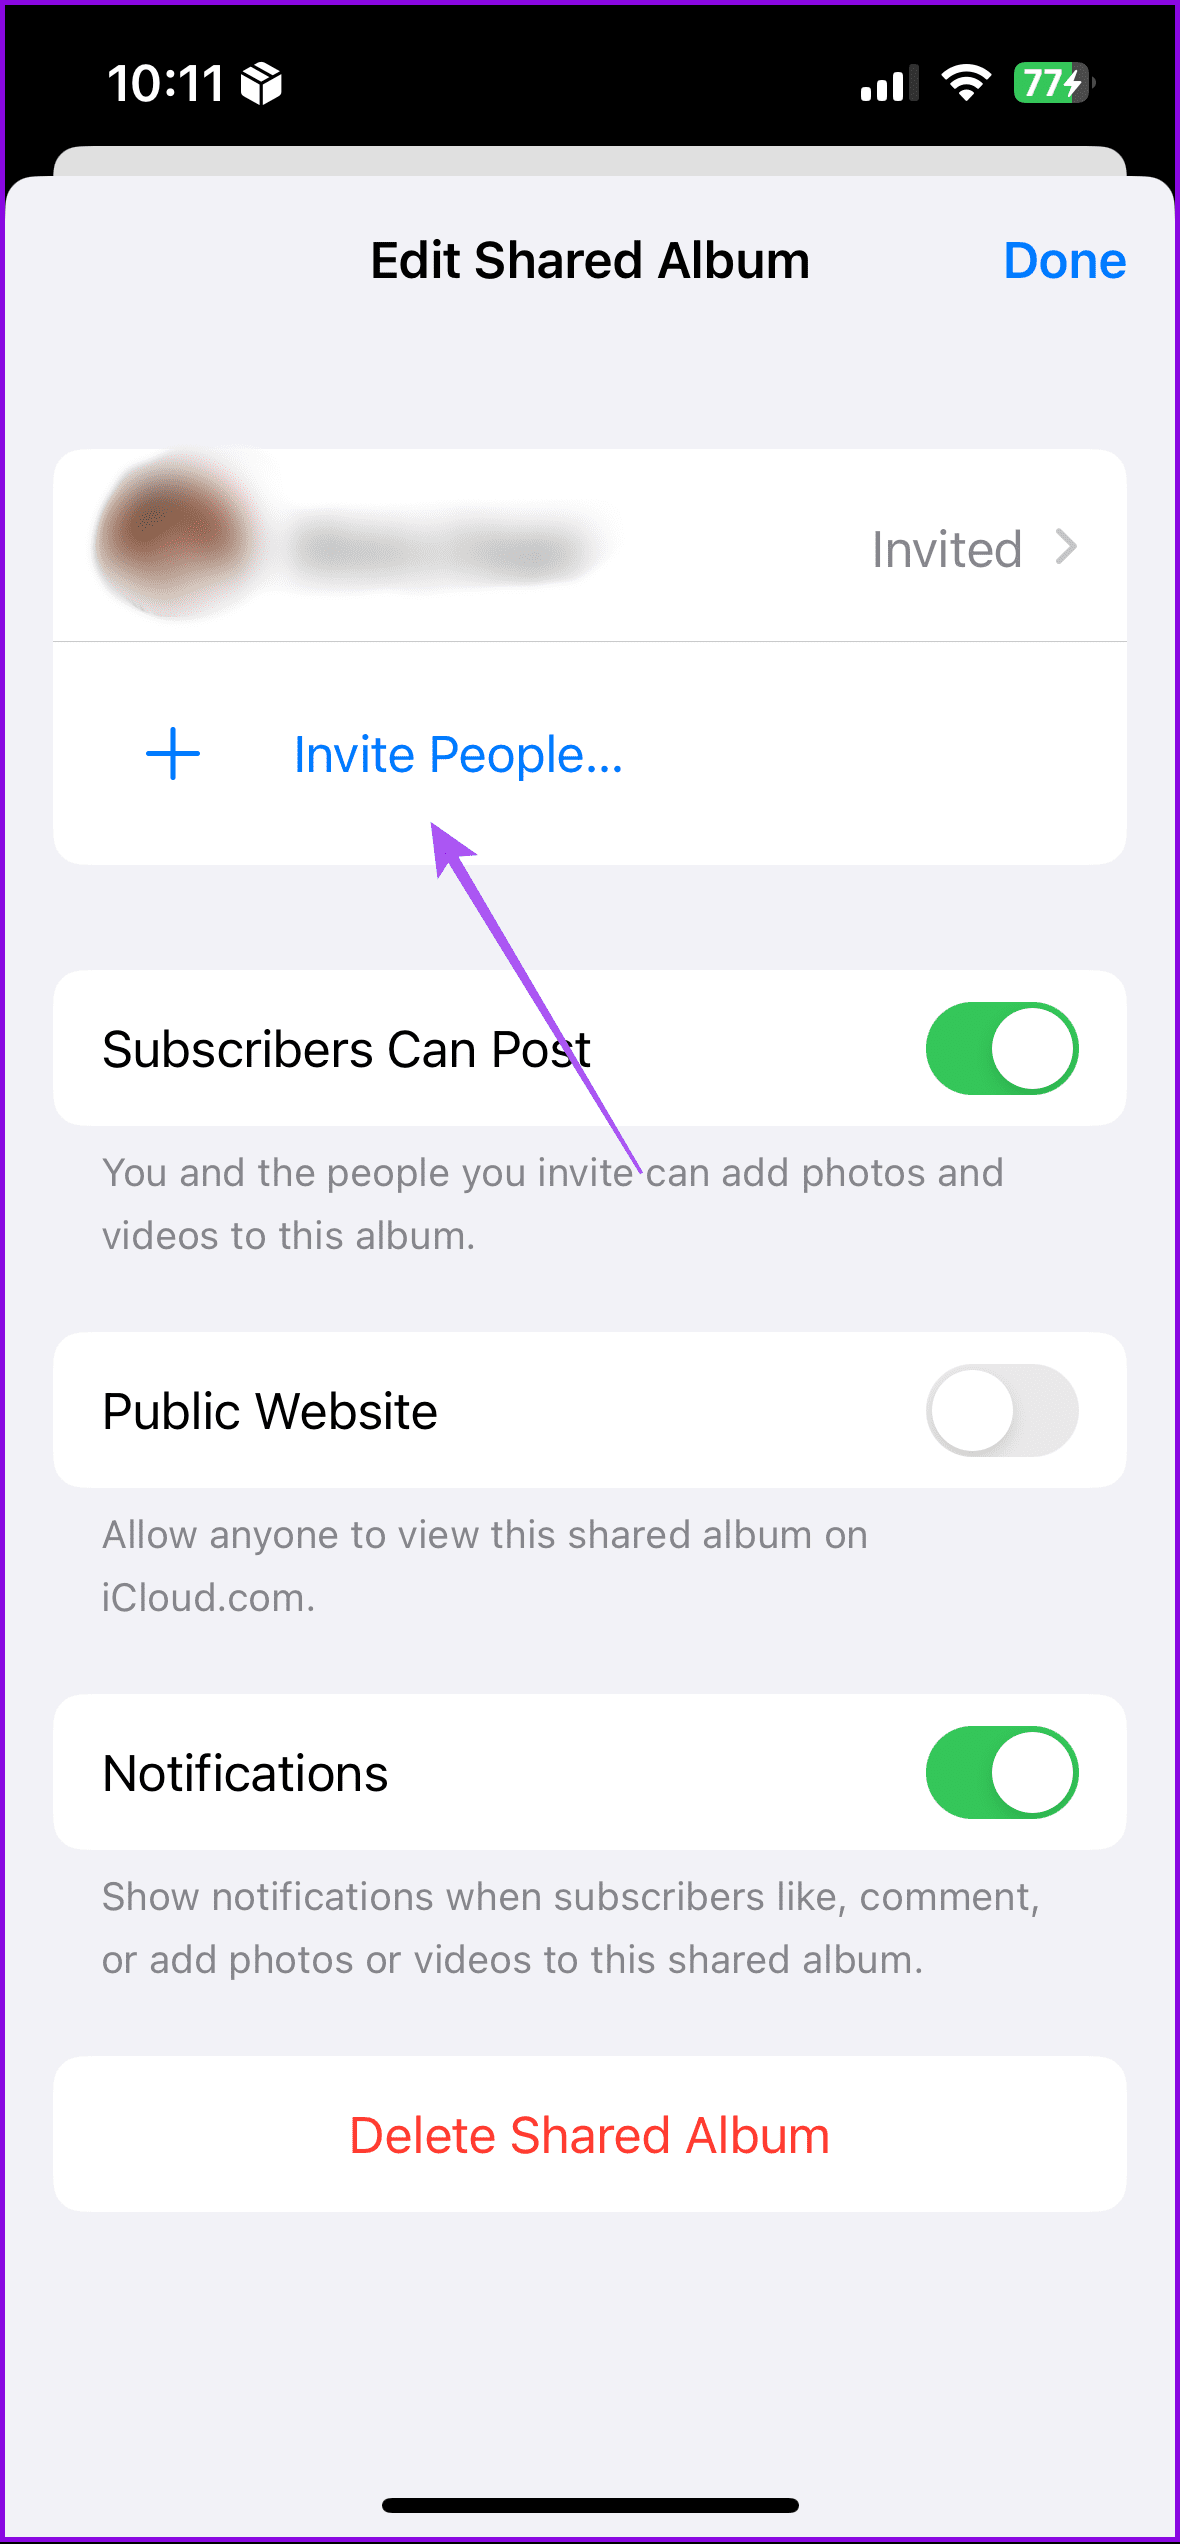
Step 3: Tap Add to save your selection.
Step 4: Tap Done on the Edit Shared Album page to save your changes.
How to Delete People From a Shared Album on Your iPhone
If you no longer want to grant certain individuals access to your Shared Album, here’s what you should do:
Open the Shared Album in Photos app > People icon > Tap the contact name > Select Remove Subscriber at the bottom.


How to Delete a Shared Album on Your iPhone
Once you feel a Shared Album has lived its purpose, you can delete it from your iPhone. Here’s how to do so.
Open the Shared Album > People icon > Delete Shared Album.

Tip: If you find that your Shared Albums have a lot of duplicate photos, you don’t have to set about deleting them manually. You can remove the duplicate photos by visiting your iPhone’s duplicate folder. You can also consider downloading a third-party app to remove duplicate images.
Was this helpful?
Last updated on 15 August, 2024
1 Comment
Leave a Reply
Read Next
 2 Ways to Fix Apple Photos Not Showing Shared Albums
Basic Fixes Check Apple server status: You can visit Apple's official System Status support page to check if the Photos app is facing any issues in the backend.
2 Ways to Fix Apple Photos Not Showing Shared Albums
Basic Fixes Check Apple server status: You can visit Apple's official System Status support page to check if the Photos app is facing any issues in the backend.
 How to Rename Photos, Videos, and Albums on iPhone and iPad
Rename and Save Photos in the Files App Since the Photos app on your iPhone doesn't have renaming options, you must use the Files app.
How to Rename Photos, Videos, and Albums on iPhone and iPad
Rename and Save Photos in the Files App Since the Photos app on your iPhone doesn't have renaming options, you must use the Files app.
 How to Add Photo Cutout Sticker to Another Photo on iPhone
Method 1: Using Markup Editor In this method, first, you need to add the sticker to the sticker gallery.
How to Add Photo Cutout Sticker to Another Photo on iPhone
Method 1: Using Markup Editor In this method, first, you need to add the sticker to the sticker gallery.
 How to Find and Delete Safari’s ‘Shared With You’ Links on iPhone
How to Enable Shared With You If your iPhone runs iOS 15 or later, you can use the Shared With You feature.
How to Find and Delete Safari’s ‘Shared With You’ Links on iPhone
How to Enable Shared With You If your iPhone runs iOS 15 or later, you can use the Shared With You feature.
 How to See All the Photos Shared via Facebook Messenger
Check Shared Photos on the Web Messaging is an important part of our lives and each platform that is offering IM services is trying to one-up the other.
How to See All the Photos Shared via Facebook Messenger
Check Shared Photos on the Web Messaging is an important part of our lives and each platform that is offering IM services is trying to one-up the other.
 6 Ways to Fix Windows 11 Can’t Access Shared Folder
Fix 1: Use the Command Prompt to Access the Shared Folder If you can't open the shared folder in File Explorer, use Command Prompt to access it.
6 Ways to Fix Windows 11 Can’t Access Shared Folder
Fix 1: Use the Command Prompt to Access the Shared Folder If you can't open the shared folder in File Explorer, use Command Prompt to access it.
 How to Save Shared Files on Google Drive for Web and Mobile
Method 1: Use Shared With Me in Google Drive for Web Step 1: Open the browser, go to Google Drive, and click on the Shared with me link in the sidebar.
How to Save Shared Files on Google Drive for Web and Mobile
Method 1: Use Shared With Me in Google Drive for Web Step 1: Open the browser, go to Google Drive, and click on the Shared with me link in the sidebar.
 6 Ways to Fix Multiple Connections to a Server or Shared Resource by the Same User
Network and file sharing issues can be frustrating, especially when encountering errors like 'Multiple Connections to a Server or Shared Resource by the Same User.' In this article, we'll delve
6 Ways to Fix Multiple Connections to a Server or Shared Resource by the Same User
Network and file sharing issues can be frustrating, especially when encountering errors like 'Multiple Connections to a Server or Shared Resource by the Same User.' In this article, we'll delve
The article above may contain affiliate links which help support Guiding Tech. The content remains unbiased and authentic and will never affect our editorial integrity.


Please update this answer with info on how to customize the order in which photos appear in a shared album