One of the best things about using Microsoft Excel to create and edit spreadsheets is that it keeps you updated about the status of your work. You can see when cells are ready to be edited, which cells refer to others, and even the results of quick sums without having to input formulae.
Understanding how to customize functions in the Excel status bar helps you work smarter and faster.
Customize Excel Status Bar: The Status Bar Explained
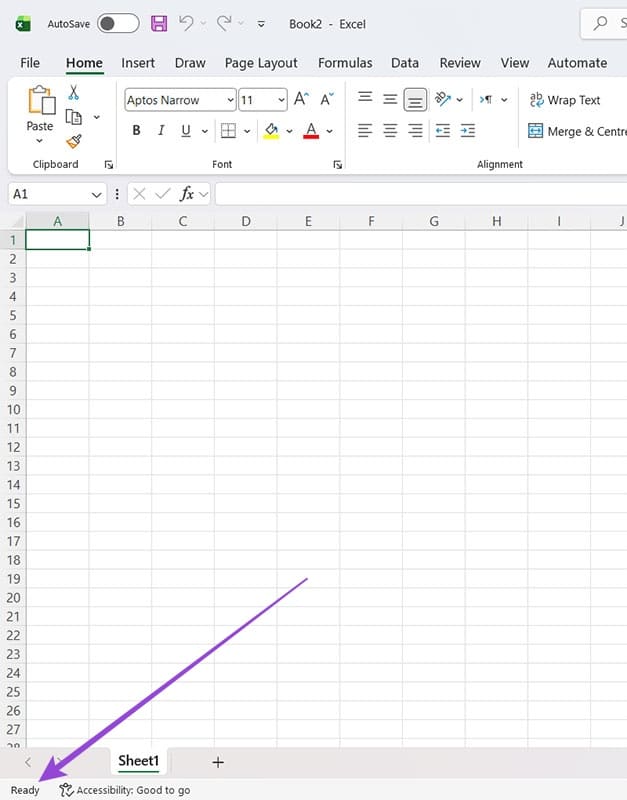
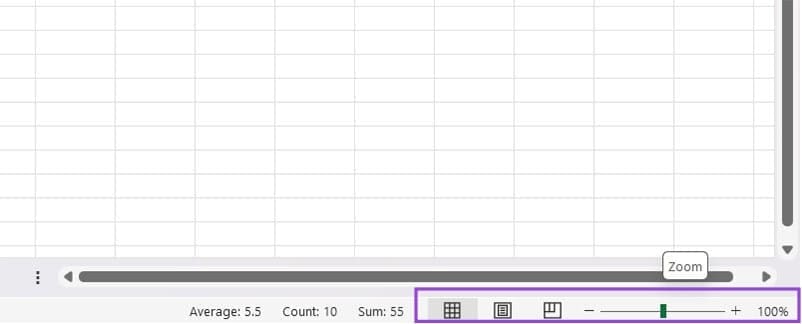
The status bar is at the very bottom of every Microsoft Excel workbook. You can see it when you open a blank workbook, as it will say “Ready” in the bottom left corner.
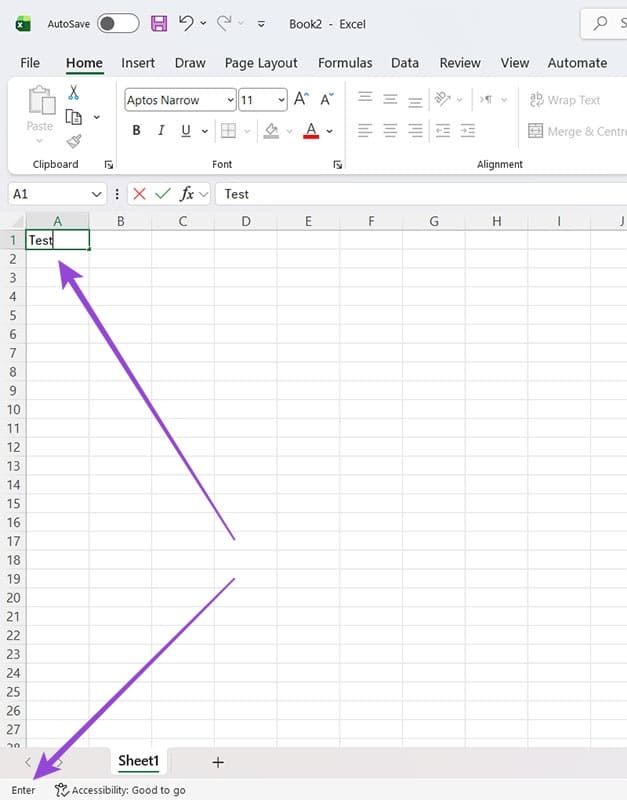
If you start to type in a cell, the status in the status bar changes from “Ready” to “Enter,” indicating that you’re now in content entry mode.
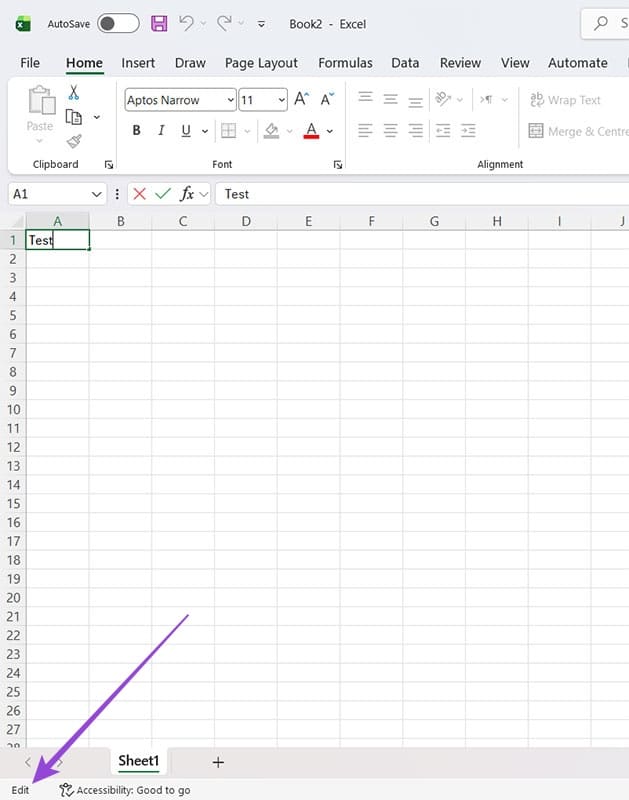
If you double click back into a cell, the status changes to “Edit,” showing that you’re now able to change existing data.
Creating a formula that links to another cell changes the status to “Point,” meaning that the cell you’re editing is literally pointing to data in another cell(s).

Other features in the status bar include:
- Worksheet view type (Normal, Page Break, or Page Layout)
- The zoom slider
- Average, count, and sum for the selected cells
These options are all to the right of the status bar.
There are a number of other features you can add or disable for your Excel status bar, from being able to see if Caps Lock is on to additional mathematical calculations.
How to Customize Functions in the Excel Status Bar: Step-by-Step Guide
Step 1. In any Excel workbook, right-click on the status bar. Make sure you’re on the status bar rather than the workbook tab. It’s the bar right at the bottom with the zoom slider to the right.

Step 2. Browse the list of functions to see which are ticked and which are not. Note: there’s an arrow at the bottom of the menu that reveals more functions. The ticked ones are active, and you can change that by left-clicking on them with your mouse. In this instance, the user has decided to remove Average, Count, and Sum for a cleaner status bar.
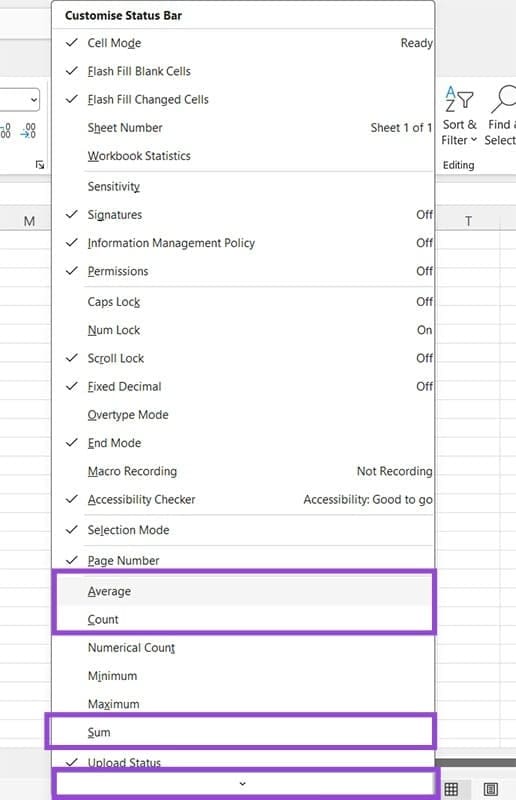
You can now see that when the numbers are highlighted, no mathematical functions are shown in the status bar.
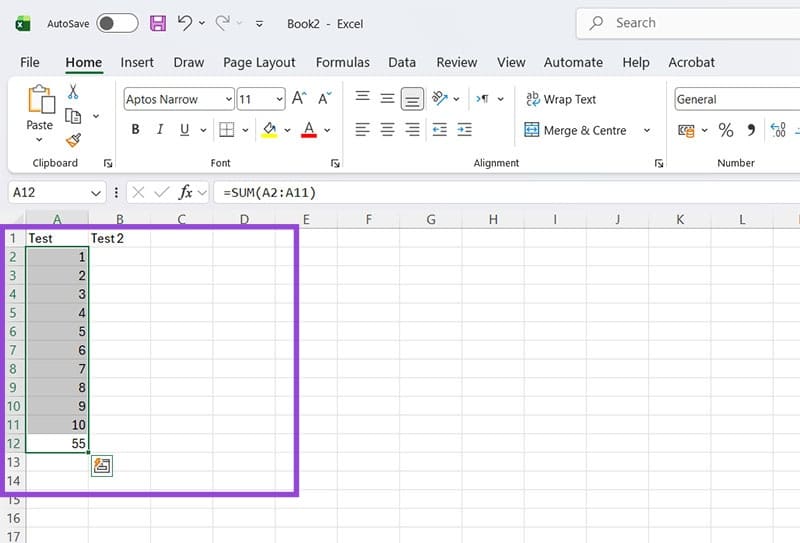
Step 3. To add features currently disabled, simply left-click once on the desired feature and watch the tick appear. This time, the user wants more mathematical functionality. They’re adding in the ability to see Count, Numerical Count, Maximum, and Minimum amounts.
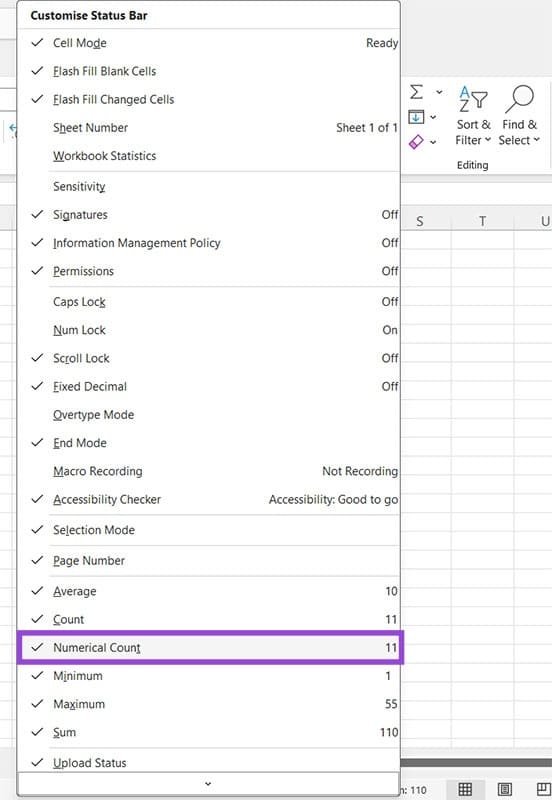
When highlighting the numbers (or any set of numerical data) the functions show the relevant amounts in the status bar.

Follow these steps to customize Excel status bars on any workbook and have your sheets completely personalized to the way you work.
Was this helpful?
Last updated on 26 February, 2026
Read Next
 14 Essential Microsoft Excel Functions for Data Analysis
1.
14 Essential Microsoft Excel Functions for Data Analysis
1.
 How to Show Internet Speed on Status Bar in Samsung Phones
Show Internet Speed on Samsung Sadly, Samsung has failed to implement the speed meter feature on their phones.
How to Show Internet Speed on Status Bar in Samsung Phones
Show Internet Speed on Samsung Sadly, Samsung has failed to implement the speed meter feature on their phones.
 How to Change Status Bar Clock Position or Remove It on Samsung Phone
Change or Remove Status Bar Clock Position on Samsung Phone Currently, the clock is at the top-left corner of the Samsung Galaxy phone.
How to Change Status Bar Clock Position or Remove It on Samsung Phone
Change or Remove Status Bar Clock Position on Samsung Phone Currently, the clock is at the top-left corner of the Samsung Galaxy phone.
 How to Customize the Navigation Bar on Samsung Galaxy Phones
Over the past few years, the navigation gestures have quietly gotten the lead on the navigation bar on Android phones.
How to Customize the Navigation Bar on Samsung Galaxy Phones
Over the past few years, the navigation gestures have quietly gotten the lead on the navigation bar on Android phones.
 7 Ways to Fix Can’t Type in Windows 11 Search Bar
Fix 1: Restart the Windows Explorer Process Windows Explorer is a system process that handles the graphical user interface (GUI) for several utilities, including the taskbar.
7 Ways to Fix Can’t Type in Windows 11 Search Bar
Fix 1: Restart the Windows Explorer Process Windows Explorer is a system process that handles the graphical user interface (GUI) for several utilities, including the taskbar.
 How to Use the Edge Bar in Microsoft Edge on Windows 11
How to Enable Edge Bar in Microsoft Edge Step 1: Launch Microsoft Edge on your PC > click the three-dot menu icon at the top right > select Settings.
How to Use the Edge Bar in Microsoft Edge on Windows 11
How to Enable Edge Bar in Microsoft Edge Step 1: Launch Microsoft Edge on your PC > click the three-dot menu icon at the top right > select Settings.
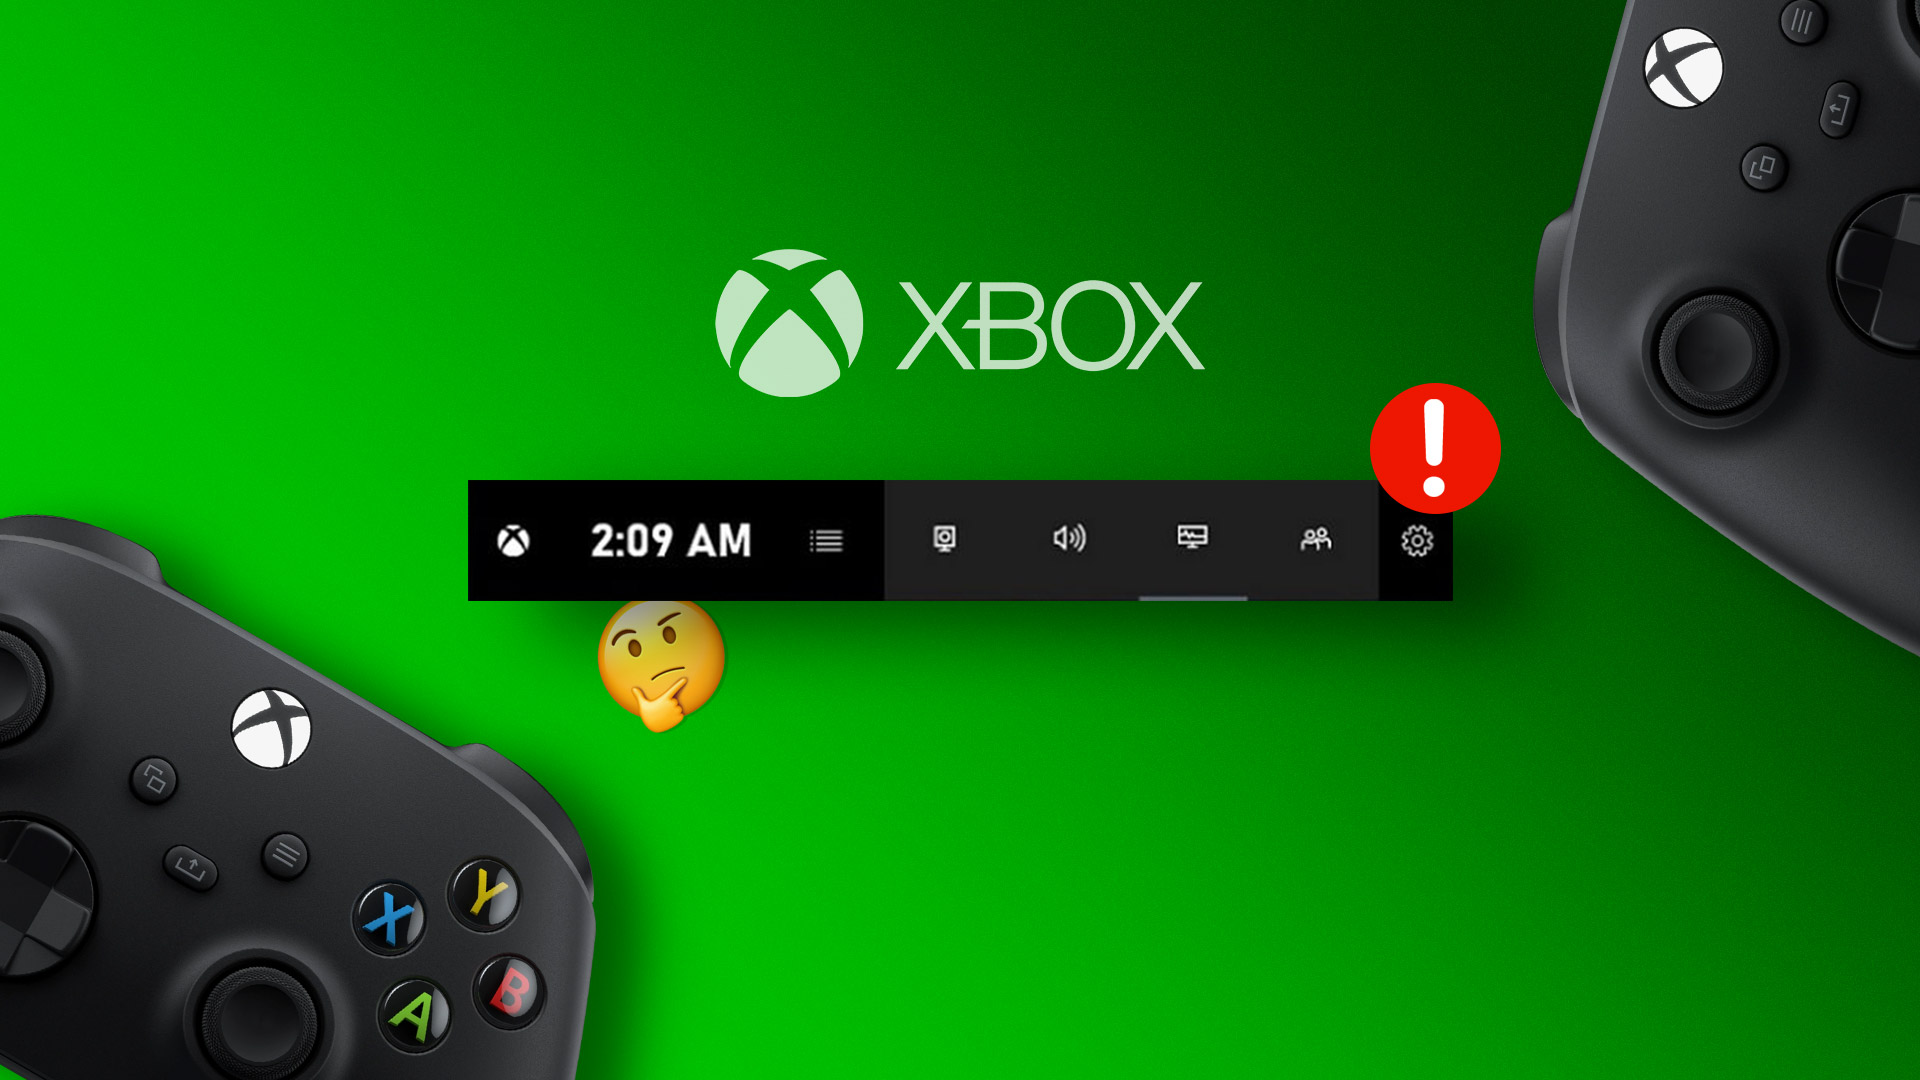 5 Ways to Fix Xbox Game Bar Not Working on Windows 11
Fix 1: Enable Xbox Game Bar in Windows Settings If you can't launch the Xbox Game Bar from your connected game controller on Windows 11, head to Windows Settings to
5 Ways to Fix Xbox Game Bar Not Working on Windows 11
Fix 1: Enable Xbox Game Bar in Windows Settings If you can't launch the Xbox Game Bar from your connected game controller on Windows 11, head to Windows Settings to
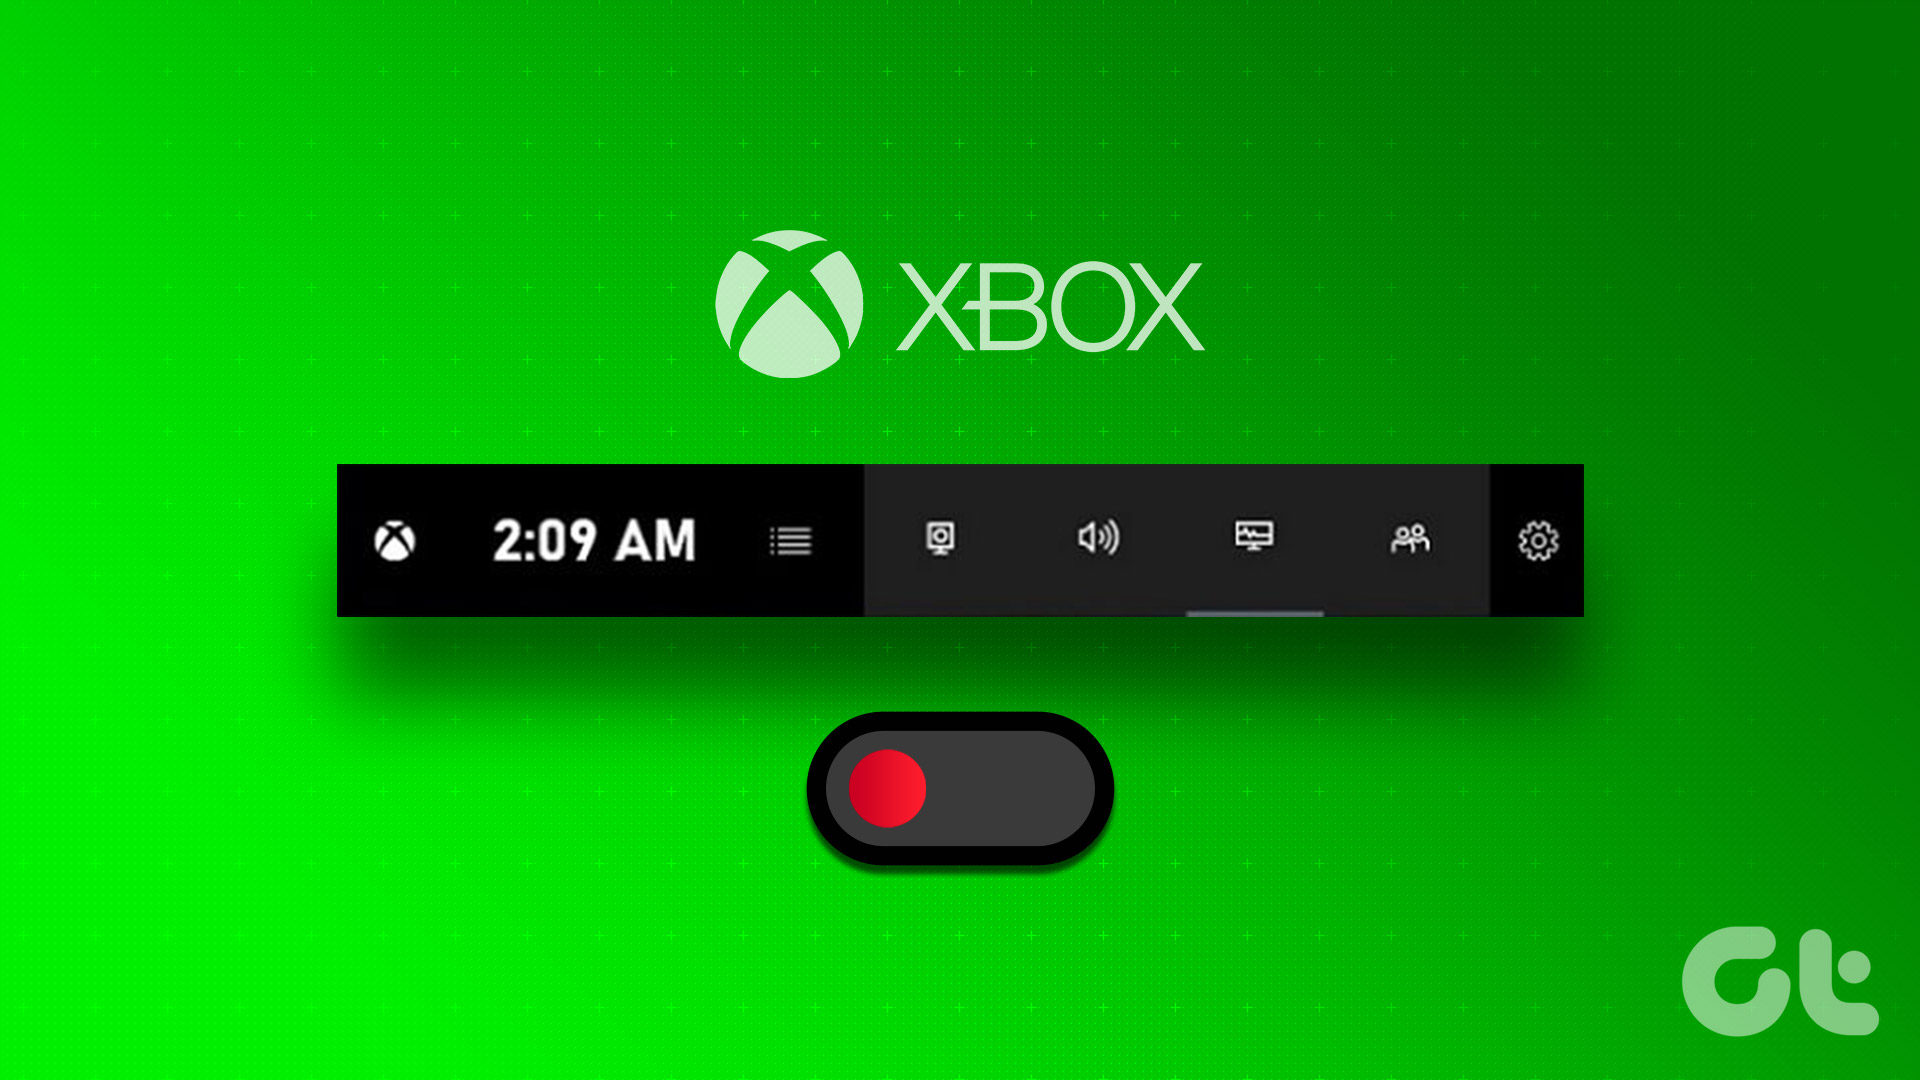 3 Ways to Disable Xbox Game Bar on Windows 11
Method 1: Using PowerShell Step 1: Press the Windows key, type PowerShell, and click Run as Administrator.
3 Ways to Disable Xbox Game Bar on Windows 11
Method 1: Using PowerShell Step 1: Press the Windows key, type PowerShell, and click Run as Administrator.
The article above may contain affiliate links which help support Guiding Tech. The content remains unbiased and authentic and will never affect our editorial integrity.