Are you looking to give your computer a fresh start by installing the latest version of Windows? Installing Windows 11 from scratch can help you resolve all your current operating system issues and improve overall performance. In this article, we’ll show you how to clean install Windows 11 on your PC.
Before moving forward with the steps, ensure you have taken the backup of your data. In addition to that, check if your PC meets a minimum hardware requirement. You will need at least 4GB RAM, 64GB storage space, and a 1 gigahertz (GHz) processor or faster with 2 or more cores on a compatible 64-bit processor for fresh installation of Windows 11.
Furthermore, you will need bootable media, which you can create using tools such as Microsoft Media Creation Tool and Rufus to clean install Windows 11 on your PC. Let’s begin.
How to Create a Windows 11 Install Disk with Media Creation Tool
This is one of the most straightforward ways to download and install Windows 11 on your computer. Follow the steps below.
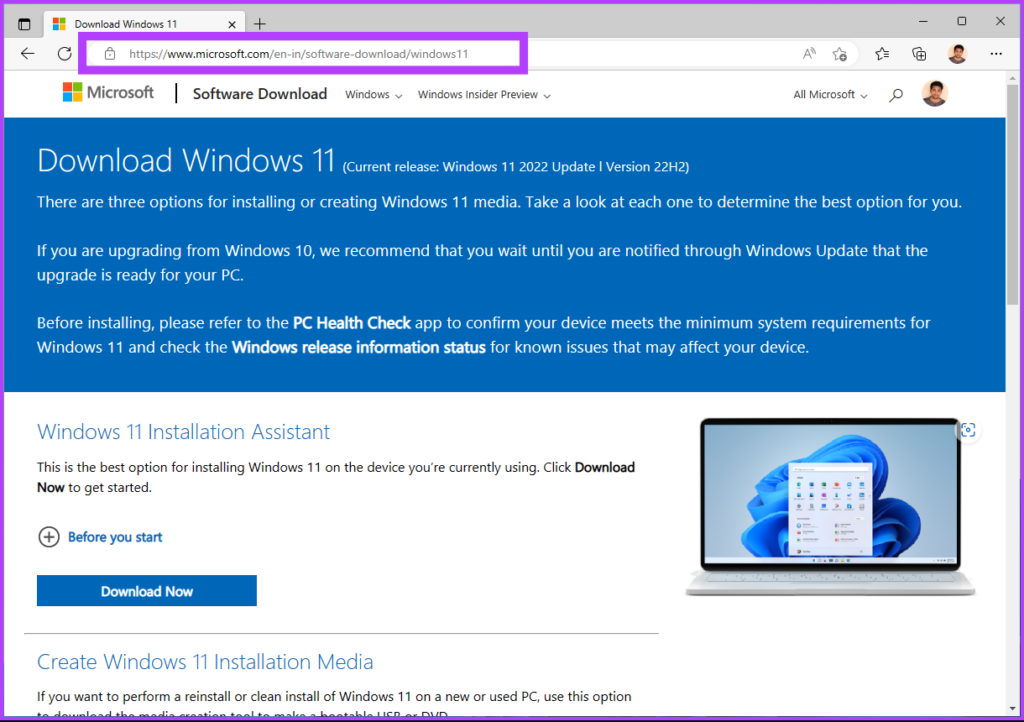
Step 1: Go to Windows 11 download page and click on Download Now under the ‘Create Windows 11 Installation Media’ section.
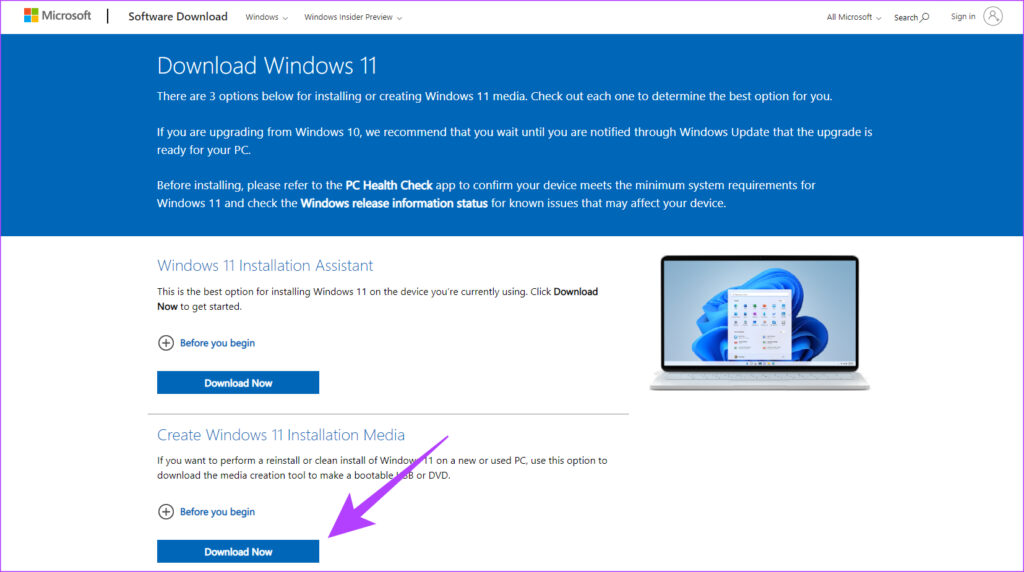
It will download the Media Creation Tool on your PC. Once downloaded, launch the program.
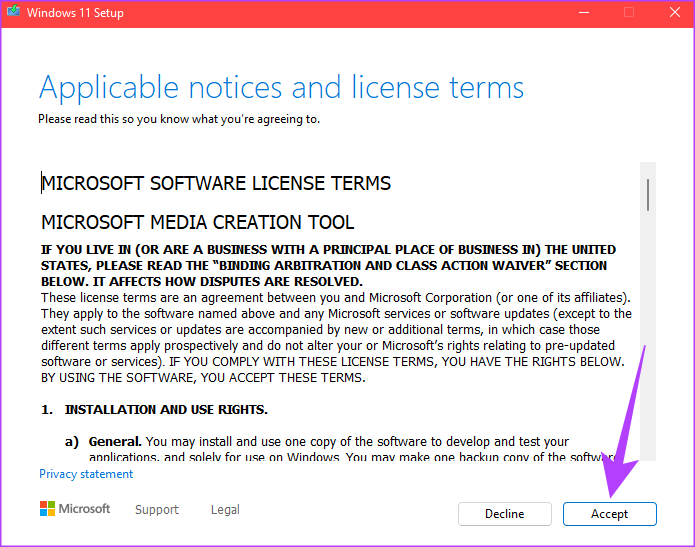
Step 2: A ‘Windows 11 Setup’ window will greet you with the ‘Applicable notices and license terms.’ Read the terms and click on Accept to proceed.
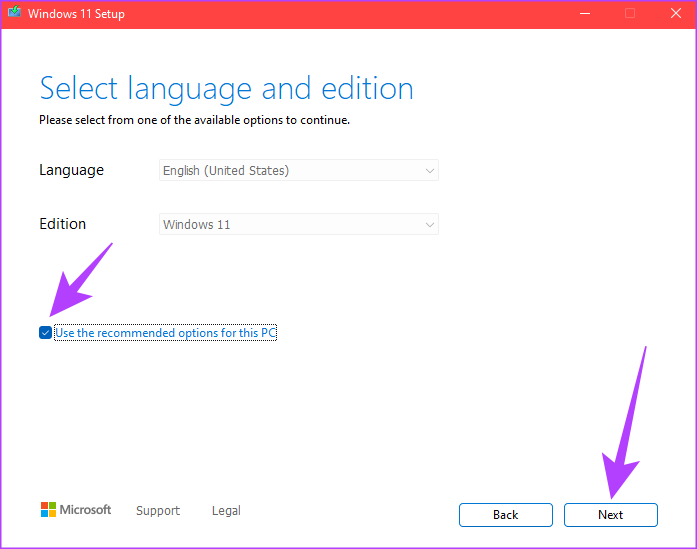
Step 3: Select the language and the Windows edition of your choice that you want to install. Once done, click on the Next button.
Note: Optionally, you can check ‘Use the recommended options for this PC’ to select the settings applied on the current PC.
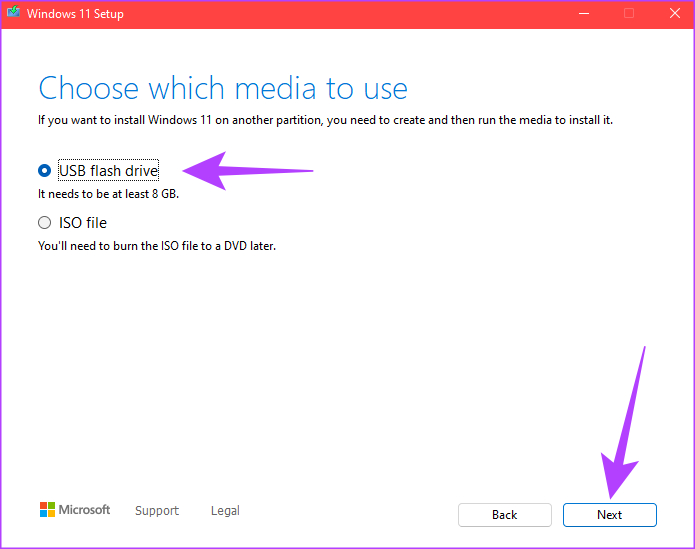
Step 4: Select the USB flash drive option on the next screen and click the Next button.
Note: The USB Drive must be formatted and be of at least 8GB.
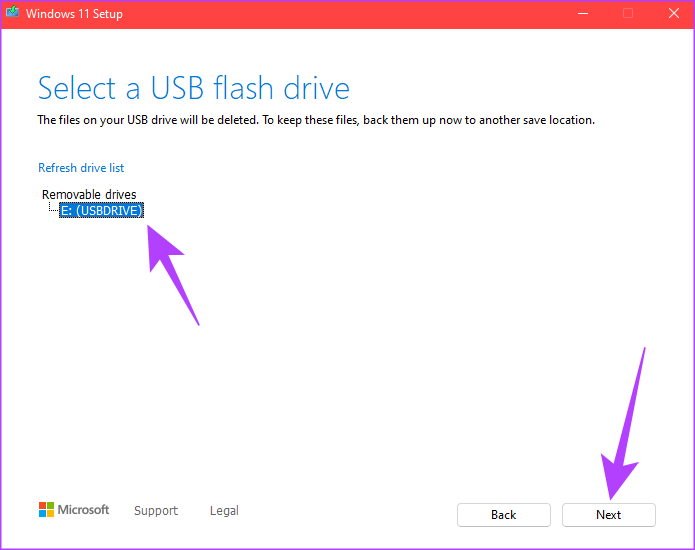
Step 5: Select the drive corresponding to the USB flash drive and click the Next button.
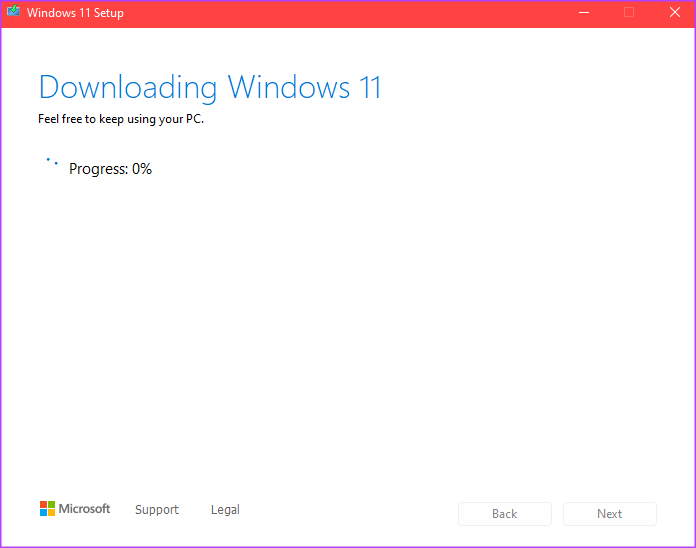
Step 6: The Media Creation Tool will download Windows 11 onto the USB drive.
Note: This process can take a while, depending on your USB drive’s internet connection speeds and the write speeds.
Step 7: After the download and installation process, you will see a message that says, ‘Your USB flash drive is ready’. Click on the Finish button.
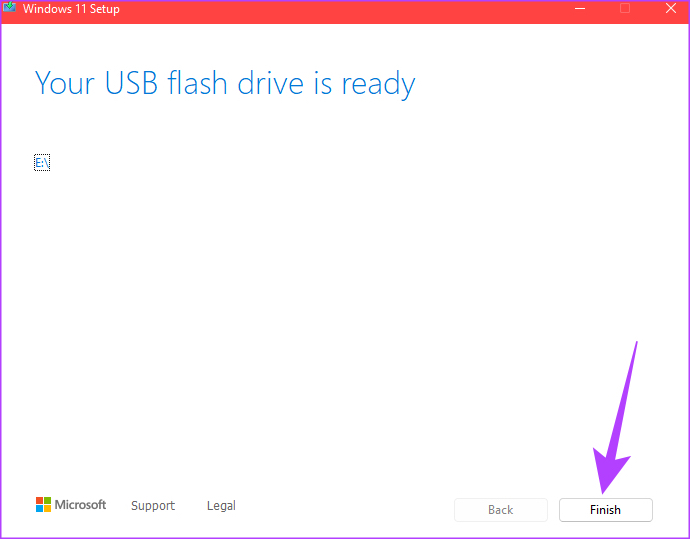
That is it! Your Windows 11 bootable USB drive has now been created and is ready to be plugged into the PC you want to install Windows 11. If you don’t want to take the Media Creation Tool route and want to make a bootable USB Drive of your own, move on to the next section.
How to Make a Bootable Windows 11 Install Disk
In this method, we will create a bootable USB drive of Windows 11 ISO file with the help of a tool called Rufus. Follow the below-mentioned steps.
Before going forward with Rufus, it is important to download Windows 11 ISO file from Microsoft. Hence, we have divided this method into two parts. If you already have a Windows 11 ISO file, you can skip to the second part.
Part I: Download Windows 11 ISO File
Step 1: Go to Microsoft’s website to download the Windows 11 ISO.
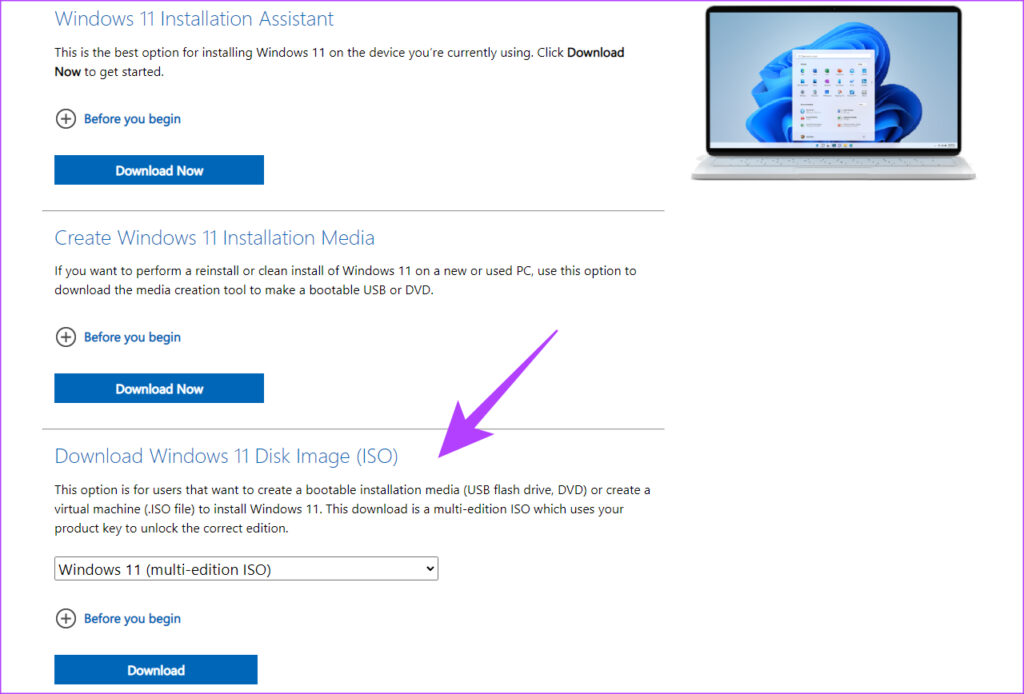
Step 2: Under ‘Download Windows 11 Disk Image (ISO),’ select Windows 11 (multi-edition ISO) and click Download.
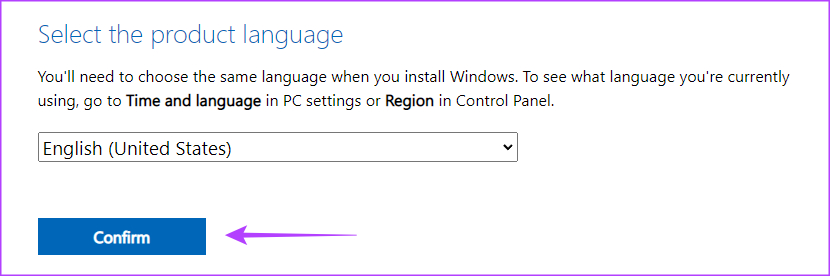
Step 3: It will validate, and in the next prompt, select the language you prefer. Press the Confirm button.
Step 4: Now, click on the 64-bit Download button.
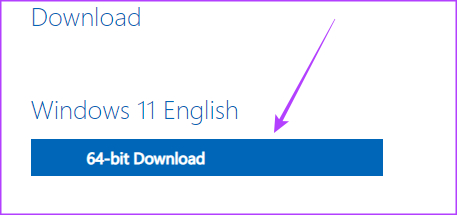
With this, Windows 11 will start downloading. Now, let’s proceed to create a bootable drive.
Part 2: Create a Bootable Windows 11 Install Disk With Rufus
Before moving forward, plug the USB drive into your PC. You don’t have to format the USB drive since the tool we will be using will automatically do it.
Step 1: Download the latest version of Rufus.

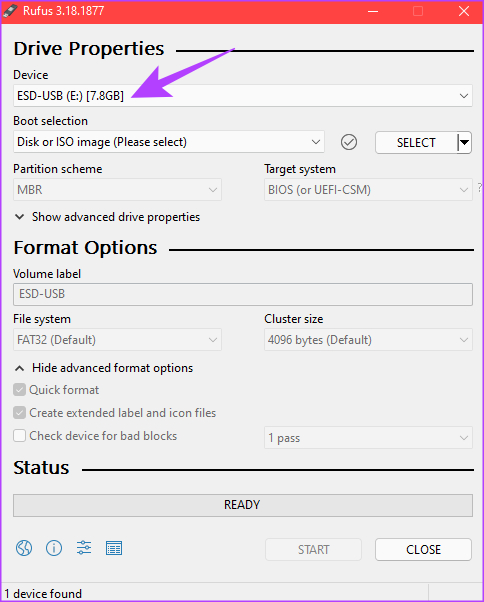
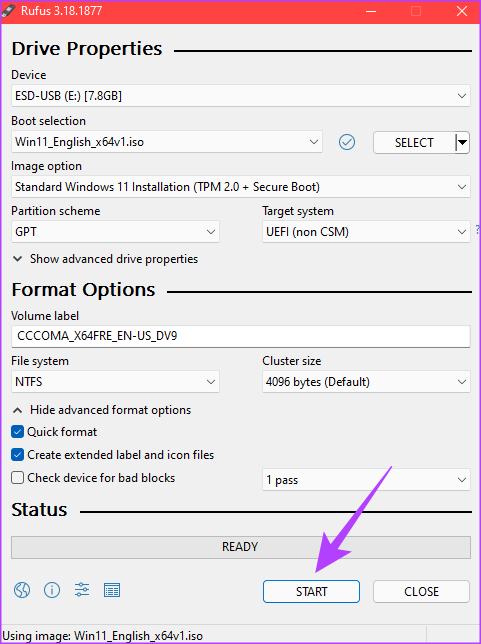
Step 2: Once downloaded, open Rufus on your computer and select the path to the USB drive in the Device drop-down.
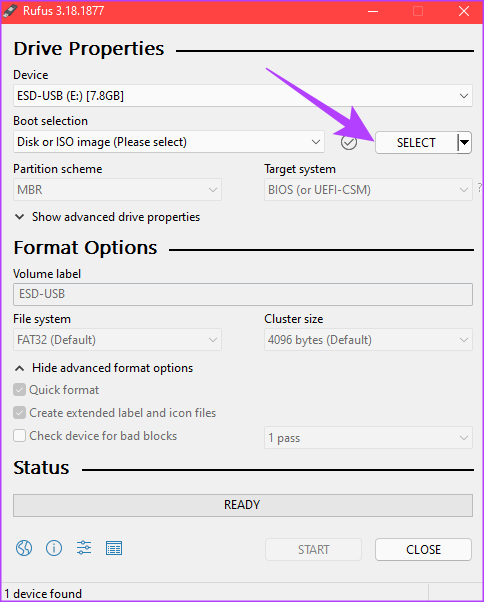
Step 3: Click on the Select button next to Boot Selection.
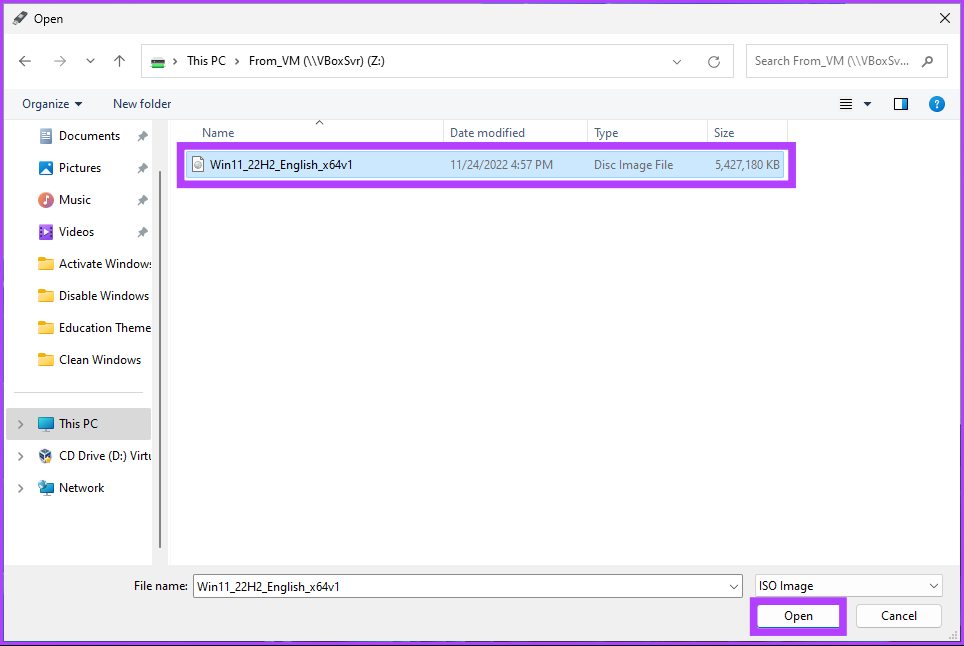
Step 4: Navigate to the Windows 11 ISO file you downloaded. Select it, and click on Open.
Step 5: Under the Image option section, select ‘Standard Windows 11 Installation (TPM 2.0 + Secure Boot)’ if your PC meets these two requirements.

Step 6: Finally, click Start.
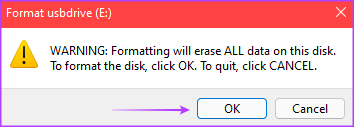
Step 7: Click on OK when prompted.
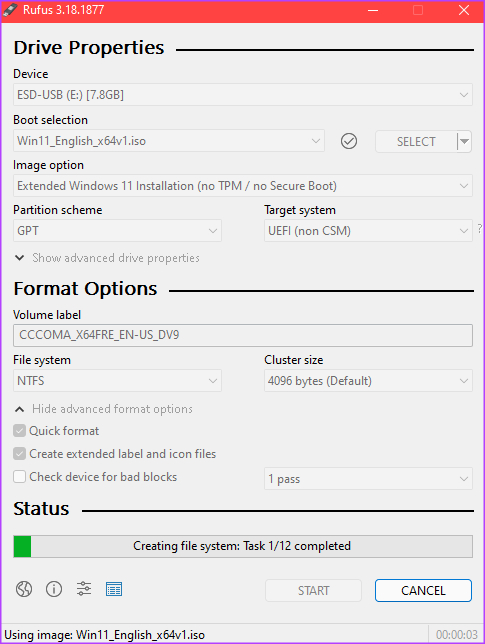
Step 8: Once the status bar at the bottom turns completely green, your Windows 11 bootable USB is ready.
That’s it. Now, let’s move towards installing it on your PC.
How to Install Windows 11 on the Target PC
If you have created a Windows 11 install disk with a media creation tool or from Rufus, follow the instructions below.
Step 1: Plug the Windows 11 bootable drive (USB) and start your Windows PC.
Step 2: Press any key to the boot from the device.
Note: This step may be different for different manufacturers. Moreover, you might need to enable secure boot. If not, you will not be able to move forward with installation.
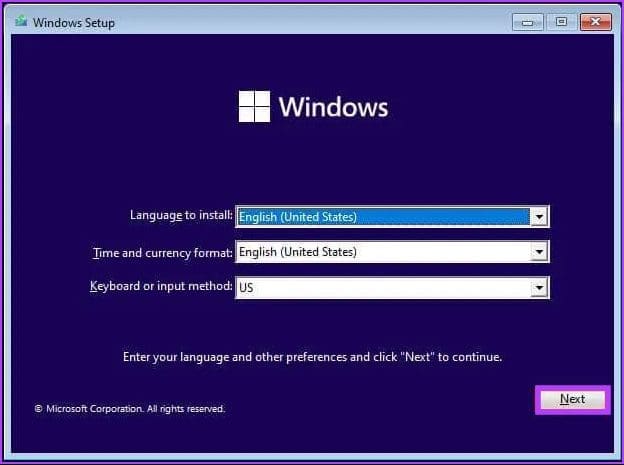
Step 3: In the Windows Setup window, select your preferred language, time, and keyboard input and click Next.
Step 4: Click the Install now button.

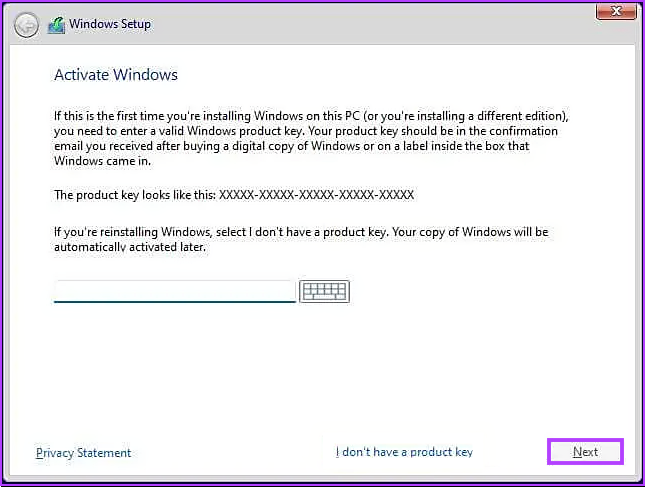
Step 5: Enter the product key and click Next.
Note: If you don’t have the product key, click on the ‘I don’t have a product key’ option to continue. You can complete the installation and activate Windows using the Settings app.
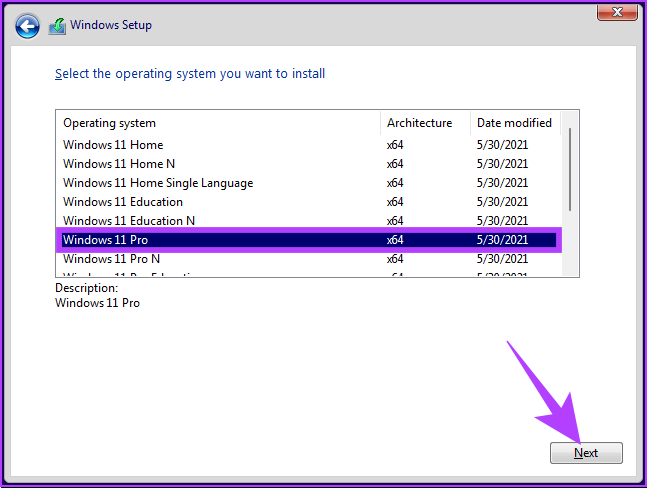
Step 6: Select the edition of Windows 11 you want to install and click Next.
Note: Ensure you have the product key for the same to activate later. If the product key doesn’t match the correct edition, Windows 11 won’t activate, and you will have to repeat the entire process.
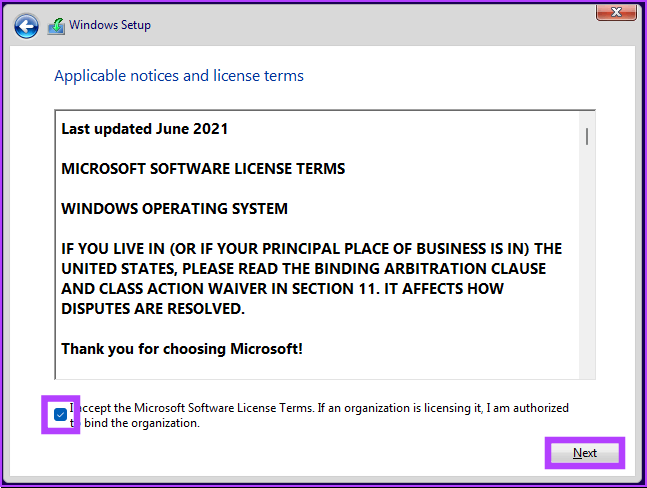
Step 7: Check the box next to ‘I accept the license terms’ and click Next.
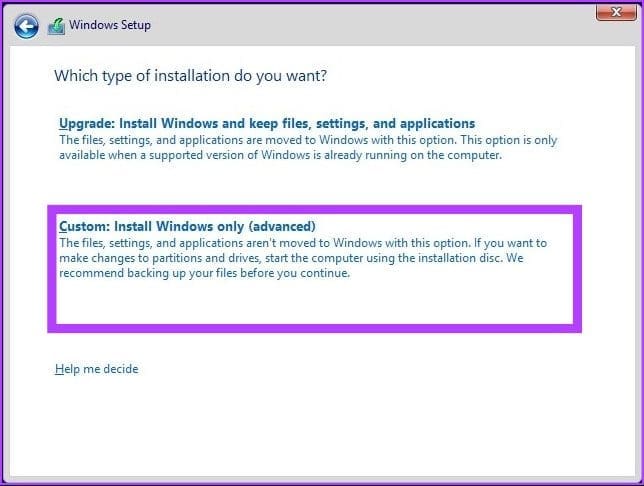
Step 8: Click ‘Custom: Install Windows only (advanced)’ option to continue.
Step 9: Select the partition with the current installation and click Delete.
Note: If multiple partitions exist, you must select and delete each partition to allow the setup to use the entire hard drive for the new setup.
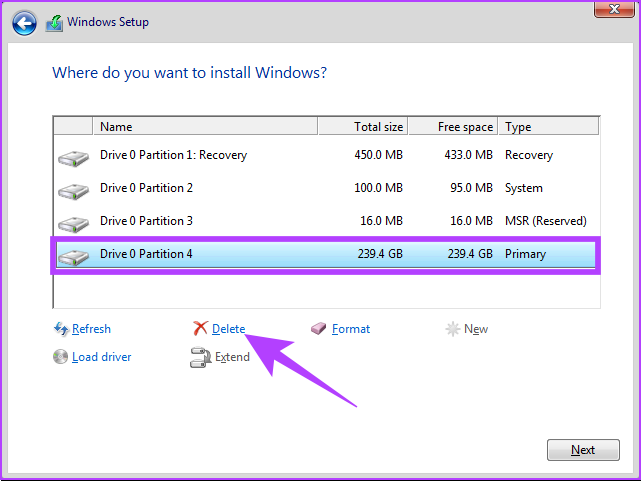
In the prompt, click the Yes button.
Step 10: Select the Drive 0 Unallocated Space and click Next.

There you go. A fresh copy of Windows 11 will be installed on your PC. If this is lengthy, you can choose to Reset the Windows too.
FAQs on Clean Installing Windows 11
Yes, reinstalling Windows 11 will erase the current operating system and all the software installed. Hence, it’s always a good idea to back up your important files before reinstalling Windows.
There are several reasons why the installation process is taking longer. This includes the speed of your computer, the size of the Windows installation file, and your internet connection. Other factors include a slow installation process, hardware issues, conflicting software, and a lack of available storage space.
A clean install of your operating system will remove viruses and give you a fresh start. It is important to note that if the virus has infected the computer’s BIOS or firmware, a clean install may not be able to remove it.
Reprise Your Windows PC
Even though it might seem daunting initially, starting from scratch is relatively easy, considering you have taken a backup of any critical data and all necessary files. Using the instructions outlined in this article, you can successfully install Windows 11 on your computer and enjoy its new features and improvements. You may also want to check these ways to auto-backup files on Windows using Cloud Services.
Was this helpful?
Last updated on 20 January, 2023
Read Next
 How to Sync Messages From iPhone to Mac: A Step-By-Step Guide
The interoperability between iPhone and Mac is unparalleled; from using the iPhone as Mac’s webcam to syncing messages from iPhone to Mac.
How to Sync Messages From iPhone to Mac: A Step-By-Step Guide
The interoperability between iPhone and Mac is unparalleled; from using the iPhone as Mac’s webcam to syncing messages from iPhone to Mac.
 DIY Outdoor Movie Theater: A Step-by-Step Tech Guide to Transform Your Backyard
If you like watching movies on a giant screen but do not fancy stepping out to a movie theatre for it, you've come to the right place.
DIY Outdoor Movie Theater: A Step-by-Step Tech Guide to Transform Your Backyard
If you like watching movies on a giant screen but do not fancy stepping out to a movie theatre for it, you've come to the right place.
 How to Install Windows 11 on VirtualBox: The Ultimate Guide
How to Enable Virtualization on Windows 11 Enabling virtualization on Windows typically involves going into the BIOS or UEFI settings and enabling support, which may vary depending on your PC's
How to Install Windows 11 on VirtualBox: The Ultimate Guide
How to Enable Virtualization on Windows 11 Enabling virtualization on Windows typically involves going into the BIOS or UEFI settings and enabling support, which may vary depending on your PC's
 4 Ways to Safely Clean Registry on Windows 11/10
1.
4 Ways to Safely Clean Registry on Windows 11/10
1.
 How to Perform a Clean Boot in Windows and Why It Matters
What Is Clean Boot on a Windows PC A clean boot in Windows is a troubleshooting technique that helps you identify software conflicts causing issues with your computer.
How to Perform a Clean Boot in Windows and Why It Matters
What Is Clean Boot on a Windows PC A clean boot in Windows is a troubleshooting technique that helps you identify software conflicts causing issues with your computer.
 How to Clean up Duplicate Photos on iPhone
Method 1: Use the Duplicates Feature in the Photos App Finding and deleting duplicate photos individually on your iPhone can be a tough nut to crack.
How to Clean up Duplicate Photos on iPhone
Method 1: Use the Duplicates Feature in the Photos App Finding and deleting duplicate photos individually on your iPhone can be a tough nut to crack.
 How to Download and Install Chrome Offline on Windows
Setting up Google Chrome on Windows 10 is a relatively smooth and uneventful affair.
How to Download and Install Chrome Offline on Windows
Setting up Google Chrome on Windows 10 is a relatively smooth and uneventful affair.
 How to Install VirtualBox on Windows 11 and 10
Prerequisites for Installing VirtualBox on Windows CPU: x86-compatible hardware (most modern Intel and AMD CPUs are supported) RAM: The minimum requirement of the host operating system (Windows 11: 4GB) plus
How to Install VirtualBox on Windows 11 and 10
Prerequisites for Installing VirtualBox on Windows CPU: x86-compatible hardware (most modern Intel and AMD CPUs are supported) RAM: The minimum requirement of the host operating system (Windows 11: 4GB) plus
The article above may contain affiliate links which help support Guiding Tech. The content remains unbiased and authentic and will never affect our editorial integrity.