Fix 1: Change the Display Mode of the Application (Game)
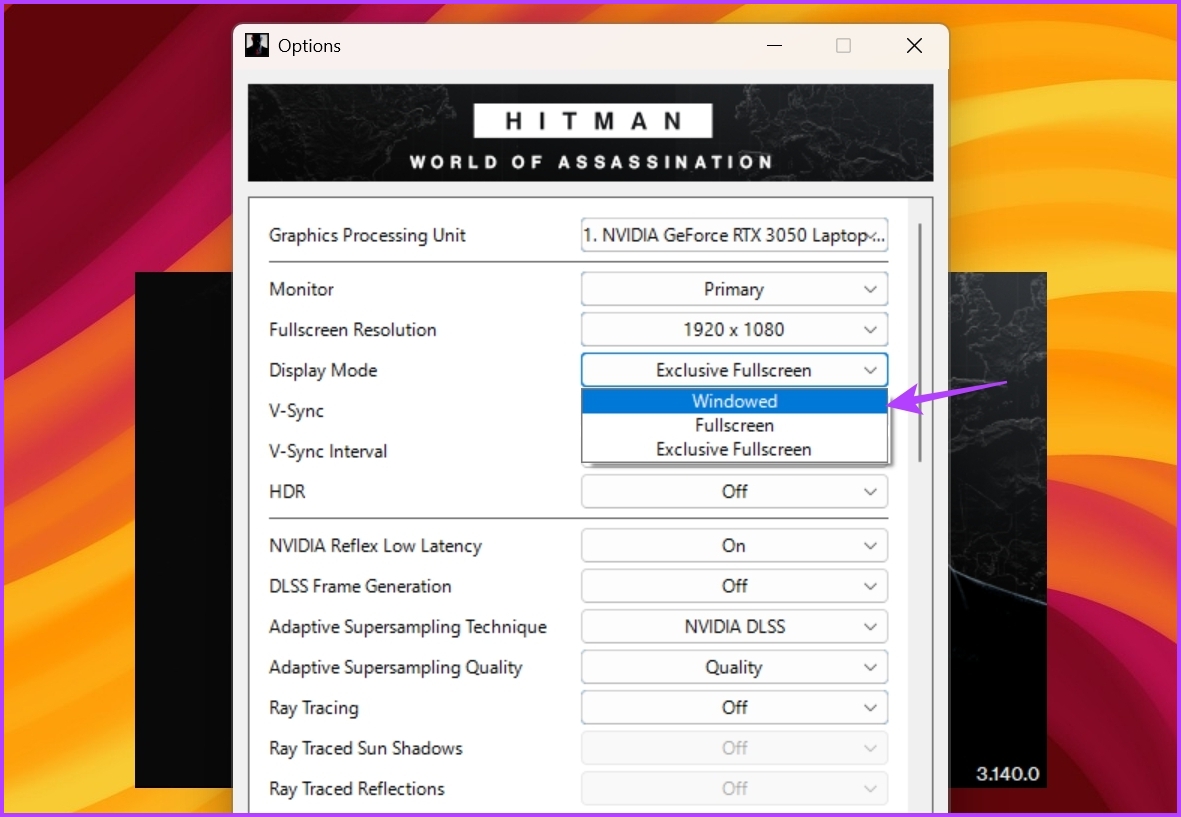
The black screen issue usually appears when tabbing out of a full-screen game. This can be due to the incompatibility between the game display mode and the display settings on your Windows PC.
You can change the game’s display mode to Windowed to fix the issue. The image below shows that most games offer this as part of the graphics settings.
If the option is unavailable, follow the steps to create a shortcut to launch the game in Windowed mode.
Step 1: Right-click on the program and choose Properties from the context menu.
Step 2: Switch to the Shortcut tab. Then, type -window at the end of the file path in the Target field.
Step 3: Click Apply and then OK.
Note: G-sync and FreeSync work both for Windowed and Fullscreen, so it doesn’t matter much if you are worried about performance.

Fix 2: Adjust Your Monitor’s Refresh Rate, Color Depth, and Format
Configuring your computer to a higher refresh rate can help improve the display quality. But if your monitor doesn’t support the configured refresh rate, you’ll likely have issues like getting a black screen using the Alt + Tab keyboard shortcut.
As such, if you have configured your monitor to a higher refresh rate, change it to its default settings to solve the issue.
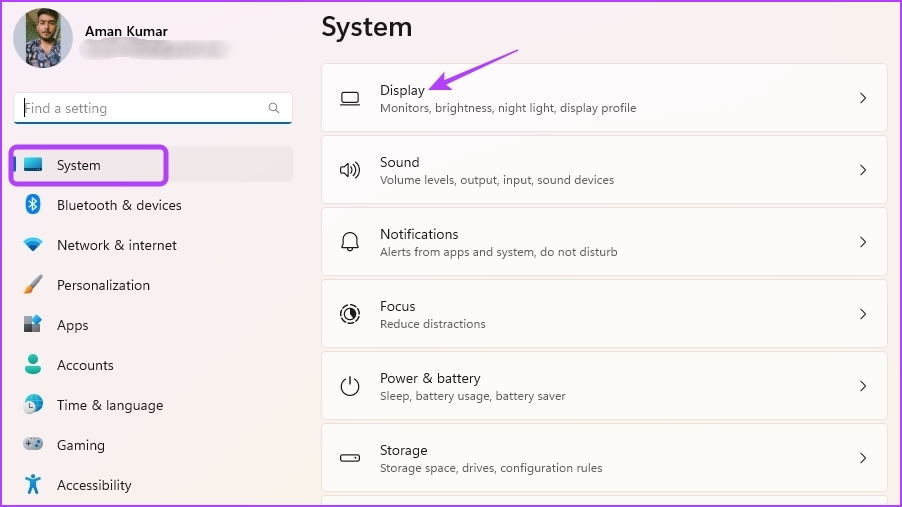
Step 1: Press the Windows + I keyboard shortcut to open the Settings app.
Step 2: Choose System from the left sidebar and select Display from the right pane.
Step 3: Choose Advanced display.

Step 4: Click the drop-down icon next to the Choose a refresh rate option and select 60Hz from the list.
Note: You’ll need to choose a refresh rate that your monitor supports. But even if you have a 120Hz or a higher-rate monitor, choose 60Hz to troubleshoot the problem.

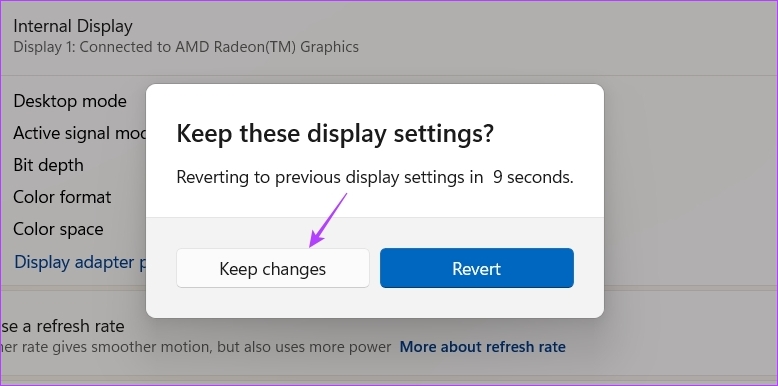
Step 5: Select Keep changes in the prompt.
Besides the refresh rate, you can significantly reduce the black screen effect by changing the refresh rate, color depth, or color format. When you click on Display adapter properties for the display, you can manage the color under Color Management—more in the forum.

Fix 3: Disable Your Monitor Game Mode
Many monitors come with a built-in game mode feature that you can enable to get a better refresh rate, faster response time, FreeSync, HDR, and much more. Sometimes, these features may cause more harm than good due to compatibility issues with your OS.
Below are the steps to disable Game Mode on an LG monitor. If you’re using a different brand of monitor, check its user manual to learn more about turning off the game mode for your model.
Step 1: Press the physical button on your monitor’s back and go to Menu.

Step 2: Choose Game Adjust from the left sidebar.

Step 3: Choose Response Time in the right pane and select Off.

Next, set Off for all other options in the right pane. Restart your PC and check if the issue persists.
4. Update or Rollback the Graphics Driver
The best way to update the graphics driver is to download it from the graphics card manufacturer’s website (NVIDIA, AMD, or Intel) and install it.
If the issue started after installing the driver, we recommend uninstalling it using the OEM software. After that, install the previous version of the driver. This will complete the rollback of the graphics driver.
5. Disable Full Screen Optimization
Full-screen optimization is a Windows feature that automatically adjusts application display settings for optimal performance and stability. It usually works fine with most programs, but it might cause issues like input lag or a black screen for others.
You can disable the full-screen optimization for that application so you can switch without using the Alt + Tab keys.
Step 1: Right-click on the problematic application and choose Properties from the context menu.
Step 2: Switch to the Compatibility tab. Then, check the Disable fullscreen optimizations option.

Step 3: Click Apply and OK.
6. Change NVIDIA Control Panel Settings
You can use the NVIDIA Control Panel to fix the black screen issue if you have an NVIDIA graphics card. Configure the preferred refresh rate option from NVIDIA’s control panel app. Here’s a step-by-step instructions to do that:
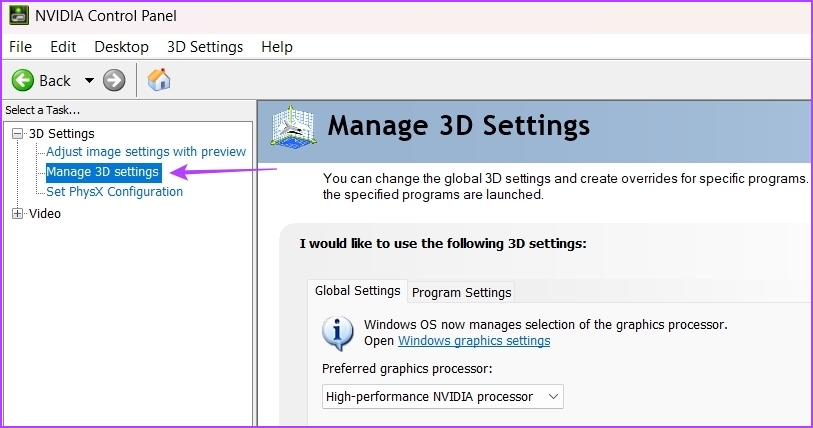
Step 1: Open the Start Menu, type NVIDIA Control Panel, and press Enter.

Step 2: Double-click on 3D Settings in the left sidebar.
Step 3: Select Manage 3D settings.
Step 4: Under the Settings section, click the drop-down icon next to Preferred refresh rate and choose Application-controlled.
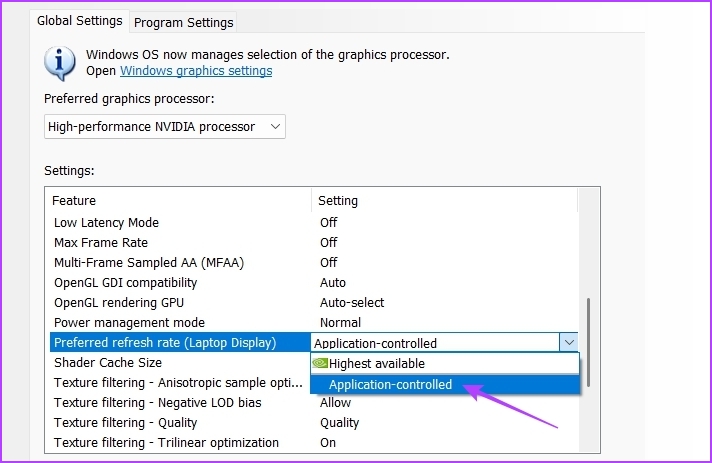
Step 5: Click Apply.
That will let the applications control the refresh rate and not let the GPU chip force it on the app.
Was this helpful?
Last updated on 20 April, 2024
Read Next
 6 Fixes for Alt + Tab Shortcut Not Working on Windows 11
Fix 1.
6 Fixes for Alt + Tab Shortcut Not Working on Windows 11
Fix 1.
 5 Ways to Fix Android Phone Automatically Pressing the Back Button
Common Fixes Check hardware damage: Ensure your phone's touch screen is intact to avoid having ghost touch issues with the back navigation button.
5 Ways to Fix Android Phone Automatically Pressing the Back Button
Common Fixes Check hardware damage: Ensure your phone's touch screen is intact to avoid having ghost touch issues with the back navigation button.
 3 Ways to Fix Ctrl + Alt + Delete Not Working on Windows 11
Basic Fixes Ensure keyboard keys are intact: Ensure that Ctrl, Alt, and Delete keys aren't damaged on your keyboard and are functioning properly.
3 Ways to Fix Ctrl + Alt + Delete Not Working on Windows 11
Basic Fixes Ensure keyboard keys are intact: Ensure that Ctrl, Alt, and Delete keys aren't damaged on your keyboard and are functioning properly.
 How to Fix Windows Alt and F4 Keys Not Working Error on Windows 10
What do most people do when a computer peripheral or an accessory stops working suddenly?
How to Fix Windows Alt and F4 Keys Not Working Error on Windows 10
What do most people do when a computer peripheral or an accessory stops working suddenly?
 How to Ctrl + Alt + Del in Remote Desktop on Windows
Method 1: Use Ctrl + Alt + End on the Keyboard It's simple - you can use the Ctrl + Alt + End on your Windows Remote Desktop session instead
How to Ctrl + Alt + Del in Remote Desktop on Windows
Method 1: Use Ctrl + Alt + End on the Keyboard It's simple - you can use the Ctrl + Alt + End on your Windows Remote Desktop session instead
 Top 6 Ways to Fix Microsoft Edge Black Screen Issues on Windows 10
Microsoft Edge continues to quickly pace ahead in the browser race on mobile and desktop.
Top 6 Ways to Fix Microsoft Edge Black Screen Issues on Windows 10
Microsoft Edge continues to quickly pace ahead in the browser race on mobile and desktop.
 Top 7 Useful Ways to Fix Windows 10 Photos Black Screen Error
Windows 10 got a lot of things right, but the Photos app was not one of them.
Top 7 Useful Ways to Fix Windows 10 Photos Black Screen Error
Windows 10 got a lot of things right, but the Photos app was not one of them.
 4 Ways to Fix Camera Showing a Black Screen on Windows 11
Basic Fixes: Ensure the camera lens is unobstructed: Certain laptops come with built-in privacy shutters for the device camera.
4 Ways to Fix Camera Showing a Black Screen on Windows 11
Basic Fixes: Ensure the camera lens is unobstructed: Certain laptops come with built-in privacy shutters for the device camera.
The article above may contain affiliate links which help support Guiding Tech. The content remains unbiased and authentic and will never affect our editorial integrity.