iOS offers multiple ways to convert pictures to PDF on iPhone quickly, efficiently, and without an app. Here is how.
Method 1: Convert a Picture to PDF via the Photos app
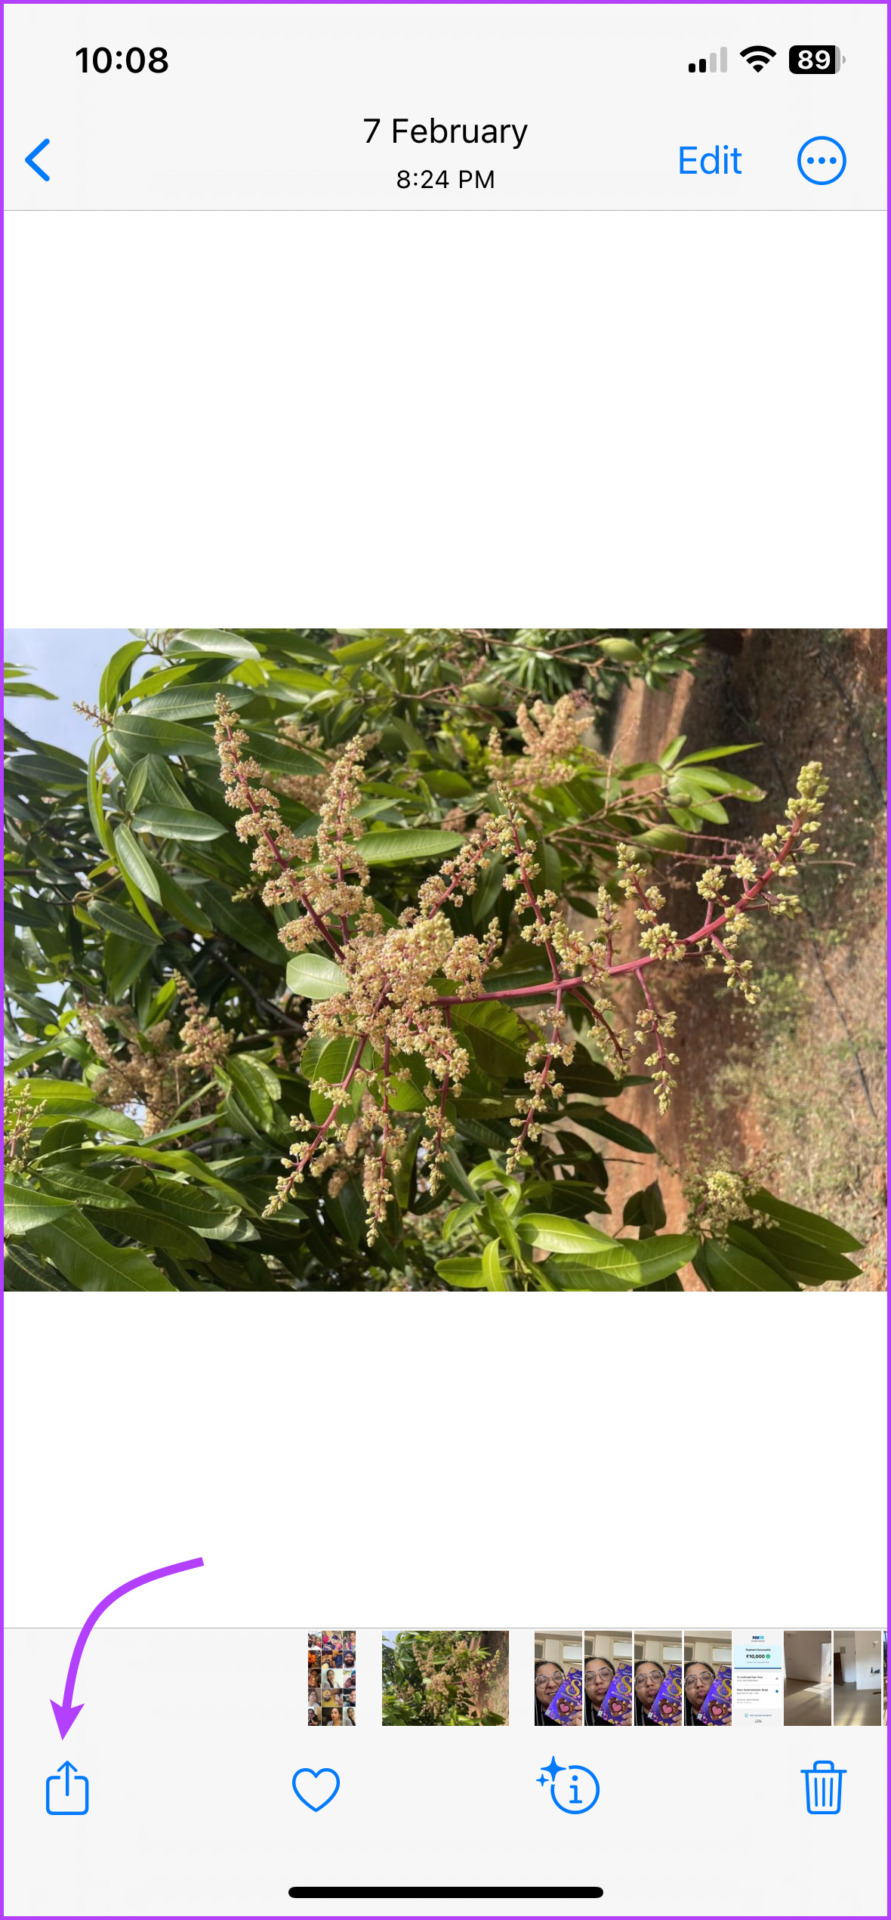
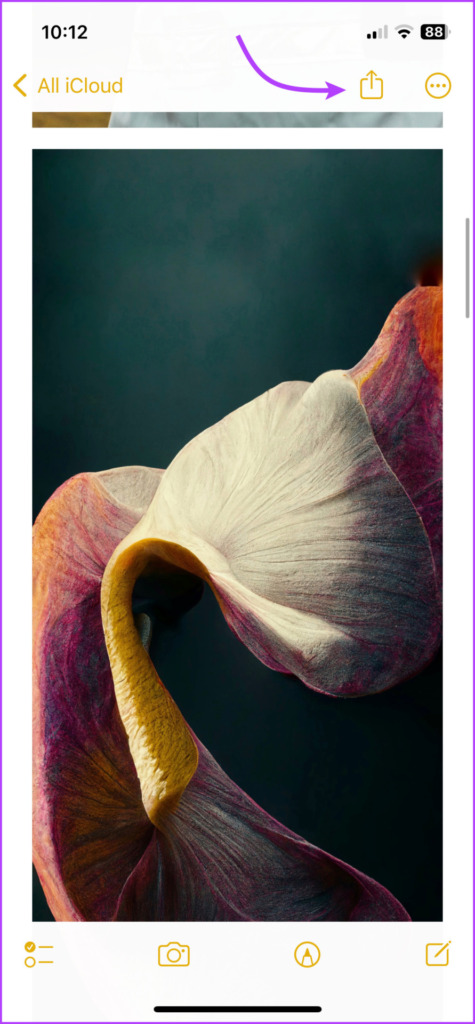
Step 1: Open the photo in the Photos app and tap the Share icon at the bottom left corner.
Step 2: Select Print from the Share Sheet.
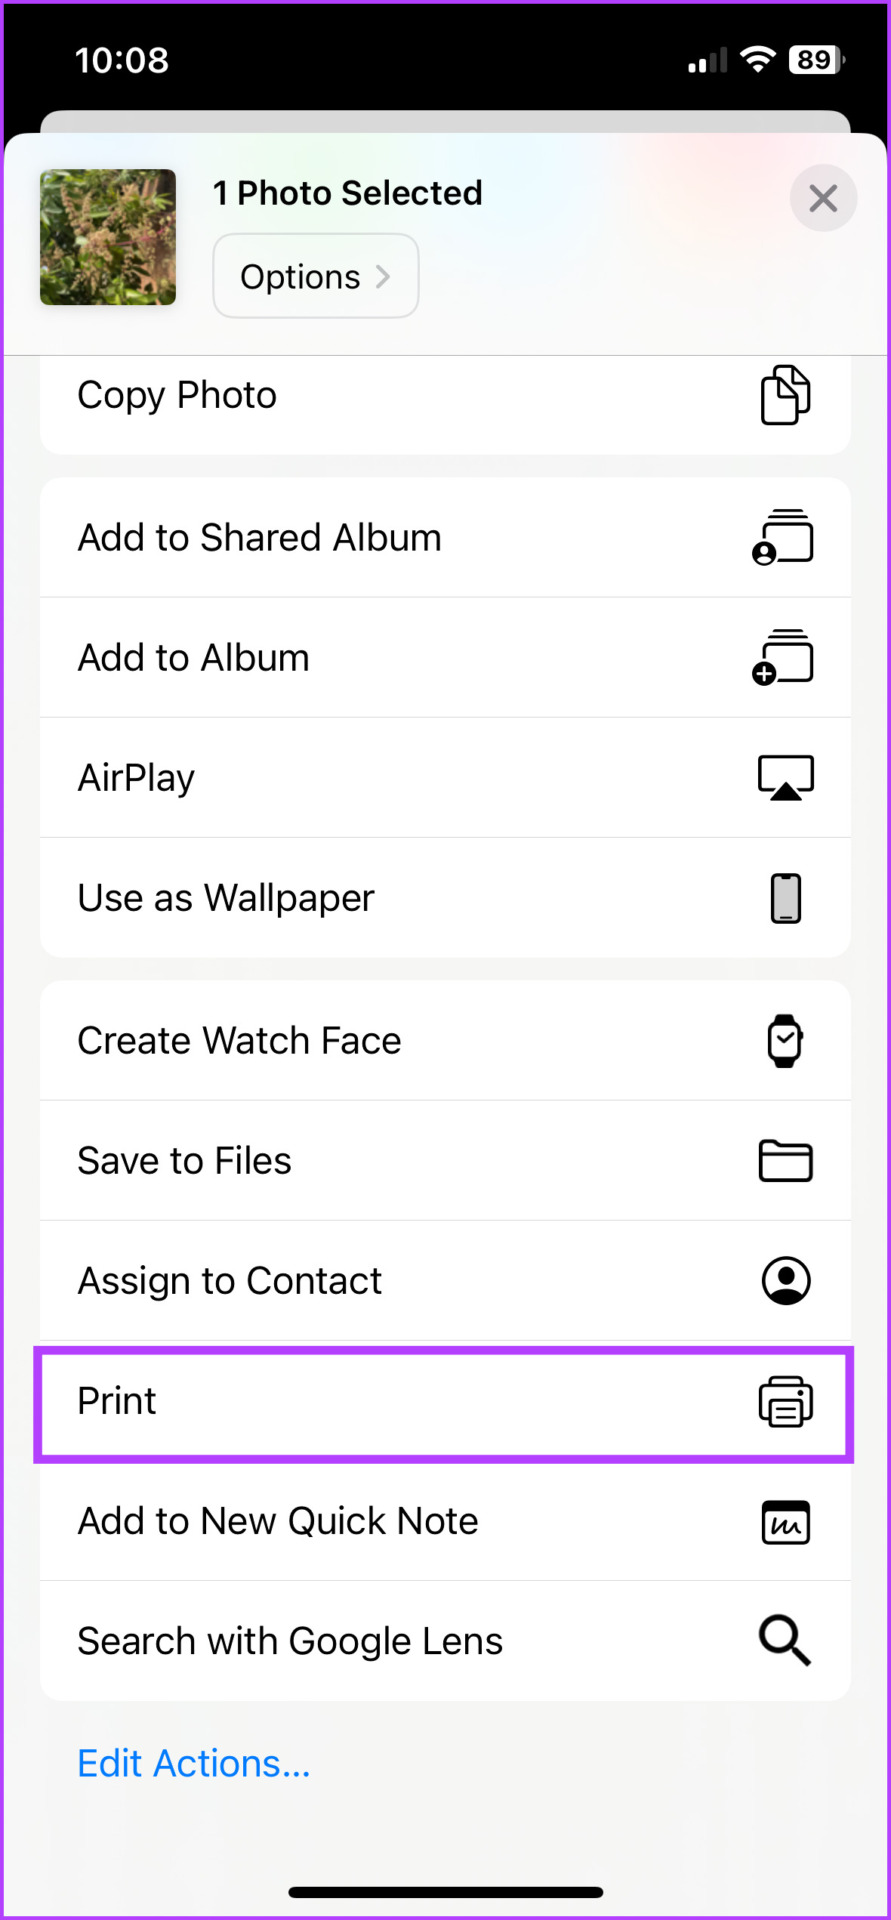
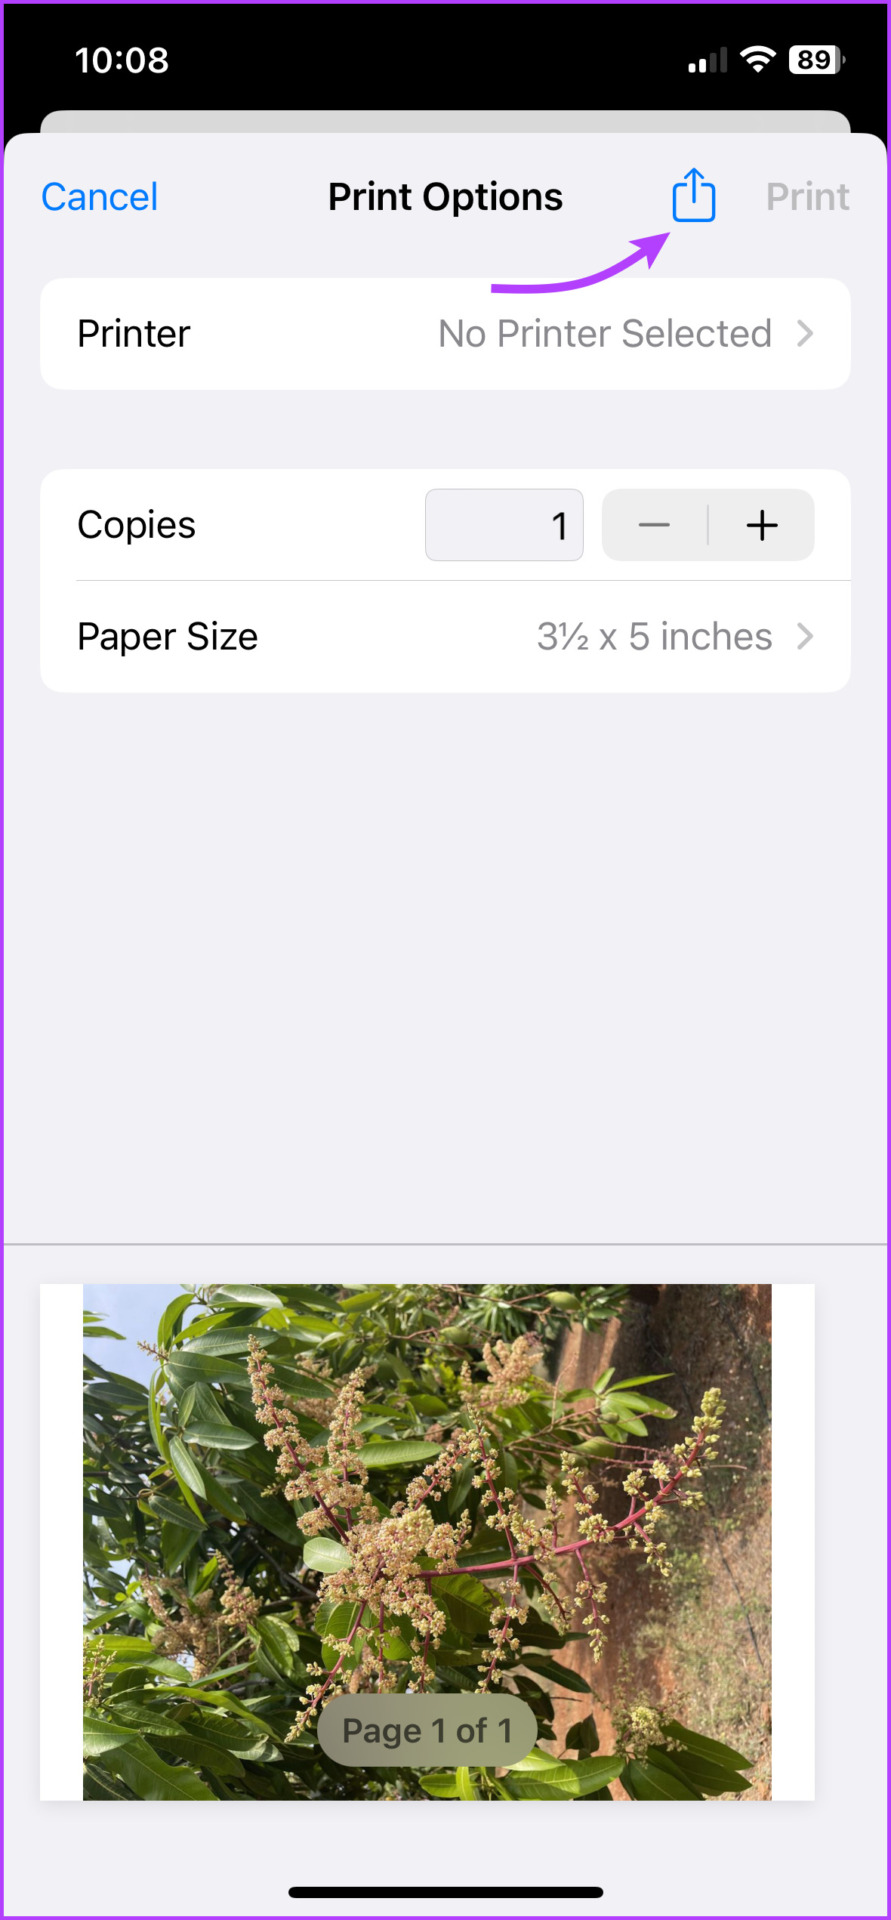
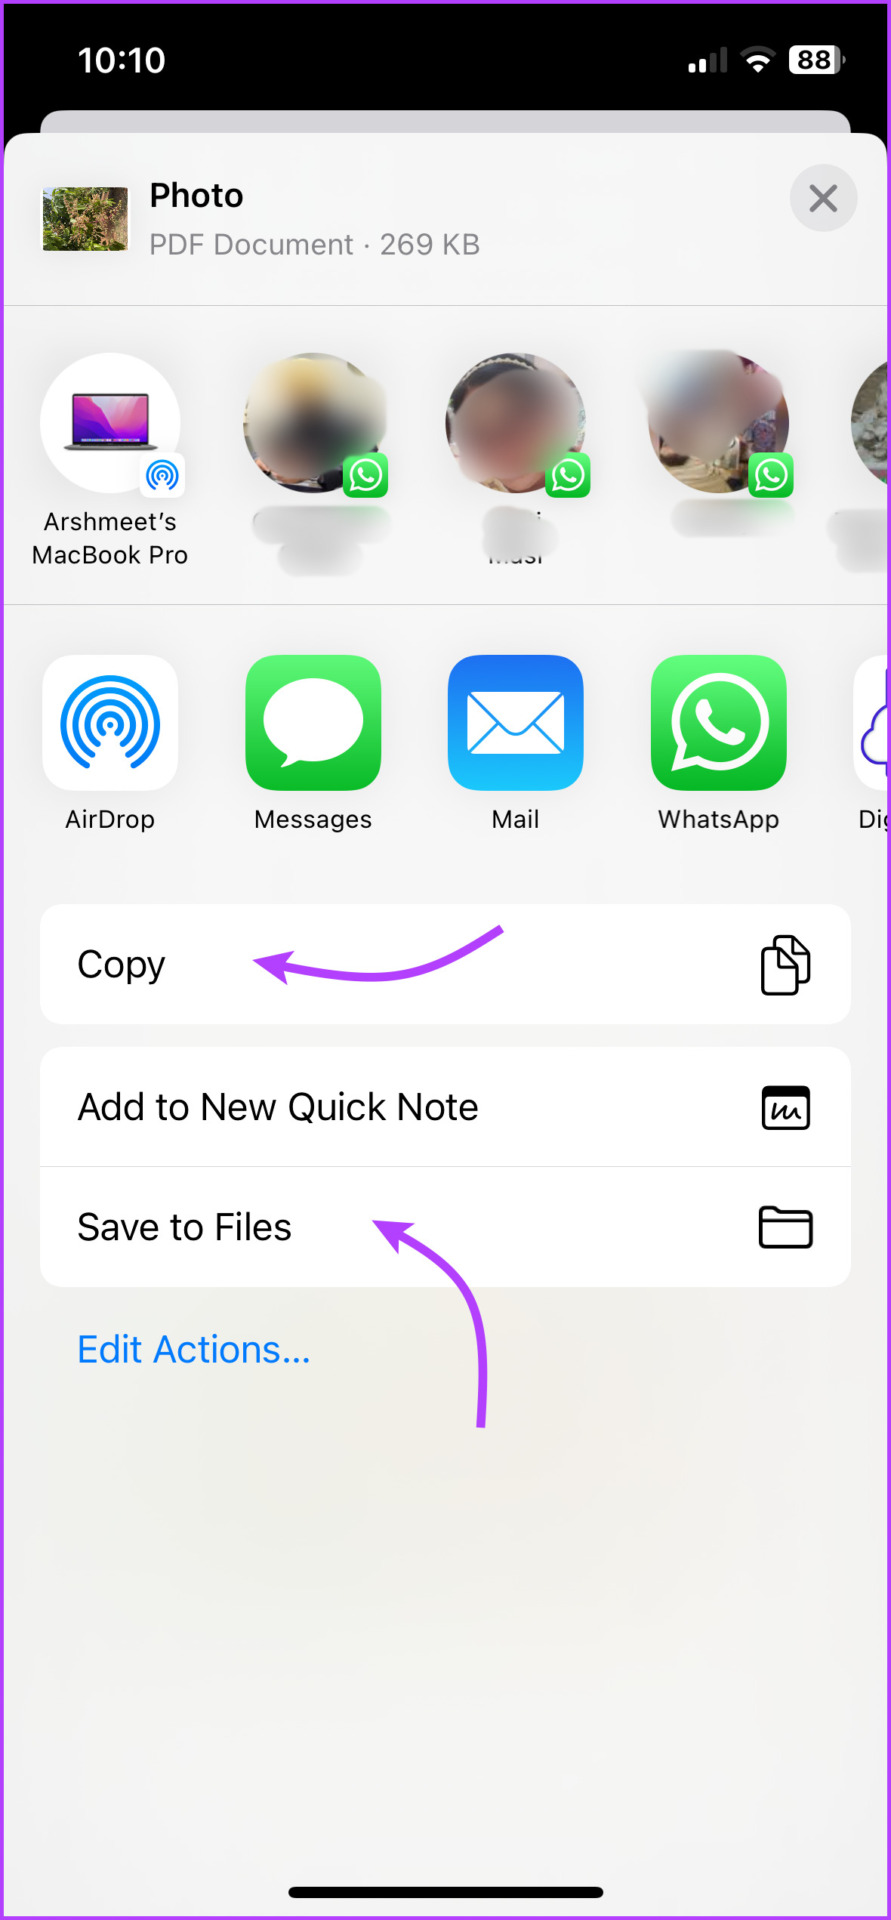
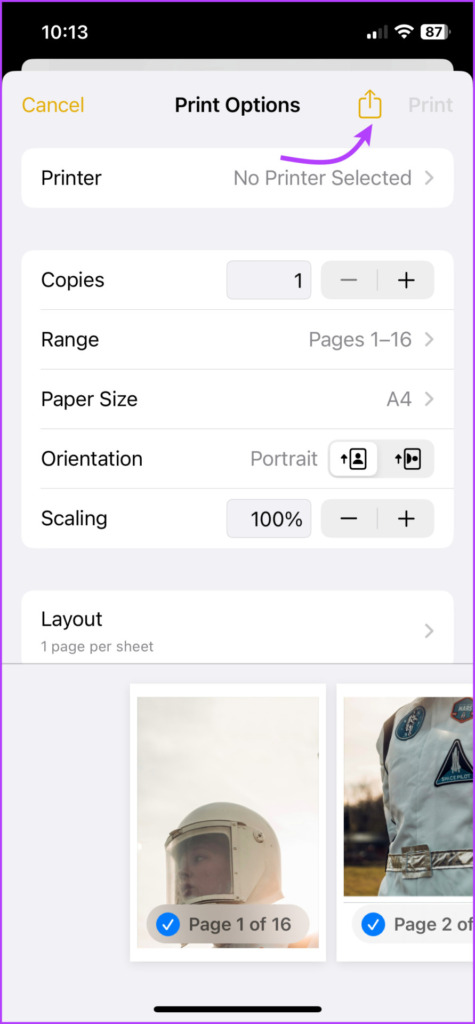
Step 3: From the print preview page, tap the Share icon again. This will auto-convert the print preview, aka the photo, into a PDF file.
Step 4: You can Copy it, Save to Files, or send/share it per your preference.
Note: You can not only convert photos to PDFs but also edit PDFs on an iPhone without a third-party app, albeit with limited functionality.
Method 2: Convert Multiple Photos to PDF on iPhone
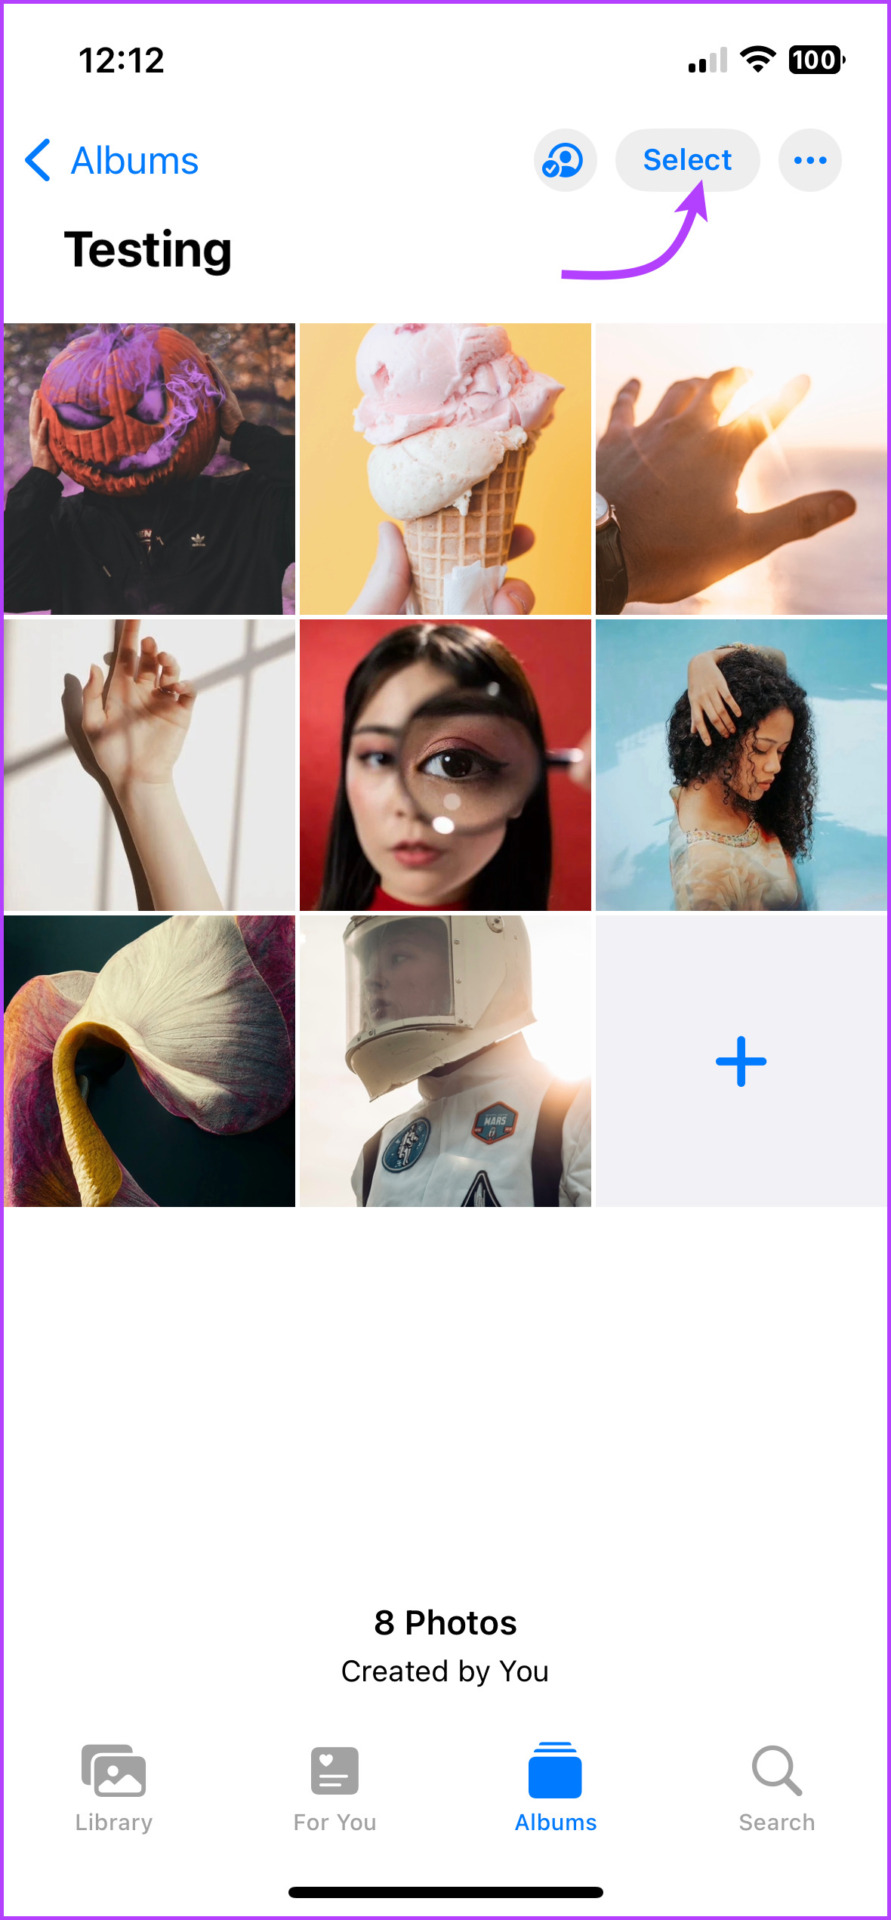
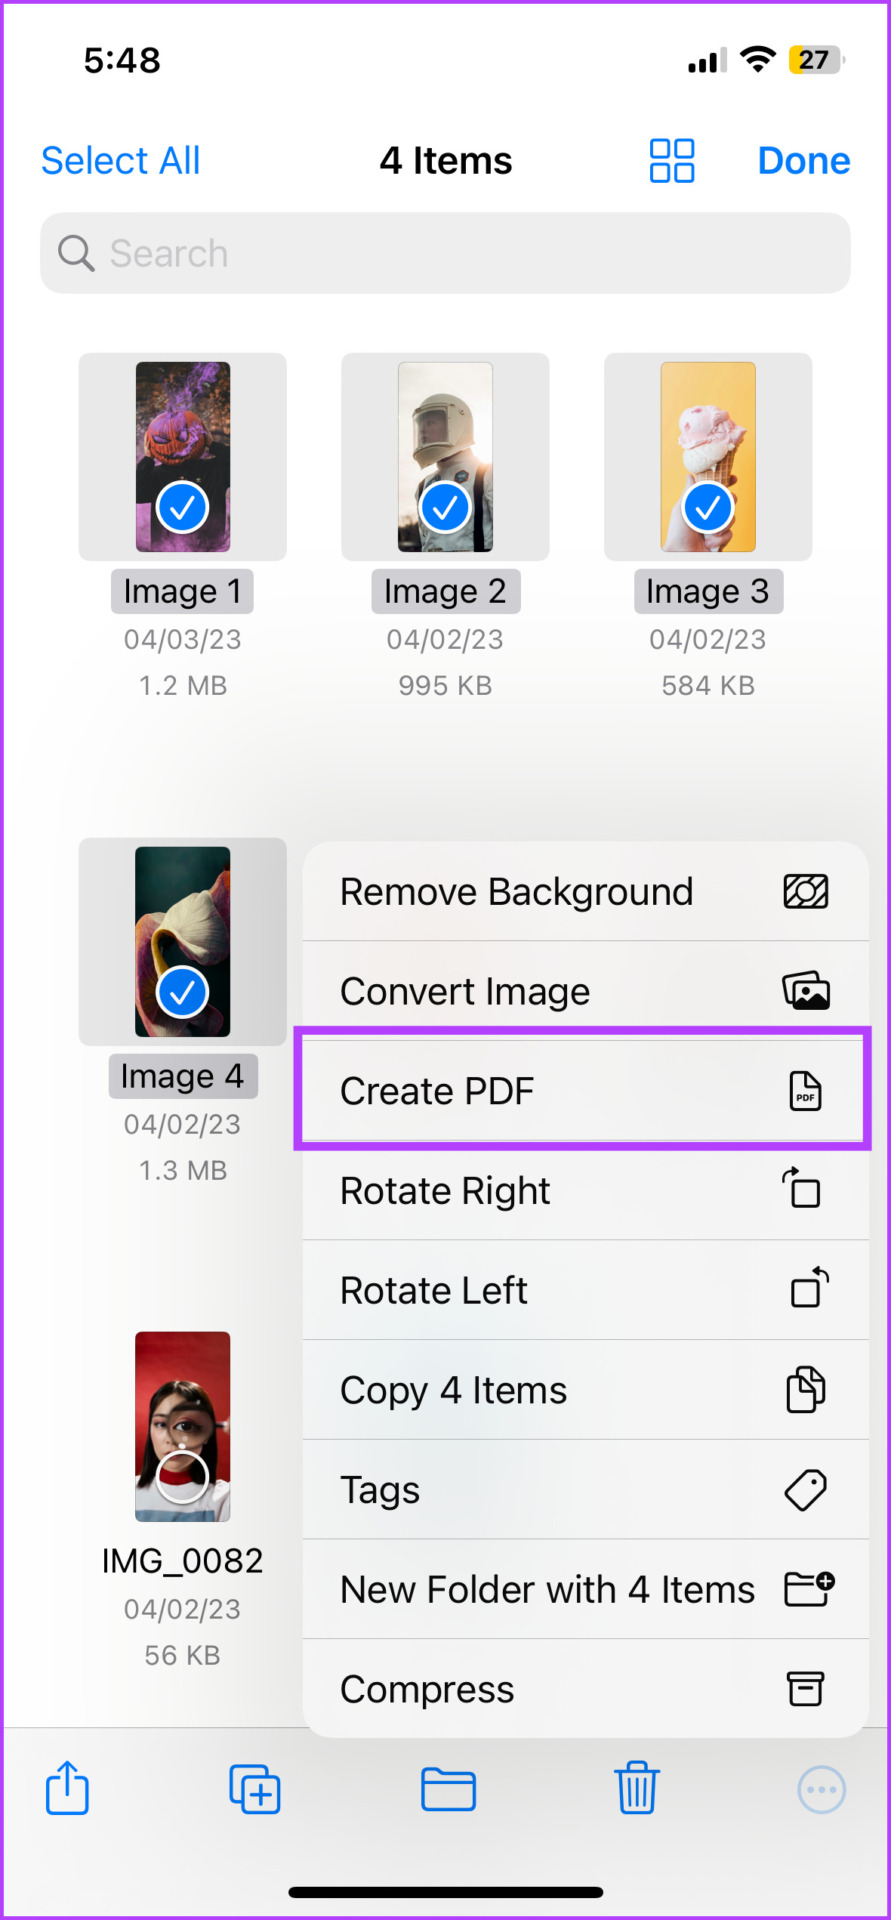
Step 1: In the Photos app, tap Select from the top-right corner.
Step 2: Select the images you want to save as PDF and tap the Share icon.
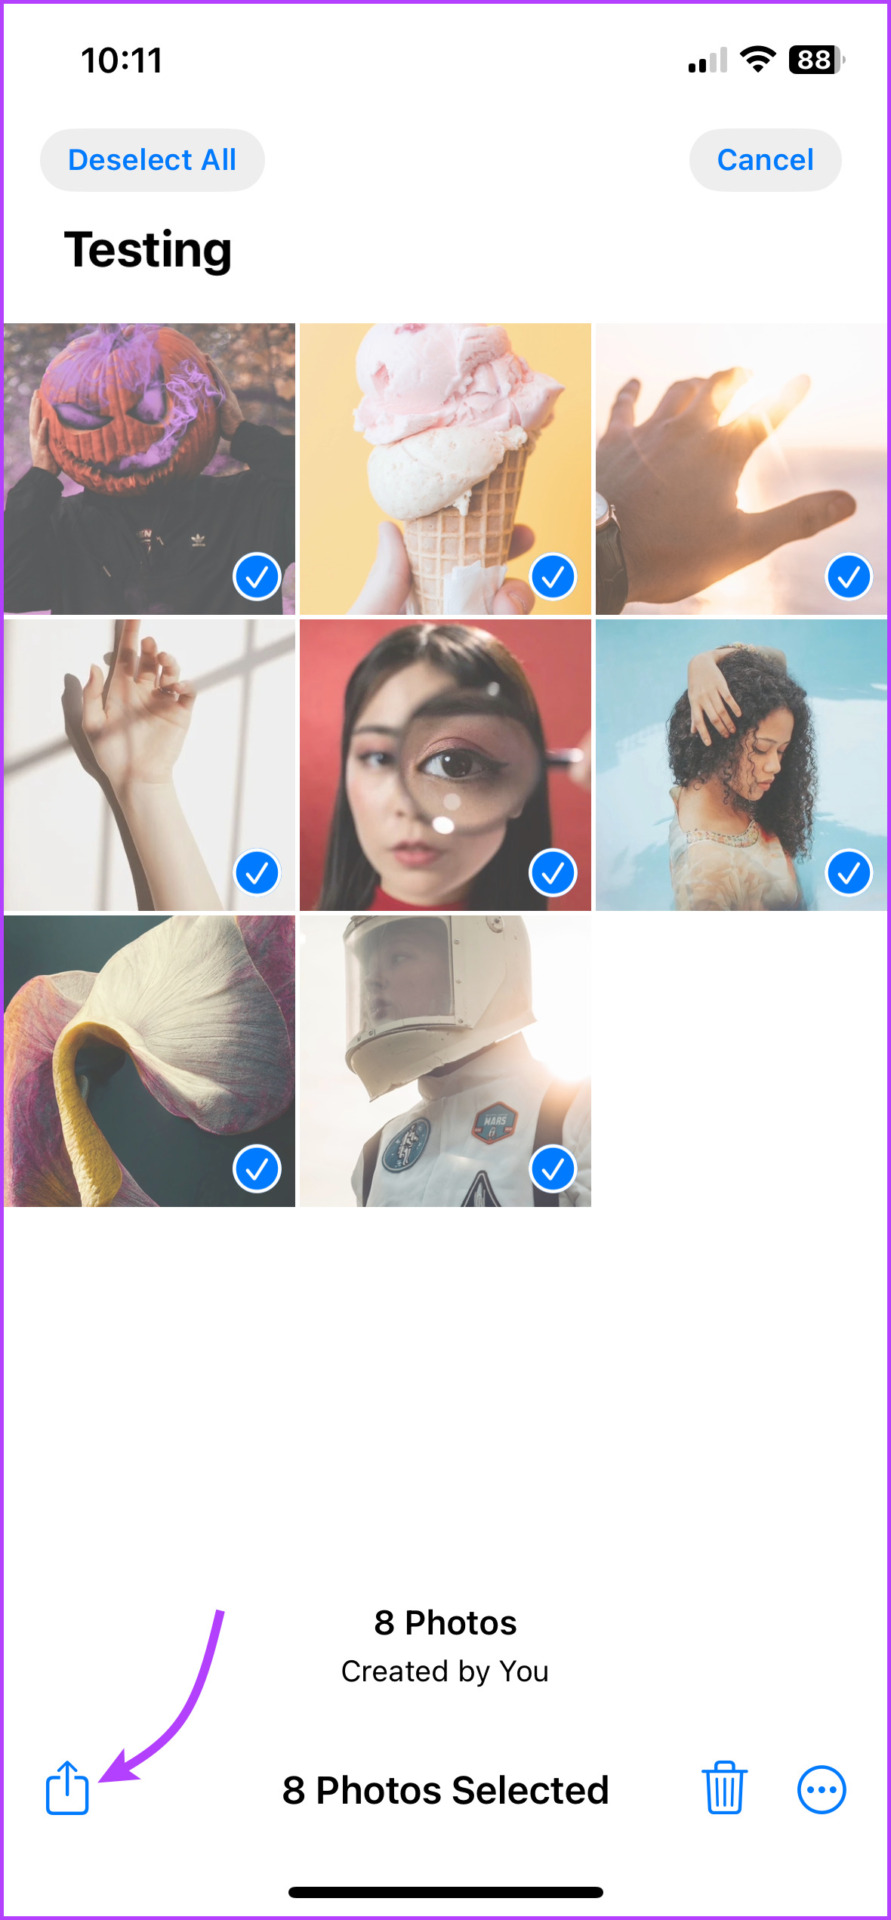
Step 3: Next, select Print in the Share Sheet.
Step 4: Select the Share icon from the print preview page. Here, you’ll observe that the photo is auto-converted into a PDF.
You can now share it with someone, attach it to your email, copy the file to the clipboard, or save the PDF to your Files app.
Things to Remember
- You can’t rearrange the images once you tap Share. So, select the images in the order you want them in the PDF document.
- Each image will be on an individual page; you can’t club images on a single page.
Method 3. Save Photos as PDFs on iPhone via the Files App
This method will be more convenient if your photos are saved in iCloud Drive, Google Drive, Dropbox, etc.
Step 1: Open the Files app and browse the folder with the photos.
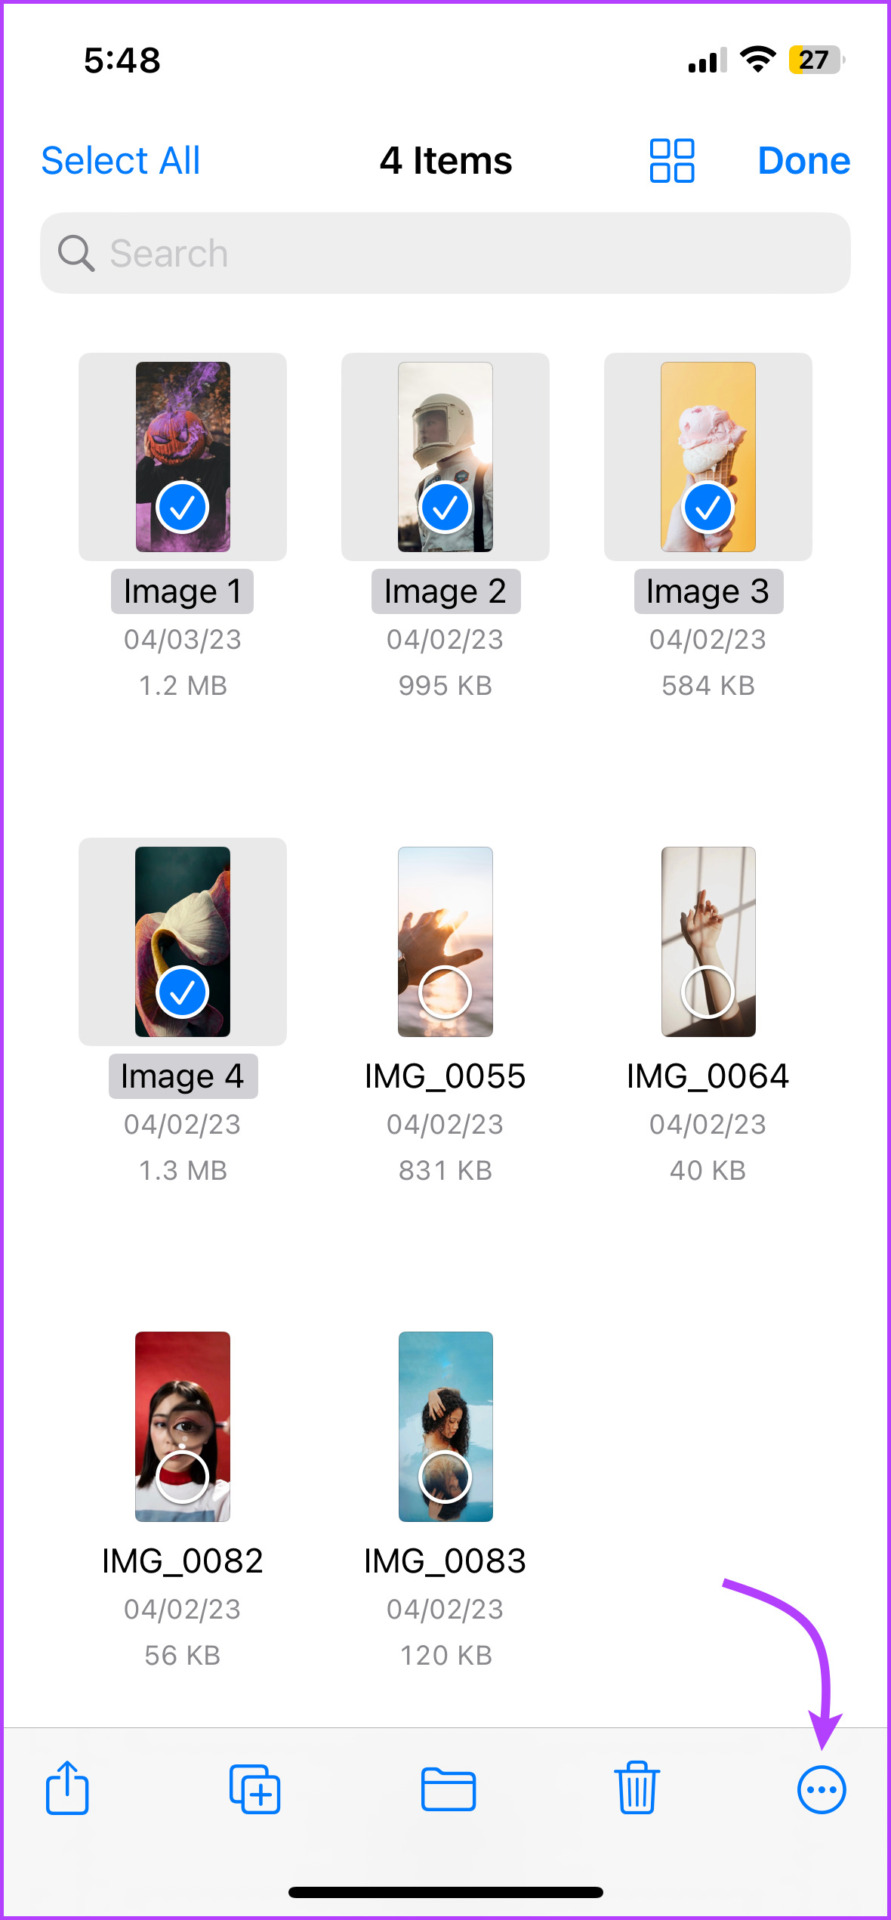
Step 2: Tap the three-dot icon at the top-right corner. Now, tap Select and choose the photo/photos.
Step 3: Select the three-dot icon at the bottom-right corner and tap Create PDF.

You’ll now find the converted PDF file in the same location. You can preview it, move it to another location, or share it with other apps and contacts.
Special Tips
- When converting multiple photos, the Files app arranges them in an alphabetical or numerical order in the PDF. So, rename the photos accordingly.
- After the PDF is created, you can easily add or delete pages/images from the PDF file.
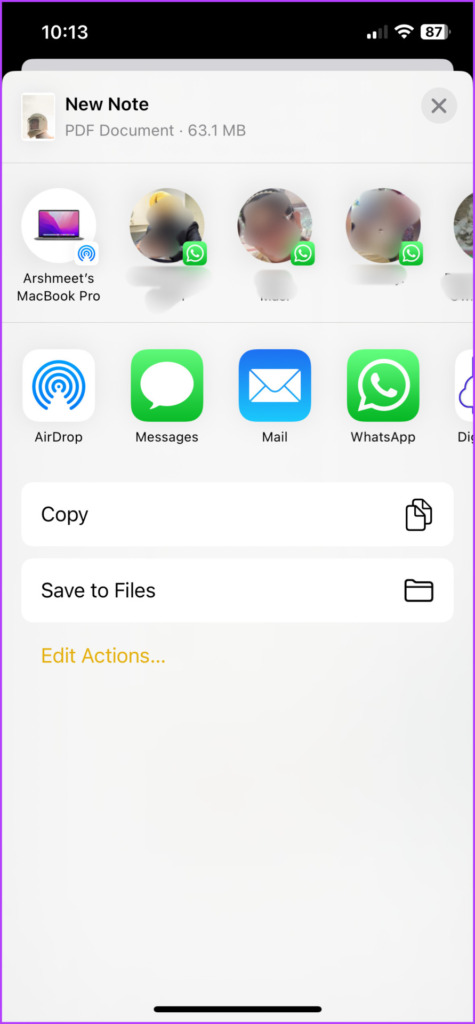
Method 4: Use the Notes App to Convert Multiple Images
A key benefit of using the Notes app to convert images into a PDF is that you can add text to the PDF-like image titles, captions, descriptions, etc. You can also use Markup tools to draw, add signatures, and more.
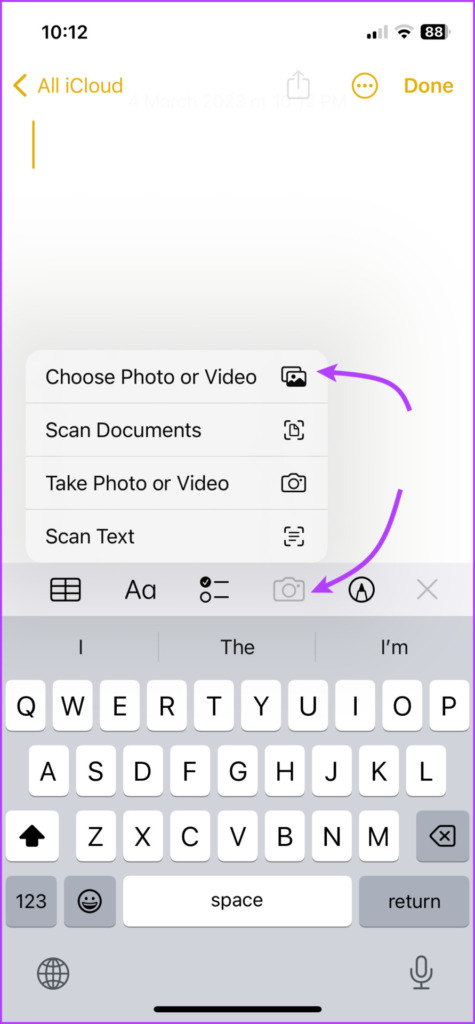
Step 1: Open a new note and tap the Camera icon. Select Choose Photo or Video.
Step 2: Select photos, organize them, or add text if needed. Once done, tap the Share button.
Step 3: From the Share Sheet, select Print.
Step 4: Here, tap the Share button to share or save the PDF.
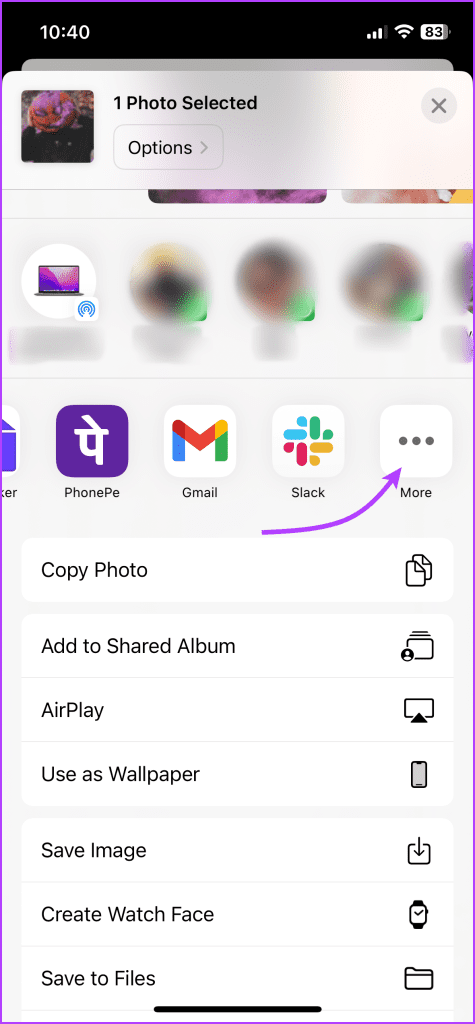
Method 5: Use the Books App
Step 1: In the Photos app, select the Photo/Photos.
Step 2: Tap the Share icon and select the Books app.
Note: If you can’t see the Books app, swipe right to the three-dot icon and select Books from the options.
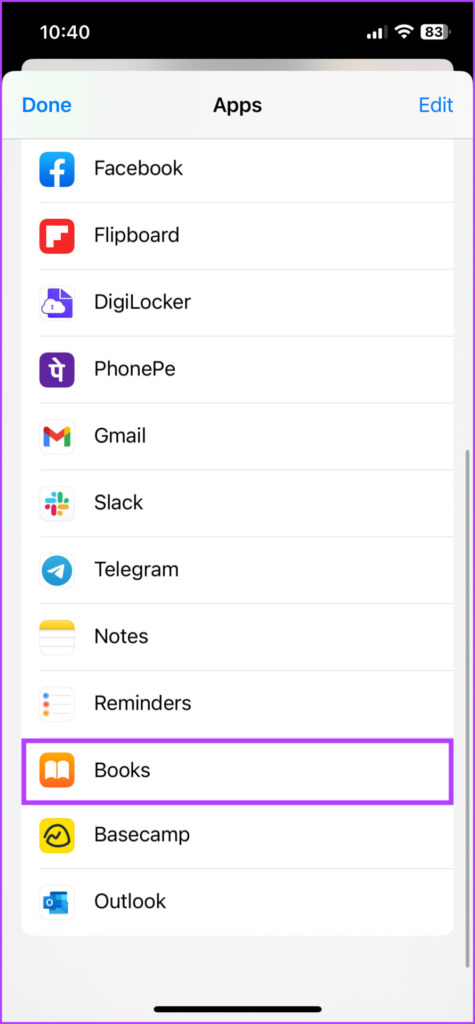
That’s it. The Books app will instantly save the photo as a PDF. To view, share, or rename the PDF, go to the Books app and tap the three-dot icon next to it.
While the iPhone can easily convert multiple photos to PDF, there are certain limitations. If you want more freedom to arrange multiple images in a stylized format, use third-party apps or websites like Canva or iLovePDF.
Was this helpful?
Last updated on 02 April, 2024
Read Next
 4 Easy and Quick Ways to Convert Word to PDF on iPhone and iPad
Converting a Word file into a PDF before sharing it with anyone has multiple benefits.
4 Easy and Quick Ways to Convert Word to PDF on iPhone and iPad
Converting a Word file into a PDF before sharing it with anyone has multiple benefits.
 4 Best Ways to Convert PNG to JPG on iPhone and iPad
PNG images may have the edge over JPEGs in terms of picture quality.
4 Best Ways to Convert PNG to JPG on iPhone and iPad
PNG images may have the edge over JPEGs in terms of picture quality.
 How to Convert Anything and Everything to PDF on Android
Time and again, while talking about any post on PDF, I have emphasized on how it’s one of the best file formats for digital transmission.
How to Convert Anything and Everything to PDF on Android
Time and again, while talking about any post on PDF, I have emphasized on how it’s one of the best file formats for digital transmission.
 How to Convert Google Forms to PDF, Google Docs, or Word
There are multiple ways to share Google Forms.
How to Convert Google Forms to PDF, Google Docs, or Word
There are multiple ways to share Google Forms.
 4 Best Ways to View Photo Size on iPhone and iPad
Recently, I wanted to check the file size of an image on my iPhone.
4 Best Ways to View Photo Size on iPhone and iPad
Recently, I wanted to check the file size of an image on my iPhone.
 How to Add Password to a PDF File on iPhone and iPad
PDF files have become one of the most common formats to share your documents for personal and professional purposes.
How to Add Password to a PDF File on iPhone and iPad
PDF files have become one of the most common formats to share your documents for personal and professional purposes.
 5 Best EPUB to PDF (or PDF to EPUB) Converters for Desktop and Mobile
If you are a student, you do not have to carry heavy textbooks that give you a sore back.
5 Best EPUB to PDF (or PDF to EPUB) Converters for Desktop and Mobile
If you are a student, you do not have to carry heavy textbooks that give you a sore back.
 How to Reduce Photo File Size on iPhone, iPad, and Mac
Many websites limit you from uploading large files and photos.
How to Reduce Photo File Size on iPhone, iPad, and Mac
Many websites limit you from uploading large files and photos.
The article above may contain affiliate links which help support Guiding Tech. The content remains unbiased and authentic and will never affect our editorial integrity.