Method 1: Using the Settings App
The Settings app is the central hub of the Windows operating system. Whether you want to uninstall an app or repair it, you can do that using the Windows Settings app.
Additionally, you can use the Settings app to check app size in Windows 11. Here are the steps on how to do that:
Step 1: Press the Windows + I keyboard shortcut to open the Settings app.
Step 2: Select the Apps option from the left sidebar and Installed apps from the right pane.

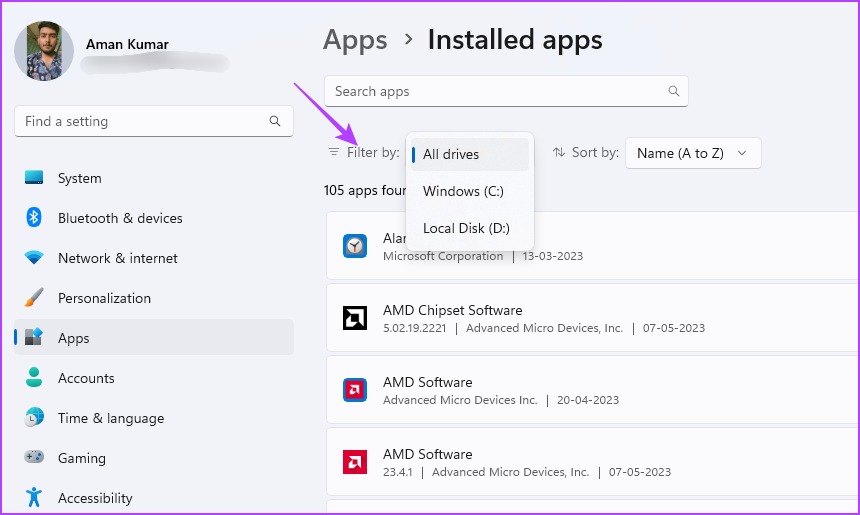
Step 3: In the Installed Apps section, you will find a list of the apps installed on your Windows PC. You can see the space taken by each app next to their name.

Step 4: You can use the Sort by option to arrange the apps based on their storage usage on your system. For instance, you can use the Size (Large to small) sorting option to arrange the list from largest to smallest apps.

If you want to check the storage size of apps installed on a particular drive, you can easily do so. Use the Filter by option to select the drive whose app storage you want to check.
Method 2: Using the Control Panel
Microsoft is slowly moving the Control Panel settings to the modern Windows Settings app. However, there’s still a large number of users who favor the traditional Control Panel over the Settings app.
Step 1: Press the Windows key to open the Start Menu.
Step 2: Type Control Panel in the Start Menu search bar and press Enter.

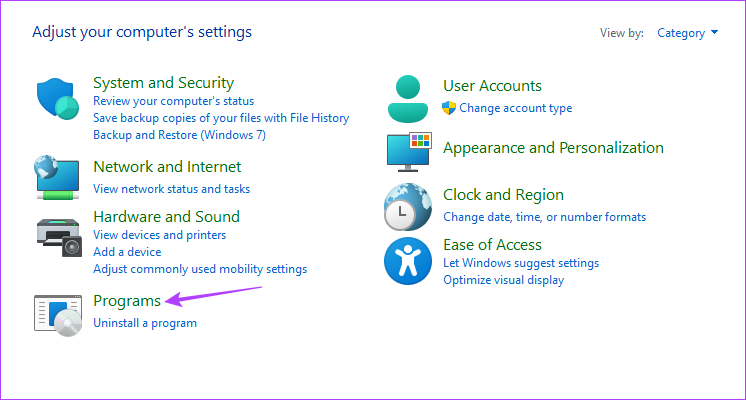
Step 3: Choose the Programs option.
Step 4: Click the Programs and Features option.

Step 5: In the Uninstall or Change a Program section, you can find the list of all the installed applications on your system. You can see the size of each application under the Size column.

You can configure the Control Panel to show only apps that are more or less than a particular size.
For instance, if you want to view only apps with more than 4 GB of space, click the drop-down icon next to Size and check the Gigantic (> 4GB) box.

Method 3: Using File Explorer
File Explorer is usually the go-to platform for accessing files and folders installed on your system. However, with the right approach, you can use File Explorer to check app size in Windows 11:
Step 1: Press the Windows + E keyboard shortcut to launch the File Explorer.
Step 2: In the File Explorer, open the drive where you’ve installed the app whose storage status you want to check. It’s usually C drive for most users.

Step 3: Open the Program Files (x86) folder.

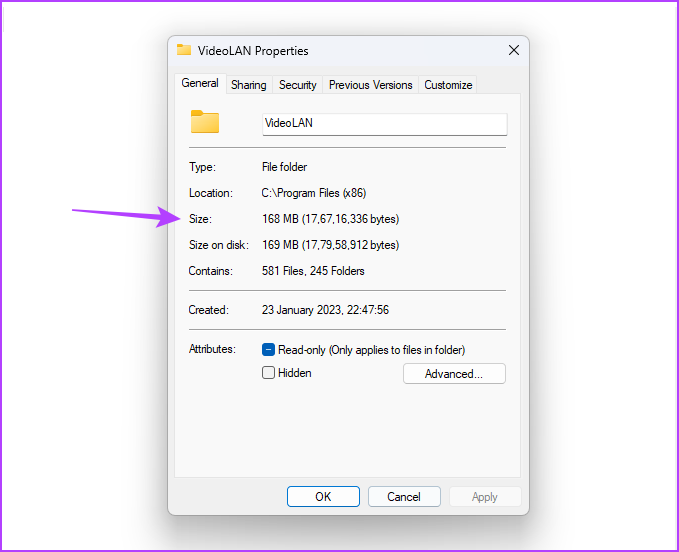
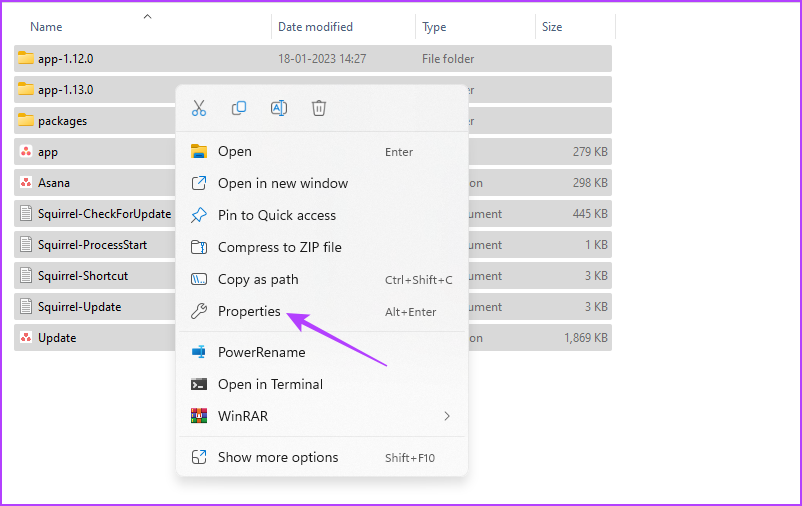
Step 4: Right-click on the app folder whose storage status you want to check and choose Properties.

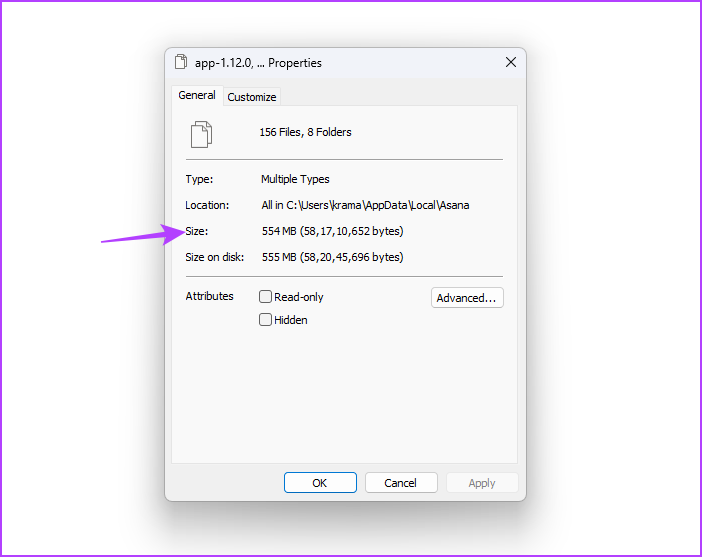
Step 5: In the General tab, you can check the space taken by that app next to the Size option.
If your app is not present in the Program Files (x86) folder, follow these steps:
Step 1: Press the Windows key to open the Start Menu.
Step 2: Type the app name in the search bar and choose Open file location from the right pane.

Step 3: Right-click on the app shortcut and choose Open file location.

Step 4: Press the Ctrl + A key to select all the files in that app folder. Then, right-click on the selected files and choose Properties.
Step 5: Check the space that the app occupies next to the Size option.
Was this helpful?
Last updated on 28 August, 2024
Read Next
 5 Ways to Check RAM Type in PC on Windows 10 and Windows 11
Method 1: Check the PC or Laptop Model From the Manufacturer's Site If you use a pre-built rig from a PC maker or have a laptop, the first course of
5 Ways to Check RAM Type in PC on Windows 10 and Windows 11
Method 1: Check the PC or Laptop Model From the Manufacturer's Site If you use a pre-built rig from a PC maker or have a laptop, the first course of
 Top 3 Ways to Check iPhone Battery Cycles in Windows and Mac
If your iPhone has iOS 11.3 or later installed, you can easily check battery health with a brief dive into the Battery section of the Settings app.
Top 3 Ways to Check iPhone Battery Cycles in Windows and Mac
If your iPhone has iOS 11.3 or later installed, you can easily check battery health with a brief dive into the Battery section of the Settings app.
 3 Ways to Check VRAM Capacity on Windows 11
Method 1: Check VRAM Capacity From the Task Manager Task Manager is a useful system application that helps you track system processes and monitor resource consumption.
3 Ways to Check VRAM Capacity on Windows 11
Method 1: Check VRAM Capacity From the Task Manager Task Manager is a useful system application that helps you track system processes and monitor resource consumption.
 3 Ways to Check RAM Speed on Windows 11
Method 1: Check RAM Speed From the Task Manager The Task Manager app allows you to view your computer's core hardware details, such as RAM speed, besides monitoring system processes
3 Ways to Check RAM Speed on Windows 11
Method 1: Check RAM Speed From the Task Manager The Task Manager app allows you to view your computer's core hardware details, such as RAM speed, besides monitoring system processes
 4 Ways to Check PC’s Uptime on Windows 11
Method 1: Check the PC's Uptime Using the Task Manager The Task Manager is usually the tool to manage background running programs, configure startup applications, and change the priority of
4 Ways to Check PC’s Uptime on Windows 11
Method 1: Check the PC's Uptime Using the Task Manager The Task Manager is usually the tool to manage background running programs, configure startup applications, and change the priority of
 6 Ways to Check Total Storage of Windows Laptop or PC
Fix 1: Using Task Manager One of the easiest ways to know your Windows laptop's total storage is from Task Manager.
6 Ways to Check Total Storage of Windows Laptop or PC
Fix 1: Using Task Manager One of the easiest ways to know your Windows laptop's total storage is from Task Manager.
 4 Ways to Check the .NET Framework Version on Windows 11
Method 1: Visit the Installation Folder Browsing the .NET Framework installation folder on Windows 11 is a nifty trick to check its version details.
4 Ways to Check the .NET Framework Version on Windows 11
Method 1: Visit the Installation Folder Browsing the .NET Framework installation folder on Windows 11 is a nifty trick to check its version details.
 5 Ways to Check GPU Health on Windows
https://youtu.be/JGwJ-_hIzfg Method 1: Using Task Manager The Windows Task Manager can help you in checking GPU health.
5 Ways to Check GPU Health on Windows
https://youtu.be/JGwJ-_hIzfg Method 1: Using Task Manager The Windows Task Manager can help you in checking GPU health.
The article above may contain affiliate links which help support Guiding Tech. The content remains unbiased and authentic and will never affect our editorial integrity.